All specications subject to change without notice. Phone: (800) 793-0093www.dacor.com
PLANNING
GUIDE
4.39
RNTT365GB
Renaissance 36” Wide
Drop-in,Touch-Control Gas Cooktop
Document # PG04-010 Revised 09/02/15 Page 2/5
Gas Supply Requirements
◊ Be certain that the cooktop being installed is correct for the
gas service being provided (natural gas or LP gas). Units
equipped for LP operation have “LP” in the model number
listed on the model/serial number label. See the diagram
below for label location.
◊ Check your local building codes for the proper method of
installation. In the absence of local codes, this appliance
should be installed in accordance with the National Fuel Gas
Code ANSI Z223.1/NFPA 54.
◊ An external manual shut-off valve must be installed between
the gas inlet and the cooktop in an easily accessible location
for the purpose of controlling the gas supply to the appliance.
◊ The cooktop comes from the factory with a regulator in
the shipping carton. Use only the regulator provided. The
regulator must be installed in the gas line that runs from the
cooktop gas inlet to the gas shut off valve.
◊ The regulator inlet accommodates a 1/2” gas line. The inlet
to the cooktop itself is equipped with a metric fitting. A brass
metric to 1/2” NPT adapter is included for connecting the
regulator to the appliance.
The cooktop gas connection is located on the bottom of the
cooktop in the back left corner as you face the front of the unit. See
page 3 for location.
RNTT365GB RNTT365GBLP
Gas Type Natural Gas LP Gas
Manifold
Pressure
4” water
column
11” water
column
Min. Gas Supply
Pressure **
5” water
column
12” water
column
Max. Gas Supply
Pressure 1/2 psi 1/2 psi
Total Connected
Load
0.5 Amp.
(0.03 kW)
0.5 Amp.
(0.03 kW)
Circuit
Requirement
120 Vac,
60 Hz, 15 Amp.
120 Vac,
60 Hz, 15 Amp.
Gas and Electrical Requirements*
* The electrical and gas data on this page is for reference only. If
the above data does not agree with the product specification label,
use the data on the product specification label.
** The gas supply pressure for testing the regulator setting shall be
at least 1-inch water column (249 Pa) above the specified manifold
pressure.
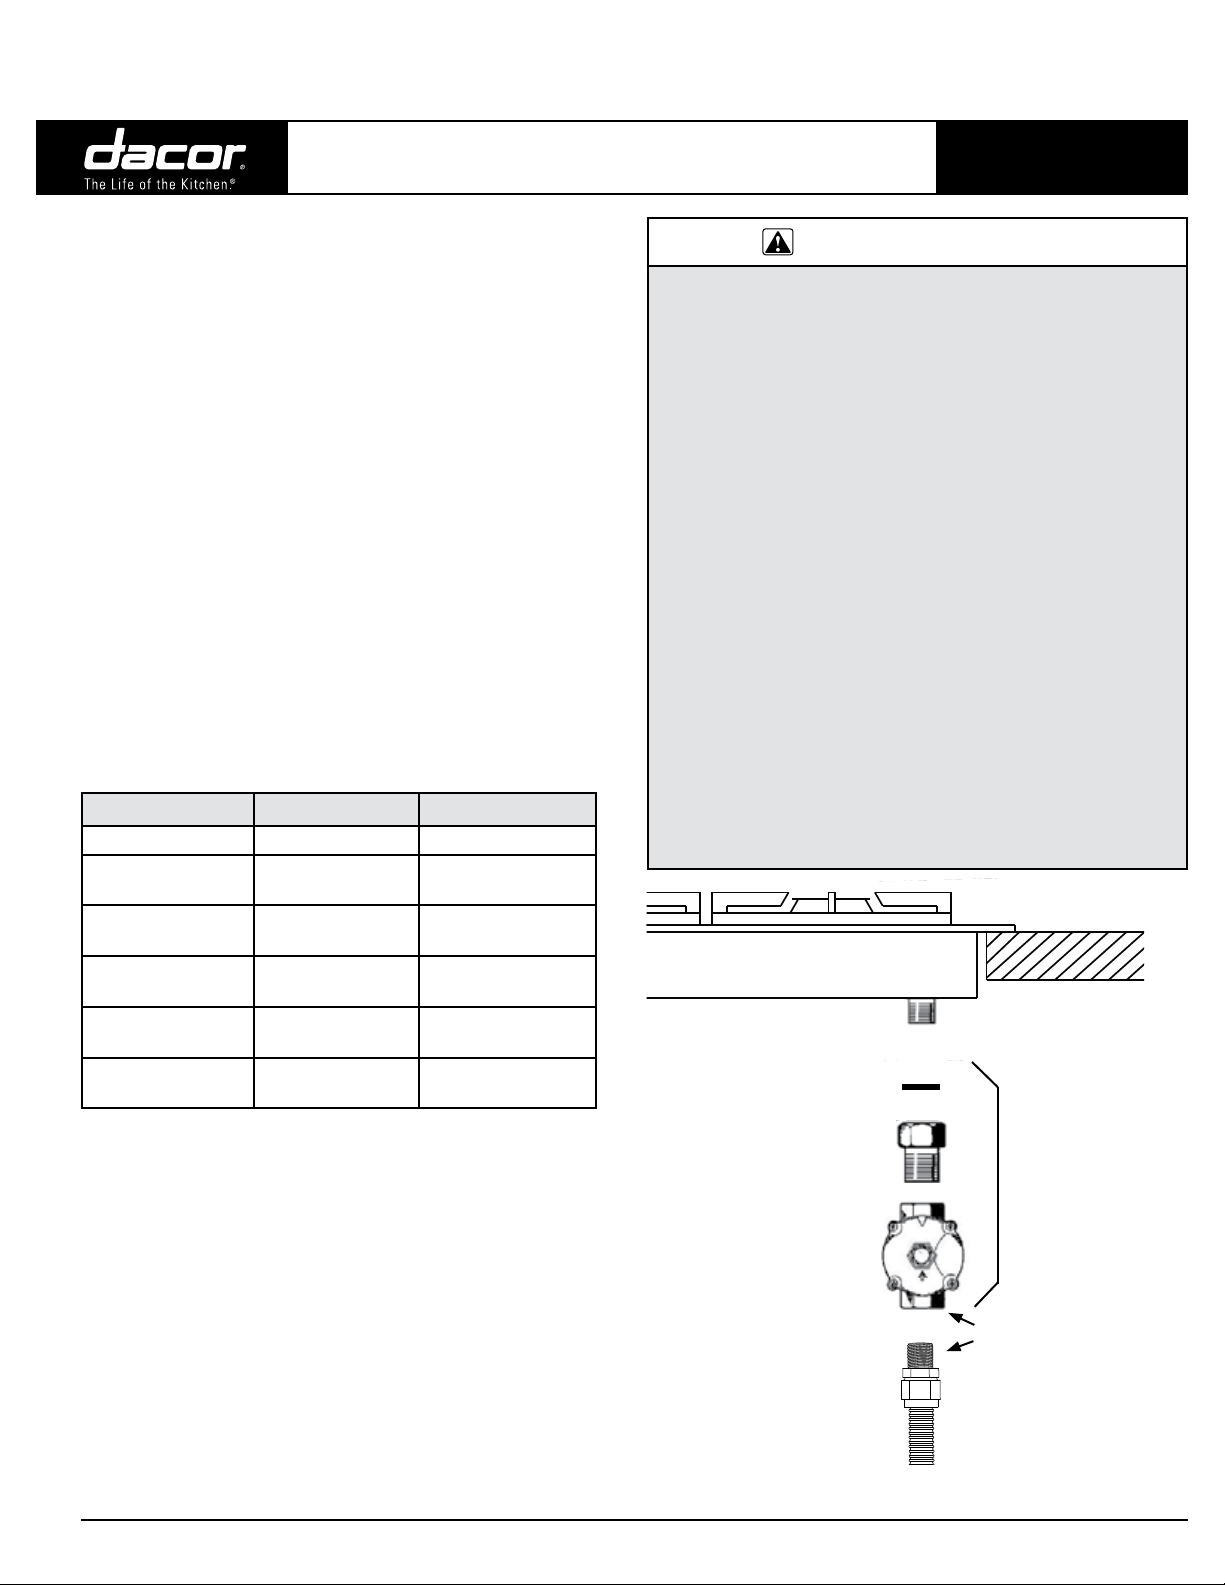
Flexible gas
line with fitting
Pressure
regulator
Brass NPT
adapter
Fiber gasket
Gas inlet
Cooktop
(not included)
1/2” NPT
Gas Line Parts Installation
WARWARNINGNING
• Verify that the gas supply meets specifications before
connection. See page 4.
• Do not install or use the cooktop without the included gas
regulator installed.
• Make sure that the arrow on the regulator points in the
direction of the gas flow, towards the cooktop.
• Do not apply excessive pressure when tightening gas
connections and fittings.
• Do not use Teflon tape or plumber’s putty on flexible gas line
connections.
• Test the gas lines for leaks as instructed before use. Do not
use a flame to check for leaks.
• The maximum gas supply pressure to the regulator must
never exceed 1/2 pounds per square inch (psi) or 3.5 kPa.
• The cooktop and shut-off valve must be disconnected from
the gas supply piping system during any pressure testing
exceeding 1/2 psi (3.5 kPa).
• The cooktop must be isolated from the gas supply piping
system by closing the shut-off valve to the cooktop during
any gas supply piping system pressure testing equal to or
less than 1/2 psi (3.5 kPa).
• For LP gas installations, the LP gas tank must have its own
high-pressure regulator in addition to the pressure regulator
supplied with the cooktop.
These
parts
are
included


