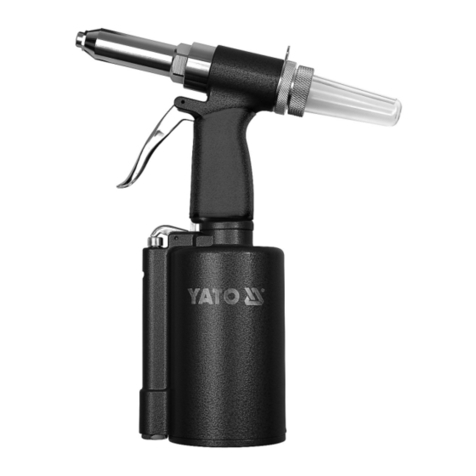
Dafra DRPB64V User manual

DRPB64V Operation Manual
PLEASE SPEND 5 MINUTES READING
THESE INSTRUCTIONS BEFORE USING
YOUR NEW RIVET TOOL.
TRUST US, IT WILL SAVE YOU TIME AND
INCONVENIENCE IN THE LONG RUN.
READ THIS MANUAL CAREFULLY BEFORE USING THE TOOL !
It is IMPORTANT to follow the safety instructions for adequate protection
against injuries.
- This tool should be used ONLY to set blind rivets within the TOOL’S CAPACITY. It MUST
NOT be used for other purposes, such as hammer, etc.
- This tool should be always operated with compressed air supply within the air pressure
range 0.5Mpa ~ 0.7Mpa.
- Always DISCONNECT the air supply from the tool before changing the tool parts, such as
jaws, etc.
- DO NOT use the tool in the environment described as below:
fuel and combustion air.
temperature rapidly rising.
humidity, rain, water, storm and thunder, lightning.
- When the tool is suspended by the operation hook during use, be sure the tool will not fall.
- When using the tool, always carry protective goggles, protective gloves, safety helmet, and
other necessary protections. It is highly recommended for safety reasons.
- Only use genuine spare parts for maintenance and repairs.
- All repair work must be carried out by skilled personnel, when in doubt, always return the
tool to the distributor.

DRPB64V Operation Manual
TOOL CAPACITY
Blind rivets 4.0mm – 4.8/5.0mm – 6.4mm standard; 6.0mm optional.
TOOL SPECIFICATIONS
Air supply pressure: 0.5Mpa ~ 0.7Mpa
Output traction power: 12,300N ~ 17,220N
Stroke: 20mm
Net weight: 1.70kgs
GETTING STARTED
Please refer to the TOOL EXPLOSIVE ILLUSTRATION and the PARTS LIST in this manual in
order to have a good understanding of the tool parts described. The descriptions of the tool parts
appear in this manual are in italics with the parts position numbers corresponding to the tool
explosive illustration.
1) This pneumatic powered tool should be used with a compressed air supply. It is
recommended to use an air hose with a diameter bigger than 8mm.
2) Before connecting the tool to the compressed air supply, check that the compressed air
pressure is within the specified range of between 0.5Mpa ~ 0.7Mpa. Once the air pressure
has been confirmed, connect the air hose adaptor onto the tool air adaptor (#52). The air
adaptor comes in different versions in different countries. Normally the tools are equipped
with the correct version for your country as default, however, if the air adaptor you have
received does is incorrect, please contact the tool distributor(s).
3) Change and use the correct nosepiece (#1) according to the size of the rivet to be set. This
tool is equipped with nosepieces from 4.0mm, 4.8mm, and 6.4mm (on the tool) in the tool
kit. Follow the steps below to change the nosepiece (#1):
a) Remove the air supply hose from air adaptor (#52).
b) Use the wrench (in accessories pack) to remove the nosepiece (#1) from the tool as
below;
c) Select the correct nosepiece from the accessories pack and screw on to the tool, using
the wrench to fix it firmly on the tool.
4) Install the mandrel collector (#24 in accessories pack) on the back of the tool.
DRPB64V Operation Manual
TOOL OPERATION FOR SETTING BLIND RIVETS
1) After completing the start-up preparations, place the rivet mandrel into the nosepiece, and
holding the tool securely, insert the rivet into the pre-drilled hole of the work piece that needs
to be fastened.
2) Pull the tool trigger (#48) to set the blind rivet in its position in the work piece.
3) After setting the rivet, the used mandrel will be sucked into the mandrel collector (#24) at the
back of the tool automatically. Always have the mandrel collector on the tool when in use, in
case a rivet mandrel comes shooting out from the back and causes injuries. Be sure to
empty the mandrel collector (#24) when half full otherwise the tool will not be able to release
used mandrels properly which can cause serious damage to the tool.
4) The power of the vacuum can be adjusted to stronger or weaker by turning the knob on back
of the tool which is visible when the mandrel collector (#24) is removed.
5) On the air adaptor hose (#53) equipped for this tool, there is a sliding switch to pause/switch
off the air supply to the tool when not in use.
TOOL MAINTAINANCE
In order to maintain optimum performance after several weeks of regular use, add a few drops
of hydraulic oil on the inlet of the air adaptor (#52)of the tool in order to reduce the friction of
the tool parts, as the oil will be blown inside the tool when it is in operation.
The tool stroke may be reduced after a period of use, which indicates that the hydraulic oil in
the pneumatic tool needs to be refilled or changed;
1) Remove the screw (#11)with a hexagon wrench:

DRPB64V Operation Manual
2) Connect the air supply and to place a cloth over the hole where the screw (#11)was
removed, then to pull the trigger (#48) and the oil will be forced out from the tool;
3) Screw the oil inject adaptor (in the oil injector set in the accessories pack) into the hole where
screw (#11)was removed;
4) Use the oil injector (in the accessories pack) to slowly inject the oil until full (approx. 15ml).
Remove the injector and its adaptor, then clean any excess oil off the tool and tightly screw
the screw (#11)back into the tool;
5) Test the tool stroke. If the stroke is still not what it should be, some air could have entered
the oil cylinder (#13) while refilling the oil in the tool. To release any extra air from the tool,
connect the tool to the air supply, pull the tool trigger (#48) 6 or 7 times, then loosen the
screw (#11), to let the extra air leak out and then tighten the screw (#11)again.

DRPB64V Operation Manual
After extensive use, the toolmay accumulate small metalchips
from rivets within the nose assembly of the tool. This will
compromise the tool’s efficiency, therefore, it is recommended that you clean or change the nose
assembly parts periodically.
1) Use the wrench (in accessories pack) and a spanner provided by user;
Included in accessories kit
Provided by user
Wrench hole 1 for compressed spring pedestal (#22);
Wrench hole 2 for clamping sleeve (#3);
Wrench hole 3 for nosepieces (#1);
Wrench hole 4 for front sleeve (#2);
2) Remove the nosepiece (#1) on the tool using the wrench included in the kit;
3) Disassemble the front sleeve (#2):
4) Disassemble clamping sleeve (#3):
5) Take out the 3-jaw set (#4) from the clamping sleeve (#3), then remove the assembly pusher (#5),
the pusher spring (#6) and mandrel tube (#20) from the tool. Once removed, inspect all parts for
wear before cleaning and replacing them. Any damaged parts should be replaced at this time.

DRPB64V Operation Manual
6) Re-assemble the cleaned or replacement parts. Put
the pusher spring (#6) onto the assembly pusher (#5) and insert it back into the tool where
assembly oil cylinder (#13) is located;
7) Place the 3-jaw set (#4) into the clamping sleeve (#3) and be sure that all 3 jaws are seated
in the correct position;
8) Place the clamping sleeve (#3) with the 3-jaw set (#4) inside it onto the assembly pusher
(#5) and ensure it is assembled firmly;
9) Replace the front sleeve (#2) and nosepiece (#1) on the tool;
TROUBLE SHOOTING
Problem
Possible Causes
Solutions
Rivet mandrel does not break
3-jaw set worn off or damaged.
Hydraulic oil in tool not sufficient.
Air supply with low pressure.
Change 3-jaw set.
Refill hydraulic oil.
Increase air supply pressure within
the specified range.
Jaws slippery on rivet mandrel
3-jaw set worn out.
Metal chips between jaws.
Pusher spring fatigued.
Change 3-jaw set.
Clean the jaws.
Change pusher spring.
Rivet mandrel cannot be put into
nosepiece
Incorrect nosepiece size chosen.
Jaws get stuck by mandrel not being
released.
Use correct size nosepiece for rivet.
Remove any jammed mandrels by
disassembling front sleeve and
clamping sleeve.
Used mandrel cannot be sucked
into mandrel collector properly
Insufficient mandrel release vacuum power.
Air supply with low pressure.
Increase the mandrel vacuum power,
ref. TOOL OPERATION section 4.
Increase air supply pressure within
the specification range.
Table of contents
Other Dafra Rivet Tools manuals