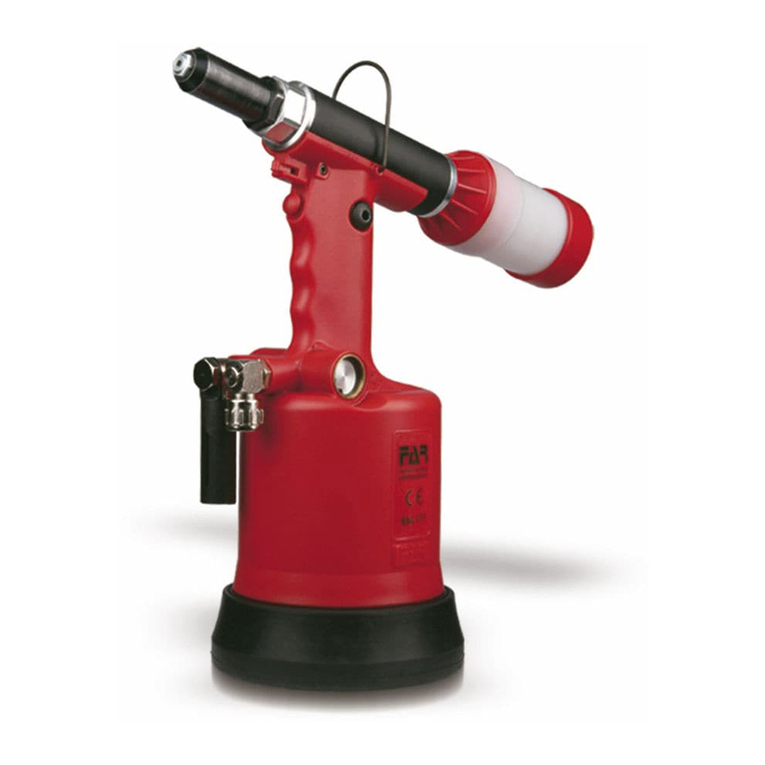
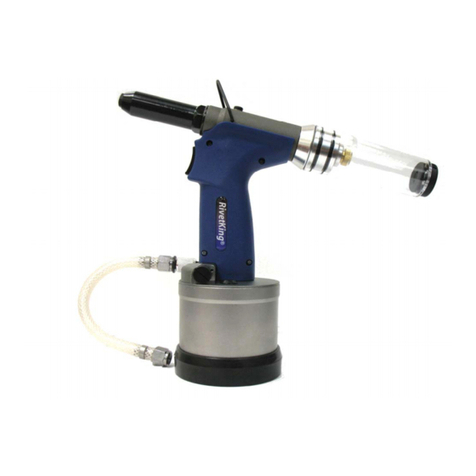
Rivet King RK-59SPS User manual

For sales, service or support call your local distributor or:
1800-BUY-RIVET or 1-800-289-7483
www.rivet.com
Operation Manual
Model# RK-59SPS

2
CONTENTS
1. GENERAL SAFETY INSTRUCTIONS AND PRINCIPLES 3
2. DESCRIPTION OF THE TOOL 4
2.1. Basic characteristics 4
2.2.Technicaldata 4
2.3.Rangeofusage 5
2.4. Tool operation 5~6
3. TOO L MAINTENANCE 7
3.1. Daily maintenance 7
3.2. Weekly maintenance 7
3.3. General maintenance 7
4.SPAREPARTS 8
4.1 Ordering 8
4.2. List of quickly expendable parts 8
5.STORAGE 9
6. COMPLETE TOOL EQUIPMENT 9
7. OPERATIONS AND WARRANTY COND ITIONS 9
7.1. Operation conditions 9
7.2. Warranty conditions 9
8.WarrantyStatement 10
9.MSDS 11

3
1.GENERALSAFETYINSTRUCTIONSANDPRINCIPLES
ATTENTION!Read all instructions and principles carefully. Every person installing, operating or maintaining
the tool must be first thoroughly acquainted with this operation manual and is obliged to adhere to the
following safety instructions and principles:
•The tool must not be used for other purposes than those for which it was designed.
•The tool must not be used in a different manner than that recommended by the manufacturer
•Any alterations of the tool, its accessories or spare parts remain in sole responsibility of the customer.
After agreement, the manufacturer provide technical support in designing and making additional alterations.
•The tool must be kept in top condition and regularly tested for damage and proper operation. The
tool must be repaired only by an authorized technician or by a person trained by the manufacturer or
supplier. Should you have any demand for training, please contact your sales agent.
•The tool must always be operated in accordance with respective sanitary and safety regulations.
•All queries regarding proper and safe operation of the tool should be addressed to your sales agent.
•Safety principles that must be adhered to in connection with operation of this tool must be known to
all workers who operate the tool.
•When handling the tool take extra care to avoid unwanted activation and possible injury.
•The tool must be during any kind of maintenance or repair (does not apply to replacing nose-pieces
and emptying the mandrel container) disconnected from the source of compressed air.
•Before operating the tool always take up firm posture and steady position.
•It is necessary to prevent break-away shanks endangering safe operation of the tool.
•Never aim with the tool at another person.
•Always check that the vent holes are not blocked or covered and that the supply hose are in good condition.
•Working pressure must not exceed 0,7 MPa.
•Oxygen or other flammable gasses from pressure cylinders must not serve as a driving agent.
•When operating the tool it is recommended to use safety glasses and utility gloves.
•If the continuous cycle of riveting exceeds 8 hours per day, it is recommended that the operators use
ear protectors.
•When working with the tool the operator must not have loose parts of wear as e.g. a tie, long hair, jewelry
etc. to avoid getting caught by the tool.
•Same safety instructions apply for persons standing close to the tool.
•Avoid unnecessary contact with the hydraulic fluid to prevent possible allergy reaction of the skin.
•The tool is equipped with permanent magnet; the magnetic pole may influence electronic and even
some mechanic machines. So it is necessary to warn about the possibility of the influence on the operation
of electronic implants (e.g. pacemakers, insulin pumps etc.) with potential fatal effect for the users
of these implants. The magnetic pole may also damage information on magnetic appliances (audio and
video cassettes, diskettes, credit cards etc.) and it can destroy the forever. While using (and storing) the
tool, please, keep distance with these sensitive appliances, in this case 0,5 m is considered as the save
distance.
•The tool is not designed for outdoor and explosive environment.
•After the service life, discard the tool according to the Disposal Act no. 185/01 Coll.

4
2.DESCRIPTIONOFTHETOOL
2.1.Basiccharacteristics
2.2.Technicaldata
Weight: 4.9lbs / 2,23 kg
Working pressure: 72.5-100psi / 0,5---0,7 MPa
Force @ 90 psi: 6,069 lbs / 27 Kn
Air consumption: 2,5 l / stroke
Stroke: .315’’ / 8 mm
Height: 280 mm
Length: 290 mm
Width (over the aircoupling): 120 mm

5
2.3 Range of usage
The pneumatic-hydraulic tool is designed for riveting with:
rivet nuts 5/16-18’’~1/2-13’’ / M8-M12
rivet bolts ¼-20’’~5/16-18’’ / M6~M8 (steel)
2.4. Tool operation
The manufacturer equipped the tool with a anvil and mandrel for rivet nuts __. For riveting
of rivets with a different dimension, it is necessary to exchange the anvil and mandrel and
change basic set up and regulation of the tool as following:
1) Loosen the counter-nut of the anvil
2) Screw out the anvil from the front nozzle
3) Screw out the mandrel from the sleeve
4) Choose appropriate anvil and mandrel, see the following chart:
5) Screw the mandrel on to the sleeve (to the backstop) and then turn it back, so that the flats of
the hexagons of the screw-plug gauge and sleeve are matching.
6) Slide on the anvil to the hexagons of the mandrel and sleeve.
7) Screw on the anvil to the front nozzle.
8) Set-up the anvil:
for rivet nuts
the rivet nut is screwed on the whole length of the thread on the mandrel and the front of the
rivet nut leans on the anvil. Fasten the position of the anvil with a counternut.
for rivet bolts
set-up the anvil so that there is a cca 1 mm space between the outer side of the rivet
bolt and inner side of the anvil. do it as following: screw on the anvil to the backstop to the
mandrel and then screw it back one or two turns. Fasten the position of the anvil with a
counternut.
9) basic stroke set-up as following (does not apply for all types of rivet nuts):

6
10) Adjust revolving air supply into any required position and connect the tool to the source of
the compressed air.
11) Put the rivet on the mandrel and push towards the anvil, this will screw on the rivet.
12) Put the screwed rivet into the prepared hole.
13) Press the trigger and the rivet will be riveted in.
14) Relieve the trigger, the mandrel will screw out from the rivet (if it is not fully screwed out, use
the unscrewing button).
15) Check the fastened rivet
- if the rivet is not fully fastened it is necessary to increase the stroke.
- if the rivet is too fastened, which results in deformation of the rivet and the mandrel is hard
to unscrew out from the rivet, it is necessary to decrease the stroke.
16) Check the setting-up of the anvil according to the step 8).
The tool, which is set up a prepared this way is ready for riveting.

7
3.TOOLMAINTENANCE
Duringmaintenancethetoolmustbedisconnectedfromthesourceofcompressedair!!!
3.1.Dailymaintenance
Daily, before starting work, apply a drop of lubricating oil (we recommend hydraulic oil MOBIL
DTE32) into the air inlet of the tool, on condition there is no lubricating device
connected in the air distribution.
Check the tool for air leakage, if necessary replace damaged hoses and clasps.
If the pressure regulator is not equipped with a filter, blow through the air hose before its
connection to the tool in order to get rid of impurities and water. If the pressure regulator has a
filter, dry it out.
Check whether the fixed nose-piece corresponds to the BR diameter and that all screw threads
and joints are tightened properly.
Check whether the air outlets are really empty.
3.2.Weeklymaintenance
Cleaning of the tool and replacement of worn or non-functional parts.
Unscrew the anvil and mandrel according to the chapter 2.4., point 1) to 3) and clean them
thoroughly.
Visually check - especially the mandrel, anvil and front nozzle - if worn or damaged, replace
them.
Dismounted parts should be reinstalled according to the chapter 2.4., points 5) to 7) including
setting up according to the point 8).
3.3.Generalmaintenance
General maintenance should be performed after about 500 000 strokes or once every three
years. The tool must be completely disassembled and all seals and worn parts must be replaced.
This repair may be carried out by an authorized technician only or a person trained by the
manufacturer or supplier.

8
4.SPAREPARTS
4.1.Ordering
Orderthesparepartsexclusivelyfromthemanufacturerorfromyoursalesagents.
Theordermustcontain:
a)toolserialnumber
b)numberoforderedpart
c)numberofpieces
d)nameofyourcompanyandpreciseaddress
e)yourtaxidentificationnumberandidentificationnumber
4.2.Listofquicklyexpendableparts
Alltypesanddimensionsofmandrelsandanvils.............seecharinpara2.4
Frontnozzlecomplete.......................................................RK55SPS‐600
Jointsleeve........................................................................RK55SPS‐400

9
5.STORAGE
thepneumatic‐hydraulictoolembeddedinashippingcontainermustbestoredinenvironment
withrelativehumidityto70%andtemperaturerangingfrom+5octo+40oc,withoutaggressive
evaporationofsalts,acidsandcaustics.
6.COMPLETETOOLEQUIPMENT
Replaceableanvilsandmandrelslocatedinaplasticbag,operationsmanual.
7.OPERATIONSANDWARRANTYCONDITIONS
7.1.Operationconditions
Forreliablefunctionofthetool,werecommendtousetreatedcompressedair.treated
compressedairmeanscompressedatmosphericairbareofsolidparticlesandwater,reducedto
requiredpressureandlubricatedwithanti‐corrosiveoil.Immediatelybeforethetooltheremust
bearegulationvalvesettomaximumoutletpressureof0,7MPa,airfilterandlubricationin
thecircuitofcompressedair.
Though sound-pressure level of impulse noise LpaI does not exceed .... db(a), still it is recommended
to use ear protectors during continuous and long-term operation. average overall vibration
total effective value ahv,8h = .... m.s2.
The trigger enables safe control of the tool with a force max. 10 n < 50 n without releasing
the grip-handle according to the health regulation.
7.2.Warrantyconditions
For reliable and safe function of the tool it is necessary to adhere to instructions and principles
stated above. For the warranty period the customer must not perform any alterations other than
those permitted by the manufacturer, see paragraph 2.1, 3.1, 3.2. other non-detachable parts are
secured with paint. In case of neglecting this protection, the manufacturer shall not admit possible
warranty repairs. To admit warranty repair the customer must submit proof of purchase (invoice). the
warranty period is 12 months from the day of purchase if the purchase contract does not state
otherwise.
Warranty is valid provided that the following:
•General safety instruction and principles (paragraph 1)
•Tool operation (paragraph 2.4)
•Daily and weekly maintenance (paragraph 3.1 and 3.2)
•Storage (paragraph 5)
•Operations and warranty conditions (paragraph 7)
•Subject to blanket warranty statement as indicated on following page:
Warranty does not apply to quickly expendable parts (see paragraph 4.2.)

10
Warranty Statement:
Industrial Rivet & Fastener Co. Inc. (hereinafter “IRF”), hereby warrants to the initial retail customer or original
authorized distributor (“Warrantee”) only that its products will be free from defects in material and
workmanship for a period of 1 year from the purchase date provided that the products are used in accordance
with “IRF’s” instructions as to maintenance, operation and use.
The said warranty does not extend to goods subjected to misuse, neglect, accidental/improper installation,
improper maintenance or which have been altered/repaired by anyone other than the seller or its certifiably
authorized agents. The said warranty does not extend to consumable components or wear components as
listed in schedule A.
The warrantee’s only remedy and IRF’s only obligation in the event of a defect or failure in the products, is that
IRF, at its sole option, repair, replace or re work the products, but in no case shall the cost of the foregoing
exceed the invoice price of the products.
This warranty shall be void if any person seeking to make a claim for defective products fails to notify IRF within
30 days, or, if distributor fails to provide evidence that the product failed within 30 days of the failure. Proof
and date of purchase, maintenance records as well as details regarding failure must be sent via e-mail, and a
sample of the failed products sent via postal service is required for warranty evaluation.
This warranty is in lieu of all other warranties, expressed or implied, including merchantability, or
fitness provided for herein. Under no circumstance shall IRF be liable for incidental or
consequential damages arising from the defect or failure in its products.
Seller’s sole obligation under the foregoing warranty will be limited to, at Seller’s option, repair or replacement
of the tool (and shipping to the buyer with transportation charges paid to any place within the contiguous 48
states). Returned goods will be evaluated by our warranty repair department and a conclusion will be
determined and classified as:
a) Warranty Repair (free of charge)
b) Non-Warranty repair or Abuse/Neglect (Hourly rate, Schedule B)
c) Maintenance (Flat Fee, Schedule B)
Schedule A – Limited Warranty
The following are considered consumable or wear parts and are not covered under the warranty.
Consumables: Jaws, Nosepieces, Jaw Pusher, Jaw Spring
Wear Parts: Mandrel Catcher, O-Rings, Pneumatic Seals, Hydraulic Seals*
*Hydraulic seals have a limited warranty (6 months) and the replacement is at the sole discretion of the
manufacturer.
Schedule B – Maintenance/Repair
Price Schedule as of 1/1/2011
Bench Fee: $ 60.00 (up to one hour)
Hourly Rate: $ 60.00 per hour
Flat Fee:
Level 1 - Adjustments, cleaning and light repair $45.00 + parts
Level 2 – Maintenance, Oil Change, plus Level 1 service $65.00 + parts
Level 3 – Complete disassembly, change all seals, plus level 2 service $120.00 + parts
If inspection by the seller of returned goods shows no breach of the forgoing warranty, Seller’s regular
conditioning charges (Schedule B) apply. Upon this conclusion we will either repair the tool at no cost to you
and return it postage paid, or call you to inform you of the repair cost. The repair will need to be approved in
writing before any work is performed.
A comprehensive tool service and repair program, for details contact your local area sales representative or call:
Industrial Rivet & Fastener Co.
200 Paris Ave
Northvale, NJ 07647

11
MSDS
MSDS
Lubricant Details
MOLY GREASE
(MSC P/N: 60002136)
Manufacturer:
T.S. Moly-Lubricants, Inc., Houston, TX
Emergency: (713)671-2676
MSDS Number: TS-122 Lithium EP-2 Moly Poly Grease
First Aid:
SKIN:
Prolonged or repeated skin contact with this product tends to
remove skin oils, possibly leading to irritation and dermatitis.
No chronic health problems known.
INGESTION:
May cause irritation and gastrointestinal discomfort consisting of
nausea, vomiting, lethargy and/or diarrhea.
EYES:
Flush eyes with plenty of water for several minutes. Get
medical attention if eye irritation persists.
Fire:
FLASH POINT: 450°F/232°C
Use water to cool containers exposed to fire. For fires in
enclosed areas, firefighters should use self-contained breathing
apparatus. Avoid fumes or burning product.
Environment:
WASTE DISPOSAL:
Because material uses, transformations, mixtures, processes,
etc. may affect classification, it is the responsibility of the user to
determine the method of disposal according to the latest EPA,
state and local regulations
SPILLAGE:
Recover free product. Add sand, earth, or some other suitable
adsorbent. Keep product out of sewers and watercourses by
diking or impounding.
Handling/ Storage:
Store in cool dry area in original or equivalent container in
accordance with all applicable regulations. Do not apply high
heat or flame to container.
Emhart Approved Equivalents:
None
MOBIL DTE 32
Manufacturer:
EXXONMOBIL Oil Corp., Fairfax, VA
Emergency: (609)737-4411 (call collect)
MSDS Number: 600684-00
First Aid:
SKIN:
Remove contaminated clothing and shoes and wipe excess
from skin. Flush skin with water, and then wash with soap and
water. If irritation occurs, get medical attention. Do not reuse
clothing until cleaned.
INGESTION:
Do not induce vomiting. In general, no treatment is necessary
unless large quantities of product are ingested. However, get
medical attention.
EYES:
Flush with water. If irritation occurs, get medical attention.
Fire:
FLASH POINT: 345 °F/174 °C
Material will float and can be re-ignited on the surface of water.
Use water fog, ‘alcohol foam’, dry chemical or carbon dioxide
(CO2) to extinguish flames. Do not use a direct stream of water.
Environment:
WASTE DISPOSAL:
Because material uses, transformations, mixtures, processes,
etc. may affect classification, it is the responsibility of the user to
determine the method of disposal according to the latest EPA,
state and local regulations.
SPILLAGE:
Soak up residue with an absorbent such as clay, sand or other
suitable material. Place in a non-leaking container and seal
tightly for proper disposal. Report spills/releases as required to
appropriate authorities.
Handling:
Wash with soap and water before eating, drinking, smoking,
applying cosmetics, or using toilet. Properly dispose of leather
articles such as shoes or belts that cannot be decontaminated.
Use in a well ventilated area. High pressure injection under the
skin may occur due to the rupture of pressurized lines. Always
seek medical attention.
Storage:
Keep containers closed when not in use. Do not store in open
or unlabelled containers. Store away from strong oxidizing
agents and combustible materials. Do not store near heat,
sparks, flame or strong oxidants.
Emhart Approved Equivalents:
• Shell Spindle Oil #22
• Shell Tellus Oil #22
Table of contents
Other Rivet King Rivet Tools manuals

Rivet King
Rivet King FreeSet RK-777-1 User manual

Rivet King
Rivet King RK21 Operator's manual

Rivet King
Rivet King RK-INLINE User manual

Rivet King
Rivet King RK-986 User manual

Rivet King
Rivet King FreeSet RK-777C-1Q User manual

Rivet King
Rivet King RK-8000S User manual

Rivet King
Rivet King RK-187 User manual

Rivet King
Rivet King RK-250 User manual
Popular Rivet Tools manuals by other brands

Fixi
Fixi 02RBZ user manual

Würth
Würth HES 510-OZS operating instructions

TKR Group
TKR Group VAS 6790/2 Setup and installation guide

Motion Pro
Motion Pro 08-0467 instructions

Stanley
Stanley PROSET PB3400 Accessories manual

Industrial Rivet & Fastener Co.
Industrial Rivet & Fastener Co. Rivet King RK-7532-P3 Operation manual