Dake SE-5X8 Operating and maintenance manual

Dake Corporation
724 Robbins Road
Grand Haven, MI 49417
Phone: 800.937.3253
Fax: 800.846.3253
www.dakecorp.com
customerservice@dakecorp.com
DAKE PORTABLE BANDSAW
SE-5X8
INSTRUCTIONAL MANUAL
WARNING!
Read and understand all instructions and responsibilities before operating. Failure to follow
safety instructions and labels could result in serious injury.

Dake Corporation
724 Robbins Road
Grand Haven, MI 49417
www.dakecorp.com
1 REV032019
TABLE OF CONTENTS
DAKE STANDARD LIMITED WARRANTY............................................................ 2
RETURN & REFUND POLICY .............................................................................. 4
SPECIFICATIONS ................................................................................................ 5
INTRODUCTION AND USE .................................................................................. 6
WARNING STICKERS – INDICATIONS .......................................................... 7
TYPE OF USE INTENDED .......................................................................... 7
GENERAL SAFETY REGULATIONS........................................................... 8
MAIN MACHINE COMPONENTS ....................................................................... 10
INSTALLATION................................................................................................... 11
ELECTRICAL CONNECTION .................................................................... 12
ADJUSTMENTS.................................................................................................. 12
ADJUSTING BLADE TENSION ................................................................. 12
CUTTING ANGLE-HEAD ROTATION ADJUSTMENT ............................... 13
ADJUSTING THE SLIDING BLADE GUIDE POSITION............................. 13
BLADE SPEED ADJUSTMENT ................................................................. 13
POSITIONING OF THE WORKPIECE IN THE VISE ................................. 13
INSTALLATION AND ADJUSTMENT OF BANDSAW STOCK STOP........ 14
OPERATIONS..................................................................................................... 14
USE AS A MANUAL CUTTING SAW ......................................................... 14
MAINTENANCE - STORAGE - ASSISTANCE - DISPOSAL ............................... 15
REPLACING SAW BLADE......................................................................... 15
LUBRICATION / COOLANT....................................................................... 16
CLEANING................................................................................................. 16
TROUBLESHOOTING ........................................................................................ 17
EXPLODED VIEWS & PART LIST...................................................................... 18
ORDERING INFORMATION ............................................................................... 21
ELECTRICAL COMPONENTS............................................................................ 22

Dake Corporation
724 Robbins Road
Grand Haven, MI 49417
www.dakecorp.com
2 REV032019
DAKE STANDARD LIMITED WARRANTY
Finished Machines
Dake warrants to the original purchaser the finished machine manufactured or distributed by it to
be free from defects in material and workmanship under normal use and service within 1 year
(12 months) from the delivery date to the end user.
Parts & Couplings
Dake warrants to the original purchaser the component part or coupling manufactured or
distributed by it to be free from defects in material and workmanship under normal use and
service within 30 days from the delivery date to the end user.
The standard limited warranty includes the replacement of the defective component part or
coupling, at no cost to the end user.
Warranty Process
Subject to the conditions hereinafter set forth, the manufacturer will repair or replace any portion
of the product that proves defective in materials or workmanship. The manufacturer retains the
sole right and option, after inspection, to determine whether to repair or replace defective
equipment, parts or components. The manufacturer will assume ownership of any defective
parts replaced under this warranty.
All requested warranty claims must be communicated to the distributor or representative
responsible for the sale. Once communication has been initiated, Dake Customer Service must
be contacted for approval:
Phone: (800) 937-3253
Email: customerservice@dakecorp.com
When contacting Dake, please have the following information readily available:
- Model #
- Serial #
- Sales Order #
Purchasers who notify Dake within the warranty period will be issued a Case number and/or a
Return Material Authorization (RMA) number. If the item is to be returned per Dake’s request,
the RMA number must be clearly written on the exterior packaging. Any item shipped to Dake
without an RMA will not be processed.

Dake Corporation
724 Robbins Road
Grand Haven, MI 49417
www.dakecorp.com
3 REV032019
Warranty Exceptions:
The following conditions are not applicable to the standard limited warranty:
(a) Part installation or machine service was not completed by a certified professional, and
is not in accordance with applicable local codes, ordinances and good trade practices.
(b) Defects or malfunctions resulting from improper installation or failure to operate or
maintain the unit in accordance with the printed instructions provided.
(c) Defects or malfunctions resulting from abuse, accident, neglect or damage outside of
prepaid freight terms.
(d) Normal maintenance service or preventative maintenance, and the parts used in
connection with such service.
(e) Units and parts which have been altered or repaired, other than by the manufacturer
or as specifically authorized by the manufacturer.
(f) Alterations made to the machine that were not previously approved by the
manufacturer, or that are used for purposes other than the original design of the
machine.

Dake Corporation
724 Robbins Road
Grand Haven, MI 49417
www.dakecorp.com
4 REV032019
RETURN & REFUND POLICY
Thank you for purchasing from Dake! If you are not entirely satisfied with your purchase, we are
here to help.
Returns
All Dake manufactured / distributed machines, parts and couplings include a 30-day return
option. These policies are valid from the date of final shipment to the end user.
To be eligible for a return, the item must be unused and in the same condition as received.
All requested warranty claims must be communicated to the distributor or representative
responsible for the sale. Once communication has been initiated, Dake Customer Service must
be contacted for approval:
Phone: (800) 937-3253
Email: customerservice@dakecorp.com
Once the return request has been approved by Customer Service, a representative will supply a
Return Material Authorization (RMA) number. The returned item must have the provided RMA
number clearly marked on the outside packaging. Any item received without an RMA number
clearly visible on the packaging will not be processed.
An RMA number can only be provided by the Dake Customer Service team and must be
obtained prior to the return shipment.
Refunds
Once the item has been received and inspected for damages, a representative will notify the
requestor referencing the provided RMA number.
If the return is approved, a refund will be issued to the original method of payment, less a 20%
restocking fee. The restocking fee may be waived if an order is placed at the time of return with
like-value merchandise.
Transportation costs are the responsibility of the end user and will not be credited upon return
approval.
Any item that is returned after the initial 30 days or has excessive/obvious use will not be
considered for a full refund.

Dake Corporation
724 Robbins Road
Grand Haven, MI 49417
www.dakecorp.com
5 REV032019
SPECIFICATIONS
Machine Type Portable mitering gravity fed horizontal bandsaw
Blade Size 68-1/4” x 1/2”
Blade Speed – Low Range 114 - 262 FPM
Horsepower 2.5 H.P. maximum
Weight 60 pounds
Overall Height 20 inches
Base Width 18 inches
Depth 39 inches
Round Capacity @ 0° 6 inches
Round Capacity @ 45° 4 inches
Square Capacity @ 0° 6 inches
Square Capacity @ 45° 4 inches
Rect. Capacity @ 0° 6 X 5 inches
Rect. Capacity @ 45° 4-3/4” X 4 inches
In the space provided record the serial number and model number of the machine. This
information is only found on the black Dake tag shown below. If contacting Dake this information
must be provided to assist in identifying the specific machine.

Dake Corporation
724 Robbins Road
Grand Haven, MI 49417
www.dakecorp.com
6 REV032019
INTRODUCTION AND USE
The Use and Maintenance Manual is made up of two parts, this document and the additional
parts and diagrams. Save this manual for future use.
Keep the Use and Maintenance Manual in good condition: Remember, it is an integral part of
the machine. Always refer to the manual to get best machine performance in maximum safety
while performing the operations described therein.
It is recommended that this manual be kept in an easily accessible place, near the machine, at
all times so that it can be consulted whenever necessary.
DANGER - WARNING
USE THE MACHINE SOLELY AND EXCLUSIVELY FOR THE USES INDICATED AND IN
ACCORDANCE WITH THE RECOMMENDATIONS PROVIDED IN THIS MANUAL.
NEVER TAMPER WITH IT, FORCE IT OR USE IT IN ANY INAPPROPRIATE MANNER.
HOW TO CONSULT THIS MANUAL AND THE SYMBOLS USED
Please pay particular attention to the words “WARNING”, “DANGER”, and “CAUTION" as used
in this manual.
To draw the user’s attention to certain information and provide warning messages, the
operations described in this manual are accompanied by symbols and notes to highlight the
presence of any hazards and indicate the safe use of the equipment.
DANGER - WARNING: IMPORTANT INFORMATION CONCERNING GENERAL
SAFETY.
DANGER-CAUTION: highlights situations where careful and sensible actions are
essential.
NOTES: information of a technical nature.

Dake Corporation
724 Robbins Road
Grand Haven, MI 49417
www.dakecorp.com
7 REV032019
WARNING STICKERS – INDICATIONS
The stickers affixed to the machine are indicated below.
Serial number / year of manufacture
r
Indication of direction of rotation:
TYPE OF USE INTENDED
The machine has been designed and built for cold cutting metal materials. For this operation,
the workpiece is held in place by a vise and the cutting head is controlled by the operator who
stands in front of the machine during use.
RECOMMENDED USE
The machine can be used to work on:
•METAL OR SIMILAR MATERIALS
•DRY CUTTING ONLY
PROHIBITED USE
It is prohibited to:
• OPERATE ON NON-METALS, ORGANIC MATERIALS AND/OR FOOD STUFFS,
• OPERATE ON MATERIALS WHICH MAY RELEASE TOXIC SUBSTANCES DURING THE
WORK PROCESS.
DANGER - WARNING
•The saw has been designed and built for dry cutting only. Do not use any kind of
cutting fluid.
•This machine is not suitable for use in potentially explosive atmospheres.
Basic logo / CE marking / indication
of motor characteristics and data.
Wear PPE:

Dake Corporation
724 Robbins Road
Grand Haven, MI 49417
www.dakecorp.com
8 REV032019
GENERAL SAFETY REGULATIONS
DANGER – WARNING
When using electrical tools, it is essential to observe basic safety precautions at all times to
reduce risk of fire, electric shock, and injury.
Ambient Conditions:
•Avoid using the machine in locations which are very humid or in the presence of
flammable liquids or gas.
•Always keep the work area tidy and clear of work scarp pieces; untidy work benches and
work areas are a source of potential danger.
Clothing and personal protective equipment:
•Do not wear clothing with loose sleeves or any accessories such as scarves, necklaces,
bracelets or any other object which may get caught up in the machine’s moving parts.
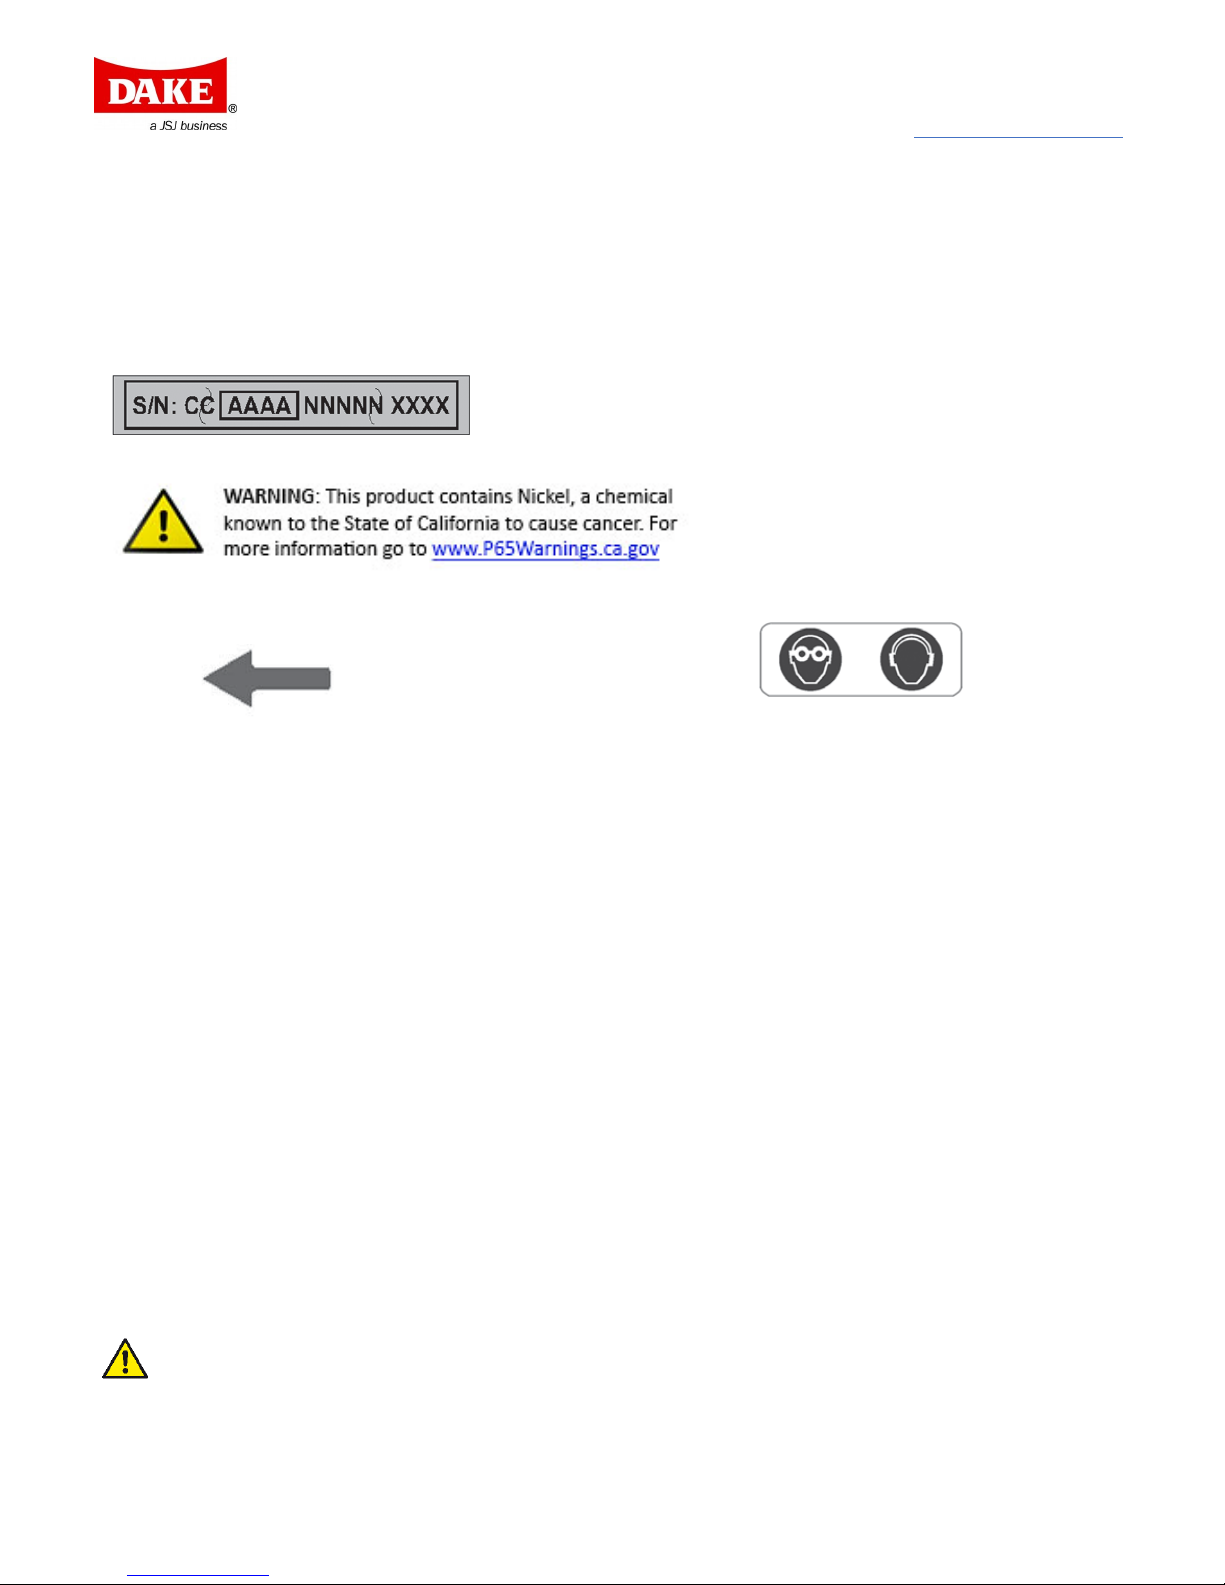
•Always wear safety protection devices. regulation safety glasses/goggles, well-fitting
gloves, ear protection.
•It is advisable to wear slip-resistant safety footwear.
•When necessary, suitably tie back long hair to prevent any risk of it becoming trapped or
entangled in moving parts.
•Wear an approved dust mask.
Care and use of electrical components:
•Pay attention to the power supply cable: never use it to lift the machine. Do not pull on
the cable to disconnect the plug from the power socket. Keep the cable away from sharp
edges, oil and high temperatures.
•Should it be necessary to use an extension cord, make sure it is heavy enough and an
approved type.
•Regularly check any extension cords being used and replace them if damaged.
•Whenever the machine is used outdoors, only use extension cords which have been
approved for outdoor use and are marked accordingly.
General safety warnings:
•Keep unauthorized persons and children away from the machine: never allow them to
come near or into contact with it.
•Always pay attention what you are doing.
•Always stay in a comfortable and well-balanced position.
•Never leave tools or measuring devices on the machine.
•Adopt safe working methods.
•Unplug the machine from the power supply when it is not in use, before performing any
maintenance operations and before replacing accessories or blades.

Dake Corporation
724 Robbins Road
Grand Haven, MI 49417
www.dakecorp.com
9 REV032019
Safety checks:
•Remove any tools before switching the saw on.
•Avoid inadvertent start-up: make sure that the switch is in the stop position before
connecting the machine to the power supply.
•Check the various machine elements to make sure there are no signs of damage.
•Before proceeding to use the machine, check all the safety devices and any other item
which may be damaged to ensure that the machine works properly and can perform the
task it is designed to do.
•Check that mobile parts are well aligned, move smoothly and are intact.
•Check the mounting and any other condition which may influence operation. Any
damaged part or guard must be repaired or replaced.
•It is essential to avoid using the machine if the switch malfunctions in any way.
•It is strictly forbidden to use the machine without the blade guards in place.
•Do not force the machine. The end results will be better and the machine safer to use if it
is used at the speed and rhythm it was designed for.
Machine upkeep and maintenance:
•Always keep the handles and handgrips dry, clean and free from oil and grease.
•Always keep the tools in perfect condition. Keep blades sharp and clean to ensure
maximum performance and safety.
DANGER - WARNING
•The use of any accessory or connection different to those indicated in this manual may
lead to the risk of injury.
•Do not dissemble this machine.
•Repairs to the machine must be carried out by skilled personnel only. Failure to observe
these warnings could create severe risks to users.
RESIDUAL RISKS
Cutting and severing hazard:
This risk is due to the presence of the rotating blade. It is indicated by the symbol:
Precautions to be taken
• During the cutting phase, do not wear work gloves.
• Keep hands away from the work area.
• Never remove cuttings or fragments from the machine when the blade is rotating.
Friction or abrasion hazard:
This risk is due to the presence of the rotating blade.

Dake Corporation
724 Robbins Road
Grand Haven, MI 49417
www.dakecorp.com
10 REV032019
MAIN MACHINE COMPONENTS
1. Control handgrip
9. Swivel Support
2. Blade tension handwheel
10. Stock stop assembly
3. Transport handles
11. Vise
4. Moveable blade guides
12. Vise adjustment screw
5. Cutting bow casting
13. Base
6. Blade
14. Blade tension window
7. Motor
15. Speed selector switch
8. Control Box
16. Power switch
The bandsaw is made up of two main parts: the machine body (5) complete with motor and
drive system (7) which is joined, by means of a swivel support (9), to the bottom section, made
up of a base (13) and vise (11).

Dake Corporation
724 Robbins Road
Grand Haven, MI 49417
www.dakecorp.com
11 REV032019
INSTALLATION
CONTENTS OF THE PACKAGING
• 1 bandsaw / handles and hardware
• 1 Stock stop assembly
• User Manual
REMOVING THE PACKAGING
Remove the box used to protect the machine during transport.
It is advisable to keep the packaging for future use (for transporting or storing the machine).
SAW HANDLING
a) Install the handles (3).
b) Lift the machine only with these handles.
POSITIONING WORK STATION
Position the machine on a work bench or on a pedestal at a height of between 35”- 37” from the
ground. The surface on which the machine is placed must be big enough to guarantee machine
stability
DANGER-WARNING AUTONOMOUS CUTTING SAWS
This model of machine (SE-5X8) must only be used in a dedicated work area to which
unauthorized access is prohibited.
If no such work area is available, it is advisable to cordon off the machine's operating area (6’ of
clearance on all sides of the bandsaw)
Position the machine in a work area with adequate lighting.
It is advisable to secure the machine to the workbench with M6 screws using the holes provided
on the base.

Dake Corporation
724 Robbins Road
Grand Haven, MI 49417
www.dakecorp.com
12 REV032019
ELECTRICAL CONNECTION
Safety Standards for electrical connections
Check that the electric supply system to which the machine is to be connected is grounded in
accordance with the relative safety regulations in force.
DANGER - WARNING
• Check that the power supply system is equipped with a circuit breaker to protect all
conductors from short circuit overloads.
• Before connecting machine to the electrical system, check that the main voltage
matches the voltage indicated on the machine itself.
• Once connected, to avoid any possible residual risks of tripping and falling, make sure
that the power supply cable lies completely on the ground and is not at any point
raised in the air.
• The saw’s electrical system is fitted with a device which automatically opens the circuit
if the voltage drops below the minimum set limit and inhibits automatic reset of
operating conditions when the voltage returns to the set rated levels.
• Should the machine suddenly cut out there is no cause for alarm. Check that there has
not been a voltage failure in the main supply.
ADJUSTMENTS
Blade configurations, speeds and feeds and cutting pressure recommendations are printed on a
label affixed to the motor housing.
DANGER – WARNING
• Put the machine is safe conditions (see “GENERAL SAFETY REGULATIONS”).
• Wear protective gloves.
• At the end of every adjustment operation, check that all fasteners are securely tightened.
• At the end of every adjustment operation make sure no tools have been left on the
machine.
ADJUSTING BLADE TENSION
Machine with tension indicator: turn the handwheel (2) clockwise until the indicator (14) on
body is aligned with the “MAX” position on the label.
DANGER - WARNING
IF THE BAND TENSION IS TOO HIGH IT MAY JUMP OUT OF THE GUIDES.

Dake Corporation
724 Robbins Road
Grand Haven, MI 49417
www.dakecorp.com
13 REV032019
CUTTING ANGLE-HEAD ROTATION ADJUSTMENT
The machine is supplied with basic positions calibrated at: 0° and 45°
To adjust the cutting angle, proceed as follows:
1. Loosen the locking knobs,
2. Turn the swivel support using the handgrip,
3. Stop rotation when the pointer is aligned with the selected position on the graduated
scale on the base,
4. Lock the swivel support by tightening knobs.
ADJUSTING THE SLIDING BLADE GUIDE POSITION
DANGER - CAUTION
PERFORM ADJUSTMENT OPERATIONS WHENEVER YOU PREPARE A WORK PROCESS
1. Loosen knob that is locking blade guide.
2. Slide the blade guide until it is as close to the workpiece as possible;
3. Simulate the work process to be performed to make sure that there is no interference
and/or contact between the blade guide, the workpiece and other parts of the
machine.
4. Lock the blade guide in position by tightening the knob.
BLADE SPEED ADJUSTMENT
Adjust the cutting speed as indicated in this manual. The device for regulating blade speed is a
rocker switch on top of the control box (8).
Select the speed (196 / 262 fpm) using the rocker switch (15).
POSITIONING OF THE WORKPIECE IN THE VISE
DANGER - WARNING
TO POSITION FLAT OR SPECIAL
SHAPED PROFILES, PLEASE REFER
TO THE EXAMPLES PROVIDED IN
THE DRAWING.

Dake Corporation
724 Robbins Road
Grand Haven, MI 49417
www.dakecorp.com
14 REV032019
INSTALLATION AND ADJUSTMENT OF BANDSAW STOCK STOP
1. Screw the guide rod (10) in the hole on the base.
2. Tighten the nut.
3. Loosen the handwheel and position the holder (10) at the required distance.
4. Tighten the handwheel.
OPERATIONS
DANGER - WARNING
THE MACHINE IS EQUIPED WITH A MAIN POWER SWITCH (located on control box 8) TO
BE ACTIVATED BEFORE THE WORK OPERATION. ONCE WORK HAS BEEN
COMPLETED, TURN OFF THE MAIN POWER SWITCH.
• Never wear gloves while operating saw.
• Before making a new cut, always remove the cut part left from the previous cut.
• Keep hands well away from the cutting area.
USE AS A MANUAL CUTTING SAW
The cutting head must be raised to the maximum up position then brought down to un-lock
the head lock feature. Do not force the head down as this may damage the saw.
1. Secure the workpiece to be cut in the vise using the vise adjusting screw (12).
2. Press button (located in the handle grip1) to start the blade.
3. Lower the cutting head slowly until it comes into contact with the workpiece
DANGER - CAUTION
To avoid breaking the blade, reduce pressure as soon as the blade comes into
contact with the workpiece.
4. Complete cutting until you break through the cut.
5. Release the button to stop work.
6. Lift the head as far as it will go.
DANGER - CAUTION
• Never bring hands anywhere near the cutting area until the blade has stopped and head
has been raised to its full height.
• Let the cut piece fall onto the base of the machine. Do not grab the cut part.
• In the event of excessive cutting pressures, the current limiter will trip, back off the cutting
pressure to safeguard the machine and operator.

Dake Corporation
724 Robbins Road
Grand Haven, MI 49417
www.dakecorp.com
15 REV032019
MAINTENANCE - STORAGE - ASSISTANCE - DISPOSAL
Routine maintenance operations which can be performed by the user are described
below.
Have the machine repaired by qualified personnel only. This machine complies with all the
relevant safety prescriptions. Repairs to the machine must be carried out by skilled personnel
only using original spare parts. Failure to observe this recommendation could jeopardize user
safety.
DANGER - WARNING
Before performing any maintenance work the machine must be disconnected from the power
source and locked out.
REPLACING SAW BLADE
DANGER – WARNING: WEAR PROTECTIVE GLOVES.
Tools required: Appropriate hex keys and/or screwdrivers are needed to replace the blade.
Check the rotation of the used blade. Notice arrow direction on the head frame.
Use of used blades is not recommended.
Check the compatibility of the NEW blade for the saw. Only use a blade with a thickness
between .025” and .035”.
1. Loosen the blade guide handle and slide the blade guides towards the center of the of
the cutting head. Lightly tighten the handles (4).
2. Remove the rear blade cover by unscrewing the hex screws. Remove cover and put it
safely out of your way.
DANGER – WARNING WHEN THE BLADE COVER IS OPENED, THE BLADE MAY
JUMP OUT.
3. Turn the handwheel (2) counter clockwise to loosen and facilitate removal of the blade;
4. First remove the blade from the blade wheels and then from the blade guide bearings.
5. Remove and clean any chips or debris using a small brush.
6. Install the new blade.
7. Make sure, by means of a visual inspection, that the blade is installed with the teeth
pointing in the direction indicted by the arrow on the machine; (Forward) Tighten the
blade tensioning handle lightly.
8. Mount the blade cover by tightening the hex screws.
9. Turn the handwheel (2) clockwise to tighten blade until the indicator (14) on the body is
aligned with the “MAX” position on the label.

Dake Corporation
724 Robbins Road
Grand Haven, MI 49417
www.dakecorp.com
16 REV032019
DANGER - WARNING
TO GET OPTIMUM PERFORMANCE FROM YOUR BLADE, CARRY OUT THE BREAK-IN
PROCEDURE. ALWAYS BREAK-IN THE BLADE USING THE BLADE MANUFACTURES
BREAK-IN RECOMMENDATIONS. IF UNAVAILABLE THESE STEPS WILL PROVIDE
GENERIC BREAK-IN PROCEDURES.
Start out making three cuts, putting only a light pressure on the workpiece.
Light pressure: as an example, consider an operation to cut a solid steel bar (e.g. C40, D .2”
dia). This should be cut in about 4 minutes. Once the blade has been broken-in the same
workpiece can easily be cut in about 2 minutes.
LUBRICATION / COOLANT
The machine does not need lubricating / coolant.
CLEANING
DANGER – WARNING
• Wear suitable personal protective equipment (e.g. safety glasses, etc.).
• Avoid using compressed air.
• Keep saw and surrounding areas clean from debris.

Dake Corporation
724 Robbins Road
Grand Haven, MI 49417
www.dakecorp.com
17 REV032019
TROUBLESHOOTING
PROBLEM
PROBABLE CAUSE
REMEDY
Motor is not working
1. Faulty motor, power cable
or plug.
2. Blown fuse in electrical
panel.
3. No voltage at the power
supply
4. Motor’s thermal circuit
breaker has tripped
1. Get machine checked by a
qualified electrician.
DANGER – WARNING
NEVER ATTEMPT TO REPAIR THE
MOTOR YOURSELF, IT COULD BE
DANGEROUS.
2. Check and replace fuses if
necessary.
3. Check power supply.
4. Thermal overload tripped. Wait
a few minutes for overload to
re-set
Tripping of the thermal
circuit breaker
1. Motor has overheated.
2. Motor overload caused by
excessive cutting pressure.
3. Motor faulty
1. Check that the motors cooling
vents are not obstructed.
2. Reduce the cutting pressure.
3. Get motor check by a qualified
personal.
Cuts are not square
1. Excessive cutting pressure
or distortion of the part in
the vise.
2. Incorrect or worn blade.
3. Cutting speed incorrect.
4. Misalignment of guides.
5. Incorrect clamping.
6. Incorrect blade tensioning.
1. Reduce cutting pressure,
adjust clamping vise.
2. Check cutting chart on motor
for proper blade parameters.
3. Adjust cutting speed.
4. Check guide alignment.
5. Check clamping positioning.
6. Check blade tension.
The cut finish is rough
or irregular
1. Worn out blade or teeth
missing.
2. Wrong blade for the job.
3. Excessive cutting pressure.
1. Replace blade with new.
2. Check cutting parameters
compare to the blade tooth
and cutting speeds listed on
the motor chart.
3. Reduce cutting pressure.
Blade jumps out of the
guides.
1. Excessive wear of rubber
coating on the band
wheels.
2. Slipping blade on band
wheels.
3. Seized guide bearing
1. Clean any sprays or lubricant
from the band wheels or
replace if needed.
2. Loose blade tension. Check
and adjust tension.
3. Replace worn bearings.

Dake Corporation
724 Robbins Road
Grand Haven, MI 49417
www.dakecorp.com
18 REV032019
EXPLODED VIEWS & PART LIST
Pos . Description Pa rt # Pos . Description Pa rt #
1Uni 5737 M14x100 17 Uni 5931 M6x16
25.08.01.32 18 5.12.40.29
30.06.30.40 19 5.13.80.42
45.12.40.50 20 0.40.29.05
50.14.70.03 21 0.14.40.03
6Complete Vise 303417 22 Uni 5931 M8x25
7Swivel Support 303416 23 Uni 6592 Ø8
8
Uni 6592 Ø14 27 5.06.30.67
9Uni 5587 M14 28 5.14.21.05
10 Uni 5721 M14 29 5.13.77.78
11 5.15.95.03 30 Rest Foot 303414
13 0.12.07.18 36 5.17.10.87
14 Uni 7473 M8 42 Vise Handle 303415
15 7.13.05.52 47 5.18.28.28
16 5.13.38.25 48 0.40.06.05
49 0.15.07.01

Dake Corporation
724 Robbins Road
Grand Haven, MI 49417
www.dakecorp.com
19 REV032019
Pos . Description Pa rt # Pos . Description Pa rt #
50 Ge a r group 303413
73 5.12.40.47
51 0.60.60.05
74 5.21.42.22
52 Uni 7687 M4x6 75
Handwheel
303410
53 Blade tension index cover 303412 76 5.12.06.38
54 5.04.29.20 77 0.59.06.24
56 0.15.01.49 78 5.18.17.39
57 5.15.41.03 79 0.08.02.59
58 0.40.05.11 80 5.12.20.24
59 Drive wheel 303411 82 5.10.05.04
60 Uni 6592 Ø12 83 5.08.10.05
61 Uni 7474 M12 84 Uni 5933 M5x25
62 Uni 5588 M10 85 5.13.07.34
63 5.00.15.58 87 0.40.05.13
64 5.13.78.08 88 5.18.17.37
65 0.15.51.49 89 5.87.10.48
66 0.60.62.04 90 Trigger switch 303409
67 0.15.51.16 91 Uni 6592 Ø10"
68 3.27.74.02 92 Pull handle 303408
69 5.18.17.36 93 5.14.20.79
70 Uni 5923 M5x16 94 5.15.95.04
71 0.10.20.05 95 0.17.99.01
72 Uni 5933 M8x20
71
Table of contents
Other Dake Saw manuals

Dake
Dake SE-8.5M Operating and maintenance manual

Dake
Dake CUT 250 COLD SAW User manual

Dake
Dake SE-912 User manual

Dake
Dake Technics 350 CE Operating and maintenance manual

Dake
Dake JH-10 User manual

Dake
Dake Trademaster User manual

Dake
Dake SE-712 Operating and maintenance manual

Dake
Dake SE-5X6 RCT User manual

Dake
Dake Technics 350 SA User manual

Dake
Dake LAGUNA 14CX User manual

Dake
Dake E-16 User manual

Dake
Dake Technics 250 Operating and maintenance manual

Dake
Dake SXC 988040 User manual

Dake
Dake V-26 User manual

Dake
Dake F-16 User manual

Dake
Dake SL913 TW Quick start guide

Dake
Dake SE-712 User manual

Dake
Dake 14-10 User manual

Dake
Dake E-16 User manual

Dake
Dake SUPER CUT 315 Operating and maintenance manual