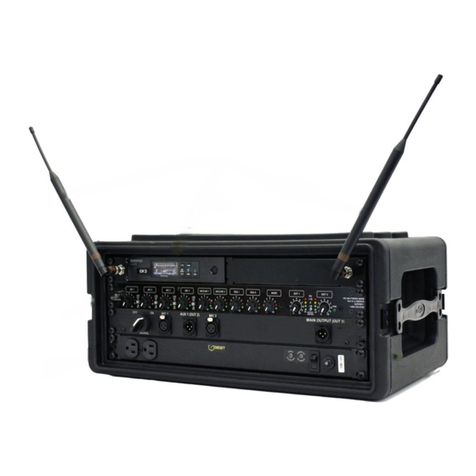
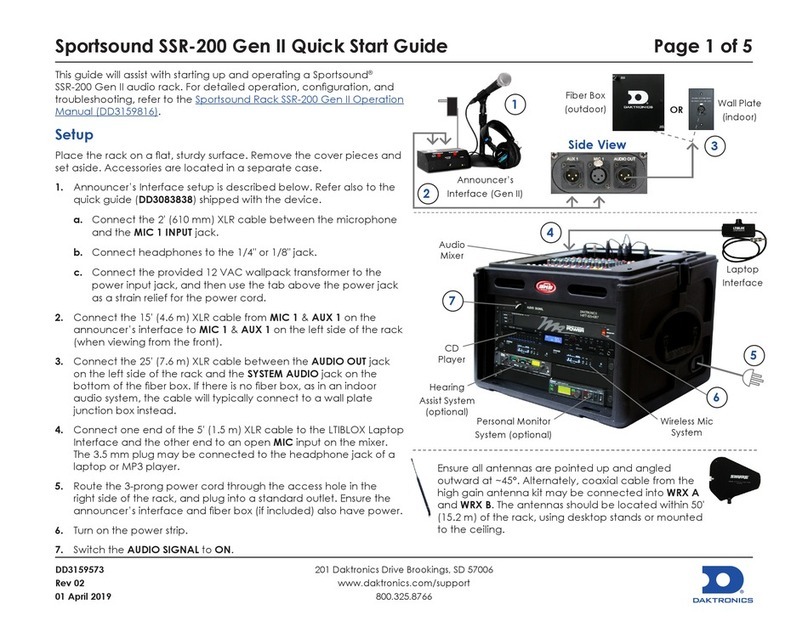
Daktronics Sportsound SSR-300 User manual

201 Daktronics Drive PO Box 5128 Brookings, SD 57006-5128
Tel: 1-800-DAKTRONICS (1-800-325-8766) Fax: 605-697-4746
www.daktronics.com/support
Sportsound®Rack
SSR-300
Operation Manual
DD2324779 Rev 4 – 24 August 2016

DD2324779
P1340
Rev 4 – 24 August 2016
daktronics, inc.
Copyright © 2012-2016
All rights reserved. While every precaution has been taken in the preparation of this manual, the publisher assumes no
responsibility for errors or omissions. No part of this book covered by the copyrights hereon may be reproduced or copied in any
form or by any means – graphic, electronic, or mechanical, including photocopying, taping, or information storage, and retrieval
systems – without written permission of the publisher.
Sportsound®is a registered trademark of Daktronics, Inc. All other trademarks are property of their respective companies.

Table of Contents i
Table of Contents
Section 1: Introduction.......................................................................................................................................... 1
1.1 Resources............................................................................................................................................................... 1
1.2 Daktronics Nomenclature................................................................................................................................... 2
Section 2: SSR-300 Components ......................................................................................................................... 3
2.1 Overview ............................................................................................................................................................... 3
2.2 Standard Equipment............................................................................................................................................ 5
Audio Mixer................................................................................................................................................... 5
Professional CD/Media Player................................................................................................................... 5
Announcer’s Interface .................................................................................................................................. 5
Laptop Interface ............................................................................................................................................ 6
Wireless Microphone System...................................................................................................................... 6
Distribution Amplier.................................................................................................................................. 7
Feedback Reducer ......................................................................................................................................... 7
ADA Hearing Assist System ....................................................................................................................... 7
Wireless Personal Stereo Monitor System................................................................................................. 7
High Gain Antenna Kit ................................................................................................................................ 8
Single-Muff Headset..................................................................................................................................... 8
Self-Powered Monitor Speaker ................................................................................................................... 8
USB Audio Interface ..................................................................................................................................... 8
2.3 Signal Cables......................................................................................................................................................... 8
Section 3: Setup & Operation ..............................................................................................................................11
3.1 Power & Signal Connections ............................................................................................................................ 11
3.2 Setup..................................................................................................................................................................... 11
3.3 Powering ON ...................................................................................................................................................... 11
3.4 Powering Down.................................................................................................................................................. 12
3.5 Mixer Operation ................................................................................................................................................. 12
3.6 Wireless Mic System Operation ....................................................................................................................... 14
Wireless Receiver ........................................................................................................................................ 14
Single Receiver ..................................................................................................................................... 14
Network Receivers............................................................................................................................... 14
Wireless Mic & Bodypack Operation....................................................................................................... 15
3.7 Microphone Best Practices ................................................................................................................................ 16
3.8 Personal Monitor System Operation ............................................................................................................... 16
3.9 Hearing Assist System Operation.................................................................................................................... 18
Section 4: Maintenance & Troubleshooting ...................................................................................................... 19
4.1 Maintenance........................................................................................................................................................ 19
4.2 Troubleshooting ................................................................................................................................................. 19
Section 5: Replacement Parts ............................................................................................................................ 21
5.1 SSR-300 Components......................................................................................................................................... 21
Section 6: Daktronics Exchange and Repair & Return Programs .................................................................. 23
6.1 Exchange Program ............................................................................................................................................. 23
Before Contacting Daktronics ................................................................................................................... 23
6.2 Repair & Return Program ................................................................................................................................. 24
Shipping Address........................................................................................................................................ 24
6.3 Daktronics Warranty & Limitation of Liability ............................................................................................. 24
Appendix A: Reference Drawings .......................................................................................................................... 25
Appendix B: Supplementary Manuals ................................................................................................................... 33
Appendix C: Daktronics Warranty and Limitation of Liability ............................................................................. 35


Introduction 1
Section 1: Introduction
This manual explains the operation of the Sportsound®Rack (SSR) 300. For additional information regarding
the safety, installation, operation, or service of this system, refer to the telephone numbers listed in Section 6.
This manual is not specic to a particular installation. Project-specic information takes precedence over any
other general information found in this manual.
IMPORTANT SAFEGUARDS
• Read and understand all instructions before beginning the installation process.
• Do not drop the control equipment or allow it to get wet.
• Do not disassemble control equipment or electronic controls of the system; failure to follow this
safeguard will make the warranty null and void.
• Always turn off and/or unplug the control equipment when it is not in use. This keeps equipment
protected from power spikes and lightning.
• Never yank the power cord from the outlet. Grasp the plug and pull to disconnect.
• Do not let any power cord touch hot surfaces or hang over the edge of a table that would damage or
cut the cord. Arrange the cord with care so that it will not be tripped over.
• Inspect control equipment for shipping damage such as rattles and dents, and verify that all
equipment is included as itemized on the packing slip. Immediately report any problems to
Daktronics; save all packing materials if exchange is necessary.
• Keep equipment covered when possible to protect from dust and debris.
1.1 Resources
Figure 1 illustrates a Daktronics drawing label. The drawing
number is located in the lower-right corner of a drawing. This
manual refers to drawings by listing the last set of digits and
the letter preceding them. In the example, the drawing would
be referred to as Drawing D-1007804. All references to drawing
numbers, appendices, gures, or other manuals are presented in
bold typeface. Any drawings referenced in a particular section
are listed at the beginning of it as shown below:
Reference Drawing:
System Riser Diagram ................................................................................................. Drawing D-1007804
All drawings referenced in this manual are found in Appendix A.
Daktronics identies manuals by the DD or ED number located on the cover page. For example, this manual
would be referred to as DD2324779.
Daktronics has a searchable knowledgebase of common questions and
troubleshooting tips: www.daktronics.com/support
Visit the Daktronics Support YouTube channel to learn how to properly
operate Sportsound racks: www.youtube.com/DaktronicsSupport
Drawing Number
Figure 1: Drawing Label

2 Introduction
1.2 Daktronics Nomenclature
Most display components have a white label that lists the part number (Figure 2).
Part numbers will also appear on certain drawings. If a component is not found in the
Replacement Parts List in Section 5 use the label to order a replacement. Section 6
describes the Daktronics Exchange Policy and the Repair & Return Program. Refer to
these instructions if replacing or repairing any display component.
Main Component Labels
Part Type Part Number
Individual circuit board 0P-XXXX-XXXX
Assembly; a collection of
circuit boards 0A-XXXX-XXXX
Wire or cable W-XXXX
Fuse F-XXXX
Transformer T-XXXX
Metal part M-XXX
Fabricated metal assembly 0S-XXXXXX
Specially ordered part PR-XXXXX-X
0P-1127-0024
SN: 2465
02/19/12 Rev. 1
Figure 2: Part Label
Accessory Labels
Component Label
Termination block for
power or signal cable TBXX
Grounding point EXX
Power or signal jack JXX
Power or signal plug for
the opposite jack PXX

SSR-300 Components 3
Section 2: SSR-300 Components
2.1 Overview
Reference Drawing:
Audio; SSR-300 Rack Elevation ...................................................................................Drawing D-1191264
Audio; SSR-300; 24 / 40RU Schematic ........................................................................Drawing D-1191265
The SSR-300 announcer’s rack is available in two different sizes: 40 RU and 24 RU (Figure 3).
• The SSR-300-40 is 77" (1956 mm) tall, 25.75" (654 mm) wide, and 32.5" (826 mm) deep.
• The SSR-300-24 is 49" (1245 mm) tall, 25.75" (654 mm) wide, and 32.5" (826 mm) deep.
The mixer is located remotely from the other rack components, up to 50' (15.2 m) away.
In Appendix A, refer to Drawing D-1191264 for component locations and Drawing D-1191265 for a detailed
wiring schematic.
21
5
3
6
4
8
9
7
40 RU Rack24 RU Rack
Figure 3: SSR-300 Racks

4 SSR-300 Components
Figure 4 displays the various announcer’s rack components and how they are arranged.
# Component Reference Supplementary Manual
1Sound System ON/OFF Key N/A N/A
2ADA Hearing Assist System Section 3.9 Listen®LT-800, LR-400 & LA-122 Users Manuals
3Wireless Personal Stereo Monitor
System Section 3.8 Shure®PSM®900 Personal Wireless Monitor System
User Guide
4Audio Mixer Section 3.5 Yamaha 01V96 Digital Mixing Console Owner’s Manual
5Professional CD Player N/A DENON Professional CD/Media Player DN-501C
Owner’s Manual
6Wireless Receiver System Section 3.6 Shure®QLX-D®Wireless System User Guide
7Feedback Reducer N/A Shure®Model DFR22 Installation Guide
8Distribution Amplier N/A ATI DA416 Distribution Amplier User Manual
9Storage Drawers N/A N/A
All supplementary manuals are listed in Appendix B.
21
5
3
6
4
8
9
7
40 RU Rack24 RU Rack
Figure 4: SSR-300-40 Components (door removed)

SSR-300 Components 5
2.2 Standard Equipment
Audio Mixer
The Yamaha 01V96 Digital Mixer (Figure 5) provides the
performance and reliability of digital live sound in a compact
design. Small but powerful, this mixer handles up to 40 inputs
and offers 24 bit/96 kHz operation for optimum resolution
and quality of sound. Other features include:
• Precise 24-bit/96-kHz audio and high-performance
head amps
• Up to 40 simultaneous inputs and 20 mix buses in a
compact rack-size mixer
• Flexible, independent compression and gating/ducking processors
• Top-performance 24-bit/96kHz effect processors built-in
• Powerful channel functions with exible control and digital patching capability
• Comprehensive interface with large LCD, 100 mm motor faders, and dedicated scene memory keys
(up to 99 scenes)
Professional CD/Media Player
The DN-501C (Figure 6) is a professional, rack-mount CD/Media Player with a combination of exible le
formats and comprehensive inputs and outputs. Other features include:
• Supports CD-DA/WAV/MP3/AAC/AIFF audio le formats
• USB mass storage device playback, including direct digital playback from iPod/iPhone
• Balanced analog and digital AES/EBU outputs (XLR)
• Unbalanced analog and digital coaxial outputs (RCA)
• ±16% Pitch Control
• IR, RS-232c (9-pin D-sub), and GPIO (25-pin D-sub)
controllable
Announcer’s Interface
The Daktronics Announcer’s Interface (Figure 7) includes one
(1) balanced MIC output, one (1) balanced AUX input, and
headphone jacks; headphone volume control knob; and momentary
or continuous microphone activation buttons. Microphone and
headphones are provided.
Figure 5: Audio Mixer
Figure 6: Professional CD Player
Figure 7: Announcer’s Interface Kit

6 SSR-300 Components
Laptop Interface
This portable, durable balanced audio converter allows connection of a laptop
or mp3/music player into pro-level mixers (Figure 8). Other features include:
• 1/8" (3.5 mm) male input
• Balanced XLR male output
• Adjustable output volume control
• Black powder-coated aluminum chassis
Wireless Microphone System
The Shure®QLX-D®is a professional UHF wireless microphone system. Dual receivers in the audio rack
allow operation of two wireless transmitters simultaneously (Figure 9). Over 60 compatible channels per
frequency band and up to 17 compatible systems per 6 MHz TV channel are available. Automatic Frequency
Selection technology detects the clearest frequencies in the area. Other features include:
• Lockable settings
• Battery power gauges
• Effective Range: 328' (100 m) under optimal conditions
• Audio Frequency Response: 20Hz to 20kHz, ±2dB
• Total Harmonic Distortion: <0.1%
• RF Sensitivity: -97 dBm at 10-5 BER
Figure 8: Laptop Interface
Figure 9: Wireless Microphone & Bodypack Transmitter w/ Mute Switch

SSR-300 Components 7
Distribution Amplier
The ATI DA416S Quad Distribution Amplier is a four-input, sixteen-output distribution amplier that
accepts four input signals and distributes each input to four individually adjustable, active balanced outputs.
Other features include:
• Separate LEDs for each 1x4 channel indicate input signal presence
• Phoenix connectors for easy pre-wiring and exible output channel assignment
• Individual wide range audio taper output level controls
Feedback Reducer
The Shure®DFR22 is a two-input, two-output digital audio processor with feedback reduction. The 2 x 2
matrix mixer allows either or both inputs to be routed to either or both outputs, with additional controls for
levels and polarity. The unit stores sixteen presets and provides 24-bit conversion, 48kHz sampling and a
minimum dynamic range of 100 dB. Other features include:
• Digital feedback reducer, in both mono and stereo processors
• Automatic gain control
• Parametric and graphic equalizers
• Mono & stereo compressor/limiter
• Ducker
• Two-way crossover & splitter
• Subwoofer control
• Peak stop limiter
ADA Hearing Assist System
The Listen®LT-800 Stationary Transmitter in the audio rack allows individuals to
experience every word at an event. This system is designed to broadcast the audio
signal throughout the facility. It is capable of transmitting to multiple receiver types
and its adjustable receivers allow each user to have full volume control.
The Listen LT-4200 Portable FM Receiver (Figure 10) provides users with the choice of
57 channels and accessory options ideal for a wide range of applications. The receivers
are digitally tuned so transmission will not drift, assurance that when you select a
channel it stays on the channel.
Wireless Personal Stereo Monitor System
The Shure®PSM®900 Wireless in-ear monitor system is used for on-eld/on-stage talent.
The system includes a transmitter in the audio rack and a receiver (Figure 11) worn by the
performer that allows for personal adjustment of mix and volume and compensates for
delay from the sound system.
Sound travels at 1120' (341 m) per second. This produces a noticeable delay as one moves
away from the speaker. Even experienced performers have trouble adjusting to this delay.
A wireless in-ear monitor system provides a real-time signal to the talent and blocks the
sound delay from their ears.
Note: If more receivers are required and the transmitter is already installed,
additional receiver packs and headphones are available to purchase.
Figure 10: Portable FM
Receiver
Figure 11: PSM
Receiver

8 SSR-300 Components
High Gain Antenna Kit
The Shure®PA805 (Figure 12) is a directional antenna for increased range and
reduced interference. The “gain” of this antenna enables it to receive signals
from a greater distance than at typical “whip” type antenna. The antenna
allows for increased performance of wireless microphones with 6 db of gain.
The directional antennas may be located up to 50' (15.2 m) away from the
announcer’s rack.
Single-Muff Headset
The professional single-muff headset (Figure 13) may be used in place of the
standard announcer’s interface wired microphone and headphones. Other
features include:
• Ambient noise attenuation
• Neodymium magnet system for high reproduction precision
• Soft, circumaural ear pads
• Cardioid condenser microphone
Self-Powered Monitor Speaker
The Yamaha MSP3 monitor speaker (Figure 14) features a compact bass reex
cabinet, with a 3.94" (100 mm) two-way cone speaker and a 0.87" (22 mm) dome speaker.
Other features include:
• Three inputs: one ¼" phone, one RCA, one XLR
• Tone control (High/Low)
USB Audio Interface
The Radial®Engineering USB-Pro™ (Figure 15) provides an interface from laptop
computers to balanced outputs. Other features include:
• 24-bit, 96 kHz quality audio
• Two balanced XLR outputs (left and right)
• 3.5mm TRS headphone output
• Ground lift and mono-sum switches
2.3 Signal Cables
Cable specications are as follows:
• 30' (9.1 m) XLR cable from rack to ber box or wall plate (part # 0A-1340-0301)
• 25' (7.6 m) snake cable (part # W-1950) or 50' (15.2 m) snake cable (part # W-1951)
from 24 RU rack to remote mixer
• 5' (1.5 m) XLR cable for auxiliary audio input (part # W-1627)
• 15' (4.6 m) XLR cable from announcer’s interface to wall plate (part # W-2074)
• 25' (7.6 m) XLR cable for connecting additional wired microphones (part # W-1560)
Figure 12: Directional Antenna
Figure 13: Single-Muff
Headset
Figure 14: Self-
Powered Speaker
Figure 15: USB
Audio Interface

SSR-300 Components 9
Notes:
• Keep unbalanced cable lengths under 6' (1.8 m) to prevent unwanted noise from being picked up.
Use appropriate converters, such as the LTIBLOX Laptop Interface, to convert to balanced cables
(Figure 16) for longer cable runs if necessary.
• Run audio cables away from power cables to prevent noise.
• Audio cables must be kept separate from current loop (scoreboard control) signal cables.
Figure 16: Balanced/Unbalanced Cable Comparisons


Setup & Operation 11
Section 3: Setup & Operation
3.1 Power & Signal Connections
Reference Drawing:
Installation Riser; Sportsound Rack 300.......................................................................Drawing C-1102369
All connections are made upon installation. Some equipment may be connected and disconnected each
time it is used. Drawing C-1102369 in Appendix A shows a general overview of how standard and optional
equipment connects to the rack. Note that every project is unique, so be sure to follow any site-specic riser
drawings and documentation for the facility to determine the exact layout of system components.
3.2 Setup
The Announcer’s Interface equipment is typically kept in the bottom storage drawers along with other
accessories. Follow the steps below to properly reconnect it to the rack. For more information, refer also to the
quick guide (DD3083838) shipped with the device.
1. Connect the 2' (610 mm) XLR cable between the microphone and the MIC 1 INPUT jack.
2. Connect headphones to the 1/4" or 1/8" jack.
3. Connect the provided 12 VAC wallpack transformer to the power input jack, and then plug the
other end into a standard 120 VAC outlet. Use the tab above the power jack as a strain relief for the
power cord.
4. Connect the 15' (4.6 m) XLR cable from MIC 1 & AUX 1 on the announcer’s interface to Mic 1 &
Aux 1 on the announcer's plate.
For the 24 RU rack only, there will be a 25' (7.6 m) or 50' (15.2 m) cable harness factory wired to the rack.
Route this cable to the desired mixer location and connect each plug to the appropriate jack on the mixer
according to the wire labels. Plug the mixer into a standard power outlet.
3.3 Powering ON
Unlock the door of the rack, and turn the SOUND SYSTEM key switch (Figure 17) to the ON (vertical)
position.
Note: Keep both sets of keys in a safe location to prevent theft/tampering of rack equipment!
Figure 17: Power Key Switch

12 Setup & Operation
3.4 Powering Down
1. Press the USER DEFINED KEY on mixer labeled OFF (Figure 18).
2. Turn the SOUND SYSTEM key switch to the OFF (horizontal) position.
3. If the system will not be used for some time, unplug the power cord.
4. Place all accessories back in the appropriate slots of the storage drawers
to keep them safe and organized.
5. Close and lock the rack door.
3.5 Mixer Operation
Basic instructions are described below. For more information about audio mixer
operation, refer to the Yamaha 01V96 Digital Mixing Console Owner’s Manual.
1. Press the USER DEFINED KEY labeled GAME (Figure 19).
Note: Custom keys (presets) may have been set up during training.
Press the desired key as needed for a specic application. The creation of
additional presets is recommended for advanced users only.
2. Ensure all source equipment is turned on and operational (refer to the
appropriate sections of this manual and/or manufacturers’ manuals).
3. Verify gain knobs for the channels in use are adjusted so the SIGNAL
light is green and the PEAK light is not lit (Figure 20).
4. Ensure the ON buttons for the channels in use and for the STEREO slider are illuminated; also verify
no SOLO buttons are illuminated (Figure 21).
Figure 18: OFF Key
Figure 19: GAME Key
Figure 20: Gain Knobs & PEAK/SIGNAL Indicators
Figure 21: Channel & SOLO Buttons

Setup & Operation 13
5. Bring sliders up slowly and listen for the signal (Figure 22).
6. The signal should be visible on the STEREO output meter (Figure 23):
• The amber LEDs indicate that the level is near clip.
• The red LEDs indicate that the signal has reached the digital limit.
REMEMBER: Bad input = bad output. No adjustment on the mixer can make a poor
source sound better. For best results, be sure to use high-quality audio les from
your MP3 player or laptop, and set the device to near full volume.
Figure 22: Channel Sliders
Figure 23: Output Meter

14 Setup & Operation
3.6 Wireless Mic System Operation
Basic instructions are described below. For more information about wireless mic system operation, refer to
the Shure®QLX-D®Wireless System User Guide.
Note: For systems built prior to January 2015, refer to the Shure®ULX®Wireless System User Guide for
setup and operation instructions.
Wireless Receiver
The unit displays the following information (Figure 24):
a. Transmitter Battery Life
b. TV Channel
c. Frequency
d. Group Number
e. Channel Number
f. RF Signal Strength
g. Transmitted Audio Level
h. Gain Level
Single Receiver
1. Ensure all transmitters are powered off. Press the power button to turn on the receiver if it is not
already on.
2. Press menu until “scan” displays on the LCD.
3. Press enter to start frequency scan. When scan is complete, Group and Channel will display on
the LCD.
Network Receivers
1. Ensure all transmitters are powered off. Turn on all receivers and wait one minute to allow time to
connect to the network.
2. Press menu on one receiver until group number ashes.
3. Use the arrow buttons to select a group to scan.
4. Press enter, wait for channel, and then press enter again
5. Press menu until “network scan” displays on the LCD.
6. Press enter twice to deploy channels to other receivers.
Note: Perform a scan on all of the wireless units just minutes before the game! If a scan is performed too far
ahead of time, frequencies set up by the media later on may interfere with previously congured wireless
microphone settings.
PowerIR Window
a
e
b c
dg
fh
Power
ON/OFF
Power
ON/OFF
IR Window
Figure 24: Wireless Receiver LCD & Controls

Setup & Operation 15
Wireless Mic & Bodypack Operation
1. Open the battery cover. Insert new or fully-charged AA batteries prior to each use, and always have
spares on hand.
2. Power on the transmitter device (Figure 25).
3. Hold the transmitter device up close to one receiver in the rack, ensuring the infrared (IR) windows
are aligned.
4. Press sync on the receiver; “good” will display if sync was successful.
5. Repeat steps 1-4 to pair another transmitter device with an additional receiver (if present).
Note: Plug the referee mute switch into the jack on top of the bodypack unit and plug headphones/
lapel mic into the referee mute switch.
Verify Reception: With a transmitter and the receiver both turned on and having matching GROUP and
Channel numbers, the RF meter on the receiver should be indicating signal. Speak into the microphone and
the TX AUDIO meter should indicate signal presence.
Additional Tips:
• Perform a group and channel scan to obtain the best available channel for microphones.
• Check that battery levels are adequate to prevent wireless equipment from powering off during use.
• Program one microphone per receiver; multiple microphones on the same channel will cause
interference and microphones will drop out.
• Always use quality batteries to prevent battery leaks that can corrode and shorten the life of the
equipment.
PowerIR Window
a
e
b c
dg
fh
Power
ON/OFF
Power
ON/OFF
IR Window
Figure 25: Wireless Mic & Bodypack Controls

16 Setup & Operation
3.7 Microphone Best Practices
• Keep handheld microphones 4-6 inches (102-152 mm) from the mouth (about the width of a hand).
“P-pops” are loud sounds created by the release of breath when saying letters like “p” or “b”. To
avoid P-pops, keep handheld microphones below the mouth, angled toward the nose at a 45° angle.
Do not point the front of the microphone straight at the mouth.
• Position headset microphones as close to the mouth as comfortable.
• The referee bodypack kit includes both headset and lapel microphones. In general it is recommended
to use the headset mic for best results. If the lapel mic is desired, clip it onto a lapel, as close to the
center of the chest as possible.
• The softer or louder the speaker’s voice, move the microphone closer or further away, respectively.
• Never hit or intentionally blow into a microphone as it could quite easily be damaged.
3.8 Personal Monitor System Operation
Basic instructions are described below and shown in Figure 26. For more information, refer to the Shure®
PSM®900 Personal Wireless Monitor System User Guide.
1. Flip the transmitter POWER switch to ON if it is not already on; ensure the RF switch to the left of it
is OFF at this time.
2. Power on the handheld receiver using the volume knob.
3. Attach the antenna and earphones to the top of the handheld receiver.
4. Flip open the battery cover to expose the control buttons. Press SCAN and the display will show
“SYNC NOW”.
Note: Insert new or fully-charged batteries prior to each use, and always have spares on hand.
5. Hold the bodypack up to the transmitter with the sync IR windows facing each other, and press the
SYNC button on the transmitter. The display will show “SYNC SUCCESS” when nished.
6. Flip the transmitter RF switch to ON. The blue LED on the receiver should illuminate to indicate that
it is detecting the transmitter.
Other manuals for Sportsound SSR-300
2
Table of contents
Other Daktronics Recording Equipment manuals

Daktronics
Daktronics 5000 Series User manual

Daktronics
Daktronics LiveBook GFX User manual

Daktronics
Daktronics SPORTS WIRE 4000 INTERFACE User manual

Daktronics
Daktronics SPORTSOUND SSR-100 GEN II User manual

Daktronics
Daktronics Sportsound Gen II User manual

Daktronics
Daktronics VIP-4060 User manual

Daktronics
Daktronics Sportsound Rack SSR-100 User manual

Daktronics
Daktronics Sportsound SSR-200 User manual

Daktronics
Daktronics Sportsound SSR-AM User manual

Daktronics
Daktronics DM-100 Gen III User manual