Daniela DAN2GTS User manual

Appliance User Manual
2,4 & 5 BURNER GAS COOKTOPS
DAN2GTS• DAN64GTS/1 • DAN64GTS/2
DAN7• DAN75GTS• DAN95GTS
• DAN95GTS/1
danielaappliances.com.au

P I02 9604 1226 E I sales@danielaappliances.com.au W| danielaappliances.com.au
PAGE 2
Daniela Appliances started in 1988. Formally known as Italnova,
the company began operating by selling other major leading brands.
Since then, Daniela Appliances has it’s own range, continuously
evolving, striving on delivering leading-edge quality products at
very competitive prices.
From an Italian heritage our brand Daniela was then established in
2005 from a father’s love to a daughter and naming it after Daniela,
now the new proprietor. Daniela has worked closely with her father for
many years learning from his decades of industry experience. Daniela
with her extensive knowledge and understanding of appliances, now
continues her father’s legacy with a modern flare.
Our products are extensively tested and come with ISO certification
certificates prior to importation. Daniela Appliances continuously
designs and sources the best parts, to bring you an elegant feel that
will last the test of time and for a third of the cost from a major brand.
Daniela Appliances is dedicated to offering our customers exceptional
products with exceptional service. Our commitment is to provide our
valuable customers the very best in technology with the very best in
safety that combines both the values that brings us market success.

P I 029604 1226 E Isales@danielaappliances.com.auW| danielaappliances.com.au
PAG E 3
DAN2GTS
30CM 2BURNER GAS COOKTOPS
60CM 4BURNER GAS COOKTOPS
DAN7
75CM 5BURNER GAS COOKTOPS
DAN75GTS/1
70CM 5 BURNERGAS COOKTOPS
DAN95GTS
90CM 5 BURNER GAS COOKTOPS

P I02 9604 1226 E I sales@danielaappliances.com.au W| danielaappliances.com.au
PAGE 4
IMPORTANT SAFETY INSTRUCTIONS
GENERAL INFORMATION
• The adjacent cabinetry/furniture and all materials used in the installation must be able to
withstand a minimum temperature of 65°C above the ambient temperature of the room it
is located in, whilst in use.
• Certain types of vinyl or laminate kitchen furniture are particularly prone to heat damage
or discolouration at temperatures below the guidelines given above.
• Any damage caused by the appliance being installed in contravention of this temperature
limit, will be the liability of the owner.
• This appliance is designed for domestic household use and for the cooking and frying of
• Do not spray aerosols in the vicinity of this appliance while it is in operation.
• APPLIANCES OPERATING ON L.P.G. Where the hotplate is installed in marine craft
of caravans, it must incorporate a flame failure device and is NOT to be used as
a space heater.
• Do not modify this appliance.
• You should not use this appliance to store items on or as a work surface.
• You should not store or place flammable liquids/materials on top or near the appliance.
SAVE THIS INSTRUCTION IN A SAFE PLACE FOR FUTURE REFERENCE
Thank you for choosing Daniela appliances!
Please read all instructions before using this appliance. This book contains valuable
information about operation, care and service. Keep it in a safe place for future
reference. Should the appliance be sold or transferred to another owner, or should
you move house and leave the appliance, always ensure that the book is supplied with
the appliance in order that new owner can be acquainted with the functioning of the
appliance and relevant warnings.
The manufacturer cannot be held responsible for any inaccuracies due to printing or
transcription errors that may be found in this handbook.
N.B.: the pictures shown in the figures in this manual are purely indicative.

P I 029604 1226 E Isales@danielaappliances.com.auW| danielaappliances.com.au
PAG E 5
• Repairs may only be carried out by service engineers or their authorised service agent.
CHILD SAFETY
• We strongly recommend that babies and young children are prevented from being near
the appliance and not allowed to touch the appliance at any time. During and after use,
all surfaces will be hot.
DURING USE
• Any film or stickers that are present on the hob surface when it is delivered should be
removed before use.
• Care should be used when utilising the appliance, otherwise there is a risk of burns being
caused.
• You should not allow the electrical connection cables to come into contact with the hob
surface when it is hot or any hot cookware.
• If fat and oil overheats, then it can ignite extremely quickly. For this reason, when cooking
with fat and oil the appliance should not be left unattended.
•
CLEANING
• Cleaning of the hob should be carried out on a regular basis.
• IMPORTANT: Before attempting to clean the appliance, it should be disconnected from
the mains and cool.
• Great care should be taken whilst using this appliance and when following the
cleaning procedure.
• You should not use a steam jet or any other high pressure cleaning equipment to
clean the appliance.

P I02 9604 1226 E I sales@danielaappliances.com.au W| danielaappliances.com.au
PAGE 6
OPERATING THE GAS HOB
LIGHTING BURNERS
Simply press the knob in and turn, anti-clockwise to maximum. Check that the gas has been lit,
again. Select the right size burner for the required cooking.
Large flame: maximum setting
Small flame: minimum setting
• When the burner is alight, adjust the flame to suit the cooking requirements.
• If the burner still fails to ignite, a match or lighting device can be used, but care must
be taken. If the proble
DO NOT TOUCH HOT SURFACES, ALLOW HOB TO COOL BEFORE WIPING
SPILLAGE. KEEP THE GAS IGNITERS CLEAN AND DRY.
PRACTICAL HINTS FOR USE:
Do not use pots which exceed the width of the trivetts (the trivet is the frame
with fingers that the pots sit on). If the pot size exceeds the edge of the trivet, flames could
cause damage to work surfaces either side of the hotplate.
Do not use pots which are to small for the burner size, they may become unstable on the trivet.
• Always use a vessel for cooking that is
appropriate in size for the size of the burner.
Never use pots that are too small or to large.
For wok cooking it is recommended that a
domestic size wok, no larger than 400mm in
diameter be used.
• Use a strong flame to bring liquids to the boil,
seal meat and generally for food which must
be cooked rapidly – i.e. when using a wok.
• Use a low flame for sauces or stews.
• Do not cook food over to strong aheat.
Boil fast does not cook any faster but violently
stirs up the foodso that it loses itsflavour.

P I 029604 1226 E Isales@danielaappliances.com.auW| danielaappliances.com.au
PAG E 7
CLEANING
Cleaning operations must only be carried out when the hob is cool and the
appliance should be disconnected from the mains supply before commencing
any cleaning process. Always wipe spills up when they occur. Do not leave spills to
dry onto the surface of the hob.
SUITABLE PANS
BURNERS PANS
Minimum Diametre Maximum Diametre
Wok 220mm 260mm
Rapid 180mm 220mm
Semi-Rapid 120mm 200mm
Auxilary 80mm 160mm
• The diametre of the bottom of the pan should correspond to that of the burner.
• The burner flame must never extend beyond the diametre of thepan.
• Use flat bottomed pans only.
HOB BURNER CAPS
• The hob burner caps simply sit on the burners. Just remove them and clean them with a moist,
slightly soapy sponge.
• Do not put hob burner caps in cold water immediately after use. Thermal shock could cause
the enamel to crack.
• The use of abrasive agents is not recommended as they could scratch and dull the surface.
• Never use abrasives, scouring pads or sharp objects. This will cause irreparable damage
to the enamel.
•
The enamel could dull if cleaned while it is still hot.
STAINLESS STEEL AND CHROMED PARTS
• Use commercial products designed for cleaning stainless steel and chromed steel,and
followthe maker’s instructions. Never use abrasives, scouring pads or sharp objects.
Care should be taken when cleaning around the graphics.

P I02 9604 1226 E I sales@danielaappliances.com.au W| danielaappliances.com.au
PAGE 8
INSTALLATION- GENERAL
The installation must be carried out by a suitably qualified and authorised person,
in accordance with the current version of the following:
1. The requirements of the local Gas and Electrical authorities must be adhered to:-
- Consult AS5601 (AG601) as appropriate
- Consult SAA Wiring rules for electrical installations as appropriate.
2. Location of gas inlet
• 64GTS located 125mm from left side at rear
• 75GTS located 175mm from roght side at rear
• 95GTS located left side, 250mm from front 30mm in from edge.
3. Electrical connection
• 240mm C/L from RH side (as viewed from front)
• 40mm C/L from rear
• Connection is by means of flexible cord and plug.
4. Overall dimensions of hotplate
MODEL WIDTH DEPTH HEIGHT
64GTS 580mm 500mm 80mm
75GTS 680mm 500mm 80mm
95GTS 860mm 500mm 80mm
5. Daniela Appliances and their appointed agents decline any responsibilities in the case of
installation is not according to these instructions.
6. Remove any packaging, plastic film etc from appliance.
7. Before placing hotplate in position fit the foam sealing strip on the underside, around the
perimeter. This will prevent spillage entering the cupboard under the hotplate.
IMPORTANT: WHEN THE HOTPLATE IS INSTALLED ABUTTING A SIDE OR REAR WALL,
THE WALL MUST BE OF NON-COMBUSTABLE MATERIAL, e.g. CERAMIC TILES.
The following minimum clearances to combustible materials must be observed:
• Minimum clearance from hotplate edge (burner) to side wall must be 200mm.
• Minimum clearance from the hotplate (burner) edge to rear wall must be 200mm.
• Minimum clearance from the hotplate to cupboard above the hob burners must be
minimum of 600mm.

P I 029604 1226 E Isales@danielaappliances.com.auW| danielaappliances.com.au
PAG E 9
INSTALLATION - GAS CONNECTION
• These Technical Instructions have been prepared for use by Authorised persons. This unit
must only be installed by an Authorised person e.g. licensed plumber and gasfitter.
• This appliance is for use with connections using rigid copper connection or;
this appliance is suitable for installation with a flexible hose connection. Hose connection
must be to AS1869 – Class B and be no more than 1.5 metres in length. Hose must be
support independent of any surface which may become hot.
• Gas Inlet fitting is ½” BSP (male) thread.
• Fit the appliance inlet elbow and sealing washer and tighten, attach the regulator supplied
for Natural Gas (if applicable) as close as possible to inlet of the hotplate. For LPG
appliances, the test point adaptor (supplied) must be fitted. The supply connection is to be
accessible with the appliance installed.
• It is recommended that an isolating valve and union be fitted, to enable disconnection for
servicing. These are to be in an accessible location.
• Check connections are gas tight with soapy water or other approved method.
UNDER NO CIRCUMSTANCES USE A NAKED FLAME WHEN CHECKING FOR LEAKS.
• Check Gas Adjustments (refer INSTALLATION – GAS CHECKS AND ADJUSTMENTS)
• Ensure the appliance operating pressure is adjusted and set according to these instructions
and local authority requirements. When satisfied that the hotplate is operating correctly,
instruct the customer in its safe operation. Ensure the customer understands fully by having
them operate the hotplate and all its functions.
Rangehoods and overhead exhaust fans must be installed according to the manufacturer's
instructions and AS5601, but in no case shall clearance from hob burners be less than 600mm for
the rangehood and 750mm for the overhead exhaust fan. It is recommended that the adjacent
kitchen surfaces should be capable of withstanding temperatures of 100ºC.
Refer also AS5601 for installation requirements.
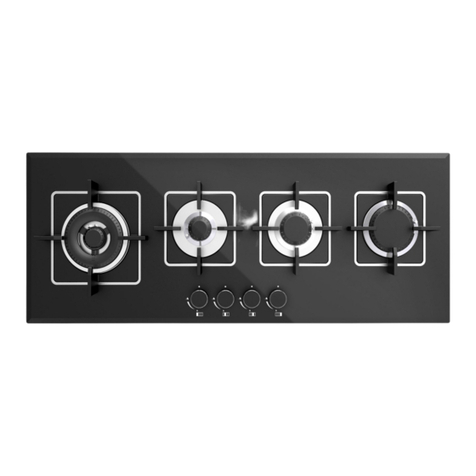
The hotplate must be secured to the bench using the supplied brackets and attached to ensure
hotplate does not move (in position).
MODEL WIDTH DEPTH
64GTS 555mm 475mm
75GTS 555mm 475mm
95GTS 830mm 475mm

P I02 9604 1226 E I sales@danielaappliances.com.au W| danielaappliances.com.au
PAGE 10
INSTALLATION - ELECTRICAL CONNECTION
BEFORE CONNECTING THE PLUG INTO THE POWER SOCKET,
FOLLOW THESE INSTRUCTIONS:-
• The electrical supply for the upright cooker must be a 240Volt 50 Hz.
• The fuse and electrical wiring of the home / premises must support the load of the appliance.
• The 3-pin plug, used to connect the electricity, must be easily reached when the hotplate is
in its installed position.
• The hotplate must be earthed. Connect the hotplate to a properly earthed and rated power
socket, as appropriate.
• The flexible cord of the appliance must not be subject to direct heat and must be positioned
after installation of the hotplate so that its temperature does not exceed 75ºC.
IMPORTANT: If apower socket needs to be installed or relocated, the work must be carried out
by a licensedelectrician.
UNDER NO CIRCUMSTANCES USE A NAKED
FLAME WHEN CHECKING FOR LEAKS.
• Check Gas Adjustments (refer INSTALLATION
– GAS CHECKS AND ADJUSTMENTS)
• Ensure the appliance operating pressure
is adjusted and set according to these
instructions and local authority requirements.
When satisfied that the hotplate is operating
correctly, instruct the customer in its safe
operation. Ensure the customer understands
fully by having them operate the hotplate and
all its functions.
Natural Gas Regulator

P I 029604 1226 E Isales@danielaappliances.com.auW| danielaappliances.com.au
PAG E 11
INSTALLATION -
GAS CHECKS AND BURNER ADJUSTMENTS
IMPORTANT: Set appliance operating pressure to that indicated on appliance data plate.
The test point is located on the appliance regulator (or adaptor for LPG) .
PRESSURE ADJUSTMENTS
•
the rear of the appliance and place the hose of the Manometer onto it. Turn the gas on to
the appliance and light the Wok Burner and Small Burner at maximum setting. Check the
pressure and adjust at the regulator if necessary to the settings in the table on the last page
or onthe Data plate.
• For Propane Gas, adjust at the regulator on the gas supply cylinder – Turn regulator
adjusting screw clockwise increase pressure whilst anti-clockwise decrease pressure. Refit
the test point sealing screw whenfinished. Check installation for correct operation.
LOW FLAME SETTING
• Check the lowflame setting for each hob burner with the control engaged in the minimum
position. Turn the control until it engages in the minimum position and remove the control
knob. Insert a screwdriver inthe adjusting screw (located next to the gascock shaft). To
increase the flame, turn the adjusting screw anti-clockwise. To decrease the flame, turn the
adjusting screw clockwise. Adjust for a minimum, stable and clear flame.
N.B. Ensure that the minimum flame will not be extinguished by air draughts.
IGNITER OPERATION
• Check that the igniter for each burner successfully ignites the gas and that the burner
remains alight.
• If an igniter fails to work or a burner fails to remain alight, first remove the electrical supply
plug fromthe electrical power outlet (GPO), and then check that all the electrical connections
are clean, dry and in place. Also check burner to ensure ports are not blocked or dirty.
• If the hotplate fails to operate correctly, contact Daniela Appliances or their appropriate
agent for service.

P I02 9604 1226 E I sales@danielaappliances.com.au W| danielaappliances.com.au
PAGE 12
ANCILLARY SERVICE INFORMATION
• SERVICE TO BE CARRIED OUT ONLY BY AN AUTHORISED PERSON!
• DO NOT ATTEMPT ANY REPAIRS YOURSELF.
• DO NOT MODIFY APPLIANCE!
• ALWAYS ENSURE THAT THE GAS AND ELECTRICAL SUPPLY
IS DISCONNECTED BEFORE SERVICING APPLIANCE.
• It is also recommended that this appliance be serviced at 12 month minimum.
ELECTRICAL EQUIPMENT AND COMPONENTS
• ALWAYS ENSURE THAT THE POWER SUPPLY IS DISCONNECTED BEFORE
SERVICINGTHE APPLIANCE.
• The electrical component is primarily located below the hob surface. Removal of the hob is
straightforward by removing the control knobs, the trivets, the burner capsand burner head
assembliesand skirts.
• Using aflat bladed screwdriver remove the five screws, one in each corner of the hotplates
left and right spillage bowls andone centrally located at the rear of the centre spillage bowl.
• Then lift the hob upwards. Replacement is a reversal of the above procedure.
• Care must be taken to ensure that no damage occurs to the spark ignition leads or the
igniters. The electronic ignitionpack is easily accessible for service or replacement below
the hob centrally at the rear.
GAS CONTROLS AND GAS MANIFOLD
• Removal of the gas manifoldis initially accomplished by removing the control knobs, the
trivets,the burner caps and burner head assemblies and skirts.
• Using aflat bladed screwdriver remove the five screws, one in each corner of the hotplates
left and right spillage bowls andone centrally located at the rear of the centre spillage bowl.
• Care must be taken to ensure that no damage occurs to the spark ignition leads, igniters
or thermocouples, if fitted. Disconnect all ancillary gas piping. Remove the two securing
brackets at the front and also the securing bracket near the gas inlet point to the burner
compartment. The gas manifold may then be extracted.
• Replacement is reversal of the above procedure.

P I 029604 1226 E Isales@danielaappliances.com.auW| danielaappliances.com.au
PAG E 13
CONVERSION TO ANOTHER GAS TYPE
• If the gas appliance is to be used with another gas type e.g. either Propane Gas or Natural
Gas, it must be convertedby an Authorised Person. Contact Daniela Appliances or their
authorised agent for information and parts.
NATURAL GAS PROPANE GAS
Injector
Diameter MJ/h Gas
Pressure
Injector
Diameter MJ/h Gas
Pressure
Wok Burner 1.70 13 1.0 kPa 0.98 13 2.75 kPa
Large Burner 1.40 10 1.0 kPa 0.90 10.5 2.75 kPa
Medium Burner 1.10 6.5 1.0 kPa 0.70 6.5 2.75 kPa
Small Burner 0.90 4.2 1.0 kPa 0.55 3.7 2.75 kPa
***64 30.2 MJ/h 29.7 MJ/h
***75, ***95 40.2 MJ/h 40.2 MJ/h
The table above shows the appropriate injector sizes for either Natural Gas or LPG (Propane)
IMPORTANT! The conversion work must be carried out by a registered gas fitter and in
accordance with the current standards.
WARNING: Always isolate the cooktop from the electricity supply before changing the injectors
and/or adjusting the minimum flow of the burners.
• Remove the pan-stands,burners and flame spreaders (A).
• Unscrewthe injector (B) and replace it with the stipulated
injector for the new gas supply (see table on page 15).
• Reassemble all the burners carefully; in particular you
should make sure that the flame spreader is correctly
placed on the burner.
IMPORTANT! The minimum flow adjustment process
must be completed before the appliance is next used.

P I02 9604 1226 E I sales@danielaappliances.com.au W| danielaappliances.com.au
PAGE 14
After conversion check the GAS PRESSURE and IGNITER OPERATION for the burners.
If the hotplate cooker cannot be adjusted to perform correctly, or if there is excessive
flame discolouration, yellow tipping or excessive noise, contact Daniela Appliances or
their authorised service agent for advice.
Please also ensure that the duplicate data plate supplied be attached to the appliance
or in an easily accessible place such as an adjacent cupboard for future reference.
MINIMUM FLOW ADJUSTMENT FOR COOKTOP GAS TAPS
IMPORTANT! All work must be carried out by a registered gas fitter and in accordance with the
current standards.
WARNING: Always isolate the cooktop from the electricity and gas supply before changing the
injectors and/or adjusting the minimum flow of the burners.
• Switch the burner on and set the knob at the minimum position.
• Remove the knob from the tap and place a small bladed screwdriver in the centre of the tap shaft.
• Unscrewthe adjusting screw, in order to increase the gas flow or tighten the adjusting screw
to decrease the gas flow.
• The correct adjustment is obtained when the flame has a length of about 3-4mm.
• For ULP gas, the adjusting screw must be tightly screwed in.
• Refit the control knob.
• Make sure that the flame does not go out by quickly turning
from maximum flow to minimum flow. lf it does then remove
the control knob and make further adjustments to the gas flow,
testing it again once the adjustment has been made.
• Repeat thisprocessfor each one of the gas taps.
• When converting from Narural Gas to ULP gas ensure that the NG
regulator is removed and replaced with the Test Point Assembly. A gas regulator suitable for a
supply pressure of 2.75kPa should be at the inlet to the appliance. Replace the old data plate
with one which is suitable for the type of gas for which the appliance has beenregulated.
IMPORTANT! Where this appliance isinstalled in marine craft or in caravans, it shall not be usedas
a space heater.
TROUBLESHOOTING HOTPLATES
• Users are not allowed to perform any maintenance operations on any partsof thisappliance.
Maintenance must be carried out exclusively by authorized technical service personnel.
• To accessburners, injectors, valves etc; disconnect gas and power supply fromappliance.
Ensure appliance is cool before removing trivets, burners etc.

P I 029604 1226 E Isales@danielaappliances.com.auW| danielaappliances.com.au
PAG E 15
TROUBLE POSSIBLE CAUSE
SOLUTION
FOR THE USER FOR THE TECHNICAL
SUPPORT SERVICE
Burner won’t light.
Gas and electrical
supply not working.
Check the gas supply
is turned on. Also
ensure electrical supply
is operational
Test gas pressure,
and electrical supply
is correct. Turn on if
necessary.
Pressure drop in
gas pipe.
Check appliance inlet
supply, pipe sizes,
contact the gas utility
company;
The ignition plug is not
securely fixed, or the
connection with the
cable is wrong.
Check the
connection.
Ignition plug insulator
damaged / dirty.
Clean / replace
the plug.
Clogged nozzle. Clean the pilot flame
nozzle or replace it.
Burner dirty
Wash burner with
warm soapy water, dry
and reposition.
Clean or replace
burner (if necessary).
Gas valve damaged. Replace it.
After releasing the
knob, the flame
goes out.
The thermocouple is
by the burner flame.
Clean and repeat the
ignition procedure.
Clean burner
assembly.
Thermocouple faulty. Replace the
thermocouple.
Gas valve faulty. Replace it.
TROUBLESHOOTING HOTPLATES
• When you needto access under hob, remove screws which hold the hob in position, located
under each burner. Lift hob to access valves and electrical system.
• To re-assemble, carry out work in reverse order, and test operation of appliance before leaving.

P I02 9604 1226 E I sales@danielaappliances.com.au W| danielaappliances.com.au
PAGE 16
TROUBLE POSSIBLE CAUSE
SOLUTION
FOR THE USER FOR THE TECHNICAL
SUPPORT SERVICE
Flame on main
burner won’t light
Pressure drop
in gas pipe.
Check inlet gas
pressure, pipe sizes,
contact the gas
utility company.
Burner nozzle
is clogged.
Clean the burner
nozzle (see chapter,
Replacing the main
burner nozzles).
Gas valve damage. Replace it.
heat in flame
Gas pressure does not
seem strong enough.
Check gas pressure
at appliance regulator.
Adjust if necessary.
Correct size
burner used
Ensure correct size
burner is being used
for the pot.
Turn heat up on
flame to cook food.
Replace it.
Uneven Cooking
Burner is set too high. Use a lower
temperature.
Incorrect size pot
used for burner.
Place the pot on the
burner appropriate
to the cooking
requirements.
TROUBLESHOOTING HOTPLATES
• Users are not allowed to perform any maintenance operations on any parts of this appliance.
Maintenance must be carried out exclusively by authorized technical personnel.

P I 029604 1226 E Isales@danielaappliances.com.auW| danielaappliances.com.au
PAG E 17
TROUBLE POSSIBLE CAUSE
SOLUTION
FOR THE USER FOR THE TECHNICAL
SUPPORT SERVICE
Uneven Cooking
Burner flame uneven.
Clean burner by
washing in warm soapy
water, dry and locate
burner correctly.
Check inlet gas
pCheck injector for
dirt / spillage. Clean
or replace burner if
necessary.
Pot supports not
correctly positioned.
Pot supports are
designed to go in one
location. Ensure pot
support is correctly
located over burner.
Gas Smell
Gas burner turned on
but not ignited.
and wait 5 minutes.
Ventillate area. Attempt
to relight burner and
ensure flame stays lit.
Check gas pressure
at appliance regulator.
Adjust if necessary.
and can smell gas. appliance isolating valve
and contact gasfitter.
Use approved
methods of
checking and locating
gas leaks.
Repair as required.
This appliance is marked according to the European directive
2002/96/EC for Waste Electrical and Electronic Equipment (WEEE).
By ensuring this product is disposed of correctly, you will help prevent potential negative
consequences for the environment and human health, which could otherwise be caused
by inappropriate waste handling of this product.
The symbol on the product, or on the documents accompanying the product, indicates that
this appliance may not be treated as household waste. Instead, it shall be handed over to
the applicable collection point for the recycling of electrical and electronic equipment.
Disposal must be carried out in accordance with local environmental regulations for waste
disposal. For more detailed information about treatment, recovery and recycling of this
shop where you purchased the product.
The packaging materials that are used are environmentally friendly and can be recycled.
Please discard all packaging material with due regard for the environment.

P I02 9604 1226 E I sales@danielaappliances.com.au W| danielaappliances.com.au
PAGE 18
NOTE: Model number and details are to be recorded below for future reference.
Please have the following information ready before calling our customer care team.
FURTHER INFORMATION
It is a warranty requirement that proof of purchase must be provided when booking a service call.
Please be advised that without this proof of purchase, your warranty may not be honoured.
All warranty will be voided, if not installed by a licensed technician or tradesman.
Please record their details below for future reference:
TECHNICAN / TRADESMAN WHO INSTALLED: ..............................................................................................
.......................................................................................................................................................................................
LICENSE NUMBER: ..................................................................................................................................................
DATE OF INSTALLATION:.......................................................................................................................................
INSTALLATION RECEIPT NUMBER:.....................................................................................................................
If you require more information, service, warranty or spare parts enquiries
please contact customer care.
DANIELA APPLIANCES PTY LTD
(02) 9604 1226 (9am – 5pm EST, Monday – Friday)

P I 029604 1226 E Isales@danielaappliances.com.auW| danielaappliances.com.au
PAG E 19
TERMS AND CONDITIONS
TERMS OF WARRANTY
Daniela appliances warrants to the original purchaser of appliance providing the product is installed specifically
for their intended use, under proper care, domestic/residential use and maintenance of the products supplied by
Daniela appliances, will be free from defects in workmanship and materials subject to the terms and conditions
to follow.
Daniela Appliances warranty only applies to the original owner and is not transferable. Our warranty covers
rectification free of charge for any faults arising from defective materials or components and faulty workmanship.
The product will be repaired or replaced at the discretion of Daniela Appliances.
NOTE: All costs of installation, stone benchtop replacement, cabinetry replacement or repair, sink/tapware
removal, un-installation, cartage, freight, travelling expenses and insurance are to be paid by the customer.
RETURN POLICY
Kindly inspect your goods at time of delivery.
If you notice any damage to your goods please notify our delivery team at the time of delivery. Recommend you
thoroughly inspect your goods at this time. If you notice any damage to your goods please call with in 24 hours
of receiving delivery, please notify Daniela Appliances Pty Ltd immediately. Evidence of damage will be required.
If for any reason you need to return an item please call Daniela Appliances Pty Ltd on (02 )9604-1226, within
48 hours of receiving the goods or appliances.
If your goods remain boxed and in an unopened condition, they may be returned with in 30 days of the invoice
date for a full refund. A collection fee of $50 will be charged should you require Daniela Appliances Pty Ltd to
collect the stock.
If your goods have been unboxed but otherwise are in as new condition (Have not been used or connected) a
20% restocking fee (20% of the purchase price) will apply.
Daniela Appliances Pty Ltd DOES NOT DEAL WITH FACTORY SECONDS, DAMAGES OR OPENED GOODS, and
charges restocking fees to cover the return costs. A collection fee of $50 or the delivery charge if greater than
the $50 will apply.
Please note that if you request connection of your appliance, Daniela Appliances Pty Ltd will unbox the product at
the time of delivery. We recommend you inspect your goods thoroughly at time of delivery, as to avoid extra charges.
Return of goods are to be covered by the customer, or alternatively can be returned in person to Daniela
Appliances Pty Ltd, at no extra charge. Please note that a collection fee of $50 or greater will be charged should
you wish Daniela Appliances Pty Ltd, to collect the stock on your behalf.
You as a customer have a duty of care for the product whilst in your possession. If products are damaged by you,
and subsequently returned, a charge will be made to repair the product to its original condition. Please be aware
that where repair is economically viable, no refund will be given.
All refunds will be issued when goods arrive back to Daniela Appliances warehouse and have been inspected
accept returns of any goods that you have attempted to install or have used.
If there are any further queries, please don’t hesitate to contact Daniela Appliances Pty Ltd on (02) 9604 1226.
THANK YOU.

danielaappliances.com.au
P I02 96041226 E Isales@danielaappliances.com.au A I6/9 Hume Road, Smithfield NSW 2164
This manual suits for next models
6
Table of contents
Other Daniela Cooktop manuals

Daniela
Daniela DAN90AGG User manual

Daniela
Daniela DAN64GTG User manual

Daniela
Daniela DAN6IM User manual

Daniela
Daniela DAN6CM User manual

Daniela
Daniela DAN2CM User manual

Daniela
Daniela DAN2GAG User manual

Daniela
Daniela DAN9TM User manual

Daniela
Daniela DAN9IM User manual

Daniela
Daniela DAN6TM User manual

Daniela
Daniela DAN9IPQ User manual