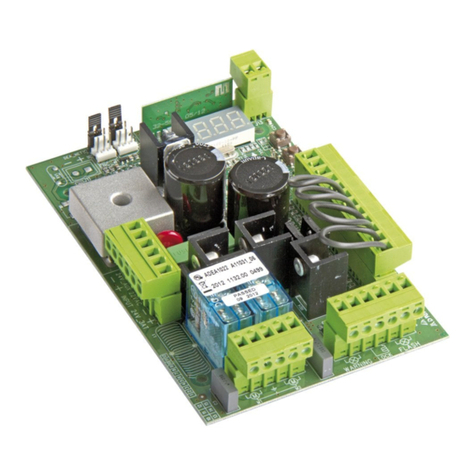
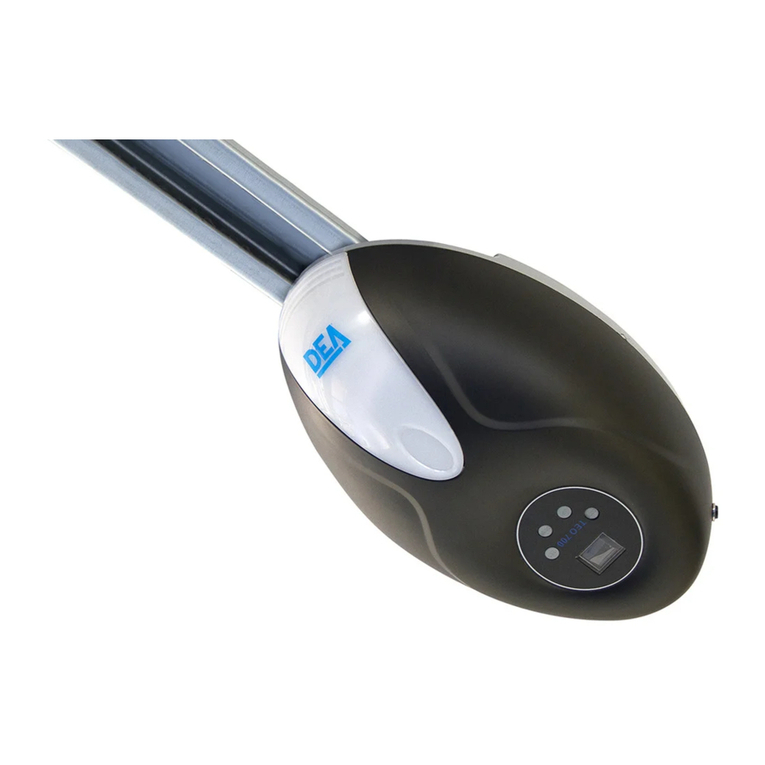
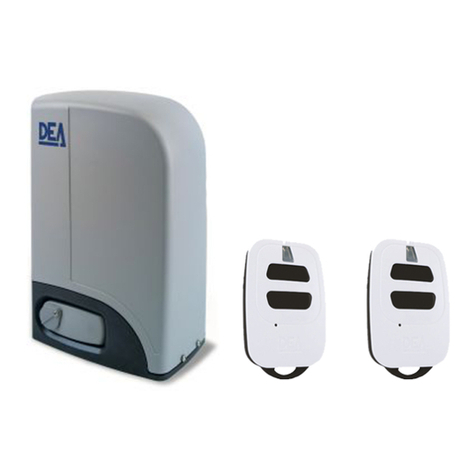
Dea ADVANCE Series Product manual

I63605X Rev. 06 (18-11-19)
ADVANCE
- ADVANCE
- ADVANCE XL
Operatore elettromeccanico per porte sezionali
Istruzioni d’uso ed avvertenze
Sectional door electromechanical operator
Operating instructions and warnings
Moto-reducteur pour portes sectionnelles
Notice d’emploi et avertissements
Elektromechanischer Antrieb für Schwing- und Sektionaltore
Bedienungsanleitung und Hinweise
Operador electromecánico para puertas seccionales
Instrucciones de uso y advertencias
Operador electromecânico para portas seccionais
Instruções para utilização e advertências
Urządzenie elektromechaniczne do bram segmentowych
Instrukcja montażu i użytkowania
Электро-механический привод для секционных ворот
Инструкции ипредупреждения


25
ADVANCE
Sectional door
electromechanical operator
Operating instructions and warnings
Index
1Warnings Summary 25 6Basic Functions 32
2Product Description 27 7Standard Programming 34
3Technical data 28 8Advanced Programming 36
4Installation and Assembly 28 9Messages shown on the Display 41
5Electrical Connections 10 Start-up 42
5.1 - ADVANCE 30 11 Maintenance 42
5.2 - ADVANCE XL 32 12 Product Disposal 43
SYMBOLS
The following symbols are used within this manual to indicate potential hazards.
Important safety notice. Any failure to observe this notice could result in personal injuries or even death. Injuries. Any failure to
observe these instructions could result in serious damage or even the complete destruction of the product.
Important safety notice. Contact with the electrical power components could result in personal injuries or even death.
Important notice for professional installation, programming and commissioning.
1 WARNINGS SUMMARY
WARNING! IMPORTANT SAFETY INSTRUCTIONS. CAREFULLY READ AND FOLLOW ALL WARNINGS AND INSTRUC-
TIONS THAT ACCOMPANY THE PRODUCT SINCE INCORRECT INSTALLATION COULD CAUSE HARM TO PEOPLE, ANIMALS
OR THINGS. WARNINGS AND INSTRUCTIONS PROVIDE IMPORTANT INFORMATION REGARDING SAFETY, INSTALLATION,
USE AND MAINTENANCE. KEEP THE INSTRUCTIONS TOGETHER THE TECHNICAL DOCUMENTATION AND FOR FUTURE
REFERENCE.
WARNING The device may be used by children of less than 8 years of age, people
with reduced physical, mental or sensory impairment, or generally anyone without
experience or, in any case, the required experience provided the device is used under
surveillance or that users have received proper training on safe use of the device and are
aware of the dangers related to its use.
WARNING Fixed installation command (buttons, etc.) must be situated out of the
reach of children at a height of at least 150 cm from the ground. Do not allow children
to play with the device, the fixed commands or the radio controls of the system.
WARNING Product use in abnormal conditions not foreseen by the manufacturer
may generate hazardous situations; meet the conditions indicated in these
instructions.
INTENDED USE:
The drive unit is designed for the automation of non-commercial garage doors and
balanced garage doors with integrated fall protection, within the specified technical limits.

26
WARNING DEA System reminds all users that the selection, positioning and
installation of all materials and devices which make up the complete automation
system, must comply with the European Directives 2006/42/CE (Machinery Directive),
2014/53/UE (RED Directive). In order to ensure a suitable level of safety, besides
complying with local regulations, it is advisable to comply also with the above mentioned
Directives in all extra European countries.
WARNING Under no circumstances use the device in an explosive atmosphere or in
areas that may be corrosive or could damage product parts. Check that the
temperatures at the installation site are suitable and comply with the temperatures
declared on the product label.
WARNING When working with the “dead man” switch, make sure that there are no
people in the area where the automatism is being used.
WARNING Check that there is a switch or an omni polar magneto-thermal circuit
breaker that enables complete disconnection in case of over voltage category III
conditions installed upstream from the power system.
WARNING To ensure an appropriate level of electrical safety always keep the 230V
power supply cables apart (minimum 4mm in the open or 1 mm through insulation)
from low voltage cables (motors power supply, controls, electric locks, aerial and auxiliary
circuits power supply), and fasten the latter with appropriate clamps near the terminal
boards.
WARNING If the power cable is damaged, it must be replaced by the manufacturer or
its technical assistance service or, in any case, by a person with similar qualifications
to prevent any risk.
WARNING All installation, maintenance, cleaning or repair operations on any part of
the system must be performed exclusively by qualified personnel with the power
supply disconnected working in strict compliance with the electrical standards and
regulations in force in the nation of installation.
Cleaning and maintenance destined to be performed by the user must not be performed
by unsupervised children.
WARNING Using spare parts not indicated by DEA System and/or incorrect re-
assembly can create risk to people, animals and property and also damage the
product. For this reason, always use only the parts indicated by DEA System and
scrupulously follow all assembly instructions.
FORCE ADJUSTMENT WARNING:
Changing the closure force could result in hazardous situations. The closure for-
ce must therefore only be increased by qualified personnel. After adjustment, compliance
with regulatory limits values should be detected with a force impact measuring instru-
ment. The sensitivity of the obstacle detection may be adjusted gradually to the door (see
programming instructions). The anti-crushing device operation must be checked after
each manual adjustment. Manual modification of the force can only be done by qualified
personnel by performing the measurement test according to EN 12445. Modifications to
the force adjustment must be documented in the machine manual.
WARNING The compliance of the internal sensing obstacles device to requirements
of EN12453 is guaranteed only if used in conjunction with motors fitted with encoders.

27
WARNING Any external security devices used for compliance with the limits of impact
forces must be conform to standard EN12978.
WARNING In compliance with EU Directive 2012/19/EG on waste electrical and elec-
tronic equipment (WEEE), this electrical product should not be treated as municipal mixed
waste. Please dispose of the product and bring it to the collection for an appropriate local
municipal recycling.
EVERYTHING THAT IS NOT EXPRESSLY PROVIDED FOR IN THE INSTALLATION MANUAL IS NOT ALLOWED. CORRECT OP-
ERATOR OPERATION IS ONLY ENSUED WHEN THE REPORTED DATA IS RESPECTED. THE COMPANY DOES NOT RESPOND
FOR DAMAGE CAUSED BY FAILURE TO COMPLY WITH THE INSTRUCTIONS CONTAINED IN THIS MANUAL. WITHOUT AF-
FECTING THE ESSENTIAL FEATURES OF THE PRODUCT, THE COMPANY RESERVES THE RIGHT TO MAKE ANY CHANGES
DEEMED APPROPRIATE AND AT ANY TIME IN ORDER TO TECHNICALLY, STRUCTURALLY AND COMMERCIALLY IMPROVE
THE PRODUCT WITHOUT BEING REQUIRED TO UPDATE THIS DOCUMENT.
2 PRODUCT DESCRIPTION
2.1 Models and contents of the package
The ADVANCE product range consists of a family of 24V electromechanical operators for balanced spring-operated doors and sectional
doors. All the motorized models require the use of control units (NET series). The ADVANCE drive unit is designed for the automation of
non-commercial garage doors and balanced garage doors with integrated fall protection, within the specified technical limits.
The drive unit can be used on the following types of doors:
Sectional doors Side tilting doors
Check the “Packaging content” (Fig. 1) and compare them with your product; this could be useful during assembly.
2.2 Transport and storage
The ADVANCE models are always delivered in boxes that provide the product with adequate protection; always respect the storage and
handling indications shown on the boxes themselves. Depending on the version and the track type, the furnished product may differ from
the illustrations contained within this manual. The drive unit must be stored/transported lying down at a temperature of -20°C to +40°C,
with a relative humidity value of RF 20 - 80%, without condensation. The maximum height of the stacks are as follows: 6 motor heads, 6
tracks or else 6 complete Kits packed in cardboard boxes. The stacked units must be secured in order to prevent tipping.

28
3 TECHNICAL DATA
ADVANCE ADVANCE XL
Motor power supply voltage (V) 24 V
Absorbed power (W) 100 180
Max Thrust (N) 600 1200
Work cycle (cycles/hour) 20 25
Maximum n° of operations in 24 60 75
Operating temperature range (°C) -20÷50 °C
Opening speed (cm/s) 17 16
Weight of product with package (Kg) 4
Sound pressure emitted (dBA) < 70
Protection degree IP X0
NET724N NET724NXL
Power supply (V) 220 - 240 V ~ ±10% (50/60 Hz)
Rated power transformer (VA) 150 VA (230/25V)
Fuse F1 (A) T2A 250V (retarded)
Auxiliaries power supply output -24 V
(24V_AUX + 24V_ST = max 200mA)
Stabilized power supply output for safety devices 24 V max 200mA
Configurable Output 1 24 V max 5 W
Configurable Output 2 24 V max 5 W
Receiver frequency 433,92 MHz
Transmitters type of coding HCS fix-code - HCS rolling code - Dip-switch - DART
Max remote controllers managed 100
CONTROL BOARD
OPERATOR
4 INSTALLATION AND ASSEMBLY
4.1 For a satisfactory installation of the product is important to:
• The drive unit can only be mounted on garage doors that are in perfect mechanical condition:
The door must be thoroughly inspected (with particular regard to the springs, wheels/wheel supports, ropes, and hinges) in order
to check for any wear and/or damage. Furthermore, check to make sure that all the fastening screws have been tightened in a
secure and stable manner.
• Check the door’s balance and smoothness of movement:
The door must be easy to manoeuvre manually along its entire stroke;
The door must maintain its position without moving when stopped in its open or closed positions, or at any intermediate position.
If any damage is encountered prior to installing the drive unit (wear or difficulties moving the door), stop using the door immediately
and have it repaired by qualified personnel!
• Check to make sure that the encumbrance of the drive unit/ track (Fig. 8a - d) is compatible with the selected installation zone.
• The device requires a 230V power outlet. This must be installed at about 50 cm from the control unit by a qualified electrician.
NOTE: The standard installation of the “ADVANCE” drive unit has been designed with the motor head towards the side of the
door in order to ensure a minimal distance for the connection to the control unit. If the installation conditions do not allow for
the standard attachment to be performed, the automation unit can be turned 180° with the motor head towards the centre of the
garage. In this case, follow the directions below.
Notice: Standard Installation (Fig. 5a)
The standard installation of the “ADVANCE” drive unit has been designed with the motor head towards the side of the door, and the track
towards the centre of the garage.
Notice: Non-Standard Installation (Fig. 5b)
If the installation site does not allow the unit to be mounted in the Standard position, the automation will have to be turned and installed
in the “traditional” method.
In this case, while holding the release lever in the working position (locked), raise the lever, rotate it by 180° (Fig. 5) and return it to its
original position. At this point, the track can be installed with the chain tensioning part in the jamb of the door. Once this has been done,
continue the installation process from point 4.2.

29
4.2 Preparation for assembly (Fig. 8)
• Measure the width of the door, and mark the centre line on the top edge of the door and on the lintel.
• Recommendation for the track’s proper assembly on the door’s longitudinal axis. Open the garage door completely and mark the sign
previously made on the top edge of the door on the ceiling as well.
• Open and close the door completely, and take note of the highest point reached by the door (TLP). The “TLP” is the point with the
smallest distance between the edge of the door and the ceiling.
• The distance between the TLP and the track/motor head should be 10-20 mm. It is recommended to maintain an angle equal to or
less than 30° between the towing arm and the track on the ceiling.
• Make sure that the track is perfectly horizontal with respect to the ceiling once assembled.
• If the installation is to be carried out under conditions different from those indicated, it may be necessary to use additional angular
and/or slotted mounting brackets. Any additional brackets must be cut, deburred, and mounted as shown in Fig. 8.
• For safety reasons, the suspension brackets must always be cut well below the holes to be used for fastening (Fig. 8d).
4.3 Assembly
ASSEMBLING THE TRACK (Fig. 3)
Join the two halves of the track using the coupling (verify the proper insertion side), and push until the stopper in the track is reached.
ADJUSTING THE BELT-TENSIONER (Fig. 4)
The belt’s tension must be adjusted using the tensioner on the end of the track. In order to avoid damaging the automation’s mechanical
components, the belt must not be overtightened.
MOUNTING THE TRACK ON THE CEILING (Fig. 8)
Mount the belt track in the centre with respect to your door.
Note: The centre of the garage and the centre of the door may be different.
Use tools and fastening materials that are suitable for the installation site’s conditions.
ASSEMBLING THE MOTOR HEAD ON THE CEILING TRACK (Fig. 7)
Mount the motor head on the ceiling track. Make sure that the position is correct when inserting the motor shaft into the housing. Secure
the motor head using the supplied screws. The motor head can be conveniently wired with its cable on the ground, and can then be
fastened to the track.
CONNECTING THE CABLE TO THE MOTOR HEAD
Connect the pre-assembled cable to the motor head shown as in
the figure. Secure the connection by tightening the fastening screws
on the female terminal. The “Flash” terminals are not utilized.
Plug Motor Terminal Block
MOT 1
FLASH
ENC
ENC A
+
ENC B
-
YELLOW
GREY
BROWN
WHITE
GREEN
PINK
CONNECTING THE CABLE TO THE CONTROL UNIT (Fig. 9)
• Fasten the control unit to the wall at least 1.5 m off the ground,
using fasteners suitable for the surface.
• Insert the connection cable, into an electrical channel.
• Cut off the excess cable and connect it as shown in the adjacent
diagram, or else as shown on page. 31/33.
Control Unit
MOT 1
OUT 1
ENC (M1)
ENC A
+
ENC B
-
YELLOW
GREY
BROWN
WHITE
GREEN
PINK
4.4 How to release the gear motor (Fig. 6)
In the event of a malfunction or power failure, the motor can be released as shown in Fig. 6a or 6b in order to move the door manually.
CAUTION The safety and efficacy of moving the automation manually is only guaranteed by DEA System if the system has been
properly installed using original accessories.

30
5.1 ELECTRICAL CONNECTIONS FOR THE ADVANCE MODELS
! Risk of malfunction due to improper installation !
! Risk of personal injury and property damage due to electric shocks !
Execute the wiring following the directions of “Table 1” and diagram (Pag. 31).
WARNING To ensure an appropriate level of electrical safety always keep the 230V power supply cables apart (minimum 4mm in the
open or 1 mm through insulation) from low voltage cables (motors power supply, controls, electric locks, aerial and auxiliary circuits
power supply), and fasten the latter with appropriate clamps near the terminal boards.
WARNING Connect to the power supply 230 V ~± 10% 50 Hz through a multi pole switch or a different device that can ensure multi pole
disconnection from the power supply, with a contact opening of 3 mm.
Table 1 “terminal board connections”
1-2-3-4 Motor 1 encoder output
5-6 Motor 1 output max 5A
7-8 7 (+) Configurable 24V output 1 max 5W (see P066 for values that can be selected)
8 (-)
9-13 9 - N.O.
Input 4. Unused
If the installation requires different
commands and / or additional to the
standard, you can configure each in-
put to the required rate.
Refer to Chapter
“Advanced Programming”.
13 - Com
10-13 10 - N.O.
Input 3. Unused
13 - Com
11-13 11 - N.O. Input 2 START. In case of intervention it provokes: the operator opening or closing. It
may operate as “inversion” mode (P049=0) or “step by step” mode (P049=1).
13 - Com
12-13
12 - N.C. Input 1 PHOTO 1. When enabled (see parameter P050 in the table), activation of
PHOTO 1 provokes: an inversion of direction (during closing), the arrest of the move-
ment (during opening), prevent the start (gate closed). If unused, short circuit.
13 - Com
14-15 14 (-) Stabilized 24 V power supply output for tested safety devices max 200mA
15 (+)
16-17 16 (+) Configurable 24V output 2 max 5W (see P062 for values that can be selected)
17 (-)
18 Aerial signal input
19 Ground aerial input
CON 1 Connection of motors metallic parts
CON 2 25 V ~ transformer power supply input
CON 3 Courtesy light output
CON 4 Input for NET-NODE / MEMONET connector
CON 5 Input for NET-EXP connector
J4 (jumper)
Operating mode selection jumper:
(closed) = Normal functioning;
(open) = Programming mode;

31
ADVANCE WIRING DIAGRAM
(2x1,5 mm2+ 4x0,5 mm2)
PLUG CABLE/ADV (cod. 397321)
INTERNAL WIRING SET BY THE FACTORY
EXTERNAL WIRING SET BY THE INSTALLER
MOT 1
MOT 1
FLASH
Plug
Motor Terminal Block
IN 4
IN 3
4567123 8
19 18
MOT 1
IN 2
IN 1
COM
J4 CON3
CON1
CON2
CON2
OUT 1
OUT 2
+24V_ST
CON4
ENC (M1)
ENC A
+
ENC B
-
91314151610 11 12 17
RG58
F1
POWER SUPPLY
230V~ 50Hz ±10%
H05VV-F 3x0,75mm2
FN
230V
25V
TX RX
COM
N.C.
N.O.
N.O.
START
2 x 0,5 mm2
2 x 0,5 mm2
PHOTO 1
OPEN GATE
WARNING LIGHT
24V max 5W
COURTESY LIGHT
2 x 0,5 mm2
2 x 0,5 mm2
2 x 0,5 mm
2
2 x 0,5 mm2
2 x 0,5 mm2
FLASHING LIGHT
24V max 5W
FLASH
CON5
ENC
ENC A
+
ENC B
-
YELLOW
GREY
BROWN
WHITE
GREEN
PINK
YELLOW
GREY
BROWN
WHITE
GREEN
PINK

32
5.2 ELECTRICAL CONNECTIONS FOR THE ADVANCE XL MODELS
! Risk of malfunction due to improper installation !
! Risk of personal injury and property damage due to electric shocks !
Execute the wiring following the directions of “Table 2” and diagram (Pag. 33).
WARNING To ensure an appropriate level of electrical safety always keep the 230V power supply cables apart (minimum 4mm in the
open or 1 mm through insulation) from low voltage cables (motors power supply, controls, electric locks, aerial and auxiliary circuits
power supply), and fasten the latter with appropriate clamps near the terminal boards.
WARNING Connect to the power supply 230 V ~± 10% 50 Hz through a multi pole switch or a different device that can ensure multi pole
disconnection from the power supply, with a contact opening of 3 mm.
Table 2 “terminal board connections”
1-2-3-4 Motor 1 encoder output
5-6 Motor 1 output max 5A
7-8 7 (+) Configurable 24V output 1 max 5W (see P066 for values that can be selected)
8 (-)
9-13 9 - N.O.
Input 4. Unused
If the installation requires different
commands and / or additional to the
standard, you can configure each in-
put to the required rate.
Refer to Chapter
“Advanced Programming”.
13 - Com
10-13 10 - N.O.
Input 3. Unused
13 - Com
11-13 11 - N.O. Input 2 START. In case of intervention it provokes: the operator opening or closing. It
may operate as “inversion” mode (P049=0) or “step by step” mode (P049=1).
13 - Com
12-13
12 - N.C. Input 1 PHOTO 1. When enabled (see parameter P050 in the table), activation of
PHOTO 1 provokes: an inversion of direction (during closing), the arrest of the move-
ment (during opening), prevent the start (gate closed). If unused, short circuit.
13 - Com
14-15 14 (-) Stabilized 24 V power supply output for tested safety devices (AUX + ST)
=
max 200mA
15 (+)
20-21 20 (-) 24 V power supply output for auxiliary devices
21 (+)
16-17 16 (+) Configurable 24V output 2 max 5W (see P062 for values that can be selected)
17 (-)
18 Aerial signal input
19 Ground aerial input
CON 1 Connection of motors metallic parts
CON 2 25 V ~ transformer power supply input
CON 3 Courtesy light output
CON 4 Input for NET-NODE / MEMONET connector
CON 5 Input for NET-EXP connector
J4 (jumper)
Operating mode selection jumper:
(closed) = Normal functioning;
(open) = Programming mode;
6 BASIC FUNCTIONS
After having installed the motor and made the elec-
tric connections and adjustments, it will be possible
to command the door directly using the keys on the
electric box.
Warning: If the installation requires commands diffe-
rent from standard ones, it is possible to program the ▲
(UP) and ▼(DOWN) buttons for the desired operation.
Refer to the table “Inputs configuration parameters”
at page 44.
Display Key Description
Causes the door to open if pressed.
Blocks movement during any manoeuvre if
pressed.
Causes the door to close if pressed.

33
ADVANCE XL WIRING DIAGRAM
J4
178 9 13 14 15 1610 11 124567123
19 18
21
20
OUT 1
IN 4
IN 3
MOT 1
IN 2
IN 1
COM
OUT 2
+24V_ST
CON1
CON2
CON2
CON4
+24VAUX
ENC (M1)
ENC A
+
ENC B
-
RG58
F1
POWER SUPPLY
230V~ 50Hz ±10%
H05VV-F 3x0,75mm2
FN
230V
25V
TX RX
COM
N.C.
N.O.
N.O.
START
2 x 0,5 mm2
PHOTO 1
OPEN GATE
WARNING LIGHT
24V max 5W
COURTESY LIGHT
2 x 0,5 mm2
2 x 0,5 mm2
2 x 0,5 mm
2
2 x 0,5 mm2
FLASHING LIGHT
24V max 5W
2 x 0,5 mm2
CON5
2 x 0,5 mm2
FLASH
CON3
(2x1,5 mm2+ 4x0,5 mm2)
PLUG CABLE/ADV (cod. 397321)
INTERNAL WIRING SET BY THE FACTORY
EXTERNAL WIRING SET BY THE INSTALLER
MOT 1
MOT 1
FLASH
Plug
Motor Terminal Block
ENC
ENC A
+
ENC B
-
YELLOW
GREY
BROWN
WHITE
GREEN
PINK
YELLOW
GREY
BROWN
WHITE
GREEN
PINK

34
7 STANDARD PROGRAMMING
To access the control unit programming functions, remove the
lid from the electric box and remove Jumper J4 from the bo-
ard.
NORMAL
FUNCTIONING
PROGRAMMING
MODE
1 Power Supply
When turned on, “ ”, “ ” (or the current firmware version) “ ”, “ ” appear on the display in sequence followed by the
closed gate symbol “----”.
*If the control panel has already been programmed and the power fails or is switched off - once power is returned and a START command
is given, the position reset procedure is performed (see “rESP” in the table “WORKING STATUS MESSAGES” on page 41.
2 Motors stroke learning
ATTENTION: during the learning cycle there is no protection by the obstacles detection sensor!
1. When you remove the Jumper J4, the display will shows P003;
2. Press button to go on with the setting;
3. As you see the message “ ” blinking, verify the right door
movements using the buttons (OPEN) and (CLOSE);
Attention: if the movement is not correct, switch off the
power supply, invert the motor connections and repeat the
check.
Set the door in the position of total closure;
4. Push the button and hold it for 3 sec. (if you leave it before
3 sec., the operation will be interrupted);
5. Release the button as soon as the “ ” message start
blinking;
Set the door in open position;
7. Push the button and hold it for 3 sec. (if you leave it before
3 sec., the operation will be interrupted);
8. Release the button as soon as the “ ” message start
blinking;
9. An opening and closing manoeuvre will follow, at normal speed;
at the end of the procedure the display will show P003.

35
3 Transmitters learning
1. Scroll down the parameters with and
keys until you visualise P005;
2. Confirm by pressing on the key;
3. When the symbol “ ” appears, press on
any key of the transmitter you want to memo-
rize;
4. The display visualizes the number of the trans-
mitter just memorized and then “ ”;
5. Memorize all necessary transmitters repeat-
ing this procedure from step 3;
6. Wait 10 seconds before quitting the memori-
zation mode, display shows now “P003“.
Warning: In the case of rolling code remotes,
the receiver can be put into learning mode by
pressing the hidden button on a remote control
previously learned.
Warning: When using personalized transmitters,
after entering P005 the learning of the first
personalized transmitter is possible only by
pressing its hidden button. Afterwards, only
transmitters personalized with the same
encryption key can be memorized (through the
usual procedure), unless a memory reset is
carried out (P004).
4 Deletion of all transmitters
1. Scroll down the parameters until you visualize P004;
2. Confirm by pressing on the key;
3. When “ ” is flashing, press the key for a few sec-
onds;
4. Release the key as soon as “ ” stops flashing;
5. All memorized transmitters have been deleted (display
shows again P004).
5 Programming complete
WARNING At the end of the programming procedure, re-introduce Jumper J4, until “- - - -” is shown on the display and close the lid of
the electric box. The automatism is now in stand-by for normal operating commands.
To perform any “Advanced Programming” operations (parameters modification, programming block/release, configuration of inputs
etc..), go to page 36.

36
8 ADVANCED PROGRAMMING
Below find the description of some programming procedures relative to the management of the radio-commands memory and advan-
ced configuration of the command inputs.
To access the control unit advanced programming functions, remove the Jumper J4 from the board. Use the and keys to go to
P005 and hold the key down for 5 seconds (at this point, all of the parameters are visible and can be modified).
1 Visualisation of inputs and operations-counter status
1. Scroll the parameters with the and keys until the
screen reads P013;
2. Access the parameter by pressing the button;
3. The “Input Status” is shown on the screen (check that this
is correct):
4. Press the button again;
5. The “Total Operation Counter” appears on the
screen followed by the multiplier.
To calculate the number of completed operations, the two
values must be multiplied.
I.e.: = 120x10 = 1200 operations completed
6. Press the button again;
7. The “Total Maintenance Counter” appears on the
screen followed by the multiplier.
To calculate the number of operations remaining before
the maintenance request, the two values must be
multiplied.
I.e.: = 1500x1 = 1500 operations yet to be
completed before the maintenance request
8. Press the button again to exit the parameters (P013 is
shown on the screen again).
2 Selection type of operators ! IMPORTANT !
1. Scroll down the parameters with and keys until you visua-
lise P028;
2. Access the parameter by pressing the key;
3. Acting on and keys, set:
- d000 = ADVANCE
- d002 = ADVANCE XL
4. Confirm your choice by pressing the key (display returns again
to P028).

37
3 Selection operating with or without encoder ! IMPORTANT !
1. Scroll down the parameters with and keys until you visua-
lise P029;
2. Access the parameter by pressing the key;
3. Acting on and keys, set:
- d001 = 1 channel encoder;
- d002 = 2 channel encoder;
4. Confirm your choice by pressing the key (display returns again
to P029).
4 Transmitters coding selection
1. Scroll down the parameters with and keys until you visualise
P027;
2. Confirm by pressing on the key;
3. Select the type of transmitter by scrolling and keys:
- d000=fix rolling-code (suggested);
- d001=complete rolling-code;
- d002=dip-switch;
- d003=DART;
4. Confirm by pressing on the key (display shows again P027).
Warning: If you need to vary the type of encoding, and only if other remo-
tes with different encoding are memorized, you need to erase memory
(P004) AFTER you have set the new encoding.
5 Adjustment of operating parameters
If you need to modify the operating parameters (force, speedness
etc..):
1. Scroll down the parameters until you visualize the desire param-
eter (i.g. P032);
2. Confirm by pressing on the key;
3. By pressing on and , set up the desired value;
4. Confirm by pressing on the key (display shows the parameters
previously selected).
For the complete list of the “Operating Parameters” See the table
on page. 45.
6 How to search and delete a transmitter
1. Scroll down the parameters until you visualize P006;
2. Confirm by pressing on the key;
3. By pressing on and , keys, select the transmitter you
want to delete (eg. );
4. When “ ” flashes, confirm the deletion by pressing
the key for a few seconds;
5. Release the key when appears “ ”;
6. The selected transmitter is deleted (display shows again
P006).

38
7 Restoring default parameters
WARNING At the end of the procedure, the display will be blocked on flashing “ ” and motor stroke learning must be carried out
again before any other operation can be carried out.
7.1 Restoring operating parameters
1. Scroll through the parameters with the buttons and
until the display shows P007;
2. Confirm by pressing on the key;
3. When “ ” is flashing, press the key for a few
seconds;
4. Release the key as soon as “ ” stops flashing;
All the default values are restored except for the para-
meters from P016 to P022;
5. At the end of the operation display returns to P007.
Warning: After you restore the default parameters, you
must program the control panel again and adjust all ope-
rating parameters.
7.2 Restoring “I/O” setting (Input/Output)
1. Scroll through the parameters with the buttons and
until the display shows P010;
2. Confirm by pressing on the key;
3. When “ ” is flashing, press the key for a few
seconds;
4. Release the key as soon as “ ” stops flashing;
All the default values only for the parameters from
P016 to P022 are restored;
5. At the end of the operation display returns to P010.
8 Locking-Unlocking access to programming
By using a “dip-switch” remote (regardless of the type of remotes already memorized) it’s possible to lock-unlock access to the program-
ming of the control panel to avoid tampering. The remote setting is the locking-unlocking code verified by the control board.
8.1 Locking access to programming
1. Scroll through the parameters with the buttons
and until the display shows P008;
2. Access the parameter by pressing the button ;
3. The display shows alternately the writing
to indicate that the control board
is waiting for the transmission of the block code;
4. Within 10 seconds press CH1 on the “TX Master”,
the display shows before returning
to the list of parameters;
5. Access to programming is locked.
WARNING Programming lock/unlock can also be set via Smartphone using the DEAinstaller APP. In this case, an installer code is set
(other than zero) that can only be unlocked via APP.

39
8.2 Unlocking access to programming
1. Scroll through the parameters with the buttons
and until the display shows P008;
2. Access the parameter by pressing the button ;
3. The display shows alternately the writing
to indicate that the control board
is waiting for the transmission of the unlocking
code;
4. Within 10 sec. press the CH1 of the “TX Master”,
the display shows before returning
to the list of parameters;
5. Access to programming is unlocked.
8.3 Unlocking access to programming and global reset
WARNING! This procedure involves the loss of all stored set-
tings.
The procedure allows the unlocking of the control panel without
having to know its unlocking code.
Following this release, you must program the control panel again
and adjust all operating parameters, in particular, remember to
properly set the configuration of parameters. You will also need to
repeat the measurement of impact forces to ensure the installa-
tion compliance to standards.
1. Scroll through the parameters with the buttons and until
the display shows P008;
2. Access the parameter by pressing the button ;
3. The display shows alternately the writing ;
4. Press the button , the display shows the flashing writing
;
5. Press the button again and hold for 5 seconds (releasing it be-
fore, the procedure is terminated): The display shows the fixed
writing followed by , before returning to the list of
parameters;
6. Access to programming is unlocked.
WARNING At the end of the procedure, the display will be blo-
cked on flashing “ ” and motor stroke learning must be
carried out again before any other operation can be carried out.

40
9 Downloading/uploading data memory
9.1 Downloading data to an external memory unit (DOWNLOAD)
1. Scroll down the parameters with and keys until you visualize P011;
2. Press the key, the display visualizes the word “ ” flashing;
3. Press the again and continue pressing it for 5 sec (if you release it before this period, the procedure is stopped);
4. Release the key as soon as the word “ ” stops flashing;
All the control panel configurations (TYPE, parameters, remotes, operators stroke, etc..) are saved in the external memory unit;
Warning: If there is any data in the external memory, during the memory download they will be overwritten.
5. At the end of the operation display returns to P011.
9.2 Uploading data from an external memory unit (UPLOAD)
1. Scroll down the parameters with and keys until you visualize P012;
2. Press the key, the display visualizes the word “ ” flashing;
3. Press the again and continue pressing for 5 sec (if you release it before this period, the procedure is stopped);
4. Release the key as soon as the word “ ” stops flashing;
All the control panel configurations (TYPE, parameters, remotes, operators stroke, etc..) contained in the external memory unit are
uploaded in the connected control panel;
5. At the end of the operation display returns to P012.
WARNING If you are not connected to any MEMONET units or if the connecting cable is disconnected during the data transfer operation,
the display will visualize , then the control unit is entirely reset and the display shows the word “TYPE” flashing.
Refer to the MEMONET instruction to restore command unit functioning.
10 Inputs configuration
Where the installation requires different commands and / or additional to
the standard ones described by plan, you can configure each input for the
operation desired (eg. START, PHOTOS, STOP, etc ...).
1. Scroll down the parameters with the and to see that corresponding
to the desired one:
●P019=for INPUT 1;
●P020=for INPUT 2;
●P021=for INPUT 3;
●P022=for INPUT 4;
2. Confirm by pressing on the key to get access to the parameter (eg.
P020);
3. Scroll down with the and , keys to set the value corresponding to
the desired operation (refer to table “Input Configuration parameters” on
page 44);
4. Confirm by pressing on the key (display shows again P020).
5. Execute the new connection to the input just reconfigured.
11 Programming complete
WARNING At the end of the programming procedure, re-introduce Jumper J4, until “- - - -” is shown on the display and close the lid of
the electric box. The automatism is now in stand-by for normal operating commands.

41
9 MESSAGES SHOWN ON THE DISPLAY
WORKING STATUS MESSAGES
Mess. Description
Gate is closed
Gate is opened
Opening under way
Closing under way
While in step-by-step mode, the control board awaits further instructions after a start command
Stop input intervened or an obstacle is detected with limited inversion duration (P055 > 0 or P056 > 0)
Board in BOOT-MODE: Indicates that the firmware is corrupted or updating. To restore the firmware, use the DEAinstaller APP and make sure
NET-NODE is corrected to the correct port.
Warning: When updating the firmware, all data in the board memory (settings and radio commands) are lost. Make sure you have backed
up the memory to be restore data after the update.
Position reset under way: the research of the closing stop (in low speed) has started
ERROR MESSAGES
Mess. Description Possible solutions
Board programming attempted when a NET-NODE
device is connected.
Turn off power, disconnect the NET-NODE from the communication port and turn back
on;
External photocells and/or safety devices are activated
or out of order. - Make sure that all safety devices and/or photocells installed are working properly.
Possible fault/overheating in the control unit’s power
circuit.
Turn off power for several minutes and turn back on. Give a start command: if the
message is repeated, replace the control unit.
Time-out operators run: The engine/s exceeded the
maximum operating time (4min) without ever stopping.
- Give a start pulse to start the position reset procedure;
- Ensure that this operation is successful.
Time-out obstacle detection: With anti-crushing sensor
disabled, was still detected the presence of an obsta-
cle that prevents movement of the leaf for a period of
10 seconds more.
- Make sure there are no specific frictions and / or obstacles during the run;
- Give a start pulse to initiate a position reset procedure;
- Verify that the operation is completed successfully.
Operators mouvement not detected. - Make sure that operators and encoders connections are well done.
- If this error appears again, replace the control panel.
No/interrupted communication with remote memory
board (also NET-EXP or NET-NODE).
- Check that the connecting cable of the external memory card is connected properly.
- If you are performing a data transfer operation (DOWNLOAD / UPLOAD), make sure
that it is not interrupted (eg by unplugging the card before the end of the operation).
Please note: the interruption of an UPLOAD, also involves a total RESET of the control
unit.
Possible fault/overheating in the control unit’s power
circuit.
Turn off power for several minutes and turn back on. Give a start command: if the
message is repeated, replace the control unit.
Possible malfunction in the control unit’s power circuit
or in the encoder circuit.
Check the wiring of the encoder and the motor. Shut the power supply off and on again.
Give a start command: if the message is repeated, perform the following checks.
- Enter P003 and move the door using the + and - buttons.
- If the door moves at maximum speed and the display shows Err7, replace the motor’s
encoder card.
- If the motor still remains stationary, replace the control unit.
Sensitive regulation parameters were edited via
DEAinstaller APP without running motor stroke learning
at the end of the operation.
Run motor stroke learning (P003) first to be able to run any other operation.
You are trying to learn a motor with a number of encoder
channels different than the value set in parameter
P029.
Set the parameter value P029 correctly.
NET-NODE connected to the incorrect communication
port.
Connect NET-NODE to the correct port according to that indicated in the control unit
diagram.

42
10 COMMISSIONING
The commissioning phase is extremely important for ensuring maximum system safety, as well as legal and regulatory compliance,
namely with all the requirements of EN 12445, which establishes the testing methods for gate automation units.
DEA System would like to emphasize that any system installation, cleaning or repair operations must only be carried out by qualified
personnel, who must conduct all the tests necessary based on the risks present;
Check prior to activation by repeatedly opening and closing the door and automation unit, and verifying their perfect functionality.
This will allow you to verify that there are no installation or adjustment errors. Check the impact force during the obstacle detection
phase, as required by EN 12445.
10.1 Instructions for the user
Ensure that the owner/user is instructed during commissioning regarding safe operaton fo the machine. It is recommended to
explain or demonstrate the functions directly on the object:
• Safe use of the plant with respect of all safety regulations;
• The position and function of all commands and safety devices and their effect during the various operating conditions;
• The safe use of the manual release mechanism;
• The arrangement and meaning of warnings;
• Operational conditions.
WARNING Using spare parts not indicated by DEA System and/or incorrect re-assembly can create a risk to people, animals and
property and also damage the product. For this reason, always use only the parts indicated by DEA System and scrupulously follow all
assembly instructions.
10.2 Unlocking and Manual operation
In the event of any system anomalies or power failures, release the gear motor (Fig. 6) and manoeuvre the door leaf manually.
WARNING The efficancy and safety of manual operation of the automation is guaranteed by DEA System only if the installation has
been installed correctly and with original accessories.
11 MAINTENANCE
Good preventive maintenance and regular inspection ensure
long working life. In the table below you will find a listo f inspec-
tions/maintenance operations to be programmed and executed
periodically.
Consult the TROUBLE-SHOOTING” table whenever anomalies
are observed in order to find the solution to the problem and con-
tact DEA System directly whenever the solution required is not pro-
vided.
INTERVENTION TYPE PERIODICITY
Lightly lubricate the chain and the movable pins.
Remove any excess lubricant. The toothed belt
must not be lubricated. Clean the automation
unit with a dry cloth or a vacuum cleaner
6 months
Check screw tightness 6 months
Check the tension of any belts or chains (see
Pic. 4) 6 months
TROUBLE-SHOOTING
Description Possible solutions
By activating the open or close command, the door does
not move and the operator electric motor does not start
to operate.
The operator is not powered correctly; check the connections, the fuses and the conditions
of the power supply cables and replace/repair them, if necessary. If the door does not close,
also check that the photocells operate correctly.
By activating the open command, the motor starts to
operate by the gate does not move.
Check that the motor release is closed (see Pic. 6).
Check that the motor does not push in the opposite direction; this could be caused by
inverted wiring.
During the movement the operator functions in a jerky
manner, it is noisy and stops half-way or does not start.
The door does not have free movement; release the motor and organise the points of rota-
tion.
The power of the gear motor could be insufficient with respect to the features of the door;
check the choice of model.
This manual suits for next models
4
Table of contents
Other Dea Garage Door Opener manuals
Popular Garage Door Opener manuals by other brands

Chamberlain
Chamberlain LiftMaster CSL24V quick start guide

B&D
B&D Panelift B&D Storm-Shield PFI installation instructions

Merlin
Merlin MS65MYQ Installation and operating instructions

Stratco
Stratco SDO800G installation guide

ARC
ARC DG-O FORTE Installation & owner's manual

BFT
BFT KUSTOS BT A25 installation manual

ForceDoor
ForceDoor FS 600 Installation instructions and user guide

Craftsman
Craftsman 139.18405D owner's manual

Chamberlain
Chamberlain 3265C 1/2 HP owner's manual

Meross
Meross MSG100 Voice Commands Guide

Beninca
Beninca ZED Operating instructions and spare parts catalogue

Gliderol
Gliderol Glidermatic GRD installation instructions