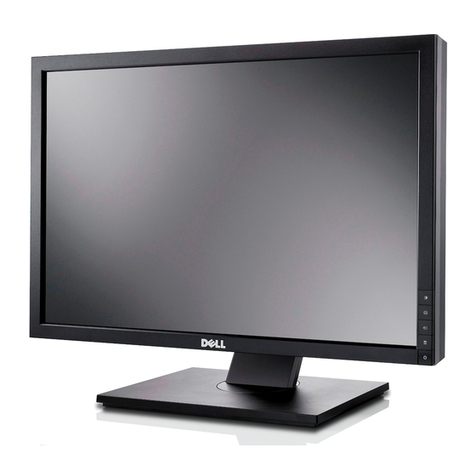
Dell UltraScan P990 User manual

www.dell.com
®
Dell®Model UltraScan P990 Color Monitor User’s Guide
Guide de l’utilisateur du moniteur couleur Dell®UltraScan P990
Dell®Modell UltraScan P990 Farbmonitor - Benutzerhandbuch
Monitor en color Dell®modelo UltraScan P990; Guía del usuario
DELL P990(E).book Page 1 Friday, December 4, 1998 2:36 PM

DELL P990(E).book Page 2 Friday, December 4, 1998 2:36 PM

®
Dell®Model UltraScan P990 Color Monitor User’s Guide
____________________
Information in this document is subject to change without notice.
© 1994–1998 Dell Computer Corporation. All rights reserved.
Reproduction in any manner whatsoever without the written permission of Dell Computer Corporation is strictly forbidden.
Trademarksusedinthistext: DellandtheDELLlogoareregisteredtrademarksofDellComputerCorporation;Microsoft,Windows,andWindows NT,
are registered trademarks of Microsoft Corporation;VESA is a registered trademark of Video Electronics Standards Association; IBM is a registered
trademark of International Business Machines Corporation; The ENERGY STAR name and logo are registered trademarks of the U.S. Environmental
Protection Agency (EPA). As an ENERGY STAR Partner, Dell Computer Corporation has determined that this product meets the ENERGY STAR
guidelines for energy efficiency.
Other trademarks and trade names may be used in this document to refer to either the entities claiming the marks and names or their products. Dell
Computer Corporation disclaims any proprietary interest in trademarks and trademarks and trade names other than its own.
November 1998 P/N 2221D, 3221D, 4221D
DELL P990(E).book Page 3 Friday, December 4, 1998 2:36 PM

DELL P990(E).book Page 4 Friday, December 4, 1998 2:36 PM

v
English
Contents ............................................................................1-Vii
Main Body...........................................................................1-1
Appendix ........................................................................... A-1
Français
Table des matières .............................................................2-V
Corps principal ...................................................................2-1
Appendice ......................................................................... A-1
Deutsch
Inhalt ..................................................................................3-V
Hauptteil.............................................................................3-1
Anhang .............................................................................. A-1
Español
Contenido ...........................................................................4-V
Texto principal ....................................................................4-1
Apendice............................................................................ A-1
.......................................................................5-V
.................................................................5-1
..................................................................... A-1
...........................................................................6-V
......................................................................6-1
........................................................................... A-1
DELL P990(E).book Page v Friday, December 4, 1998 2:36 PM

vi
DELL P990(E).book Page vi Friday, December 4, 1998 2:36 PM

1-v ii
Contents
Introductions. . . . . . . . . . . . . . . . . . . . . . . . . . . . . . . . . . . .1-1
Safety Instructions. . . . . . . . . . . . . . . . . . . . . . . . . . . . . . . . . . . . . . . . . . . . . . . . . . . . . . .1-1
Maintenance . . . . . . . . . . . . . . . . . . . . . . . . . . . . . . . . . . . . . . . . . . . . . . . . . . . . . . . . . . .1-1
Plug and Play . . . . . . . . . . . . . . . . . . . . . . . . . . . . . . . . . . . . . . . . . . . . . . . . . . . . . . . . . . .1-1
Warning on Power Connection . . . . . . . . . . . . . . . . . . . . . . . . . . . . . . . . . . . . . . . . . . . . .1-2
Setup. . . . . . . . . . . . . . . . . . . . . . . . . . . . . . . . . . . . . . . . . .1-3
Using the Monitor . . . . . . . . . . . . . . . . . . . . . . . . . . . . . . . .1-4
Parts and Controls . . . . . . . . . . . . . . . . . . . . . . . . . . . . . . . . . . . . . . . . . . . . . . . . . . . . . . .1-4
Using the tilt-swivel. . . . . . . . . . . . . . . . . . . . . . . . . . . . . . . . . . . . . . . . . . . . . . . . . . . . . .1-5
Adjusting the Brightness and Contrast . . . . . . . . . . . . . . . . . . . . . . . . . . . . . . . . . . . . . . .1-5
Automatically sizing and centering the picture . . . . . . . . . . . . . . . . . . . . . . . . . . . . . . . . .1-6
Press the ASC button. . . . . . . . . . . . . . . . . . . . . . . . . . . . . . . . . . . . . . . . . . . . . . . . .1-6
Introducing the On Screen Display (OSD) system . . . . . . . . . . . . . . . . . . . . . . . . . . . . . .1-6
Navigating the menu . . . . . . . . . . . . . . . . . . . . . . . . . . . . . . . . . . . . . . . . . . . . . . . . .1-6
COLOR RETURN - Restoring the Color Image . . . . . . . . . . . . . . . . . . . . . . . . .1-10
MOIRE ADJUST - Adjusting the moire . . . . . . . . . . . . . . . . . . . . . . . . . . . . . . .1-10
Graphic Enhancement Mode (GEM) . . . . . . . . . . . . . . . . . . . . . . . . . . . . . . . . .1-12
Monitor Information . . . . . . . . . . . . . . . . . . . . . . . . . . . . . . . . . . . . . . . . . . . . .1-12
Resetting the adjustments . . . . . . . . . . . . . . . . . . . . . . . . . . . . . . . . . . . . . . . . . . . . . . .1-13
Resetting a single adjustment item . . . . . . . . . . . . . . . . . . . . . . . . . . . . . . . . . . . . .1-13
Resetting all of the adjustment data for the current input signal . . . . . . . . . . . . . . .1-13
Resetting all of the adjustment data for all input signals . . . . . . . . . . . . . . . . . . . . .1-13
Power saving mode. . . . . . . . . . . . . . . . . . . . . . . . . . . . . . . . . . . . . . . . . . . . . . . . . . . . .1-14
Preset Timing Modes . . . . . . . . . . . . . . . . . . . . . . . . . . . . . . . . . . . . . . . . . . . . . . . . . . .1-14
DELL P990(E).book Page vii Friday, December 4, 1998 2:36 PM
1-v iii
Troubleshooting . . . . . . . . . . . . . . . . . . . . . . . . . . . . . . . .1-15
If thin lines appear on your screen (damper wires) . . . . . . . . . . . . . . . . . . . . . . . . . . . . .1-15
On-screen messages . . . . . . . . . . . . . . . . . . . . . . . . . . . . . . . . . . . . . . . . . . . . . . . . . . .1-15
Monitor Self Test. . . . . . . . . . . . . . . . . . . . . . . . . . . . . . . . . . . . . . . . . . . . . . . . . . . . . . .1-16
Troubleshooting. . . . . . . . . . . . . . . . . . . . . . . . . . . . . . . . . . . . . . . . . . . . . . . . . . . . . . . .1-16
Specifications . . . . . . . . . . . . . . . . . . . . . . . . . . . . . . . . . .1-20
Warranties . . . . . . . . . . . . . . . . . . . . . . . . . . . . . . . . . . . .1-21
Warranties and Return Policy . . . . . . . . . . . . . . . . . . . . . . . . . . . . . . . . . . . . . . . . . . . . .1-21
Dell Computer Corporation’s Environmental Program . . . . . . . . . . . . . . . . . . . . . . . . . .1-26
Year 2000 Statement of Compliance for Dell-Branded Hardware Products . . . . . . . . . .1-29
Appendix . . . . . . . . . . . . . . . . . . . . . . . . . . . . . . . . . . . . . A-1
Regulatory Notices . . . . . . . . . . . . . . . . . . . . . . . . . . . . . . . . . . . . . . . . . . . . . . . . . . . . . A-1
Tables
Table 3-1 Geometry Adjustments . . . . . . . . . . . . . . . . . . . . . . . . . . . . . . . . . . . . . . .1-7
Table 3-2 Convergence Adjustment . . . . . . . . . . . . . . . . . . . . . . . . . . . . . . . . . . . . .1-9
Table 3-3 Option Adjustment . . . . . . . . . . . . . . . . . . . . . . . . . . . . . . . . . . . . . . . . . .1-9
Tabel 3-4 Display Power Management System (DPMS) . . . . . . . . . . . . . . . . . . . . .1-14
Table 3-5 Preset Timing Modes . . . . . . . . . . . . . . . . . . . . . . . . . . . . . . . . . . . . . . .1-14
Tabel 3-6 Troubleshooting Problems . . . . . . . . . . . . . . . . . . . . . . . . . . . . . . . . . . . .1-16
Table 3-7 Specifications . . . . . . . . . . . . . . . . . . . . . . . . . . . . . . . . . . . . . . . . . . . . . .1-20
Table A-1 Green Away Collection Points . . . . . . . . . . . . . . . . . . . . . . . . . . . . . . . . .1-30
DELL P990(E).book Page viii Friday, December 4, 1998 2:36 PM
Introductions 1-1
Introductions
Safety Instructions
•Prevent internal heat build up by allowing adequate air circulation. Do not place the
monitor on surfaces (rugs, blankets, etc.) or near materials (curtains, draperies) that
may block the ventilation holes.
•Do not install the monitor near heat sources such as radiators or air ducts, or in a place
subject to direct sunlight, excessive dust, mechanical vibration or shock.
•Do not place the monitor near equipment that generates magnetism, such as tele-
phones, subwoofers/speakers fans or fluorescent lighting.
Maintenance
The screen’s surface is covered with a thin anti-reflective coating to enhance the ergo-
nomic characteristics of the monitor.
•Clean the screen surface lightly with a soft cloth. If necessary, use water with a soft
cloth to remove hand oils, fingerprints. etc. Do not use any type of abrasive pad,
scouring powder or solvents such as alcohol, benzene or ammonia as they might
damage the anti-reflective coating.
Plug and Play
This monitor complies with the DDC™1 and DDC2B Display Data Channel (DDC) stan-
dards of VESA.
When a DDC1 host system is connected, the monitor synchronizes with the V. CLK in
accordance with the VESA standards, and outputs the EDID (Extended Display Identifica-
tion Data) to the data line.
When a DDC2B host system is connected, the monitor automatically switches to the
appropriate standard.
DELL P990(E).book Page 1 Friday, December 4, 1998 2:36 PM

1-2 Dell Model UltraScan P990 Color Monitor User’s Guide
DDC™ is a trademark of Video Electronics Standard Association.
•Your monitor operates according to DDC2B. Only computers that support the same
guidelines and operate at the same or higher level can make use of this feature.
•If your computer does not support the relevant guidelines, you can still use your mon-
itor and computer. You may need to manually specify the appropriate resolution in the
computer.
•The highest resolution automatically selected may not give the best result. You may
need to manually select the most suitable resolution in the computer.
Warning on Power Connection
•Use an appropriate power cord for your local power supply.
For customers in the U.S.A.
If you do not use an appropriate power cord, the monitor will not conform to man-
datory FCC standards.
•Before disconnecting the power cord, wait for at least 30 seconds after turning off the
power to allow the static electricity on the CRT display surface to discharge.
•After the power has been turned on, the CRT is demagnetized (degaussed) for about
5 seconds. This generates a strong magnetic field around the metal frame, which may
affect the data stored on magnetic tapes and disks near the monitor. Place magnetic
recording equipment, tapes and disks away from this monitor.
The socket should be installed near the equipment and be easily accessible.
DELL P990(E).book Page 2 Friday, December 4, 1998 2:36 PM
Setup 1-3
Setup
Setup
1. Make sure the computer system and monitor are switched off and attach
the Blue video signal cable to the Blue video output of the computer.
2. Make sure the monitor is switched off and attach the power cord to the
monitor. Then, attach the other end of the power cord to a power outlet.
3. Switch on the monitor and computer.
4. Adjust the user controls according to your personal preference.
Installation is complete.
NOTE: If you have any problems with your Dell Monitor, refer to the “Troubleshooting”
section on pages 1-15 to 1-19.
Computer
to the video output
connector on the computer
Video
Signal cable
Both are a Blue color
to an AC power outlet
Power cord Video Signal Cable
DELL P990(E).book Page 3 Friday, December 4, 1998 2:36 PM
1-4 Dell Model UltraScan P990 Color Monitor User’s Guide
Using the Monitor
Parts and Controls
1(RESET) button (page 1-13)
Resets the adjustments to the factory settings.
2Auto Sizing and Centering button (page 1-6)
Automatically adjusts the picture size and position.
3(BRIGHTNESS) m/Mbuttons (page 1-5)
Adjust the picture brightness.
Operate as the m/Mbuttons when adjusting other items.
4(MENU) button (page 1-6)
Displays the MENU OSD.
56(CONTRAST) </,buttons (page 1-5)
Adjust the contrast.
Operate as the </,buttons when adjusting other items.
61(POWER) switch and indicator (page 1-14)
Turns the monitor on and off.
The indicator lights up green when the monitor is on, and lights up orange when the
monitor is in Power Saving mode.
7AC IN connector
Provides AC power to the monitor.
8Blue Video signal input connector (HD15) attached
Inputs RGB video signals and SYNC signals
Front Rear
DELL P990(E).book Page 4 Friday, December 4, 1998 2:36 PM
Using the Monitor 1-5
Using the tilt-swivel
This monitor can be adjusted within the angles shown below. To turn the monitor vertically
or horizontally, hold it at the bottom with both hands.
Adjusting the Brightness and Contrast
1. Press the (BRIGHTNESS) m/Mor 6(CONTRAST) </,buttons.
The BRIGHTNESS/CONTRAST OSD appears.
2. To adjust the brightness/contrast;
Press the (BRIGHTNESS) m/M/6(CONTRAST) </,buttons.
90°
15°
5°
90°
BRIGHTNESS/CONTRAST
26 26
DELL P990(E).book Page 5 Friday, December 4, 1998 2:36 PM
1-6 Dell Model UltraScan P990 Color Monitor User’s Guide
Automatically sizing and centering the
picture
You can easily adjust the picture to fill the screen by pressing the ASC (auto sizing and cen-
tering) button.
Press the ASC button.
The picture automatically fills the screen.
NOTE: This function is intended for use with a computer running Windows or similar
graphic user interface software that provides a full-screen picture. It may not work properly
if the background color is dark or if the input picture does not fill the screen to the edges
(such as an MS-DOS prompt).
Introducing the On Screen Display (OSD)
system
Navigating the menu
Press the MENU button to display the main MENU on your screen.
OK
MENU
MENU
EXIT
CENTER
SIZE
GEOMETRY
ZOOM
COLOR
CONVERGENCE
OSD POSITION
OPTION
GRAPHIC ENHANCEMENT
80.0kHz/ 75Hz
1280 X 1024
Displaying Frequencies and
Preset timing
DELL P990(E).book Page 6 Friday, December 4, 1998 2:36 PM
Using the Monitor 1-7
Use the (BRIGHTNESS) m/Mand MENU buttons to select the desired function.
CENTER
Select the CENTER menu to adjust the picture’s
centering.
SIZE
Select the SIZE menu to adjust the picture’s hori-
zontal and vertical size.
GEOMETRY
Select the GEOMETRY menu to adjust the picture’s
rotation and shape.
Table 3-1. Geometry Adjustments
Select To
ROTATION Rotate the picture
PINCUSHION Expand or contract the picture sides
PIN BALANCE Shift the picture sides to the left or right
KEYSTONE Adjust the picture width at the top and bottom of the
screen
KEY BALANCE Shift the picture to the left or right at the top and bottom of
the screen
CENTER
26
73
SIZE
26
73
ROTATION
GEOMETRY
26
DELL P990(E).book Page 7 Friday, December 4, 1998 2:36 PM

1-8 Dell Model UltraScan P990 Color Monitor User’s Guide
ZOOM
Select the ZOOM menu to enlarge or reduce the
picture.
COLOR
Select the COLOR menu to adjust the picture’s
color temperature. You can use this to help with
monitor and printer color matching.
You can also fine tune the color temperature from
9,300K to 5,000K by selecting VARIABLE, and
using the 6</,buttons to adjust the color tem-
perature manually.
When using one of the GEM modes, you can fine
tune the color temperature from 11,000K to
9,300K.
ZOOM
ZOOM
COLOR
1
29300K
VARIABLE
COLOR
1
2
VARIABLE
COLOR
DELL P990(E).book Page 8 Friday, December 4, 1998 2:36 PM
Using the Monitor 1-9
CONVERGENCE
Select the CONVERGENCE menu to adjust the pic-
ture’s quality. You can adjust the vertical and
horizontal convergence.
Table 3-2. Convergence Adjustments
Select To
H CONVERGENCE eliminate horizontal red or blue color shadows
V CONVERGENCE eliminate vertical red or blue color shadows
OSD POSITION
Select the OSD POSITION menu to move the OSD
position.
OPTION
Select the OPTION menu to adjust the monitor’s
options. The options include:
Table 3-3. Option Adjustments
Select To
MANUAL DEGAUSS Degaussing (demagnetizihog) the screen
CONTROL LOCK Locking the controls
LANGUAGE Changing the OSD language
COLOR RETURN Restoring the color image (Image Restoration) – See
COLOR RETURN section for details.
CANCEL MOIRE Adjusting the moire
CONVERGENCE
26
73
OSD POSITION
26
73
MANUAL DEGAUSS
ON
OPTION
DELL P990(E).book Page 9 Friday, December 4, 1998 2:36 PM

1-10 Dell Model UltraScan P990 Color Monitor User’s Guide
COLOR RETURN - Restoring the Color Image
The color of most display monitors tends to gradually lose its brilliance after several years
of usage. The Color Return feature allows you to help restore the color to the original fac-
tory preset levels.
MOIRE ADJUST - Adjusting the moire
Moire is a type of natural interference which produces soft, wavy lines on your screen. It
may appear due to interference between the pattern of the picture on the screen and the
phosphor pitch pattern of the monitor.
To restore the image, first press the m/Mbuttons to
select (COLOR RETURN). Then press the right 6
,button.
A white rectangle appears in the center of the screen
while the image is being restored (about two seconds).
NOTE: Before using this feature, the monitor must be in
normal operation mode (Green power indicator) for at
least 30 minutes. If the monitor goes into power saving
mode, you must return the monitor to normal operation
mode and wait for 30 minutes for the monitor to be
ready. You may need to check your computer’s power
saving settings to help keep the monitor in normal oper-
ation mode for the full 30 minutes. If the monitor is not
ready, the following message will appear.
COLOR RETURN
OPTION
ON
COLOR RETURN
AVAILABLE
AFTER
WARM UP
OPTION
Example of moire
DELL P990(E).book Page 10 Friday, December 4, 1998 2:36 PM

Using the Monitor 1-11
Before you can adjust this setting, the Cancel Moire setting must be turned on.
Select the CANCEL MOIRE menu to turn on the Moire
Adjustment.
To adjust the amount of moire cancellation, first press
the m/Mbuttons to highlight (MOIRE ADJUST).
Then press the 6</,buttons to adjust the amount
of moire cancellation until the moire effect is at a
minimum.
•OFF •ON
CANCEL MOIRE
OPTION
MOIRE ADJUST
OPTION
26
DELL P990(E).book Page 11 Friday, December 4, 1998 2:36 PM

1-12 Dell Model UltraScan P990 Color Monitor User’s Guide
Graphic Enhancement Mode (GEM)
Monitor Information
You can display the model name, serial number and year of manufacture usign the INFOR-
MATION OSD.
Press and hold the MENU button for 5 seconds.
The OSD automatically disappears after 30 seconds.
GRAPHIC ENHANCEMENT MODE (GEM)
Select the Graphic Enhancement MENU to change
the viewing characteristics of the picture.
There are 3 GEM viewing modes;
The STANDARD MODE is ideal for spreadsheets,
word processing, and other text oriented
applications.
The PRESENTATION MODE is useful for presentation programs that require vivid
colors.
The GRAPHICS/VIDEO MODE gives movies and games enhanced visual appeal by
increasing the sharpness and brightness.
NOTE:
•The PRESENTATION MODE and GRAPHICS/VIDEO MODE may produce ghost
images when displaying text oriented applications.
These modes change the brightness of the picture dynamically according to
changes in moving pictures. If ghost images appear, set the GEM to STANDARD
MODE.
•The PRESENTATION MODE and GRAPHICS/VIDEO MODE change the color
temperature adjustment range from 9,300K ∼5,000K to 11,000K ∼9,300K. (See
COLOR adjustment for the detailed message.)
•Changing video modes or cycling power will automatically set the GEM mode
back to STANDARD mode.
BEXIT
Select EXIT to close the menu.
The INFORMATION OSD includes the model name,
serial number, year and week of manufacture.
GRAPHIC ENHANCEMENT
STANDARD MODE
GRAPHICS/VIDEO MODE
PRESENTATION MODE
INFORMATION
MODEL : P990
MANUFACTURED : 1998-53
SER NO : 123456789ABCD
DELL P990(E).book Page 12 Friday, December 4, 1998 2:36 PM
Table of contents
Languages:
Other Dell Monitor manuals

Dell
Dell P Series Use and care manual

Dell
Dell E157FP - 15" LCD Monitor User manual

Dell
Dell P2411H User manual

Dell
Dell UltraSharp 2208WFP User manual

Dell
Dell SE2416H User manual

Dell
Dell E2214H User manual

Dell
Dell UltraSharp 2208WFP User manual

Dell
Dell P3424WE User manual

Dell
Dell E1715SE User manual

Dell
Dell S2421HN User manual

Dell
Dell S2230MX User manual

Dell
Dell UltraSharp UP2718Q User manual

Dell
Dell E2211H User manual

Dell
Dell E2223HN User manual

Dell
Dell E173FP - 17" LCD Monitor User manual

Dell
Dell E1913 User manual

Dell
Dell E207WFP User manual

Dell
Dell E198WFP User instructions

Dell
Dell E1609WFP User manual

Dell
Dell SP2009W User manual