manuals.online logo
Brands
  1. Home
  2. •
  3. Brands
  4. •
  5. DeLonghi
  6. •
  7. Electric Heater
  8. •
  9. DeLonghi EW 7707CM User manual

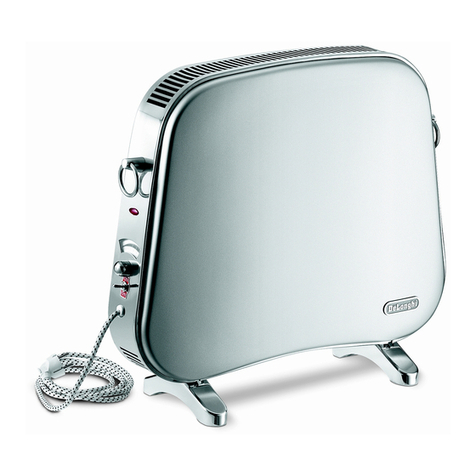
DeLonghi EW 7707CM User manual

4
IMPORTANT
SAFEGUARDS
When using any electrical appliance, some basic safety
precautions should always be observed to reduce the risk
of re, electric shock, and/or injury to persons. Read all in-
structions carefully before using the appliance. Specically:
Danger!
Failure to observe the warning may result in life threatening
injury by electric shock.
- Do not operate any heater with a damaged
cord or plug or after the heater malfun-
ctions, has been dropped or damaged in any
manner.
If heater has leaked any oil, discontinue
using the heater and contact the service
centre as indicated in the instruction leaet.
Return heater to authorized service facility
for examination, electrical or mechanical
adjustment, or repair.
- This heater is not intended for use in bathro-
oms, laundry areas, or similar indoor loca-
tions. Never position the appliance where it
may fall into a bathtub or come in contact
with water.
- Use this appliance only as described in this
manual. Any other use not indicated by the
manufacturer may cause re, electric shock,
or injury to persons.
- CAUTION: To prevent electric shock, make
sure the wide prong of the plug is inserted
in the wide slot of the outlet.
Important!
Failure to observe the warning could result in injury or
damage to the appliance.
- The appliance is not intended for use by
persons (including children) with reduced
physical, sensory or mental capabilities, or
lack of experience and knowledge, unless
they have been given supervision or instruc-
tion concerning use of the appliance by a
person responsible for their safety.
Children should be supervised to ensure that
they do not play with the appliance.
- Extreme caution is necessary when any hea-
ter is used by or near children or invalids and
whenever the heater is left operating and
unattended.
- Do not wrap the cord around the appliance
immediately after use.
- To prevent current overload and blown fu-
ses, make sure that no other appliance is
plugged into the same outlet or into another
outlet wired into the same circuit.
- If the power cord is damaged, to reduce the
risk of malfunction it must be replaced by
the manufacturer, its service agent, or a li-
censed and qualied professional.
- Do not use this appliance with an extension
cord or outlet strip. Connect the appliance
directly to a suitable outlet.
Danger of burns!!
Failure to observe the warning could result in burns or
scalds.
- This appliance gets very hot when in use.
To prevent burns, do not touch hot surfaces
with bare skin. Use the handle when moving
the appliance. Keep all ammable materials,
such as furniture, pillows, bedding, paper,
clothing, and curtains at least 3 feet (90 cm)
from the front and top of the appliance, also
avoid contact with the sides and back.
- Do not run the power cord under carpeting.
Do not cover cord with throw rugs, runners,
or the like. Keep the cord away from any pas-
sageways where it could be tripped over.
- Do not insert or allow foreign objects to get
into the air intake or air outlet grille, as this
may cause electric shock or re, or damage
the appliance.
- To prevent a possible re, do not block air in-
take or air outlet grille in any way. Do not use
the appliance on soft surfaces, such as beds,
where the openings may become blocked.
- Do not cover the appliance while it is fun-
ctioning in order to avoid overheating and
the risk of re.
5
- The internal parts of the appliance can beco-
me very hot or produce sparks during opera-
tion. Do not use the appliance in areas where
gasoline, paints, or other ammable liquids
are used or stored.
- It is normal for heater’s plug and cord to
feel warm to the touch. However, an exces-
sively hot or deformed plug or cord is not
normal and may be the result of a defective
electrical outlet. Defective outlets must be
replaced before using the heater. Plugging
the heater into a worn outlet may result in
overheating of the power cord or may cause
the risk of re.
- Do not place the heater near a bed because
objects such as pillows or blankets can fall
o the bed and be ignited by the heater.
Please note:
This symbol indicates recommendations and important
information for the user.
- If your radiator is equipped with a
polyethylene tape used as a carry handle,
remove it before connecting appliance to
the outlet.
- Always disconnect the plug from the power
outlet when the appliance is not in use.
- Do not use the appliance outdoors.
- To completely turn o the appliance, push
the ON/OFF button, and then unplug the
heater.
- Connect to properly polarized outlets only.
- Make sure that the plug is fully inserted into
the outlet.Wall outlets may deteriorate with
time, so check the plug periodically for signs
of overheating or deformation. If the outlet
has deteriorated, stop using it and have it
repaired.
- Check that neither the appliance nor the po-
wer cord have been damaged during ship-
ping.
- Make sure that no styrofoam or other pa-
cking materials remain in the appliance.
- Make sure that no pieces of polystyrene or
other packaging material have been left
between one element of the appliance and
another. It may be necessary to pass over the
appliance with a vacuum cleaner.
- The rst time the appliance is used, run it at
the maximum power for at least two hours.
During this time, ventilate the room thorou-
ghly to eliminate the “new” smell released
by the appliance. It is completely normal for
the appliance to emit “creaking” sounds the
rst time it is run.
- Extreme caution is necessary whenever the
heater is left operating unattended.
- Do not open the appliance. No user-service-
able parts inside.
SAVE THESE
INSTRUCTIONS
THIS PRODUCT IS FOR HOUSEHOLD USE
ONLY
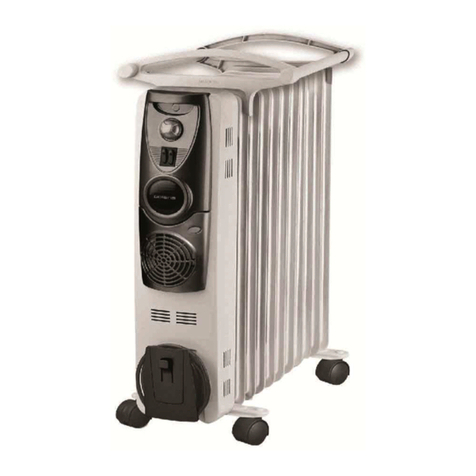
DESCRIPTION
A thermostat
B switches
Cgreen pilot light
D COMFORTEMP button
E cord holder
F wheel
USE
“Easy wheel” system
Turn the radiator upside-down on a rug or a soft surface
in order to prevent damaging the paint nish. Fully unfold
the castors by turning them outwards (see gure).
Turn the radiator back to its upright position.
Important! Always operate the heater in upright
position only (wheels on the bottom, controls on top). Any
other position could create hazardous situation.
WATTS ECONOMIZER
For more economical use, the two switches may be
6
used individually, after unit has reached the operating
temperature:
- button in position «l» = minimum power (indicator
light on);
- button in position «ll» = intermediate power (indicator
light on);
- both buttons in position «l» «ll» = maximum power
(indicator lights on)
With pilot lights ON, the heater is ON.
LOCATION
Place the heater on the oor beneath the coldest window
in the room, or any other location. Your heater will reduce
the eect of cold drafts. The heater should not be placed
immediately below a power outlet. Do not use this radiator in
rooms with a oor area of less than 43 square feet (4 sq. m.).
CONNECTION
The radiator should be connected to a properly polarized
household outlet in perfect working condition. Keep loose
clothing or bedding, furniture and ammable material away
from the heater’s wall outlet.
TURNING ON TWO-SWITCH MODELS
Turn the thermostat clockwise to its maximum position. Push
down both switches. The switch lights stay on independently
of the thermostat cycling.
When room reaches the desired temperature, turn the
thermostat knob counter-clockwise very slowly and carefully
until you hear a click. This should set your heater to maintain
the desired temperature by cycling on and o as required.
USE OF THERMOSTAT
The thermostat operates according to room air temperature,
rather than radiator temperature. Turning it counter-
clockwise to smaller numbers would decrease the
temperature; clockwise to greater numbers would increase
the temperature.
ANTIFREEZE function
Turn the thermostat dial to the position and push both
switches on. The appliance will maintain a minimum room
temperature of approximately 41°F (5°C), thus preventing
freezing while conserving energy.
COMFORTEMP Function
With both switches on and the COMFORTEMP button de-
pressed the appliance is automatically set to reach and main-
tain the suggested & preset ideal energy-saving temperature.
When operating in COMFORTEMP mode, the half-circle green
pilot light is on.To quit the COMFORTEMP function and return
to manual operation, depress the COMFORTEMP button once
again.
Important! To completely shut the heater o, ON/
OFF both switches must be set in the OFF position.
A safety device
A safety device switches the heater o in the event of
overheating. To restart the heater, call the nearest Service
center.
MAINTENANCE AND SERVICE
Always unplug the heater from the power outlet and allow
the radiator to cool.Wipe radiator with a soft damp cloth; do
not use detergents and abrasives. Should the radiator not be
in use over a certain length of time, roll the cable around the
holder and store it in a dry place.
This appliance has been built to last for many years of
trouble-free service. In case of malfunction or doubt, do not
try to repair the heater by yourself: this might increase the
risk of re and electric shock. Contact the De longhi toll free
number.
Your product is equipped with a polarized alternating
current line plug (a plug having one prong wider than the
others). This plug will t into the power outlet only one
way. This is a safety feature. If you are unable to insert the
plug fully into the outlet, try reversing the plug. If the plug
should still fail to t, contact your electrician to replace
your obsolete outlet. Do not attempt to modify the plug to
bypass this safety feature.
7
TROUBLESHOOTING
PROBLEM CAUSE SOLUTION
The appliance doesn't work Be sure it is plugged in and that the
electrical outlet is working.
Check for any obstruction.
The switches are in the OFF position.
The thermostat may be set too low.
Plug into the mains.
Remove the obstruction. Let the appliance
cool down then reinsert the plug into the
mains. If the appliance doesn’t work please
contact the nearest service center.
Switch on the appliance.
Turn the thermostat to a higher setting until
the heater restarts.

Other manuals for EW 7707CM

7

This manual suits for next models

1

Other DeLonghi Electric Heater manuals

DeLonghi 634H Firmware update

DeLonghi

DeLonghi 634H Firmware update

DeLonghi EW7507EK User manual

DeLonghi

DeLonghi EW7507EK User manual

DeLonghi ELECTRIC CONVECTOR HEATER User manual

DeLonghi

DeLonghi ELECTRIC CONVECTOR HEATER User manual

DeLonghi HCA 530FTSW User manual

DeLonghi

DeLonghi HCA 530FTSW User manual

DeLonghi TRH0715L User manual

DeLonghi

DeLonghi TRH0715L User manual

DeLonghi Electric Convector Heater Installation instructions manual

DeLonghi

DeLonghi Electric Convector Heater Installation instructions manual

DeLonghi 634 User manual

DeLonghi

DeLonghi 634 User manual

DeLonghi EW0715W User manual

DeLonghi

DeLonghi EW0715W User manual

DeLonghi HCO series User manual

DeLonghi

DeLonghi HCO series User manual

DeLonghi HCX9115E-6A AG User manual

DeLonghi

DeLonghi HCX9115E-6A AG User manual

DeLonghi RADIANT HEATER WITH TERMOSTAT User manual

DeLonghi

DeLonghi RADIANT HEATER WITH TERMOSTAT User manual

DeLonghi HCM Series User manual

DeLonghi

DeLonghi HCM Series User manual

DeLonghi TRF1 15 User manual

DeLonghi

DeLonghi TRF1 15 User manual

DeLonghi HS15F User manual

DeLonghi

DeLonghi HS15F User manual

DeLonghi 2507L User manual

DeLonghi

DeLonghi 2507L User manual

DeLonghi BBH 100 Installation instructions manual

DeLonghi

DeLonghi BBH 100 Installation instructions manual

DeLonghi EW 7707CM Installation instructions manual

DeLonghi

DeLonghi EW 7707CM Installation instructions manual

DeLonghi HVR 9032 User manual

DeLonghi

DeLonghi HVR 9032 User manual

DeLonghi MG7307CM Installation instructions manual

DeLonghi

DeLonghi MG7307CM Installation instructions manual

DeLonghi HMH User manual

DeLonghi

DeLonghi HMH User manual

DeLonghi STRETTO User manual

DeLonghi

DeLonghi STRETTO User manual

DeLonghi IH User manual

DeLonghi

DeLonghi IH User manual

DeLonghi HCM2030 User manual

DeLonghi

DeLonghi HCM2030 User manual

DeLonghi TRV0715 User manual

DeLonghi

DeLonghi TRV0715 User manual

Popular Electric Heater manuals by other brands

Trane BAYEVAC05LG1A Installer's guide

Trane

Trane BAYEVAC05LG1A Installer's guide

flowair LEO EL 23 Technical documentation operation manual

flowair

flowair LEO EL 23 Technical documentation operation manual

HOMCOM HD986-B7 Using instruction

HOMCOM

HOMCOM HD986-B7 Using instruction

Harvia PO10E Instructions for installation and use

Harvia

Harvia PO10E Instructions for installation and use

Chromalox PE417-3 Installation, operation and renewal parts identification

Chromalox

Chromalox PE417-3 Installation, operation and renewal parts identification

Kambrook SNUGASABUG KRH100 user manual

Kambrook

Kambrook SNUGASABUG KRH100 user manual

Fired Up Corporation Sola SPH-15AA instruction manual

Fired Up Corporation

Fired Up Corporation Sola SPH-15AA instruction manual

Valor Fires 850 Installer and owner guide

Valor Fires

Valor Fires 850 Installer and owner guide

TESY CN 06 EA W Operation and storage manual

TESY

TESY CN 06 EA W Operation and storage manual

Dimplex Quantum Classic VFR 20 Installation and user instructioins

Dimplex

Dimplex Quantum Classic VFR 20 Installation and user instructioins

Dimplex Quantum E Series quick start guide

Dimplex

Dimplex Quantum E Series quick start guide

TESY CN 03 100 EIS W Operation and storage manual

TESY

TESY CN 03 100 EIS W Operation and storage manual

Harvia PC70EE Instructions for installation and use

Harvia

Harvia PC70EE Instructions for installation and use

IRIT IR-6008 Manual instruction

IRIT

IRIT IR-6008 Manual instruction

Holmes HFH103 owner's guide

Holmes

Holmes HFH103 owner's guide

Centrometal HPe2/4CM Guidebook for installation, handling and maintenance

Centrometal

Centrometal HPe2/4CM Guidebook for installation, handling and maintenance

Calienta 10624990 operating instructions

Calienta

Calienta 10624990 operating instructions

ambe RIR2000 Safety instructions and operation manual

ambe

ambe RIR2000 Safety instructions and operation manual

manuals.online logo
manuals.online logoBrands
  • About & Mission
  • Contact us
  • Privacy Policy
  • Terms and Conditions

Copyright 2025 Manuals.Online. All Rights Reserved.