manuals.online logo
Brands
  1. Home
  2. •
  3. Brands
  4. •
  5. DeLonghi
  6. •
  7. Heater
  8. •
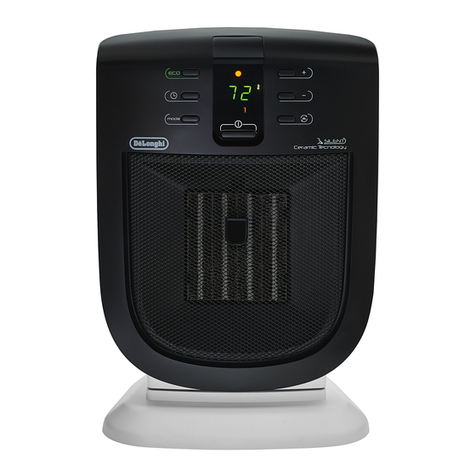
  9. DeLonghi HVF3555TB User manual

DeLonghi HVF3555TB User manual

This manual suits for next models

1

Other DeLonghi Heater manuals

DeLonghi HFX66V15C User manual

DeLonghi

DeLonghi HFX66V15C User manual

DeLonghi Holmo Fluid User manual

DeLonghi

DeLonghi Holmo Fluid User manual

DeLonghi MG7307CMM User manual

DeLonghi

DeLonghi MG7307CMM User manual

DeLonghi HBP Series User manual

DeLonghi

DeLonghi HBP Series User manual

DeLonghi TRRS2715EBKCA User manual

DeLonghi

DeLonghi TRRS2715EBKCA User manual

DeLonghi TCH8093ER User manual

DeLonghi

DeLonghi TCH8093ER User manual

DeLonghi TRDX4 User manual

DeLonghi

DeLonghi TRDX4 User manual

DeLonghi DRAGON HM3 Manual

DeLonghi

DeLonghi DRAGON HM3 Manual

DeLonghi TCH8093ERCA User manual

DeLonghi

DeLonghi TCH8093ERCA User manual

DeLonghi HCA User manual

DeLonghi

DeLonghi HCA User manual

DeLonghi RCH100 User manual

DeLonghi

DeLonghi RCH100 User manual

DeLonghi CERAMIC FAN HEATER User manual

DeLonghi

DeLonghi CERAMIC FAN HEATER User manual

DeLonghi HBC Series User manual

DeLonghi

DeLonghi HBC Series User manual

DeLonghi HVY1020 Mini User manual

DeLonghi

DeLonghi HVY1020 Mini User manual

DeLonghi HOR KH770920 User manual

DeLonghi

DeLonghi HOR KH770920 User manual

DeLonghi TRDX40820E User manual

DeLonghi

DeLonghi TRDX40820E User manual

DeLonghi HEX60 Series User manual

DeLonghi

DeLonghi HEX60 Series User manual

DeLonghi HFX65 Series User manual

DeLonghi

DeLonghi HFX65 Series User manual

DeLonghi DCH6031 User manual

DeLonghi

DeLonghi DCH6031 User manual

DeLonghi FAN HEATER User manual

DeLonghi

DeLonghi FAN HEATER User manual

DeLonghi FAN HEATER User manual

DeLonghi

DeLonghi FAN HEATER User manual

DeLonghi TRRS2715EBK User manual

DeLonghi

DeLonghi TRRS2715EBK User manual

DeLonghi TCH7915ER User manual

DeLonghi

DeLonghi TCH7915ER User manual

DeLonghi SRI User manual

DeLonghi

DeLonghi SRI User manual

Popular Heater manuals by other brands

Porter-Cable PCXH80KT Operating instructions and owner's manual

Porter-Cable

Porter-Cable PCXH80KT Operating instructions and owner's manual

Dyna-Glo RA18LPDG user manual

Dyna-Glo

Dyna-Glo RA18LPDG user manual

Dimplex PLX050E instruction manual

Dimplex

Dimplex PLX050E instruction manual

EOS Herkules XL S120 installation instructions

EOS

EOS Herkules XL S120 installation instructions

Trebs Comfortheat 99209 manual

Trebs

Trebs Comfortheat 99209 manual

Biddle STYLE2 Series Installation operation & maintenance

Biddle

Biddle STYLE2 Series Installation operation & maintenance

Vermont Castings Non-Catalytic Convection Heater 2477CE Installation and operating manual

Vermont Castings

Vermont Castings Non-Catalytic Convection Heater 2477CE Installation and operating manual

Fagor RA-1505 Instructions for use

Fagor

Fagor RA-1505 Instructions for use

THERMAL FLOW Delta 175 Operating instructions manual

THERMAL FLOW

THERMAL FLOW Delta 175 Operating instructions manual

GET G2CH instructions

GET

GET G2CH instructions

ApenGroup PK Series User, installation, and maintenance manual

ApenGroup

ApenGroup PK Series User, installation, and maintenance manual

oventrop Regucor Series quick start guide

oventrop

oventrop Regucor Series quick start guide

Blaze King CLARITY CL2118.IPI.1 Operation & installation manual

Blaze King

Blaze King CLARITY CL2118.IPI.1 Operation & installation manual

ELMEKO ML 150 Installation and operating manual

ELMEKO

ELMEKO ML 150 Installation and operating manual

BN Thermic 830T instructions

BN Thermic

BN Thermic 830T instructions

KING K Series Installation, operation & maintenance instructions

KING

KING K Series Installation, operation & maintenance instructions

Empire Comfort Systems RH-50-5 Installation instructions and owner's manual

Empire Comfort Systems

Empire Comfort Systems RH-50-5 Installation instructions and owner's manual

Well Straler RC-16B user guide

Well Straler

Well Straler RC-16B user guide

manuals.online logo
manuals.online logoBrands
  • About & Mission
  • Contact us
  • Privacy Policy
  • Terms and Conditions

Copyright 2025 Manuals.Online. All Rights Reserved.

4
INTRODUCTION
Thank you for choosing a De’Longhi product. Please take few
moments to read the instructions to avoid risks or damage to
the appliance.
IMPORTANT
SAFEGUARDS
When using any electrical appliance, some basic safety precau-
tions should always be observed to reduce the risk of re, electric
shock, and/or injury to persons. Read all instructions carefully
before using the appliance. Specically:
Danger!
Failure to observe the warning may result in life
threatening injury by electric shock.
- Do not operate the appliance with a damaged
cord or plug, after faulty operation, or when it
has been dropped or damaged in any way. Con-
tact the nearest authorized service facility for
examination, electrical or mechanical adjust-
ment, or repair.
- Never position the appliance where it may fall
into a bathtub or come in contact with water. Do
not use the appliance near showers, bathtubs,
sinks, swimming pools, etc.
- Never use this heating appliance in the immedi-
ate vicinity of swimming pool.
- If the appliance is located in a room with bath or
shower, respect the “safety distances”shown in
g. 1 and always install away from taps, basins,
showers, etc.
- CAUTION: ALTHOUGH THIS DEVICE IS PROVIDED
WITH PROTECTION WHICH REDUCESTHE RISK OF
ELECTRIC SHOCK, THIS PRODUCT SHOULD NEVER
BE USED NEARWATER.
- Do not insert or allow foreign objects to get into
the air intake or air outlet grille, as this may
cause electric shock or re, or damage the appli-
ance.
- Make sure that the plug is fully inserted into the
outlet. Wall outlets may deteriorate with time,
so check the plug periodically for signs of over-
heating or deformation. If the outlet has dete-
riorated, stop using it and have it repaired.
Important!
Failure to observe the warning could result in injury
or damage to the appliance.
- The appliance is not intended for use by persons
(including children) with reduced physical, sen-
sory or mental capabilities, or lack of experience
and knowledge, unless they have been given
supervision or instruction concerning use of
the appliance by a person responsible for their
safety. Children should be supervised to ensure
that they do not play with the appliance.
- Always disconnect the plug from the power out-
let when the appliance is not in use.
- Do not use the appliance outdoors.
- Do not run the power cord under carpeting. Do
not cover cord with throw rugs, runners, or the
like. Keep the cord away from any passageways
where it could be tripped over.
- To prevent a possible re, do not block air intake
or air outlet grille in any way. Do not use the ap-
pliance on soft surfaces, such as beds, where the
openings may become blocked.
- Use this appliance only as described in this man-
ual. Any other use not indicated by the manu-
facturer may cause re, electric shock, or injury
to persons.
- To prevent current overload and blown fuses,
make sure that no other appliance is plugged
into the same outlet or into another outlet wired
into the same circuit.
- If the supply cord is damaged, to reduce the
risk of malfunction it must be replaced by the
manufacturer, its service agent, or a licensed
and qualied professional.
- Do not use this appliance with an extension cord
or outlet strip. Connect the appliance directly to
a suitable outlet.
- Make sure that the plug is fully inserted into the
outlet. Wall outlets may deteriorate with time,
so check the plug periodically for signs of over-
heating or deformation. If the outlet has dete-
riorated, stop using it and have it repaired.
- Do not place the heater near a bed because ob-
jects such as pillows or blankets can fall o the
bed and be ignited by the heater.
- Use the appliance always and only in the vertical
position.
- Do not use this appliance in a room smaller than
43 square feet (4 m²).
5
Danger of burns!!
Failure to observe the warning could result in burns
or scalds.
- This appliance gets very hot when in use. To
prevent burns, do not touch hot surfaces with
bare skin. Use the handle when moving the ap-
pliance. Keep all ammable materials, such as
furniture, pillows, bedding, paper, clothing, and
curtains at least 3 feet (90 cm) from the front
and top of the appliance also avoid contact with
the sides and back.
- Do not wrap the cord around the appliance im-
mediately after use.
- Do not cover the appliance while it is function-
ing in order to avoid overheating and the risk of
re.
- The internal parts of the appliance can become
very hot or produce sparks during operation. Do
not use the appliance in areas where gasoline,
paints, or other ammable liquids are used or
stored.
- It is normal for heater’s plug and cord to feel
warm to the touch. However, an excessively
hot or deformed plug or cord is not normal and
may be the result of a defective electrical outlet.
Defective outlets must be replaced before using
the heater. Plugging the heater into a worn out-
let may result in overheating of the power cord
or may cause the risk of re.
- Do not use the appliance to dry laundry, and
do not obstruct the air intake and outlet grilles
(danger of overheating).
- Do not operate the appliance in contact with
walls, furniture, curtains, etc.
Please note:
This symbol indicates recommendations and impor-
tant information for the user.
- To completely turn o the appliance, turn the
function selector knob to 0, and then unplug the
heater.
- Check that neither the appliance nor the power
cord have been damaged during shipping.
- Make sure that no styrofoam or other packing
materials remain in the appliance.
- The rst time the appliance is used, run it at the
maximum power for at least two hours. Dur-
ing this time, ventilate the room thoroughly to
eliminate the“new”smell released by the appli-
ance. It is completely normal for the appliance
to emit“creaking”sounds the rst time it is run.
- Do not open the appliance. No user-serviceable
parts inside.
- Before storing the appliance, check it is com-
pletely o and the cable is unplugged. At this
point wrap the cord around the base. Do not
store in a dusty room. The room temperature
should be between 32-86°F (0-30°C). Do not
load anything above it.
- Heaters draw more current than small appli-
ances, overheating of the outlet may occur even
if it has not occured with the use of other appli-
ances.
SAVE THESE
INSTRUCTIONS
THIS PRODUCT IS FOR HOUSEHOLD USE ONLY
Please note: Your product is equipped with a polarized
alternating current line plug (a plug having one blade wider
than the other). This plug will t into the power outlet only one
way. This is a safety feature. If you are unable to insert the plug
fully into the outlet, try reversing the plug. If the plug should still
fail to t, contact your electrician to replace your obsolete outlet.
Do not defeat the safety purpose of the polarized plug.
GFI SAFETY PLUG (Appliance Leakage Current Inter-
rupter)
This device provides protection
against electric shock due to ground
fault currents by automatically shut-
ting o the power. To test the opera-
tion of the GFI Safety Plug , switch the
heater ON at either the 1 or 2 setting. Press the TEST button on
the GFI Safety Plug located at the end of the power cord. The
heaterand fanshouldstop operatingand thePowerLightshould
be extinguished. Press the RESET button on the GFI Safety Plug
to resume normal operation of the heater. This device should not
be used as on ON/OFF operation switch. “CAUTION: ALTHOUGH
THIS DEVICE IS PROVIDED WITH PROTECTION WHICH REDUCES
THE RISK OF ELECTRIC SHOCK, THIS PRODUCT SHOULD NEVER BE
USED CARELESSLY NEAR WATER.”
6
Tip over safety device
A tip over safety device turns the appliance o if it falls over or is
positioned inappropriately in such a way as to jeopardise safety.
When the appliance is placed back in a vertical position it starts
again automatically.
DESCRIPTION
A Timer
B Thermostat
C Function selector
DIndicator light
E Pedal switch
F Swivelling base
USE
Electrical connection
Before plugging into the outlet, make sure the voltage of your
outlet supply corresponds to the value V indicated on the appli-
ance and that the socket and power line are appropriate for the
load required.
Functioning and use
Make sure the appliance is o before plugging into the outlet.
1. Plug the appliance into the outlet. The light comes on.Your
appliance has a timer, see the section“Models with 24 hour
timer”. However, to operate the appliance without pro-
gramming, move all the teeth of the timer to the outside.
2. Turn the thermostat dial to maximum.
3. Summer mode (fan only): turn the function selector to
the position.
4. Low power operation: turn the function selector to posi-
tion 1 (the fan operates at minimum).
5. Medium power operation: turn the function selector to
position 2(the fan operates at medium).
6. High power operation: turn the function selector to po-
sition 3(the fan operates at maximum).
7. Switching o: turn the function selector to the “0”posi-
tion.
Setting the thermostat
Position the thermostat on maximum. When the room has
reached the required temperature, turn the thermostat dial
slowly counter clockwise until you hear a click and the fan goes
o. The thermostat will then keep room temperature at the se-
lected level automatically.
Frost prevention mode
With the function selector in position 3 and the thermostat
dial in position , the appliance maintains room temperature
at about 42 degrees F (5°C), preventing freezing with minimal
energy consumption.
24 HOUR TIMER
After setting the thermostat and function selector to the re-
quired position, to programme heating, proceed as follows:
- turn the timer disk clockwise until the pointer on the timer
slines up with the number corresponding to the current
time.
- set the times when you want the appliance to operate by
pushing the teeth towards the outside. Each tooth corre-
sponds to 30 minutes.
The appliance will now function automatically each day at the
times set.
Please note: To use the appliance without programming,
push all the teeth outwards.
MOTORIZED ROTATING BASE
Some models have a motorized rotating base. To distribute the
air ow over a larger area, press the pedal. The appliance swings
from right to left. To stop the appliance in the desired position,
simply press the pedal again.
MAINTENANCE
- Always unplug from the outlet before cleaning.
- Clean the air intake and outlet grilles regularly.
- Do not use abrasive products or solvents to clean the appli-
ance.
TECHNICAL CHARACTERISTICS
Power supply See rating plate
Absorbed power “
THE TIMER IS SET FOR THE FOLLOW-
ING PERIODS OF OPERATION:
FROM 11TO 13: ON
FROM 13TO 18: OFF
FROM 18TO 20: ON
FROM 20TO 11: OFF
TEETH IN THE
“ON”POSITION
TEETH INTHE“OFF”
POSITION
POINTER ON
CURRENTTIME 10.00
TEETH INTHE“
ON”POSITION