manuals.online logo
Brands
  1. Home
  2. •
  3. Brands
  4. •
  5. DeLonghi
  6. •
  7. Heater
  8. •
  9. DeLonghi TRH0715 User manual

DeLonghi TRH0715 User manual

4
IMPORTANT
SAFEGUARDS
When using any electrical appliance, some basic safety
precautions should always be observed to reduce the risk
of re, electric shock, and/or injury to persons. Read all in-
structions carefully before using the appliance. Specically:
Danger!
Failuretoobservethewarningmayresult inlife threatening
injury by electric shock.
- Do not operate any heater with a damaged
cord or plug or after the heater malfun-
ctions, has been dropped or damaged in any
manner.
If heater has leaked any oil, discontinue
using the heater and contact the service
centre as indicated in the instruction leaet.
Return heater to authorized service facility
for examination, electrical or mechanical
adjustment, or repair.
- This heater is not intended for use in bathro-
oms, laundry areas, or similar indoor loca-
tions. Never position the appliance where it
may fall into a bathtub or come in contact
with water.
- Use this appliance only as described in this
manual. Any other use not indicated by the
manufacturer may cause re, electric shock,
or injury to persons.
- CAUTION: To prevent electric shock, make
sure the wide prong of the plug is inserted
in the wide slot of the outlet.
Important!
Failure to observe the warning could result in injury or
damage to the appliance.
- The appliance is not intended for use by
persons (including children) with reduced
physical, sensory or mental capabilities, or
lack of experience and knowledge, unless
they have been given supervision or in-
struction concerning use of the appliance by
a person responsible for their safety.
Children should be supervised to ensure
that they do not play with the appliance.
- Extreme caution is necessary when any he-
ater is used by or near children or invalids
and whenever the heater is left operating
and unattended.
- Do not wrap the cord around the appliance
immediately after use.
- To prevent current overload and blown fu-
ses, make sure that no other appliance is
plugged into the same outlet or into ano-
ther outlet wired into the same circuit.
- If the power cord is damaged, to reduce the
risk of malfunction it must be replaced by
the manufacturer, its service agent, or a li-
censed and qualied professional.
- Do not use this appliance with an extension
cord or outlet strip. Connect the appliance
directly to a suitable outlet.
Danger of burns!!
Failure to observe the warning could result in burns or
scalds.
- This appliance gets very hot when in use.
To prevent burns, do not touch hot surfa-
ces with bare skin. Use the handle when
moving the appliance. Keep all ammable
materials, such as furniture, pillows, bed-
ding, paper, clothing, and curtains at least
3 feet (90 cm) from the front and top of the
appliance, also avoid contact with the sides
and back.
- Do not run the power cord under carpeting.
Do not cover cord with throw rugs, runners,
or the like. Keep the cord away from any
passageways where it could be tripped over.
- Do not insert or allow foreign objects to get
into the air intake or air outlet grille, as this
may cause electric shock or re, or damage
the appliance.
- To prevent a possible re, do not block air
intake or air outlet grille in any way. Do not
use the appliance on soft surfaces, such as
beds, where the openings may become blo-
cked.
- Do not cover the appliance while it is fun-
5
ctioning in order to avoid overheating and
the risk of re.
- The internal parts of the appliance can
become very hot or produce sparks during
operation. Do not use the appliance in areas
where gasoline, paints, or other ammable
liquids are used or stored.
- It is normal for heater’s plug and cord to
feel warm to the touch. However, an exces-
sively hot or deformed plug or cord is not
normal and may be the result of a defective
electrical outlet. Defective outlets must be
replaced before using the heater. Plugging
the heater into a worn outlet may result in
overheating of the power cord or may cause
the risk of re.
- Do not place the heater near a bed because
objects such as pillows or blankets can fall
o the bed and be ignited by the heater.
Please note:
This symbol indicates recommendations and important
information for the user.
- If your radiator is equipped with a
polyethylene tape used as a carry handle,
remove it before connecting appliance to
the outlet.
- Always disconnect the plug from the power
outlet when the appliance is not in use.
- Do not use the appliance outdoors.
- To completely turn o the appliance, push
the ON/OFF button, and then unplug the
heater.
- Connect to properly polarized outlets only.
- Make sure that the plug is fully inserted
into the outlet. Wall outlets may deteriorate
with time, so check the plug periodically for
signs of overheating or deformation. If the
outlet has deteriorated, stop using it and
have it repaired.
- Check that neither the appliance nor the po-
wer cord have been damaged during ship-
ping.
- Make sure that no styrofoam or other pa-
cking materials remain in the appliance.
- Make sure that no pieces of polystyrene or
other packaging material have been left
between one element of the appliance and
another. It may be necessary to pass over
the appliance with a vacuum cleaner.
- The rst time the appliance is used, run it at
the maximum power for at least two hours.
During this time, ventilate the room thorou-
ghly to eliminate the “new” smell released
by the appliance. It is completely normal for
the appliance to emit“creaking”sounds the
rst time it is run.
- Extreme caution is necessary whenever the
heater is left operating unattended.
- Do not open the appliance. No user-service-
able parts inside.
SAVE THESE
INSTRUCTIONS
THIS PRODUCT IS FOR HOUSEHOLD USE
ONLY
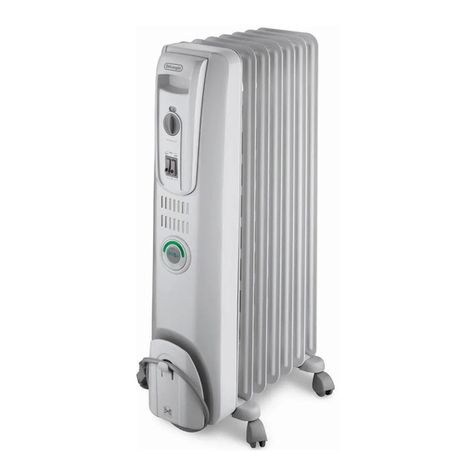
DESCRIPTION
(see g. 1)
AThermostat
B Switches
C Cord holder
USE
“Easy wheel”system
Turn the radiator upside-down on a rug or a soft surface
in order to prevent damaging the paint nish. Fully unfold
the castors by turning them outwards (see gure).
Turn the radiator back to its upright position.
Please note: Always operate the heater in upright
position only (wheels on the bottom, controls on top). Any
other position could create hazardous situation.
6
Watts economizer
For more economical use, the Min. or Med. Watt switches
may be used individually, after unit has reached the ope-
rating temperature.
With pilot lights ON, the heater is ON.
Location
Place heater on the oor beneath the coldest window in
the room, or any other location. Your heater will reduce
the eect of cold drafts. The heater should not be placed
immediately below a power outlet. Do not use this radiator
in rooms with a oor area of less than 43 square feet (4
sq. m.).
Connection
The radiator should be connected to a properly polarized
A/C 120 V household outlet in perfect working conditions.
Keep loose clothing or bedding, furniture and ammable
material away from the heater’s wall outlet.
Turning on two-switch models
Turn the thermostat clockwise to its maximum position.
Push down both switches. The switch lights stay on in-
dependently of the thermostat cycling. When room rea-
ches the desired temperature, turn the thermostat knob
counter-clockwise very slowly and carefully until you hear
a click. This should set your heater to maintain the desired
temperature by cycling on and o as required.
Please note: The heater normally requires about 15
minutes to reach the desired temperature.
Use of thermostat
The thermostat operates according to room air temperatu-
re, rather than radiator temperature.
Turning it counter-clockwise to smaller numbers would
decrease the temperature; clockwise to greater numbers
would increase the temperature.
Antifreeze function
Turn the thermostat dial to the position and push the
switches on.The appliance will maintain a minimum room
temperature of approximately 41°F (5°C), thus preventing
freezing while conserving energy.
Please note:To completely shut the heater o, MIN/
MED switches must be set in the“0”position.
Your product is equipped with a polarized alter-
nating current line plug (a plug having one blade
wider than the other). There is only one way it can
be plugged into a power supply. This is a safety fea-
ture. If you are unable to insert the plug fully into
the outlet, try again by turning it the other way. If
it would still not go in, it is probably due to an obso-
lete outlet which should be replaced. Do not temper
with the plug or outlet to defeat the purpose of this
safety mechanism.
A safety device
A safety device switches the heater o in the event of
overheating. To restart the heater, call the nearest Service
center.
MAINTENANCE AND SERVICE
Always unplug the heater from the power outlet and allow
the radiator to cool. Wipe radiator with a soft damp cloth;
do not use detergents and abrasives. Should the radiator
not be in use over a certain length of time, roll the cable
around the holder and store it in a dry place (see g. on
front page).
This appliance has been built to last for many years of trou-
ble-free service. In case of malfunction or doubt, do not try
to repair the heater by yourself: this might increase the risk
of re and electric shock. Contact the De'Longhi Customer
Service.
7
TROUBLESHOOTING
PROBLEM CAUSE SOLUTION
The display doesn't work Be sure it is plugged in and that the
electrical outlet is working
Check for any obstruction
The switches are in the OFF position
The thermostat may be set too low
Plug into the power outlet
Remove the obstruction. Let the appliance
cool down then reinsert the plug into the
mains. If the appliance doesn't work please
contact the
De'Longhi Customer Service
Switch on the appliance
Turn the thermostat to a higher setting
until the heater restarts
Please check it is correctly positioned

Other manuals for TRH0715

2

Other DeLonghi Heater manuals

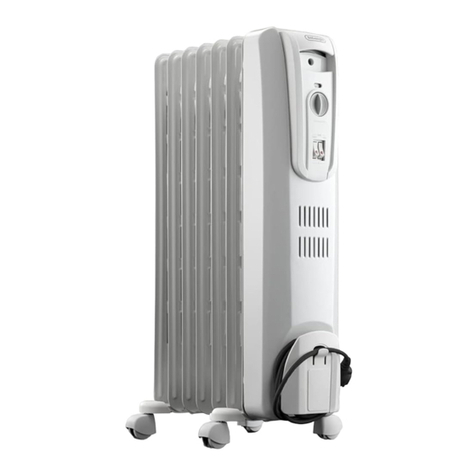
DeLonghi HFX30 Series User manual

DeLonghi

DeLonghi HFX30 Series User manual

DeLonghi HFX66V15C User manual

DeLonghi

DeLonghi HFX66V15C User manual

DeLonghi HFX30 Series User manual

DeLonghi

DeLonghi HFX30 Series User manual

DeLonghi CATALYTIC HEATER User manual

DeLonghi

DeLonghi CATALYTIC HEATER User manual

DeLonghi TRD50615E User manual

DeLonghi

DeLonghi TRD50615E User manual

DeLonghi FAN HEATER User manual

DeLonghi

DeLonghi FAN HEATER User manual

DeLonghi Fivy User manual

DeLonghi

DeLonghi Fivy User manual

DeLonghi HCX3120FS User manual

DeLonghi

DeLonghi HCX3120FS User manual

DeLonghi Horizontal HTC 4030 User manual

DeLonghi

DeLonghi Horizontal HTC 4030 User manual

DeLonghi Electric oil filled radiator Installation instructions manual

DeLonghi

DeLonghi Electric oil filled radiator Installation instructions manual

DeLonghi DRAGON 4 User manual

DeLonghi

DeLonghi DRAGON 4 User manual

DeLonghi TCH8093ER User manual

DeLonghi

DeLonghi TCH8093ER User manual

DeLonghi TRNS Series User manual

DeLonghi

DeLonghi TRNS Series User manual

DeLonghi HMH550-3R User manual

DeLonghi

DeLonghi HMH550-3R User manual

DeLonghi TCH8093ERBCA User manual

DeLonghi

DeLonghi TCH8093ERBCA User manual

DeLonghi TRRS series User manual

DeLonghi

DeLonghi TRRS series User manual

DeLonghi EW 7707CM User manual

DeLonghi

DeLonghi EW 7707CM User manual
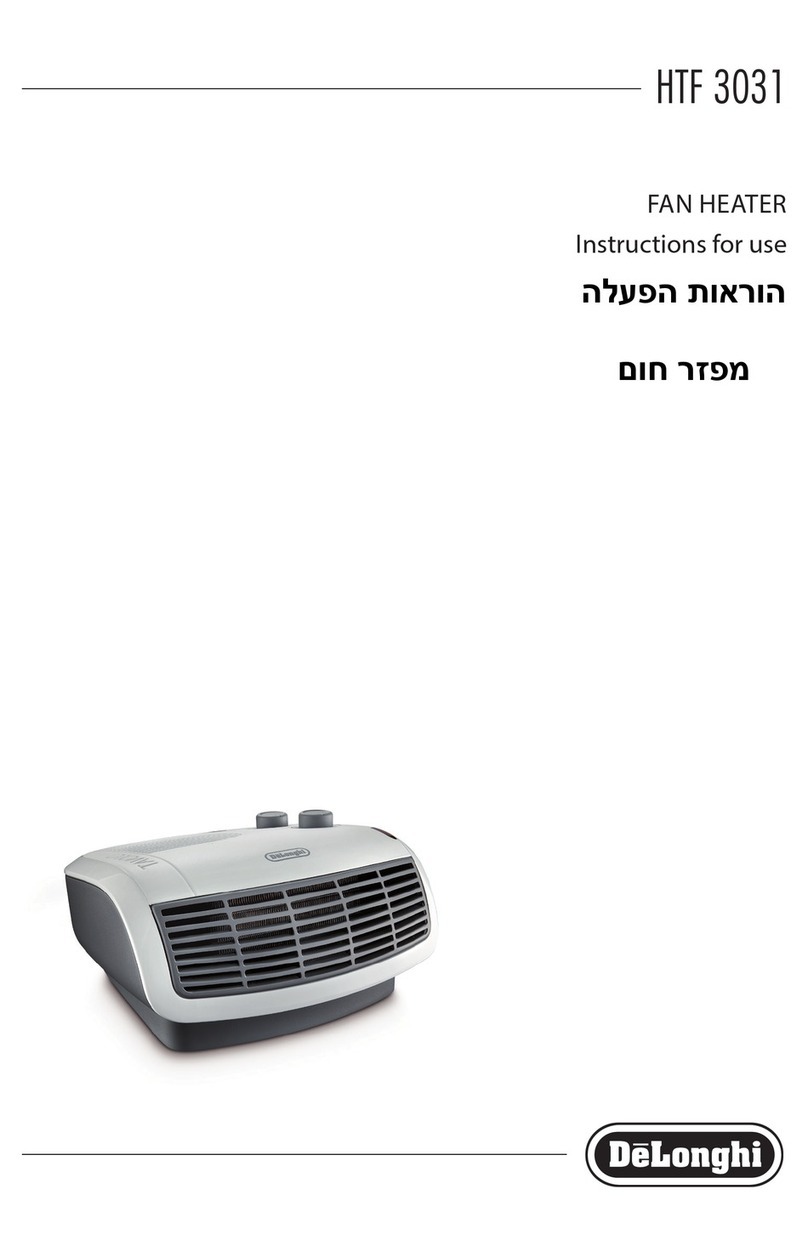
DeLonghi HCM2030 User manual

DeLonghi

DeLonghi HCM2030 User manual

DeLonghi DRAGON 4 TRDS4 0820E User manual

DeLonghi

DeLonghi DRAGON 4 TRDS4 0820E User manual

DeLonghi HVA Series User manual

DeLonghi

DeLonghi HVA Series User manual

DeLonghi TOWER CERAMIC HEATER User manual

DeLonghi

DeLonghi TOWER CERAMIC HEATER User manual

DeLonghi TCH 8993ER.BC User manual

DeLonghi

DeLonghi TCH 8993ER.BC User manual

DeLonghi DCH4120 User manual

DeLonghi

DeLonghi DCH4120 User manual

DeLonghi DCH5915ER User manual

DeLonghi

DeLonghi DCH5915ER User manual

Popular Heater manuals by other brands

Elnur Gabarron ECOMBI SSH Series user guide

Elnur

Elnur Gabarron ECOMBI SSH Series user guide

Broan 192 installation instructions

Broan

Broan 192 installation instructions

Kermi Pateo Use and Installation Instructions

Kermi

Kermi Pateo Use and Installation Instructions

Charnwood CW40B Operating and installation instructions

Charnwood

Charnwood CW40B Operating and installation instructions

Burda TERM VOLCANO RCV025 Assembly and operating instructions

Burda

Burda TERM VOLCANO RCV025 Assembly and operating instructions

Goldair SFH7000 Instruction leaflet

Goldair

Goldair SFH7000 Instruction leaflet

Mylek MY0210R instruction manual

Mylek

Mylek MY0210R instruction manual

atomi smart Smart WiFi quick start guide

atomi smart

atomi smart Smart WiFi quick start guide

Adler Europe AD 7826 user manual

Adler Europe

Adler Europe AD 7826 user manual

Glen Dimplex CONVECTAIR OPERA 7735 Installation and user guide

Glen Dimplex

Glen Dimplex CONVECTAIR OPERA 7735 Installation and user guide

Bimar S600.CH Instruction booklet

Bimar

Bimar S600.CH Instruction booklet

ALASKA FH2012 instruction manual

ALASKA

ALASKA FH2012 instruction manual

Nouveau NHCV250 operating instructions

Nouveau

Nouveau NHCV250 operating instructions

Empire DV-25-4SG Installation instructions and owner's manual

Empire

Empire DV-25-4SG Installation instructions and owner's manual

MIA HL 930N manual

MIA

MIA HL 930N manual

Gabarron DILIGENS DIL4GC Installation instructions and user guide

Gabarron

Gabarron DILIGENS DIL4GC Installation instructions and user guide

BYECOLD IGT1-HH0606-1 instruction manual

BYECOLD

BYECOLD IGT1-HH0606-1 instruction manual

Mark INFRA 30-9 Mounting instruction

Mark

Mark INFRA 30-9 Mounting instruction

manuals.online logo
manuals.online logoBrands
  • About & Mission
  • Contact us
  • Privacy Policy
  • Terms and Conditions

Copyright 2025 Manuals.Online. All Rights Reserved.