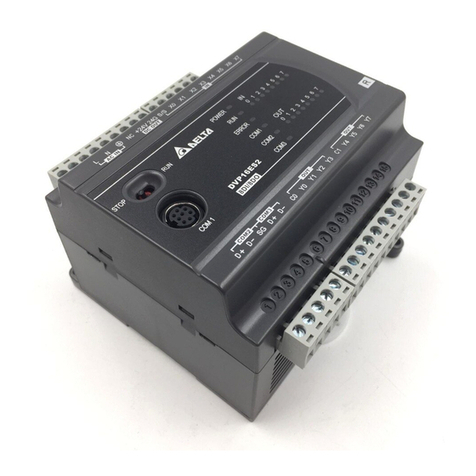
Delta ASRTU-EC16AP1TA User manual

www.deltaww.com
*We reserve the right to change the information in this manual without prior notice.
Industrial Automation Headquarters
Taiwan: Delta Electronics, Inc.
Taoyuan Technology Center
No.18, Xinglong Rd., Taoyuan District,
Taoyuan City 33068, Taiwan
TEL:+886-3-362-6301 / FAX:+886-3-371-6301
Asia
China: Delta Electronics (Shanghai)Co., Ltd.
No.182 Minyu Rd., Pudong Shanghai, P.R.C.
Post code : 201209
TEL: +86-21-6872-3988 / FAX: +86-21-6872-3996
Customer Service: 400-820-9595
Japan: Delta Electronics (Japan), Inc.
Industrial Automation Sales Department
2-1-14 Shibadaimon, Minato-ku
Tokyo, Japan 105-0012
TEL: +81-3-5733-1155 / FAX: +81-3-5733-1255
Korea: Delta Electronics (Korea), Inc.
1511, 219, Gasan Digital 1-Ro., Geumcheon-gu,
Seoul, 08501 South Korea
TEL: +82-2-515-5305 / FAX: +82-2-515-5302
Singapore: Delta Energy Systems (Singapore)Pte Ltd.
4 Kaki Bukit Avenue 1, #05-04, Singapore 417939
TEL: +65-6747-5155 / FAX: +65-6744-9228
India: Delta Electronics (India)Pvt. Ltd.
Plot No.43, Sector 35, HSIIDC Gurgaon,
PIN 122001, Haryana, India
TEL: +91-124-4874900 / FAX: +91-124-4874945
Thailand: Delta Electronics (Thailand)PCL.
909 Soi 9, Moo 4, Bangpoo Industrial Estate (E.P.Z),
Pattana 1 Rd., T.Phraksa, A.Muang,
Samutprakarn 10280, Thailand
TEL: +66-2709-2800 / FAX: +66-2709-2827
Australia: Delta Electronics (Australia)Pty Ltd.
Unit 20-21/45 Normanby Rd., Notting Hill Vic 3168, Australia
TEL: +61-3-9543-3720
Americas
USA: Delta Electronics (Americas)Ltd.
5101 Davis Drive, Research Triangle Park, NC 27709, U.S.A.
TEL: +1-919-767-3813 / FAX: +1-919-767-3969
Brazil: Delta Electronics Brazil Ltd.
Estrada Velha Rio-São Paulo, 5300 Eugênio de
Melo - São José dos Campos CEP: 12247-004 - SP - Brazil
TEL: +55-12-3932-2300 / FAX: +55-12-3932-237
Mexico: Delta Electronics International Mexico S.A. de C.V.
Gustavo Baz No. 309 Edicio E PB 103
Colonia La Loma, CP 54060
Tlalnepantla, Estado de México
TEL: +52-55-3603-9200
EMEA
EMEA Headquarters: Delta Electronics (Netherlands)B.V.
Sales: Sales.IA.EMEA@deltaww.com
Marketing: Marketing.IA.EMEA@deltaww.com
Technical Support: iatechnicalsupport@deltaww.com
Customer Support: Customer-Support@deltaww.com
Service: Service.IA.emea@deltaww.com
TEL: +31(0)40 800 3900
BENELUX: Delta Electronics (Netherlands)B.V.
Automotive Campus 260,5708 JZ Helmond, The Netherlands
Mail: Sales.IA.Benelux@deltaww.com
TEL: +31(0)40 800 3900
DACH: Delta Electronics (Netherlands)B.V.
Coesterweg 45,D-59494 Soest,Germany
Mail: Sales.IA.DACH@deltaww.com
TEL: +49(0)2921 987 0
France: Delta Electronics (France)S.A.
ZI du bois Challand 2,15 rue des Pyrénées,
Lisses, 91090 Evry Cedex, France
Mail: Sales.IA.[email protected]
TEL: +33(0)1 69 77 82 60
Iberia: Delta Electronics Solutions (Spain)S.L.U
Ctra. De Villaverde a Vallecas, 265 1º Dcha Ed.
Hormigueras – P.I. de Vallecas 28031 Madrid
TEL: +34(0)91 223 74 20
Carrer Llacuna 166, 08018 Barcelona, Spain
Mail: Sales.IA.Iberia@deltaww.com
Italy: Delta Electronics (Italy)S.r.l.
Via Meda 2–22060 Novedrate(CO)
Piazza Grazioli 18 00186 Roma Italy
Mail: Sales.IA.It[email protected]
TEL: +39 039 8900365
Russia: Delta Energy System LLC
Vereyskaya Plaza II, oce 112 Vereyskaya str.
17 121357 Moscow Russia
Mail: Sales.IA.RU@deltaww.com
TEL: +7 495 644 3240
Turkey: Delta Greentech Elektronik San. Ltd. Sti. (Turkey)
Şerifali Mah. Hendem Cad. Kule Sok. No:16-A
34775 Ümraniye – İstanbul
Mail: Sales.IA.Turkey@deltaww.com
TEL: + 90 216 499 9910
MEA: Eltek Dubai (Eltek MEA DMCC)
OFFICE 2504, 25th Floor, Saba Tower 1,
Jumeirah Lakes Towers, Dubai, UAE
Mail: Sales.IA.MEA@deltaww.com
TEL: +971(0)4 2690148
ASRTU-EC16AP1TA
EtherCAT Remote
Communication Module
Operation Manual
AS-0242920-02
2022-11-07

i
ASRTU-EC16AP1TA Operation Manual
Table of Contentsi
Chapter 1 Preface.............................................................................................1-1
1.1 Explanation of Symbols in This Manual.............................................................. 1-2
1.2 Revision History ............................................................................................. 1-2
Chapter 2 Overview..........................................................................................2-1
2.1 Characteristics ............................................................................................... 2-2
2.2 Specifications................................................................................................. 2-2
2.3 Extension Modules Connectable........................................................................ 2-5
Chapter 3 Profile and Parts ..............................................................................3-1
3.1 Profile and Dimensions.................................................................................... 3-2
3.2 Parts............................................................................................................. 3-2
3.3 Definition of EtherCAT Port Pins........................................................................ 3-4
3.4 Address Switches............................................................................................ 3-4
3.5 Extension Module Port..................................................................................... 3-4
Chapter 4 Installing and Wiring .......................................................................4-1
4.1 Installing ASRTU-EC16AP1TA and AS Extension Modules to DIN Rail ..................... 4-2
4.2 Connecting EtherCAT Ports .............................................................................. 4-3
4.3 Wiring........................................................................................................... 4-3
4.3.1 Power Input .............................................................................................. 4-3
4.3.2 Ground..................................................................................................... 4-4
4.4 Input and Output Wiring.................................................................................. 4-5
4.4.1 External Input Wiring ................................................................................. 4-5
4.4.2 External Output Wiring............................................................................... 4-6
Chapter 5 Configuring in DIADesigner-AX........................................................5-1
5.1 Software Introduction ..................................................................................... 5-2
5.2 Adding ASRTU-EC16AP1TA and Right-Side Extension Modules .............................. 5-2
5.2.1 Manually Adding ASRTU-EC16AP1TA and Right-Side Extension Modules ............ 5-2
5.2.2 Using Auto Scan Function to Add ASRTU-EC16AP1TA and Right-Side Modules.... 5-6
5.3 Operation Mode Setup..................................................................................... 5-8
5.4 PDO Configuration .......................................................................................... 5-8
5.5 Startup Parameters....................................................................................... 5-12
5.6 EtherCAT I/O Mapping................................................................................... 5-13
Chapter 6 Introduction of Parameters..............................................................6-1
6.1 Parameter List................................................................................................ 6-3
6.2 General Objects.............................................................................................. 6-3
6.2.1 Device Type (1000h) .................................................................................. 6-3
6.2.2 Error Register (1001h) ............................................................................... 6-3
6.2.3 Device Name (1008h) ................................................................................ 6-4
6.2.4 Hardware Version (1009h) .......................................................................... 6-4
6.2.5 Software Version (100Ah)........................................................................... 6-4
6.2.6 Identity (1018h)........................................................................................ 6-5
6.3 PDO Mapping Objects...................................................................................... 6-6
6.3.1 Receive PDO Mapping................................................................................. 6-6
6.3.2 Transmit PDO Mapping ............................................................................... 6-6
6.3.3 Parameters for Right-Side Extension Modules ................................................ 6-6

ii
6.4 Local Parameters Objects ................................................................................ 6-7
6.4.1 RTU Parameter (3000h).............................................................................. 6-7
6.4.1.1 Switch ID (3000:01h)...................................................................................... 6-7
6.4.1.2 Control Word (3000:02h)................................................................................. 6-7
6.4.1.3 Digital Output (3000:03h)................................................................................ 6-9
6.4.1.4 Digital Input (3000:04h).................................................................................. 6-9
6.4.1.5 Digital Input Filter Time (3000:05h ~ 3000:0Ch)................................................ 6-9
6.4.1.6 Right IO Refresh Time (3000: 0Dh)................................................................... 6-9
6.4.1.7 COMlost_RTU_Output (3000:0Eh) ....................................................................6-10
6.4.2 Counter Channel 1 Operation (3001h)........................................................ 6-10
6.4.2.1 Counter Channel 1 Command (3001: 01h)........................................................6-10
6.4.2.2 Counter channel 1 InputMode (3001: 02h)........................................................6-11
6.4.2.3 Counter Channel 1 CountDirection (3001: 04h)..................................................6-13
6.4.2.4 Counter Channel 1 AB-Phase FrequencyMode (3001: 05h) ..................................6-13
6.4.2.5 Counter Channel 1 Present CounterValue (3001: 06h)........................................6-13
6.4.2.6 Counter Channel 1 TriggerMode (3001: 07h) .....................................................6-13
6.4.2.7 Counter Channel 1 ErrorCode (3001: 08h) ........................................................6-14
6.4.2.8 Counter Channel 1 Status (3001: 09h) .............................................................6-14
6.4.3 Counter Channel 2 Operation (3003h)........................................................ 6-14
6.4.4 Pulse Output Channel 1 Operation (3005h) ................................................. 6-15
6.4.4.1 Pulse Output Channel 1 Command (3005: 01h) .................................................6-15
6.4.4.2 Pulse Output Channel 1 MotionMode (3005: 02h)...............................................6-16
6.4.4.3 Pulse Output Channel 1 Status (3005:04h) .......................................................6-18
6.4.4.4 Pulse Output Channel 1 CurrentPulses (3005: 05h)............................................6-18
6.4.4.5 Pulse Output Channel 1 TargetPulse (3005: 06h) ...............................................6-19
6.4.4.6 Pulse Output Channel 1 TargetFrequency (3005: 07h) ........................................6-19
6.4.4.7 Pulse Output Channel 1 Acceleration Time (3005: 08h).......................................6-19
6.4.4.8 Pulse Output Channel 1 Deceleration Time (3005: 09h) ......................................6-20
6.4.4.9 Pulse Output Channel 1 OutputMode (3005: 0Ah) ..............................................6-20
6.4.4.10 Pulse Output Channel 1 OutputDirection (3005: 0Bh) .....................................6-21
6.4.4.11 Pulse Output Channel 1 Actual MotionMode (3005: 0Ch) .................................6-22
6.4.4.12 Pulse Otput Channel 1 ActualFrequency (3005: 0Eh) ......................................6-22
6.4.5 Pulse Output Channel 2 Operation (3006h) ................................................. 6-22
6.4.6 COMlost_DOmodule_Outputs (2100h~2107h)............................................. 6-23
6.4.7 COMlost_AOmodule_Outputs (2120h~2127h) ............................................. 6-24
6.5 Module Config Objects .................................................................................. 6-28
6.5.1 Configured Module ID List (F030h)............................................................. 6-28
6.5.2 Detected Module ID List (F050h) ............................................................... 6-28
Chapter 7 Application Examples.......................................................................7-1
7.1 Using DELTA AX3 Series CPU with ASRTU-EC16AP1TA ......................................... 7-4
7.2 Using ASRTU-EC16AP1TA’s High-Speed Counting and Pulse Output..................... 7-10
Chapter 8 Error Diagnosis and Trouble-shooting..............................................8-1
8.1 LED Indicator Diagnosis .................................................................................. 8-2
8.2 Status Indication Diagnosis.............................................................................. 8-3
Appendix A Accessories for EtherCAT Communication ........................................A-1
A.1 Accessories for EtherCAT Communication .......................................................... A-2
Appendix B Online Firmware Upgrade ................................................................B-1
B.1 Online Firmware Upgrade ................................................................................ B-2

ASRTU-EC16AP1TA EtherCAT Remote Communication Module Operation Manual
1-2
_1
This manual provides an introduction to product functions, specifications, installation, basic
operations and settings.
This product is an OPEN TYPE device and therefore should be installed in an enclosure free of
airborne dust, humidity, electric shock and vibration. The enclosure should prevent
non-maintenance staff from operating the device (e.g. key or specific tools are required for
operating the enclosure) in case that danger and damage on the device may occur.
Be sure to read the manual carefully and follow the instructions so as to avoid injuries to personnel
and damage to products.
1.1 Explanation of Symbols in This Manual
Precautions before operation
Before operation, please read relevant safety instructions carefully so as to prevent an injury to personnel and
damage to products.
!Danger
Indicates the highly potential hazards. Severe personal injury or even death
will result if you do not follow the instructions.
!
Warning
Indicates the potential hazards. Minor personal injury or even death may result if you
do not follow the instructions.
!Caution
Indicates much attention should be paid. A bad accident can occur if you do not
follow the instructions.
1.2 Revision History
Version Revision Release Date
1st The first version was published. November 1, 2022
2nd The external output wiring figure was updated by changing
the max. output current from 0.1A to 0.5A in Section 4.4.2. November 7, 2022

2-1
2
Chapter 2 Overview
Table of Contents
2.1 Characteristics ............................................................................................... 2-2
2.2 Specifications................................................................................................. 2-2
2.3 Extension Modules Connectable........................................................................ 2-5

ASRTU-EC16AP1TA EtherCAT Remote Communication Module Operation Manual
2-2
_2
1. Thank you for choosing Delta ASRTU-EC16AP1TA. To ensure correct installation and operation of
the unit, please read this manual carefully before use.
2. This manual only provides introductory information on ASRTU-EC16AP1TA. For more detailed
information on EtherCAT protocol, please refer to relevant references or literatures.
3. ASRTU-EC16AP1TA is defined as an EtherCAT remote slave and AS series DI/DO modules and
AI/AO modules can be connected on its right side. (Note: The communication module and
positioning module are not allowed to connect on the right side of ASRTU-EC16AP1TA.)
4. Refer to AS Series Module Manual for more details on how to use AS series extension modules.
2.1 Characteristics
Compliant with the EtherCAT protocol, supports PDO, SDO and other services in the CoE protocol
as well as Hot Connection function.
Supports Distributed Clock SYNC, SyncManagers and Free Run.
8 digital input points and 8 digital output points built in ASRTU-EC16AP1TA
2 channels for high-speed counting with counting modes of single pulse, “pulse+direction” and
“phase A+phase B” and maximum input frequency of 200kHz
2 channels for high-speed pulse output with pulse output modes of “pulse+direction”, “Phase A +
phase B” and CW/CCW with a maximum of 200 kHz output frequency.
(Note: the maximum output frequency is 100 kHz for the “phase A+phase B” output mode)
Supports AS series extension modules including digital modules, analog modules, load cell
modules and temperature measurement modules.
Maximum 32 modules in total including digital modules and special modules can be connected to
the right side of ASRTU-EC16AP1TA, among which the maximum number of special modules like
analog modules, temperature measurement modules and load cell modules is 16.
Maximum 1024 points in total for digital input and output, which include the input and output points
built in ASRTU-EC16AP1TA
Ability to realize the high-speed remote I/O control with the minimum cycle time of 500us.
The node address of ASRTU-EC16AP1TA can be set by the rotary address switches.
2.2 Specifications
Electrical specification
Item Specification
Power voltage 24 VDC (-15% ~ 20%)
Consumption power 1.8 W
Isolation voltage 500 V
Electrical specification for built-in digital input points (24VDC)
Item Specification
Number of digital input points 8 points (X0.0 ~ X0.7)
Connector type Removable terminal block
Input type Digital input

Chapter 2 Overview
2-3
2_
Item Specification
Input form Direct current (sinking or sourcing)
Input voltage/ current 24 VDC, 5 mA
Action
level OFF→ON >15 VDC
ON→OFF <5 VDC
Response
time
OFF→ON
X0.0~X0.3: < 2.5 us
X0.4~X0.7: < 20 us
ON→OFF
X0.0~X0.3: < 2.5 us
X0.4~X0.7: < 200 us
Maximum input frequency
X0.0~X0.3: 200 kHz
X0.4~X0.7: 500 Hz
Input signal
Voltage input
Sinking
: The inputs are NPN transistors whose collectors are
open collectors.
Sourcing: The inputs are PNP transistors whose collectors
are open collectors.
Input Isolation 500 VAC
Input display
When the optocoupler is driven, the input LED indicator is
ON.
Electrical specification for built-in digital output points
Item Specification
Number of digital output points 8 points (Y0.0 ~ Y0.7)
Connector type Removable terminal block
Output form Transistor-T (sinking) (NPN)
Voltage 5~30 VDC
Leakage current < 10 uA
Maximum load
Resistance 0.5A/output, 2A/COM
Inductance inapplicable
Bulb inapplicable
Minimum load 1mA/5V
Maximum output
frequency
Resistance 200 kHz (Y0.0 ~ Y0.3) /100 Hz (Y0.4 ~ Y0.7)
Inductance inapplicable
Bulb inapplicable
Maximum
response time OFF→ON 2.5 us (Y0.0 ~ Y0.3) /0.5 ms (Y0.4 ~ Y0.7)
ON→OFF
EtherCAT communication specification
Item Specification
Communication protocol EtherCAT Protocol
Supported service CoE (PDO, SDO)
Physical layer 100 BASE-TX
Baud rate 100 Mbps

ASRTU-EC16AP1TA EtherCAT Remote Communication Module Operation Manual
2-4
_2
Item Specification
Transmission medium Cat 5 or above shielded cable
Transmission distance 100 m
Topology structure Linear topology
Environmental Specification
Item Specification
Noise Immunity
ESD(IEC 61131-2, IEC 61000-4-2):
8KV Air Discharge, 6KV
Contact Discharge
EFT(IEC 61131-2, IEC 61000-4-4)
: Power Line: 2KV, Digital
I/O: 1KV
Communication I/O: 2KV
Damped-Oscillatory Wave: Power Line: 1KV, Digital I/O: 1KV
RS(IEC 61131-2, IEC 61000-4-3): 80M Hz ~ 1000M Hz,
10V/m; 1400M Hz ~ 6000M Hz, 3 V/m
Operating temperature -20ºC ~ 60ºC
Storage temperature -40ºC ~ 80ºC
Operating humidity
5 ~ 95%
No condensation
Storage humidity
5 ~ 95%
No condensation
Pollution degree 2
Ingress protection
(IP ratings)
IP20
Vibration/shock resistance
Standard: IEC 61131-2, IEC 68-2-6 (TEST Fc)/IEC 61131-2 &
IEC 68-2-27 (TEST Ea)
Safety Conforms to IEC 61131-2, UL 61010-1, UL 61010-2-201
Barometric pressure-altitude Operating: 1013 ~ 795 hPa (0 ~ 2000 m)
Storage: 1013 ~ 660 hPa (0 ~ 3500 m)
Flammability
rating of plastic case UL94V-0
Weight 84 g

Chapter 2 Overview
2-5
2_
2.3 Extension Modules Connectable
Digital input and output modules connectable to ASRTU-EC16AP1TA and their specifications
DI/DO module
(Model name)
Default I/O mapping data
(E
therCAT master →ASRTU-
EC16AP1TA)
(ASRTU
-EC16AP1TA →EtherCAT master
)
AS08AM10N
N/A
8 bits
AS08AN01P
8 bits
N/A
AS08AN01R
8 bits
N/A
AS08AN01T
8 bits
N/A
AS16AM10N
N/A
16 bits
AS16AN01P
16 bits
N/A
AS16AN01R
16 bits
N/A
AS16AN01T
16 bits
N/A
AS16AP11P
8 bits
8 bits
AS16AP11R
8 bits
8 bits
AS16AP11T
8 bits
8 bits
AS32AM10N
N/A
32 bits
AS32AN02T
32 bits
N/A
AS64AM10N
N/A
64 bits
AS64AN02T
64 bits
N/A
Special modules connectable to ASRTU-EC16AP1TA and their specifications
Special module
(Model name)
Default I/O mapping data
(E
therCAT master → ASRTU-
EC16AP1TA)
(ASRTU-EC16AP1TA→EtherCAT master)
AS04AD-A
-
10 words
AS08AD-B
-
18 words
AS08AD-C
-
18 words
AS04DA-A
8 words
2 words
AS06XA-A
4 words
10 words
AS04RTD-A
-
10 words

ASRTU-EC16AP1TA EtherCAT Remote Communication Module Operation Manual
2-6
_2
Special module
(Model name)
Default I/O mapping data
(E
therCAT master → ASRTU-
EC16AP1TA)
(ASRTU-EC16AP1TA→EtherCAT master)
AS06RTD-A
-
14 words
AS04TC-A
-
10 words
AS08TC-A
-
18 words
AS02LC-A
1 word
7 words

3-1
3
Chapter 3 Profile and Parts
Table of Contents
3.1 Profile and Dimensions.................................................................................... 3-2
3.2 Parts............................................................................................................. 3-2
3.3 Definition of EtherCAT Port Pins........................................................................ 3-4
3.4 Address Switches............................................................................................ 3-4
3.5 Extension Module Port..................................................................................... 3-4

ASRTU-EC16AP1TA EtherCAT Remote Communication Module Operation Manual
3-2
_3
3.1 Profile and Dimensions
Unit: mm
3.2 Parts
Number Name Description
1
Model Name
Model name of the module

Chapter 3 Profile and Parts
3-3
3_
Number Name Description
2
POWER LED indicator
(Blue)
Indicates the status of the power supply
ON: The power is on.
OFF: No power
Run LED indicator
(Green)
ON: The module is in EtherCAT Operational status.
OFF: The module is in EtherCAT Initial status.
Blinking:
1. The module is in EtherCAT Pre-Op status (blinks
every 0.5 second).
2. The module is in EtherCAT Safe-Op status. (blinks
every 1 second).
Error LED indicator
(Red)
ON: The power voltage is too low (<17V).
Blinking: An error occurs in the module.
OFF: The module is normal.
PORT1 LED indicator
(Green)
ON: Normally connected at PORT1 and no data
exchange
Blinking: Normally connected at PORT1 and data
exchange happening
OFF: Not connected at PORT1
PORT2 LED indicator
(Green)
ON: Normally connected at PORT2 and no data
exchange
Blinking: Normally connected at PORT2 and data
exchange happening
OFF: Not connected at PORT2
3
Address switch
Sets the node address of the module
4
EtherCAT interface
Two ports, PORT1 for input and PORT2 for output
5 Input/output LED indicator
(Red)
If there is an input signal, the input LED indicator is ON.
If there is an output signal, the output LED indicator is
ON.
6
Extension module port
Connects extension modules
7 Removable Terminal Block
Inputs are connected to transducers and switches.
X0.0/X0.1 can be used as general input points as well as
channel 1 for high-
speed counting. X0.2/X0.3 can be
used as general i
nput points as well as channel 2 for
high-speed counting.
Outputs are connected to loads to be driven.
Y0.0/Y0.1 can be used as general output points as well
as channel 1 for high-speed pulse output. Y0.2/Y0.3 can
be used as general output points as well as channel 2 for
high-speed pulse output.
8
Power Input port
24V DC power input port
9
Label
Nameplate

ASRTU-EC16AP1TA EtherCAT Remote Communication Module Operation Manual
3-4
_3
3.3 Definition of EtherCAT Port Pins
There are two EtherCAT ports for the EtherCAT communication in ASRTU-EC16AP1TA.
See the following table for the definitions of EtherCAT port pins.
PIN Signal Description
12345678
EtherCAT
1 Tx+ Positive pole for transmitting data
2 Tx- Negative pole for transmitting data
3 Rx+ Positive pole for receiving data
4 Reserved Reserved
5 Reserved Reserved
6 Rx- Negative pole for receiving data
7 Reserved Reserved
8
Reserved
Reserved
3.4 Address Switches
The switches are used for setting up the node address of ASRTU-EC16AP1TAin the EtherCAT network.
Switch setting Description
0 ~ 99 EtherCAT node address
Example:
If you need to set the node address of ASRTU-EC16AP1TA to 26, simply switch the corresponding
switch of x101to 2 and the corresponding switch of x100to 6.
Notes:
Please set up the node address when the power is switched off. After the setup is completed,
re-power ASRTU-EC16AP1TA.
When ASRTU-EC16AP1TA is operating, changing the setting of the node address is invalid.
Use the slotted screwdriver to rotate the switch carefully in case the switch is scratched.
To use the station alias function, please set the configured station alias to the same value as the
address switch if the node address switch is set to a non-zero value. If the address switch is set to
0, set up the value for the configured station alias in the software.
3.5 Extension Module Port
The extension module port is used for connecting Delta AS series DI/DO extension modules and special
modules.

4-1
4
Chapter 4 Installing and Wiring
Table of Contents
4.1 Installing ASRTU-EC16AP1TA and AS Extension Modules to DIN Rail ..................... 4-2
4.2 Connecting EtherCAT Ports .............................................................................. 4-3
4.3 Wiring........................................................................................................... 4-3
4.3.1 Power Input .............................................................................................. 4-3
4.3.2 Ground..................................................................................................... 4-4
4.4 Input and Output Wiring.................................................................................. 4-5
4.4.1 External Input Wiring ................................................................................. 4-5
4.4.2 External Output Wiring............................................................................... 4-6

ASRTU-EC16AP1TA EtherCAT Remote Communication Module Operation Manual
4-2
_4
4.1 Installing ASRTU-EC16AP1TA and AS Extension Modules
to DIN Rail
Please push the clips of ASRTU-EC16AP1TA in the directions indicated by arrow ①until you hear a
click. That means the DIN clips are interlocked each other. Then insert the module hooks at the bottom
into the DIN rail mounting slot until you hear a click. That means ASRTU-EC16AP1TA is well connected
to the DIN rail.
To install an extension module, push the clips of the AS extension module in the directions indicated by
arrow ①. Then aim the left-side slot of the extension module at the right-side slot of
ASRTU-EC16AP1TA and push the extension module in the direction as illustrated by arrow ②until you
hear a click, which means the module is secured to the DIN rail and well connected to
ASRTU-EC16AP1TA. In the same way, install more IO modules to the right side of ASRTU-EC16AP1TA
and secure them to DIN rail one by one.
IN
EtherCAT
IN
OUT
0
1
2
3
4
5
6
7
0
1
2
3
4
5
6
7
ASRTU-EC
0
1
2
3
4
5
6
7
0
1
2
3
4
5
6
7
C0
C0
IN OUT
PO WE R
RUN
ERROR
NODE ADDRESS
x10
1
0
x10
0
9
8
7
6
5
4
3
2
1
0
9
8
7
6
5
4
3
2
1
O UT
Link/Act 0
Link/Act 1
16AP
DIN Rail Clip
DIN Rail Clip
1
1

Chapter 4 Installing and Wiring
4-3
4_
4.2 Connecting EtherCAT Ports
There is a strict network topology requirement for the EtherCAT network. The network must follow the
rule that the input port of the next ASRTU-EC16AP1TA must be connected to the output port of the
current ASRTU-EC16AP1TA.
Using Delta cables for EtherCAT communication is recommended. For specifications of Delta cables,
refer to Appendix A.
4.3 Wiring
4.3.1Power Input
The power input of ASRTU-EC16AP1TA is 24V DC. Please notice the following points during use.
Connect the supply power to the two terminals, 24V and 0V and the grounding terminal to the earth.
Be cautious that the ASRTU-EC16AP1TA device may be damaged if the positive and negative
polarities of the supply power are connected reversely.
Please be sure to use certified power supply with SELV output or certified power supply providing
double insulation evaluated by UL60950, or UL61010-1 and UL61010-2-201 standards
The diameter of the power wire must be between 22 and 18 AWG and the rated temperature should
be greater than 70°C. The power terminal block plug wiring torque is 4.5 in-lbs.
The cables of the AC power 110V, 220V and DC power 24V must be twisted and connected to the
module as short as possible in length.
Do NOT combine the AC 110V, 220V, and DC 24V cables with the main circuit and I/O signal cables
together and please keep them away from each other. If the space permits, it’s recommended to
separate these lines by more than 100mm.

ASRTU-EC16AP1TA EtherCAT Remote Communication Module Operation Manual
4-4
_4
ASRTU-EC16AP1TA Safety Circuit Wiring
AC power supply: 100~240VAC; 50/60 Hz
Power supply circuit protection fuse
System circuit isolation device: The electromagnetic contactor, relay and other switch can be used as
the isolation device to prevent the system from becoming unstable when the power supply is
discontinuous.
Power indicator
Emergency stop button: The button cuts off the system power supply when an accidental situation
takes place.
Delta power module DVP-PS02 or AS-PS02A (24VDC)
ASRTU-EC16AP1TA device
Ground
Safety circuit
4.3.2Ground
The diameter of the ground wire should not be less than the diameters of the wires connected to the
terminals L and N.
If using multiple pieces of equipment, do use a single-point ground.
ASRTU-EC16AP1TA Another piece
of equipment
The single-point ground is better.

Chapter 4 Installing and Wiring
4-5
4_
If you cannot use a single-point ground, use a common-point ground.
ASRTU-EC16AP1TA Another piece
of equipment
The common-point ground is permitted.
Do not connect equipment ground wires together as shown below.
ASRTU-EC16AP1TA Another piece
of equipment
The equipment can not be grounded in this way.
4.4 Input and Output Wiring
4.4.1External Input Wiring
The input points X0.0~X0.7 of ASRTU-EC16AP1TA are direct current inputs with two types of wiring: Sinking
and Sourcing. See the two types of wiring below.
Sinking
Under Sinking mode, the current flows into the common terminal S/S and the simplified model is shown
below.
S/S
IN0
ASRTU EC16AP1TA-
Sinking
24VDC
5mA Internal Circuit
See the relevant wiring circuit in the following figure.
Table of contents
Other Delta Industrial Equipment manuals

Delta
Delta HEX110QA User manual

Delta
Delta HEX050QA User manual

Delta
Delta DTM Series User manual

Delta
Delta PMC-24V300W1B Series User manual

Delta
Delta HEX260PA-A User manual

Delta
Delta J1900 Series User manual

Delta
Delta HEX100PC Series User manual

Delta
Delta DVP02LC-SL User manual

Delta
Delta HEX200PB User manual

Delta
Delta DVP-ES3 Series User manual

Delta
Delta HEX150PB Series User manual

Delta
Delta HEX180PB User manual

Delta
Delta TP02G-AS1 User manual

Delta
Delta LE-412523 User manual

Delta
Delta Dometic CDF 11 User manual

Delta
Delta DVP-ES2 User manual

Delta
Delta 46-461 User manual

Delta
Delta HEX050PA User manual

Delta
Delta HEX080QA Series User manual

Delta
Delta 32-325 User manual