Delta DJ-30 User manual

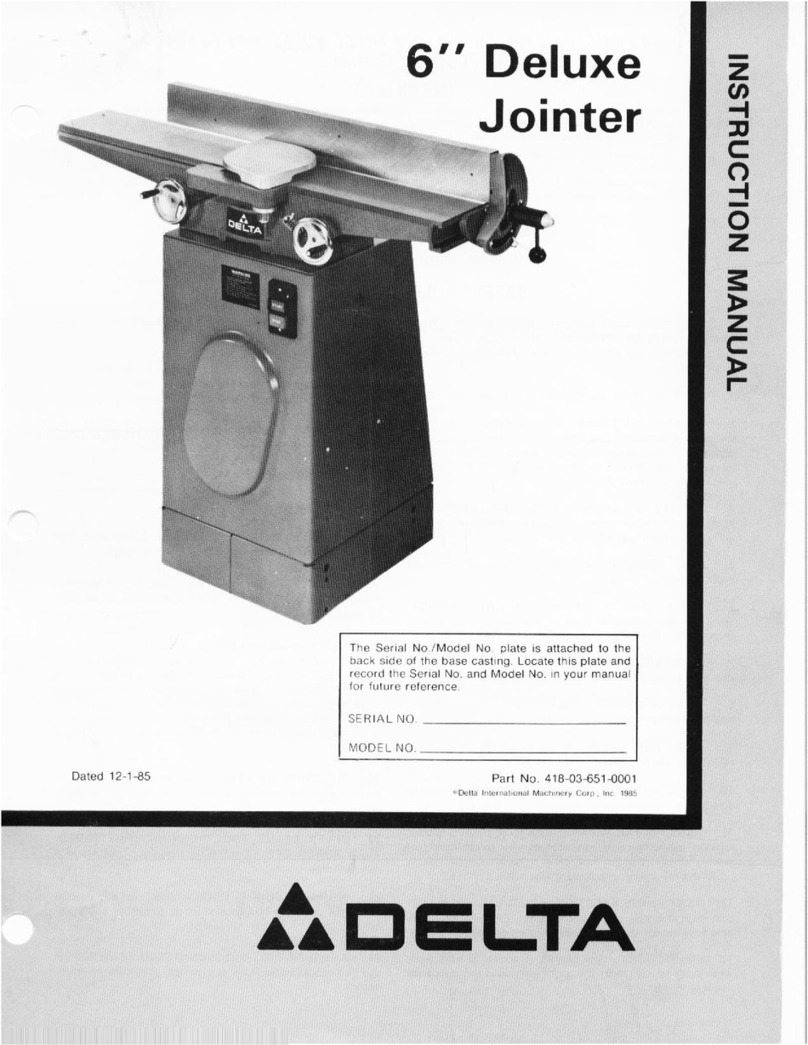
INSTRUCTION MANUAL
REVISED 9-7-98 PA RT NO. 1349482
'Delta International Machinery Corp. 1998
DJ-30 12 Jointer
(Model 37-360, Three Phase)
(Model 37-361, Single Phase)

2
TABLE OF CONTENTS
SAFETY RULES................................................................ 3
ADDITIONAL SAFETY RULES FOR JOINTERS ...................................... 4
DEFINITIONS O F JOINTING A N D PLANING OPERATIONS............................. 5
UNPACKING
Removing Shipping Crate .................................................... 6
Removing Machine From Shipping Skid ........................................ 7
SELECTING FLOOR SPACE...................................................... 8
ASSEMBLY INSTRUCTIONS
Assembling Dust Hood ...................................................... 8
Moving Start-S top Switch To The Up Position ................................... 8
Assembling Jointer Fence ................................................... 8
ELECTRICAL CONNECTIONS .................................................... 9
Single Phase Installation . .................................................... 9
Three Phase Installation . ................................................... 10
OPERATING CONTROLS AND ADJUSTMENTS
Start-S top Switch .......................................................... 11
Fence Operation ........................................................... 11
Adjusting Fence Positive Stops .............................................. 12
Infeed Table Adjustments ................................................... 13
Outfeed Table Adjustments.................................................. 14
Adjusting Belt Tension ..................................................... 14
Adjusting Spring Tension Of Cutterhead Guard................................. 15
OPERATION .................................................................. 15
Placement Of Hands During Feeding ......................................... 15
Jointing A n Edge .......................................................... 16
Planing Or Surfacing ....................................................... 16
Beveling ................................................................. 16
Taper Cuts................................................................ 17
Cutting A Rabbet .......................................................... 17
Jointing Or Planing W arped Wood............................................ 17
Direction Of Grain ......................................................... 17
MAINTENANCE
Removing, Replacing And Setting Knives ..................................... 18
W ARRANTY .................................................................. 20

3
SAFETY RULES
W oodworking can be dangerous if safe and proper operating procedures are not followed. As with all machinery, there are cert ain
hazards involved with the operation of the product. Using the machine with respect and caution will considerably lessen the possi -
bility of personal injury . However, if normal safety precautions are overlooked or ignored, personal injury to the operator may result.
Safety equipment such as guards, push sticks, hold-downs, featherboards, goggles, dust masks and hearing protection can reduce
your potential for injury . But even the best guard won t make up for poor judgment, carelessness or inattention. Always use common
sense and exercise caution in the workshop. If a procedure feels dangerous, don t try it. Figure out an alternative procedure that feels
safer . REMEMBER: Your personal safety is your responsibility.
This machine was designed for cert ain applications only. Delt a Machinery strongly recommends that this machine not be modified
and/or used for any application other than that for which it was designed. If you have any questions relative to a p articular applica -
tion, DO N O T use the machine until you have first cont acted Delt a to determine if it can or should be performed on the product.
DELTA INTERNATIONAL MACHINERY CORP.
MANAGER OF TECHNICAL SERVICES
246 ALPHA DRIVE
PITTSBURGH, PENNSYLVANIA 15238
(IN CANADA: 644 IMPERIAL ROAD, GUELPH, ONTARIO N1H 6M7)
W ARNING: FAILURE TO FOLLOW THESE RULES
M AY RESULT IN SERIOUS PERSONAL INJURY
1. FOR YOUR O W N SAFETY, READ INSTRUCTION
MANUAL BEFORE OPERATING T HE TO O L. Learn the
tool s application and limit ations as well as the specific
hazards peculiar to it.
2. KEEP GUARDS IN PLACE and in working order.
3. ALWAYSWEAREYEPROTECTION.
4. GROUNDALLTOOLS. If tool is equipped with three-
prong plug, it should be plugged into a three-hole electrical
recept acle. If an adapter is used to accommodate a two-
prong recept acle, the adapter lug must be att ached to a
known ground. Never remove the third prong.
5. REMOVE ADJUSTING KEYS AND WRENCHES. Form
habit of checking to see that keys and adjusting wrenches are
removed from tool before turning it on.
6. KEEP WORKAREA CLEAN. Cluttered areas and
benches invite accident s.
7. DON T USE IN DANGEROUS ENVIRONMENT. Don t
use power tools in damp or wet locations, or expose them
to rain. Keep work area well-lighted.
8. KEEP CHILDREN A N D VISITO R S A W A Y . All children
and visitors should be kept a safe dist ance from work area.
9. MAKEWORKSHOP CHILDPROOF with p adlocks,
master switches, or by removing st arter keys.
10. DON T FORCE TO O L. It will do the job better and be
safer at the rate for which it was designed.
11. USE RIGHT TO O L. Don tforce tool or att achment to do
a job for which it was not designed.
12. WEARPROPER APPAREL. No loose clothing, gloves,
neckties, rings, bracelet s, or other jewelry to get caught in
moving part s. Nonslip footwear is recommended. Wear
protective hair covering to cont ain long hair .
13. ALW AYS USE SAFETY GLASSES.W ear safety glasses.
Everyday eyeglasses only have impact resist ant lenses;
they are not safety glasses. Also use face or dust mask if
cutting operation is dusty.
14. SECURE WORK. Use clamp s or a vise to hold work
when practical. It s safer than using your hand and frees
both hands to operate tool.
15. D O N T O V E R R E A C H . Keep proper footing and balance
at all times.
16. MAINTAIN TOOLS IN TO P CONDITION. Keep tools
sharp and clean for best and safest performance. Follow
instructions for lubricating and changing accessories.
17. DISCONNECT TOOLS before servicing and when
changing accessories such as blades, bit s, cutters, etc.
18. USE RECOMMENDED ACCESSORIES. The use of
accessories and att achments not recommended by Delt a
may cause hazards or risk of injury to persons.
19. REDUCE THE RISK O F UNINTENTIONAL STAR T-
I N G . Make sure switch is in OFF position before plugging
in power cord.
20. NEVER STAND O N TOOL. Serious injury could occur
if the tool is tipped or if the cutting tool is accident ally
cont acted.
21. CHECK DAMAGED PARTS. Before further use of the
tool, a guard or other p art that is damaged should be care -
fully checked to ensure that it will operate properly and
perform it s intended function check for alignment of moving
part s, binding of moving p art s, breakage of p art s, mounting,
and any other conditions that may af fect it s operation. A
guard or other p art that is damaged should be properly
rep aired or replaced.
22. DIRECTION O F FEED.Feed work into a blade or cutter
against the direction of rot ation of the blade or cutter only.
23.
NEVER LEAVE TOOL RUNNING UNATTENDED. TURN
POWEROFF
. Don t leave tool until it comes to a complete
stop.
24. DRUGS, ALCOHOL, MEDICATION. Do not operate
tool while under the influence of drugs, alcohol or any
medication.
25. MAKESURE TOOL IS DISCONNECTED FROM POWER
SUPPLY
while motor is being mounted, connected or re-
connected.
26. W ARNING: The dust generated by cert ain woods and
wood products can be injurious to your health. Always oper -
ate machinery in well ventilated areas and provide for proper
dust removal. Use wood dust collection systems whenever
possible.
4
ADDITIONAL SAFETY RULES FOR
JOINTERS
1. W ARNING: Do not operate the jointer until it is
completely assembled and inst alled according to the
instructions.
2.IF Y O U A R E N O T thoroughly familiar with the oper -
ation of jointers, obt ain advice from your supervisor ,
instructor or other qualified person.
3. KEEP cutterhead sharp and free of all rust and pitch.
4. BEFORE st arting machine, check cutterhead guard to
make sure it is not damaged and operates freely.
5. A LW A Y S make sure exposed cutterhead behind the
fence is guarded, especially when jointing near the edge.
6. NEVER perform jointing or planing operations with
the cutterhead guard removed.
7. MAKECERTAIN the infeed and out feed t ables are
tightened before st arting the machine.
8. NEVER st art the jointer with the workpiece cont act -
ing the cutterhead.
9. A L W A Y S hold the workpiece firmly against the t ables
and fence.
10. NEVER perform any operation free-hand which
means using your hands to support or guide the work -
piece. A LW A Y S use the fence to position and guide the
work.
11. AVOID awkward operations and hand positions
where a sudden slip could cause your hand to move into
the cutterhead.
12. A LW A Y S use hold-down/push blocks for jointing
material less than 3 inches in height or planing material
thinner than 3 inches.
13. D O N O T perform jointing operations on material
shorter than 14 inches, narrower than 3/4 inch or less
than 1/2 inch thick.
14. D O N O T perform planing or surfacing operations on
material shorter than 14 inches, narrower than 3/4 inch,
wider than 12 inches or less than 1/2 inch thick.
15. NEVER make jointing or planing cut s deeper than
1/8 inch. On cut s more than 1-1/2 inches wide, adjust
depth of cut to 1/16 inch or less to avoid overloading
machine and to minimize chance of kick-back (work
thrown back toward you).
16. MAINTAIN the proper relationship of infeed and out -
feed t able surfaces and cutterhead knife p ath.
17. SUPPORT the workpiece adequately at all times
during operation; maint ain control of the work at all times.
18. D O NOT back the workpiece toward the infeed t able.
19. D O N O T attempt to perform an abnormal or little-
used operation without study and the use of adequate
hold-down/push blocks, jigs, fixtures, stop s,etc.
20. S H U T O F F power before servicing or adjusting
jointer.
21. DISCONNECT jointer from power source and clean
the machine before leaving it.
22. M A K E SURE the work area is clean before leaving
the machine.
23. SHOULD any p art of your jointer be missing, dam -
aged or fail in any way, or any electrical component fail
to perform properly, shut-of f switch and remove plug from
power supply outlet. Replace missing, damaged or failed
part s before resuming operation.
24. ADDITIONAL INFORMATION regarding the safe
and proper operation of this product is available from the
National Safety Council, 1121 Spring Lake Drive, It asca,
IL 60143-3201 in the Accident Prevention Manual for
Industrial Operation and also in the Safety Dat a Sheet s
provided by the NSC. Please also refer to the American
National Standard Institute ANSI 01.1 Safety Require-
m e n t s for W oodworking Machinery and the U.S. D e p art-
ment of Labor OSHA 1910.213 Regulations.
25. S AVE THESE INSTRUCTIONS. Refer to them fre -
quently and use them to instruct others.

5
DEFINITIONS O F JOINTING A N D PLANING OPERATIONS
Fig. 2
Fig. 3
JOINTING OPERATIONS Jointing cut s or edge jointing is the simplest and most common operation which can be
done on the jointer and these cut s are made to square an edge of a workpiece. The fence is square with the t able and
the depth of cut is approximately 1/8 inch. The workpiece is positioned on the jointer with the narrow edge of the work -
piece on the infeed t able and the major flat surface of the workpiece against the fence, as shown in Fig. 2. The work-
piece is moved from the infeed t able, across the cutterhead to the out feed t able. CAUTION: Never pass your hands
directly over the cutterhead and use push blocks to feed the workpiece whenever possible .The hand over the
out feed t able presses the work down so that the newly-formed surface will make perfect cont act with the t able. The hand
over the infeed t able (usually the right hand) exert s no downward pressure, but simply advances the work to the
cutterhead. Both hands exert pressure to keep the work in cont act with the fence.
PLANING OPERATIONS Planing or surfacing is identical to the jointing operation except for the position of the work -
piece. For planing, the major flat surface of the workpiece is placed on the infeed t able of the jointer with the narrow
edge of the workpiece against the fence, as shown in Fig. 3. The workpiece is moved from the infeed t able, across the
cutterhead to the out feed t able est ablishing a flat surface on the workpiece. Always use push blocks when performing
planing operations and NEVER pass your hands directly over the cutterhead.

UNPACKING
REMOVING SHIPPING CRATE
Your new 12 Jointer is shipped complete in one wooden shipping crate. Remove the crate from
around the machine leaving the bottom of the machine fastened to the shipping skid at this time.
Remove the fence assembly, dust hood and all loose items from the shipping crate. Figure 4
illustrates all the loose items supplied with your machine.
1 - Dust Hood
2 - 8mm Hex wrench
3 - 12 and 14mm open end wrench
4 - 10 and 12mm open end wrench
5 - 5/8 long Button Head Screws (7)
6 - Push Blocks (2)
7 - 1-1/8 long Socket Head Screws (2)
8 - Flat Washers (2)
9 - Fence Assembly
10 - 4mm T-Handle wrench (not shown)
11 - 3mm and 10mm Hex wrench (not shown)
12 - 17mm and 19mm Open end wrench (not shown)
6
Fig. 4
1
2
3
4
5
9
8
7
6

7
REMOVING MACHINE
FROMSHIPPING SKID
1. Open door (A) Fig. 5, under infeed t able and remove
mounting hardware that fastens infeed end of machine
to skid.
Fig. 5
Fig. 6
Fig. 7
2. Remove three screws (B) Fig. 6, and remove cover
(C) from dust chute located under out feed t able. Remove
mounting hardware located inside cover (C) that fastens
out feed end of machine to skid and replace cover (C).
3. Remove machine from shipping skid and position in permanent location.
W ARNING: THE JOINTER IS VE RY H E AVY A N D A FORKLIFT O R HOIST WITH
STRAPS UNDER THE TABLE BRACKETS SHOULD BE USED TO MOVE THE
MACHINE. Figure 7 illustrates the machine removed from the shipping skid.
A
C
B

8
ASSEMBLING DUST HOOD
1. Assemble the dust hood (A) Fig. 8, to the out feed
end of the jointer base using the seven 5/8 long button
head screws (B) as shown.
SELECTING FLOOR SPA C E
It is import ant that the machine be set on a solid, level foundation. If rocking occurs,
place met al shims at the corners between the base and the floor. Lag screws or bolt s
may be used if desired to secure the machine to the floor using the same holes that
fastened the machine to the shipping skid.
ASSEMBLY INSTRUCTIONS
Fig. 1 1
Fig. 8
Fig. 9 Fig. 10
ASSEMBLING
JOINTER FENCE
1. Assemble the jointer fence assembly (A) Fig. 1 1,to
the machine cabinet, as shown, using the two 1-1/8
long screws (B) and flat washers supplied.
MOVING STA R T-STO P
SWITCH TO THE UP POSITION
1. For shipping purposes, the st art-stop switch and
switch arm (A) is shipped in the down position, as shown
in Fig. 9. Simply remove the two screws (B) Fig. 9, rot ate
switch and switch arm (A) 180 degrees, as shown in
Fig. 10, and replace the two screws (B).
A
B
B
B
A
BA
B
B
B
A

9
ELECTRICAL CONNECTIONS
The electrical rating of the DJ-30 12 Jointer is either 230 V olt, single phase, or 200-230/460 V olt, three
phase.
Before connecting your machine to an electrical power system, be sure the electrical rating of the jointer
agrees with the rating of the power system.
W ARNING: BEFORE ATTEMPTING TO SUPPLY POWERTO YOUR MACHINE, MAKE C E RTAIN THE
SUPPLY LINE IS N O T ENERGIZED. ALSO, MAKE C E RTAIN THE RECEPTACLE IN QUESTION IS
PROPERLY GROUNDED. IF Y O U ARE NOT SURE, HAV E A C E RTIFIED ELECTRICIAN CHECK THE
RECEPTACLE.
SINGLE PHASE INSTALLATION
If your machine is supplied with single phase electricals, proceed as follows when connecting your
machine to an electrical power system:
Fig. 12
A
B
Fig. 13 Fig. 14
1. Remove screw (A) Fig. 12, and terminal strip cover (B).
2. Remove plastic covering (C) Fig. 13, that snap s into
terminal strip.
3. Bring power line through access hole in bottom of
terminal strip box and connect the two power lines to
terminals (D) Fig. 14, and the green ground wire to ground
screw (E).
4. Replace plastic covering (C) Fig. 13, and terminal
strip cover removed in STEP 1.
C
E
D
IMPORTANT:The jointer cutterhead is a high inertia load which causes the motor to draw a high inrush
current during st arting. The jointer must be connected to an electrical circuit protected by a properly
sized fuse or circuit breaker to handle this high inrush of current. W e recommend either a 30 Amp time
lag fuse, or a 40 Amp motor st art circuit breaker .

10
Fig. 16
Fig. 17
THREE PHASE INSTALLATION
If the motor on your machine is wired for 200, 230 or 460 Volts,Three Phase, proceed
as follows when connecting your machine to an electrical power system.
1. Remove screw (A) Fig. 15, and terminal strip cover
(B).
2. Remove plastic covering (C) Fig. 16, that snap s into
terminal strip.
3. Bring three phase power line through access hole in
bottom of terminal strip box and connect the three power
lines to terminals (D) Fig. 17, and the green ground wire
to ground screw (E).
4. IMPORTANT:The rot ation of the cutterhead must be
in a clockwise direction when viewed from the lef t side of
the machine; that is, the knives must be rot ating toward
the infeed t able from the top. If the cutterhead rot ation is
incorrect, disconnect the machine from the power source
and interchange any two of the three incoming power
lines connected to terminals (D) Fig. 17.
C
E
D
Fig. 15
A
B

11
Fig. 18
Fig. 19
Fig. 20
Fig. 21
OPERATING CONTROLS AND ADJUSTMENTS
START-STO P SWITCH
The st art-stop switch is conveniently located on a post,
behind the jointer fence, for easy accessibility. To start
the machine, simply press the st art button (A) Fig. 18,
and to stop the machine, press the stop button (B).
FENCE OPERATION
1. The fence (A) Fig. 19, can be moved across the t able
by loosening lock lever (B) and rot ating handwheel (C).
Af ter the fence is moved to it s desired position, retighten
lock lever (B) securely. NOTE: Lock lever (B) can be re-
positioned by pulling out the handle and repositioning it
on the serrated nut located underneath the hub of the
handle. As the fence (A) is moved across the t able, the
sliding portion of the column (D) guards the cutterhead in
back of the fence as shown.
2. To tilt the fence (A) to the right, as shown in Fig. 20,
or to the lef t, as shown in Fig. 21, loosen lock handle (E)
move the fence to the desired angle and tighten handle
(E) securely. NOTE: Handle (E) Figs. 20 and 21, is
spring-loaded and can be repositioned by pulling out the
handle and repositioning it on the serrated nut located
underneath the hub of the handle. Also, when tilting the
fence to the right (outward) as shown in Fig. 20, the stop
(F) Fig. 20, must be rot ated to the up position as shown.
IMPORTANT:When cutting a bevel, we suggest that
whenever possible the fence (A) be tilted toward the
table, as shown in Fig. 21. The fence will then form a
V -shape with the t ables, and the work is easily pressed
into the pocket while p assing it across the knives.
A
B
A
C
D
B
A
F
E
E
A

12
ADJUSTING FENCE
POSITIVE STO P S
The fence on your jointer is equipped with positive stop s at
the most used fence positions of 90 degrees and 45
degrees right and lef t.To check and adjust the positive
stop s, proceed as follows:
1. Position the fence 90 degrees to the t able making sure
end of stop screw (A) is against stop (B) as shown in
Fig. 22. Then tighten lock handle (C).
2. Using a square (D) Fig. 23, check to see if the fence is
at 90 degrees to the t able as shown.
3. If the fence is not at 90 degrees to the t able, loosen
lock handle (C) Fig. 22, and lock nut (E). T urn stop screw
(A) until end of screw (A) cont act s stop (B) when fence is
90 degrees to the t able and lock handle (C) is tightened.
Fig. 22
Fig. 23
Fig. 24
Fig. 25
4. T ilt the fence inward as far as possible and using a
combination square (F) Fig. 24, check to see if the fence is
tilted inward 45 degrees to the t able, as shown. If an adjust -
ment is necessary, loosen nut s (G) Fig. 25, and adjust
screws (H) until ends of screws (H) cont act bracket s (J)
when the fence is at 45 degrees to the t able. IMPORTANT:
Always make certain the fence locking handle (E) is tight -
ened before operating machine.
C
BA
E
D
F
J
H
G
E
J
H
G

13
Fig. 26
Fig. 27
Fig. 28
5. T ilt the fence outward as far as possible and using a
combination square (F) Fig. 26, check to see if the fence is
tilted outward 45 degrees to the t able, as shown. NOTE:
90 degree stop (B) must be rot ated up in order to tilt the
fence outward. If an adjustment is necessary, loosen lock
nut (K) Fig. 27, and adjust screw (L) until head of screw (L)
cont act s back of fence (M) when the fence is at 45 degrees
tothet able. IMPORTANT:Always make sure fence locking
handle (E) is tightened before operating machine.
INFEED TABLE
ADJUSTMENTS
To raise or lower the infeed t able, loosen t able lock handle
(A) Fig. 28, and move the t able raising and lowering hand
lever (B) up or down until the t able is at the desired position
and tighten t able lock handle (A). NOTE: The t able lock
handle (A) can be repositioned by pulling out the handle
and repositioning it on the serrated nut located under the
handle.
The depth of cut of the infeed t able (position of t able in
relationship with the cutting circle) can be read with the
English/Metric scale and pointer (G) Fig. 28.
Positive stop s are provided on the jointer to limit the height
and depth of the infeed t able. T o adjust the stop s, simply
loosen two locknut s (C) and (D) Fig. 29, and turn the two
adjustment screws (E) and (F) as necessary.Retighten
locknut s (C) and (D). W e recommend that the height of the
infeed t able be adjusted so the t ableatit s highest point will
be 1/2mm below the highest point of the knives. This is an
import ant feature of your jointer which enables you to
rapidly position the infeed t able for a finish or a final cut.
B
F
M
K
L
E
A
B
G
Fig. 29
EC
D
F

14
Fig. 30
OUTFEED TABLE
ADJUSTMENTS
For most jointing operations the out feed t able must be
exactly level with the knives at their highest point of revolu -
tion. To move the out feed t able, loosen lock handle (A)
Fig. 30, and move the t able raising and lowering hand lever
(B) up or down until the t able is level with the knives.
It may be necessary to adjust the positive stop s. Loosen
the two locknut s (D) and (E) Fig. 31, and the two adjusting
screws (F) and (G) when moving the t able up or down.
When the t able is exactly level with the knives at the
highest point of revolution, tighten lock handle (A) Fig. 30,
and turn adjusting screw (F) Fig. 31, until it bottoms; then
tighten locknut (D). Screw (G) is also a positive stop for the
lower limit of the out feed t able. W e suggest that this stop
also be tightened when the out feed t able is set level with
the knives. This will prevent the out feed t able from acci -
dently being lowered.
ADJUSTING BELT TENSION
The jointer is shipped with two V -belts assembled and
properly tensioned to the cutterhead and motor pulley.If
it becomes necessary to adjust belt tension, proceed as
follows:
B
A
Fig. 31
D
FE
G
Fig. 32
Fig. 33
B
A
1. DISCONNECT THE MACHINE FROMTHEPOWER
SOURCE.
2. Pull outward on latch handle (A) Fig. 33, and open
hinged access door (B).
3. Fig. 31, illustrates the V -belt s (C), motor pulley (D) a nd
cutterhead pulley (E). There should be approximately 1/2
inch deflection in the center sp an of the belt s (C) using light
finger pressure. To adjust belt tension refer to STEP 4.
E
C
D

15
Fig. 34
Fig. 35
4. T o adjust belt tension, turn nut s (F) and (G) Fig. 34, to
move motor plate (H) up or down until there is approxi -
mately 1/2 inch deflection at the center sp an of the belt s,
as explained in STEP 3.
ADJUSTING
SPRING TENSION OF
CUTTERHEAD GUARD
The cutterhead guard (A) Fig. 35, completely covers the
cutterhead. During operation the material being jointed or
planed pushes the guard (A) out of the way and at the
completion of the cut, the guard (A) springs back over the
cutterhead providing full coverage. If it ever becomes
necessary to adjust the spring tension of the cutterhead
guard (A), loosen two screws (B) and turn screw (C) clock -
wise to increase or counterclockwise to decrease the
spring tension. Then tighten the two screws (B).
OPERATION
The following directions will give the beginner a st art on jointer operations. Use scrap pieces of lumber to
check settings and to get the feel of the operations before attempting regular work.
W ARNING: A LW AY S U S E CUTTERHEAD GUARDANDKEEP HANDS AW AY FROMCUTTERHEAD.
ALW AYS USE PUSH BLOCKS WHENEVER POSSIBLE.
Fig. 36
PLACEMENT OF HANDS
DURING FEEDING
At the st art of the cut, the lef t hand holds the work firmly
against the infeed t able and fence, while the right hand
pushes the work toward the knives. Af ter the cut is under -
w a y, the new surface rest s firmly on the out feed t able as
shown in Fig. 36. The lef t hand should then be moved to
the work on the out feed t able, at the same time maint ain -
ing flat cont act with the fence. The right hand presses the
work forward, and before the right hand reaches the cutter-
head, it should be moved to the work on the out feed t able.
CAUTION: NEVER PASS HANDS DIRECTLY OVER
THE CUTTERHEAD AND USE PUSH BLOCKS WHEN-
EVER POSSIBLE.
WORK
INFEED TABLE
O U T-FEED
TABLE
CUTTER
A
C
B
H
G
F

16
Fig. 37
Fig. 38
Fig. 39
JOINTING AN EDGE
This is the most common operation for the jointer. Set the
guide fence square with the t able. Depth of cut should be
the minimum required to obt ain a straight edge. Hold the
best face of the piece firmly against the fence throughout
the feed as shown in Fig. 37.
D O N O T perform jointing operations on material shorter
than 14 inches, narrower than 3/4 inch or less than 1/2 inch
thick.
N E V E R pass your hands directly over the cutterhead and
use push blocks to feed the workpiece whenever possible.
PLANING OR SURFACING
Planing or surfacing is identical to the jointing operation
except for the position of the workpiece. For planing, the
major flat surface of the workpiece is placed on the infeed
table of the jointer with the narrow edge of the workpiece
against the fence, as shown in Fig. 38. The workpiece is
moved from the infeed t able, across the cutterhead to the
out feed t able est ablishing a flat surface on the workpiece.
Always use push blocks when performing planing opera -
tions and NEVER pass your hands directly over the cutter -
head.
D O N O T perform planing or surfacing operations on mater-
ial shorter than 14 inches, narrower than 3/4 inch, wider
than 12 inches or less than 1/2 inch thick.
BEVELING
To cut a bevel, lock the fence at the required angle and run
the work across the knives while keeping the work firmly
against the fence and t ables. Several p asses may be nec-
essary to arrive at the desired result. When the angle is
small, there islittle dif ference whether the fence is tilted to
the right or lef t. However, at greater angles approaching 45
degrees, it is increasingly dif ficult to hold the work properly
when the fence is tilted to the right. The advantage of the
double-tilting fence is appreciated under such conditions.
When tilted to the lef t, the fence forms a V -shape with the
tables, and the work is easily pressed into the pocket while
passing it across the knives as shown in Fig. 39. If the
bevel is laid out on the piece in such direction that this
involves cutting against the grain, it will be better to tilt the
fence to the right.

17
TAPER CUTS
One of the most useful jointer operations is cutting an edge to a t aper.The method can be used on a wide variety of work.
Tapered legs of furniture are a common example.
Instead of laying the piece on the infeed t able, lower the forward end of the work onto the out feed t able. Do this very care -
fully , as the piece will sp an the knives and they will t ake a bite from the work, with a tendency to kickback unless the piece
is firmly held. Now push the work forward as in ordinary jointing. The ef fect is to plane of f all the stock in front of the knives
to increasing depth, leaving a t apered surface.
The ridge lef t by the knives when st arting the t aper may be removed by taking a very light cut according to the regular method
for jointing, with the infeed t able raised to it s usual position.
Practice is required in this operation, and the beginner is advised to make trial cut s on waste material. Taper cut s over p art
of the length and a number of other special operations can easily be done by the experienced craf tsman.
Fig. 40
CUTTING A RABBET
When making a rabbet cut, as shown in Fig. 40, the cutter -
head guard must be removed. AFTER THE RABBET CUT
IS COMPLETED, BE CERTAIN GUARDIS REPLACED.
CAUTION: Use pushblocks whenever possible, as shown.
1. Adjust the fence so that the dist ance between the end
of the knives and the fence is equal to the wid th of the
rabbet.
2. Lower the infeed t able an amount equal to the depth of
the rabbet. If the rabbet is quite deep, it may be necessary
to cut it in two or more p asses. In that event, the t able
is lowered an amount equal to about half the depth of the
rabbet for the first p ass, then lowered again to proper depth
to complete the cut.
Fig. 41 Fig. 42
JOINTING OR PLANING WARPED WOOD
If the wood to be jointed is dished or warped, t ake light cut s until the surface is flat. A void forcing such material down against
thet able; excessive pressure will spring it while p assing the knives, and it will spring back and remain curved af ter the cut is
completed.
DIRECTION O F GRAIN
A void feeding the wood into the jointer against the grain as shown in Fig. 41. The result will be chipped and splintered edges.
Feed with the grain as in Fig. 42, to obt ain a smooth surface.
FRONT TABLE FRONT TABLE
REAR
TABLE
REAR
TABLE
CUTTER CUTTER
WRONGFEED -AGAINST THE GRAIN CORRECT FEED - WITH T H E GRAIN

18
Fig. 43
Fig. 44
Fig. 45
MAINTENANCE
REMOVING, REPLACING A N D SETTING KNIVES
If the knives are removed from the cutterhead for replacement or regrinding, care must be used
in removing, replacing and resetting them as follows:
1. DISCONNECT THE MACHINE FROM THE POWERSOURCE.
2. Move the fence to the right until it is clear of the cutterhead.
3. Loosen two screws (A) Fig. 43, and remove cutter -
head guard assembly (B). W ARNING: B E EXTREMELY
CAREFUL THAT YOUR HANDS D O NOT COME IN
CONTACT WITH THE KNIVES.
4. Using wrench (C) Fig. 44, slightly loosen the six knife
locking screws (D) in each knife slot by turning the
screws (D) clockwise .This relieves stress in the cutter -
head.
5. Loosen screws (D) Fig. 44, further , and remove the
knife, knife locking bar and lif ter springs located under
the knives. Remove the remaining two knives in the same
manner.
6. Before replacing the knives, make cert ain the knife
locking bars are throughly clean and free of gum and
pitch and adjust the height of the out feed t able to be
.030 above the cutterhead body as follows:
A. Using a straight edge (E) Fig. 45, and feeler
gages (F) that equal .030 , adjust the height of
the out feed t able to be .030 above the cutter -
head body (G). Then lock the out feed t able in
place.
A
B
C
D
D
G
E
F

19
Fig. 46
Fig. 48
7. IMPORTANT:For ease in rot ating the cutterhead
during the knife setting operation, pull outward on latch
(H) Fig. 46, and open hinged access door (J). This pro -
vides access to the cutterhead pulley (K) Fig. 47, and
belt (L) allowing you to rot ate the cutterhead. CAUTION:
Af ter knives are adjusted, make cert ain the access door
(J) is in the closed and locked position.
8. Replace the knife locking bars, lif ter springs and
knives into each slot in the cutterhead. W ARNING: CARE
MUST BE TAKEN WHEN INSERTING TH E KNIVES
A S THE CUTTING EDGES ARE VERY SHARP. Push
the knives down as far as possible and snug up the knife
locking screws by turning them counterclockwise just
enough to hold the knives in position.
9. Construct a U shaped block out of hardwood simi -
lar to the one shown at (M) Fig. 48, and place this block
on the rear t able over the cutterhead, as shown. Using
wrench (C), loosen knife locking screws by turning them
clockwise. The knife (O) willlif t up and cont act the ends
of the gage block (M). The knives are adjusted correctly
when the cutting edge of the knife cont act s the gage
block when the knife is at it s highest point. When you are
cert ain the knife is adjusted properly, tighten the knife
locking screws by turning them counterclockwise.
10. Adjust the remaining two knives in the same manner.
W ARNING: MAKECERTAIN THAT ALL KNIVES A R E
SECURELY FASTENED IN CUTTERHEAD BEFORE
TURNING O N POWER.
11. Replace cutterhead guard.
MO
C
J
H
Fig. 47
K
L

Delt a will rep air or replace, at it s expense and at it s option, any Delt a machine, machine part, or machine
accessory which in normal use has proven to be defective in workmanship or material, provided that the
customer notifies his supplying distributor of the alleged defect within two years from the date of delivery
to him, of the product and provides Delt a Machinery with reasonable opportunity to verify the defect by
inspection. Delt a Machinery may require that electric motors be returned prep aid to the supplying distrib -
utor or authorized service center for inspection and rep air or replacement. Delt a Machinery will not be
responsible for any asserted defect which has resulted from misuse, abuse or rep air or alteration made
or specifically authorized by anyone other than an authorized Delt a service facility or represent ative.
Under no circumst ances will Delt a Machinery be liable for incident al or consequential damages resulting
from defective product s.This warranty is Delt a Machinery s sole warranty and set s forth the custome rs
exclusive remedy, with respect to defective product s; all other warranties, express or implied, whether of
merchantability, fitness for purpose, or otherwise, are expressly disclaimed by Delt a.
Two Y ear Limited Warranty
Delt a Machinery
This manual suits for next models
2
Table of contents
Other Delta Power Tools manuals

Delta
Delta 4'' Jointer User manual

Delta
Delta 43-290C User manual

Delta
Delta S Series User manual

Delta
Delta 37-380 User manual

Delta
Delta ShopMaster MM300 User manual

Delta
Delta DBW-350 User manual

Delta
Delta 37-285 User manual

Delta
Delta 11-990 User manual

Delta
Delta 902118 43-505 User manual

Delta
Delta 14-651 User manual

Delta
Delta 14-650 User manual

Delta
Delta DJ-20 Series User manual

Delta
Delta 43-424 User manual

Delta
Delta Delta JT360 User manual

Delta
Delta 70-200 User manual

Delta
Delta S Series User manual

Delta
Delta 432-01-651-0006 User manual

Delta
Delta 37-360 User manual

Delta
Delta 17-959L User manual

Delta
Delta Shopmaster GR050 User manual