Dematech Dema-Craft 60l User manual

www.dematechsa.com | info@dematechsa.com | +27 (0) 21 385 0483
13 Michigan Street, Airport Industria, 7490, Cape Town, South Africa

Dema-Craft 60l
Operation Manual
Thank you for purchasing the Dema-Craft.
Please follow the instructions to get the best use from your brewing vessel.
The process described is just a guide.
We suggest that you use this process for your rst few batches before
adjusting to suite your brewing style.
EnglishEnglish
www.dematechsa.com
Head Oce:
Cape Town, South Africa
info@dematechsa.com
Oce Number: +27 (0) 21 385 0483
13 Michigan Street, Airport Industria, 7490, South Africa
1.

SAFETY INSTRUCTIONSSAFETY INSTRUCTIONS
• Read all the instructions carefully, and keep this manual for future reference.
• Check the products rating label and make sure the brewing vessel voltage is t
for your outlet voltage before using.
• Do not use the device if the cord or plug is damaged.
• Switch o the brewing vessel before removing the plug.
• Only move the brewing vessel when the power is o and it is empty (no water).
• This appliance requires a 13amp-16amp plug.
• Never submerge the brewing vessel. To clean the exterior, use a damp cloth.
Always protect the electric power cable from water.
• Do not switch on the machine if the vessel is empty. The machine does have a
dry-boil cut-o switch to turn the element o if it overheats (when there is no
water) but the element and electronics may still be damaged. The warranty
does not cover damage due to dry-boil.
• Please do not turn on the pump for more than 5 minutes at a time during wort
boiling (Because bubbles will cause the pump to idle and wear out under high
temperature). It is not recommended to use the pump for pumping out the wort
after cooling (rather use the tap on the front of the unit). Hops and trub may
enter the pump, potentially blocking and damaging the system
WHAT’S IN THE BOX?WHAT’S IN THE BOX?
1 Digital controller1 Digital controller
2 Switches (PCB and Pump)2 Switches (PCB and Pump)
3 Faucet3 Faucet
4 Built-in pump4 Built-in pump
5 Circulation valve5 Circulation valve
6 Cam-lock connector6 Cam-lock connector
7 Circulation tube7 Circulation tube
2.

PARTSPARTS
Telescopic overow
tube + adjustable for
half batches
Top sparge plate
for grain basket
Glass lid cover with
hole for circulation
pipe
Circulation pipe
(Cam-lock
connector)
Filter tube Screw nutWhite screw cap
cover
Bottom tube
Bottom sparge plate
for grain basket
Grain basket Grain basket handle
ADDITIONAL ACCESSORIES:ADDITIONAL ACCESSORIES:
13m chiller
coil
Whirlpool
arm
Hop sieve Grain paddle Thermowell
3.

OPERATIONOPERATION
Switch operation
The switch “PCB” is the ON/OFF switch for the power to the Digital Controller that
controls the heating elements. The switch “PUMP” is the ON/OFF-switch for the
pump.
Switch ON Switch OFF
Tap operation
Closed To open, pull the
safety latch up and turn
the lever 90°
counterclockwise.
To close, pull the safety
latch up and turn the le-
ver clockwise by 90°.
Valve operation
This valve is to open and close the wort circulation from the pump. It is also used to
adjust the wort ow during mashing.
Closed Open
If the Switch is on you will see a red
light
4.

Componenets prepared Install the top
sparge plate,
white screw cap
cover at the top.
Circulation tube assembly
1 2 3 4
Insert circulation
pipe into the
cam-lock
connector.
To lock, push the
Cam-lock levers
down.
Now it’s locked
and ready to
use.
Direct the hose
through the
glass lid
• Adjust the ow rate using the blue valve. If the ow is too fast, the grain
basket will overow down the central pipe, and the bottom of the boiler
may run dry.
• Adjust the ow until the ow from the pump matches the speed at which
the wort ows through the grain. This may need to be adjusted during the
Note:
Grain basket overflow pipe assembly
Use the screw to
connect the bot-
tom sparge plate
with telescopic
overow tube
Use screw driver to attach the two metal handles to the top sparge plate. These han-
dles are already attached.
Secure the overow pipe into the bottom sparge plate by inserting the larger, thread-
ed end of the overow pipe through the hole in the bottom plate and securing the nut
from the bottom. Make sure that the nut is only nger tight. Attach the smaller nut on
the top of the overow pipe.
The white grain stopper cap is only used while mashing in so that the milled grain
cannot fall into the overow pipe. Remove this cap when all grains have been added.
5.

Grain basket assembly
Use the handle to lower
the grain basket into the
Dema-craft. Make sure
that the supports on the
basket are hooked onto
the support ring
When adding the mash
water and grains,
remove the top sparge
plate and add the grain
stopper.
When the mashing is
completed, use the handle
to lift the Grain basket up
and hook its bottom
supports onto the support
ring
Bazooka mesh filter assembly on tap
Bottom little tube assembly
Note: Please insert this tube into the pump before using the brewing vessel to prevent
the malt from clogging the pump inlet.
4.
6.

HOW TO USE THE CONTROLLER?HOW TO USE THE CONTROLLER?
Control Panel and Key Functions
Temp button Press to set target temperature for each step
Power button Press to set power for each step
Timer button Press to set timer for each step
- button Press to reduce the value
+ button Press to increase the value
Start/Stop Press to start or stop the program
Manual/Pause Press to enter manual mode.
Press to pause the program on manual mode.
Auto/Pause Press to enter auto mode.
Press to pause the program on Auto mode.
S/P: W Set the power
S/T: ℃ Set the temperature
-H When it’s ashing, it means it is heating to
target temperature
7.

Manual Mode Setting
1. Switch on the PCB switch, then press the MANUAL/PAUSE button to enter manual
mode.
2. Press the TEMP button. The temperature set-point (S/T: XX.X°C) at the bottom right
of the screen will ash and you can use the – and + buttons to set your temperature.
3. Press the POWER button. The power set-point (S/P: XXXXW) at the bottom left of
the screen will ash and you can use the – and + buttons to set your wattage. We rec-
ommend 3000W for raising temperature up between steps. 1500W during your mash-
ing phase to maintain mash temperature. And once boiling, drop to 2500W to maintain
a rolling boil.
8.

4. Press the TIMER button. The time (XX min) at the top right of the screen will ashing
and you can use the – and + buttons to set your countdown timer.
5. Once the TEMP, POWER and TIMER have been set, press the START/STOP button to
start the machine. The H – symbol at the top left of the screen will ash to show that
the machine is heating. The machine will then heat the liquid up to your temperature
set-point. Once it reaches the set-point, the machine will chime and start the count-
down timer while maintaining the set-point temperature. The time will ash while the
timer is counting down.
Note: The H – symbol will continue ashing even when the elements are o. Once the
timer reaches zero, the machine will chime and the word END will ash on the screen.
Press the START/STOP button to stop the chime.
6. To edit any of the TEMP, POWER or TIMER settings, press the MANUAL/PAUSE
button again. To return to your program after adjusting any of the settings, press the
MANUAL/PAUSE button again
7. The default boiling temperature is 100℃. The timer will not be triggered if temperature does
not indicate 100℃.
8. If the machine starts to boil, but shows a lower temp on the display (i.e. if you are brewing
at a higher altitude than sea level), make the following adjustment to set the temp at 100℃ and
trigger the timer.
9. Press START/STOP until only the temperature is displayed on the screen. Press “-” and “+”
button together for 5 seconds and then release, the display will show the C1 (temperature
oset for celsius) or F1 (temperature oset for fahrenheit). Press the MANUAL/PAUSE button
until the display shows C2 (boil temperature oset for celsius) or F1 (boil temperature oset
for fahrenheit).Temperature correction range is from 0℃ to +10℃ or 0℃ to +50℃. If you set C2 to 6℃
then the unit will begin the boiling stage of the program at 94℃.
8. Press MANUAL/PAUSE button during heating to go back to the edit page. You can edit
Temp/Power/Timer, then press the MANUAL/PAUSE button again to resume.
NOTE: Long press TEMP for 5 seconds, switch degree centigrade to Fahrenheit.
This operation only can be preceded when you switch on the machine before any setting. 9.

Auto Mode Setting
1. Switch on the PCB switch, then press the AUTO/PAUSE button to enter auto mode.
S1 (Stage 1) will be displayed in the top left corner of the screen.
2. Press the TEMP button. The temperature set-point (S/T: XX.X°C) at the bottom right
of the screen will ash and you can use the – and + buttons to set your temperature.
3. Press the POWER button. The power set-point (S/P: XXXXW) at the bottom left of
the screen will ash and you can use the – and + buttons to set your wattage. We rec-
ommend 3000W for raising temperature up between steps. 1500W during your mash-
ing phase to maintain mash temperature. And once boiling, drop to 2500W to maintain
a rolling boil.
4. Press the TIMER button. The time (XX min) at the top right of the screen will ashing
and you can use the – and + buttons to set your countdown timer.
10.

5. After you have set the parameters for S1, press AUTO/PAUSE button again. S2
(Stage 2) will be displayed in the top left corner of the screen. Set the TEMP, POWER
and TIMER parameters as above.
6. Repeat the process above for S1 through S9.
The program will automatically go into boiling after step 2. If you would like to have
more mashing steps, simply press temp and then minus to decrease the tempera-
ture from boiling. This informs the program that you would like to have more mashing
steps. Now you can set your mashing steps accordingly. When you have programmed
all the mashing steps for your recipe, press temp and then + When the temperature
reaches 100C (or lower if you changed the C2 value) the program will go into the boil-
ing step.
7. The step where you set the temperature to “boiling” will always be the last step in
the program and all subsequent steps will be ignored.
8. After setting the boiling step, you can set the hop reminders. Press - or + to set the
time at which the hop reminder will chime. Setting it at 60min means that the remind-
er will chime 60 minutes BEFORE the end of the boil. Press the TIMER button to set
further hop reminders (up to 9 in total). The reminder for the rst hop addition cannot
be longer than the boil time (i.e. you cannot have a 60 min reminder if your boil time is
30 min).
9. When you have entered all of your steps, press the START/STOP button to conrm
the above step mashing settings.
10. At the end of each step, the machine will chime and will not proceed to the next
step until AUTO/PAUSE is pressed.
11. Pressing the AUTO/PAUSE button will stop the element and timer working tempo-
rarily and pause the current step, while paused you can edit the settings for the step.
Press AUTO/PAUSE to continue.
11.

Saving brewing recipe
1. After setting your brewing recipe in auto mode, press STOP button until you are
back at the main page (only the temperature is displayed).
2. Press MANUAL/PAUSE button to enter the manual mode edit page
3. To save the settings that you have just set in auto mode, long press the MANUAL/
PAUSE button for 5 seconds then release it. The machine will chime to conrm that
the settings have been saved.
4. To start a new brewing recipe, go to the main page (only the temperature is dis-
played) and long press the POWER and TIMER buttons for 5s. R0 (recipe 0) will display
at the top left of the screen.
5. Press “-” or “+” to scroll between the recipes. Press the Start/Stop button to conrm
the selected recipe and return to the main page.
Press the AUTO/PAUSE button to enter auto mode. S1 (Stage 1) will be dis-
played in the top left corner of the screen. Here you can edit the temperature,
power and timer
Press TIMER button to set the subsequent
hop reminders (up to 9 in total).
Press the START/STOP button to conrm the
above step mashing settings and start the
program.
Press TIMER button to set 2nd hops reminder. Press
timer again for 3rd, 4th, 5th...9th setting. Hops count-
down timer
1. Press the START/STOP button to
conrm the
above step mashing settings and
start the program.
If you would like to skip the
hop reminder settings, press
START/STOP button to
conrm the previous set-
tings and start the program.
Press the AUTO/PAUSE button
again to go to the next stage
(S2 to S9)
In the boiling step, press the
AUTO/PAUSE button again to
set the hop reminders
10.
12.

Recipe Selection in Auto Mode
LET’S BREW!LET’S BREW!
Brewing Preperation
Make sure that the brewing vessel is positioned on a stable and secure surface before
brewing as a full vessel contains boiling hot liquids and can weigh up to 70kg.
• The machine should never be moved during the brewing process. The handles
are only designed for moving the machine when empty.
Press the START/STOP button until you are back at the main page (only the tempera-
ture is displayed). Long press the POWER and TIMER buttons for 5 seconds. R0 (recipe
0) will display at the top left of the screen.
Press the - or + buttons to scroll between the recipes.
Press the START/STOP button to conrm the
selected recipe and return to the main page.
Press the AUTO/PAUSE button to enter chosen recipe edit page. Here you can edit the Power/
Timer/Temp settings or press the START/STOP button to start the selected recipe.
13.

Brewing Process (example)
• Always clean the brewing vessel before and after use.
• Attach the Bazooka lter to the inside tail of the tap using the included hose clamp.
• Add the required quantity of strike water before switching the brewing vessel on.
• Insert the bottom sparge plate into the malt pipe and then insert the malt pipe
into the brewing vessel.
• Heat up the water to your strike temperature in either manual or auto mode.
• Add the milled grain into grain basket and stir it gently.
• Once your grain is well mixed and completely saturated, gently place the top
sparge plate on top of your mash
• Switch on the pump to circulate the wort through your grain bed. If the wort is
over owing through the central overow pipe, reduce the pump ow by using
the blue valve.
• After mashing, carefully lift the malt pipe with the included handle, and gently
set the feet of the malt pipe down onto the support ring on the boiler.
• If you are sparging, you can gently pour your sparge water into the malt pipe
and let it run through your grain. Leave the grain to drain into boiler for at least
10mins after sparging before removing).
• Heat up the water to boiling temperature
• Add the hops etc. at the correct times according to your recipe.
• Immerse your wort chiller into the boiling wort 10 minutes before the end of the
boil to sanitise it.
• After the boil is nished, cool down the wort to the pitching temperature stated
in your recipe before transferring to your fermenting vessel via the tap and
bazooka lter on the front of the machine.
MAINTENANCEMAINTENANCE
• It is very important to clean the machine after use.
• Place 10-20L of water into the machine and heat to 60C. Dissolve a brewing
cleaner such as Oxydet into the warm water and recirculate it through the pump
for 15 minutes while you clean the inside of your Demacraft with a soft cloth.
• Do not use sharp metal implements to remove any residue. Use a soft cloth or
soft scouring pad to clean the inside of the boiler.
• Any wort residue on the base of the boiler should be cleaned o before next use.
• After cleaning rinse the machine well, including ushing the pump by
connecting a hose to the pump outlet.
• Do not get water on any electronic parts of the machine.
• Do not immerse the machine in water.
• To clean the outside of the brewing vessel, simply use a damp, soft cloth and
warm
14.

TROUBLESHOOTING TIPSTROUBLESHOOTING TIPS
Ingredients stuck in the pump
C1-- temperature oset
ERR-1 shown on display
Failing to reach 100℃
C2-- boiling point oset
ERR-2 shown on display
Flush the pump by connecting a hose to the
outlet of the pump. If that fails, dismantle the
pump to remove the ingredients.
Press “-” and “+” at the same time enter into
the C1 temperature correction setting. Setting
range is from -10℃ to +10℃. This is a temperature
oset if the probe is reading the temperature
incorrectly.
This error is displayed if the temperature read-
ing is lower than -20℃. This is most often due to
a loose probe connection.
To rectify, open the bottom of the machine
and check if the sensor is loose.
Put the lid on to see if it comes to a boil. If
that fails, do a temperature correction as de-
scribed below.
Press “-” and “+” at the same time enter into
the C1 temperature correcting setting and
then press the AUTO/PAUSE button to enter
into the C2 temperature correction setting.
This is a temperature oset for the boiling
temperature only
This error is displayed if the temperature read-
ing is higher than 120℃, it is an overheat/boil-
dry warning.
ELECTRIC CIRCUITELECTRIC CIRCUIT
15.

16.
WHAT TEMPERATURE SHOULD YOU BOIL AT?WHAT TEMPERATURE SHOULD YOU BOIL AT?
BREWING RECIPESBREWING RECIPES
Check your location elevation here:
www.whatismyelevation.com
Next, check the below list to see which temperature you should boil at.:
style which works perfectly for the Dema-Craft 60L
Altitude in meters Altitude in feet Temperature in deg C Temperature in deg. Fahrenheit
0 m. 0 ft. 100 ºC 100 ºC
152 m. 500 ft. 99.5 ºC 211 ºF
305 m. 1000 ft 99 ºC 210 ºF
457 m. 1500 ft. 98.5 ºC 209 ºF
610 m. 2000 ft. 98 ºC 208 ºF
762 m. 2500 ft. 97.5 ºC 207 ºF
914 m. 3000 ft 97 ºC 206 ºF
1067 m. 3500 ft. 96 ºC 205.5 ºF
1219 m. 4000 ft. 95.5 ºC 204 ºF
1372 m. 4500 ft. 95 ºC 203.5 ºF
1524 m. 5000 ft. 94.5 ºC 202 ºF
1676 m. 5500 ft. 94 ºC 201.5 ºF
1829 m. 6000 ft. 93.5 ºC 200.5 ºF
1981 m. 6500 ft. 93 ºC 199.5 ºF
2134 m. 7000 ft. 92.5 ºC 198.5 ºF
2286 m. 7500 ft. 92 ºC 198 ºF
2438 m. 8000 ft. 91.5 ºC 197 ºF
2591 m. 8500 ft. 91 ºC 196 ºF
2743 m. 9000 ft. 90.5 ºC 195 ºF
2895 m. 9500 ft. 90 ºC 194 ºF
3048 m. 10000 ft. 89.5 ºC 193 ºF

www.dematechsa.com | info@dematechsa.com | +27 (0) 21 385 0483
13 Michigan Street, Airport Industria, 7490, Cape Town, South Africa
Table of contents
Popular Dispenser manuals by other brands

Cosmos
Cosmos PANAS instruction manual
Vitlab
Vitlab genius operating manual
Sloan
Sloan Soap/Sanitizer Dipensers Installation & operating instruction manual
TAKE-A-LABEL
TAKE-A-LABEL TAL-450-18 operating instructions
Coca-Cola
Coca-Cola Freestyle 7100 user guide
Prince Castle
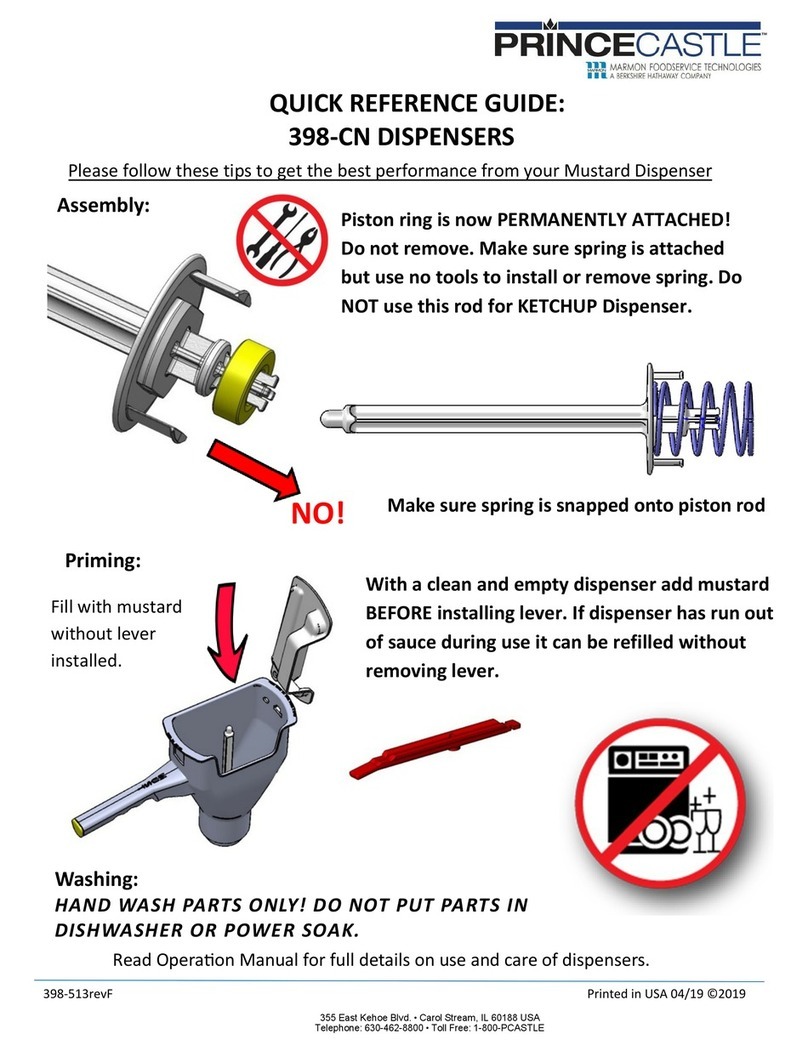
Prince Castle 398-CN Quick reference guide

