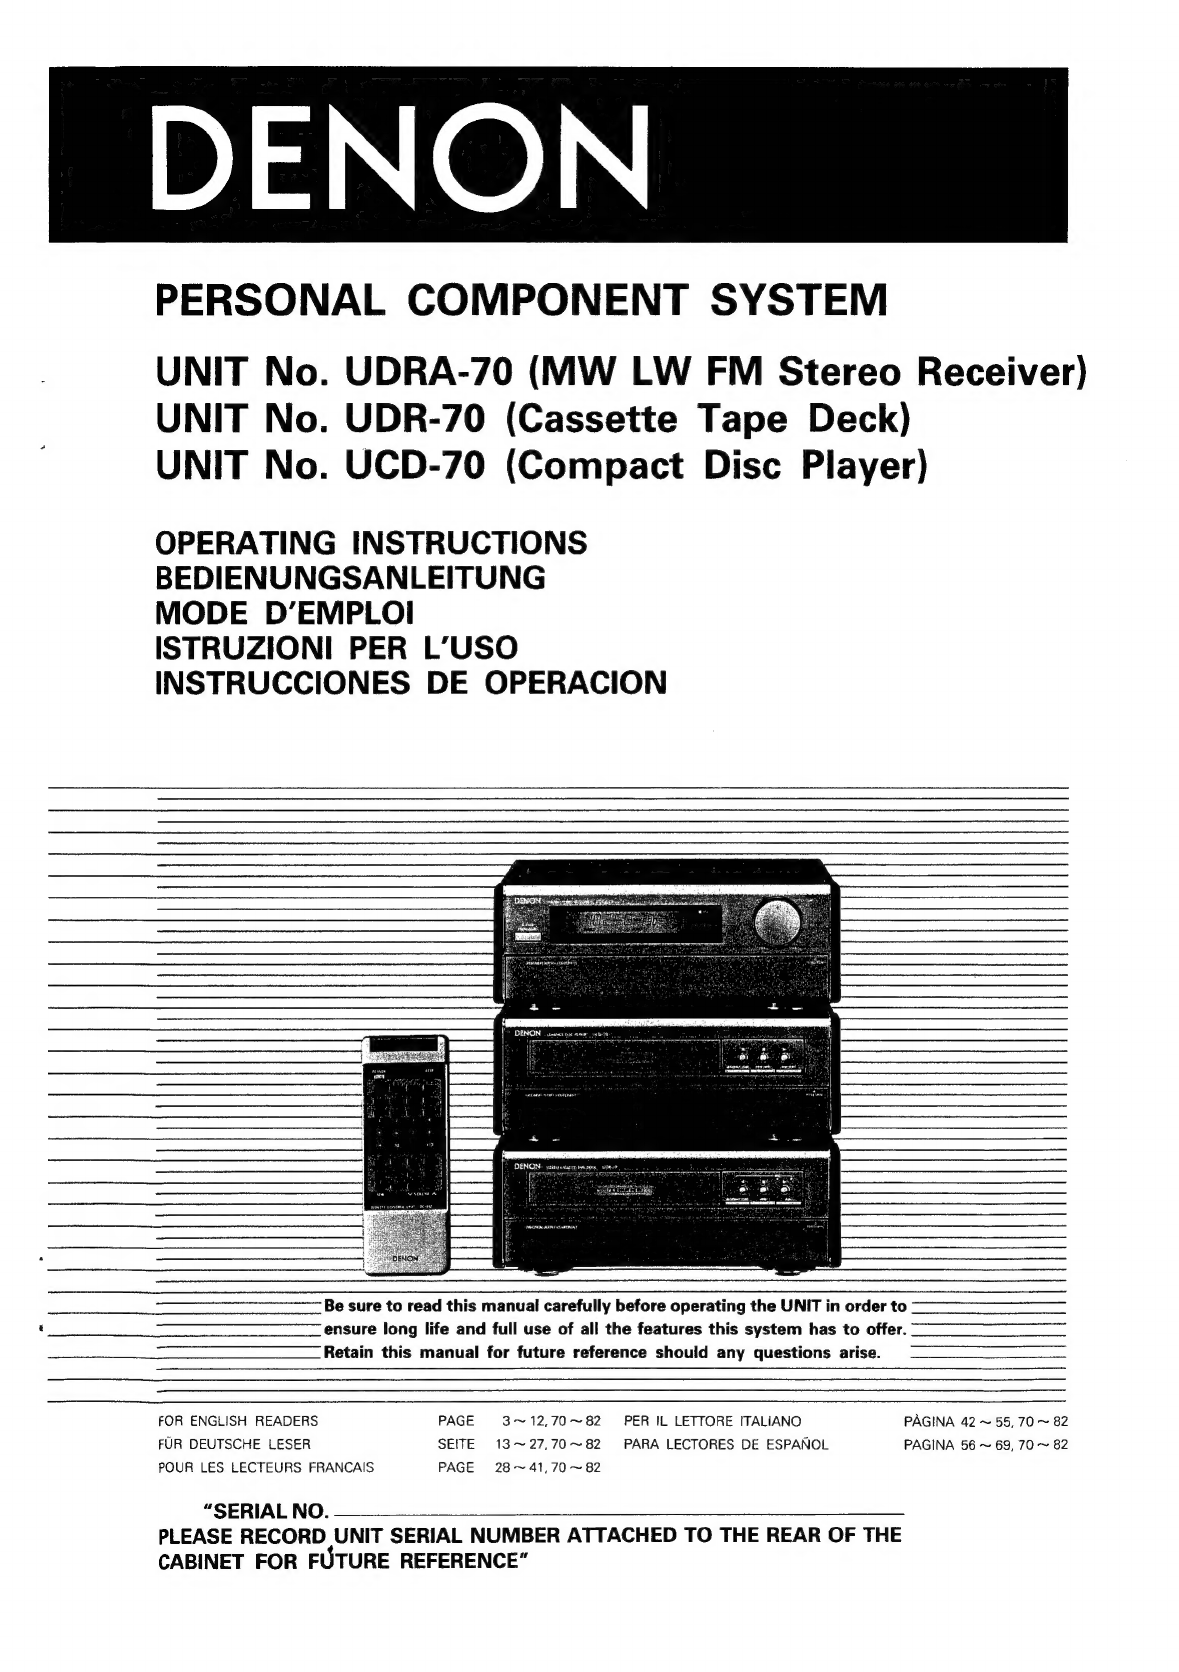
Denon UDRA-70 User manual

DENON
PERSONAL
COMPONENT
SYSTEM
UNIT
No.
UDRA-70
(MW
LW
FM
Stereo
Receiver)
UNIT
No.
UDR-70
(Cassette
Tape
Deck)
UNIT
No.
UCD-70
(Compact
Disc
Player)
OPERATING
INSTRUCTIONS
BEDIENUNGSANLEITUNG
MODE
D’EMPLOI
ISTRUZIONI
PER
L’USO
INSTRUCCIONES
DE
OPERACION
.
os
:
Be
sure
to
read
this
manual
carefully
before
operating
the
UNIT
in
order
to
ensure
long
life
and
full
use
of
all
the
features
this
system
has
to
offer.
Retain
this
manual
for
future
reference
should
any
questions
arise.
FOR
ENGLISH
READERS
PAGE
3~12,70~82
PER
IL
LETTORE
ITALIANO
PAGINA
42
~
55,
70
~
82
FUR
DEUTSCHE
LESER
SEITE
13~27,.70~82
PARA
LECTORES
DE
ESPANOL
PAGINA
56
~
69,
70
~
82
POUR
LES
LECTEURS
FRANCAIS
PAGE
28~41,70~82
“SERIAL
NO.
PLEASE
RECORD
UNIT
SERIAL
NUMBER
ATTACHED
TO
THE
REAR
OF
THE
CABINET
FOR
FUTURE
REFERENCE”

Avoid
high
temperatures
Allow
for
sufficient
heat
dispersion
when
installed
on
a
rack.
Vermeiden
Sie
hohe
Temperaturen
Beachten
Sie,
daf&
eine
zureichende
Luftzirkulation
gewahrleistet
wird,
wenn
das
Gerat
auf
ein
Regal
gestellt
wird.
Eviter
des
températures
élevées
Tenir
compte
d’une
dispersion
de
chaleur
suffisante
lors
de
I’installation
sur
une
étagére.
Evitate
di
esporre
l’unita
a
temperature
alte.
Assicuratevi
che
ci
sia
un’adeguata
dis-
persione
del
calore
quando
installate
Vunita
in
un
mobile
per
componenti
audio.
Evite
altas
temperaturas
Permite
la
suficiente
dispersién
del
calor
cuando
esta
instalado
en
la
con-
sola.
Vermijd
hoge
temperaturen.
Zorg
voor
een
degelijk
hitteafvoer
in-
dien
het
apparaat
op
een
rek
wordt
geplaatst.
Undvik
héga
temperaturer.
Se
till
att
det
finns
mdjlighet
till
god
varmeaviedning
vid
montering
i
ett
Handle
the
power
cord
carefully.
Hold
the
plug
when
unplugging
the
cord.
Gehen
Sie
vorsichtig
mit
dem
Netzkabel
um.
Halten
Sie
das
Kabel
am
Stecker,
wenn
Sie
den
Stecker
herausziehen.
Manipuler
le
cordon
d’alimentation
avec
précaution.
Tenir
la
prise
lors
du
débranchement
du
cordon.
Manneggiate
il
filo
di
alimentazione
con
cura.
Agite
per‘la
spina
quando
scollegate
il
cavo
dalla
presa.
Maneje
el
cordén
de
energia
con
cuidado.
Sostenga
el
enchufe
cuando
desconecte
el
cordén
de
energia.
Hanteer
het
netsnoer
voorzichtig.
Houd
het
snoer
bij
de
stekker
vast
wanneer
deze
moet
worden
aan-
of
losgekoppeld.
Hantera
natkabeln
varsamt.
Hall
i
kabeln
nar
den
kopplas
fran
el-
uttaget.
Keep
the
set
free
from
moisture,
water,
and
dust.
Halten
Sie
das
Gerat
von
Feuchtigkeit,
Wasser
und
Staub
fern.
Protéger
l’appareil
contre
|'humidité,
"eau
et
la
poussiére.
Tenete
l’unita
lontana
dall’umidita,
dal-
'acqua
e
dalla
polvere.
Mantenga
el
equipo
libre
de
humedad,
agua
y
polvo.
Laat
geen
vochtigheid,
water
of
stof
in
het
apparaat
binnendringen.
Utsatt
inte
apparaten
fér
fukt,
vatten
och
damm.
Unplug
the
power
cord
when
not
using
the
set
for
long
periods
of
time.
Wenn
das
Gerat
eine
langere
Zeit
nicht
verwendet
werden
soll,
trennen
Sie
das
Netzkabel
vom
Netzstecker.
Débrancher
le
cordon
d’alimentation
lorsque
l'appareil
n’est
pas
utilisé
pen-
dant
de
longues
périodes.
Disinnestate
il
filo
di
alimentazione
quando
avete
I’intenzione
di
non
usare
il
filo
di
alimentazione
per
un
lungo
periodo
di
tempo.
Desconecte
el
cordén
de
energia
cuan-
do
no
utilice
el
equipo
por
mucho
tiempo.
Neem
altijd
het
netsnoer
uit
het
stop-
kontakt
wanneer
het
apparaat
gedurende
een
lange
periode
niet
wordt
gebruikt.
Koppla
ur
natkabeln
om
apparaten
inte
kommer
att
anvandas
i
lang
tid.
*(For
sets
with
ventilation
holes)
Do
not
obstruct
the
ventilation
holes.
Die
Beltiftungséffnungen
durfen
nicht
verdeckt
werden.
Ne
pas
obstruer
les
trous
d’aération.
Non
coprite
i
fori
di
ventilazione.
No
obstruya
los
orificios
de
ventilacién.
De
ventilatieopeningen
mogen
niet
wor-
den
beblokkeerd.
Tapp
inte
till
ventilations6ppningarna.
NOTE
ON
USE/HINWEISE
ZUM
GEBRAUCH/
OBSERVATIONS
RELATIVES
A
L’UTILISATION
NOTE
SULL’'USO/NOTAS
SOBRE
EL
USO/ALVORENS
TE
GEBRUIKEN/OBSERVERA
Do
not
let
foreign
objects
in
the
set.
Keine
fremden
Gegensténde
in
das
Geraét
kommen
lassen.
Ne
pas
laisser
des
objets
étrangers
dans
l'appareil.
E’
importante
che
nessun
oggetto
é
inserito
all’interno
dell’unita.
No
deje
objetos
extrahos
dentro
del
equipo.
Laat
geen
vreemde
voorwerpen
in
dit
apparaat
vailen.
Se
till
att
frammande
foremal
inte
tran-
ger
in
i
apparaten.
Do
not
let
insecticides,
benzene,
and
thinner
come
in
contact
with
the
set.
Lassen
Sie
das
Gerat
nicht
mit
Insekti-
ziden,
Benzin
oder
Verdinnungsmittein
in
Berihrung
kommen.
Ne
pas
mettre
en
contact
des
insecti-
cides,
du
benzéne
et
un
diluant
avec
Yppareil.
Assicuratewvi
che
I‘unita
non
venga
in
contatto
con
insetticidi,
benzolo
o
sol-
venti.
No
permita
el
contacto
de
insecticidas,
gasolina
y
diluyentes
con
el
equipo.
Laat
geen
insektenverdelgende
mid-
delen,
benzine
of
verfverdunner
met
dit
apparaat
in
kontakt
komen.
Se
till
att
inte
insektsmedel
pa
sprayb-
ruk,
bensen
och
thinner
kommer
i
kon-
takt
med
apparatens
hdlje.
Never
disassemble
or
modify
the
set
in
any
way.
Versuchen
Sie
niemals
das
Gerat
au-
seinander
zu
nehmen
oder
auf
jegliche
Art
zu
verandern.
Ne
jamais
démonter
ou
modifier
|’ap-
pareil
d’une
maniére
ou
d’une
autre.
Non
smontate
mai,
né
modificate
l’unita
in
nessun
modo.
Nunca
desarme
o
modifique
el
equipo
de
ninguna
manera.
Nooit
dit
apparaat
demonteren
of
op
andere
wijze
modifiéren.
Ta
inte isér
apparaten
och
férsdk
inte
bygga
om
den.

ENGLISH
CONTENTS
Main
Features
...
Before
Using
Antenna
Connections
Connections
Part
Names
and
Functions
Listening
to
Radio
Broadcasts
Using
the
Timers
Playing
Cassette
Tapes
e
Using
the
MS
(Music
Search)
function
Recording
Cassette
Tapes
wae
70,71
ww
72~75
Remote
Control
Unit
Cassette
Deck
e
Before
recording
and
playback
...
Troubleshooting
...
Specifications
Playing
CDs
e
Basic
playback
e
Special
playback
functions
e
Edited
recording
onto
sides
A
and
B
of
a
tape
List
of
DENON
Service
Network
Check
that
the
following
parts
are
included
in
the
package
aside
from
the
main
unit:
@
Operating
Instructions
....ccccecscsssssessecsesesseccsseescssecsssueessseccesesessscess
1
@
FM
Antenna
@
AM
Loop
Antenna
@
Remote
Controller
®
R6P/AA
batteries
....
©
System
Connector
@
FM
Antenna
adapter
(UDRA-70
only)
SAFETY
IMPORTANT
WARNING:
TO
PREVENT
FIRE
OR
SHOCK
HAZARD,
DO
NOT
EXPOSE
THIS
APPLIANCE
TO
RAIN
OR
MOISTURE.
IMPORTANT
(BRITISH
MODEL
ONLY)
The
wires
in
this
mains
lead
are
coloured
in
accordance
with
the
following
code:
Blue:
Neutral
Brown:
Live
The
colours
of
the
wires
in
the
mains
lead
of
this
apparatus
may
not
correspond
with
the
coloured
markings
identifying
the
terminals
in
your
plug
proceed
as
follows.
The
wire
which
is
coloured
blue
must
be
connected
to
the
terminal
which
is
marked
with
the
letter
N
or
coloured
black.
The
wire
which
is
coloured
brown
must
be
connected
to
the
terminal
which
is
marked
with
the
letter
L
or
coloured
red.
CLASS
1
LASER
PRODUCT
LUOKAN
1
LASERLAITE
KLASS
1
LASERAPPARAT
“CLASS
1
.
”
ADVARSEL:
USYNLIG
LASERSTRALING
VED
ABNING
LASER
PRODUCT
UNDGA
UDSAETTELSE
FOR
STRALING.
VAROITUS:
LAITTEEN
KAYTTAMINEN
MUULLA
KUIN
TASSA
KAYTTOOHJEESA
MAINITULLA
TAVALLA
SAATTAA
ALTISTAA
KAYTTAJAN
TURVALLISUUSLUOKAN
1
YLITTAVALLE
NAKYMATTOMALLE
LASERSATEILYLLE.
VARNING:
OM
APPARATEN
ANVANDS
PA
ANNAT
SATT
AN
I
DENNA
BRUKSANVISNING
SPECIFICERATS,
KAN
ANVANDAREN
UTSATTAS
FOR
OSYNLIG
LASERSTRALNING,
SOM
OVERSKRIDER
GRANSEN
FOR
LASERKLASS
1.
COMPACT
e
This
compact
disc
player
is
capable
of
playing
discs
which
have
the
mark
at
right.
DIGITAL
AUDIO

ENGLISH
MAIN
FEATURES
@
30
FM/AM
station
random
preset
tuner
.
*
Random
presetting
makes
for
easy
operation.
e
Power
amplifier
designed
for
quality
sound
*
30W
+
30W
high
quality
power
amplifier.
e
SDB
control
°
*
Super
dynamic
bass
control
for
clear
low
bass
sound.
e
Super
linear
converter
and
high
performance
digital
filter
°
*
Denon’s
unique
systems
for
preventing
loss
of
CD
sound
quality
create
an
excellent
sound
field.
°
BEFORE
USING
e
Moving
the
system
e
To
prevent
short-circuiting
or
damage
of
connection
cords,
be
sure
to
unplug
the
power
cord
and
disconnect
all
connection
cords
before
moving
the
system.
e
In
addition,
always
remove
CDs
before
moving
the
system.
If
not,
the
CD
may
be
scratched.
e
Before
turning
the
power
on
Check
again
that
all
connections
are
proper
and
that
the
connection
e
cords
are
not
damaged.
Always
set
the
power
switch
to
the
STANDBY
position
before
disconnecting
connection
cords.
ANTENNA
CONNECTIONS
Editing
circuit.
included
*
When
performing
edited
recording
onto
tapes,
trakcs
can
be
selected
automatically
so
that
the
blank
space
on
the
tape
is
minimum.
Dolby
B,
C
N.R
*
For
playback
and
recording
with
high
quality
sound.
CD
SRS
circuit
*
CDs
can
be
recorded
at
the
touch
of
a
button.
Easy-to-use
remote
control
unit
Humming
may
be
produced
if
the
system
is
set
near
a
TV
set
or
other
audio
component
or
its
connection
cords.
If
this
happens,
try
changing
the
position
of
the
equipment
and
connection
cords.
Do
not
move
the
system
abruptly
from
a
cold
place
to
a
warm
place,
as
this
may
cause
dew
(water
droplets)
to
form
in
the
set,
preventing
proper
operation.
If
this
happens,
wait
one
hour
before
using
the
system.
Be
sure
to
keep
this
manual.
The
illustrations
used
in
this
manual
may
differ
from
the
actual
system.
FM
OUTDOOR
ANTENNA
Open
the
cover
7Sonm
COAXIAL
CABLE
300
ohm
ANTENNA
FM
INDOOR
ANTENNA
(an
Accessory)
300
ohm
75
ohm
COAXIAL
CABLE
Attach
to
the
holder
AM
OUTDOOR
ANTENNA
75
ohm
ANTENNA
COAXIAL
CABLE
75
ohm
COAXIAL
CABLE
Assembling
the
Loop
Antenna
e@
Remove
the
tie
fastening
the
loop
anten-
na’s
lead
and
connect
the
lead
to
the
antenna
terminals.

Power
plug
Connect
the
speaker
system
for
e
AM
loop
antenna
the
left
channet
(the
left
side
as
seen
from
the
front)
to
the
L
terminals,
the
speaker
system
for
the
right
channel
to
the
R
termin-
ais.
Connect
the
speaker
systems
before
inserting
the
system
con-
nector.
{Speaker
impedance
at
8
ohms.)
FM
antenna
Refer
to
Page
4.
SNOILOANNOD
Record
Player
(Option)
the
system
connector
wire
to
prevent
noise
from
entering
the
antennas.
Keep
the
FM
and
AM
antenna
wires
away
from
|
(MM
cartridge}
Ground
Wire
Super
Woofer
(Option)
(Option)
(Left
channel)
(Right
channel)
Only
connect
the
AUDIO
jacks
when
connecting
a
DAT.
VTR/DAT
Do
not
plug
the
power
cord
into
the
power
outlet
until
all
connections
are
completed.
Connect
properly
as
shown
in
the
diagram.
Check
the
right
and
left
channels,
and
be
sure
to
connect
the
speaker's
L
terminals
to
the
amplifier's
L
terminals,
the
speaker's
R
terminals
to
the
amplifier's
R
terminals.
@
Be
sure
to
insert
the
plugs
securely.
Incomplete
connections
can
cause
noise.
Note
that
grouping
connection
cords
(pin-plug
cords)
together
with
power
cords
or
setting
them
near
power
transformers
can
cause
noise.
Note
that
if
the
input
jacks
selected
with
the
FUNCTION
selectors
are
open
{if
nothing
is
connected),
the
sound
may
leak
to
another
component
connected
to
different
input
jacks.
R
Connecting
the
System
Connector
Cord
The
sets
can
also
be
placed
:
; ;
next
to
one
another.
When
connecting
the
system
connector
When
disconnecting
the
system
connec-
(Set
the
receiveron
the
very
top.)
cord,
press
on
the
center
of
the
connector
tor
cord,
press
the
sides
of
the
connector
plug
until
you
hear
a
ctick.
plug
towards
the
middle
and
pull.
NOTE
This
system
includes
digital
circuitry,
so
it
may
cause
problems
with
the
colors
on
a
TV.
If
so,
turn
the
system‘s
power
switch
off.
Aide
OO
2
Connector
plug
€
Connector
cord
~
|
Note
that
disconnecting
by
pulling
on
the
cord
can
damage
it.
|
m
2
GQ)
a
2)
=.

ENGLISH
PART
NAMES
AND
Cone
DENON
seru
steno
acenen
we
|
[nF
O,
G0
me
a
mmo)
mie
o
yaaa
steno
NO
This
diagram
shows
the
trap
door
open.
—]
POWER
switch
Press
this
switch
once
to
turn
on
the
power
and
the
display.
The
displays
on
the
CD
player
and
cassette
deck
also
light.
The
CD
player’s
play
indicator
does
not
light.
The
cassette
deck’s
direction
of
play
indicator
lights.
SDB
(Super
Dynamic
Bass)
indicator
This
lights
when
the
SDB
function
is
turned
on
with
the
SDB
button.
REMOTE
SENSOR
VOLUME
control
Use
this
control
to
adjust
the
volume.
Turn
clockwise
(
)
to
increase
the
volume,
counterclockwise
(©
)
to
decrease
it.
PHONES
jack
When
using
headphones,
plug
them
in
here.
The
sound
from
the
speakers
is
cut
when
headphones
are
plugged
These
are
used
to
preset
and
recall
AM
and
FM
broadcasts,
to
set
the
time
and
timer,
etc.
MEMORY
button
This
button
is
used
when
presetting
AM
and
FM
stations.
idpeab
ieee
(FM
stereo
mute/mono)
selector
utton
(For
FM
reception)
STEREO
mute:
Use
this
mode
to
receive
FM
broadcasts
in
stereo.
(“AUTO”
appears
on
the
display.)
The
muting
circuit
is
activated
to
cut
noise
between
stations.
In
this
mode,
FM
broadcasts
are
received
in
monaural,
regardless
of
whether
they
are
broad-
cast
in
monaural
or
stereo.
Set
to
the
mono
mode
if
there
is
much
noise
in
the
stereo
mute
mode
(with
“AUTO”
displayed)
or
if
the
signals
are
weak.
This
button
will
not
function
when
receiving
MW
and
LW
broadcasts.
RECEIVER
DISPLAY
oo
6
©
609
MONO:
The
reception
These
indicate
the
band
being
received.
This
lights
when
signals
are
received
from
the
re-
mote
contro!
unit.
EMORY
button
is
pressed
during
presetting.
This
lights
when
the
sta-
tion
is
tuned
in
Foor
©6866
@€@e@ee6@
©8026
6
frequency,
function,
time,
and
timer
set-
tings
are
displayed
here.
BAND
(FM/MW/LW)
selector
button
The
band
switches
between
FM
and
MW,
LW
each
time
this
button
is
pressed.
AUTO
TUNING
UP
and
DOWN
buttons
These
are
used
to
tune
in
MW,
LW
and
FM
stations,
and
for
corrections
when
setting
the
time
and
timer.
SDB
(Super
Dynamic
Bass)
button
Press
this
button
for
more
powerful
bass
sound.
Press
again
to
turn
the
SDB
function
off.
FUNCTION
selectors
Use
these
to
select
the
program
source.
TIME
SET
button
This
is
used
when
setting
the
timer
and
the
current
time,
and
when
checking
the
timer
settings,
etc.
CLEAR
button
in.
rosa!
F :
:
N
f
M
This
is
used
to
change
the
current
time
and
the
timer
settings.
epee
buttons
for
FM/AM
presetting,
time
set-
TIMER
button
’
This
is
used
to
set
the
timer.
Timer
START
MODE
button
Use
this
button
to
select
the
function
when
setting
the
timer.
Timer
STANDBY
button
Press
this
button
so
that
the
timer
will
operate
at
the
set
times.
DISPLAY
TIME/FUNCTION
button
Press
this
button
to
switch
the
display
between
the
function
and
the
time.
BASS
control
Use
this
to
adjust
the
bass.
TREBLE
control
Use
this
to
adjust
the
treble.
BALANCE
control
Use
this
to
adjust
the
balance
between
the
volume
of
the
left
and
right
channels.
The
volume
is
the
same
for
the
left
and
right
channels
when
the
control
is
at
the
center.
ON:
Lights
when
the
timer
on
time
is
set.
OFF:
Lights
when
the
timer
off
time
is
set.
This
indicates
the
preset
number.
02.50
=F3
This
flashes
for
about
10
seconds
when
the
lie)
-
STEREO
AUTO
MONO
hd
:
é ;
a
This
lights
to
in-
dicate
that
the
timer
is
set.
ON
TIMER
7
OFF
SLEEP
This
|
This
fights
when
the
sleep
timeris
set.
|
when
the
sleep
timer
is
set.
NOTE:
@
The
timer
standby
mark
*
not
set.
@
”
will
not
light
if
the
current
time
is
These
indicate
the
FM
reception
mode.
STEREO:
Lights
when
receiving
stereo
broadcasts.
AUTO:
Lights
when
the
auto
mode
is
set
with
the
FM
mode
button.
Lights
when
the
monaural
mode
is
set
with
the
FM
mode
button.
MONO:

CD
PLAYER
DENON
comacrosc
maven
*
Disc
tray
The
disc
tray
opens
forward
when
the
OPEN/CLOSE
button
@
is
pressed.
To
close
the
disc
tray,
press
the
OPEN/CLOSE
button
@
again.
It
PAUSE
button
Press
this
button
to
stop
playback
temporarily.
Press
the
PLAY
button
to
resume
playback.
HH
STOP
button
Press
this
button
to
stop
playback.
>
PLAY
button
Press
this
button
to
start
playing
the
disc.
If
pressed
when
the
disc
holder
is
open,
the
disc
holder
closes
and
playback
begins.
o 8
©
Play
indicator
This
lights
when
the
disc
is
played
and
sound
is
output.
OPEN/CLOSE
button
Press
this
button
to
open
and
close
the
disc
holder.
Press
once
to
open
the
disc
holder
forward,
then
press
again
to
close
the
disc
holder.
1)
Track
CD
PLAYER
DISPLAY
Tape
type
and
remaining
time
display
During
the
editing
func-
tion,
C-20
lights
and
the
rc
This
diagram
shows
the
trap
door
open.
80
is
displayed
when
the
disc
data
cannot
be
read
properly.
When
a
disc
is
loaded:
e
The
total
number
of
tracks
is
displayed
in
the
stop
mode.
e
The
track
number
is
displayed
in
the
play
and
program
modes.
¢
{[
or
]]
is
displayed
when
the
innermost
or
outermost
section
of
the
disc
is
reached
in
the
manual
search
mode.
Time
dispiay
0000
js
displayed
when
the
disc
data
cannot
be
read
properly.
When
a
disc
is
loaded:
e
The
elapsed
playing
time
is
displayed
in
the
stop
mode.
©
The
elapsed
time
for
the
track
currently
playing
is
displayed
in
the
play
and
pause
modes.
e
The
elapsed
time
for
the
programmed
tracks
is
displayed
in
the
program
mode.
ENGLISH
144
44
(automatic/
manual
search
reverse
button)
Press
this
button
to
move
the
pickup
back
to
the
beginning
of
the
desired
track.
Press
in
the
play
or
pause
mode
to
move
back
a
number
of
tracks
equal
to
the
number
of
times
the
button
is
pressed.
>>
PPI
(automatic/
manual
search
forward
button)
Press
this
button
to
move
the
pickup
forward
to
the
beginning
of
the
desired
track.
Press
in
the
play
or
pause
mode
to
move
forward
a
number
of
tracks
equal
to
the
number
of
times
the
button
is
pressed.
*
The
automatic
search
function
is
set
if
the
button
is
released
within
0.5
seconds,
and
the
manual
search
function
is
set
if
the
button
is
held
in
for
more
than
0.5
seconds.
REPEAT
button
Press
this
button
for
repeat
playback.
EDIT
button
Press
this
button
for
edited
recording
(dividing
the
tracks
to
be
recorded
to
fit
onto
sides
A
and
B
of
a
tape
according
to
the
tape’s
length).
TAPE
A/B
button
Press
this
button
during
editing
to
switch
the
display
between
the
display
for
side
A
and
the
display
for
side
B
of
the
tape.
number
display
The
indicators
switch
as
follows
when
tape
time
is
displayed.
TRACK
“03
/
EDIT
U
(
PLay:n PAUSE]
ie
oe
[A]
tare
[5]
[wrsssrapw
ae
3
t4
15
0
»
PLAY
lights
when
the
disc
is
play-
ing,
and
tl
PAUSE
lights
when
in
the
pause
mode.
During
editing,
EDIT,
(J,
and
TAPE
tight,
the
remaining
time
for
side
A
is
displayed
on
the
time
display,
the
numbers
of
the
tracks
set
for
side
A
light
on
the
calendar
display,
while
the
numbers
of
the
tracks
set
for
side
B
flash.
When
the
TAPE
A/B
button
is
pressed,
[A]
turns
off,
[B]
lights,
and
the
remaining
time
and
numbers
of
the
tracks
set
for
side
B
are
displayed
in
the
same
way
as
for
side
A.
PROGRAM
lights
during
the
programmed
search
mode.
eNO
DISC
lights
on
the
display
if
no
disc
is
loaded,
or
if
the
disc
is
loaded
upside-down
or
is
heavily
scratched
or
dirty.
NO
DISC
IN
the
REPEAT
button
is
pressed
in
the
play
mode:
First
press
:
REPEAT
wl
1718
1920)
(OVER)
Second
press
:
REPEAT
Third
press
;
REPEAT
[A]-
BI
Fourth
press
:
Off
This
lights
when
there
are
more
than
20
tracks
on
the
disc,
These
indicate
the
time
display
mode.
TOTAL
lights
when
the
remaining
time
for
ail
tracks
is
displayed.
SINGLE
lights
when
the
remaining
time
per
track
is
displayed.
“Music
calendar”
display
This
indicates
the
numbers
of
the
tracks
on
the
disc,
up
to
a
maximum
of
20,
The
track
numbers
turn
off
after
the
corresponding
tracks
are
played.
In
the
program
mode,
the
numbers
of
the
programmed
tracks
are
displayed,
up
toa
maximum
of
20.
All
indicators,
1
to
20,
light
when
the
disc
data
cannot
be
read
properly.

ENGLISH
©
eo
660
DENON
stercocasserre
rare
occx
MITO
REVERSE
AUTO
TAPE
SELECTOR
MOPAZONTAL
LOADING
SYSTEM:
2
MOTOR
MECHANSA
Cassette
tray
The
cassette
tray
opens
out
when
the
OPEN/CLOSE
button
@
is
pressed.
Insert
the
cassette
tape
with
the
side
on
which
the
tape
is
exposed
facing
away
from
you.
To
close
the
cassette
tray,
press
the
OPEN/CLOSE
button
@
again.
>
(forward
playback
button):
Press
this
button
to
record
or
play
the
tape
in
the
forward
direction.
4
(reverse
playback
button):
Press
this
button
to
record
or
play
the
tape
in
the
reverse
direction.
i
(stop
button):
Press
this
button
while
the
tape
is
moving
to
stop
the
tape.
Playback
direction
indicators
This
flashes
during
playback.
Recording
indicator
This
lights
when
the
recording
or
recording
standby
mode
is
set
using
the
REC/REC
MUTE
button
@,
and
flashes
during
the
recording
mute
mode.
#
OPEN/CLOSE
button
Press
this
button
to
open
and
close
the
cassette
tray.
44
(rewind
button):
Press
this
button
to
rewind
the
tape.
When
pressed,
the
playback
direction
indicators
@
flash.
Also,
if
pressed
during
playback
in
the
}»
(forward)
direction,
the
tape
is
rewound
to
the
beginning
of
the
current
selection.
if
pressed
during
playback
in
the
q
(reverse)
direction,
the
tape
is
forwarded
to
the
beginning
of
the
next
selection.
(fast-forward
button):
Press
this
button
to
fast-forward
the
tape.
When
pressed,
the
playback
direction
indicators
@
flash.
Also,
if
pressed
during
playback
in
the
>»
(forward)
direction,
the
tape
is
forwarded
to
the
beginning
of
the
next
selection.
If
pressed
during
playback
in
the
q
(reverse)
direction,
the
tape
is
rewound
to
the
beginning
of
the
current
selection.
CASSETTE
DECK
DISPLAY
dB-10
-5
[nvm
one
000
|
Ltt
|
0
+3
+5
COUNTER
RESET
button
Press
this
button
to
reset
the
tape
counter
to
“0000”,
CD
SRS
(CD
synchronized
recording
button)
Use
this
button
for
CD
synchronized
recording.
Refer
to
Page
77.
REC/REC
MUTE
(recording/
recording
mute)
button
To
record,
press
the
REC/REC
MUTE
button
and
the
>
PLAY
button.
If
only
the
REC/REC
MUTE
button
is
pressed,
the
deck
is
set
to
the
recording
pause
mode.
If
pressed
during
recording,
the
deck
is
set
to
the
recording
mute
mode
for
approximately
5
seconds,
after
which
it
is
set
to
the
recording
pause
mode.
INPUT
LEVEL
control
Use
this
control
to
set
the
recording
level.
DOLBY
NR
selector
switch
Use
this
switch
to
select
the
Dolby
NR
mode,
OFF,
B
or
C.
During
playback,
set
this
switch
to
the
same
mode
in
which
the
tape
was
recorded.
REV.
MODE
switch
Use
this
to
set
the
reverse
mode
to
one
of
the
following
modes:
+—
(one
side
mode),
[>
(reverse
mode),
C2?
(continuous
mode).
In
the
continuous
mode,
the
tape
stops
automatically
after
both
sides
are
played
five
times.
Refer
to
Page
11.
This
is
displayed
when
no
tape
is
loaded.
-3
Roe
ee
=
Refer
to
next
page.
[|
-
END
@©:
The
recording
level
is
displayed
here
dur-
ing
recording,
the
playback
level
during
playback.
Dolby
noise
reduction
manufactured
under
license
from
Dolby
Laboratories
Licensing
Corporation.
“DOLBY”
and
the
double-D
symbol
[0
are
trademarks
of
Dolby
Laboratories
Licensing
Corporation.

ENGLIS
Remaining
Tape
Indicators
-
END,
®
and
©
These
indicators
notify
that
the
tape
is
reaching
the
end
during
recording
and
playback.
The
indicators
differ
according
to
the
diameter
of
the
tape
hub.
END
:
This
starts
flashing
when
the
tape
is
nearing
the
end
during
recording
or
playback,
then
stops
flashing
and
remains
lit
once
the
end
of
the
tape
is
reached.
After
this,
the
indicator
turns
off
as
soon
as
another
mode
is
set.
@
:
Fornormai
hubs,
®
and
END
tight
when
the
tape
is
nearing
the
end.
Use
these
two
indicators
to
determine
the
amount
of
tape
remaining.
The
indicator
lights
when
the
tape
is
nearing
the
end,
then
turns
off
when
the
tape
stops.
@
:
When
recording
or
playing
tapes
with
large
hubs,
@
and
END
light
when
the
tape
is
nearing
the
end.
Use
these
two
indicators
to
determine
the
amount
of
tape
remaining.
The
indicator
lights
when
the
tape
is
nearing
the
end,
then
turns
off
when
the
tape
stops.
Example
1:
About
5
minutes
from
the
end
of
the
tape
e@
Large
hubs
are
hubs
with
a
diameter
of
about
27mm.
during
playback
in
the
forward
direction
on
a
Note
that
if
the
hub
is
larger
than
this,
there
may
be
a
major
error
in
indicating
the
remaining
time.
60-minute
tape
with
normal
hubs:
NUGCe
>
END.
®
JUAN
Example
2:
About
8
minutes
from
the
end
of
the
tape
during
playback
in
the
forward
direction
on
a
60-minute
tape
with
large
hubs:
re
43
-END:
@O
FAVS
Example
3:
About
5
minutes
from
the
end
of
the
tape
during
playback
in
the
reverse
direction
on
a
Normal
hub
Large
hub
60-minute
tape
with
normal
hubs:
Sere
of
iA
~
END:@©
®
Use
the
following
table
to
determine
the
approximate
time
to
the
end
of
the
tape
when
the
END,
@
and
etauy’®
indi
fl
i
ini
it:
my
©
indicators
start
flashing
or
stop
flashing,
remaining
lit:
Normal.
hub
Large
hub
Playback
in
Playback
in
Playback
in
Playback
in
forward
direction
reverse
direction
forward
direction
|
reverse
direction
Approx.
1
minute
|
Approx.
5
minutes
|
Approx.
7
minutes
|
Approx.
5
minutes
Approx.
5
minutes}
Approx.
5
minutes
|
Approx.
8
minutes
|
Approx.
5
minutes
*
There
are
no
C-90
tapes
with
large
hubs.
Example
4:
About
5
minutes
from
the
end
of
the
tape
during
playback
in
the
reverse
direction
on
a
60-minute
tape
with
large
hubs:
Hub
diameter
Me
hey
5
END:
“en
NO;
©
Tape
fength
NOTE:
The
remaining
tape
times
shown
on
the
table
are
only
rough
indicators
of
the
actual
remaining
time.
The
“END”,
“@”
and
“©”
indicators
may
not
light
when
using
cassettes
with
thin
tape
or
a
small
hub
diameter.
9

ENGLISH
REMOTE
CONTROL
UNIT
@
Open
the
battery
case
lid
on
the
back
Remote
contro!
sensor
of
the
remote
contro!
unit.
e
The
remote
control
unit
can
be
used
a
straight
distance
of
approximately
7
meters
from
the
remote
control
sensor,
but
this
distance
will
be
30°
shorter
if
there
are
obstacles
in
the
way
or
if
the
remote
control
unit
is
SS
operated
from
an
angle.
Remote
control
transmitter
@®
Insert
the
two
batteries
(R6P,
AA)
in
the
proper
direction.
“Hi”
appears
at
the
upper
left
corner
of
the
tuner’s
display
when
signals
are
re-
ceived.
®
Set
the
battery
case
lid
back
in
place.
@
Be
careful
that
the
remote
contro!
sensor
is
not
exposed
to
direct
sunlight
or
strong
light
from
lighting
fixtures.
If
it
is,
the
remote
control
unit
may
not
work.
e@
When
adjusting
the
volume
from
the
remote
controi
unit,
the
volume
will
stop
changing
if
the
remote
control
transmitter
is
moved
away
from
the
remote
control
sensor.
Press
the
button
again
to
continue
changing
the
volume.
Button
Names
and
Functions
Stop
button
{(
HI)
Play
button
(
P»
)
Press
this
to
stop
CD
playback.
Press
this
to
start
playback
of
the
CD.
POWER
button
SLEEP
button
Press
this
to
turn
on
the
power
for
the
entire
Press
this
to
set
the
sleep
timer.
Pause
button
(II)
Press
this
to
temporarily
stop
playback.
Press
the
play
button
(P)
to
resume
playback.
Auto
search
button
(144)
Press
this
button
during
playback
to
return
to
the
beginning
of
the
currently
playing
track.
Press
again
within
0.5
seconds
to
move
to
the
beginning
of
the
previous
track.
Search
button
(44)
Auto
search
button
(>P#)
Press
this
to
move
backward.
Press
this
button
during
playback
to
advance
DIRECT
button
to
the
beginning
of
the
next
track.
Press
again
within
0.5
seconds
to
move
to
the
beginning
of
the
following
track.
Press
this
for
direct
search
on
the
CD
player.
PROG
button
Press
this
for
programmed
search
on
the
CD
player.
Number
buttons
TIME
button
Press
this
button
repeatedly
to
switch
the
CD
player
time
display
between
the
remaining
time
per
track,
the
total
remaining
time,
and
the
elapsed
time
per
track.
tecall
preset
stations.
CANCEL
button
When
playing
a
CD,
press
these
after
pressing
: ;
tet
the
DIRECT
or
PROG
button
to
specify
track
fas
once:
ale
mae
to
cancel
the
numbers.
program
rack,
Deck
operation
buttons
FUNCTION
button
Use
these
buttons
to
operate
the
cassette
deck.
Orr
cn
od
TUNER,
To
record,
press
the
REC/REC
MUTE
button
7
GD,
an
-
then
one
of
the
PLAY
buttons
(¢
or
DP).
Press
the
REC/REC
MUTE
button
twice
to
create
a
VOLUME
buttons
Cee
ee
5-second
blank
space
on
the
tape.
The
recording
pause
mode
is
set
when
the
REC
Use
these
to
adjust
the
volume.
PAUSE
button
is
pressed
during
recording.
Press
>
to
decrease
the
volume,
<
to
increase
[
it
Press
these
after
pressing
the
TUNER
button
to
SDB
(Super
Dynamic
Bass)
button
Press
this
for
a
sound
with
more
powerful
bass,
Press
again
to
return
to
the
normal
sound.
10

ENGLISH
CASSETTE
DECK
Before
Recording
and
Playback
This
deck
is
equipped
with
an
auto
reverse
mechanism,
so
cassette
tapes
can
be
played
and
recorded
on
both
sides
or
played
continuously
without
having
to
turn
them
over.
@
Direction
of
tape
travel
This
deck
has
two
play
buttons,
one
for
the
forward
direction
(front
side)
s
and
another
for
the
reverse
direction
(back
side).
The
side
being
played
can
Playback
on
back
side
'
Playback
on
front
side
;
:
:
(Side
which
is
visible
be
changed
during
playback
by
pressing
the
opposite
play
button.
when
loaded
ia
cassette
tray.)
@
Reverse
mode
Set the
reverse
mode
switch
(REV.
MODE)
as
follows:
e
One-side
recording/playback
mode
(
——
)
In
this
position,
only
the
front
side
or
the
back
side
of
the
cassette
tape
is
played
or
recorded.
(The
tape
stops
automatically
when
the
end
of
that
side
is
reached.)
Start
from
[Os|—
‘aia
—>
[Pa
Auto
stop
e
Two-side
(reverse)
recording/playback
mode
(
=
)}
front
side
In
this
position,
when
the
end
of
the
front
side
is
reached,
recording
or
playback
automatically
switches
to
the
back
side
and
continues
from
Ainevion
[Oo]
ce)
et
rx:
)
Start
from
there.
(The
tape
stops
automatically
when
the
end
of
the
back
side
is
back
side
reached.)
e
Continuous
mode
(
C
})
Playback
continues
until
the
STOP
button
is
pressed,
but
stops
Start
from
automatically
after
both
sides
have
been
played
five
times.
front
side
(ey—
—
—>
[Pa
~~
‘
Reverse
Auto
stop
04
<+-—/-d
q+/
If
you
start
playing
or
recording
from
the
back
side,
the
tape
will
stop
automatically
at
the
end
of
the
back
side.
r—>
(09)
--->°dg/-,
Reverse
Reverse
\--/09)
+
---(O\47
*
The
reverse
recording/playback
mode
{
=
)
is
set
automatically
during
recording.
Check
the
following
before
recording
or
playing
cassette
tapes:
1.
Is
the
head
dirty?
...
The
sound
quality
will
be
poor
if
the
head
is
dirty.
2.
Are
the
accidental
erasure
Res
Prevention
tabs
broken
Off?
ou...
Recording
is
not
possible
if
they
are.
NOTE:
©
Be
sure
to
load
the
cassette
tape
with
the
open
side
facing
away
from
you.
Loading
it
in
the
opposite
direction
can
cause
damage.
¢
Do
not
press
the
OPEN/CLOSE
button
during
playback
or
recording.
Always
press
the
STOP
button
before
pressing
the
OPEN/CLOSE
button.
Using
the
Tape
Counter
e
Reset
the
counter
toOQ00by
pressing
the
COUNTER
RESET
button.
Auto
Tape
Selector
Mechanism
This
deck
is
equipped
with
an
auto
tape
selector
mechanism
which
uses
the
Accidental
erasure
prevention
tabs
Detection
holes
detection
holes
in
the
cassette
halves
to
automatically
set
the
recording
bias
and
equalization
best
suited
for
that
type
of
tape.
®
Do
not
use
ferrichrome
tapes.
©
Use
meta!
tapes
equipped
with
detection
holes.
Detection
Metal
tape
Chrome
tape
11

ENGLISH
TROUBLESHOOTING
Power
does
not
turn
on
when
POWER
button
pressed.
@
Power
cord
not
plugged
into
outlet.
Measures
@
Plug
cord
into
outlet
property.
@
VOLUME
control
set
to
minimum.
e@
Headphones
are
connected.
No
sound
produced
from
speakers.
Common
Trebles
not
produced
or
stereo
effect
not
clear.
e
No
cassette
tape
loaded.
e
Cassette
tape’s
tabs
broken
off.
Recording
not
performed
when
REC/
PAUSE
button
pressed.
e
Speaker
cords
not
connected
to
speaker
terminals.
¢
Speaker's
polarities
(®
and
©)
not
matched.
e
Connect
speaker
cords
properly,
Source
other
than
the
one
desired
is
@
Function
selector
buttons
not
set
properly.
@
Set
to
desired
function.
heard.
e
Turn
VOLUME
control
clockwise
(
()).
©
Disconnect
headphones.
@
Connect
speaker
cords
properly.
e
Load
tape.
©
Apply
cellophane
tape
over
holes.
@
Heads
dirty.
e
Tape
stretched.
Sound
is
interrupted
during
playback
or
recording,
or
treble
sound
low.
Wow
is
heavy
during
playback
or
re-
e
Capstans
or
pinch
rollers
dirty.
ar
is
cording.
Hissing
noise
heard
during
FM
reception.
e
Antenna
not
pointed
in
proper
direction.
@
Change
direction
of
antenna.
@
Signals
weak.
@
Install
outdoor
antenna.
Hissing
or
scratchy
noise
heard
during
©
Noise
from
TV
or
interference
from
MW/LW
reception.
Humming
noise
heard
during
MW/LW
reception.
Disc
loaded
but
number
of
tracks
not
dis-
played.
source
frequency.
@
Disc
loaded
upside-down.
@
Disc
dirty.
®
Non-standard
disc
loaded.
e
Disc
loaded
upside-down.
e
Foreign
object
in
disc
holder.
e
Disc
dirty.
@
Disc
scratched.
Operation
not
performed
when
buttons
pressed,
or
playback
stops
in
middle
of
track.
CD
Player
Sound
skips.
Humming
noise
heard
during
playback.
Condensation
Water
droplets
(or
condensation)
may
form
on
the
optical
lens
or
disc
in
the
follow-
ing
cases:
e
Just
after
a
heater
is
turned
on
in
the
room.
@
When
the
set
is
placed
in
a
steamy
or
humid
room.
@
When
the
set
is
moved
abruptly
from
a
cold
place
to
a
warm
room.
SPECIFICATIONS
©
Receiver
(UDRA-70)
®
Disc
scratched.
@
Player
set
in
shaky,
unstable
place.
source
frequency.
Reception
frequency
range:
FM:
87.50
MHz
~
108.00
MHz
MW:
522 kHz
~
1611
kHz
LW:
153
kHz
~
279 kHz
Reception
sensitivity:
FM:
1.5
uV,75
ohms
(SN
ratio
30
dB)
MW:
20
nV
(SN
ratio
20
dB)
LW:
35
yV
(SN
Ratio
20
dB)
FM
stereo
separation:
35
dB
(1
kHz)
Practical
maximum
output:
30W
+
30W/
(40
Hz
~
20
kHz)
Bass
adjustment:
100
Hz
+8 dB
Treble
adjustment:
10
kHz
+8 dB
SDB
(Super
Dynamic
Bass):
80
Hz,
+8
dB
Included
jacks:
PHONO:
MM
Cartridge
Input
jacks
DAT/VCR:
Input
jacks,
output
jacks
for
recording
Headphones
jack:
3.5
mm
mini-size
jack
250
(W)
x
96
(H)
x
354
(D)
mm
({9-27/32"
x
3-25/32”
x
13-15/16")
Max.
externai
dimensions:
Weight:
5.3
kg
(11
Ibs
17
oz)
Power
supply:
AC
220
V
50
Hz,
AC
240
V
50
Hz
(for
U.K.
model)
Power
consumption:
145W
*
Maximum
dimensions
include
controls,
jacks,
and
covers.
e@
Signals
over
power
cord
modulated
by
power
e
Dust,
fingerprints,
or
spittle
on
disc.
e@
Signals
over
power
cord
modulated
by
power
@
Clean.
e
Replace
tape.
@
Turn
TV
off.
e
Set
system
in
different
direction.
@
Install
outdoor
antenna.
other
stations.
e
Ptug
in
cord
in
opposite
direction.
@
Install
outdoor
antenna.
@
Reload
disc.
®
Clean
disc.
e
Replace
with
standard
disc.
@
Reload
disc.
e
Remove
disc
and
remove
foreign
object.
@
Clean
disc.
@
Replace
with
non-scratched
disc.
@
Clean
disc.
e
Replace
with
non-scratched
disc.
@
Set
player
in
stable
place.
¢
Plug
in
cord
in
opposite
direction.
lf
Condensation
Occurs
The
signals
on
the
disc
cannot
be
read
properly
and
the
CD
player
may
not
operate
properly.
To
get
rid
of
the
condensation,
turn
the
power
on
and
let
the
set
sit
for
about
one
hour.
Operation
shouid
be
normal
after
this.
@
CD
Player
(UCD-70)
Wow
&
flutter:
Below
measurable
limits
(+0.001%
W.Peak)
Playing
time:
60
minutes/one
side
Sampling
frequency:
44.1
kHz
Light
source:
Semiconductor
Max.
external
dimensions:
250
(W)
x
96
(H)
x
312
(D)
mm
(9-27/32"
x
3-25/32”
x
12-9/32")
Weight:
2.8kg
e
Cassette
Deck
(UDR-70)
Type:
Horizontal
4-track,
2-channel
auto
reverse
stereo
cassette
deck
-
Heads:
1
hard
permalloy
head
for
recording
and
playback,
1
double-gap
ferrite
head
for
erasing
Tape
speed:
4.75
cm/s
Included
circuits:
Dolby
8
and
C
Wow
&
flutter:
0.06%
or
less
(W.R.M.S.)
Normal,
chrome
and
metal
tapes
250
(W)
x
96
(H)
x
312
(D)
mm
(9-27/32"
x
3-25/32”
x
12-9/32")
Usable
tapes:
Max.
external
dimensions:
Weight:
3.2
kg
(7
Ibs
1
oz)
e
Remote
Control
Unit
(RC-142)
Type:
Infrared
pulse
Number
of
buttons:
38
65
(W)
x
175
(H}
x
20
(D}
mm
(2-9/16"
x
6-57/64"
x
25/32")
130
g
(approx.
5
02)
(including
batteries)
Max.
external
dimensions:
Weight:
(W)
=
width,
(H)
=
height,
(D)
=
depth
*
Specifications
and
contents
are
subject
to
change
without
notice
for
purposes
of
improvement.
12

ENGLISH
DEUTSCH
FRANCAIS
Se)
ESPANOL
LISTENING
TO
RADIO
BROADCASTS,
ANHOREN
VON
RUNDFUNKSENDUNGEN,
ECOUTE
D’EMISSIONS
DE
RADIO,
ASCOLTO
DELLE
TRASMISSIONI
RADIO
RECEPCION
DE
EMISIONES
RADIALES
TUNING,
ABSTIMMEN,
SYNTONISATION,
SINTONIZACION,
SINTONIZZAZIONE
6
0
e880
Example:
Tuning
in
FM
102.50,
_Beispiel:
Abstimmen
des
UKW-Rundfunksenders
102,50,
Exemple:
Syntoniser
FM
102,50
Esempio:
Sintonizzazione
della
stazione
FM
102,50,
Ejemplo:
Para
sintonizar
la
frecuencia
102,50
de
FM
Set
the
VOLUME
control
to
the
MIN
position,
then
press
the
SYSTEM
POWER
button.
Select
the
FM
band
using
the
BAND
FM/AM
button.
Use
the
UP
and
DOWN
TUNING
buttons
to
set
the
frequency
to
102.50
MHz.
oO
fe)
Presetting
AM
and
FM
Stations,
_
Voreinstellung
von
MW-
und
ce
aut
aunnnencier®;
Prérégler
les
stations
AM
et
FM,
Preselezione
delle
stazioni
AM
e
FM,
_Presintonizacién
de
estaciones
de
AM
y
Fi
Example:
Preset
FM
102.50
at
preset
button
3
Beispiel:
Voreinstellung
des
UKW-Rundfunksenders
102,50
in
Taste
3
Exemple:
Prérégler
FM
102,50
sur
la
touche
de
préréglage
3
Esempio:
Preselezione
della
stazione
FM
102,50
nel
tasto
di
preselezione
3
Ejemplo:
Presintonice
la
frecuencia
102.50
de
FM
en
el
boton
3
Press
the
MEMORY
button.
ites
]
Oe
:
50
si
“[meEMO
}
=
The
“MEMORY”
indicator
flashes
for
10
seconds.
O
—
Press
preset
button
3
while
a
le.
5d
et
3
the
“MEMORY”
indicator
is
flashing.
P
3
appears.
Up
to
30
MW,
LW
and
FM
stations
at
random
can
be
preset
using
this
procedure.
For
example,
to
preset
the
12th
station,
press
+10
and
2,
or
for
the
23rd
station,
press
+10,
+10
and
3.
Auto
Tuning
e
When
the
TUNING
buttons
are
pressed,
the
frequency
changes
in
steps
of
50
kHz
for
FM,
9kHz
for
MW
and
1
kHz
for
LW.
e
Ifthe
TUNING
UP
or
DOWN
button
is
held
in
for
more
than
0.5
seconds,
the
frequency
continues
to
change
when
the
button
is
released,
the
next
station
is
found
automatically,
and
tuning
stops
there
(auto
tuning).
Tuning
will
not
stop
if
the
antenna
input
is
weak
and
the
TUNED
indicator
does
not
light.
To
stop
auto
tuning,
press
the
UP
or
DOWN
button
again.
e
DEUTSCHE
—
SEITE
24
e
FRANCAIS
—
PAGE
38
e
ITALIANO
—PAGINA
52
e
ESPANOL
—
PAGINA
66
70

ESPANOL
ITALIANO
FRANCAIS
DEUTSCH
ENGLISH
POWER
REMOTE
SENSOR)
ON/STANDBY
TUNEO
STEREO
AUTO
C]
AND
TUNING
OOO
ao
ene
ee
2
Om
CT
UY
CD:
0°90
o
0.0.0.0-06
AUF
AU
wo)
0
TIME
SET
CLEAR
TIMER
START
MODE
STANOBY
DISPLAY
at
BASS
TRE
Al
PAESET
TIME
SET
MR
SE
Ted
EBLE
BALANCE
Example:
To
listen
to
an
FM
station,
preset
at
button
3
Beispiel:
Anhéren
eines
UKW-Senders,
der
in
die
Nummerntaste
3
voreingestellt
wurde.
Exemple:
Ecouter
une
station
FM
préréglée
sur
la
touche
3
Esempio:
Ascolto
della
stazione
FM
che
é
stata
preselezionata
nel
tasto
3
Ejemplo:
Para
escuchar
una
estacién
de
FM
presintonizada
en
el
boton
3
oe
~
102.50
~e
3
TUNED
Operating
From
the
Remote
Control
Unit
@
Press
the
remote
control
unit’s
“TUNER”
button.
e
Press
the
remote
control
unit’s
“3”
button.
FM
Stereo
Reception
e
fan
FM
stereo
broadcast
is
received
when
the
STEREO/MONO
button
has
been
pressed
turning
the
AUTO
and
MONO
indicators
on,
the
STEREO
indicator
lights
and
the
station
is
received
in
stereo.
If
the
monaural
mode
is
set,
the
STEREO
indicator
turns
off
and
the
station
is
received
in
monaural.
Notes
on
Presetting
e@
When
an
FM
station
is
preset,
the
auto
or
monaural
mode
is
also
set,
so
check
the
display
before
presetting
the
station.
e
Ifastation
is
preset
at
a
button
at
which
another
station
has
previously
been
preset,
the
previous
station
is
cleared
and
the
new
station
is
preset.
e@
The
preset
memory
is
not
cleared
immediately
if
the
power
cord
is
unplugged,
but
will
be
cleared
if
the
cord
is
left
unplugged
over
a
long
period
of
time.
If
this
happens,
preset
the
stations
again.
e
DEUTSCHE
—
SEITE
24
e
FRANCAIS
—
PAGE
38
e
ITALIANO
-PAGINA
52
e
ESPANOL
—
PAGINA
66
71

ENGLISH
DEUTSCH
FRANCAIS
ITALIANO
ESPANOL
USING
THE
TIMERS,
TIMER-BETRIEB,
UTILISATION
DES
MINUTERIES,
USO
DEI
TIMER
USO
DE
LOS
TEMPORIZADORES
Setting
the
Current
Time
(the
time
is
displayed
in
the
24-hour
mode)
Einstellung
der
gegenwartigen
Zeit
(die
Zeit
wird
in
der
24-Stunden-Betriebsart
angezeigt)
Réglage
de
Iheure
actuelle
(I'heure
est
affichée
dans
le
mode
de
24
heures)
Impostazione
dell’ora
attuale
(l’orologio
sara
visualizzato
nel
formato
delle
24
ore)
Ajuste
de
la
hora
actual
(la
hora
es
indicada
en
el
formato
de
24
horas}
DENON
="
90.00-p
3-0
TUNED
STEREO
AUTO
POWER
ON/STANOBY
eS
+
oe
A
Bass
TREBLE
BALANCE
TIMGSET
CLEAR
TAMER
START
MODE
STANDBY
OSPLAY
TIMER
SET
Example:
Setting
the
time
to
19:30
(7:30
p.m.),
Beispiel:
Einstellen
der
Zeit
auf
19:30,
Exemple:
Réglage
de
I’heure
a
19:30,
Esempio:
Impostazione
delle
ore
19.30
(7.30
pomeridiane),
Ejemplo:
Para
ajustar
ta
hora
a
las
19:30
(7:30
p.m.)
POWER
ON/STANDBY
Power
button.
)
Wy
SINT
L,
9
0:00
90:00:
TOS
AL
NZ
UNZTS
Press
number
buttons
aN
we
pele
7
1,
9,
3
and
0,
in
that
order.
=]
‘3
=
All
set
piaces
flash.
Fave
Vepervyg
gas
Press
button
10
for
0.
Press
the
SET
button
simul-
taneously
with
the
chime
of
a
time
service,
etc.
Stops
flashing
and
starts
counting
from
00
seconds.
e
Use
the
UP
and
DOWN
buttons
to
switch
the
place
which
is
flashing.
Setting
the
Timers
(2
different
timer
settings
can
be
made)
Einstellung
der
Timer
(es
kénnen
2
unterschiedliche
Timer-Einstellungen
vorgenommen
werden)
Réglage
des
minuteries
(2
réglages
différents
de
minuterie
peuvent
étre
faits)
Impostazione
dei
timer
(potete
effettuare
2
differenti
impostazioni
del
timer)
Ajuste
de
los
temporizadores
(se
podran
hacer
2
ajustes
distintos
de
temporizador)
@
Be
sure
to
set
the
current
time.
e@
Regular
timer:
The
power
can
be
turned
on
and
off
once
every
day
at
the
same
time.
(Wake-up
timer)
e@
Sleep
timer:
The
power
can
be
set
to
turn
off
in
up
to
60
minutes
in
steps
of
10
minutes
using
the
remote
control
unit.
Be
sure
to
preset
stations
before
setting
the
timer.
Refer
to
“Presetting
AM
and
FM
Stations”.
@
DEUTSCHE
—
SEITE
24
e
FRANCAIS
—
PAGE
38
©
ITALIANO
PAGINA
52
e
ESPANOL
-
PAGINA
66
72

ESPANOL
ITALIANO
FRANCAIS
DEUTSCH
ENGLISH
Setting
the
Timer
(preset
AM
and
FM
stations
beforehand)
Einstellung
des
“Jeden-Tag”-Timers
(wahlen
Sie
vorher
MW-
und
UKW-Rundfunksender
vor)
Réglage
de
la
minuterie
journaliére
(prérégier
au
préalable
les
stations
AM
et
FM)
Impostazione
del
timer
quotidiano
(preselezionate
le
stazioni
AM
e
FM
in
anticipo)
Ajuste
del
temporizador
semanal
(presintonice
estaciones
de
AM
y
FM
de
antemano)
079)
0000
Example:
Setting
the
on
time
to
12:35,
the
off
time
to
12:56,
the
tuner
(FM
102.50MHz
preset
at
button
3)
Beispiel:
Einstellung
der
Einschaltzeit
auf
12:35,
der
Ausschaltzeit
auf
12:56,
des
Tuners
(UKW
102,50
MHz
der
in
die
Nummerntaste
3
voreingestellt
wurde.)
Exemple:
Réglage
de
I’heure
d’enclenchement
a
12:35,
I’heure
d’arrét
4
12:56,
le
syntoniseur
(FM
102,50
MHz
préréglée
sur
!a
touche
3)
Esempio:
Impostazione
delle
12.35
come
ora
di
attivazione,
delle
12.56
come
ora
di
disattivazione,
del
sintonizzatore
(FM
102,50
MHz
che
é
stata
preselezionata
nel
tasto
3)
Ejemplo:
Para
fijar
!a
hora
de
activacién
a
las
12:35
y
la
hora
de
desactivacion
a
las
12:56,
ajustar
el
sintonizador
a
la
frecuencia
(102.50
MHz
de
FM
presintonizada
en
el
botdn
3)
Press
the
POWER
aan
Press
the
TIMER
button.
Ld
;
FUNC
ren
STAT
HOD
9
TUNER
=|r™")
TUNER
mode.
AIR,
CH
—~+—CD
Press
the
SET
button.
O
:
P
le.
So
“spe
9
_
Press
“3”.
TIMESET
;
es
Flashes.
Press
the
SET
button.
G:
ie
B12
sont
tne
Press
number
buttons
“8,
Se
oS
1",
"2",
"3"
and
"5",
Auto
Press
the
SET
button.
Press
number
buttons
fi
=
nen
“4,
"2",
"5"
and
“6”,
fe
Us
Press
the
SET
button.
Press
the
STANDBY
button.
1
The
illumination
STANOBY
turns
off
and
the
current
time
is
POWER
displayed.
ON/STANOBY
“TIMER
©
“is
Press
the
POWER
button.
C_]
weet
displayed.
®
The
timer
will
operate
at
the
same
times
every
day
ifthe
©
mark
is
lit.
@
DEUTSCHE
—
SEITE
24
e
FRANCAIS
—
PAGE
38
e
ITALIANO
—PAGINA
52
e
ESPANOL
—
PAGINA
66
73

ENGLISH
DEUTSCH
FRANCAIS
ITALIANO
ESPANOL
Examples
of
How
the
Timers
Can
Be
Used,
_Beispiele
fur
die
Benutzung
der
Timer
Exemples
comment
utiliser
les
minuteries,
_Esempio
dell’uso
dei
timer
Ejemplos
de
como
pueden
usarse
los
temporizadores
Example
1
Waking
up
to
the
sound
of
a
CD
/
Wecken
mit
einer
CD-Platte
/
Se
réveiller
au
son
d’un
disque
compact
/
P
Sveglia
al
suono
del
Compact
Disc
/
Para
despertar
con
el
sonido
de
un
disco
compacto
POWER
ON/STANDBY
4
OPENCLOSI
LY
Press
the
receiver's
POWER
-—
Press
the
CD
player's
—>
Set
the
compact
disc
-+
Press
the
OPEN/CLOSE
button
to
turn
the
power
on.
OPEN/CLOSE
button
to
in
the
tray.
button
again
to
close
open
the
tray.
the
tray.
Press
the
receiver's
cu
Ne
TIMER
button.
TUNER-~—*>—
TAPE
AIR.
CH
CD
Press
the
receiver's
START
MODE
button
r
a
and
set
the
C
D
mode.
START
MODE
Follow
steps
6
to
12
in
Setting
the
Timer.
Folgen
Sie
den
Schritten
6
bis
12
Einstellung
des
Timers
Suivre
les
points
6412
dans
Réglage
de
{a
minuteries
Seguite
i
passi
da
6
a
12
nella
sezione
Impostazione
dei
timer
Siga
los
pasos
6
a
12
de
la
seccién
Ajuste
del
temporizadores
Waking
up
to
the
sound
of
a
tape
/
Wecken
mit
einem
Cassettenband
/
Se
réveiller
au
son
d'une
cassette
/
Example’
Sveglia
al
suono
di
un
nastro
/
Para
despertar
con
el
sonido
de
una
cinta
POWER
ON/STANDBY
4
opencLose
og
S
OPENCLOSE
SYS
YQ
=
XY
Press
the
tuner’s
POWER
-»
Press
the
cassette
deck’s
—
Set
the
cassette
tape
—
Press
the
OPEN/CLOSE
button
to
turn
the
power
on.
OPEN/CLOSE
button
to
in
the
tray.
button
again
to
close
open
the
tray.
the
tray.
Press
the
receiver's
TIMER
button.
fee
.
Cain,
CH————
CD.
Press
the
receiver's
START
MODE
button
O
TA
p
F
and
set
the
TAPE
mode.
START
MODE
Follow
steps
6
to
12
in
Setting
the
Timer.
Folgen
Sie
den
Schritten
6
bis
12
Einstellung
des
Timers
Suivre
les
points
6
&
12
dans
Réglage
de
la
minuteries
Seguite
i
passi
da
6
a
12
nella
sezione
Impostazione
del
timer
Siga
los
pasos
6
a
12
de
la
seccién
Ajuste
del
temporizadores
74

ESPANOL
ITALIANO
FRANCAIS
DEUTSCH
ENGLISH.
Recording
a
radio
broadcast
while
away
from
home
(“air
check”)
Aufnahme
eines
Rundfunksenders,
wahrend
ihrer
Abwesenheit
(“Luftkontrolle”)
Example
3
Enregistrement
d'une
émission
de
radio
en
étant
éloigné
de
la
maison
(“vérification
d’
émission”)
Registrazione
incustodita
di
una
trasmissione
radio
Para
grabar
una
emision
radial
al
estar
ausente
de
casa
a
A
openciose
SS
ORENCLOSE
———_
a
dey
Lt
ae
Press
the
receiver's
POWER
-+
Press
the
cassette
deck’s
—
Set the
cassette
tape
—
Press
the
OPEN/CLOSE
button
to
turn
the
power
on.
OPEN/CLOSE
button
to
onto
which
you
want
to
button
again
to
close
open
the
tray.
record
in
the
tray.
the
tray.
Press
the
receiver's
TIMER
button.
TUNER——=—
TAPE:
Press
the
receiver's
AIR.
CH».
CD
START
MODE
button
and
set
the
Al
{air
check)
mode.
START
MODE
Follow
steps
6
to
16
in
Setting
the
Timer.
Folgen
Sie
den
Schritten
11
bis
16
Einstellung
des
Timer
Suivre
les
points
6
a
16
dans
Réglage
de
la
minuteries
Seguite
i
passi
da
6
a
16
nella
sezione
Impostazione
del
timer
Siga
los
pasos
6
a
16
de
la
seccién
Ajuste
del
temporizadores
e
Recording
starts
in
the
(forward)
direction.
However,
if
the
tape
is
not
removed
and
inserted
before
setting
the
timer,
recording
starts
in
the
direction
indicated
by
the
LED
(green).
e
Check
that
the
tape
direction
and
the
reverse
mode
are
set
as
you
want.
e
Nothing
is
recorded
on
the
leader
tape
at
the
beginning
of
the
tape,
so
to
avoid
missing
the
beginning,
set
the
starting
time
to
a
minute
or
so
before
the
program
is
scheduled
to
start.
Checking
the
Timer
Settings
To
check
the
timer
settings,
turn
the
receiver's
POWER
button
on,
press
the
TIMER
button,
then
press
the
SET
button.
The
timer
start
mode,
reception
band,
preset
number,
and
on
and
off
times
are
displayed
in
order
each time
the
SET
button
is
pressed.
Setting
the
Sleep
Timer,
Einstellung
des
Schlaf-Timers,
Réglage
de
la
minuterie
de
sommeil,
tmpostazione
dello
sleep
timer,
Ajuste
del
temporizador
de
desactivacion
automatica
Example:
Setting
to
50
minutes,
Beispiel:
Einstellung
auf
50
Minuten,
Exemple:
réglage
a
50
minutes,
Esempio:
Impostazione
a50
minuti,
Ejemplo:
Para
ajustar
el
tiempo
de
desactivacion
a
50
minutos
50~p
3
x
auTO
|
Press
the
remote
control
unit’s
“SLEEP”
appears
and
flashes
for
5
seconds.
SLEEP
button.
(twice)
60
+
50
-+
40
+
30
+
20-
10-0
The
power
turns
off
after
50
minutes.
e
If
the
sleep
timer
and
regular
timer
settings
overlap,
the
sleep
timer
is
given
priority.
©
Do
not
press
the
TIMER
STANDBY
button
during
the
timer
operation
(after
the
power
has
been
turned
on
with
the
timer).
The
timer
may
not
operate
properly
if it
is
pressed.
e
If
the
same
times
are
set
for
the
on
and
off
times,
the
power
will
not
turn
off
even
if
“STANDBY”
is
lit.
e@
Even
if
you
are
listening
to
a
band
other
than
the
one
set
for
the
timer,
the
tuner
switches
to
the
band
set
for
the
timer
when
the
timer
on
time
is
reached.
e
Ifthe
display
is
not
normal,
unplug
the
power
cord,
then
pressing
in
number
button
1,
plug
the
cord
back
in.
This
resets
the
tuner
to
the
initial
settings
and
makes
the
display
normal.
The
preset
stations,
current
time,
and
timer
settings
are
cleared,
So
reset
them.
@
DEUTSCHE
—
SEITE
25
e@
FRANCAIS
—
PAGE
39
e
ITALIANO
-—PAGINA
53
e
ESPANOL
—
PAGINA
67
79

ENGLISH
DEUTSCH
FRANCAIS
ITALIANO
ESPANOL
PLAYING
CASSETTE
TAPES
(one-side
playback,
two-side
playback,
and
continuous
playback)
WIEDERGABE
VON
CASSETTENBANDERN
leinseitige
Wiedergabe,
beidseitige
Wiedergabe
und
fortlaufende
Wiedergabe)
LECTURE
DE
CASSETTES
(lecture
d’une
face,
lecture
de
deux
faces
et
lecture
continue)
RIPRODUZIONE
DELLE
CASSETTE
(riproduzione
di
un
lato,
riproduzione
di
due
lati
e
riproduzione
continua)
REPRODUCCION
DE
CINTAS
(reproduccién
por
un
lado,
reproduccién
por
los
dos
lados
y
reproduccién
continua)
DENON
|
sreacocasse—e
r49€
bec
COUN"
RESET
COSAS
REC
REC
MUTE
tt
Se
AUTO
REVEASE
AUTO
TAPE
SELECTOR
FF
ON
I)
PORIZONTAL
LOADING
SYSTEM
2
MOTOR
MECHAMS
REV
PAOD
4
OPEN/CLOSE
:
Recorded
tape,
Bespieltes
Cassettenband,
Cassette
enregistrée,
Nastro
registrato
Cinta
grabada
Set
to
B
or
C
(as
indicated
on
the
tape)
for
tapes
re-
corded
in
Dolby
NR.
Press
the
STOP
button
Playback
starts
in
(MI)
to
stop
playback.
the
direction
of
the
button
pressed.
OFF
BC
DOLBY
NR
e
lf
a
tape
is
loaded,
these
operations
can
be
performed
from
the
remote
control
unit.
Using
the
MS
(Music
Search)
Function
8
This
function
lets
you
move
to
the
beginning
of
following
or
previous
selections.
@
Press
>»
or
4.
=
>
The
tape
moves
back
or
forward
a
number
of
selections
@
Press
PP
or
4d.
O
Q
equivalent
to
the
number
of
times
the
PP
or
44
button
e
If
the
rewind
button
is
pressed,
was
pressed.
the
tape
is
rewound
to
the
be-
For
example:
ginning
of
the
selection
current-
;
*t
select’
3
ly
playing.
If
the
fast-forward
sele
[4
jon
ds
7
ath
button
is
pressed,
the
tape
is
ataacha
ia
forwarded
to
the
beginning
of
the
following
selection.
PLAY
b>
b>
b>
Cue
Say
e
For
the
regular
fast-forward
and
rewind
operations,
press
the
STOP
button
(
MM)
first,
then
press
the
DP
or
44
button.
e
DEUTSCHE
—
SEITE
25
e
FRANCAIS
—
PAGE
39
e
ITALIANO
—PAGINA
53
e
ESPANOL
—
PAGINA
67
76

ESPANOL
ITALIANO
FRANCAIS
DEUTSCH
ENGLISH
RECORDING
CASSETTE
TAPES,
AUFNAHME
AUF
CASSETTENBANDER
ENREGISTREMENT
DE
CASSETTES,
REGISTRAZIONE
DELLE
CASSETTE
GRABACION
DE
CINTAS
DENON
steneocasserre
rane
o€c«
e
The
positions
of
the
VOLUME
and
tone
controls
do
not
affect
the
sound
being
recorded.
Level
meter
(3)
e
Tape
for
recording
4
OPEN/CLOSE
(a
Cassettenband
fiir
die
Aufnahme
S
Cassette
pour
enregistrement
Nastro
da
registrare
Cinta
a
ser
grabada
One-side
recording
Two-side
(reverse)
recording
This
deck
has
a
quick
re-
verse
mechanism,
but
the
sound
is
interrupted
when
the
tape
is
re-
versed.
—J
1
=
IO
REV
MODE
TL
Set
to
B
or
C
to
record
in
Dolby
OFF
BOC
NR.
DOLBY
NR
To
record
from
the
To
record
from
the
component
connected
to
the
To
record
from
the
radio:
PHONO,
DAT
or
VCR
jacks:
CD
player:
sti
onl
O
fT
FUNCTION
FM/AM
Press
the
band
Press
the
FUNCTION
selector
button
of
button
of
Receiver
Tuner.
4
4
Select
the
band
to
Start
playback
on
the
PHONO
or
DAT/VCR.
to
be
recorded.
Set
the
disc
in
the
CD
player.
Adjust
the
recording
level
Recording
level
control
Press
the
REC/REC
MUTE
button.
O
£0
REC/REC
MUTE
Press
the
CD
SRS
Press
the
>
ce
The
green
button.
The
red
CD
Ou
indicator
SRS
indicator
lights.
gppure
flashes.
(Recording
starts.)
MIN
@
|e
MAX
Adjust
the
level
meter
us-
ing
the
recording
level
control.
Refer
to
following.
(1)
Recording
level
control
Recording
Input
Level
Adjustment
The
sound
may
be
distorted
if
the
recording
input
level
is
too
high,
or
very
noisy
if
the
level
is
too
low.
It
is
important
to
adjust
the
recording
input
level
in
order
to
obtain
a
recording
with
well-balanced
sound.
e
Adjust
the
recording
input
level
control
so
that
the
level
meter
lights
up
to
about
the
points
shown
on
the
table
below.
Approximate
Recording
Input
Levels
e
DEUTSCHE
—
SEITE
25
e
FRANCAIS
--
PAGE
39
e
ITALIANO
—PAGINA
53
e
ESPANOL
-
PAGINA
67
NOTE:
The
actual
recording
level
differs
according
to
the
source
and
the
type
of
tape,
so
make
a
test
recording
first.
This manual suits for next models
2
Table of contents
Other Denon Stereo System manuals

Denon
Denon CEOL Piccolo DRA-N5 User manual

Denon
Denon CEOL carino User manual

Denon
Denon S-81 Instruction Manual

Denon
Denon AVR-1709 User manual

Denon
Denon D-107 User manual

Denon
Denon TU-1510AE User manual

Denon
Denon CEOL carino User manual

Denon
Denon D-F10 User manual

Denon
Denon D-F100MC User manual

Denon
Denon S-32 User manual

Denon
Denon DM33S - Micro System User manual

Denon
Denon D-A03 User manual

Denon
Denon S-81 User manual

Denon
Denon UD-M31 User manual

Denon
Denon HEOS 7 HS2 User manual

Denon
Denon D-107 User manual

Denon
Denon D-F101S User manual

Denon
Denon S-81 User manual

Denon
Denon HEOS Manual

Denon
Denon AirPlay AVR-3311CI User manual