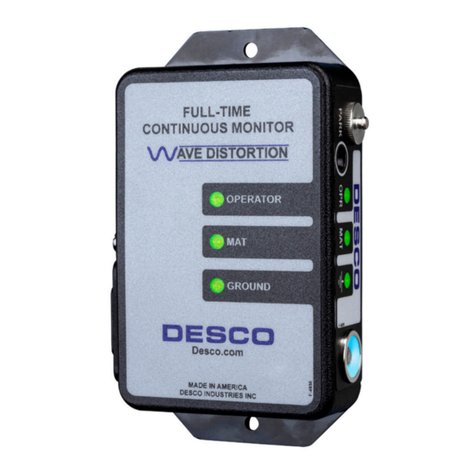
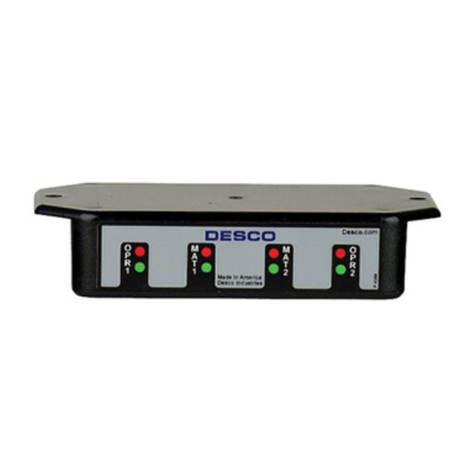
Desco 19239 Installation and operating instructions

TB-3072 Page 1 of 4 © 2017 DESCO INDUSTRIES, INC.
Employee Owned
DESCO WEST - 3651 Walnut Avenue, Chino, CA 91710 • (909) 627-8178
DESCO EAST - One Colgate Way, Canton, MA 02021-1407 • (781) 821-8370 • Website: Desco.com
Mini Monitor
Installation, Operation and Maintenance
Description
The Desco Mini Monitor is a single workstation
continuous monitor. It continuously monitors the
path-to-ground integrity of one operator and one ESD
worksurface. The Mini Monitor eliminates the need for
periodic testing and record keeping of wrist straps.
The Mini Monitor is designed with Wave Distortion
Technology which provides stable continuous monitoring
of the path-to-ground and presence of 1 megohm
resistance of an operator’s wrist strap. Audio and visual
alarms activate (in less than 50 milliseconds) when the
operator unintentionally disconnects from the monitor or
the wrist strap connection points are intermittent. The
Mini Monitor also serves as a ground point for an ESD
worksurface and monitors for a path-to-ground of less
than 500 megohms. All Mini Monitors are calibrated to
NIST standards and include a certificate.
April 2017
Wave Distortion Technology is the Most Reliable
Technology for the Continuous Monitoring of
Single-Wire (Conductor) Wrist Straps
“Wave Distortion” or vector impedance works by
applying a continuous test voltage of 1.2 volts
peak-to-peak at 1 to 2 microamperes (0.000002
amperes) to the wrist strap that is connected to the
continuous or constant monitor. The test voltage
creates a sine wave that the monitor circuit compares
to established patterns. By monitoring the “distortions”,
or shape of the sine wave, Wave Distortion Technology
determines if the monitored circuit is complete - the
operator is in the circuit and the total equivalent DC
resistance is within specifications. Wave Distortion
Technology produces a very fast alarm time (<50
milliseconds) and minimal false alarms.
ANSI/ESD S20.20 section 7.3 states “Compliance
verification records shall be established and maintained
to provide evidence of conformity to the technical
requirements.” Per ANSI/ESD S1.1 Annex A.3 Daily
(wrist strap system) testing may be omitted if constant
monitoring used.” Per ESD Handbook ESD TR 20.20
section 5.3.2.4.4 “Typical Test programs recommend
that wrist straps that are used daily should be tested
daily. However, if the products that are being produced
are of such value that knowledge of a continuous,
reliable ground is needed, and then continuous
monitoring should be considered or even required.”
The Mini Monitor and its accessories are available as
the following item numbers:
Item Description
19239 Mini Monitor, Black, North America
19242 Mini Monitor, Blue, with Jewel® Wrist Strap,
North America
19243 Mini Monitor, Black, Universal Power Adapter
19258 Power Adapter, 100-240VAC Input, 24VDC
150mA Output, IEC Inlet
19260 Power Adapter, 100-240VAC Input, 24VDC
150mA Output, North America Plug
98220 Calibration Unit, for Wave Distortion Monitors
Packaging
1 Mini Monitor
1 09100 Jewel® Elastic Wrist Strap (19242 only)
2 Push and Clinch Snaps
1 Power Adapter, 24VDC
1 Certificate of Calibration
Made in the
United States of America
TECHNICAL BULLETIN TB-3072
Figure 1. Desco Mini Monitor


TB-3072 Page 2 of 4 © 2017 DESCO INDUSTRIES, INC.
Employee Owned
DESCO WEST - 3651 Walnut Avenue, Chino, CA 91710 • (909) 627-8178
DESCO EAST - One Colgate Way, Canton, MA 02021-1407 • (781) 821-8370 • Website: Desco.com
Features and Components A. Power Jack: Connect the included 24VDC power
adapter here.
B. Operator LEDs: Illuminates green when the
operator is properly grounded. Illuminates solid red and
audible alarm sounds when the operator is not properly
grounded.
C. Worksurface LEDs: Illuminates green when the
worksurface is properly grounded. Illuminates red and
audible alarm sounds when the worksurface is not
properly grounded.
D. Park Snap: Allows the operator to disconnect (and
park) a wrist strap when leaving the workstation, without
creating a false alarm. Touch the park snap and the
monitor's audible alarm will disable for 6 seconds. Use
this time to disconnect the wrist cord from the wristband,
and attach it to the park snap or remove the banana
plug from the jack. Upon returning to the workstation
and disconnecting the wrist cord from the park snap, the
operator has 6 seconds to reconnect the wrist cord to a
worn wristband before activating the alarm.
E. Monitored Operator Jack: Insert the single-wire
wrist cord here to monitor the operator's connection to
ground.
F. 10mm Ground Snap: Connects the worksurface mat
to electrical ground.
G. 10mm Worksurface Monitor Snap: Verifies that the
worksurface's path-to-ground is <500 megohms.
Installation
1. Remove the Mini Monitor from the carton, and
inspect for damage.
2. Determine the mounting location of the Mini Monitor.
It is normally installed toward the front edge of a
workstation where its LEDs can be visible to the
operator. Install the two included push and clinch
snaps to the worksurface mat.
A
D
B
C
E
FG
Figure 2. Mini Monitor features and components
Worksurface Mat
Push and Clinch Snaps
Figure 3. Installing the push and clinch snaps to the
front edge of a worksurface mat
1-5/16"

TB-3072 Page 3 of 4 © 2017 DESCO INDUSTRIES, INC.
Employee Owned
DESCO WEST - 3651 Walnut Avenue, Chino, CA 91710 • (909) 627-8178
DESCO EAST - One Colgate Way, Canton, MA 02021-1407 • (781) 821-8370 • Website: Desco.com
3. Align the two snaps underneath the Mini Monitor
to the two snaps on the worksurface mat. Apply
downward force on the monitor once aligned to
snap the Mini Monitor into place.
4. Locate an appropriate AC outlet nearby the Mini
Monitor, and test it for proper wiring and grounding
prior to use. The Desco AC Outlet Analyzer or
similar test equipment may be used to verify the
outlet’s functionality. Use item number 98132 for
120VAC North American outlets and item number
98131 for 220VAC UK outlets.
5. Connect the power adapter to the power jack
located on the top-side of the Mini Monitor. Route
the wire from the supply to the tested AC outlet, and
plug it into the outlet.
Installation onto Micastat® Laminate
Materials Needed:
2 14244 Micastat® Flush Mount Ground Inserts
1 14242 Micastat® Flush Mount Insert Tool
1 09857 10mm Socket and Rivet (100 per pack)
2 8-32 Button Cap Screws
1. Install the two flush mount ground inserts into the
Micastat® laminate. Space the inserts as shown in
Figure 3.
2. Once the ground inserts are installed, remove the
8-32 screws that were supplied with the kits.
3. Place 10mm snap sockets on top of the installed
brass ground inserts.
4. Screw the 10mm snap sockets into place on the
ground inserts using the 8-32 button cap screws.
5. Align the two snaps underneath the Mini Monitor
to the two snaps on the Micastat®laminate. Apply
downward force on the monitor once aligned to
snap the Mini Monitor into place.
6. Connect the power adapter to the power jack
located on the top-side of the Mini Monitor. Route
the wire from the supply to a nearby AC outlet
and plug it into the outlet. Make sure the voltage
and frequency match those listed on the power
supply. The Mini Monitor is now powered, and the
Micastat® laminate is now grounded.
Operation
1. Fit the wristband snugly onto the wrist.
2. Snap the wrist cord to the wristband.
3. Plug the wrist cord into the operator jack. The
green operator LED will illuminate. This indicates
that the operator is properly grounded.
4. If this does not happen, examine the wrist cord for
continuity or damage and the wristband to ensure
that it fits securely. If you have dry skin, apply an
approved dissipative hand lotion such as Menda
Reztore™ ESD Hand Lotion.
5. When leaving the workstation, first touch the
monitor's park snap. The monitor's audible
alarm will disable for 6 seconds. Use this time to
disconnect the wrist cord from the wristband and
attach it to the park snap without sounding a false
alarm.
6. Upon returning to the workstation and disconnecting
the wrist cord from the park snap, the monitor will
provide 6 seconds for the operator to reconnect the
wrist cord to a worn wristband before sounding the
monitor's alarm.
Push and
Clinch Snaps
Worksurface Mat
Figure 4. Connecting the Mini Monitor to the push and
clinch snaps on a worksurface mat
Figure 5. Using the Mini Monitor

TB-3072 Page 4 of 4 © 2017 DESCO INDUSTRIES, INC.
Employee Owned
Specifications
Input Voltage and
Frequency
(External Adapter)
AC/DC Power Adapter
Power Input:
100-240VAC, 50/60 Hz
Power Output:
24VDC @ 150mA
Cable Length:
5 ft. (1.5 m)
Operating Temperature 50 to 95°F (10 to 35°C)
Environmental
Requirements
Indoor use only at altitudes
less than 6500 ft. (2 km)
Maximum relative humidity
of 80% up to 85°F (30°C)
decreasing linearly to 50% @
85°F (30°C)
Dimensions 2.77" L x 2.08" W x .90" H
(70 mm x 53 mm x 23 mm)
Weight 0.1 lbs. (0.05 kg)
Operator Test Range*500 kilohms to 10 megohms
impedance
Worksurface Test
Limit**
500 megohms (±20%)
Operator Test Voltage 1.2V peak-to-peak @ 1.2µA,
open circuit
Worksurface Test
Voltage
5 to 7.5V, open circuit
Alarm Response Time <50 ms
Country of Origin United States of America
*This cannot be verified with standard DC test
equipment. The continuous monitor is an impedance
sensing device, and the limits are determined by the
magnitude and angle of the impedance.
**The worksurface mat must have a conductive
layer such as Dual Layer Rubber or Dissipative
3-Layer Vinyl with conductive buried layers. Desco
workstation monitors are not recommended for use with
homogeneous matting.
Calibration
Frequency of recalibration should be based on the
critical nature of those ESD sensitive items handled
and the risk of failure for the ESD protective equipment
and materials. In general, Desco recommends that
calibration be performed annually.
Use the Desco 98220 Calibration Unit for Wave
Distortion Monitors to perform periodic verification (once
every 6-12 months) of the Mini Monitor. The Calibration
Unit can be used to check the test limits of the Mini
Monitor without removing it from the workstation.
See TB-2082 for more information.
Figure 6. Desco 98220 Calibration Unit for Wave
Distortion Monitors
This manual suits for next models
1
Table of contents
Other Desco Monitor manuals

Desco
Desco 19228 Service manual

Desco
Desco 19246 Instruction Manual

Desco
Desco 19234 Service manual

Desco
Desco EMIT 50513 Installation guide

Desco
Desco 19208 Service manual

Desco
Desco 19241 Service manual

Desco
Desco 19226 Service manual

Desco
Desco 19665 Installation and operating instructions

Desco
Desco 19668 Installation and operating instructions

Desco
Desco 19325 Service manual