manuals.online logo
Brands
  1. Home
  2. •
  3. Brands
  4. •
  5. Desoutter
  6. •
  7. Tools
  8. •
  9. Desoutter SLE Series User manual

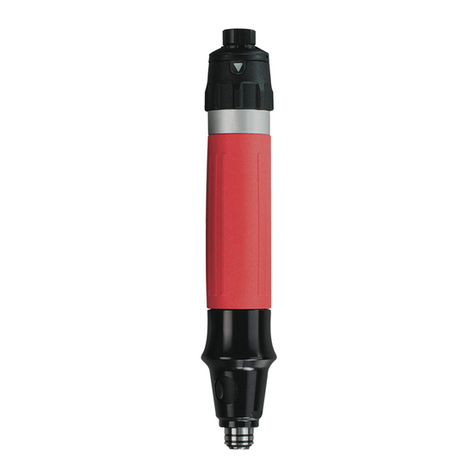
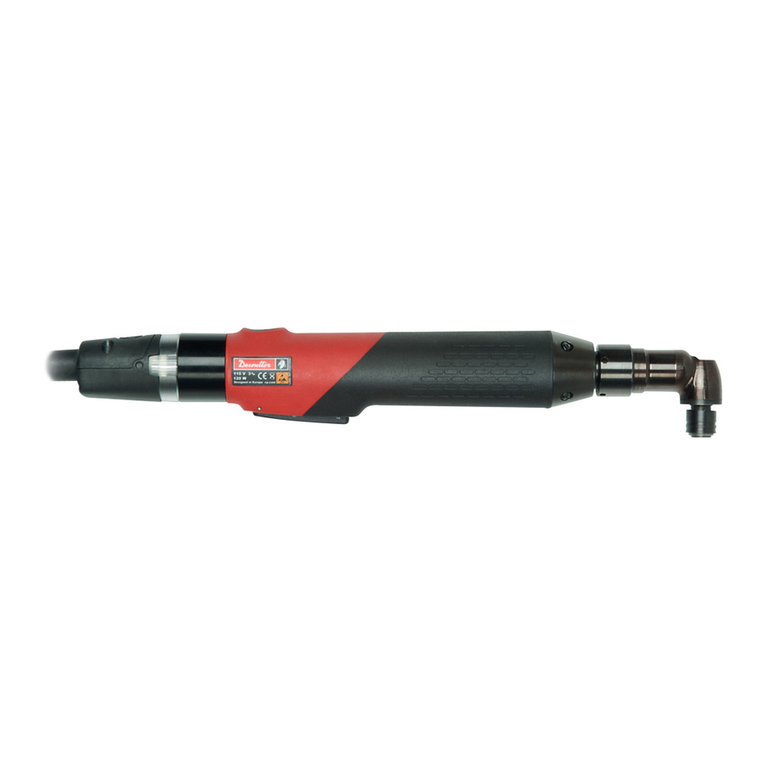
Desoutter SLE Series User manual

Desoutter Limited Eaton Road Hemel Hempstead Hertforshire HP2 7DR England
SLE SeriesSLE
Printed in England 1 of 36 Part No. 473223 Issue 1 12.2001
C*****-2200*
SLE012-22000L-SS90A4H 1464954
SLE017-11500L-SS90A4H 1464964
SLE026-11000L-SS90A4H 1464974
SLE032-7750L-
S90A4H 1464984
SLE047-5550L-
S90A4H 1464994
C*****-2200*
SLE012-22000T-SS4Q 1465004
SLE017-11500T-
S4Q 1465014
SLE026-11000T-SS4Q 1465024
SLE032-7750T-SS4Q 1465034
SLE047-5550T-SS4Q 1465044
C*****-2200*
SLE012-22000A-SS4Q 1464854
SLE017-11500A-SS4Q 1464864
SLE026-11000A-SS4Q 1464874
SLE032-7750A-SS4Q 1464884
SLE047-5550A-SS4Q 1464894
C*****-2200*
SL012-22000L-SS4Q 1464904
SLE017-115000L-SS4Q 1464914
SLE026-11000L-SS4Q 1464924
SLE032-7750L-SS4Q 1464934
SLE047-5550L-SS4Q 1464944
C******-2200*
SLE026-11500A-CC4Q 1465414
SLE030-11000A-CC4Q 1465424
SLE036-7750A-CC4Q 1465434
SLE045-5550A-CC4Q 1465444
C*****-2200*
SLE026-11500A-CC4Q 1465884
SLE030-11000A-CC4Q 1465894
SLE036-7750A-CC4Q 1465904
SLE045-5550A-CC4Q 1465914
Desoutter Limited Eaton Road Hemel Hempstead Hertforshire HP2 7DR England
SLE Series -Data
Printed in England 2 of 36 Part No. 473223 Issue 1 12.2001
DATA:
Class of construction = III
Rated input = 53W
Rated current = 2.2A
Rated voltage = 40Vdc
Weight = 0.64Kg -
0.84Kg
Accessories:
Product catalogue: LT1310
Accessorise catalogue: LT1426, LT1427,
LT1428, LT1429,
LT1430, LT1393.
Ergosense LT198
1107892 Tool Holster
2 108892 Kit Vacuum
3467033 Side Handle.
46155710560 Suspension Shackle
STATEMENT OF USE:
This product is designed for installing and
removing threaded fasteners in wood, metal
and plastic. No other use permitted.
For professional use only.
Requirements:
This tool can only be used with an ESP7
controller.
DATEN:
Konstruktionsklasse =III
Nenneingabe =53W
Nennstromstärke =2.2A
Steuerpflichtige Spannung = 40Vdc
Gewicht =0.64Kg -
0.84Kg
Zubehör:
ProduktKatalog: LT1310
Zusatzgeräte Katalogisieren: LT1426, LT1427,
LT1428, LT1429,
LT1430, LT1393.
Ergosense LT198
1107892 Werkzeughalfter
2 108892 Kit: Vakuum
3467033 Seitenhaltegriff
46155710560 Aufhängungsbügel
VERWENDUNGSZWECK:
Das Produkt ist zum Einbringen und Entfernen von
Befestigungsschraubenaus Holz, Metall und Plastik
konzipiert.Andere Anwendungen sind nichterlaubt.
Anforderungen:
Dieses Werkzeug kann nur in Verbindung mit
einem ESP7 Controller verwendet werden.
DONNES:
Catégorie de construction =III
Puissance d’entrée nominale =53W
Intensité nominale =2.2A
Évaluée tension = 40Vdc
Poids =0.64Kg -
0.84Kg
Accessoires:
Catalogue De Produit: LT1310
Les accessoires cataloguent LT1426, LT1427,
LT1428, LT1429,
LT1430, LT1393.
Ergosense LT198
1107892 Pochette à outil
2108892 Kit vide
3467033 Poignée latérale
46155710560 Manille de suspension
DECLARATION D’UTILISATION:
Le produit est conçu pour la pose et le retrait de
fixations filetées sur bois,métal et plastique. Aucun
autre emploi n’est admis.
Exigences :
Cet outil peut uniquement fonctionner avec un
contrôleur ESP 7.
DATA:
Constructieklasse =III
Nominale invoer =53W
Nominale stroom =2.2A
Toegestane spanning = 40Vdc
Gewicht =0.64Kg -
0.84Kg
Accessoires:
Catalogue De Produit: LT1310
Les accessoires cataloguent LT1426, LT1427,
LT1428, LT1429,
LT1430, LT1393.
Ergosense LT198
1107892 Gereedschaphouder
2108892 Kit Vacuüm
3467033 Zijhandgreep
46155710560 Hangsluiting
GEBRUIKSAANWIJZING:
Het product is ontworpen om bevestigingsmidde-
len met schroefdraad in
hout, metaal of kunststof aan te brengen of te ver-
wijderen.Het toestel
mag niet voor andere doeleinden gebruikt worden.
Benodigdheden:
Dit gereedschap kan alleen worden gebruikt met
een ESP7 regelaar.
To reduce risk of injury read and understand these
instructions and the safety instructions.
PT No 476263
Um das Risiko von Verletzungen zu reduzieren,
müssen diese Anweisungen und sicherheitstech-
nischen Anweisung gelesen und verstanden wer-
den. Teilnr 476263
Pour réduire le risque de blessures, lire attentive-
ment les consignes d'exploitation et de sécurité
Pièce Nº 476263
Lees en begrijp deze aanwijzingen voor gebruik
en veiligheid om kans op verwonding te
reduceren
Onderdeelnr 476263
WARNING WARNUNG ATTENTION WAARSCHUWING
Desoutter Limited Eaton Road Hemel Hempstead Hertforshire HP2 7DR England
SLE Series -Warning
Printed in England 6 of 36 Part No. 473223 Issue 1 12.2001
SAVE THESE INSTRUCTIONS
Failure to follow all instructions listed below, may result in electric
shock, fire and/or serious personal injury.
Work Area
Keep your work area clean and well lit. Cluttered benches and
dark areas invite accidents.
Do not operate power tools in explosive atmospheres, such as in
the presence of flammable liquids, gases or dust. Power tools cre-
ate sparks which may ignite the dust or fumes.
Keep bystanders, children and visitors away while operating a
power tool. Distractions can cause you to lose control.
Electrical Safety
Grounded tools must be plugged into an outlet properly installed
and grounded in accordance with all codes and ordinances. Never
remove the grounding prong or modify the plug in any way. Do not
use any adaptor plugs. Check with a qualified electrician if you are
in doubt as to whether the outlet is properly grounded. If the tools
should electrically malfunction or break down, grounding provides
a low resistance path to carry electricity away from the user.
Avoid body contact with grounded surfaces such as pipes, radia-
tors, ranges and refrigerators. There is an increased risk of electric
shock if your body is grounded.
Don't expose power tools to rain or wet conditions. Water entering
a power tool will increase the risk of electric shock.
Do not abuse the cord. Never use the cord to carry the tools or pull
the plug from an outlet. Keep cord away from heat, oil, sharp
edges or moving parts. Replace damaged cords immediately.
Damaged cords increase the risk of electric shock.
When operating a power tool outside, use an outdoor extension
cord marked "W-A" or "W". These cords are rated for outdoor use
and reduce the risk of electric shock.
Personal Safety
Stay alert, watch what you are doing and use common sense when
operating a power tool. Do not use tool while tired or under the
influence of drugs, alcohol or medication. A moment of inattention
while operating power tools may result in serious personal injury.
Dress properly. Do not wear loose clothing or jewellery. Contain
long hair. Keep your hair, clothing and gloves away from moving
parts. Loose clothes, jewellery or long hair can be caught in mov-
ing parts.
Avoid accidental starting. Be sure switch is off before plugging in.
Carrying tools with your finger on the switch or plugging in tools
that have the switch on invites accidents.
Remove adjusting keys or switches before turning the tool on. A
wrench or key that is left attached to a rotating part of the tool may
result in personal injury.
Do not overreach. Keep proper footing and balance at all times.
Proper footing and balance enables better control of the tool in
unexpected situations.
Use safety equipment. Always wear eye protection. Dust mask,
non-skid safety shoes, hard hat or hearing protection must be used
for appropriate conditions.Hold tool by insulated gripping surfaces
when performing an operation where the cutting tool may contact
hidden wiring or its own cord. Contact with a "live" wire will make
exposed metal parts of the tool "live" and shock the operator.
Tool use and care
Use clamps or other practical way to secure and support the
workpiece to a stable platform. Holding the work by hand or
against the body is unstable and may lead to loss of control.
Do not force tool. Use the correct tool for your application. The
correct tool will do the job better and safer at the rate for which
it is designed.
Do not use the tool if switch does not turn it on or off. Any tool
that cannot be controlled with the switch is dangerous and
must be repaired.
Disconnect the plug from the power source before making any
adjustments, changing accessories or storing the tool. Such
preventive safety measures reduce the risk of starting the tool
accidentally.
Store idle tools out of reach of children and other untrained per-
sons. Tools are dangerous in the hands of untrained users.
Maintain tools with care. Keep cutting tools sharp and clean.
Properly maintained tools, with sharp cutting edges are less
likely to bind and are easier to control.
Check for misalignment or binding of moving parts, breakage of
parts, and any other condition that may affect the tools opera-
tion. If damaged, have the tool serviced before using. Many
accidents are caused by poorly maintained tools.
Use only accessories that are recommended by the manufac-
turer for your model. Accessories that may be suitable for one
tool, may become hazardous when used on another tool.
Service
Tool service must be performed only by qualified personnel.
Service or maintenance performed by unqualified personnel
could result in a risk of injury.
When servicing a tool, use only identical replacement parts.
Follow instructions in the maintenance section of this manual.
Use of unauthorised parts or failure to follow Maintenance
Instructions may create a risk of electric shock or injury.
GB
Desoutter Limited Eaton Road Hemel Hempstead Hertforshire HP2 7DR England
SLE Series -Data
Printed in England 8 of 36 Part No. 473223 Issue 1 12.2001
OPERATING INSTRUCTIONS
IMPORTANT: This tool is fitted with temperature sensing. If the temperature inside
the tool motor area exceeds a pre set temperature, the ESP7 Controller will disable
the tool and display, ERROR 013.
Should this Error occur, the reason for this must be established (E.g. Tool being used
out side of cycle times stated, at too higher torque, in too high an ambient temperature,
or tool has become defective etc.).
Note: The Error 013 message will clear and the tool will be re useable after the
internal temperature has cooled sufficiently. Alternatively, use another tool..
With the correct accessory fitted, connect the tool to the ESP 7 controller
Ensure all Forward and Reverse times / Speeds, Current and special function parameters
are programmed correctly in the "SETUP - MODE" and " PROGRAM GROUP " parameters
to be used for the application (refer to the ESP 7 Servicing and
Operating Instructions).
Note: Default rotation is clockwise (RHD), this can be changed to anti-clockwise (LHD) in
the ESP7 "SETUP - MODE" parameters.
To operate the tool using the tools controls:
Auto - Push start tools:
ESP 7 TOOL programmed PUSH
ESP 7 MODE programmed PUSH
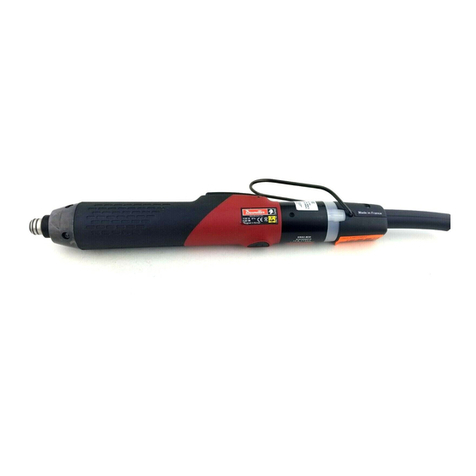
Forward: Hold tool around the red (grip) section and then
press the tool against the fastener until the operation
has finished.
Reverse: Hold tool around the red (grip) section, first press
and hold the reverse button and then press the tool
against the fastener until the operation has finished.
ESP 7 TOOL programmed PUSH
ESP 7 MODE programmed COMBI
Forward or Reverse: Hold tool around the red (grip) section,
position the tool onto the fastener, press and hold the
Forward button / Lever / Trigger, (Or Reverse button for Reverse)
and then press the tool against the fastener until the operation
has finished.
Lever, Trigger Start and Angle Head Tools: (Non push Start, Manual Clutch or Current Controlled):
ESP7 TOOL programmed MANU
Forward or Reverse: Hold tool around the red (grip) section, position tool onto the fastener
and press and hold the Lever or Trigger for Forward operation (Or Reverse button for Reverse),
until the operation has finished.
The fixing is tightened to the required torque set by adjusting the tension on the clutch spring (O on
mechanical clutch tools), or when the programmed current has been achieved on the current controlled
tools. (Both clutch adjustment and Current Parameter value has to be established using suitable torque
measuring equipment to achieve the required torque).
After a tightening or loosening operation, the tool is available to start again after:
Auto Push - Start tools: Lifting the tool away from the fastener. (Button / Lever /
Trigger can be held pressed).
Manual and Angle Head tools: Releasing and re-pressing the Forward Button /
Lever / Trigger or Reverse button.
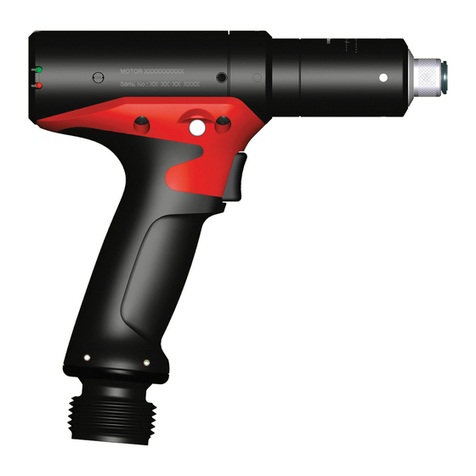
Information on trigger operation (Pistol Grip Tools)
Single operation trigger On / Off (not progressive)
Torque adjustment (To be set up using suitable torque measuring equipment to achieve the required
torque)
(Mechanical Clutch)
As depicted on the exploded diagram
(Current Control)
Current Parameter(s) to be set up. (Refer to the ESP 7 Servicing & Operating Instructions).
GB
Desoutter Limited Eaton Road Hemel Hempstead Hertforshire HP2 7DR England
SLE Series - Pistol Grip Assembly
Printed in England 26 of 36 Part No. 473223 Issue 1 12.2001
23
1
4
1 473843 KIT TRIGGER ASSEMBLY 1
4 473743 KIT SWITCH ASSEMBLY 1
3 473923 KIT SPRING 1
2 473803 KIT PISTOL GRIP ASSEMBLY 1
Desoutter Limited Eaton Road Hemel Hempstead Hertforshire HP2 7DR England
SLE Series - Maintenance & Adjustment
Printed in England 27 of 36 Part No. 473223 Issue 1 12.2001
>3.5s
>1s
409073 D57 TOOL CLAMPS & ALL VARIABLES
467003 SIDE HANDLE AND D53 TOOL CLAMPS
Desoutter Limited Eaton Road Hemel Hempstead Hertforshire HP2 7DR England
SLE Series - Clutch-Manual, Lever & Trigger-S4Q
Printed in England 28 of 36 Part No. 473223 Issue 1 12.2001
1 446583 KIT (CONTAINS) 1
- CIRCLIP 1
- RING 1
- SPRING 1
- SLEEVE 1
- BALL 2
2 251703 RING 1
3 463763 WASHER 1
4 467283 CLUTCH ADJ KIT (CONTAINS) 1
- CIRCLIP 1
- RING ADJUSTING 1
- RING LOCKING 1
- BALL 3
5 443523 SPRING 0.4 - 2.5Nm 1
461913 SPRING 1.5 - 4.7Nm 1
6 301253 BALL CUP 1
7 182493 BALL 6
8 463783 SPINDLE - S4Q 1
9 ******** BALL 1
10 463793 ROLLER 1
11 239753 ‘O’ RING 1
12 443513 CAM CLUTCH 1
13 280313 BALL 14
14 301253 ROLLER 1
15 446583 SERVICE KIT 1
1
23
4
567
8910
11 12
13
14
15
Desoutter Limited Eaton Road Hemel Hempstead Hertforshire HP2 7DR England
SLE Series - Clutch-S4Q
Printed in England 29 of 36 Part No. 473223 Issue 1 12.2001
1 446583 KIT (CONTAINS) 1
- CIRCLIP 1
- RING 1
- SPRING 1
- SLEEVE 1
- BALL 2
2 467283 CLUTCH ADJ KIT (CONTAINS) 1
- CIRCLIP 1
- RING ADJUSTING 1
- RING LOCKING 1
- BALL 3
3 443523 SPRING 0.4 - 2.5Nm 1
4 301253 BALL CUP 1
5 182493 BALL 6
6 443553 SPINDLE CLUTCH S4Q 1
7 239753 ‘O’ RING 1
8 301263 RETAINING SLEEVE 1
9 443513 CAM CLUTCH 1
10 301243 LATCH PIN 1
11 301253 ROLLER 1
12 307123 SPRING 1
13 280313 BALL 14
14 446583 SERVICE KIT 1
1
2
34
5
6
789
10
11
12
13
14
Desoutter Limited Eaton Road Hemel Hempstead Hertforshire HP2 7DR England
SLE Series -Solid Spindles
Printed in England 30 of 36 Part No. 473223 Issue 1 12.2001
SOLID SPINDLE (LEVER & TRIGGER START) SOLID SPINDLE (PUSH START)
1 2050446603 KIT
- CIRCLIP 1
- RING 1
- SPRING 2
- SLEEVE 1
- BALL 3
2 2050251703 RING 1
3 2050463763 WASHER 1
4 2050347733 CIRCLIP 1
5 2050473583 SOLID SPINDLE 1
1 2050446603 KIT
- CIRCLIP 1
- RING 1
- SPRING 2
- SLEEVE 1
- BALL 3
2 2050347733 CIRCLIP 1
3 2050473583 SOLID SPINDLE 1
Desoutter Limited Eaton Road Hemel Hempstead Hertforshire HP2 7DR England
SLE Series - Modules
Printed in England 31 of 36 Part No. 473223 Issue 1 12.2001
475513
475523
476273
476283
443623 SB
443863 SB
462113 S4Q
443133 S4Q
473333 S4Q
473343 S4Q
475293
443123
443103
443113
443873
2000RPM
1500RPM
1000RPM
750RPM
550RPM
464663 T
467853 L
SLE
464663
Desoutter Limited Eaton Road Hemel Hempstead Hertforshire HP2 7DR England
SLE Series - Modules
Printed in England 32 of 36 Part No. 473223 Issue 1 12.2001
475513
475523
476273
476283
443623 SB
443863 SB
475333 C4Q
473593 C4Q
443123
443113
443103
443873
1500RPM
1000RPM
750RPM
550RPM
467853 L
SLE
464663 T
464663
Desoutter Limited Eaton Road Hemel Hempstead Hertforshire HP2 7DR England
SLE Series -Maintenance and Adjustment
Printed in England 33 of 36 Part No. 473223 Issue 1 12.2001

This manual suits for next models

52

Other Desoutter Tools manuals

Desoutter ERP20S User manual

Desoutter

Desoutter ERP20S User manual

Desoutter VP2-X User manual

Desoutter

Desoutter VP2-X User manual

Desoutter PT Series Operating instructions

Desoutter

Desoutter PT Series Operating instructions

Desoutter TRA12 User manual

Desoutter

Desoutter TRA12 User manual

Desoutter B Series User manual

Desoutter

Desoutter B Series User manual

Desoutter PT Series Operating instructions

Desoutter

Desoutter PT Series Operating instructions

Desoutter EFDS80-330 User manual

Desoutter

Desoutter EFDS80-330 User manual

Desoutter ERS2 User manual

Desoutter

Desoutter ERS2 User manual

Desoutter SC2 User manual

Desoutter

Desoutter SC2 User manual

Desoutter B16MV User manual

Desoutter

Desoutter B16MV User manual

Desoutter 6158129960 User manual

Desoutter

Desoutter 6158129960 User manual

Desoutter SXRA Series User manual

Desoutter

Desoutter SXRA Series User manual

Desoutter ERP5 Original instructions

Desoutter

Desoutter ERP5 Original instructions

Desoutter SC2-065L500-R4Q User manual

Desoutter

Desoutter SC2-065L500-R4Q User manual

Desoutter MC51-10 User manual

Desoutter

Desoutter MC51-10 User manual

Desoutter ECA15 User manual

Desoutter

Desoutter ECA15 User manual

Desoutter SB047-LR500-S90-A4H User manual

Desoutter

Desoutter SB047-LR500-S90-A4H User manual

Desoutter EAD User manual

Desoutter

Desoutter EAD User manual

Desoutter ELS7-880-A User manual

Desoutter

Desoutter ELS7-880-A User manual

Desoutter K190B3CW User manual

Desoutter

Desoutter K190B3CW User manual

Desoutter SD Series Quick start guide

Desoutter

Desoutter SD Series Quick start guide

Desoutter PT Series Operating instructions

Desoutter

Desoutter PT Series Operating instructions

Desoutter SD Series User manual

Desoutter

Desoutter SD Series User manual

Desoutter 6153980330 User manual

Desoutter

Desoutter 6153980330 User manual

Popular Tools manuals by other brands

Tyco Electronics ERGOCRIMP operating instructions

Tyco Electronics

Tyco Electronics ERGOCRIMP operating instructions

Gardena RollUp S Operator's manual

Gardena

Gardena RollUp S Operator's manual

molex 57834-5000 operating manual

molex

molex 57834-5000 operating manual

Huskie Tools ECO-MK7336B Operator's manual

Huskie Tools

Huskie Tools ECO-MK7336B Operator's manual

Sealey SA84.V2 instructions

Sealey

Sealey SA84.V2 instructions

Chicago Pneumatic CP824 instruction manual

Chicago Pneumatic

Chicago Pneumatic CP824 instruction manual

pela tools LD-E04200 quick start guide

pela tools

pela tools LD-E04200 quick start guide

DURHAND XBW-01 instruction manual

DURHAND

DURHAND XBW-01 instruction manual

Stihl AX 6 P instruction manual

Stihl

Stihl AX 6 P instruction manual

VAR DR-10100 manual

VAR

VAR DR-10100 manual

Marsh HT owner's manual

Marsh

Marsh HT owner's manual

NEO TOOLS 75-011 instruction manual

NEO TOOLS

NEO TOOLS 75-011 instruction manual

Johnson LEVEL UP 1920-0800D Operator's manual

Johnson

Johnson LEVEL UP 1920-0800D Operator's manual

WOODLAND SCENICS RG5162 instructions

WOODLAND SCENICS

WOODLAND SCENICS RG5162 instructions

TradeQuip 1994T owner's manual

TradeQuip

TradeQuip 1994T owner's manual

EINHELL RT-MG 200 CE Original operating instructions

EINHELL

EINHELL RT-MG 200 CE Original operating instructions

Neopost NJOG-101 operating guide

Neopost

Neopost NJOG-101 operating guide

Benchmark 1280-000 manual

Benchmark

Benchmark 1280-000 manual

manuals.online logo
manuals.online logoBrands
  • About & Mission
  • Contact us
  • Privacy Policy
  • Terms and Conditions

Copyright 2025 Manuals.Online. All Rights Reserved.