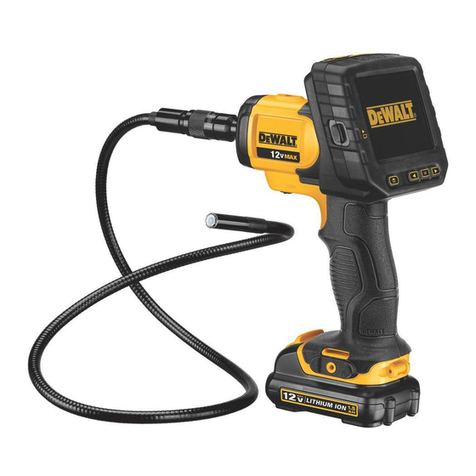
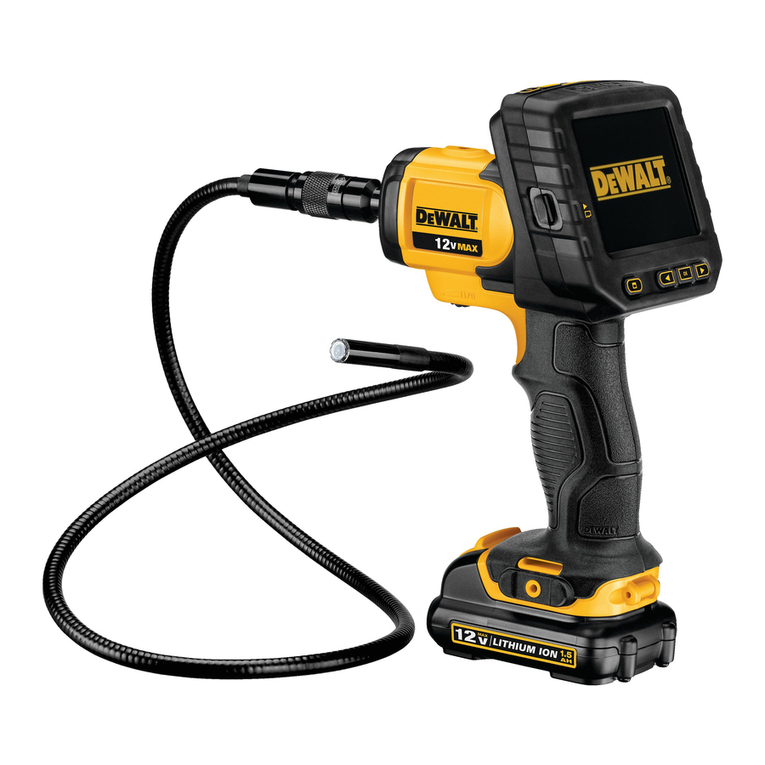
DeWalt DCT410 User manual

If you have questions or comments, contact us.
Pour toute question ou tout commentaire, nous
contactor.
Si tiene dudas o comentarios, contactenos.
1-800-4-DEWALT
• www.dewalt.com
INSTRUCTION
MANUAL
GUIDE
D'UTILISATION
MANUALDE
INSTRUCCIONES
INSTRUCTIVODE
OPERACI6N,
CENTROSDESERVICIOY POLIZADE
GARANTIA.ADVERTENCIA:LEASEESTEINSTRUCTIVOANTESDE
USARELPRODUCTO.
DCT410,
DCT411,DCT412
12V
Max*
Cordless
InspectionCamera
Camera
de
surveillance
sans
fil12V max*
Camara
inalambricade
inspeccion
12V
Max*

Definitions: Safety Guideiines
Thedefinitionsbelowdescribethelevelofseverityforeach
signalword.Pleasereadthemanualandpayattentiontothese
symbols.
ADANCER: Indicates an imminently hazardous situation
which, if not
avoided,
will result in death or serious
injury.
AWARNING: indicates a potentially hazardous situation
which, if not
avoided,
couid result in death or serious
injury.
ACAUTiON: Indicates a potentially hazardous situation which,
if not
avoided,
may result in minor or moderate
injury.
NOTICE:
indicates a practice not related to personal injury
which, if not
avoided,
may result in property damage.
IFYOUHAVEANYQUESTIONSORCOMMENTSABOUTTHISOR
ANYDEWALTTOOL,CALLUSTOLLFREEAT:
1-800-4-DEWALT
(1-800-433-9258).
WARNING: To reduce the risk of
injury,
read the instruction
manual.
Important Safety Instructions
•Read these instructions.
•Keep these instructions.
•Heed ail warnings.
•Follow ail instructions.
•Oniy use attachments/accessories specified by the manufacturer.
•Refer ail servicing to qualified service
personnel.
Servicing is
required when the apparatus has been damaged in any way,
the apparatus has been exposed to rain or moisture, does not
operate
normally,
or has been
dropped.
SAVE ALL WARNINGS AND INSTRUCTIONS
FOR FUTURE REFERENCE
Work Area Safety
a) Keep work area clean and well lit Cluttered or dark areas
invite accidents.
b) Keep children and bystanders away while operating
an inspection camera. Distractions can cause you to lose
control.
Personal Safety
a) Stay
alert,
watch what you are doing and use common
sense when operating an inspection camera. Do not use
an inspection camera while you are tired or under the
influence of
drugs,
alcohol or medication. A moment of
inattention while operating the inspection camera may result in
serious personal
injury.
b) Use personal protective
equipment.
Always wear eye
protection. Protective equipment such as dust
mask,
non-
skid safety shoes, hard hat, or hearing protection used for
appropriate conditions will reduce personal injuries.
c) Do not overreach. Keep proper footing and balance at ail
times.
This enables better control of the inspection camera in
unexpected situations.
d) Dress
properly.
Do not wear loose clothing or
jewelry.
Keep your
hair,
clothing and gloves away from moving
parts.
Loose clothes, jewelry or long hair can be caught in
moving
parts.
Use and Care
a) Store an idle inspection camera out of the reach of
children and do not allow persons unfamiliar with the
inspection camera or these instructions to operate the

inspection camera. Inspection cameras are dangerous in the
hands of untrained
users,
b) Use the inspection camera, accessories and tooi
bits,
etc. in accordance with these instructions, taking into
account the working conditions and the work to be
performed.
Use of the inspection camera for operations
different from those intended couid result in a hazardous
situation.
Battery Tool Use and Care
a) Recharge oniy with the charger specified by
DEWALT .
A
charger that is suitable for one type of battery pack may create
arisk of fire when used with another battery
pack.
b) When battery pack is not in use, keep it away from other
metai objects iike paper
dips,
coins,
keys,
naiis,
screws,
or other smaii metai objects that can make a connection
from one terminal to
another.
Shorting the battery terminals
together may cause burns or a
fire.
c) Under abusive conditions, liquid may be ejected from
the
battery;
avoid
contact,
if contact accidentally occurs,
flush with
water,
if iiquid contacts
eyes,
additionally seek
medical
help.
Liquid ejected from the battery may cause
irritation or burns.
Safety Information for Inspection Cameras
AWARNING: Do not disassemble or modify the inspection
camera. There are no serviceable parts
inside,
if you need
assistance contact D&A/ALTat
1-800-4-D^ALT
(1-800-433-9258) or
go to http://www.dewait.com on the
internet.
•Do not operate the inspection camera in explosive
atmospheres, such as in the presence of flammable liquids,
gases,
or
dust,
inspection cameras create sparks which may
ignite the dust or fumes.
•The inspection camera should only be used with specificaily
designated
DEWALT
batteries. Use of any other batteries may
create a risk of
fire.
•Store the inspection camera out of reach of children and
other untrained persons. Tools are dangerous in the hands of
untrained
users.
•Do not disassemble the inspection camera. There are no user
serviceable parts inside.
•Do not use anywhere the unit may come into exposure with
moving
parts,
hazardous chemicais, or electrical charges.
Such situations may result in serious injury or death; such as
wails,
pipes,
automobiles, and
machinery.
•Do not operate inspection camera near moving
machinery.
Can result in injury if the camera cable gets caught into moving
parts and pulls the user in.
•Do not use the inspection camera around corrosive
chemicals. Exposure to corrosive, oily environments can ruin the
plastic covering on the camera head and ruin the picture
quality.
•Do not use the camera if condensation forms inside the
lens.
Let the water evaporate before using again.
•Do not remove or deface warning
labels.
AWARNING: Do not expose camera, monitor or battery to
excessive heat such as sunshine, fire or the
like.
AWARNING: Shock
hazard.
Do not allow the inspection
camera cable to come into contact with live
wires.
Shut off
circuit breakers to the entire area to avoid
injury.
AWARNING: ALWAYS use safety glasses. Everyday eyeglasses
are NOT safety glasses. Also use face or dust mask if cutting
operation is
dusty.
ALWAYS WEAR CERTIFIED SAFETY
EQUIPMENT:
•ANSI Z87.1 eye protection (CAN/CSA Z94.3).
2
A
CAUTION:
Do not use on humans or animals. This is not for
human or animal use and can cause injury if
used.
A
CAUTION:
When not In use, place inspection camera on its
side on a stable surface where it will not cause a tripping or
failing
hazard.
Some tools with large battery packs will stand upright
on the battery pack but may be easily knocked
over.
AWARNING: Modifications not authorized by the manufacturer may
void user's authority to operate this device.
Regulatory Notices
•ThisClassB digitalapparatuscomplieswithCanadianICES-003.
•ThisdevicecomplieswithPart15oftheFCCRules.Operationis
subjecttothefollowingtwoconditions:
1.
Thisdevicemaynotcauseharmfulinterference,and
2.
Thisdevicemustacceptanyinterferencereceived,including
interferencethatmaycauseundesiredoperation.
NOTE:
Thisequipmenthasbeentestedandfoundtocomplywith
thelimitsfora ClassB digitaldevice,pursuanttoPart15oftheFOO
Rules.
Theselimitsaredesignedtoprovidereasonableprotection
againstharmfulinterferenceina residentialinstallation.Thisequipment
generates,usesandcanradiateradiofrequencyenergyand,ifnot
installedandusedinaccordancewiththeinstructions,maycause
harmfulinterferencetoradiocommunications.However,thereIsno
guaranteethatinterferencewillnotoccurina particularinstallation.If
thisequipmentdoescauseharmfulinterferencetoradioortelevision
reception,
whichcanbedeterminedbyturningtheequipmentoffand
on,
theuserisencouragedtotrytocorrecttheInterferencebyoneor
moreofthefollowingmeasures:
-Reorientorrelocatethereceivingantenna.
-Increasetheseparationbetweentheequipmentandreceiver.
-Connecttheequipmentintoanoutletona circuitdifferentfrom
thattowhichthereceiverisconnected.
-Consultthedealeroranexperiencedradio/TVtechnicianforhelp.
Important Safety Instructions for All
Battery Packs
Whenorderingreplacementbatterypacks,besuretoincludecatalog
numberandvoltage.Consultthechartattheendofthismanualfor
compatibilityofohargersandbatterypacks.
Thebatterypackisnotfullychargedoutofthecarton.Beforeusing
thebatterypackandcharger,readthesafetyinstructionsbelow,then
followchargingproceduresoutlined.
READ ALL INSTRUCTIONS
•Do
not charge or use battery In explosive atmospheres,
such as in the presence of flammable liquids, gases or
dust.
inserting or removing the battery from the charger may ignite the
dust or fumes.
•NEVER force battery pack into
charger.
DO NOT modify
battery pack in any way to fit into a non-compatible charger
as battery pack may rupture causing serious personal
injury.
Consult the chart at the end of this manual for compatibility of
batteries and chargers.
•Charge the battery packs oniy in DFWALT chargers.
•DO NOT splash or immerse in water or other liquids.
•Do
not store or use the tool and battery pack in locations
where the temperature may reach or exceed 105 "F (40 °C)
(such as outside sheds or metal buildings in summer).
AWARNING: Fire
hazard.
Never attempt to open the battery pack
for any reason, if battery pack case is cracked or
damaged,
do not
insert into
charger.
Do not crush, drop or damage battery
pack.
Do
not use a battery pack or charger that has received a sharp
blow.
3
been
dropped,
run over or damaged in any way
(i.e.,
pierced with a
naii,
hit with a
hammer,
stepped on). Damaged battery packs should
be returned to service center for recyciing.
AWARNING: Fire
hazard.
Do not store or carry battery so
that metal objects can contact exposed battery terminals.
For example, do not place battery in aprons, pockets, tooi boxes,
product kit boxes, drawers, etc., with loose
naiis,
screws,
keys,
etc.
Transporting batteries can possibly cause fires if the battery
terminals inadvertently come In contact with conductive
materials such as
keys,
coins,
hand tools and the
like.
The US
Department of Transportation Hazardous Ivlateriai Regulations (HMR)
actually prohibit transporting batteries in commerce or on airplanes
(i.e.,
packed in suitcases and carry-on luggage) UNLESS they are
properly protected from short circuits. So when transporting individual
batteries, make sure that the battery terminals are protected and well
insulated from materials that couid contact them and cause a short
circuit.
SPECIFICSAFETYINSTRUCTIONSFORLITHIUMION(Ll-lon)
•Do not incinerate the battery pack even if it is severely
damaged or is completely worn out. The battery pack can
explode in a
fire.
Toxic fumes and materials are created when
lithium ion battery packs are
burned.
•If battery contents come Into contact with the
skin,
immediately wash area with miid soap and
water,
if battery
iiquid gets into the eye, rinse water over the open eye for 15
minutes or until irritation ceases, if medical attention is
needed,
the battery electrolyte is composed of a mixture of iiquid organic
carbonates and iithium
salts.
•Contents of opened battery celis may cause respiratory
irritation. Provide fresh air. if symptoms persists, seek medical
attention.
AWARNING: Burn
hazard.
Battery iiquid may be flammable if
exposed to spark or flame.
The RBRC™ Seal
TheRBRC^'^(RechargeableBatteryRecycling
Corporation)Sealonthenickelcadmium,nickelmetal
hydrideorlithiumionbatteries(orbatterypacks)indicate
thatthecoststorecyclethesebatteries(orbattery
packs)attheendoftheirusefullifehavealreadybeenpaidby
DEWALT.
Insomeareas.ItIsillegaltoplacespentnickelcadmium,nickelmetal
hydrideorlithiumIonbatteriesinthetrashormunicipalsolidwaste
streamandtheRBRCprogramprovidesanenvironmentallyconscious
alternative.
RBRC^"incooperationwith
DEWALT
andotherbatteryusers,has
establishedprogramsintheUnitedStatesandCanadatofacilitate
thecollectionofspentnickelcadmium,nickelmetalhydrideorlithium
Ionbatteries.Helpprotectourenvironmentandconservenatural
resourcesbyreturningthespentnickelcadmium,nickelmetalhydride
orlithiumionbatteriestoanauthorized
DEWALT
servicecenteror
toyourlocalretailerforrecyoling.Youmayalsocontactyourlocal
recyclingcenterforinformationonwheretodropoffthespentbattery.
RBRC^"^isa registeredtrademarkofthe
Rechargeable Battery
Recyciing Corporation.
Important Safety Instructions for All
Battery Chargers
SAVE THESE INSTRUCTIONS: This manual contains important
safety and operating instmctions for battery chargers.
•Before using
charger,
read ail instmctions and cautionary markings
on
charger,
battery
pack,
and product using battery
pack.
AWARNING: Shock
hazard.
Do not allow any iiquid to get inside
charger.
Eectric shock may
result.
4
ACAUTION: Bum
hazard.
To reduce the risk of
injury,
charge oniy
DFWALT rechargeable batteries. Other types of batteries may burst
causing personal injury and damage.
NOTICE:
Under certain conditions, with the charger plugged in to the
power
supply,
the charger can be shorted by foreign
material.
Foreign
materials of a conductive nature such as, but not limited to, grinding
dust,
metai
chips,
steel
wool,
aluminum
foil,
or any buildup of metallic
particles should be kept away from charger cavities. Always unplug the
charger from the power
supply,
when there is no battery pack in the
cavity.
Unplug charger before attempting to clean.
AWARNING:
•DO NOT attempt to charge the battery pack with any
chargers other than the ones In this
manual.
The charger and
battery pack are specifically designed to work
together.
•These chargers are not Intended for any uses other than
charging
DEWALT
rechargeable batteries. Any other uses may
result in risk of
fire,
electric shock or electrocution.
•Do
not expose charger to rain or
snow.
•Pull by plug rather than cord when disconnecting
charger.
This will reduce risk of damage to electric plug and
cord.
•Make sure that cord is located so that it will not be stepped
on, tripped
over,
or otherwise subjected to damage or
stress.
•Donof
use an extension cord unless It Is absolutely
necessary.
Use of improper extension cord couid result in risk of
fire,
electric
shock,
or electrocution.
•When operating an inspection camera outdoors, use an
extension cord suitable for outdoor use. Use of a cord suitable
for outdoor use reduces the risk of electric
shock.
•An extension cord must have adequate wire size (AWG
or American Wire Gauge) for
safety.
The smaller the gauge
number of the
wire,
the greater the capacity of the
cable,
that is
16 gauge has more capacity than 18 gauge. An undersized cord
will cause a drop in line voltage resulting in loss of power and
overheating. When using more than one extension to make up the
total length, be sure each individual extension contains at least the
minimum wire
size.
The following table shows the correct size to
use depending on cord length and namepiate ampere
rating,
if in
doubt,
use the next heavier gauge. The smaller the gauge
number,
the heavier the
cord.
MinimumGaugeforCordSets
AmpereRating
Voits TotalLengthofCordinFeet meters)
AmpereRating 120V 25(7.6)50(15.2) 100(30.5) 150(45.7)
AmpereRating
240V 50(15.2)100(30.5) 200(61.0) 300(91.4)
More
Than
NotMore
Than
AWG
0 6 18 16 16 14
6 10 18 16 14 12
10 12 16 16 14 12
12 16 14 12 NotRecommended
•Do
not place any object on top of charger or place the
charger on a soft surface that might block the ventilation
slots and result In excessive Internal
heat.
Place the charger
in a position away from any heat source. The charger is ventilated
through slots in the top and the bottom of the housing.
•Do not operate charger with damaged cord or
plug.
•Do not operate charger if It has received a sharp
blow,
been
dropped,
or otherwise damaged in any way. Take it to an
authorized service
center.
5

•Do not disassemble
charger;
take It to an authorized service
center when service or repair is
required.
Incorrect reassembly
may result in a risk of electric sfiocK electrocution or
fire.
•Disconnect the charger from the outlet before attempting
any
cleaning.
This will reduce the risk of electric
shock.
Removing the battery pack will not reduce this
risk.
•NEVER attempt to connect 2 chargers
together.
•The charger is designed to operate on standard 120 V
household electrical
power.
Do not attempt to use it on any
other
voltage.
This does not apply to the vehicular
charger.
Chargers
Yourtoolusesa
DEWALT
charger.Besuretoreadallsafetyinstructions
beforeusingyourcharger.Consultthechartonthebackcoverofthis
manualforcompatibilityofchargersandbatterypacks.
Charging Procedure (Fig. 1)
1.
Plugthechargerintoan
FIG.
1
appropriateoutlet
beforeinsertingbattery
pack.
2.
Insertthebatterypack
(A)
Intothecharger,
asshownInFigure1,
makingsurethepackis
fullyseatedincharger.
Thered(charging)light
willblinkcontinuously
indicatingthatthe
chargingprocesshas
started.
3.Thecompletionofchargewillbeindicatedbytheredlight
remainingCNcontinuously.Thepackisfullychargedandmaybe
usedatthistimeorleftInthecharger.
Indicator Light Operation
DCB106
PACK
CHARGING
PACK
CHARGED
DCB107,DCB112
I
PACK
CHARGING
I
PACK
CHARGED
)HOT/COLD
DELAY
— |-
Charge Indicators
HOT/COLDPACKDELAY
DGB107,DCB112
TheDCB107andDCB112chargershavea hot/colddelayfeature.
Whenthechargerdetectsa batterythatishot,itautomaticallydelays
charginguntilthebatteryhascooled.Whenthechargerdetectsa
batterythatis
cold,
itautomaticallydelayscharginguntilthebattery
haswarmed.
Theredlightwillcontinuetoblink,buta yellowIndicatorlightwill
beilluminatedduringthisoperation.Oncethebatteryhascooled,
theyellowlightwillturnoffandthechargerwillresumethecharging
procedure.
6
LEAVINGTHEBATTERYPACKINTHECHARGER
Thechargerandbatterypackcanbeleftconnectedwiththecharge
indicatorshowingPackCharged.
WEAKBATTERYPACKS:Weakbatterieswillcontinuetofunction
butshouldnotbeexpectedtoperformasmuchwork.
FAULTYBATTERYPACKS:Thischargerwillnotchargea faulty
batterypack.Thechargerwillindicatefaultybatterypackbyrefusing
tolightorbydisplayingproblempackorcharger.
NOTE:
Thiscouldalsomeana problemwitha charger.
Wall Mounting
DCB107,DCB112
Thesechargersaredesignedtobewallmountableortosituprighton
atableorworksurface.
Ifwallmounting,locatethechargerwithinreachofanelectricaloutlet.
Mountthechargersecurelyusingdrywallscrewsatleast1"(25.4mm)
long,
screwedintowoodtoanoptimaldepthleavingapproximately
7/32"(5.5mm)ofthescrewexposed.
Important Charging Notes
1.
Longestlifeandbestperformancecanbeobtainedifthebattery
packischargedwhentheairtemperatureisbetween65°Fand
75°F(18-24"C).DONOTchargethebatterypackinanair
temperaturebelow+40°F(+4.5°C),orabove+105°F(+40.5°C).
Thisisimportantandwillpreventseriousdamagetothebattery
pack.
2.
Thechargerandbatterypackmaybecomewarmtotouchwhile
charging.
Thisisa normalcondition,anddoesnotindicatea
problem.
Tofacilitatethecoolingofthebatterypackafteruse,
avoidplacingthechargerorbatterypackina warmenvironment
suchasina metalshed,oranuninsulatedtrailer.
3.Ifthebatterypackdoesnotchargeproperly:
a.CheckoperationofreceptaclebypluggingIna lamporother
appliance;
b.Checktoseeifreceptacleisconnectedtoa lightswitchwhich
turnspoweroffwhenyouturnoutthelights;
c.Movechargerandbatterypacktoa locationwherethe
surroundingairtemperatureisapproximately65°F-75°F
(18-24
"0:
d.
Ifchargingproblemspersist,takethe
tool,
batterypackand
chargertoyourlocalservicecenter.
4.
Thebatterypackshouldberechargedwhenitfailstoproduce
sufficientpoweronjobswhichwereeasilydonepreviously.DO
NOTCONTINUEtouseundertheseconditions.Followthe
chargingprocedure.Youmayalsochargea partiallyusedpack
wheneveryoudesirewithnoadverseaffectonthebatterypack.
5.Foreignmaterialsofa conductivenaturesuchas,butnotlimited
to,
grindingdust,metalchips,steelwool,aluminum
foil,
orany
buildupofmetallicparticlesshouldbekeptawayfromcharger
cavities.Alwaysunplugthechargerfromthepowersupplywhen
thereIsnobatterypackInthecavity.Unplugchargerbefore
attemptingtoclean.
6.Donotfreezeorimmersechargerinwateroranyotherliquid.
AWARNING: Shock
hazard.
Don't allow any iiquid to get inside
charger.
Eectric shock may
result.
A
CAUTION:
Never attempt to open the battery pack for any reason,
if the plastic housing of the battery pack breaks or
cracks,
return to
aservice center for
recyciing.
Storage Recommendations
1.
ThebeststorageplaceIsonethatIscoolanddryawayfromdirect
sunlightandexcessheator
cold.
7

2.
Forlongstorage,itisrecommendedtostorea fullycharged
batterypackina cooldryplaceoutofthechargerforoptimal
results.
NOTE:
Batterypacksshouldnotbestoredcompletelydepletedof
charge.Thebatterypackwillneedtoberechargedbeforeuse.
SAVE THESE INSTRUCTIONS
FOR FUTURE USE
COMPONENTS (Fig. 2, 3)
AWARNING: Never modify the inspection camera or any part of it.
Damage or personal injury could
result.
A.12\/Max*LithiumIonBattery
B.CamerawithLED's
0.3'(.91m)Cameracable
D.Cameraconnector
E.Screen
F.Cameracableon/offswitch/ LEDbrightnesscontrolswitch
G.
Handleset
H.MicroSDslotformicroSDmemorycards16gborless
I.Powerbuttonforthescreen:Boththescreenandthe
^—cameracable(F)needtobeturnedon.
Zoom/Deletebutton:
Thebuttonhas2 functions:
8
K.i
L.
M.
Zoom:
Thisistobeusedwhenyouneeda
closerlookattheobject(3xzoom).
Delete:Wheninthefoldermenu,picturescanbe
deletedbyusingthisbutton.
Play:Pressthebuttontogotothefolderwherephotos
andvideosaresaved.
OR
Pressthebuttontoplayvideos.
Camera:Pressthisbuttonfortakinga photo.
Record:
Pressthisbuttontostartandstoprecording
avideo.
MainMenu:Pressthisbuttontoshowa listofoptionsfor
operatingtheinspectioncameraortoexita screen.
BackArrow:Pressthisbuttontonavigatebackward.
OK:Pressthisbuttontosavechanges.
ForwardArrow:Pressthisbuttontonavigateforward.
Powerindicatorforthehandleset:Whenthegreen
_lightisonitindicatesthatthehandlesetison.
S.Resetbutton
INTENDEDUSE
Theinspectioncameraisdesignedtoplayreal-timevideowhilelooking
intowallsand/ortightspaces.Witha microSDcard(soldseparately),
thetoolcanthentakephotosorrecordvideosfordocumentation
purposes.
FIG.
4
PhotosaresavedinJPGformatandvideosaresavedasAVI.This
DEWALT
inspectioncameraiscompatiblewithmicroSDmemory
cardsupto16gigabytes.
Applicationsconsistofautomotiveinspection,plumbinginspection,
HVACinspectionorcablerouting.Readtheentiremanualbeforeusing
thisinspectioncamera.
DONOTuseinpresenceofflammableliquidsorgases.Thecamera
cableextensioniswaterproofuptothecameraconnector.DONOT
USEthehandlesetunderwetconditions.
Theinspectioncameraisa professional
tool.
DONOTletchildren
comeIntocontactwiththe
tool.
Supervisionisrequiredwhen
inexperiencedoperatorsusethis
tool.
ASSEMBLY
Screen (Fig. 4)
Whenthescreenisattachedtothe
handlesetwitha battery,itwillreceive
achargefromthebattery.Ensurethe
screenisfullychargedbeforeuse.
Whenthescreenisdisengagedfrom
thehandleset,a batteryiconappears
intheupperleftcorner.Thisicon
alsodisplaysthecurrentchargeofthe
screen.
Toinstallthescreen(E)intothehandle
set(G),alignthescreenwiththerails
onthehandlesetandslideitfirmlyinto
thehandleuntilyouhearthelocksnap
intoplace.
Toremovethescreenfromthehandle
set,firmlyslidethescreenupfromthe
toolhandle.
9

Thescreencanbeturnedonandviewedwhenitisnotattachedtothe
handleset,allowingeasiermaneuverabilityofthecamera.
Camera
Cable (Fig. 5)
Alignthecameracablewiththecameraconnector(D).Pushinand
turntheconnectorcounterclockwise(camerascreenfacingyou)to
firmlyattach.
Toremovethecameracable,turntheconnectorclockwise(direction
ofarrow).
Additionalcameracableandextensionsareavailableatadditional
cost.Pleasecontact
DEWALT
IndustrialToolCo.,701EastJoppa
Road,
Baltimore,MD21286,call
1-800-4-DEWALT
(1-800-433-9258)
orvisitourwebsitewww.dewalt.com.
Hook
and Magnet DCT410 (Fig. 6)
Thehookisbeneficialforretrievingcableorwirelocatedintight
spaces.Themagnetisbeneficialforretrievingmetalobjectsintight
spaces.
Toattachthehookormagnet,turntheknurledpartofthecamera
counterclockwiseuntilitstops..
Alignthehookormagnetwiththegraygroove(T)thenslideitdown
untilthetabs(U)atthetopofthehook/magnetaresecurelyInthe
notches(V)locatedinthecameralens.
Turntheknurledpartclockwisetolockthebaseofthehookand
magnet.
Hook,
Magnet and Mirror DCT411
(Fig. 7, 8)
Followtheprocessbelowtoassemblethehook,magnetormirror
ontotheDGT4119 mmcamera.
I.With
thesleeve(W)ontheaccessory,insertthebottomof
accessory(bentwire)intothehole(X)inthe9 mmcameracable.
2.
MakesuretheaccessoryIsinthegroove(Y)onthesleeve
andslidethesleeveontothecamerauntilthesleevecovers
thehole(X).
10
FIG.
8
ACAUTION:
Cut
Hazard.
Use care when handling
hook.
Belt
Hook (Fig. 9)
(Optional
Accessory)
AWARNING: To reduce the risk of serious personal
Injury,
DO
NOT suspend tool overhead or suspend objects from the belt
hook.
ONLY hang tool's belt hook from a work
belt.
AWARNING: To reduce the risk of serious personal
injury,
ensure the screw (Z) holding the belt hook is
secure.
IMPORTANT:WhenattachingorFIG.9
removingthebelthook,useonly
thescrew(Z)thatisprovided.
Thebelthook(AA)canbebe
attachedtoeithersideofthetool
usingonlythescrew(Z)provided,
toaccommodateleft-orright-
handedusers.Ifthehookisnot
desiredatall,itcanberemovedfromthe
tool.
Tomovebelthook,removethescrew(Z)thatholdsthebelthookIn
placethenreassembleontheoppositeside.
OPERATION
Installing
and Removing the Battery Pack
(Fig. 10)
NOTE:
Makesureyourbatterypackisfullycharged.
Toinstallthebatterypack(A)intothetoolhandle,alignthebatterywith
therailsInsidethetool'shandleandslideitfirmlyIntothehandleuntil
youhearthelocksnapintoplace.
FIG.
10
A
Toremovethebatterypackfromthe
tool,
pressthereleasebutton(BB)
andfirmlypullthebatterypackoutofthetoolhandle.Insertitintothe
chargerasdescribedinthechargersectionofthismanual.
Getting
Started
INITIALSETUP
Language Setup
1.
PresstheforwardorbackarrowtoselectEnglish,Frenchor
Spanish.
Engilsh
I
French
Spanish
11

2.
Press
theOK
button
to
confirm
and
exit.
Date
and
Time Setup
1.
Press
the
forward
or
backarrow
to
highlight
the
field
to
change.
DATE/TIME
1011/01/ 2010mm/dd/yyyy
12HR
11:44PM
2.
Press
theOK
button
to
activate
the
field(fieldturnsgreen).
3.Press
the
forward
or
backarrow
to
change
the
activated
field.
4.
Press
theOK
button
to
savechanges(fieldturnsyellow).
5.Repeatabovesteps
to
changeremainingfields.
6.Press
the
mainmenubutton
to
exit.
BASICOPERATION
NOTE:
Atany
timeduring
the
cameraoperation,pressing
the
main
menubuttonwillreturn
tothe
previousmenu.
To Record Photos
or
Videos
Besure
a
micro
SD
card(soldseparately)
is
loaded
inthe
cardslot
(H).
1.
Turnboth
the
camera
(B)andthe
handle
set(G)on.
2.
Aim
camera
at
destination.
A.Press
the
camerabutton
(L)to
take
a
photo.
A
confirmationicon
willappear
inthetop
rightside
of
screen.
OR
B.Press
the
recordbutton
(M)to
startrecording.
A
reddot
willappear
Inthetop
rightside
ofthe
screen.Tostop
recording,
press
the
recordbuttonagain.
Thecamerawillcreate
a
folder
onthe
micro
SD
card
for
that
day.All
photos
or
videostakenthat
day
will
be
stored
In
thisfolder.
To View Photos
or
Videos
1.
Press
the
mainmenubutton
to
show
the
MainMenu.
2.
Press
the
fonward
or
backarrow
to
select
the
Folderoption.
Datemmo
W
Language
yFormatDisk
DefaultSetup
^
TimeStamp
I•
Folder"
CD
DEWALT
Copyrlgtit
3.Press
theOK
button
to
navigate
tothe
nextscreen.
12
4.
Press
the
forward
or
backarrow
to
select
a
datedfolder.
2a
01-11-2009
3• 01-12-2009
4• 01-13-2009
5• 01-14-2009
6• 01-15-2009
7• 01-16-2009
To Delete Individual Photos
or
Videos:
1.
Press
the
mainmenubutton
to
show
the
MainMenu.
2.
Press
the
forward
or
backarrow
to
select
the
Folderoption.
5.Press
theOK
button
to
select
the
datedfolder.
6.Press
the
forward
or
backarrow
to
select
the
photo
or
video.
^
Datemme
^
Language
yFormatDisk
'IDefaultSetup
tfpTimeStamp
I• Folder
in
DEWALT
Copyright
FILE
1 O 05:53:00 VID
|2 05:53:00 PHOT1
•
OM
0-2009
3
4
5
[£l
•
D
05:53:03
05:55:40
05:59:03
PHOT
VID
VID
6 06:05:17 PHOT
BACK 7
•
05:05:17 WO
3.Press
theOK
button
to
navigate
tothe
nextscreen.
4.
Press
the
fonward
or
backarrow
to
select
a
datedfolder.
7.Press
theOK
button
to
view
the
photo
or
video.
FOLDER
11 D 01-10-20091
2D 01-11-2009
3• 01-12-2009
4• 01-13-2009
5• 01-14-2009
6• 01-15-2009
7• 01-16-2009
BACK
5.Press
theOK
button
to
navigate
tothe
nextscreen.
6.Press
the
forward
or
backarrow
to
select
a
photo
or
video.
8.Press
the
forward
or
backarrow
to
advance
tothe
nextphoto
orvideo.
9.Whenfinished,press
the
mainmenubutton
to
exit.
FILE
1D
05:53:00 WD
|2
\a
05:53:00 PHOT1
•
01-10-2009
3Q
05:53:03 PHOT
•
01-10-2009 4O
5O
05:55:40
05:50:03
WD
WD
6Q
05:05:17 PHOT
BACK 7O
05:05:17 WD
13

7.Press
the
deletebutton.Select
YESto
delete
the
Individualphoto
orvideo.
FILE
1
• 05:53:00VID
I2 [g05:53:00PHOT]
r1 3 0 05:53:03PHOT
I' 4 D 05:56:40VID
01-10-2009^
5
LJ05:59:03VID
60 06:05:17PHOT
7O 06:05:17VID
IDELETE?I
BACK
I •jESjt NOI
8.Press
the
mainmenubutton
to
exit.
To Delete
a
Photo
or
Video While Viewing
1.
Press
the
mainmenubutton
to
show
the
MainMenu.
2.
Press
the
forward
or
backarrow
to
select
the
Folderoption.
MAINMENU
03
DateHlme
^
Language
U
FormatDisk
'3
DefaultSetup
ftpTimeStamp
I• Folder|
m
DEWALT
Copyright
3.Press
theOK
button
to
navigate
tothe
nextscreen.
4.
Press
the
fonA/ard
or
backarrow
to
select
a
datedfolder.
FOLDER
Ii • 01-10-2009I
2• 01-11-2009
3• 01-12-2009
4• 01-13-2009
5• 01-14-2009
6• 01-15-2009
7• 01-16-2009
BACK
5.Press
theOK
button
to
navigate
tothe
nextscreen.
6.Press
the
fonward
or
backarrow
to
select
a
photo
or
video.
7.Press
theOK
button
to
view.
8.Press
the
deletebutton.Select
YESto
delete
the
Individualphoto
orvideo.
To Change Languages
1.
Press
the
mainmenubutton
to
show
the
MainMenu.
2.
Press
the
forward
or
backarrow
to
select
the
Languageoption.
MAINMENU
03
Datemme
I
W
Language|
U
FormatDisk
oDefaultSetup
03
TimeStamp
•
Folder
m
DEWALT
Copyright
14
3.Press
theOK
button
to
select.
4.
Press
the
forward
or
backarrow
to
selectEnglish,French
or
Spanish.
IEnglish"|
French
Spanish
4.
Press
the
forward
or
backarrow
to
highlight
a
field
to
change.
5.Press
theOK
button
to
savechanges.
6.Press
the
mainmenubutton
to
exit.
To
Change Date/Time
1.
Press
the
mainmenubutton
to
show
the
MainMenu.
2.
Press
the
forward
or
backarrow
to
selectDate/Timeoption.
DATE/TIME
01
/ 01/ 2010
mm/dd/yyyy
|12HR|
11:44PH
5.Press
theOK
button
to
activate
the
field(fieldturnsgreen).
6.Press
the
forward
or
backarrow
to
change
the
activated
field.
7.Press
theOK
button
to
savechanges.
8.Repeatabovesteps
to
changeremainingfields.
9.Press
the
mainmenubutton
to
exit.
To Activate
the
Time Stamp
1.
Press
the
mainmenubutton
to
show
the
MainMenu.
2.
Press
the
forward
or
backarrow
to
select
the
TimeStampoption.
IgoDatemme
Language
U
FormatDisk
O
DefaultSetup
03
TimeStamp
•
Folder
HI
DEWALT
Copyright
3.Press
theOK
button
to
navigate
tothe
nextscreen.
03
DatafTlme
•PLanguage
U
FormatDisk
"3
DefaultSetup
j
03
TimeStamp
•
Folder
m
DEWALT
Copyright
3.Press
theOK
button
to
navigate
tothe
nextscreen.
15

4.
Press
the
forward
or
backarrow
to
select
OFForON.
TIMESTAMP TIMESTAMP
OFF
ON
OFF
ON
5.Press
theOK
button
to
savechanges.
6.Press
the
mainmenubutton
to
exit.
To Format Micro
SD
Card
NOTICE:
Formatting
the
micro
SD
card will erase
ail data.
1.
Press
the
mainmenubutton
to
show
the
MainMenu.
2.
Press
the
forward
or
backarrow
to
select
the
FormatDiskoption.
FORMATDISK
Caution:
Formattingwillerasealldata
NO YES
FORMATDISK
Areyousureyouwanttoformatdisk?
NO YES
5.Press
theOK
button
to
savechanges
and
exit.
To Change Default Setup
NOTICE:
Changing
to
default setup will erase current settings
and restore factory
settings.
1.
Press
the
mainmenubutton
to
show
the
MainMenu.
2.
Press
the
forward
or
backarrow
to
select
the
DefaultSetup
option.
03
Date/Time
Language
IU FormatDisk
'3
DefaultSetup
01
TimeStamp
•
Folder
tn
DEWALT
Copyright
3.Press
theOK
button
to
navigate
tothe
nextscreen.
4.
Press
the
forward
or
backarrow
to
select
NOorYES.
03
Date/Tlme
•PLanguage
U
FormalDisk
DefaultSetup
0
TimeStamp
•
Folder
CD
DEWALT
Copyright
r
3.Press
theOK
button
to
navigate
tothe
nextscreen.
16
4.
Press
the
forward
or
backarrow
to
select
NOorYES.
DEFAULTSETUP
Caution:
Willrestorefactorysettings
NO YES
DEFAULTSETUP
Caution:
Willrestorefactorysettings
NO YES
5.Press
theOK
button
to
savechanges
and
exit.
Operating Tips
•
Use
only
DEWALT
12V
Max*lithium
ion
battery.
•Ensure
the
DEWALT
battery
isIn
goodworkingcondition.
Ifthelow
batteryIndicatorlight
onthe
screen
is
flashing,
the
batteryneeds
to
be
recharged.
•
To
extendbatterylife,makesure
to
turnboth
the
screen
andthe
handle
setoff
when
notinuse.
•Makesure
the
screen
is
fullychargedbeforeoperation.
MAINTENANCE
Cleaning
AwARNING: Blow dirt
and
dust
off
with
clean,
dry air at
least once
a
week. To
minimize
the
risk
of eye injury,
always wear ANSI
287.1
approved
eye
protection when performing
this.
AWARNING: Never
use
solvents
or
other harsh chemicals
for
cleaning
the
non-metallic parts
of the tool.
These chemicals
may
weaken
the
plastic materials used
In
these
parts. Use a
cloth
dampened only with water
and
mild
soap.
Never
let any
liquid
get
inside
the tool;
never Immerse
any
part
of the
tool Into
a liquid.
CHARGERGLEANINGINSTRUCTIONS
AWARNING: Shock
hazard.
Disconnect
the
charger from
the AC
outlet before
cleaning.
Dirt
and
grease
may be
removed from
the
exterior
of the
charger using
a
cloth
or
soft non-metallic
brush.
Do
not
use
water
or any
cleaning solutions.
n-oubleshooting
•Makesure
the12V
Max*battery
Is
charged.
•Makesure
the
screen
is
fullycharged.
•Makesure
the
screen
is
alwaysattached
tothe
handle
set.The
picture
may
freeze
Ifyou
attempt
to
remove
the
(screen)from
the
handle
set
whiletaking
a
photo
or
video.
•Makesure
the
battery
Is
installed
onthe
handle
set
when
inuse.
•Makesure
the
cameracable
is
attached
tothe
handle
set
properly.
•Makesure
the
handle
setis
turned
onas
well
asthe
screen.
•Makesure
the
back
ofthe
handle
setisnot
coveredwithdebris
so
thescreenslides
on
easily
andno
damage
tothe
screenoccurs.
•
Ifthe
screenfreezes
or
won'tturn
on.
Insert
a
smallobject
(i.e.,
paperclip
end)
Into
the
resetbuttonlocated
onthe
back
ofthe
screen.
•
Ifthe
picture
Isdim,
roll
the
brightnesscontrolswitch
to
brighten
the
LED
light.
Accessories
AWARNING: Since accessories, other than those offered
by
DFWALT,
have
not
been tested with this
product, use of
such
accessories with this tool could
be
hazardous.
To
reduce
the
risk
of
Injury,
only DFWALT recommended accessories should
be
used with
this
product.
17

Recommendedaccessories
foruse
withyourtool
are
available
at
extracostfromyourlocaldealer
or
authorizedservicecenter.
Ifyou
needassistance
In
locating
any
accessory,pleasecontact
DEWALT
IndustrialTool
Co.,701
EastJoppaRoad,Baltimore,
MD
21286,call
1-8Q0-4-DEWALT
(1
-800-433-9258)
or
visit
our
websitewww.dewalt.
com.
RECOMMENDED
ACCESSORIES
•
Cameracable:
17mm
diameter
•
Cameracable:
9 mm
diameter
•
Cameracable:5.8mmdiameter
•
3'
(.91m)cableextension:
17mm
diameter
•
Hook
and
magnet(DCT410)
•
Hook,magnet
and
mirror(DCT411)
Pleasecontact
DEWALT
IndustrialTool
Co.,701
EastJoppaRoad,
Baltimore,
MD
21286,call
1-800-4-DEWALT
(1-800-433-9258)
or
visit
ourwebsitewww.dewalt.com.
Repairs
Thecharger,batterypack
and
inspectioncamera
arenot
sen/lceable.
There
areno
serviceablepartsinside
the
charger,batterypack
or
Inspectioncamera.
ToassureproductSAFETY
and
RELIABILITY,
repairs,maintenance
andadjustmentshould
be
performed
bya
DEWALT
factoryservice
center,
a
DEWALT
authorizedservicecenter
or
otherqualifiedservice
personnel.
Always
use
identicalreplacementparts.
Register
Online
Thank
you
for
yourpurchase.Registeryourproduct
now
for:
•WARRANTYSERVICE:
Registeringyourproductwillhelp
you
obtainmoreefficientwarrantyservice
in
casethere
Isa
problem
withyourproduct.
•
CONFIRMATION
OF
OWNERSHIP:
IncaseofanInsurance
loss,
such
as
fire,flood
or
theft,yourregistration
of
ownershipwill
serve
as
yourproof
of
purchase.
•
FOR
YOURSAFETY:
Registeringyourproductwillallow
usto
contact
youinthe
unlikelyevent
a
safetynotification
is
required
under
the
FederalConsumerSafety
Act.
Registeronline
at
wvwv.dewalt.com/reglster.
Three
Year Limited Warranty
DEWALT
willrepair,withoutcharge,
any
defects
due
to
faultymaterials
orworkmanship
for
threeyearsfrom
the
date
of
purchase.This
warrantydoes
not
coverpartfailure
due
to
normalwear
or
toolabuse.
Forfurtherdetail
of
warrantycoverage
and
warrantyrepairinformation,
visitwvwv.dewalt.com
or
call
1-800-4-DEWALT(1-800-433-9258).
Thiswarrantydoes
not
apply
to
accessories
or
damagecausedwhere
repairshavebeenmade
or
attempted
by
others.Thiswarrantygives
youspecificlegalrights
andyoumay
haveotherrightswhichvary
in
certainstates
or
provinces.
Inaddition
tothe
warranty,
DEWALT
tools
are
covered
byour:
1
YEAR
FREE
SERVICE
DEWALT
willmaintain
the
tool
and
replacewornpartscaused
by
normal
use,
for
free,
any
timeduring
the
firstyearafterpurchase.
2
YEARS
FREE
SERVICE
ON
DEWALT
BATTERY
PACKS
DC9071,DC9091,
DC9096,
DC9280,DC9360,DC9180,
DCB120,
DCB201,
DCB203,
DCB207
and
DCB127
3
YEARS
FREE
SERVICE
ON
DEWALT
BATTERY
PACKS
DCB200,
DCB204
18
DEWALT
BATTERY
PACKS
Productwarrantyvoided
Ifthe
batterypack
is
tamperedwith
Inany
way.
DEWALT
Isnot
responsible
forany
injurycaused
by
tampering
and
may
prosecutewarrantyfraud
tothe
fullestextentpermitted
by
law.
90
DAY
MONEY
BACK
GUARANTEE
If
youarenot
completelysatisfiedwith
the
performance
of
your
DEWALT
Power
Tool,
Laser,
or
Nailer
forany
reason,
youcan
return
it
within
90
daysfrom
the
date
of
purchasewith
a
receipt
fora
fullrefund
-
no
questionsasked.
LATIN
AMERICA:
Thiswarrantydoes
not
apply
to
productssold
InLatin/Vnerica.
For
productssold
in
Latin/\merica,
see
country
specificwarrantyInformationcontained
Inthe
packaging,call
the
local
company
or
see
website
for
warrantyInformation.
FREE
WARNING
LABEL
REPLACEMENT:
Ifyourwarninglabels
becomeIllegible
orare
missing,call
1-800-4-DEWALT
(1-800-433-
9258)
fora
freereplacement.
SPECIFICATIONS
CameraCableDiameter DCT410:17mm
DCT411:9mm
DGT412:5.8mm
Cablelength 3'(.91m)
Resolution 320
X
480
dpi
ScreenSize 3.5"
DCT410
INSPECTION
CAMERA
AWARNING
TO
REDUCE
THE
RISR
OF
INJURY,
USER
MUST
READ
INSTRUCTION
MANUAL
RISKOFEUCTRICSHUCR.
AVERTISSEMENT;
A
TITRE
PREVENTIF.
UREIE
GUIDE.RISOUE
DE
SECOUSSES
ELECTRIOUES.
ADVERTENCIA:
PARA
EL
MANEJO
SEGURO
lU
EL
MANUAL
DE
INSTRUCCIONES.
RIESGO
OECHOOUEEUCTRICO.
DiWALTINDUSTRIALTOaiCa.
BALTIMORE
MD
Tins
USA
FOR
SERVICE
INFORMSUON.
CAUI-nOA-OfWALT
wsOtWALTAMi
19
Other manuals for DCT410
4
This manual suits for next models
2
Table of contents
Other DeWalt Analytical Instrument manuals

DeWalt
DeWalt DW0165S User manual

DeWalt
DeWalt DW0165N User manual

DeWalt
DeWalt DCT411 User manual

DeWalt
DeWalt DCT410-XE User manual

DeWalt
DeWalt DCT410 User manual

DeWalt
DeWalt DCT410 User manual

DeWalt
DeWalt DCT410 User manual

DeWalt
DeWalt DW030PL User manual

DeWalt
DeWalt DW055E User manual

DeWalt
DeWalt DCT412 User manual
Popular Analytical Instrument manuals by other brands

Teledyne
Teledyne 3020P operating instructions

Powerfix
Powerfix PEKK 4.3 A1 Operating Instruction and Safety Manual

PCE Instruments
PCE Instruments PCE-LRF 600 user manual

Goldanalytix
Goldanalytix 06-03-00015 user guide

Teledyne
Teledyne Ultra Trace 3000 operating instructions

ideal-tek
ideal-tek TEK-SCOPE user manual