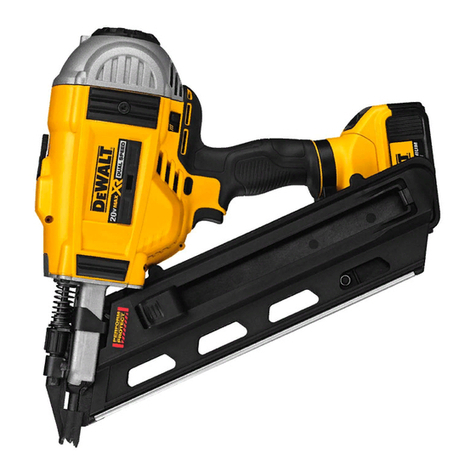
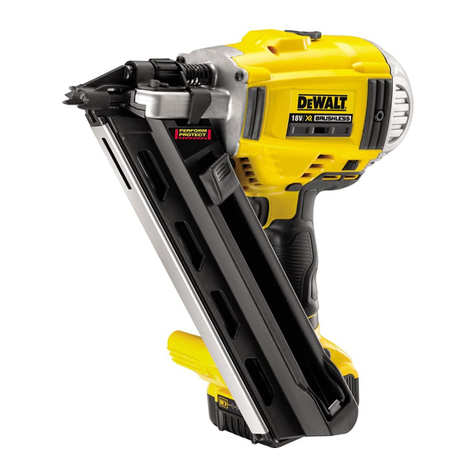
DeWalt DCN680 User manual

DCN680

B
Copyright DeWALT
English (original instructions) 3
Українська (переклад з оригінальної інструкції) 15

1
Fig. A
14
15
Fig. B
14
15
2
4
15
14
9
8
12
11
7
17
3
13
16
56
10
18
1
19

2
Fig. D
Fig. E
2
Fig. H
Fig. I
Fig. C
Fig. G
Fig. F
7
16
5
3
4
8

ENGLISH
3
aWARNING: To reduce the risk of injury, read the
instructionmanual.
Definitions: Safety Guidelines
The definitions below describe the level of severity for each
signal word. Please read the manual and pay attention to
thesesymbols.
DANGER: Indicates an imminently hazardous
situation which, if not avoided, will result in death or
seriousinjury.
WARNING: Indicates a potentially hazardous situation
which, if not avoided, could result in death or
seriousinjury.
CAUTION: Indicates a potentially hazardous situation
which, if not avoided, may result in minor or
moderateinjury.
NOTICE: Indicates a practice not related to
personal injury which, if not avoided, may result in
propertydamage.
Denotes risk of electricshock.
Denotes risk offire.
EC‑Declaration of Conformity
Machinery Directive
Finish Nailer
DCN680
DeWALT declares that these products described under
Technical Data are in compliance with:
2006/42/EC, EN60745‑1:2009+A11:2010, EN60745‑2‑16:2010.
These products also comply with Directive 2014/30/EU and
2011/65/EU. For more information, please contact DeWALT at
the following address or refer to the back of themanual.
The undersigned is responsible for compilation of the technical
file and makes this declaration on behalf ofDeWALT.
Markus Rompel
Vice‑President Engineering, PTE‑Europe
DeWALT, Richard‑Klinger‑Straße 11,
D‑65510, Idstein, Germany
13.02.2017
The vibration and/or noise emission level given in this
information sheet has been measured in accordance with
a standardised test given in EN62841and may be used to
compare one tool with another. It may be used for a preliminary
assessment ofexposure.
WARNING: The declared vibration and/or noise emission
level represents the main applications of the tool. However
if the tool is used for different applications, with different
accessories or poorly maintained, the vibration and/or
noise emission may differ. This may significantly increase
the exposure level over the total workingperiod.
An estimation of the level of exposure to vibration and/or
noise should also take into account the times when the tool
is switched off or when it is running but not actually doing
the job. This may significantly reduce the exposure level
over the total workingperiod.
Identify additional safety measures to protect the operator
from the effects of vibration and/or noise such as: maintain
the tool and the accessories, keep the hands warm
(relevant for vibration), organisation of workpatterns.
DCN680
Voltage VDC 18
Type 1
Battery type Li‑Ion
Actuating mode Sequential /
Bump
Fasteners
length mm 15‑54
shank diameter mm 1.25
angle 0°
Weight (without battery pack) kg 2.4
Noise values and vibration values (triax vector sum) according to EN60745‑2‑16:
LPA (emission sound pressure level) dB(A) 84
LWA (sound power level) dB(A) 95
K (uncertainty for the given sound level) dB(A) 3
Vibration emission value a
h
= m/s22,5
Uncertainty K = m/s21,5
Congratulations!
You have chosen a DeWALT tool. Years of experience, thorough
product development and innovation make DeWALT one of the
most reliable partners for professional power toolusers.
Technical Data
English (original instructions)
CORDLESS 18GA STRAIGHT FINISH NAILER
DCN680

4
ENGLISH
e ) When operating a power tool outdoors, use an
extension cord suitable for outdoor use. Use of a cord
suitable for outdoor use reduces the risk of electricshock.
f ) If operating a power tool in a damp location is
unavoidable, use a residual current device (RCD)
protected supply. Use of an RCD reduces the risk of
electricshock.
3) Personal Safety
a ) Stay alert, watch what you are doing and use
common sense when operating a power tool. Do not
use a power tool while you are tired or under the
influence of drugs, alcohol or medication. A moment
of inattention while operating power tools may result in
serious personalinjury.
b ) Use personal protective equipment. Always wear eye
protection. Protective equipment such as a dust mask,
non‑skid safety shoes, hard hat or hearing protection used
for appropriate conditions will reduce personalinjuries.
c ) Prevent unintentional starting. Ensure the switch
is in the off‑position before connecting to power
source and/or battery pack, picking up or carrying
the tool. Carrying power tools with your finger on the
switch or energising power tools that have the switch on
invitesaccidents.
d ) Remove any adjusting key or wrench before turning
the power tool on. A wrench or a key left attached
to a rotating part of the power tool may result in
personalinjury.
e ) Do not overreach. Keep proper footing and balance
at all times. This enables better control of the power tool
in unexpectedsituations.
f ) Dress properly. Do not wear loose clothing or
jewellery. Keep your hair and clothing away from
moving parts. Loose clothes, jewellery or long hair can be
caught in movingparts.
g ) If devices are provided for the connection of dust
extraction and collection facilities, ensure these are
connected and properly used. Use of dust collection
can reduce dust‑relatedhazards.
GENERAL POWER TOOL SAFETY WARNINGS
WARNING: Read all safety warnings, instructions,
illustrations and specifications provided with this
power tool. Failure to follow all instructions listed below
may result in electric shock, fire and/or seriousinjury.
SAVE ALL WARNINGS AND INSTRUCTIONS
FOR FUTUREREFERENCE
The term “power tool” in the warnings refers to your
mains‑operated (corded) power tool or battery‑operated (cordless)
powertool.
1) Work Area Safety
a ) Keep work area clean and well lit. Cluttered or dark
areas inviteaccidents.
b ) Do not operate power tools in explosive
atmospheres, such as in the presence of flammable
liquids, gases or dust. Power tools create sparks which
may ignite the dust orfumes.
c ) Keep children and bystanders away while operating
a power tool. Distractions can cause you to losecontrol.
2) Electrical Safety
a ) Power tool plugs must match the outlet. Never
modify the plug in any way. Do not use any adapter
plugs with earthed (grounded) power tools.
Unmodified plugs and matching outlets will reduce risk of
electricshock.
b ) Avoid body contact with earthed or grounded
surfaces, such as pipes, radiators, ranges and
refrigerators. There is an increased risk of electric shock if
your body is earthed orgrounded.
c ) Do not expose power tools to rain or wet conditions.
Water entering a power tool will increase the risk of
electricshock.
d ) Do not abuse the cord. Never use the cord for
carrying, pulling or unplugging the power tool. Keep
cord away from heat, oil, sharp edges or moving
parts. Damaged or entangled cords increase the risk of
electricshock.
Batteries Chargers/Charge Times (Minutes)
Cat # VDC Ah Weight (kg) DCB104 DCB107 DCB112 DCB113 DCB115 DCB116 DCB117 DCB118 DCB132 DCB119
DCB546 18/54 6.0/2.0 1.05 60 270 170 140 90 80 40 60 90 X
DCB547 18/54 9.0/3.0 1.46 75* 420 270 220 135* 110* 60 75* 135* X
DCB548 18/54 12.0/4.0 1.44 120 540 350 300 180 150 80 120 180 X
DCB181 18 1.5 0.35 22 70 45 35 22 22 22 22 22 45
DCB182 18 4.0 0.61 60/40** 185 120 100 60 60/45** 60/40** 60/40** 60 120
DCB183/B 18 2.0 0.40 30 90 60 50 30 30 30 30 30 60
DCB184/B 18 5.0 0.62 75/50** 240 150 120 75 75/60** 75/50** 75/50** 75 150
DCB185 18 1.3 0.35 22 60 40 30 22 22 22 22 22 X
DCB187 18 3.0 0.54 45 140 90 70 45 45 45 45 45 90
DCB189 18 4.0 0.54 60 185 120 100 60 60 60 60 60 120
*Date code 201811475B or later
**Date code 201536or later
Batteries
Chargers/Charge Times (Minutes)
Cat #
DC
Weight
*Date code 201811475B or later
**Date code 201536or later

5
ENGLISH
Nailer Safety Warnings
• Always assume that the tool contains fasteners. Careless
handling of the nailer can result in unexpected firing of
fasteners and personalinjury.
• Do not point the tool towards yourself or anyone
nearby. Unexpected triggering will discharge a fastener
causing aninjury.
• Do not actuate the tool unless the tool is placed firmly
against the workpiece. If the tool is not in contact with
the workpiece, the fastener may be deflected away from
yourtarget.
• Disconnect the tool from the power source when the
fastener jams in the tool. While removing a jammed
fastener, the nailer may be accidentally activated if it is
pluggedin.
• Use caution while removing a jammed fastener. The
mechanism may be under compression and the fastener
may be forcefully discharged while attempting to free a
jammedcondition.
• Do not use this nailer for fastening electrical cables. It is
not designed for electric cable installation and may damage
the insulation of electric cables thereby causing electric shock
or firehazards.
Additional Nailer Safety Warnings
WARNING: When using any nailer, all safety precautions,
as outlined below, should be followed to avoid the risk
of death or serious injury. Read and understand all
instructions before operating thetool.
WARNING: NEVER spray or in any other way apply
lubricants or cleaning solvents inside the tool. This can
seriously affect the life and performance of thetool.
WARNING: if the tool has been dropped or you suspect
tool damage perform tool operation check as defined
contacts eyes, additionally seek medical help. Liquid
ejected from the battery may cause irritation orburns.
e ) Do not use a battery pack or tool that is damaged or
modified. Damaged or modified batteries may exhibit
unpredictable behaviour resulting in fire, explosion or risk
ofinjury.
f ) Do not expose a battery pack or tool to fire or
excessive temperature. Exposure to fire or temperature
above 130°C may causeexplosion.
g ) Follow all charging instructions and do not charge
the battery pack or tool outside the temperature
range specified in the instructions. Charging
improperly or at temperatures outside the specified range
may damage the battery and increase the risk offire.
6) Service
a ) Have your power tool serviced by a qualified repair
person using only identical replacement parts. This
will ensure that the safety of the power tool ismaintained.
b ) Never service damaged battery packs. Service
of battery packs should only be performed by the
manufacturer or authorized serviceproviders.
h ) Do not let familiarity gained from frequent use of
tools allow you to become complacent and ignore
tool safety principles. A careless action can cause severe
injury within a fraction of asecond.
4) Power Tool Use and Care
a ) Do not force the power tool. Use the correct power
tool for your application. The correct power tool
will do the job better and safer at the rate for which it
wasdesigned.
b ) Do not use the power tool if the switch does not turn
it on and off. Any power tool that cannot be controlled
with the switch is dangerous and must berepaired.
c ) Disconnect the plug from the power source and/
or remove the battery pack, if detachable, from
the power tool before making any adjustments,
changing accessories, or storing power tools. Such
preventive safety measures reduce the risk of starting the
power toolaccidentally.
d ) Store idle power tools out of the reach of children
and do not allow persons unfamiliar with the power
tool or these instructions to operate the power tool.
Power tools are dangerous in the hands of untrainedusers.
e ) Maintain power tools and accessories. Check for
misalignment or binding of moving parts, breakage
of parts and any other condition that may affect the
power tool’s operation. If damaged, have the power
tool repaired before use. Many accidents are caused by
poorly maintained powertools.
f ) Keep cutting tools sharp and clean. Properly
maintained cutting tools with sharp cutting edges are less
likely to bind and are easier tocontrol.
g ) Use the power tool, accessories and tool bits etc.
in accordance with these instructions, taking into
account the working conditions and the work to be
performed. Use of the power tool for operations different
from those intended could result in a hazardoussituation.
h ) Keep handles and grasping surfaces dry, clean and
free from oil and grease. Slippery handles and grasping
surfaces do not allow for safe handling and control of the
tool in unexpectedsituations.
5) Battery Tool Use and Care
a ) Recharge only with the charger specified by the
manufacturer. A charger that is suitable for one type
of battery pack may create a risk of fire when used with
another batterypack.
b ) Use power tools only with specifically designated
battery packs. Use of any other battery packs may create
a risk of injury andfire.
c ) When battery pack is not in use, keep it away from
other metal objects, like paper clips, coins, keys,
nails, screws or other small metal objects, that can
make a connection from one terminal to another.
Shorting the battery terminals together may cause burns
or afire.
d ) Under abusive conditions, liquid may be ejected
from the battery; avoid contact. If contact
accidentally occurs, flush with water. If liquid

6
ENGLISH
you or a co‑worker. Be aware that the nail may follow the
grain of the wood (shiner), causing it to protrude unexpectedly
from the side of the work material. Drive the chisel point of the
nail perpendicular to the grain to reduce risk ofinjury.
• Do not drive nails onto the heads of other fasteners or with the
tool at too steep an angle. Personal injury from strong recoil,
jammed fasteners, or ricocheted nails mayresult.
• Keep hands and body parts clear of immediate work
area. Hold workpiece with clamps when necessary to keep
hands and body out of potential harm. Be sure the workpiece
is properly secured before pressing the nailer against the
material. The contact trip may cause the work material to
shiftunexpectedly.
• Do not use tool in the presence of flammable dust, gases
or fumes. The tool may produce a spark that could ignite
gases causing a fire. Driving a nail into another nail may also
cause aspark.
• Keep face and body parts away from back of the tool
cap when working in restricted areas. Sudden recoil can
result in impact to the body, especially when nailing into hard
or densematerial.
• Grip tool firmly to maintain control while allowing tool to
recoil away from work surface as fastener is driven. In Bump
mode if contact trip is allowed to recontact work surface
before trigger is released an unwanted fastener will bedriven.
• Choice of triggering method is important. Check the manual
for triggeringoptions.
Sequential/Bump Selector Switch
Sequential Action
• When using the tool in sequential mode, do not
actuate the tool unless the tool is placed firmly against
theworkpiece.
Bump Action (Fig. D)
• When using the tool in bump action, be careful of
unintentional double fires resulting from tool recoil.
Unwanted fasteners may be driven if the contact trip is
allowed to accidentally re‑contact the worksurface.
• When “bump” actuating the finish nailer, always keep
tool in control. Inaccurate placement of tool can result in
misdirected discharge of afastener.
• To Avoid Double Fires:
‑Do not engage the tool against the work surface with a
strongforce.
‑Allow the tool to recoil fully after eachactuation.
‑Use tool in sequentialmode.
• Do not drive nails onto the heads of other fasteners.
Strong recoil, jammed fasteners, or ricocheted nails mayresult.
• Be aware of material thickness when using nailer. A
protruding nail may causeinjury.
• Depth adjustment: To reduce risk of serious injury from
accidental actuation when attempting to adjust depth,
ALWAYS;
‑Remove batterypack.
‑Engage triggerlock.
in the mode selection section of the manual. If it doesn’t
perform according to the manual, stop using the tool and
have it serviced at an authorised DeWALT servicecentre.
• Hold tool by insulated gripping surfaces when
performing an operation where driven fastners may
contact hidden wiring. Contact with a “live” wire will make
exposed metal parts of the tool “live” and shock theoperator.
• Always wear appropriate personal hearing and other
protection during use. Under some conditions and duration
of use, noise from this product may contribute to hearingloss.
• Disconnect battery pack from the tool when not in use. Always
remove battery pack and remove fasteners from magazine
before leaving the area or passing the tool to another
operator. Do not carry tool to another work area in which
changing location involves the use of scaffoldings, stairs,
ladders, and the like, with battery pack connected. Do not
make adjustments, perform maintenance or clear jammed
fasteners while battery is inplace.
• Do not remove, tamper with, or otherwise cause the
tool, trigger, trigger lock‑off, or contact trip to become
inoperable. Do not tape or tie trigger or contact trip in the
on position. Do not remove spring from contact trip. Make
daily inspections for free movement of trigger and contact trip.
Uncontrolled discharge couldresult.
• Inspect tool before use. Do not operate a tool if any
portion of the tool, trigger, trigger lock‑off, or contact
trip is inoperable, disconnected, altered, or not working
properly. Damaged parts or missing parts should be repaired
or replaced before use. Refer toMaintenance.
• Do not alter or modify the tool in anyway.
• Always assume that the tool containsfasteners.
• Do not point the tool at co‑workers or yourself at
any time. No horseplay! Work safe! Respect the tool as a
workingimplement.
• Do not carry the tool from place to place holding the
trigger. Accidental discharge couldresult.
• Always use trigger lock‑off when tool is not in
immediate use. Using the trigger lock‑off will prevent
accidentaldischarge.
• Do not overreach. Maintain proper footing and balance at all
times. Loss of balance may cause personalinjury.
• Use the tool only for its intended use. Do not discharge
fasteners into open air, concrete, stone, extremely hard
woods, knots or any material too hard for the fastener
to penetrate. Do not use the body of the tool or top
cap as a hammer. Discharged fasteners may follow an
unexpected path and causeinjury.
• Always keep fingers clear of contact trip to prevent
injury from inadvertent release of thepusher.
• Always operate the tool in a clean, lighted area. Be sure
the work surface is clear of any debris and be careful not to
lose footing when working in elevated environments such
asrooftops.
• Do not drive fasteners near edge of material. The
workpiece may split causing the fastener to ricochet, injuring

7
ENGLISH
Important Safety Instructions for All Battery
Chargers
SAVE THESE INSTRUCTIONS: This manual contains important
safety and operating instructions for compatible battery
chargers (refer to TechnicalData).
• Before using charger, read all instructions and cautionary
markings on charger, battery pack, and product using
batterypack.
WARNING: Shock hazard. Do not allow any liquid to get
inside charger. Electric shock mayresult.
WARNING: We recommend the use of a residual current
device with a residual current rating of 30mA orless.
CAUTION: Burn hazard. To reduce the risk of injury,
charge only DeWALT rechargeable batteries. Other types of
batteries may burst causing personal injury anddamage.
CAUTION: Children should be supervised to ensure that
they do not play with theappliance.
NOTICE: Under certain conditions, with the charger
plugged into the power supply, the exposed charging
contacts inside the charger can be shorted by foreign
material. Foreign materials of a conductive nature such
as, but not limited to, steel wool, aluminum foil or any
buildup of metallic particles should be kept away from
charger cavities. Always unplug the charger from the
power supply when there is no battery pack in the cavity.
Unplug charger before attempting toclean.
• DO NOT attempt to charge the battery pack with any
chargers other than the ones in this manual. The charger
and battery pack are specifically designed to worktogether.
• These chargers are not intended for any uses other than
charging DeWALT rechargeable batteries. Any other uses
may result in risk of fire, electric shock orelectrocution.
• Do not expose charger to rain orsnow.
• Pull by plug rather than cord when disconnecting
charger. This will reduce risk ofdamage to electric plug
andcord.
• Make sure that cord is located so that it will not be
stepped on, tripped over, or otherwise subjected to
damage orstress.
• Do not use an extension cord unless it is absolutely
necessary. Use of improper extension cord could result in risk
of fire,electric shock, orelectrocution.
• Do not place any object on top of charger or place
the charger on a soft surface that might block the
ventilation slots and result in excessive internal heat.
Place the charger in a position away from any heat source. The
charger is ventilated through slots in the top and the bottom
of thehousing.
• Do not operate charger with damaged cord or plug—
have them replacedimmediately.
• Do not operate charger if it has received a sharp blow,
been dropped, or otherwise damaged in any way. Take it
to an authorised servicecentre.
• Do not disassemble charger; take it to an authorised
service centre when service or repair is required. Incorrect
Chargers
DeWALT chargers require no adjustment and are designed to be
as easy as possible tooperate.
Electrical Safety
The electric motor has been designed for one voltage only.
Always check that the battery pack voltage corresponds to the
voltage on the rating plate. Also make sure that the voltage of
your charger corresponds to that of yourmains.
iYour DeWALT charger is double insulated in
accordance with EN60335; therefore no earth wire
isrequired.
If the supply cord is damaged, it must be replaced only by
DeWALT or an authorised serviceorganisation.
Mains Plug Replacement
(U.K.& Ireland Only)
If a new mains plug needs to be fitted:
• Safely dispose of the oldplug.
• Connect the brown lead to the live terminal in theplug.
• Connect the blue lead to the neutralterminal.
WARNING: No connection is to be made to the
earthterminal.
Follow the fitting instructions supplied with good quality plugs.
Recommended fuse: 3A.
Using an Extension Cable
An extension cord should not be used unless absolutely
necessary. Use an approved extension cable suitable for
the power input of your charger (see Technical Data). The
minimum conductor size is 1mm2; the maximum length
is30m.
When using a cable reel, always unwind the cablecompletely.
Residual Risks
In spite of the application of the relevant safety regulations
and the implementation of safety devices, certain residual risks
cannot be avoided. These are:
• Impairment ofhearing.
• Risk of personal injury due to flyingparticles.
• Risk of burns due to accessories becoming hot
duringoperation.
• Risk of personal injury due to prolongeduse.
SAVE THESE INSTRUCTIONS
‑Avoid contact with trigger during adjustments
• Do not drive nails blindly into walls, floors or other work
areas. Fasteners driven into live electrical wires, plumbing, or
other types of obstructions can result ininjury.
• Stay alert, watch what you are doing and use common
sense when operating a power tool. Do not use tool
while tired or under the influence of drugs, alcohol, or
medication. A moment of inattention while operating power
tools may result in serious personalinjury.

8
ENGLISH
Battery Packs
Important Safety Instructions for All Battery
Packs
When ordering replacement battery packs, be sure to include
catalogue number andvoltage.
The battery pack is not fully charged out of the carton. Before
using the battery pack and charger, read the safety instructions
below. Then follow charging proceduresoutlined.
READ ALL INSTRUCTIONS
• Do not charge or use battery in explosive atmospheres,
such as in the presence of flammable liquids, gases or
dust. Inserting or removing the battery from the charger may
ignite the dust orfumes.
• Never force battery pack into charger. Do not modify
battery pack in any way to fit into a non‑compatible
charger as battery pack may rupture causing serious
personalinjury.
A cold battery pack will charge at a slower rate than a warm
battery pack. The battery pack will charge at that slower rate
throughout the entire charging cycle and will not return to
maximum charge rate even if the battery packwarms.
The DCB118 charger is equipped with an internal fan designed
to cool the battery pack. The fan will turn on automatically
when the battery pack needs to be cooled. Never operate the
charger if the fan does not operate properly or if ventilation slots
are blocked. Do not permit foreign objects to enter the interior
of thecharger.
Electronic Protection System
XR Li‑Ion tools are designed with an Electronic Protection
System that will protect the battery pack against overloading,
overheating or deepdischarge.
The tool will automatically turn off if the Electronic Protection
System engages. If this occurs, place the lithium‑ion battery
pack on the charger until it is fullycharged.
Wall Mounting
These chargers are designed to be wall mountable or to sit
upright on a table or work surface. If wall mounting, locate the
charger within reach of an electrical outlet, and away from a
corner or other obstructions which may impede air flow. Use
the back of the charger as a template for the location of the
mounting screws on the wall. Mount the charger securely using
drywall screws (purchased separately) at least 25.4mm long
with a screw head diameter of 7–9mm, screwed into wood to
an optimal depth leaving approximately 5.5mm of the screw
exposed. Align the slots on the back of the charger with the
exposed screws and fully engage them in theslots.
Charger Cleaning Instructions
WARNING: Shock hazard. Disconnect the charger
from the AC outlet before cleaning. Dirt and grease
may be removed from the exterior of the charger using a
cloth or soft non‑metallic brush. Do not use water or any
cleaning solutions. Never let any liquid get inside the tool;
never immerse any part of the tool into aliquid.
reassembly may result in a risk of electric shock, electrocution
orfire.
• In case of damaged power supply cord, the supply cord must
be replaced immediately by the manufacturer, its service agent
or similar qualified person to prevent anyhazard.
• Disconnect the charger from the outlet before
attempting any cleaning. This will reduce the risk of
electric shock. Removing the battery pack will not reduce
thisrisk.
• NEVER attempt to connect two chargerstogether.
• The charger is designed to operate on standard
230V household electrical power. Do not attempt to
use it on any other voltage. This does not apply to the
vehicularcharger.
Charging a Battery (Fig.B)
1. Plug the charger into an appropriate outlet before inserting
batterypack.
2. Insert the battery pack 14 into the charger, making sure the
battery pack is fully seated in the charger. The red (charging)
light will blink repeatedly indicating that the charging
process hasstarted.
3. The completion of charge will be indicated by the red
light remaining ON continuously. The battery pack is fully
charged and may be used at this time or left in the charger.
To remove the battery pack from the charger, push the
battery release button 15 on the batterypack.
NOTE: To ensure maximum performance and life of lithium‑ion
battery packs, charge the battery pack fully before firstuse.
Charger Operation
Refer to the indicators below for the charge status of the
batterypack.
Charge Indicators
FCharging I
GFully Charged J
HHot/Cold Pack Delay* K
*The red light will continue to blink, but a yellow indicator light
will be illuminated during this operation. Once the battery pack
has reached an appropriate temperature, the yellow light will
turn off and the charger will resume the chargingprocedure.
The compatible charger(s) will not charge a faulty battery pack.
The charger will indicate faulty battery by refusing tolight.
NOTE: This could also mean a problem with acharger.
If the charger indicates a problem, take the charger and battery
pack to be tested at an authorised servicecentre.
Hot/Cold Pack Delay
When the charger detects a battery pack that is too hot or too
cold, it automatically starts a Hot/Cold Pack Delay, suspending
charging until the battery pack has reached an appropriate
temperature. The charger then automatically switches to the
pack charging mode. This feature ensures maximum battery
packlife.

9
ENGLISH
(IMDG) Regulations, and the European Agreement Concerning
The International Carriage of Dangerous Goods by Road
(ADR). Lithium‑ion cells and batteries have been tested to
section 38.3of the UN Recommendations on the Transport of
Dangerous Goods Manual of Tests andCriteria.
In most instances, shipping a DeWALT battery pack will be
excepted from being classified as a fully regulated Class
9Hazardous Material. In general, only shipments containing a
lithium‑ion battery with an energy rating greater than 100Watt
Hours (Wh) will require being shipped as fully regulated Class 9.
All lithium‑ion batteries have the Watt Hour rating marked on
the pack. Furthermore, due to regulation complexities, DeWALT
does not recommend air shipping lithium‑ion battery packs
alone regardless of Watt Hour rating. Shipments of tools with
batteries (combo kits) can be air shipped as excepted if the Watt
Hour rating of the battery pack is no greater than 100Wh.
Regardless of whether a shipment is considered excepted
or fully regulated, it is the shipper's responsibility to consult
the latest regulations for packaging, labeling/marking and
documentationrequirements.
The information provided in this section of the manual is
provided in good faith and believed to be accurate at the time
the document was created. However, no warranty, expressed or
implied, is given. It is the buyer’s responsibility to ensure that its
activities comply with the applicableregulations.
Transporting the FLEXVOLTTM Battery
The DeWALT FLEXVOLTTM battery has two modes: Use
andTransport.
Use Mode: When the FLEXVOLTTM battery stands alone or is in
a DeWALT 18V product, it will operate as an 18V battery. When
the FLEXVOLTTM battery is in a 54V or a 108V (two 54V batteries)
product, it will operate as a 54Vbattery.
Transport Mode: When the cap is attached to the FLEXVOLTTM
battery, the battery is in Transport mode. Keep the cap
forshipping.
When in Transport mode, strings
of cells are electrically
disconnected within the pack
resulting in 3batteries with a
lower Watt hour (Wh) rating as compared to 1battery with a
higher Watt hour rating. This increased quantity of 3batteries
with the lower Watt hour rating can exempt the pack from
certain shipping regulations that are imposed upon the higher
Watt hour batteries.
For example, the Transport
Wh rating might indicate
3x36Wh, meaning
3batteries of 36Wh each.
The Use Wh rating might
indicate 108Wh (1batteryimplied).
Storage Recommendations
1. The best storage place is one that is cool and dry away
from direct sunlight and excess heat or cold. For optimum
battery performance and life, store battery packs at room
temperature when not inuse.
Example of Use and Transport Label Marking
• Charge the battery packs only in DeWALTchargers.
• DO NOT splash or immerse in water or otherliquids.
• Do not store or use the tool and battery pack in locations
where the temperature may fall below 4˚C (34˚F) (such
as outside sheds or metal buildings in winter), or reach
or exceed 40˚C (104˚F) (such as outside sheds or metal
buildings insummer).
• Do not incinerate the battery pack even if it is severely
damaged or is completely worn out. The battery pack can
explode in a fire. Toxic fumes and materials are created when
lithium‑ion battery packs areburned.
• If battery contents come into contact with the skin,
immediately wash area with mild soap and water. If
battery liquid gets into the eye, rinse water over the open eye
for 15minutes or until irritation ceases. If medical attention
is needed, the battery electrolyte is composed of a mixture of
liquid organic carbonates and lithiumsalts.
• Contents of opened battery cells may cause respiratory
irritation. Provide fresh air. If symptoms persists, seek
medicalattention.
WARNING: Burn hazard. Battery liquid may be flammable
if exposed to spark orflame.
WARNING: Never attempt to open the battery pack for
any reason. If battery pack case is cracked or damaged,
do not insert into charger. Do not crush, drop or damage
battery pack. Do not use a battery pack or charger that
has received a sharp blow, been dropped, run over or
damaged in any way (i.e., pierced with a nail, hit with
a hammer, stepped on). Electric shock or electrocution
may result. Damaged battery packs should be returned to
service centre forrecycling.
WARNING: Fire hazard. Do not store or carry the
battery pack so that metal objects can contact
exposed battery terminals. For example, do not place
the battery pack in aprons, pockets, tool boxes, product kit
boxes, drawers, etc., with loose nails, screws, keys,etc.
CAUTION: When not in use, place tool on its side on
a stable surface where it will not cause a tripping
or falling hazard. Some tools with large battery packs
will stand upright on the battery pack but may be easily
knockedover.
Transportation
WARNING: Fire hazard. Transporting batteries can
possibly cause fire if the battery terminals inadvertently
come in contact with conductive materials. When
transporting batteries, make sure that the battery
terminals are protected and well insulated from
materials that could contact them and cause a short
circuit. NOTE: Lithium‑ion batteries should not be put in
checkedbaggage.
DeWALT batteries comply with all applicable shipping
regulations as prescribed by industry and legal standards which
include UN Recommendations on the Transport of Dangerous
Goods; International Air Transport Association (IATA) Dangerous
Goods Regulations, International Maritime Dangerous Goods

10
ENGLISH
Date Code Position
The date code, which also includes the year of manufacture, is
printed into thehousing.
Example:
2020 XX XX
Year of Manufacture
Do not operate tool on scaffoldings,ladders.
Length ofnails.
Nailgauge.
Magazinecapacity.
Toolvoltage.
Magazine angle: 0˚.
Markings on Tool
The following pictograms are shown on the tool:
a Read instruction manual beforeuse.
g Wear earprotection.
f Wear eyeprotection.
Package Contents
The package contains:
1 Nailer
3 Non‑mar tips
1 Charger
1 Li‑Ion battery pack (C1, D1, L1, M1, P1, S1, T1, X1, Y1 models)
2 Li‑Ion battery packs (C2, D2, L2, M2, P2, S2, T2, X2, Y2 models)
3 Li‑Ion battery packs (C3, D3, L3, M3, P3, S3, T3, X3, Y3 models)
1 Instruction manual
NOTE: Battery packs, chargers and kitboxes are not included
with N models. Battery packs and chargers are not included with
NT models. Bmodels include Bluetooth® batterypacks.
NOTE: The Bluetooth® word mark and logos are registered
trademarks owned by the Bluetooth®, SIG, Inc. and any use of
such marks by DeWALT is under license. Other trademarks and
trade names are those of their respectiveowners.
• Check for damage to the tool, parts or accessories which may
have occurred duringtransport.
• Take the time to thoroughly read and understand this manual
prior tooperation.
Battery Type
The following SKU(s) operate on a 18 volt battery pack: DCN680
These battery packs may be used: DCB181, DCB182, DCB183,
DCB183B, DCB184, DCB184B, DCB185, DCB187, DCB189,
DCB546, DCB547, DCB548. Refer to Technical Data for
moreinformation.
2. For long storage, it is recommended to store a fully charged
battery pack in a cool, dry place out of the charger for
optimalresults.
NOTE: Battery packs should not be stored completely
depleted of charge. The battery pack will need to be recharged
beforeuse.
Labels on Charger and Battery Pack
In addition to the pictographs used in this manual, the labels
on the charger and the battery pack may show the following
pictographs:
LRead instruction manual beforeuse.
p See Technical Data for chargingtime.
q Do not probe with conductiveobjects.
r Do not charge damaged batterypacks.
s Do not expose towater.
t Have defective cords replacedimmediately
u Charge only between 4˚C and 40˚C.
v Only for indooruse.
x Discard the battery pack with due care for
theenvironment.
y Charge DeWALT battery packs only with designated
DeWALT chargers. Charging battery packs other than
the designated DeWALT batteries with a DeWALT
charger may make them burst or lead to other
dangeroussituations.
z Do not incinerate the batterypack.
B USE (without transport cap). Example: Wh rating
indicates 108Wh (1battery with 108Wh).
A TRANSPORT (with built‑in transport cap). Example: Wh
rating indicates 3x 36Wh (3batteries of 36Wh).

11
ENGLISH
Proper Hand Position (Fig.F)
WARNING: To reduce the risk of serious personal injury,
ALWAYS use proper hand position asshown.
WARNING: To reduce the risk of serious personal
injury, ALWAYS hold securely in anticipation of a
suddenreaction.
OPERATION
Instructions for Use
WARNING: Always observe the safety instructions and
applicableregulations.
WARNING: To reduce the risk of serious personal
injury, turn tool off and disconnect battery pack
before making any adjustments or removing/
installing attachments or accessories. An accidental
start‑up can causeinjury.
Inserting and Removing the Battery Pack
from the Tool (Fig.B)
NOTE: Make sure your battery pack 14 is fullycharged.
To Install the Battery Pack into the Tool Handle
1. Align the battery pack 14 with the rails inside the tool’s
handle (Fig. B).
2. Slide it into the handle until the battery pack is firmly seated
in the tool and ensure that you hear the lock snap intoplace.
To Remove the Battery Pack from the Tool
1. Press the release button 15 and firmly pull the battery pack
out of the toolhandle.
2. Insert battery pack into the charger as described in the
charger section of thismanual.
Fuel Gauge Battery Packs (Fig.B)
Some DeWALT battery packs include a fuel gauge which
consists of three green LED lights that indicate the level of
charge remaining in the batterypack.
To actuate the fuel gauge, press and hold the fuel gauge
button . A combination of the three green LED lights will
illuminate designating the level of charge left. When the level
of charge in the battery is below the usable limit, the fuel gauge
will not illuminate and the battery will need to berecharged.
NOTE: The fuel gauge is only an indication of the charge left on
the battery pack. It does not indicate tool functionality and is
subject to variation based on product components, temperature
and end‑userapplication.
WARNING:Disconnect battery pack from tool before
making any adjustments, changing accessories,
servicing, or moving the tool. Such preventative safety
measures reduce the risk of starting the toolaccidentally.
CAUTION: When not in use, place tool on its side on
a stable surface where it will not cause a tripping
or falling hazard. Some tools with large battery packs
will stand upright on the battery pack but may be easily
knockedover.
Belt Hook (Fig.A)
The cordless nailers include an integrated belt hook and can
be attached to either side of the tool to accommodate left‑ or
right‑handedusers.
If the hook is not desired at all, it can be removed from thetool.
To Remove Belt Hook
1. Remove battery pack fromtool.
2. To switch the tool from right‑ to left‑hand usage simply
remove the screw19 from the opposite side of the tool and
reassemble on the otherside.
3. Replace batterypack.
WARNING: Remove nails from magazine before making
any adjustments or servicing this tool. Failure to do so may
result in seriousinjury.
ASSEMBLY AND ADJUSTMENTS
WARNING: To reduce the risk of serious personal
injury, turn tool off and disconnect battery pack
before making any adjustments or removing/
installing attachments or accessories. An accidental
start‑up can causeinjury.
WARNING: Use only DeWALT battery packs andchargers.
Description (Fig.A)
WARNING: Never modify the power tool or any part of it.
Damage or personal injury couldresult.
1 Trigger
2 Trigger lock‑off
3 Depth adjustment wheel
4 Headlights/low battery/
stallindicator
5 Jam clearing latch
6 Contact trip
7 Sliding magazine
8 Bump/sequential
selectorswitch
9 Reversible belt hook
10 No‑mar pad
11 No‑mar pad storage
12 Stall release lever
13 Nail depth indicator
14 Battery
15 Battery release button
16 Magazine latch
17 Low nail indicator
Intended Use
Your cordless finish nailer has been designed for driving nails
into woodenworkpieces.
DO NOT use under wet conditions or in the presence of
flammable liquids orgases.
Your cordless finish nailer is a professional powertool.
DO NOT let children come into contact with the tool.
Supervision is required when inexperienced operators use
thistool.
• Young children and the infirm. This appliance is not
intended for use by young children or infirm persons
withoutsupervision.
• This product is not intended for use by persons (including
children) suffering from diminished physical, sensory or
mental abilities; lack of experience, knowledge or skills
unless they are supervised by a person responsible for their
safety. Children should never be left alone with thisproduct.

12
ENGLISH
WARNING: When the tool’s motor is running, pulling
the trigger or depressing the contact trip will cause a nail
tobedriven.
Preparing the Tool
WARNING: NEVER spray or in any other way apply
lubricants or cleaning solvents inside the tool. This can
seriously affect the life and performance of thetool.
NOTE: The battery pack is not fully charged out of the carton.
Follow instructions outlined (see Charging aBattery).
• Read the Safety Instruction section of thismanual.
• Wear eye and earprotection.
• Ensure magazine is empty of allfasteners.
• Check for smooth and proper operation of contact trip and
pusher assemblies. Do not use tool if either assembly is not
functioning properly. NEVER use a tool that has the contact
trip restrained in the actuatedposition.
• Keep tool pointed away from yourself andothers.
• Insert fully charged batterypack.
Using the Trigger Lock‑off (Fig.E)
WARNING: To reduce the risk of serious personal injury,
do not keep trigger depressed when tool is not in use. Keep
the trigger lock‑off switch LOCKED (Fig.E) when the tool
is not inuse.
WARNING: To reduce the risk of serious personal injury,
lock off trigger, disconnect battery pack from tool and
remove nails from magazine before makingadjustments.
Each DeWALT nailer is equipped with a trigger lock‑off2 which
when pushed to the right as shown in FigureE, prevents the
tool from firing a nail by locking the trigger and bypassing
power to themotor.
When the trigger lock‑off is pressed to the left, the tool will be
fully operational. The trigger lock‑off should always be locked
off whenever any adjustments are made or when tool is not in
immediateuse.
NOTICE: Do not store tool with battery pack installed. To
prevent damage to the pack and to ensure best battery
life, store battery packs out of the tool or charger in a cool,
drylocation.
Loading the Tool (Fig.F)
WARNING: Keep the tool pointed away from yourself and
others. Serious personal injury mayresult.
WARNING: Never load nails with the contact trip or
trigger activated. Personal injury mayresult.
WARNING: Always remove battery pack before loading or
unloading nails. Serious personal injury mayresult.
Load and Draw Method (Fig.A)
1. Press magazine latch16 and open sliding
magazine7fully.
2. Insert fasteners into the side of magazine; fasteners should
be loaded with chisel tip against front ofmagazine.
3. Close sliding magazine until the magazine latch
clipssnuggly.
Proper hand position requires one hand on the main handle
asshown.
Mode Selection
The finish nailer is capable of firing nails using bump actuation
or sequential actuation. Before operating this tool, look at the
selector switch to determine the actuation mode. Read all
instructions before selecting actuationmode.
WARNING: Keep fingers AWAY from trigger when not
driving nails to avoid accidental fastener discharge.
NEVER carry tool with finger on trigger. In bump mode
tool will drive a nail if contact trip is bumped while trigger
isdepressed.
Sequential Action (Fig.D)
Use sequential actuation mode for intermittent nailing where
very careful and accurate placement and depth control is
desired. The sequential actuation mode provides the maximum
delivery of power for driving the longestnails.
To operate the nailer in sequential actuation mode:
1. Slide the selector switch8 to expose the single nail
icon .
2. Fully depress nosepiece against the work surface (motor
willstart).
3. Pull trigger (nail will drive into worksurface).
4. Releasetrigger.
5. Lift nosepiece off worksurface.
6. Repeat steps 2through 4for nextapplication.
NOTICE: The contact trip needs to be depressed followed
by a trigger pull for each nail followed by a release of both
the contact trip and trigger after eachnail.
Bump Action (Fig.D)
Bump action is intended for rapid nailing on flat, stationary
surfaces and typically most effective for applications that require
driving shorternails.
When the tool is set in the bump actuation mode, two
methods of tool operation are available: place actuation and
bumpactuation.
Slide the selector switch8 to expose the triple nail icon .
To operate the tool using the place actuation method:
WARNING: A nail will be driven each time the trigger is
depressed as long as the contact trip remainsdepressed.
1. Depress the contact trip against the worksurface.
2. Depress thetrigger.
To operate the tool using the bump actuation method:
3. Depress thetrigger.
4. Push the contact trip against the work surface. As long as
the trigger is depressed, the tool will drive a nail every time
the contact trip is depressed. This allows the user to drive
multiple nails insequence.
WARNING: Do not keep trigger depressed when tool is not
in use. Keep the trigger lock‑off in the locked position when
the tool is not inuse.

13
ENGLISH
D
Cleaning
WARNING: Blow dirt and dust out of the main housing
with dry air as often as dirt is seen collecting in and around
the air vents. Wear approved eye protection and approved
dust mask when performing thisprocedure.
WARNING: Never use solvents or other harsh chemicals
for cleaning the non‑metallic parts of the tool. These
chemicals may weaken the materials used in these parts.
Use a cloth dampened only with water and mild soap.
C
Lubrication
Your power tool requires no additionallubrication.
MAINTENANCE
Your power tool has been designed to operate over a long
period of time with a minimum of maintenance. Continuous
satisfactory operation depends upon proper tool care and
regularcleaning.
WARNING: To reduce the risk of serious personal
injury, turn tool off and disconnect battery pack
before making any adjustments or removing/
installing attachments or accessories. An accidental
start‑up can causeinjury.
The charger and battery pack are notserviceable.
3. Lift the jam clear latch5 then pull up to open the
nosepiecedoor.
4. Remove bent nail, using pliers ifnecessary.
5. If driver blade is in the down position, cycle the stall release
lever12 using enough force to fully slide it to the other end
of the slot in thehousings.
6. Close the nosepiece door and engage the latch pin under
the two arms on the nosepiece. Push latch until it locks
inplace.
7. Reinsert batterypack.
NOTE: The tool will disable itself and not reset until the
battery pack has been removed andreinserted.
8. Reinsert nails into magazine (see Loading theTool).
NOTE: Should nails continue to jam frequently in nosepiece,
have tool serviced by an authorised DeWALT servicecentre.
Cold Weather Operation
When operating tools at temperatures below freezing:
1. Keep tool as warm as possible prior touse.
2. Actuate the tool 5or 6times into scrap timber beforeusing.
Hot Weather Operation
Tool should operate normally. However, keep tool out of direct
sunlight as excessive heat can deteriorate bumpers and other
rubber parts resulting in increasedmaintenance.
Unloading The Tool
WARNING: The trigger lock‑off should always be locked
off whenever any adjustments are made or when tool is
not inuse.
1. Press magazine latch16 and open sliding
magazine7 fully.
2. Tip the tool up until the nails slide freely out of the side of
the magazine. Close sliding magazinefully.
3. Open the jam clear door on the nosepiece to verify there are
no nailsremaining.
Dryfire Lock Out Feature (Fig.A)
Your nailer is equipped with a dryfire lock out feature to prevent
it from cycling when there are no fasteners loaded. When
the low nail indicator17 is visible, the tool is running low on
fasteners. When this happens, the tool will be locked out and
will not actuate until more nails are loaded. (Refer to Loading
the Tool.)
Adjusting Depth (Fig.G)
The depth that the fastener is driven can be adjusted using the
depth adjustment wheel3 on the side of thetool.
WARNING: To reduce risk of serious injury from
accidental actuation when attempting to adjust
depth, ALWAYS:
• Remove batterypack.
• Engage trigger lock‑off.
• Avoid contact with trigger duringadjustments.
1. To drive the nail shallower , rotate the depth adjustment
wheel3 away from the nose of thenailer.
2. To sink a nail deeper , rotate the depth adjustment
wheel3 toward the nose of thenailer.
Headlights (Fig.H)
There is a headlight4 located on each side of the nailer.
Headlights turn on upon battery insertion, activation of
the trigger, or depressing the contact trip. The lights will
automatically shut off after 20seconds unless tool remains
inuse.
NOTE: These headlights are for lighting the immediate work
surface and are not intended to be used asflashlights.
Low battery indicator: The left‑side headlight will flash four
consecutive times and then shut down to indicate lowbattery.
Jammed nail indicator: The right‑side headlight will flash
continually if a nail becomes jammed in the nosepiece
(seeClearing a Stall or JammedNail).
Clearing a Stall or Jammed Nail (Fig.A, F, I)
If a nail becomes jammed in the nosepiece or the tool stalls,
the right‑hand headlight will blink continuously. Keep the tool
pointed away from you and follow these instructions to clear:
1. Remove battery pack from tool and engage the trigger
lock‑off.
2. Press the magazine latch16 and remove any loadednails.

14
ENGLISH
Protecting the Environment
wSeparate collection. Products and batteries marked
with this symbol must not be disposed of with
normal householdwaste.
Products and batteries contain materials that
can be recovered or recycled reducing the demand for raw
materials. Please recycle electrical products and batteries
according to local provisions. Further information is available at
www.2helpU.com.
Rechargeable Battery Pack
This long life battery pack must be recharged when it fails
to produce sufficient power on jobs which were easily done
before. At the end of its technical life, discard it with due care for
our environment:
• Run the battery pack down completely, then remove it from
thetool.
• Li‑Ion cells are recyclable. Take them to your dealer or a
local recycling station. The collected battery packs will be
recycled or disposed ofproperly.
Optional Accessories
WARNING: Since accessories, other than those offered
by DeWALT, have not been tested with this product, use
of such accessories with this tool could be hazardous.
To reduce the risk of injury, only DeWALT recommended
accessories should be used with thisproduct.
Consult your dealer for further information on the
appropriateaccessories.
Never let any liquid get inside the tool; never immerse any
part of the tool into aliquid.

15
УКРАЇНСЬКА
aПОПЕРЕДЖЕННЯ: Уважно прочитайте
керівництво з експлуатації для зниження ризику
отриманнятравм.
Позначення: інструкції з техніки безпеки
Умовні позначення, наведені нижче, описують рівень
важливості кожної попереджувальної вказівки. Прочитайте
керівництво з експлуатації та зверніть увагу на символи,
наведенінижче.
НЕБЕЗПЕЧНО: Указує на безпосередню загрозу,
яка, якщо її не уникнути, призведе до смерті або
серйозноїтравми.
Декларація про відповідність ЄС
ДИРЕКТИВА ДЛЯ МЕХАНІЧНОГО ОБЛАДНАННЯ
Цвяхозабивний пістолет 18В х 15GA
DCN680
Компанія DeWALT заявляє, що ці продукти, описані у розділі
«Технічні дані» відповідають:
2006/42/EC, EN60745‑1:2009+A11:2010, EN60745‑2‑16:2010.
Ці продукти також відповідають вимогам Директив 2014/30/
EU та 2011/65/EU. Для отримання додаткової інформації,
будь ласка, зверніться до компанії DeWALT за наступною
адресою або прочитайте інформацію на зворотній стороні
цьогокерівництва.
Нижчепідписаний несе відповідальність за упорядкування
файлу технічних характеристик та робить цю заяву від
компаніїDeWALT.
Маркус Ромпель (Markus Rompel)
технічний директор, PTE‑Europa
DeWALT, Richard‑Klinger‑Straße 11,
D‑65510, Idstein, Німеччина
13.02.2017
ввімкненим, але не використовується. Це може
значно зменшити рівень впливу протягом усього
періодуроботи.
Визначення додаткових заходів безпеки для захисту
оператора від впливу вібрації та/або шуму:
технічне обслуговування інструмента та приладдя,
утримання рук у теплі (має значення для вібрації),
організація режимуроботи.
Значення вібрації та/або шуму, наведене в цьому документі,
було виміряне згідно зі стандартизованим тестом,
викладеним в EN62841та може використовуватись для
порівняння інструментів. Це значення вібрації можна також
використовувати для попередньої оцінки впливувібрації.
ПОПЕРЕДЖЕННЯ: Заявлене значення вібрації та/або
шуму відповідає вимогам цільового використання
інструмента. Однак якщо інструмент
використовується для виконання інших завдань, або
з іншими витратними матеріалами/насадками,
або не обслуговується належним чином, значення
вібрації та/або шуму може відхилятися. Це може
значно збільшити рівень впливу протягом усього
періодуроботи.
Оцінка рівня впливу вібрації та/або шуму має
враховувати час, протягом якого інструмент
є вимкненим, а також час, протягом якого він є
DCN680
Напруга Впост. струму 18
Тип 1
Тип батареї Літій‑іонна
Пусковий режим Послідовний/
поштовховий
Кріпильні елементи
довжина мм 15‑54
діаметр хвостовика мм 1,25
кут 0°
Маса (без акумулятора) кг 2,4
Значення рівня шуму та вібрації (триаксиальна векторна сума) відповідно
до стандарту EN60745‑2‑16:
LPA (рівень тиску звукового
випромінювання)
дБ(A) 84
LWA (рівень звукової потужності) дБ(A) 95
K (похибка для даного рівня гучності) дБ(A) 3
Значення вібрації ah = м/с22,5
Похибка K = м/с21,5
Вітаємо вас!
Ви обрали інструмент виробництва компанії DeWALT.
Ретельна розробка продукції, багаторічний досвід фірми
у виробництві інструментів, різні вдосконалення, все це
зробило інструменти DeWALT є одними із найнадійніших
помічників для тих, хто використовуєелектричні інструменти
у своїйпрофесії.
Технічні дані
Українська (переклад з оригінальної інструкції)
АКУМУЛЯТОРНИЙ ПОКРІВЕЛЬНИЙ ЦВЯХОЗАБИВНИЙ
ПІСТОЛЕТ 18GA
DCN680

16
УКРАЇНСЬКА
пилом. Електричні інструменти створюють іскри,
що можуть запалити пил абопару.
c ) Тримайте дітей та сторонніх подалі під час
використання інструмента. Відвернення уваги
може призвести до втратиконтролю.
2) Електрична безпека
a ) Вилка електричного інструмента повинна
відповідати розетці. Ніколи жодним чином не
змінюйте вилку. Не використовуйте адаптери
з замкнутими на землю (заземленими)
електричними інструментами. Немодифіковані
вилки та розетки, що підходять до них, зменшують
ризик ураження електричнимструмом.
b ) Уникайте контакту тіла з заземленими
поверхнями, такими як труби, радіатори,
плити та холодильники. Якщо ваше тіло
заземлене, збільшується ризик ураження
електричнимструмом.
c ) Не залишайте електричні інструменти під
дощем або в умовах підвищеної вологості. Вода,
що потрапляє в електричний інструмент, підвищує
ризик ураження електричнимструмом.
d ) Не використовуйте кабель живлення не за
призначенням. Ніколи не переносіть, не тягніть
та не відключайте електричний інструмент
від розетки живлення за допомогою шнура.
Тримайте шнур подалі від високих температур,
мастила, гострих предметів та рухомих
деталей. Пошкоджені або перекручені шнури
підвищують ризик ураження електричнимструмом.
e ) При використанні електричного інструмента
на вулиці, використовуйте подовжувальний
шнур, що підходить для використання на
вулиці. Використання шнура, що призначений для
використання поза приміщенням, знижує ризик
ураження електричнимструмом.
f ) Якщо неможливо уникнути використання
електричного інструмента в умовах
підвищеної вологості, використовуйте
живлення, захищене пристроєм залишкового
ЗАГАЛЬНІ ПРАВИЛА БЕЗПЕКИ ПРИ
ЕКСПЛУАТАЦІЇ ЕЛЕКТРИЧНОГО
ІНСТРУМЕНТА
ПОПЕРЕДЖЕННЯ: Ознайомтеся з усіма
попередженнями, інструкціями з техніки
безпеки, зображеннями та специфікаціями,
які поставляються з даним електричним
інструментом. Невиконання нижченаведених
інструкцій може призвести до ураження
електричним струмом, пожежі та/або серйозних
тілеснихушкоджень.
ЗБЕРІГАЙТЕ ВСІ ПОПЕРЕДЖЕННЯ ТА ІНСТРУКЦІЇ
ДЛЯ ПОДАЛЬШОГОВИКОРИСТАННЯ
Термін «електричний інструмент» в усіх попередженнях
стосується використовуваних вами інструментів, що
живляться від мережі енергопостачання (з електричним
кабелем) або від акумуляторів (безкабелю).
1) Безпека робочої зони
a ) Робоча зона завжди має бути чистою та добре
освітленою. Захаращена або темна робоча зона
призводить до нещаснихвипадків.
b ) Не використовуйте електричні інструменти у
вибухонебезпечній атмосфері, наприклад поруч
із вогненебезпечними рідинами, газами та
ПОПЕРЕДЖЕННЯ:
Вказує на потенційну загрозу, ігнорування якої може
призвести до смерті або серйозноїтравми.
УВАГА: Вказує на потенційну загрозу, ігнорування
якої може призвести до травми легкої або
середньоїтяжкості.
ПРИМІТКА: Вказує на ситуацію, не пов’язану з
особистою травмою, ігнорування цієї ситуації
може призвести до пошкодженнямайна.
Вказує на ризик ураження електричнимструмом.
Вказує на ризик виникненняпожежі.
Батареї
Зарядні пристрої/час зарядки (у хвилинах)
Кат. №
DC
Маса
*Код дати 201811475B або пізніше
**Код дати 201536або пізніше
Батареї Зарядні пристрої/час зарядки (у хвилинах)
Кат. № VDC Ah Маса (kg) DCB104 DCB107 DCB112 DCB113 DCB115 DCB116 DCB117 DCB118 DCB132 DCB119
DCB546 18/54 6,0/2,0 1,05 60 270 170 140 90 80 40 60 90 X
DCB547 18/54 9,0/3,0 1,46 75* 420 270 220 135* 110* 60 75* 135* X
DCB548 18/54 12,0/4,0 1,44 120 540 350 300 180 150 80 120 180 X
DCB181 18 1,5 0,35 22 70 45 35 22 22 22 22 22 45
DCB182 18 4,0 0,61 60/40** 185 120 100 60 60/45** 60/40** 60/40** 60 120
DCB183/B 18 2,0 0,40 30 90 60 50 30 30 30 30 30 60
DCB184/B 18 5,0 0,62 75/50** 240 150 120 75 75/60** 75/50** 75/50** 75 150
DCB185 18 1,3 0,35 22 60 40 30 22 22 22 22 22 X
DCB187 18 3,0 0,54 45 140 90 70 45 45 45 45 45 90
DCB189 18 4,0 0,54 60 185 120 100 60 60 60 60 60 120
*Код дати 201811475B або пізніше
**Код дати 201536або пізніше

17
УКРАЇНСЬКА
електричний інструмент, який відповідає
завданню, що виконується. Правильно обраний
інструмент виконає завдання краще та безпечніше
за умов, для яких він буврозроблений.
b ) Не використовуйте інструмент, якщо
його неможливо ввімкнути та вимкнути за
допомогою вимикача. Будь‑який електричний
інструмент, яким неможливо керувати за
допомогою вимикача, є небезпечним і має
бутивідремонтований.
c ) Якщо вилка знімна, відключіть її від джерела
живлення та/або вийміть акумулятор, перш
ніж виконувати будь‑які налаштування,
змінювати додаткове обладнання або
зберігати інструмент. Ці профілактичні
заходи зменшують ризик випадкового запуску
електричногоінструмента.
d ) Зберігайте вимкнені електричні інструменти
в недоступному для дітей місці та не
дозволяйте особам, що не знайомі з
електричним інструментом або цими
інструкціями, використовувати електричний
інструмент. Електричні інструменти є
небезпечними, якщо вони використовуються
некваліфікованимикористувачами.
e ) Технічне обслуговування електричних
інструментів та приладдя. Перевіряйте
неспіввісність, заїдання рухомих деталей,
наявність пошкоджених частин та інших
факторів, які можуть впливати на роботу
електричного інструмента. Якщо є
пошкодження, відремонтуйте електричний
інструмент перед використанням. Нещасні
випадки часто є результатом того, що інструмент
не пройшов відповідного технічногообслуговування.
f ) Різальні інструменти мають бути гострими
та чистими. Правильно доглянуті різальні
інструменти з гострими різальними кромками
мають меншу імовірність заїдання, та ними
легшекерувати.
g ) Використовуйте електричний інструмент,
додаткові інструменти та деталі
інструменту тощо у відповідності до цих
інструкцій та відповідно до даного типу
електричних інструментів, зважаючи на
умови використання та роботу, яка має
бути виконана. Використання електричних
інструментів не за призначенням може призвести
до виникнення небезпечнихситуацій.
h ) Всі ручки та поверхні для тримання
інструмента мають бути сухими, без
залишків мастила. Слизькі ручки та поверхні
для тримання не дозволяють безпечно
працювати та контролювати інструмент у
неочікуванихситуаціях.
струму (RCD). Використання RCD знижує ризик
ураження електричнимструмом.
3) Особиста безпека
a ) Будьте в стані готовності, дивіться,
що ви робите, та будьте розсудливі,
працюючи з електричним інструментом. Не
використовуйте електричний інструмент,
коли ви втомлені або знаходитесь під
впливом наркотичних речовин, алкоголю
або ліків. Втрата уваги під час роботи з
електричним інструментами може призвести до
серйознихтравм.
b ) Використовуйте особисті засоби безпеки.
Завжди використовуйте засоби захисту
очей. Засоби безпеки, такі як протипилова маска,
неслизькі безпечні черевики, захисний шолом та
засоби захисту слухового апарату при використанні
для відповідних умов зменшують імовірність
особистихтравм.
c ) Уникайте випадкового запуску. Переконайтесь
в тому, що вимикач знаходиться в позиції
Вимк., перш ніж підключати інструмент
до джерела живлення та/або акумулятора,
переміщувати або переносити. Може статися
нещасний випадок, коли ви переносите інструмент,
тримаючи палець на вимикачі, або підключаєте
живлення до вимикача в позиціїУвімк.
d ) Зніміть усі ключі для регулювання або гайкові
ключі, перш ніж вмикати електричний
інструмент. Гайковий ключ, що залишився
прикріпленим до якоїсь деталі електричного
пристрою, що обертається, може призвести
дотравм.
e ) Не прикладайте надмірного зусилля. Завжди
утримуйте правильну постановку ніг і
рівновагу. Це дає вам змогу краще контролювати
інструмент в неочікуванихситуаціях.
f ) Одягайтеся відповідним чином. Не вдягайте
вільний одяг або прикраси. Тримайте ваше
волосся та одяг подалі від рухомих деталей.
Вільний одяг, прикраси або довге волосся можуть
зачепитися за рухомідеталі.
g ) Якщо передбачені пристрої для підключення
до засобів виділення та збирання пилу,
переконайтеся, що вони правильно підключені
та використовуються. Використання таких
пристроїв зменшує ризик виникнення небезпечних
ситуацій, що пов’язані з потрапляннямпилу.
h ) Навіть якщо ви добре знаєте інструмент
та часто його використовуйте, не
розслабляйтесь та не забувайте про принципи
техніки безпеки. Необережні дії можуть за долю
секунди призвести до важких тілеснихушкоджень.
4) Використання електричного інструмента та
догляд за ним
a ) Не прикладайте надмірних зусиль під час
роботи з інструментом. Використовуйте

18
УКРАЇНСЬКА
поводження з інструментом може призвести до
несподіваної стрільби кріпильними елементами та
отриманнютравм.
• Не направляйте інструмент на себе чи когось
поблизу. Несподіване спрацювання інструмента
призведе до пострілу кріпильним елементом, що
спричинитьтравму.
• Не вмикайте інструмент, поки він не буде щільно
прилягати до заготовки. Якщо інструмент не
контактує із заготовкою, кріпильний елемент може
бути відхилений від вашоїцілі.
• Від’єднайте інструмент від джерела живлення,
коли кріпильний елемент застрягне в
інструменті. Під час виймання застряглого
кріпильного елемента, цвяхозабивний пістолет може
бути випадково активований, якщо він підключений до
джерелаживлення.
• Будьте обережні, виймаючи застряглий кріпильний
елемент. Механізм може перебувати під стисненням, і
кріпильний елемент може від цього вистрілити під час
спроби звільнитися від застряглогостану.
• Не використовуйте цей цвяхозабивний пістолет
для кріплення електричних кабелів. Він не
призначений для прокладання електричних кабелів і
може пошкодити ізоляцію електричних кабелів, що може
викликати небезпеку ураження електричним струмом
або виникненняпожежі.
Додаткові попередження з техніки
безпеки для цвяхозабивного пістолета
УВАГА! Під час використання будь‑якого
цвяхозабивного пістолета слід дотримуватися
всіх заходів безпеки, як зазначено нижче, щоб
уникнути ризику смерті або серйозних травм.
Прочитайте та зрозумійте всі інструкції перед
використовуваннямінструмента.
УВАГА! НІКОЛИ не розпорошуйте і не застосовуйте
будь‑яким іншим чином мастильні матеріали
або миючі засоби на основі розчинників
всередині інструмента. Це може серйозно
вплинути на термін служби і експлуатаційні
характеристикиінструмента.
Застереження. Якщо інструмент було скинуто
або ви підозрюєте пошкодження інструмента,
виконайте перевірку роботи інструмента, як
визначено в розділі вибору режиму цього посібника.
Якщо проблема не усунута відповідно до посібника,
не використовуйте цей інструмент і відправте його
в авторизований сервісний центр компаніїDeWalt.
• Під час виконання операції, коли кріпильний
елемент може контактувати зі
схованою електропроводкою, тримайте
електроінструмент на ізольованій поверхні.
Контакт із кабелем під напругою зробить металеві
деталі інструмента також зарядженими та може
призвести до ураження струмомоператора.
Попередження з техніки безпеки для
цвяхозабивного пістолета
• Завжди припускайте, що інструмент
містить кріпильні елементи. Необережне
5) Використання та догляд за інструментом,
що живиться від акумулятора
a ) Заряджайте інструмент лише за допомогою
зарядного пристрою, вказаного виробником.
Зарядний пристрій, що підходить до одного типу
акумуляторів, може призвести до пожежі в разі
використання з іншимакумулятором.
b ) Використовуйте електричні інструменти
лише з призначеними для них акумуляторами.
Використання інших акумуляторів може призвести
до травм абопожежі.
c ) Коли акумулятори не використовуються,
зберігайте їх подалі від металевих предметів,
як скріпки, монети, ключі, цвяхи, гвинти або
інші невеликі предмети, що можуть призвести
до замикання двох контактів. Коротке
замикання клем акумулятора може призвести до
вибуху абопожежі.
d ) За невідповідних умов використання рідина
може витекти з акумулятора; уникайте
контакту з цією рідиною. Якщо контакт таки
стався, промийте забруднену ділянку водою.
Якщо рідина потрапила в очі, промийте водою
та зверніться до лікаря. Рідина, що витікає
з акумулятора, може призвести до подразнень
таопіків.
e ) Не використовуйте пошкоджений або
модифікований акумулятор або інструмент.
Пошкоджені або модифіковані акумулятори можуть
поводити себе непередбачуваним чином, призводячи
до пожежі, вибуху або тілеснимушкодженням.
f ) Не піддавайте акумулятор та інструмент дії
вогню та надмірних температур. Дія вогню або
температури вище 130°C може спричинитивибух.
g ) Виконуйте всі інструкції щодо зарядки; заряджайте
акумулятор та інструмент тільки в межах
температурного діапазону, вказаного в
інструкціях. Неналежна зарядка або зарядка поза
межами вказаного температурного діапазону
може пошкодити акумулятор та підвищити
ризикпожежі.
6) Обслуговування
a ) Надавайте ваш електричний інструмент для
обслуговування кваліфікованим спеціалістом
з ремонту та використовуйте тільки
ідентичні замінні деталі. Це забезпечить безпеку
електричногопристрою.
b ) Ніколи не обслуговуйте пошкоджені
акумулятори самостійно. Обслуговування
акумуляторів мають виконувати представники
виробника або працівники офіційного
сервісногоцентру.
Other manuals for DCN680
4
Table of contents
Languages:
Other DeWalt Nail Gun manuals

DeWalt
DeWalt DCN45RN User manual

DeWalt
DeWalt DCN692 User manual

DeWalt
DeWalt DCN693 User manual

DeWalt
DeWalt DCN690 User manual

DeWalt
DeWalt D51823 User manual

DeWalt
DeWalt DC608 User manual

DeWalt
DeWalt DCN891 User manual

DeWalt
DeWalt DWFP12569 User manual

DeWalt
DeWalt DCN661 User manual

DeWalt
DeWalt DCN692 User manual

DeWalt
DeWalt DCN890 User manual

DeWalt
DeWalt D51275 User manual

DeWalt
DeWalt D51236 User manual

DeWalt
DeWalt D51825 User manual

DeWalt
DeWalt DWF83C User manual

DeWalt
DeWalt D51238 User manual

DeWalt
DeWalt D51276 User manual

DeWalt
DeWalt DCN45RN User manual

DeWalt
DeWalt DCN890 User manual

DeWalt
DeWalt DWFP71917 User manual