DFE SW6 User manual

OPERATING INSTRUCTIONS
Digital Tension Controller
STEADYWEB™ 6
DOC 801-2539

217 Pickering Road
Rochester, NH 03867-4630 U.S.A.
For assistance, please call:
TECHNICAL SERVICE - Installations, Start-Up, Troubleshooting, Repairs, Field
Service, Returns. [email protected]
CUSTOMER SERVICE - Replacement Parts, Individual Products, Questions about
Orders, Manuals. [email protected]
SALES - Product Information, Systems Application Questions, and
placing orders for standard products and special systems.
Telephone: (603) 332-6150 Fax: (603) 332-3758
E-mail: [email protected] Internet: www.dfe.com
©2019 Dover Flexo Electronics, Inc. All rights reserved. Dover Flexo Electronics has made reasonable effort to ensure accuracy of this
document. However NO WARRANTY, whether expressed or implied, is given regarding the completeness or correctness of information in
this document. Dover Flexo Electronics shall not be liable for damages of any kind arising from the use or misuse of this document. Dover
Flexo Electronics reserves the right to make changes, additions, and deletions to this document without notice and without obligation.

READ THIS!
*** SAFETY INFORMATION ***
Please read this manual prior to installing and operating the controller. Take care to follow
local codes and only allow properly trained individuals to operate or service the equipment.
Failure to follow the manual's instructions and practice safe working habits could result in
property damage, personal injury and/or death.
n WARNING:
Before servicing the SteadyWeb 6, power should be removed from the device. Failure to
do so could result in property damage, personal injury and/or death.
n CAUTION:
The SteadyWeb 6 contains circuit boards with static sensitive devices. When working
directly with these circuit boards, users should always practice proper grounding techniques,
including the use of ground straps.


TABLE OF CONTENTS
SECTION ONE USER INTERFACE OVERVIEW PAGE
1.1 Main Interface Description.................................... 1
1.2 Display Mode Descriptions ................................... 2
Tension Display Modes ...................................... 2
Menu Mode and Navigation................................... 3
SECTION TWO OPERATING INSTRUCTIONS
2.1 Basic Operation............................................ 5
2.2 Display Adjustments ........................................ 5
2.3 Saving and Recalling Setups.................................. 5
2.4 Auto Tension Setpoint / Manual Output Setting ................... 7
2.5 Taper Tension ............................................. 7
2.6 TLS Alarms and Resetting Them.............................. 8
2.7 Resetting Diameter Alarm.................................... 9
Index .................................................... 13
LIST OF ILLUSTRATIONS
FIGURE 1. SteadyWeb6 User Interface .................................. 1
2. Locations of Toggle Buttons/Indicators in Display.................. 2
3. Screen Showing Side Arrows ................................. 2
4. Analog Meter Display ....................................... 3
5. Trend Line Graph Display .................................... 3
6. Main Menu ............................................... 4
7. Display Configuration Menu .................................. 5
8. Select Location to Store ..................................... 6
9. Name Setup Screen ........................................ 6
10. Confirm Save Setup ........................................ 6
11. Recall Setup .............................................. 6
12. Select Setup to Delete....................................... 6
13. Adjusting Setpoint.......................................... 7
14. Enable Taper Tension ....................................... 7
15. Set Taper Percentage ....................................... 7
16. Taper Setpoint on Meter ..................................... 8
17. Taper Display on Trendline ................................... 8
18. Examples of When to Run Taper .............................. 8
19. TLS Setpoint Shown........................................ 9
20. Reset TLS Screen.......................................... 9
21. Resetting Diameter Alarm.................................... 9


1USER INTERFACE OVERVIEW
Figure 1 – STEADYWEB™6 USER INTERFACE
1.1 MAIN INTERFACE DESCRIPTION
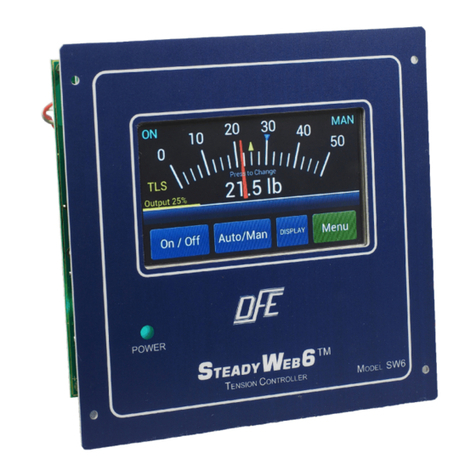
The Steady Web 6 accepts all instructions and displays all information via a 5" touchscreen display (Fig.
1). All controller functions are context driven, and operate with color-coded buttons on the display. There
are no mechanical knobs, switches or buttons to operate.
For ease of use, the locations of the critical-use buttons/critical-awareness indicators have been made
uniform from one screen to the next. Those uniformly located buttons / indicators (Fig. 2) include the
following:
1. Tension On/Off, Auto/Man (Manual), and Display toggle buttons (all colored blue and at the bottom of
the screen). The only time the On/Off toggle button displays as anything other than On/Off is when the
controller is placed in E-STOP by an external input. When in E-STOP, the On/Off button displays as E-
STOP, and may only be restored by clearing the E-STOP signal, external to the controller. There are no
functions within the controller which will permit over-riding an external E-Stop signal.
2. Line Speed, Taper, Ratio, Soft Start and Hold (Sample & Hold) mode status indicators on the
information line above the toggle buttons, when active.
3. TLS indicator and Roll Diameter indicator, left and right of the tension display, above the information
line, when applicable.
4. Tension On/Off Status (upper LH corner) and Man/Auto Status (upper RH corner)
1

Figure 3 - SCREEN SHOWING SIDE ARROWS
1.1 MAIN INTERFACE DESCRIPTION continured...
Figure 2 – LOCATIONS OF TOGGLE BUTTONS / INDICATORS IN DISPLAY
All screens, settings and adjustments which are not primarily tension-displaying functions require some on-
screen navigation to access them.
The remaining button in the lower right hand corner of the screen is green and displays as either “Menu”,
“Back” or “Save” depending on what screen is current, and is used to advance to other menus, to back out
of menus, or to save selections or adjustments.
Green buttons on menu screens indicate
selectable functions. When there are more
buttons in a menu than fit on the menu screen, the
excess buttons are off-screen, but the menu
screen may be shifted to reveal them by pressing
arrow buttons at one or both ends of the screen
(Fig. 3). If there are no arrows at the end of the
screen, then there are no off-screen buttons to
reveal.
Holding a green button down will bring up
related information, which effectively serves as an
on-screen manual.
Grey buttons indicate functions that may not be
selected until certain conditions are met. If in
doubt about why a button is grey, it may be pressed and held to view the explanation. Sometimes meeting
the necessary conditions requires permission-based access and actions in accordance with the Technical
Reference Manual (DFE P/N 801-2540).
On navigation screens, pressing the Back button will return the prior screen. If the Back button has been
replaced with another function, the use of which is not desired, the screen may be exited via the Display
button instead.
In the unlikely event of a screen failure, an always-on Power LED (Fig. 1) on the front of the controller will
inform the operator if the unit is still powered up.
1.2 DISPLAY MODE DESCRIPTIONS
To display the tension setpoint, real time tension and related process information, the Tension Display
mode should be used when making product, and the Menu Display mode should generally be used when
making changes to the process. When in Tension Display mode, pressing the Menu button will switch to
the Menu Display mode. Likewise, when in Menu Display mode, pressing the Display button will return the
screen to Tension Display mode.
TENSION DISPLAY MODES: Two different screens are available in Tension Display mode. Tension can
either be displayed as a momentary value on an analog meter (Fig. 4) or as tension vs. time in a trend-line
plot (Fig. 5) and may be toggled back and forth by pressing the Display toggle button.
Operator-adjustable display settings include Tension Update Time, Display Damping, Plot Update
Time, Line Speed Display, Diameter Display and Display Brightness, the adjustments of which are
described in Section 2.2, DISPLAY ADJUSTMENTS.
2

Figure 4 - ANALOG METER DISPLAY Figure 5 - TREND LINE GRAPH DISPLAY
1.2 DISPLAY MODE DESCRIPTIONS continued....
1. Analog Meter - The analog meter displays tension with a bold needle sweeping across similarly bold
divisions in the form of a traditional analog meter, and is the default display (Fig. 4). The meter scale is
determined by the full range tension value. This easily read analog meter is further enhanced by a large
digital tension readout in the center of the screen, and expresses the measured tension in white
characters. The auto tension setpoint is indicated by a yellow caret atop the smaller divisions of the
analog meter.
The controller output, when tension control is on, is indicated as a percentage of full output to the left of
the meter scale, above the On/Off button. When tension control is off, this indicated as the manual
setpoint instead.
When Taper is active, a blue caret, also found atop the smaller divisions of the meter scale indicates the
dynamic tension setpoint.
When TLS Low and / or TLS High are active, those limits are indicated by blue and red carets
respectively, atop the larger divisions of the meter scale. For more details about TLS, see Section 2.6,
TLS ALARMS AND RESETTING THEM.
2. Trend-line Graph - An alternative to the analog meter, the tension trend-line graph (Fig. 5) plots both
the tension and the controller output versus time, from right to left. Since the plots of tension and
controller output can cross or overlap each other, the controller output is plotted as a line, and the area
below the tension plot is filled in, with both sets of data plotted in contrasting colors for improved clarity.
The plots of the tension and output are keyed to a legend in the left margin and the auto tension setpoint
is identified by a yellow caret in the right margin of the trend-line graph. If Taper is active, and auto
tension control is on, the dynamic tension setpoint is indicated by a “T” moving in the right hand margin
of the display.
The time it takes for the trend-line to cross the screen is the Line Graph Update Time, and is
selectable as 30 seconds or 1, 2, 5, 10 or 30 minutes, per Section 2.2, DISPLAY ADJUSTMENTS. The
greater durations allow for a greater data sample, but with a loss of resolution.
The trend-line may also be paused by holding down the Display button until the trend-line stops
moving across the screen. Plotting will resume when the Display button is pressed again. Tension data
for the paused period will not be recorded, and may not be retrieved.
When TLS is used, neither TLS Low nor TLS High Limits will be indicated on the Trend-line graph. If
either tension limit switch is tripped however, the on-screen alarms will still be issued, and must be
cleared according to Section 2.6, TLS ALARMS AND RESETTING THEM.
This trend-line graph display also appears repeatedly in the Technical Reference Manual (DFE P/N
801-2540) on PID Tune View displays which allow for real-time P, I, and D adjustments while viewing
the controller output and tension.
1.3 MENU MODE AND NAVIGATION
From either of the tension display screens, the Menu button will deliver the operator to the Main Menu (Fig.
6) where subordinate menus appear for further navigation. Note that the names of all menu screens are
consistently displayed at the center of the top line.
3

Figure 6 - MAIN MENU
1.3 MENU MODE AND NAVIGATION continued....
1. OPERATOR MENU - Under the Operator
Menu, the following choices are available:
•Disp Configuration - Tension Update,
Display Damping, Plot Update Time, Line
Speed Display, Diameter Display & Display
Brightness (See Section 2.2, DISPLAY
ADJUSTMENTS for more detail).
•Configure Taper - Taper Enable & Taper
Percentage (See Section 2.5,TAPER
TENSION for more detail).
•Store / Delete Setup - Store Setup & Delete
Setup (See Sections 2.3.1, and 2.3.3 for
more detail).
•Recall Setup - As many as 30 user-named
setups (See Section 2.3.2 for more detail).
2. DIAGNOSTIC MENU - Under the Diagnostic Menu, the following choices are available (All are Read
Only, and are useful for discussions with DFE Tech Support), with all other choices greyed out:
•Version Menu - Displays versions and revisions of the software and hardware
•Read Digital Inputs - Displays digital input signals
•Read Analog Inputs > Transducer - Displays analog input signals from the transducers
•Read Analog Inputs > Signal Inputs - Displays analog input signals from other than the
transducers
3. SETUP MENU and CALIBRATION MENU - Both require permission-based access and actions in
accordance with the Technical Reference Manual (DFE P/N 801-2540).
4

Figure 7 - DISPLAY CONFIGURATION MENU
2OPERATING INSTRUCTIONS
2.1 BASIC OPERATION
When the controller has been properly set up and the control loop has been tuned, it should maintain
constant tension while the machine is running and while speed, roll diameter, or other conditions change.
However, during startup of a new roll you may want to change modes, setpoint or other settings. Usually,
the only thing the operator will need to do is turn tension On or Off, toggle between Auto and Manual
modes, and change the Auto tension setpoint or Manual output setting.
With tension off, to turn tension on and enable output, press the tension On / Off button. If the controller
is in Auto mode, the output will ramp up or down to tension the web to the Auto Tension Setpoint. If the
controller is in Manual mode, the output will change to the manual output setting. Either the auto or manual
mode will be indicated as active by the Auto / Man status indicator in the upper right hand corner of the
display. The Auto and Manual modes can be toggled back and forth by pressing the Auto / Man button.
While in either auto or manual mode, the “+” and “-“ buttons for adjusting the auto tension setpoint or the
manual output setting can be brought up by touching the tension display screen.
2.2 DISPLAY ADJUSTMENTS
Operator-adjustable display settings described
below may be found and adjusted at Menu > Main
Menu > Operator Menu > Display Configuration
(Fig. 7). Adjustments to these settings may be
made using the up and down arrows, and then
saved by pressing the SAVE button. These
adjustments serve visual purposes only, and do
not affect the control loop.
•Tension Update - Choose 0.2, 0.5, 1.0, 2.0 or
5.0 seconds and press SAVE to adjust the time
it takes for the display to update with new
information. Longer updates produce fewer
changes in displayed information over time, at
the expense of rapid visual response to
changes in tension.
•Display Damping - Choose 0.0, 0.2, 0.4, 0.8, 1.6 or 3.2 sec and press SAVE to adjust how smoothly
information is displayed.
•Plot Update Time - Choose 30 sec or 1, 2, 5, 10 or 30 min and press SAVE to adjust time that tension
displays before dropping off the trend-line graph screen. This also applies to the PID tune screen
referenced repeatedly in the Technical Reference Manual (DFE P/N 801-2540).
•Line Speed Display - Choose Auto, On or Off and press SAVE. When in Auto, if line speed is required
for control, it will be displayed by default. Otherwise, either On or Off may be chosen to force the display
of line speed or to suppress it.
•Diameter Display - Choose Auto, On or Off and press SAVE. When in Auto, if the roll diameter is
required for control, it will be displayed by default. Otherwise, either On or Off may be chosen to force
the display of roll diameter or to suppress it.
•Display Brightness - Adjust between 10% and 100% and press SAVE to control the brightness of the
display.
2.3 SAVING, RECALLING AND DELETING SETUPS
An Active Setup is composed of all the most recently selected settings and is held in non-volatile memory,
meaning that even if power is lost, the settings will not be. The active setup is not recalled using the
named setups, but will automatically come up again upon restart if the controller is shut down while
operating in that setup.
5

Figure 8 - SELECT LOCATION TO STORE
Figure 9 - NAME SETUP SCREEN Figure 10 - CONFIRM SAVE SETUP
Figure 12 - SELECT SETUP TO DELETEFigure 11 - RECALL SETUP
2.3 SAVING, RECALLING AND DELETING SETUPS continued...
A Saved Setup is a group of settings saved together in a named setup, and is also preserved in non-
volatile memory. Only by saving a named setup after changing one or more settings in that named setup
(overwriting), or by deleting the named setup, can saved settings be lost. The SW6 controller is limited to
30 named setups.
Setups are saved, recalled or deleted through the Operator Menu > Store / Delete Setup and the Operator
Menu > Recall Setup menus, as described below:
1. Store Setup - Select Store Setup, then scroll to
the location in which to store the setup and
press the Select button (Fig. 8).
If overwriting an existing setup, the existing
name will show up on the information line, and
may be accepted as-is. New names must be
entered with the keypad (Fig. 9). Once the
setup name is assigned, and the OK button is
pressed, the screen will advance to confirm the
saved setup with a press of the Save button
(Fig. 10), and return to another screen
indicating the setup was saved. OK must be
pressed to exit.
2. Recall Setup - Scroll to the named setup to be recalled (Fig. 11) and press the Recall button. Press
Recall in the next screen to copy the selected setup as the active setup. The controller will return
another screen indicating that the selected setup was recalled. OK must be pressed to exit.
3. Delete Setup - Select Delete Setup, then scroll to the named setup to be deleted and press the Select
button (Fig 12). The controller will return another screen indicating that the selected setup was deleted.
OK must be pressed to exit.
6

Figure 13 - ADJUSTING SETPOINT
Figure 14 - ENABLE TAPER TENSION
Figure 15 - SET TAPER PERCENTAGE
2.4 AUTO TENSION SETPOINT AND MANUAL OUTPUT SETTING
Pressing or tapping the tension display area on
either the Analog Meter or Trend-line Graph
display will bring up “+” and “-“ buttons (Fig. 13),
which are used to adjust the auto tension setpoint
by pressing or holding them down. Buttons used
to adjust numerical values are velocity sensitive,
meaning that the longer the button is depressed,
the faster values change.
Setpoint adjustments made in this manner apply
only to the mode displayed on screen at the time.
In other words, if the “+” and “-“ buttons are used
in the Auto mode, no change is made to the
Manual output, and vice versa.
When adjusting the auto tension setpoint with
the “+” and “-“ buttons in either the Analog Meter or Trend-line Graph display, the actual tension in white
characters is temporarily replaced with the auto tension setpoint in yellow characters. When the “+” and “-“
buttons fade away, the auto tension setpoint in yellow characters disappears and the tension in white
characters returns.
2.5 TAPER TENSION
In some cases where poor roll quality might result
from winding the entire roll at constant tension,
certain types of roll quality problems can be
avoided by reducing the tension as the diameter of
the roll increases from the core. This reduction is
known as Taper, and may be enabled at Menu >
Main Menu > Operator Menu > Configure Taper >
Taper Enable (Fig. 14). Because the tension
setpoint is constantly changing in this case, a new
control target has been established, called the
Dynamic Tension Setpoint.
The dynamic tension setpoint is the auto tension
setpoint, linearly reduced by the Taper
Percentage, going from core diameter to full roll
diameter. For example, with an auto tension
setpoint of 50 lbs, and the taper percentage set at
20%, the dynamic tension setpoint will be 50 lbs at
core, and decrease linearly to (100% - 20%) x 50
lbs = 40 lbs at full roll.
The taper percentage may be adjusted at Menu
> Main Menu > Operator Menu > Configure Taper
> Taper Percentage (Fig. 15). The dynamic
tension setpoint is identified on the momentary
tension display with a blue caret above the short
meter divisions (Fig. 16), and on the trend-line plot
as a line plot with an adjacent “T” (Fig. 17) which
moves up or down in the RH margin as the roll
diameter changes.
7

Figure 17 - TAPER DISPLAY ON TRENDLINEFigure 16 - TAPER SETPOINT ON METER
2.5 TAPER TENSION continued..
Finding the right taper percentage for a particular process may take some experimentation
in adjusting both the auto tension setpoint and the taper percentage. See the table below for
common winding defects and corresponding corrective actions:
Location Tight/Loose Example Move
Core Tight Blocking, Crushed Core Decrease Tension
Core Loose Telescope During
Unwinding
Increase Tension
Outside Tight Baggy Lane Due to Gage
Variation
Increase Taper
Outside Loose Out-of-Round Roll Decrease Taper
Global Tight Telescope During
Winding, Starring
Increase Tension and
Taper
Roisum, David R. What is the Best Taper to Run on My Winder? Converting Magazine, ©November 2007.
Figure 18 - EXAMPLES OF WHEN TO RUN TAPER
2.6 TLS, ALARMS AND RESETTING THEM
Tension Limit Switches (TLS) are used to indicate that tension is outside a specified range.
The controller can be set up to respond several different ways when tension wanders outside
the range specified with TLS settings.
If TLS is set in the Momentary mode, the controller will issue a visual on-screen "TLS"
alarm in yellow letters to the left of the meter scale (Fig. 19) when tension is outside of the
acceptable range. Once tension has returned to the specified range, the alarm will
automatically reset and disappear.
Perhaps more useful is the Latched mode, when the same alarm appears accompanied by
a more prominent "RESET TLS" message flashing in red across the meter scale (Fig. 20).
The latched alarm may be reset only by pressing on the flashing red message, and only after
tension has returned to the specified range.
In addition to issuing visual alarms when tension is out of range, TLS can also be set to
disable tension control. If tension control is disabled by TLS, the controller cannot be relied
upon to return tension to the specified range all by itself. To restore tension to the specified
range, press and hold the tension On/Off button until tension returns to the specified range,
and then release the button.
8

Figure 20 - RESET TLS SCREENFigure 19 - TLS SETPOINT SHOWN
Figure 21 - RESETTING DIAMETER ALARM
2.6 TLS, ALARMS AND RESETTING THEM continued...
2.7 RESETTING DIAMETER ALARM
The diameter alarm alerts the operator that the roll has reached a size requiring attention. A
flashing red message to “RESET DA” appears on screen when the diameter alarm is
triggered (Fig 21), either by the roll exceeding the Maximum Diameter Trip Point or dropping
below the Minimum Diameter Trip Point for longer than the Diameter Alarm Delay setting.
The alarm will persist until reset by manually pressing the flashing red message on the
screen, even if the roll diameter returns to the acceptable range. If the diameter alarm is
reset while the roll diameter is still outside the acceptable range, it will not trigger again until
after the roll diameter has returned to the acceptable range, and again crosses the trip point.
9

NOTES
10

NOTES
11

NOTES
12

INDEX
Auto/Manual Setting .................... 1 - 4
Diameter Alarm........................... 5
Display............................... 1 - 4
Menus ( functions).................... 1, 3 - 5
operator ............................ 1 - 4
Operating Instructions................... 5 - 9
Saving and Recalling Setups.............. 5 - 6
Taper Tension ......................... 7 - 8
Tension Limit Switch ...................... 8
User/Interface ......................... 1 - 4
13

217 PICKERING ROAD
ROCHESTER, NEW HAMPSHIRE 03867-4630 U.S.A
TEL: 603-332-6150
FAX: 603-332-3758
E-mail: [email protected] Internet: www.dfe.com
CANADA
MEXICO
UNITED KINGDOM
TAIWAN
KOREA
CHINA
INDIA
AUSTRALIA
SOUTH AFRICA
©2019 DOVER FLEXO ELECTRONICS, INC DOC 801-2539 R1
ALL RIGHTS RESERVED BRAYSHAW 0719 PRINTED IN USA
This manual suits for next models
1
Table of contents
Other DFE Controllers manuals
