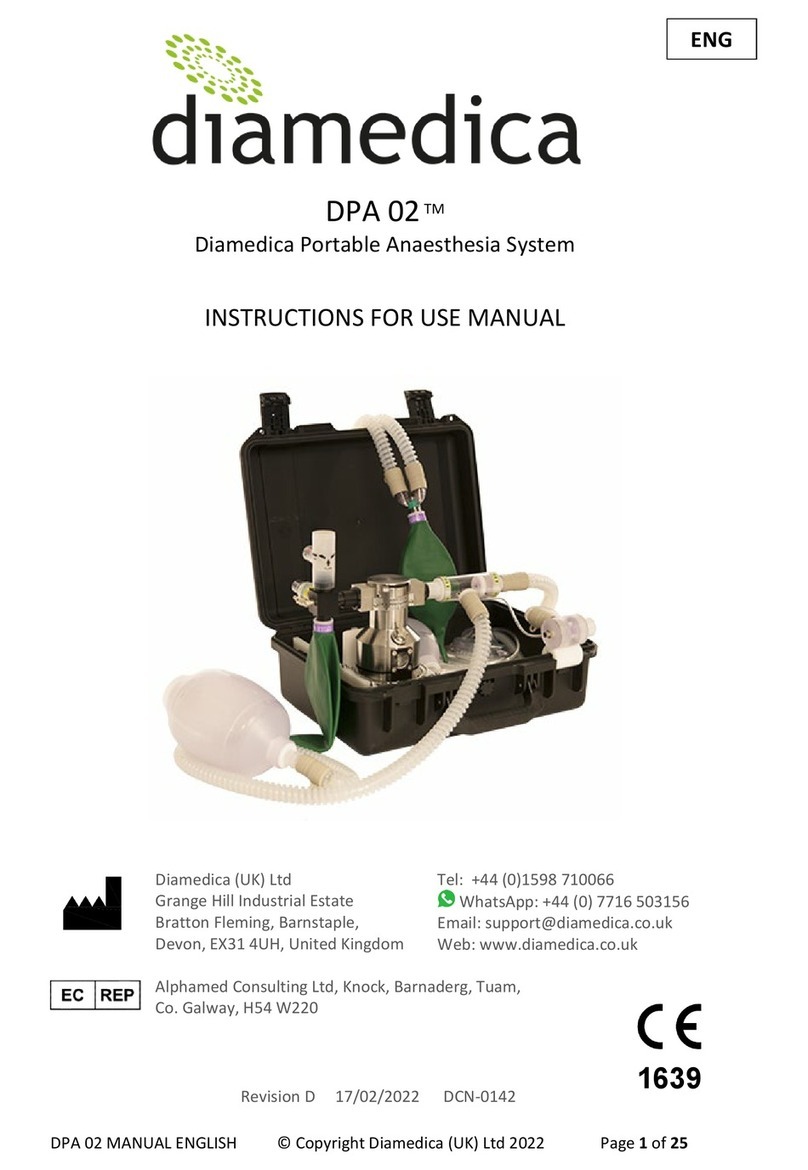
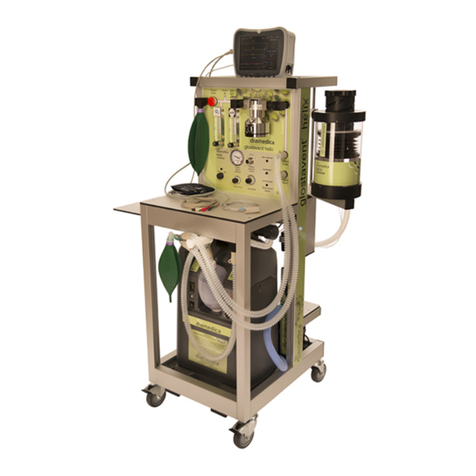
Diamedica HELIX ADULT Manual

MANUAL A/P HELIX VENT © Copyright Diamedica (UK) Ltd 2022 Page 1of 36
HELIX ADULT - PAEDIATRIC PORTABLE VENTILATOR
Part Reference - HELIX VENT A/P
INSTRUCTIONS FOR USE MANUAL
Diamedica (UK) Ltd
Grange Hill Industrial Estate
Bratton Fleming, Barnstaple, Devon, EX31
4UH, United Kingdom
Tel: +44 (0)1598 710066
WhatsApp: +44 (0) 7716 503156
Email: support@diamedica.co.uk
Web: www.diamedica.co.uk
Alphamed Consulting Ltd, Knock, Barnaderg, Tuam,
Co. Galway, H54 W220
Revision I14/06/2022 DCN-0161
ENG
1639

MANUAL A/P HELIX VENT © Copyright Diamedica (UK) Ltd 2022 Page 2of 36
Read this page first
INTENDED USE
This device is designed for, and suitable for, use in hospital settings with limited resources or in
any field or outreach location and is suitable for adult and paediatric patients.
The Helix Adult Paediatric Portable Ventilator is not intended for use in The EU. It is suitable
for use in dry non-condensing atmospheres and should be kept free of surface liquid.
The HELIX ADULT - PAEDIATRIC PORTABLE VENTILATOR provides effective and efficient ventilation
in difficult environments. It can be used as standalone equipment or in conjunction with
Diamedica’s Portable Anaesthesia systems to facilitate the administration of inhalational
anaesthesia and respiratory support in difficult environments, humanitarian emergency situations
and low resource settings.
FOREWORD
This manual is intended to provide guidance on the function, performance, and user maintenance
of the Diamedica Helix Adult-Paediatric Portable Ventilator (HAPPV). The information given in this
manual is correct at the date of publication.
The policy of Diamedica (UK) Ltd is to continuously improve its products. Changes may be made to
this manual without notice being given.
Users of the Diamedica Helix Adult-Paediatric Portable Ventilator must read, understand, and
follow the guidance given in this manual before using the system.
THE NEED FOR PATIENT MONITORING
WARNING
The Diamedica Helix Adult-Paediatric Portable Ventilator delivers mixtures of gases to the patient
and the patient should be monitored at all times.
Do not operate at altitudes above 2000M
Ensure unit is suitably situated on a level surface free from standing and dripping liquid.
Unit is not suitable for transport ventilation.
Do not cover the ventilator or place in a position that affects proper operation e.g., do not obstruct air
inlet
Do not add any attachments or accessories to the ventilator that contravene the instructions for use of
the ventilator or accessory, as the ventilator might not function correctly, leading to the risk of a serious
deterioration of health of the patient.
The only relative contraindication is if non-invasive ventilation is available, and its use is expected to
resolve the need for mechanical ventilation. This should be started first as it has fewer complications
than mechanical ventilation.
Pressure readings indicated on the gauge on top of the Helix screw indicate the pressure inside the

MANUAL A/P HELIX VENT © Copyright Diamedica (UK) Ltd 2022 Page 3of 36
bellows at the point of delivery. Downstream pressures at the patient interface may be less than this
due to length and elasticity of the circuit.
It is essential that the patient’s respiration and other vital functions are also monitored.
The ultimate responsibility for patient safety remains with the operator, who should always have a
secondary means of maintaining ventilation.
Do not initiate use if the green power light is flashing (Battery life less than 2 hours). Connect unit to
power source to recharge.
Mains power supply isolation: Disconnect the mains supply cable from the socket (see Section 4).
The Helix Adult Paediatric Portable Ventilator does not include patient monitoring for ETCO2 FIO2,
Patient airway pressure, expired volume, or PEEP. It is the responsibility of the clinician in charge to
ensure suitable monitoring is in place for the patient and procedure being performed and in the
environment in which it is being completed. Scales for Tidal volume, BPM and pressure are for indication
(+/-10%) of delivery from the ventilator.
Observations of the patient must take precedence over machine settings in judging the condition
of the patient.
The Diamedica Helix Adult-Paediatric Ventilator utilizes atmospheric air within the delivered mixture
to the patient. It is therefore recommended, particularly in areas at risk of atmospheric contamination,
that a single use bacteria filter is used within the patient circuit. HME and breathing system filters
should be medically compliant with recognized standards for use within the region of operation.
The ventilator has a breathable casing and must be kept dry and free from standing moisture (IP20)
When not in use, ensure unit is stored in a manner free from dripping liquids.
This User Manual must be stored near the product, protected from anything, which could compromise
its integrity and legibility.
NO MODIFICATION OF THIS EQUIPMENT IS PERMITTED.
The ventilator is only intended to be used by qualified medical personnel

MANUAL A/P HELIX VENT © Copyright Diamedica (UK) Ltd 2022 Page 4of 36
Classification and Electromagnetic Conformity
Classifications
The Helix Adult Paediatric Portable Ventilator has the following classifications (EN 60601-
1:2006 +A12:2014
Protection against shock.
When connected to a mains AC source via the supplied lead for charging, the
ventilator is Class II ME Equipment.
When not connected to a mains supply it is considered as Internally Powered ME
Equipment.
Protection against harmful ingress of water or particulate matter
IP20
Method(s) of sterilization
The Helix Adult Paediatric Portable Ventilator is a non-sterile device and is not
intended to be sterilized by the user.
Suitability for use in an OXYGEN RICH ENVIRONMENT
Intended for use in an Oxygen rich environment
Mode of operation
The Helix Adult Paediatric Portable Ventilator is suitable for continuous operation
subject to a power supply for recharging and drive gas supply.
Electromagnetic conformity
The Helix Adult / Paediatric Portable Ventilator is a 12V portable device that complies with
the requirements of the 93/42/EEC European directive and has been assessed against the
applicable requirements of EN 60601-1-2:2015
Standard
Description
Outcome
BS EN 55011:2009+A1
Radiated Emissions Class B
Pass
EN 61000-4-2:2009
Electrostatic Discharge (UKAS)
Pass
EN 61000-4-3:2006 + A2
Radiated RF Immunity Table 9
(UKAS)
Pass
Whilst every precaution has been taken to prevent the effect on or effect from other devices
the following precautions should be adhered to ensure continued normal operation.
Always ensure that the device is used in accordance with the Instructions for Use.
Use of this equipment adjacent to or stacked with other equipment should be avoided. If
such use cannot be avoided, both items should be observed to verify that they are
operating normally.
Only use the charger lead supplied.
The implementation of accessories or spares, other than those specified, provided, or

MANUAL A/P HELIX VENT © Copyright Diamedica (UK) Ltd 2022 Page 5of 36
advised by the manufacturer of this equipment should not be used. Failure to follow this
could result in increased electromagnetic emissions or decreased electromagnetic immunity
of this equipment and result in improper operation.
If this equipment is found to cause interference or be affected by interference from other devices,
which can be determined by turning the equipment off and on, the user is encouraged to try to
correct the interference by one or more of the following measures:
Reorient or relocate either device to Increase the separation between the
equipment. If the unit is charged disconnect from the power supply and remove
power lead.
Do not leave the charger connected to the battery for long periods after the battery is fully
charged and the unit is not in use.
Consult the manufacturer for help when required.

MANUAL A/P HELIX VENT © Copyright Diamedica (UK) Ltd 2022 Page 6of 36
DIAMEDICA HELIX ADULT - PAEDIATRIC PORTABLE VENTILATOR
INDEX
1. INTRODUCTION
2. SPECIFICATIONS
3. CLEANING, GENERAL MAINTENANCE AND DISPOSAL
4. COMPONENT PARTS OF THE HELIX VENTILATOR
5. USE OF THE VENTILATOR
A. DAILY SET UP AND TEST
B. PERIODIC (Monthly) CIRCUIT INTEGRITY CHECK
C. USE OF THE HELIX VENTILATOR IN ADULTS
D. USE OF THE HELIX VENTILATOR IN PAEDIATRICS
E. INSPIRED OXYGEN CONCENTRATION
F. F.LONG TERM VENTILATION
G. AFTER USE
H. USE OF PEEP (POSITIVE END EXPIRATORY PRESSURE)
6. ALARMS
7. USE OF SUPLEMENTARY OXYGEN
8. TROUBLE SHOOTING
9. FREQUENTLY ASKED QUESTIONS
10. USE WITH THE DPA 02 AND DPA 03 ANAESTHESIA SYSTEMS
11. SYMBOLS GLOSSARY

MANUAL A/P HELIX VENT © Copyright Diamedica (UK) Ltd 2022 Page 7of 36
1.
INTRODUCTION
DIAMEDICA HELIX ADULT - PAEDIATRIC PORTABLE VENTILATOR
This is a time cycled, volume limited pressure generator. Delivered pressure is limited via a pressure
regulator. It is a gas driven ventilator and can therefore function largely independently of the supply of
electricity. There is however a small battery in the base of the ventilator which is required to power the
electronic circuitry. This battery should be kept fully charged by keeping the ventilator connected to
the mains supply when available.
The ventilator bellows section consists of a set of bellows and a helix screw above the bellows that is
used to control the tidal volume adjustment.
A drive piston is mounted below the bellows and is driven upwards by the driving gas. This piston pushes
the top of the bellows upwards causing the bellows to expand and fill with the gas mixture (carrier air
and supplementary oxygen). When the control solenoid switches the gas flow, the piston is driven
downwards, collapsing the bellows. A valve directs the gas mixture towards the patient.

MANUAL A/P HELIX VENT © Copyright Diamedica (UK) Ltd 2022 Page 8of 36
2.
SPECIFICATIONS
The Diamedica HAPPV is suitable for adult and paediatric use. The specifications for HAPPV are
provided in the table below. Helix Adult-Paediatric Portable Ventilator specifications
Feature Specification
Height
40 cm (Helix Screw closed)
48 cm (Helix Screw Open)
Diameter
26 cm (Inclusive of valve)
Weight
9.1 kg (Unpacked weight inclusive of circuit)
Tidal Volume **
100 – 1200ml
Inspiratory/Expiratory Ratio
1:2
Inspiratory pressure range **
8 – 50cm H
2
O
Triggered breathing control **
1 – 5cm
Breaths per minute **
6 - 40
Alarms
High Pressure >60cmH
2
O (LED/Audible)
Low pressure / Disconnect <2cmH2O (LED/Audible)
Low Battery life <2 hours (Flashing Green LED)
Battery failure (Flashing Green LED / Intermittent audible)
Pressure relief
>66cmH
2
O
Drive pressure/volume
> 20psi /<75psi @ >5l/min
PEEP; circuit dependant
0 – 20 cm H
2
O
Power Supply
12volt Lithium battery
(Rechargeable from mains power A/C or vehicle D/C)
Internal rechargeable battery
>100 hours
Ingress protection (IP)
IP20
Protected from touch by fingers and objects greater than
12 millimetres.
No protection against ingress of liquid
Electrical Safety classification
Class II Equipment, double insulated
(When connected to power via PSU)
Internally powered when not connected to mains
Operating
Environment
Temperature
Humidity
Altitude
5 - 40ᵒC
35% - 90% RH
79 – 106 kpa
Storage
Environment
Temperature
Humidity
Altitude
-10 - +45ᵒC
15% - 93% RH
79 – 106 kpa
Maximum operational altitude
< 2000m
The gas flow and volume specifications are represented as STAP it should be noted that the use of alternative
patient circuitry and extreme atmospheric conditions can have an effect on the delivered values.
** Control scales are indicative. Delivered condition accurate within +/-10%

MANUAL A/P HELIX VENT © Copyright Diamedica (UK) Ltd 2022 Page 9of 36
3.
CLEANING, GENERAL MAINTENANCE AND DISPOSAL
Ventilator usage should be clearly logged and recorded to assist maintenance and cleaning activities.
This can be done in a format suitable to the user or in a format as shown below.
Date
Task
①Patient use
②Maintenance
③Cleaning
Time on
Time off
Comments
Suggested usage log for Helix adult-paediatric portable ventilator
a) Cleaning
The ventilator should be cleaned daily by wiping down with a damp cloth. Ensure unit is dry free
from moisture after wiping
Patient safety is the primary concern of the Clinician and infection control is critical to
ensuring the safety of medical procedures. Appropriate cleaning and disinfection is essential
after each patient usage. Each Helix Ventilator is supplied with a reusable breathing circuit. as
these items may come in contact with the patient and can therefore potentially pass
infectious agents from one patient to another if used improperly, the reusable breathing
tubing and patient valve provided with the Helix Ventilator should be cleaned and disinfected
according to your hospital’s infection control procedures. If no bacteria filter is used, then the
entire circuit should be cleaned and disinfected after each patient or after any contamination
event involving the breakdown of the completed circuit. Refer to table below.
Component
Image
cleaning
requirements
Frequency
Comments
Patient valve
Wash in bleach
solution, rinse
and dry in line
with hospital’s
infection control
procedures
After each patient.
Examine for
damage, replace if
necessary.

MANUAL A/P HELIX VENT © Copyright Diamedica (UK) Ltd 2022 Page 10 of 36
Patient limb
Wash in bleach
solution, rinse
and dry in line
with hospital’s
infection control
procedures
Weekly if patient
filters are
used or as
per hospitals
infection control
guidance and
procedures
Examine for
damage, replace
if necessary.
Self-inflating
bag
Wash in bleach
solution, rinse
and dry in line
with hospital’s
infection control
procedures
Weekly if patient
filters are
used or as
per hospitals
infection control
guidance and
procedures
Examine for
damage, replace
if necessary.
Limb to self-
inflating bag
Wash in bleach
solution, rinse
and dry in line
with hospital’s
infection control
procedures
Weekly if patient
filters are used or as
per hospitals
infection control
guidance and
procedures
Examine for
damage, replace
if necessary.
Ventilator
outlet block
and Patient
circuit inlet
valve
Wash in bleach
solution, rinse
and dry in line
with hospital’s
infection control
procedures
Weekly if patient
filters are
used or as
per hospitals
infection control
guidance and
procedures
Examine for
damage, replace
if necessary.
Any bacteria filters and other single-use items provided should be discarded after one use since
they are not designed to be reprocessed.
If the Clinician has any concerns relating to cleaning or maintenance or the function of the
Ventilator, they should contact the manufacturer.
b) Maintenance
The Helix Ventilator is designed to require minimal maintenance.
Patient circuit components should be inspected after each use and cleaning operation to ensure
their integrity. If any degradation of a component is observed, then it should be replaced. It is
recommended that at least one full set of patient circuit components is available to eliminate the
need for any downtime of the ventilator.
WARNING
The patient circuit tubing is Non-conducting (Applied Part). DO NOT replace with conducting/anti-
static tubing.
A full list of spares is available by contacting Diamedica – support@diamedica.co.uk

MANUAL A/P HELIX VENT © Copyright Diamedica (UK) Ltd 2022 Page 11 of 36
Replacement of Lithium Battery.
In the event that a new battery is required, this must be done by a suitably competent service
technician.
The battery is a ‘Tracer’ 12V 4ah Lithium Polymer Battery. This is available by contacting Diamedica
– support@diamedica.co.uk
To remove the ventilator battery.
a) Lay the ventilator on its back with
the panel facing up.
Unscrew the 2 screws at the bottom
of the panel.
b) Remove the 5 screws that secure the
base.
c) Carefully part the base from the
body taking care not to put to pull
on the battery connection lead

MANUAL A/P HELIX VENT © Copyright Diamedica (UK) Ltd 2022 Page 12 of 36
d) Remove the battery from the base
and disconnect the lead
e) Connect the new battery.
**Type - ‘Tracer’ 12V 4ah Lithium
Polymer Battery Ref No. BP2541
When replacing the battery ensure
the battery orientation is correct
and that the charging point is
aligned with the hole in the base.
** available by contacting Diamedica
f) Carefully replace base back onto
body section, ensuring that cable
does not become trapped when
doing so.
Re-attach base (5 screws) and front
panel (2 screws)
CHARGE BATTERY FULLY BEFORE
USING

MANUAL A/P HELIX VENT © Copyright Diamedica (UK) Ltd 2022 Page 13 of 36
Replacement of control board fuse.
If it is identified that the onboard fuse protection for the control board has blown then please
contact Diamedica
Email: support@diamedica.co.uk
WhatsApp: +44 (0) 7716 503156
The Fuse must be replaced by a technician under guidance from Diamedica – Replacing the fuse
with an incorrect type may lead to malfunction, fire, and or injury.
Non serviceable components.
The PC Control board and loom contained within the unit are non-serviceable please contact
Diamedica for any enquiries relating to these components – support@diamedica.co.uk
c) Accessories and spares
All accessories used with the Helix Ventilator must:
•Be oxygen compatible,
•Be biocompatible,
•Comply with the general requirements of the 93/42/EEC European Directive
A full list of available spares is available by contacting Diamedica – support@diamedica.co.uk
d) Method for disposing of the device
If the product is returned to the manufacturer at the end of its life the company will ensure
disposal in line with the Waste Electrical and Electronic Equipment Directive (WEEE) 2012/19/EU

MANUAL A/P HELIX VENT © Copyright Diamedica (UK) Ltd 2022 Page 14 of 36
4.
COMPONENT PARTS OF THE VENTILATOR
Diagram of the ventilator showing major components
1. Helix screw
2. Bellows
3. Pneumatic piston
4. Battery
5. Electronics board
6. Solenoid valve
7. Patient circuit connection
8. Tidal volume lock
9. Pressure relief valve
The Power supply / Charging lead.
The Helix Ventilator is supplied with a Medically certified charging lead. This lead must be kept safe with
the unit at all times. Please refer to the Leads IFU for details on safety and information regarding charging
status information.
General Input / Output
Input voltage:
100-240 VAC
Line Frequency:
50 – 60Hz
Output 12.6 VDC
Temperature
range
•
Operating:
•
Storage:
+5 °C - +40 °C
-25 °C - +85 °C
In the event that the supplied charging lead becomes lost or damaged DO NOT substitute with an
alternative, contact Diamedica – support@diamedica.co.uk / WhatsApp +44 (0) 7716 503156

MANUAL A/P HELIX VENT © Copyright Diamedica (UK) Ltd 2022 Page 15 of 36
The Control Panel.
This contains the following features from left to right:
-On /off power switch with illuminated `power on`
indicator above.
-Trigger level control (top).
-Respiratory rate control (centre).
-Patient pressure control (bottom).
Down the right-hand side:
-Alarm Mute (top)
-High pressure warning light, this is illuminated if the
airway pressure exceeds 60 cm H2O (middle)
-Low pressure warning light (bottom), this is illuminated
if the airway pressure fails to reach 3 cm H2O during
IPPV. After twenty seconds this is accompanied by an
audible warning.
At the bottom of the panel there are the drive gas connections
and return (recycled O2).
Patient circuit protection.
Relief valve characteristics
The circuit may contain pressure up to 66
cmH2O (This will be under alarm conditions at
greater than 60cmH2O) After which point the
relief valve will crack and vent.

MANUAL A/P HELIX VENT © Copyright Diamedica (UK) Ltd 2022 Page 16 of 36
Diamedica Helix Portable Ventilator Tidal Volume Control
The gauge showing the delivered
patient pressure is set into the top of
the ventilator helix control screw.
Patient valve
The Patient Circuit and Outlet Block
Entrained
room air inlet
Recycled oxygen
connection
Non return valves
Ventilator
outlet
connector
Self-inflating
bag
Reservoir
bag
Patient circuit tube
Tidal
volume
lock
The tidal volume is adjusted by turning the helix screw on
top of the bellows, restricting the movement of the drive
piston. The set tidal volume limit is read at the bottom of
the helix screw in the position indicated by the arrow.
Note the tidal volume lock must be used to
lock the
screw in the set position after each adjustment.
Recycled oxygen
tube

MANUAL A/P HELIX VENT © Copyright Diamedica (UK) Ltd 2022 Page 17 of 36
Patient Circuit
Expired
Recycled Drive Gas Connection
The recycled drive gas connection tube is connected between the
recycled O2 port on the control panel and the ventilator outlet block.
Patient Circuit
The ventilator has been designed to minimize the volume of driving gas required. This is possible
because the piston diameter is much smaller than the bellows.
The volume of driving gas required is less than 1/4 of the tidal volume set for the patient. If the drive gas
is oxygen this can then be recovered and put back into the patient circuit, increasing the FiO2 to
approximately 40%.
If higher oxygen concentrations are required, additional oxygen can be added by removing the recycled
drive gas connection identified below and applying a separate oxygen source to the tube marked below.
Note: Do not over inflate the green reservoir bag – Risk of barotrauma.

MANUAL A/P HELIX VENT © Copyright Diamedica (UK) Ltd 2022 Page 18 of 36
Refer to section 7. USE OF SUPLEMENTARY OXYGEN.
The Battery Recharge Socket
The battery recharge socket is marked above. The charger should be connected whenever power is
available. When fully charged the battery should operate for more than 100 hours.

MANUAL A/P HELIX VENT © Copyright Diamedica (UK) Ltd 2022 Page 19 of 36
Pneumatics and gas circuit
Key
1. Bellows.
11. Laerdal valve.
2. Pressure gauge. 12. Peep valve.
3. Printed Circuit Board. 13. HME filter (Not supplied with Ventilator).
4. Solenoid valve. 14. Patient interface (Mask / Tube).
5. Patient pressure controller. 15. Drive gas outlet (If O2 is used this can be connected to
supplemental input to increase FIO2 to 40% approx.)
6. Pressure regulator. 16. Patient circuit connection block.
7. Flow regulator. 17. Drive gas input.
8. Inspiratory valve.
9. Piston.
10.Supplemental Oxygen inlet.

MANUAL A/P HELIX VENT © Copyright Diamedica (UK) Ltd 2022 Page 20 of 36
5.
USE OF THE VENTILATOR
A. SET UP AND TEST
Set the ventilator on a flat surface and connect the gas source from an oxygen concentrator (nominal
recommended pressure 1.5bar - 20psi) or (regulated oxygen cylinder 4bar-60psi).
①Connect the battery charger to the
ventilator, plug into the mains power.
② Connect the patient circuit tube to the
end connection on the patient circuit block.
③Connect the self-inflating bag limb to the
lower connection on the patient circuit
block.
④ Attach the patient valve to the end of
the patient circuit limb.
⑤ Affix the reservoir bag to the underside
of the inspiratory valve.
⑥ If using O2 as the drive gas the
connection tube can be connected from the
recycled gas connection on the front right of
the ventilator to the connector on the clear
section of the patient circuit block.
Patient
Pressur
Top view
Expired
Tube connection for
recycled O2 (If used)
Or supplementary supply
Side view
Reservoir bag Self-inflating bag
(Patient circuit connected)
This manual suits for next models
1
Table of contents
Other Diamedica Medical Equipment manuals
Popular Medical Equipment manuals by other brands

Getinge
Getinge Arjohuntleigh Nimbus 3 Professional Instructions for use

Mettler Electronics
Mettler Electronics Sonicator 730 Maintenance manual

Pressalit Care
Pressalit Care R1100 Mounting instruction

Denas MS
Denas MS DENAS-T operating manual

bort medical
bort medical ActiveColor quick guide

AccuVein
AccuVein AV400 user manual


