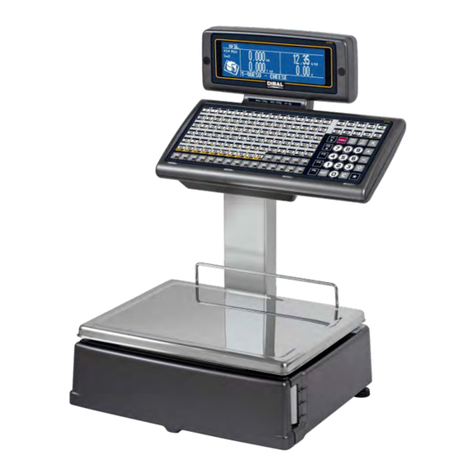
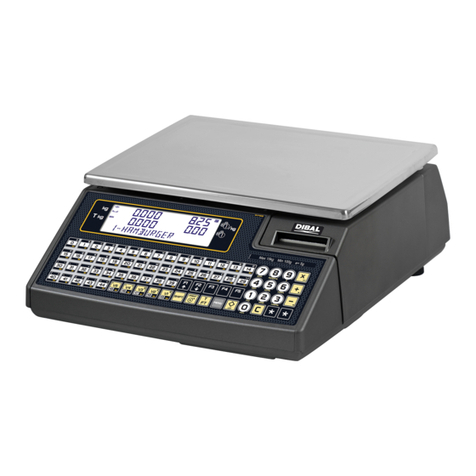
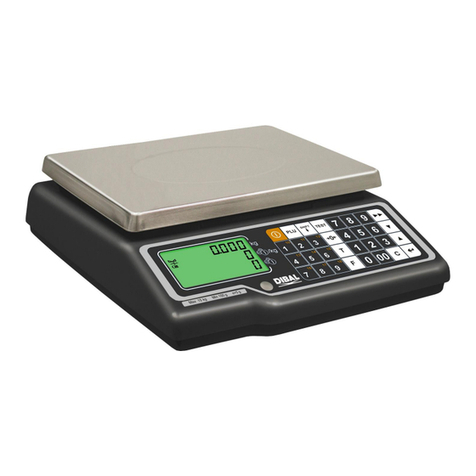
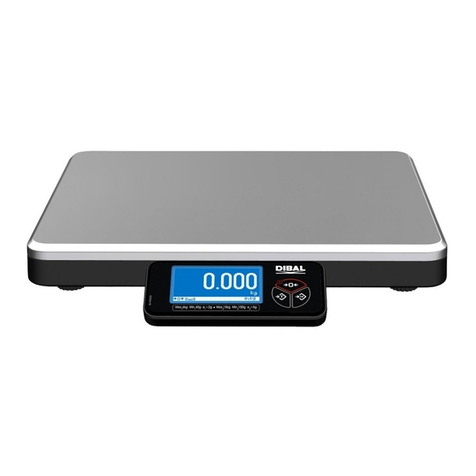
Dibal 500 Series User manual

500 RANGE
49-M500WMEN11
W-010, W-015, W-020, W-025
49-M500WMEN11
M-510, M-515, M-520, M-525
49
-
U500WMEN11
USER´S MANUAL


500 Range
I
CONTENTS
1.
INTRODUCTION .................................................................................................................................................1
1.1.
PRESENTATION...........................................................................................................................................1
1.2.
MAIN CHARACTERISTICS ........................................................................................................................1
1.3.
WEIGHING SCALES SPECIFICATIONS ...................................................................................................2
1.3.1.
General....................................................................................................................................................2
1.3.2.
Accessories..............................................................................................................................................2
1.4.
INSTALLATION OF SCALES .....................................................................................................................3
1.5.
MAINTENANCE ADVICE AND HOW TO LOOK AFTER YOUR 500 RANGE SCALES ...................4
2.
OPERATION.........................................................................................................................................................5
2.1.
SWITCHING ON............................................................................................................................................5
2.2.
STARTING UP...............................................................................................................................................6
2.3.
HOW TO OPERATE THE SCALES.............................................................................................................7
2.3.1.
Direct price .............................................................................................................................................7
2.3.2.
Normal weight.........................................................................................................................................7
2.3.3.
Non-weight operations (adding, subtraction and multiplication ..........................................................8
2.3.4.
Manual zero ............................................................................................................................................9
2.3.5.
In line discount........................................................................................................................................9
2.3.6.
Receipt printing: calculation of change and discount ............................................................................9
2.3.7.
Review receipt .......................................................................................................................................10
2.3.8.
Receipt reopening..................................................................................................................................11
2.3.9.
Operation in label mode........................................................................................................................11
2.3.10.
Fix price ................................................................................................................................................12
2.3.11.
Increase or decrease price....................................................................................................................12
2.3.12.
Net weight operations ...........................................................................................................................13
2.3.13.
Free price ..............................................................................................................................................14
2.3.14.
Return weight ........................................................................................................................................14
2.3.15.
Best Before* ..........................................................................................................................................15
2.3.16.
Batch number* ......................................................................................................................................15
2.3.17.
Totals labels ..........................................................................................................................................16
2.3.18.
Forms of payment..................................................................................................................................17
2.3.19.
Account payment form ..........................................................................................................................17
2.3.20.
Two Pay Mode ......................................................................................................................................18
2.3.21.
Selecting a default vendor.....................................................................................................................20
2.3.22.
Next Plu.................................................................................................................................................20
2.3.23.
SELF-SERVICE MODE........................................................................................................................21
2.3.24.
Configure backlighting..........................................................................................................................21
2.3.25.
Stock Manager ......................................................................................................................................21
3.
PROGRAMMING...............................................................................................................................................23
3.1.
ARTICLES 1 ]............................................................................................................................................25
3.1.1.
Creating/modifying a PLU....................................................................................................................25
3.1.2.
Copy An Article.....................................................................................................................................30
3.1.3.
Delete Article.........................................................................................................................................30
4.
VENDORS [ 2 ]....................................................................................................................................................31
4.1.
REGISTERING VENDORS 2 1 ].............................................................................................................31
4.1.1.
Consulting active vendors.....................................................................................................................32
4.1.2.
Training model......................................................................................................................................32
4.2.
REMOVING VENDORS 2 2 ]..................................................................................................................33
4.2.1.
Removing all vendors............................................................................................................................33
4.3.
CASH DRAWER OPERATION 2 3 ] ......................................................................................................34
5.
REPORTS [ 8 ] ....................................................................................................................................................35
5.1.
LISTS 8 1 ].................................................................................................................................................35
5.1.1.
Report of Articles by Code [ 8 1 1 ].....................................................................................................35
5.1.2.
Report of Articles by PLU [ 8 1 2 ]......................................................................................................35
5.1.3.
Report of Articles by Equivalence PLU / CODE [ 8 1 3 ]...................................................................35

USER´S MANUAL
49-U500WMEN11 II
5.1.4.
Sales per Artcile by Code [ 8 1 4 ].......................................................................................................36
5.1.5.
Sales per Artcile by PLU [ 8 1 5 ]........................................................................................................36
5.1.6.
Sales by Vendor/Article [ 8 1 6 ]..........................................................................................................37
5.1.7.
Big Total Group [ 8 1 7 ] .....................................................................................................................37
5.1.8.
Sales per Article by Code [Extended] [8 1 8]......................................................................................38
5.1.9.
Big Total Group [ 8 1 9 ] .....................................................................................................................39
5.1.10.
V.A.T Totals [ 8 1 10 ] .........................................................................................................................40
5.1.11.
Sales per Section [ 8 1 11 ]..................................................................................................................41
5.1.12.
Hourly Sales Report [ 8 1 12 ].............................................................................................................41
5.1.13.
Last PLU modified [ 8 1 13 ]...............................................................................................................41
5.1.14.
Cash Drawer Report [ 8 1 14 ]............................................................................................................42
5.1.15.
Traceability Report [ 8 1 15 ] ..............................................................................................................42
5.1.16.
On Credit Customers Report [ 8 1 16 ] ...............................................................................................42
5.1.17.
Fiscal Report [ 8 1 17 ]........................................................................................................................42
5.1.18.
Stock Report [ 8 1 18 ] .........................................................................................................................43
5.2.
LOGOS 8 2 ] ..............................................................................................................................................43
5.3.
FONTS 8 3 ]...............................................................................................................................................43
6.
DELETIONS [ 9 ]................................................................................................................................................44
6.1.
Z DELETION 9 1 ] ....................................................................................................................................44
6.2.
DELETING LEVELS 9 2 ]........................................................................................................................44
6.3.
PARCIAL DELETINGS 9 3 ] ...................................................................................................................45
6.3.1.
Articles Deletion [ 9 3 1 ] ....................................................................................................................45
6.3.2.
Formats Deletion [ 9 3 2 ] ...................................................................................................................45
6.3.3.
Traceability Deletion [ 9 3 3 ] .............................................................................................................45
6.3.4.
Configuration Deletion [ 9 3 4 ] ..........................................................................................................46
7.
CHANGE OF PAPER.........................................................................................................................................47
7.1.
CHANGING PAPER IN THE PRINTER....................................................................................................47
7.2.
CHANGING PAPER IN THE LABELLING MACHINE..........................................................................48
7.2.1.
Flat Model.............................................................................................................................................48
7.2.2.
Hanging and Doble Body Model ..........................................................................................................50
8.
APPENDI ON BATTERIES ...........................................................................................................................51
8.1.
WORKING MODES OF THE 500 SERIES BATTERY ................................................................................51
8.2.
BATTERY CONTROL PARAMETERS .........................................................................................................51
8.3.
OPERATION DEPENDING ON THE BATTERY CONTROL PARAMETER VALUE........................51
8.3.1.
Battery control to 1(default mode ........................................................................................................51
8.3.2.
Battery control to 1(default mode ........................................................................................................52
8.3.3.
Battery control to 2 ...............................................................................................................................52
8.4.
MESSAGES AND INDICATORS IN BATTERY-RUN SCALE..............................................................52
8.4.1.
Messages and indicator of battery load................................................................................................52
8.4.2.
Messages and indicator depending on operation status.......................................................................52
8.4.3.
Messages in operating mode changes...................................................................................................53
8.5.
OPERATION WITH INTERNAL BATTERY............................................................................................53
8.6.
BATTERY TEST IN TESTING AND ADJUSTMENTS...........................................................................53

500 Range
1
1. INTRODUCTION
1.1. PRESENTATION
The 500 weighing scale Range are the top of the DIBAL range,
especially designed for use in direct sales to the public.
DIBAL’s 500 weighing scale Range are a powerful work tool that will
permit you to reap maximum benefit from your business.
This manual should always be kept with the weighing scales in order
to ensure maximum performance from your scales in any work
situation.
FOR ANY CLARIFICATION ON THE CONTENTS OF THIS MANUAL,
REFER TO USER'S MANUAL AND SERVICE PROVIDED IN THE CD WITH
THE BALANCE.
1.2. MAIN CHARACTERISTICS
The Table below shows the characteristics of all the models in the
DIBAL 500 Range, and the sections in which the main functions are
described.
Furthermore, all the scales in the 500 Range offer:
• Graphic LCD Display with background light.
• Possibility of manual, fixed and pre-programmed net weights.
• Programmable formats for receipt and label.
• Possibility of working with 99 sections.
• BACK-UP operations through the LBS programme.
• 5 VAT rates.
• Connection to cash drawer or turnomatic.
• Logos on receipt / label.
• Different range types (see characteristics chart on scales):
MONO-RANGE MULTI-INTERVAL MULTI-RANGE
Range (kg) Step (g) Range (kg) Step (g) Range (kg) Step (g)
3 1 3/6 1/2 3/6 1/2
6 2 6/15 2/5 6/15 2/5
15 5 15/30 5/10 15/30 5/10
30 10
12 2

USER´S MANUAL
49-U500WMEN11 2
1.3. WEIGHING SCALES SPECIFICATIONS
1.3.1.General
POWER SUPPLY......................................... 110/230 VAC,50Hz, 1,3A
PRINTING METHOD .............................................THERMAL PAPER
DISPLAY...................................................................
According to model*
* DISPLAY SUPERLUX or DISPLAY BLUE L
PAPER SIZE OF LABELLING MACHINE........
Dimensions: Width x Length
Maximum Length: 100*mm
Max. 80mm. Models: W-015, M-515.
Max. 100mm. Models: W-025, M-525.
Minimum Length: 30mm
Models:W-015, W-025, M-515 &M-525.
Minimum Width: 30mm
Models:W-015, W-025, M-515 &M-525.
Width with support: 63mm
Models:W-015, W-025, M-515 &M-525.
PAPER SIZE OF RECEIPT...............................
External diameter 100* mm
*According to model
•External diameter: 57mm. Models: W-010, W-020, M-510 & M-520
•External diameter: 62mm. Models: W-015, W-025, M-515 & M-525
•Big Roll: 100mm. Models W-015, W-025, M-515 & M-525
COMMUNICATION TO SCALES ............................................
Ethernet*
*Wireless, Homeplug
COMMUNICATION TO PC......................................................
Ethernet*
*Wireless, Homeplug
CANAL DE COMUNICACIÓN OPCIONAL..............................................USB*
*Only models: W-010, W-015, W-020, W-025
TEMPERATURE FOR OPERATION............................-10ºC to +40ºC
PRECISION ........................................1/3000 || 1/6000 MAX. RANGE
1.3.2.Accessories
POWER SUPPLY CABLE
ADHESIVE LABEL ROLL
RECEIPT ROLL
USER’S MANUAL

500 Range
3
1.4. INSTALLATION OF SCALES
Follow the instructions below to ensure correct installation and operation
of thescales.
1. Check that the mains voltage corresponds to that stated on the
specifications label on the scales and that it does not fluctuate in
excess of 10% of nominal voltage.
2. Make sure that the scales can be connected to a nearby socket
that is easy to access. We recommend that the socket should be
provided with differential breaker, thermal-magnetic trips, and
ground.
3. Make sure that other equipment such as refrigerators, cutting
machines, etc. are not connected to same socket.
4. If the scales have a battery option, see Annex Battery operation.
5. Only use the scales in areas that comply with the room
temperature values stated on the specifications label (-10ºC to
40ºC).
6. Peripheral devices connected to the equipment must be
protected against fluctuation peaks of above 8A 100VA.
7. The scales must be placed on a stable, level surface.
8. No objects must come into contact with the dish.
9. Avoid extreme temperatures. Do not place the scales in direct
sunlight or close to air conditioning vents.
10. These scales have not been designed as waterproof scales.
Therefore, avoid high levels of humidity since this might cause
condensation. Protect from rain and avoid direct contact with
water. Do not spray water on the scales or submerge in water. If
the scales get wet, switch off the power supply immediately.

USER´S MANUAL
49-U500WMEN11 4
1.5. MAINTENANCE ADVICE AND HOW TO LOOK AFTER YOUR 500 RANGE
SCALES
By following these recommendations, your scales will remain in perfect
working order, thus obtaining a better performance and a longer
life.
1. Never place a weight on the scales that exceeds the maximum
limit.
2. Donot place weights suddenly on the dish if they exceed a sixth of
the maximum limit.
3. Donot exert sideways pressure on the dish
4. Always keep the keypad and dish clean. Use a dry cloth (and a
suitable cleaning product) to clean the scales.
5. Never pour or spray water on the scales. If the scales get wet,
switch off the power supply immediately.
6. Do not move the printer when it is switched on.
7. Do notmodify the scales’mechanical or electrical characteristics.
8. Clean the thermal head with the scales switched off. Do not use
blades or sharp objects for this purpose.
9. Only have the scales repaired by authorised persons, with suitable
training.
10. Always use original parts.
11. It is recommended to keep the scales out of direct sunlight,
protected from rain; avoid excessively humid conditions.
12. If the scales are operated with a battery, follow the
recommendations given in Annexe Batteryoperation.
The scales leave the factoryprepared for retail sales. Therefore, labels can
be printed at belowthe minimum limit.
In the case of pre-packaging activities, in accordance with legislation in force
(Standard EN 45501 and Directive 2009/23/EC), this type of equipment may
onlybe used if packages are above the minimum limit.
The scales can be set up for specific use for pre-packaging tasks. Consult your
supplier or technical assistance service.

500 Range
5
99999 99999
99999
99999
H5XX ESP V010N
-----
-----
-----
----
ALC 15kg
0.000 0.00
0.000 0.00
2. OPERATION
2.1. SWITCHING ON
Check that the weighing scales are correctly installed and then
turn on the switch on the bottom of the scales.
While the scales are checked for any possible errors, the
display shows a countdown from 9 to 0, and information on the
model, programme version and maximum range of the scales is
shown.
When the countdown is complete, and no errors have been
detected, articles and ingredients are checked, and the display
shows some dashes to indicate the scale range.
When the scales are switched on, there should not be
anything on the plate, because when the object is removed,
the scales will consider that weight as the net weight.
If the message, CONNECT THE COMPUTER appears after
countdown, press any key to enter the scales' normal
operation mode.
If the scales are programmed as SLAVE and the
corresponding MASTER is not working the message LOADING
DATA will appear, and the scales will remain in this status, press
any key for the scales to enter normal operation mode.

USER´S MANUAL
49-U500WMEN11 6
2.2. STARTING UP
Each of the following steps must be completed to start operating
the scales:
STEP 1: Install the scales as described in sect
1.4.INSTALLATION OF SCALE and switch on as
described in sect. 2.1.SWITCHING ON.
STEP 2: Programme the weighing scale communications, i.e.,
set up the scales as MASTER or SLAVE and assign
the corresponding address.
STEP 3: If the scales are being used for the first time, or you
wish to programme them again, the memory should
be deleted.
STEP 4: Assign each of the sales assistants who is to use the
scales one of the 20 available memories, i.e. register
the employees
STEP 5: Programme the articles.
STEP 6: If the scales are for operation in a EU country, check
that the current EURO PHASE is set up correctly.
STEP 7: Select the receipt format or programme a new one.
STEP 8: Programme printing parameters.
STEP 9: Set up the label formats.
STEP 10: Start to work with the scales, referring to the next
section 2.3 HOW TO OPERATE THE SCALES.
FOR ANY CLARIFICATION ON THE
CONTENTS OF THIS MANUAL, REFER TO
USER'S MANUAL AND SERVICE PROVIDED IN
THE CD WITH THE BALANCE.

500 Range
7
F4
F4
0 0 0 2
1 2
SHIFT F3
0.000 0.00
0.000
0.00
D
IR
ECT PRICE
0.000 0.00
0.000 0.00
0.000 0.00
0.000 0.00
0.410 0.00
0.000 0.00
DIRECT PRICE
0.410 0.00
0.000
0.00
000212
0.410 5.00
0.000 2.05
<Article name>
2.3. HOW TO OPERATE THE SCALES
DIBAL 500 Range weighing scale are specially designed to
simplify the sales assistant’s work, ensuring a high level of
speed and reliability on the part of the system, whether the latter
is one set of weighing scales or a network of MASTERS and
SLAVES connected to a PC.
The starting point of all explanations is the work status when the
weight, prince and amount is 0.
2.3.1.Direct price
The direct price must be activated in order to enter a price
with the number keys. To do this:
1. Check that the scales have been set up correctly.
2. Press F4 until the words DIRECT PRICE appear on the
display.
3. Thus, when a weight is placed on the platform, the number
keys can be used to enter the price.
4. To deactivate the direct price, simply press F4 until DIRECT
PRICE disappears from the display.
2.3.2.Normal weight
In order to weigh a product, proceed as follows:
1. Place the product to be weighed on the platform.
2. Enter the price using one of the following methods:
-Directly with the number keys and then by pressing the
corresponding memory key. To do this the DIRECT PRICE
must be activated.
-By entering the article code (check that it is in the
corresponding department and be careful to enter all the
digits in the code: code 212 is not the same as 000212!!).
To do this the DIRECT PRICE must be deactivated.
-Press the corresponding direct key (check that it is in the
corresponding department of the corresponding PLU).
In the event of an error, press Cto set the price to zero.
3. If you wish to see the price and amount in the secondary
currency, press keys SHIFT and F3.

USER´S MANUAL
49-U500WMEN11 8
V1
+
1 2 0
V1
X 4
0.410
832
0.000
341
^Euros^
0.410
5.00
0.000
2.05
<
Article
name
>
0.00
0.00
( + )
(+)
0.00
0.00
( + )
(+)
1.00
1.00
(
x
)
2.00
nits
4.Memorise the operation for the corresponding sales assistant by
pressing one of the, V1, V2..., Vxx keys. These memory keys
must have been registered beforehand.
5.Remove the article and then start again with the next one.
If you want to to check the total amount of sale before
totalizing, hold pressed the vendor’s key of the corresponding
sale for 2 seconds. The display will show for a few seconds the
number of sales the vendors has until that moment.
2.3.3. Non-weight operations (adding, subtraction
and multiplication)
The scales are able to function with articles that are not sold by
weight (price/kg), but which have a price per article, such as a
bottle of milk.
The scales must be programmed to enable adding, subtraction
and/or multiplication operations.
The method of operation is as follows:
1. Press +or -depending on whether you wish to add or
subtract.
2. Enter the price/unit of the product.In the event of an
error, press Cto set the price to zero.
3. Memorise the operation for the corresponding sales
assistant by pressing one of the V1,..., Vxx keys. These
memorykeys must have been registered beforehand.
If more than one unit is to be added or subtracted before being
memorised, press Xand enter the number of products.
If the MULTIPLICATION parameter is set to “2”, then the units
must be indicated in all unit sales. Therefore, if an attempt is
made to memorise a unit sale that is not multiplication, the
scales will beep and the following message will appear on the
display:
“Enter units”.

500 Range
9
SHIFT 0
PRINT
-
5 0
V1
PRINT
V4
∗
∗∗
∗
V4
0.000 0.00
0.000 0.00
0.000 0.00
0.000 0.00
0.410 dct
00
0.000
2.00
<
Article
name
>
0.410 dct
50
0.
000
2.00
<
Article
name>
0.000 0.00
0.000 0.00
VENDOR TOTAL?
4
total 5.00
2.3.4. Manual zero
The scales are equipped with a manual reset to zero mechanism.
If, for any reason the value of the weight is not zero, but it is within
a certain range, press keys SHIFT and 0, to reset the weight to
zero.
2.3.5. In line discount
In receipt mode, this option permits a percentage discount to be
applied to a certain article. Proceed as follows:
1. Check that the parameter for applying discounts has been set
up correctly.
2. Press PRINT until the symbol E disappears from the display.
This indicates that the scales are in receipt mode.
3. Effect the normal weight operation as far as the memorisation
step, without actually memorising.
4. Press -.
5. Enter the PERCENTAGE discount to be applied. (For example
50 represents 50%) This discount will be directly reflected in
the amount on the display and it will be applied to the receipt
on the corresponding article line.
6. Memorise and continue with normal operation.
2.3.6.Receipt printing: calculation of change and
discount
To print the total operations effected by a sales assistant, proceed
as follow:
1. Press PRINT until the symbol E disappears from the display.
This indicates that the scales are in receipt mode.
2. Effect a memorisation operation in accordance with the
sections above. For example, with sales assistant V4.
3. To print the receipt press ∗
∗∗
∗The scales will request the number
of the sales assistant with which the last operation is to be
printed.
4. Press the corresponding sales assistant key for whom the
operation is to be printed. For example V4.

USER´S MANUAL
49-U500WMEN11 10
2 0
∗
∗∗
∗
∗
∗∗
∗
F1
Vx
◊
◊◊
◊
V4
+
C
MENU
4 4.10
total 4.10
M=1 dct 00
4 4.10
total
3.28
M=1 dct 20
Tendered: 20.00
TOTAL: 15.00
Change: 5.00
SUBTOTAL SALES
00
4
Subto
0.36
11111
<
Article
>
0.865
1.25
Article
01
11111
TOTAL SALES ASSIST
5. If the option DISCOUNT ON TOTAL is activated,then the
memory number, number of articles and sum total will be
shown. The scales will request the discount percentage to be
applied to the receipt. Enter the desired value (for example
20%) and press ∗
∗∗
∗. If no operation is effected with the scales
for 15 seconds, the receipt is directly printed.
If parameter 335 is programmed (Discount on Total) as “2”,
i.e., discount on request, the discount can be applied by
pressing ∗
∗∗
∗F1 and the corresponding sales assistant key
Vx
.
If the discount on total is not activated, the selected memory
number, number of articles and sum total will be shown, and
when ∗
∗∗
∗is pressed, the receipt will be printed.
6. If the option CALCULATE EXCHANGE is activated,TYPE the
amount tendered by the customer. The display will then show
the amount tendered by the customer, the amount to be
returned by the sales assistant or the change, and the amount
to pay. If the amount tendered by the customer is not entered
for 15 seconds and the ∗
∗∗
∗key is not pressed, the receipt is
directly printed.
If no other operation is effected using the same memory, the
receipt may be printed as many times as required, and the
following text will appear on the receipts:
*** Copy ***
If other data is memorised in the same memory, it is presumed
that the operation corresponds to a new customer, and data
will be reset to 0.
2.3.7. Review receipt
To review operations effected by a sales assistant before the
corresponding receipt is printed, check that parameter 3128 is set
up correctly , proceed with the following steps:
1. Press the subtotal key ◊
◊◊
◊.
2. Press the corresponding sales assistant’s memorykey.
3. SEARCH for the operation to reviewed on the receipt using
the keys +and -. If you wish to DELETE the selected
operation, press C.
4.To return to normal operation status, press MENU.

500 Range
11
◊
◊◊
◊
V4
0
◊
◊◊
◊
V4X
PRINT
S BTOTAL SALES ASSIST
001
Subto 0.36
M: 04
De
lete ticket
S BTOT VENDOR
0.000
0.000
E
2.3.7.1 Complete deleting receipt
If you wish to cancel the entire ticket, Follow the next steps:
1. Press the subtotal key ◊
◊◊
◊.
2. Press the corresponding sales assistant’s memorykey.
3. Press 0.
4. The scale will ask if you wish to delete the receipt. In order to
delete press∗
∗∗
∗, if not press C.
2.3.8. Receipt reopening
It is possible to reopen the receipt when it has already been
printed. Parameter 3154 must be activated.
To do this, and after effecting the operation with the customer:
1. Press the subtotal key ◊
◊◊
◊.
2. If you wish to reopen the last receipt printed by one particular
sales assistant, press the corresponding memory key (for
example V4) and then press X. The receipt will then be
reopen in order to delete or add sales.
If after printing the receipt for one transaction, the scales are
changed to label mode, it will not longer be possible to reopen
the receipt.
When another operation is memorised in the same memory,
the previous receipt can no longer be reopened.
If the RECEIPT REOPENING parameter is set to 9, the scales
will allow any receipt to be reopened.
Working at “Reopening receipt” set to 9, if you wish to reopen a
closed receipt in order to modify it, a menu with two options will
appear:
‘1’ – Last receipt.
‘2’ – Other receipts.
Option “1” permits the last closed receipt to be reopened.
If option “2” is selected, other receipts can be opened and the
scales will request the number of the receipt to be reopened.
If the receipt number is in the memory and it is reopen able, a
“recover receipt” message will be displayed and the receipt may
be modified. Otherwise, the scales will show a “non-valid receipt”
message.
2.3.9.Operation in label mode
To print one label for each memorisation operation (label mode
operation) proceed as follows:
1. Press PRINT until the symbol LABEL appears on the display.
2. Effect the desired operation (weight, etc...).

USER´S MANUAL
49-U500WMEN11 12
∗
∗∗
∗
F2
F2
F2
SHIFT 1
SHIFT 3
1
Total
TOTA M 1 COP 3
0.410
5.00
0.000
2.05
E
F
FF
F
<
Article
name >
0.410
0.00
0.000
0.00
0.410
5.00
0.000
2.05
01
-
M
0.410
5.00
0.000
2.05
F MILK
0.000
0.00
0.000
0.00
The label will be printed when the memory key is pressed
corresponding to the sales assistant who has effected the
operation.
3. If you wish to make a certain number of COPIES* of the last
label issue, press ∗
∗∗
∗, then press the sales assistant key where
the operation has been saved, enter the number of copies
required, and press ∗
∗∗
∗.
4. If you wish to work in automatic labelling mode, check that the
corresponding parameter has been set correctly, then select
the required article and press F2 until the symbol Fappears
on the display.
If parameter 343 is set to 1, the memory in which the sales
are accumulated will have to be selected. If parameter 343 is
set to 2, sales will be automatically accumulated in memory
V1.
If there is any variation in the weight after a stable weight has
been attained, a label can be printed after a stable weight is
attained again, without having to press any article or sales
assistant key.
If you want to have reflected on the label the amount and the
total in EUROS
2.3.10. Fix price
This process is used to effect operations with the same article,
and to do this the corresponding parameter must be set up
correctly.Proceed as follows:
1. Place the required article on the platform.
2. Select the article to be fixed.
3. Press F2 to fix the price, and the symbol Fwill appear.
4. Now weigh the next article. To deactivate the fixed price press
F2 until symbol F disappears.
2.3.11.Increase or decrease price
After having entered a price, either defined in PLU, or as an offer
price or a direct price, press SHIFT and then 1to enter the
percentage value to increase the price, or press SHIFT and 3to
enter a percentage value to decrease the price. To do this,
parameter 5.1.7.6 must be activated.
If you do not wish to enter any percentage, press Cto resume
normal weighing mode.
To memorise the operation, effect the same procedure as that
without the percentage, i.e., after having entered the percentage,
press the memory key of the corresponding sales assistant.
*According to model.
•
Models: W
-
025 & M
-
525.

500 Range
13
SHIFT 1
10
V1
T/FT
SHIFT
T/FT
T/FT
0.590 7.89
0.000
4.69
01
–
SERLOIN
0.590 inc .00
0.000 4.69
01
–
SERLOIN
0.590 inc .10
0.000 5.16
01
-
SERLOIN
0.590
0.00
0.000
0.00
0.415
0.00
0.000
0.00
0.000
0.00
0.415
0.00
0.415
0.00
0.000
0.00
•This procedure is compatible with adding and
subtraction of one or more articles to be weighed.
•In-line discount is not compatible with this procedure.
Effect the following procedure:
1. Place the required article on the platform and select the article
to be fixed.
2. Press SHIFT + 1to increase the price or SHIFT + 3, to
decrease the price of the article.
3. Enter the percentage to be applied, using the number keys.
4. Press the keyof the sales assistant who has made the sale.
2.3.12. Net weight operations
It is possible to work with net weight values associated to each
PLU, either through the corresponding programmable net weight
keys or those obtained through manual net weights. The net
weight is shown at the bottom left corner of the display.
The NET WEIGHT ASSOCIATED TO EACH PLU is programmed
in the net weight field in the PLU creation or modification section.
To work with PROGRAMMABLE NET WEIGHTS, place the
article to be weighed on the platform, select one of the
programmable net weights by pressing SHIFT X and the key of
the desired net weight (1, 2, 3, 4, 5), enter the price and
memorise the weight.
To use the NET WEIGHT KEYS check that they have been
correctly programmed.
To effect MANUAL NET WEIGHT:
1. Place the weight to be fixed as net weight on the platform.
2. Press T/FT.
3. If you wish to fix the net weight, press SHIFT and then T/FT.
4. To cancel the net weight, make sure there is not anything on
the platform, press T/FT.
If the fixed net weight mode is being used, when the
weight is removed from the platform, a negative net weight
value will be shown on the weight display.

USER´S MANUAL
49-U500WMEN11 14
F3
F1
V1
0.205
0.00
0.000
0.00
0.
205
1.00
0.000
0.21
03
–
POTATOES
0.205
0.00
0.000
0.00
POTATOES
0.205
0.60
0.000
0.12
POTATOES
0.435
0.00
0.000
0.00
0.430 1.00
0.000 0.43
01
-
MILK
-
0.435
0.000
0.00
01
-
MILK
-
0.435
0.000
0.00
01
-
MILK
2.3.13. Free price
If you wish to FREE THE PRICE of a product at any time:
1. Check that configuration parameter 323: FREE PRICE has
the default value and place the product on the platform.
2.
The article should have enabled Modify Price.
Press the product
direct keyor enter its code with the number keys.
3. Press F3.
4. Enter the new price and proceed with normal operation for
the product.
2.3.14.Return weight
If you wish to return a product that has already been weighed and
the corresponding amount has been accumulated, the associated
parameter must be set up correctly.Then proceed as follows:
1. Replace the article on the platform.
2. Select the corresponding PLU.
3. Press F1.
4. Press the keyof the corresponding sales assistant.
Check that it is in the corresponding department and be careful to
enter all the digits in the code: code 212 is not the same as 000212
To allow releasing the price, the item selected should be the
"Modify Price" set to "YES "

500 Range
15
F5
T/FT:
SHIFT
◊
◊◊
◊
,
∗
∗∗
∗.
C
0.000 0.00
0.000 0.00
BEST BEFORE
00 / 00 / 0000
360
BATCH N MBER
2.3.15.Best Before*
If in the expiry configuration there is a value set up that allowes
the global expiry date, it will be possible to select the global
temporary expiration data.
To do this:
1. Make sure that the weighing scale is a MASTER and it is in
the working possition.
2. Press F5.
Program the expiration data. The Format of the expiration data
can be changed by pressing T/FT:
- Absolute date in the format dd/mm/yyyy (day/month/year).
-- Number of days from the date of printing the label. .+000
--00:00 hora concreta/ time concrete.
With the Ckey The expiry date is deleted. To save press ∗
∗∗
∗, and
passed to set the expiry global date.
2.3.16.Batch number*
In the Dibal 500 Range scales it is possible to programme a
batch number, which can be alphanumeric with a maximum of ten
digits, in which a global reference to labels of articles may be
assigned when the scales are in label mode.
To programme the batch number press SHIFT ◊
◊◊
◊, and enter the
batch number. By default this value will be the number of days
passed from the beginning of the year, for example batch number
252 will correspond to day9/9.
To exit the data input dialog box, press ∗
∗∗
∗. To delete editing press
C
*According to model.
•Models: W-020, W-025 & M-520,M-525
*According to model.
•Models: W-020, W-025 & M-520,M-525

USER´S MANUAL
49-U500WMEN11 16
◊
◊◊
◊
V1
◊
◊◊
◊
1
V1
S BTOT SALES AS.
0.000
0.00
0.000
0.00
S BTOTAL LEVEL 1
0.000
0.00
0.000
0.00
2.3.17.Totals labels
With this procedure it is possible to issue a label with the totals of
the previously issued labels.
There are two modes of operation:
2.3.17.1 Normal Accumulation Label
After issuing several labels, you can request a label with the totals
of the previous operations. To do this:
1. Working in label mode, Press ◊
◊◊
◊.
2. Press the key of the sales assistant who effected the
operations.
In this case, the totals will be calculated from the labels issued
from this memory key since the last time a totals label was
printed.
2.3.17.2 Totals Label For One Article
The weight and amount values will be accumulated for one
particular code. If a different code is selected, totals accumulated
until then will be reset to zero. To select this accumulation mode,
review parameter . To do this:
1. Press ◊
◊◊
◊.
2. Press the key of the sales assistant who effected the
operations.
2.3.17.3 Totals Levels
The 500 Range scales have three totals levels. When a totals
label is printed for one level, the data automatically accumulates
on the totals label on the next level up.
Each accumulated level has an associated label format and EAN
code format.
To select the totals level, proceed as follows:
1. In label mode, press ◊
◊◊
◊,
2. Press the 123keys to select the level accumulated you
are looking for (level 1 press 1level 2 press 2level 3 press
3)
3. Finally press the sales assistant's key.
If there is not EAN TOTAL CODE defined, is taken the label
default value “Ean-13 format label”
If the article is not changed at accumulation level 1, the label fields
that correspond to the PLU itself (code, name, price, etc.) will
show PLU data.
In this case too (even if the article is not changed) level 1 labels
will show the expiry date even if “One article” is not set to 1 ART
OBL.However, if the article has changed, nothing will be shown in
these fields, except in the name field, which will show
"Accumulated total".
If parameter "One article" has a value of 1 ART OBL, then plu
data will be shown at all levels. Furthermore, in this case, when an
article is changed, the accumulative totals at all three levels will be
deleted.
Other manuals for 500 Series
1
This manual suits for next models
9
Table of contents
Other Dibal Scale manuals
