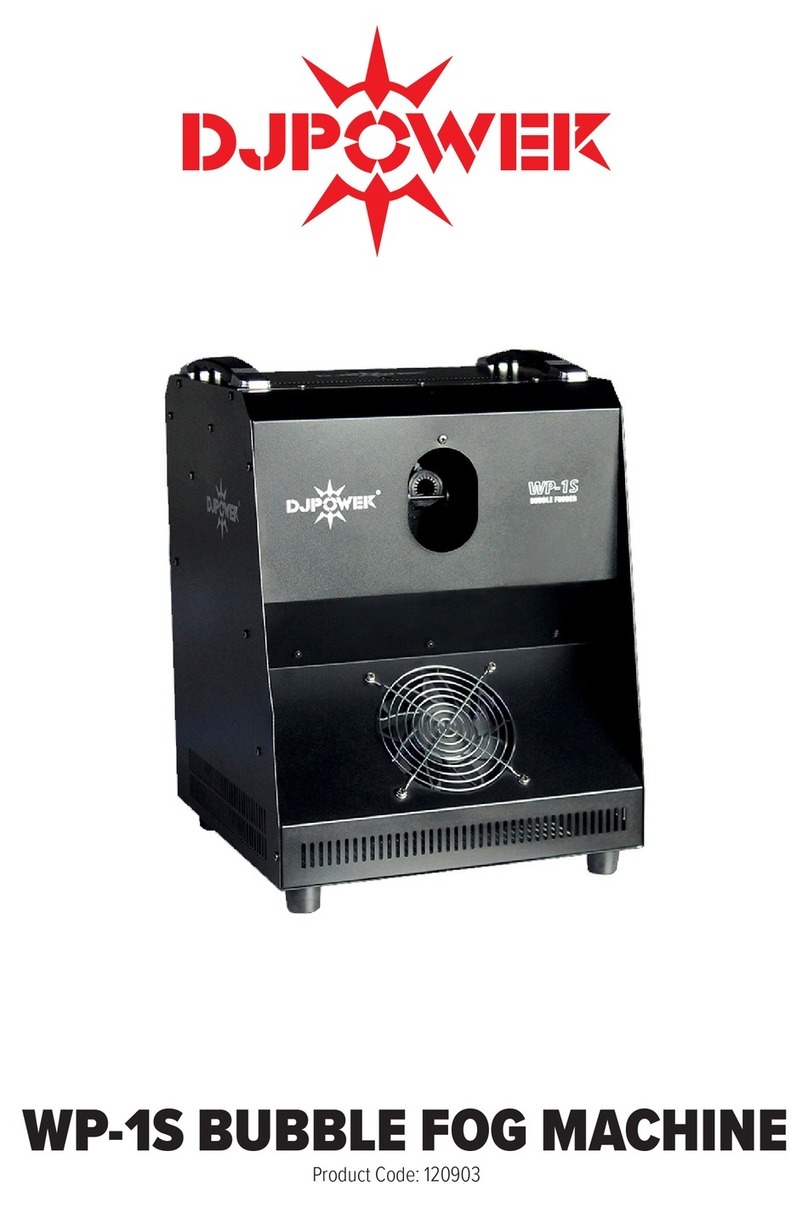
dj power WP-4 User manual

WP-4 BUBBLE FOG MACHINE
Product Code: 120590

2
- 1 -
11BBEEFFOORREE YYOOUU BBEEGGIINN
11..11WWhhaatt IIss IInncclluuddeedd
•WP-4 Super Bubble Fogger × 1
• Power cord × 1
• Warranty card× 1
Optional accessory: Flightcase (Extra charge)
1
1
.
.
2
2
U
U
n
n
p
p
a
a
c
c
k
k
i
i
n
n
g
g
I
I
n
n
s
s
t
t
r
r
u
u
c
c
t
t
i
i
o
o
n
n
s
s
Carefully unpack the product immediately and check the container to make sure all the parts are in the package and are in
good condition.
If the box or the contents (the product and included accessories) appear damaged from shipping, or show signs of
mishandling, notify the carrier or dealer/seller immediately. In addition, keep the box and contents for inspection.
1
1
.
.
3
3
S
S
y
y
m
m
b
b
o
o
l
l
s
s
S
S
y
y
m
m
b
b
o
o
l
l
M
M
e
e
a
a
n
n
i
i
n
n
g
g
C
C
a
a
u
u
t
t
i
i
o
o
n
n
Critical installation, configuration, or operation information. Not following these instructions may
make the product not work, cause damage to the product, or cause harm to the operator.
I
I
m
m
p
p
o
o
r
r
t
t
a
a
n
n
t
t
Important installation or configuration information. Failure to comply with this information may
keep the product from working correctly.
I
I
n
n
f
f
o
o
r
r
m
m
a
a
t
t
i
i
o
o
n
n
Useful information.
1
1
.
.
4
4
D
D
i
i
s
s
c
c
l
l
a
a
i
i
m
m
e
e
r
r
The information and specifications contained in this User Manual are subject to change without notice. DJPOWER assumes
no responsibility or liability for any errors or omissions and reserves the right to revise or to create this manual at any time.
Copyright © 2019 DJPOWER. All rights reserved.
1
1
.
.
5
5
S
S
a
a
f
f
e
e
t
t
y
y
N
N
o
o
t
t
e
e
s
s
Please read the following Safety Notes carefully before working with the product. The notes include important safety
information about installation, usage, and maintenance.

3
- 2 -
11..55..11PPeerrssoonnaallSSaaffeettyy
•
Always connect the product to a grounded circuit to avoid the risk of electrocution.
•Make sure that children, unauthorized people and animals do not obtain access to the machine.
1
1
.
.
5
5
.
.
2
2
M
M
o
o
u
u
n
n
t
t
i
i
n
n
g
g
a
a
n
n
d
d
R
R
i
i
g
g
g
g
i
i
n
n
g
g
•The product is for indoor use! To prevent risk of fire or shock, do not expose the product to rain or moisture.
•CAUTION: When transferring product from extreme temperature environments, (e.g. cold truck to warm humid ballroom)
condensation may form on the internal electronics of the product. To avoid causing a failure, allow product to fully
acclimate to the surrounding environment before connecting it to power.
•Do not mount the product on a flammable surface (linoleum, carpet, wood, paper, carton, plastic, etc.).
•Do not use in a confined space. Always install the product in a location with adequate ventilation, at least 20 in (50 cm)
from adjacent surfaces.
•Be sure that no ventilation slots on the product’s housing are blocked.
•when hanging, please use the safety cables to fix four safety loop on the top cover and two handles on side cover.
1
1
.
.
5
5
.
.
3
3
P
P
o
o
w
w
e
e
r
r
a
a
n
n
d
d
W
W
i
i
r
r
i
i
n
n
g
g
•Always make sure that the voltage of the outlet to which you are connecting the product is within the range stated on the
decal or rear panel of the product.。
• Make sure the power cord is not crimped or damaged.
• Do not connect the machine to the dimming controller or rheostat.
• Never disconnect the product from power cord by pulling or tugging on the cord.
• To eliminate unnecessary wear and improve its lifespan, during periods of non-use completely disconnect the product
from power via breaker or by unplugging it.
1
1
.
.
5
5
.
.
4
4
I
I
n
n
s
s
t
t
a
a
l
l
l
l
a
a
t
t
i
i
o
o
n
n
I
I
n
n
s
s
t
t
r
r
u
u
c
c
t
t
i
i
o
o
n
n
s
s
•Do not operate this product if you see damage to the housing or cables. Have the damaged parts replaced by an
authorized technician at once.
•Make sure there are no flammable materials close to this product while it is operating.
•Do not cover or plug the output nozzle during operation.
•Do not cover the ventilation slots when operating to avoid internal overheating.
•Wipe up spitted fluid immediately. Moisture – also fluid – can destroy the electric.
•Never carry the product by the power cord or any moving part. Always use the handles.
•Empty the storage bin before transporting the product.
4
- 3 -
• The maximum ambient temperature (Ta) is 104 °F (40 °C). Do not operate the product at higher temperatures.
•Drain the tank before transporting the product. Bubble fluid or the fog fluid tanks shall be used for the relevant fluid only.
• Always disconnect the product from the power source before cleaning.
•This product contains no user-serviceable parts. Any reference to servicing in this User Manual will only apply to properly
trained, certified technicians. Do not open the housing or attempt any repairs which can lead to damage or malfunction.
•In the event of a serious operating problem, stop using the product immediately.
• Use only DJPOWER Consumable. Bubble fluid PRO-PW and fog fluid PRO-C are recommended.
P
P
l
l
e
e
a
a
s
s
e
e
s
s
a
a
v
v
e
e
t
t
h
h
i
i
s
s
m
m
a
a
n
n
u
u
a
a
l
l
f
f
o
o
r
r
f
f
u
u
t
t
u
u
r
r
e
e
u
u
s
s
e
e
.
.
W
W
h
h
e
e
n
n
r
r
e
e
s
s
e
e
l
l
l
l
t
t
h
h
e
e
m
m
a
a
c
c
h
h
i
i
n
n
e
e
,
,
b
b
e
e
s
s
u
u
r
r
e
e
t
t
o
o
a
a
t
t
t
t
a
a
c
c
h
h
t
t
h
h
e
e
i
i
n
n
s
s
t
t
r
r
u
u
c
c
t
t
i
i
o
o
n
n
s
s
.
.
2
2
I
I
N
N
T
T
R
R
O
O
D
D
U
U
C
C
T
T
I
I
O
O
N
N
2
2
.
.
1
1
D
D
e
e
s
s
c
c
r
r
i
i
p
p
t
t
i
i
o
o
n
n
TOPCAT WP-4 is a newly launched professional bubble fog machine for big stages and event halls. The 4-nozzle design can
help produce huge amount of bubbles with fog filled inside. Innovative patented Jet-design ensures fog being trapped inside
bubbles, avoids too much fog dispersing in the air. The height and distance of the bubble fog can be adjusted through
changing the air outlet angle. Bubble fluid is well stored and sealed in the tank without going bad even after long time to
ensure high quality show.
2
2
.
.
2
2
F
F
e
e
a
a
t
t
u
u
r
r
e
e
s
s
• Innovative Jet design, create massive amount of fog filled bubbles;
•Well-designed heating system releases the fog evenly and purely, no fluid dropping off;
•Innovative Jet design, create massive amount of fog filled bubbles;
•Three fans with adjustable angles make the fog bubble fly higher, further;
• Built-in LCD control, 3-pin and 5-pin DMX control, easy to use;
• Big size fluid tanks, long running time on full output;
•Please use DJPOWER special bubble fluid PRO-PW and fog fluid PRO-C.
Note: The actual effect may be affected by the using environment.
2
2
.
.
3
3
Product Overview
-
3
-
P
r
o
o
o
d
u
c
t
O
v
e
r
v
rvr
v
v
i
e
w

5
- 4 -
2
2
.
.
4
4
P
P
r
r
o
o
d
d
u
u
c
c
t
t
D
D
i
i
m
m
e
e
n
n
s
s
i
i
o
o
n
n
s
s

6
- 5 -
33TTEECCHHNNIICCAALLSSPPEECCIIFFIICCAATTIIOONN
A
A
C
C
P
P
o
o
w
w
e
e
r
r
I
I
n
n
p
p
u
u
t
t
V
V
o
o
l
l
t
t
a
a
g
g
e
e
&
&
R
R
a
a
t
t
e
e
A
A
C
C
2
2
2
2
0
0
-
-
2
2
4
4
0
0
V
V
,
,
5
5
0
0
/
/
6
6
0
0
H
H
z
z
;
;
A
A
C
C
1
1
1
1
0
0
-
-
1
1
2
2
0
0
V
V
,
,
5
5
0
0
/
/
6
6
0
0
H
H
z
z
Current Limiter Type Breaker
Current Limiter Specifications 8 A, 250 V
Total Power Consumption 1,600 W
H
H
e
e
a
a
t
t
i
i
n
n
g
g
Heat Up Time Appr. 3.5 min
C
C
a
a
p
p
a
a
c
c
i
i
t
t
y
y
Bubble Fluid Tank Capacity 9 L
Fog Fluid Tank Capacity 5 L
O
O
u
u
t
t
p
p
u
u
t
t
Adjustable Output √
Max Fog Output Volume Appr. 6,000 cuft/min
Max Output Height Appr. 10 m
Max Output Distance Appr. 10 m
Fog Fluid Consumption (100% Output)Appr. 90.9 min/L
Bubble Fluid consumption (100% Output) Appr. 12.5 min/L
Consumable Type for Standard Output Test PRO-PW and PRO-C and PRO-J
P
P
l
l
a
a
c
c
e
e
m
m
e
e
n
n
t
t
&
&
M
M
o
o
u
u
n
n
t
t
i
i
n
n
g
g
Horizontal √
Inclined ×
Sidelong ×
Hang Upside Down ×
Rigging & Trussing √
C
C
o
o
n
n
t
t
r
r
o
o
l
l
On-device Manual Control LCD control board
Wireless Control ×
Wired Control ×
Control Protocol DMX512
DMX Channel Range 4
C
C
o
o
n
n
s
s
u
u
m
m
a
a
b
b
l
l
e
e
Consumable PRO-PW & PRO-C & PRO-J
W
W
e
e
i
i
g
g
h
h
t
t
&
&
D
D
i
i
m
m
e
e
n
n
s
s
i
i
o
o
n
n
s
s
Net Weight 40 kg
Gross Weight 45.5 kg
Machine Dimensions 532 × 470 × 557 mm
Packing Dimensions 730 × 590 × 640 mm

7
- 6 -
44SSEETTUUPP
4
4
.
.
1
1
A
A
C
C
P
P
o
o
w
w
e
e
r
r
The machine has two kinds of voltage power supply, it can work with an input voltage of AC 110 V-120 V, 50/60 Hz or AC 220
V-240 V, 50/60 Hz, depending on the specific model.
To determine the product’s power requirements (circuit breaker, power outlet, and wiring), use the current value listed on the
label affixed to the product’s back panel, or refer to the product’s specifications chart. The listed current rating indicates the
product’s average current draw under normal conditions.
A
A
l
l
w
w
a
a
y
y
s
s
c
c
o
o
n
n
n
n
e
e
c
c
t
t
t
t
h
h
e
e
p
p
r
r
o
o
d
d
u
u
c
c
t
t
t
t
o
o
a
a
p
p
r
r
o
o
t
t
e
e
c
c
t
t
e
e
d
d
c
c
i
i
r
r
c
c
u
u
i
i
t
t
(
(
c
c
i
i
r
r
c
c
u
u
i
i
t
t
b
b
r
r
e
e
a
a
k
k
e
e
r
r
o
o
r
r
f
f
u
u
s
s
e
e
)
)
.
.
M
M
a
a
k
k
e
e
s
s
u
u
r
r
e
e
t
t
h
h
e
e
p
p
r
r
o
o
d
d
u
u
c
c
t
t
h
h
a
a
s
s
a
a
n
n
a
a
p
p
p
p
r
r
o
o
p
p
r
r
i
i
a
a
t
t
e
e
e
e
l
l
e
e
c
c
t
t
r
r
i
i
c
c
a
a
l
l
g
g
r
r
o
o
u
u
n
n
d
d
t
t
o
o
a
a
v
v
o
o
i
i
d
d
t
t
h
h
e
e
r
r
i
i
s
s
k
k
o
o
f
f
e
e
l
l
e
e
c
c
t
t
r
r
o
o
c
c
u
u
t
t
i
i
o
o
n
n
o
o
r
r
f
f
i
i
r
r
e
e
.
.
N
N
e
e
v
v
e
e
r
r
c
c
o
o
n
n
n
n
e
e
c
c
t
t
t
t
h
h
e
e
p
p
r
r
o
o
d
d
u
u
c
c
t
t
t
t
o
o
a
a
r
r
h
h
e
e
o
o
s
s
t
t
a
a
t
t
(
(
v
v
a
a
r
r
i
i
a
a
b
b
l
l
e
e
r
r
e
e
s
s
i
i
s
s
t
t
o
o
r
r
)
)
o
o
r
r
d
d
i
i
m
m
m
m
e
e
r
r
c
c
i
i
r
r
c
c
u
u
i
i
t
t
,
,
e
e
v
v
e
e
n
n
i
i
f
f
t
t
h
h
e
e
r
r
h
h
e
e
o
o
s
s
t
t
a
a
t
t
o
o
r
r
d
d
i
i
m
m
m
m
e
e
r
r
c
c
h
h
a
a
n
n
n
n
e
e
l
l
s
s
e
e
r
r
v
v
e
e
s
s
o
o
n
n
l
l
y
y
a
a
s
s
a
a
0
0
t
t
o
o
1
1
0
0
0
0
%
%
s
s
w
w
i
i
t
t
c
c
h
h
.
.
4
4
.
.
2
2
A
A
C
C
P
P
l
l
u
u
g
g
The WP-4 Supper Bubble Fogger comes with a power input cord terminated with a Lockable power connector on one end.
The other end is
• CN plug (CN market, etc.)
• EU plug (EU market, etc.)
• US plug (US market, etc.)
If the power input cord that came with your product has no plug, or if you need the change the plug, use the table below to
wire the new plug:
4
4
.
.
3
3
R
R
e
e
s
s
e
e
t
t
B
B
r
r
e
e
a
a
k
k
e
e
r
r
• The unit is equipped with a resettable breaker. If the breaker trips, the unit will be disconnected from the power.
•Disconnect the machine from the power.
• Wait for about 15 minutes till the unit cools down.
C
C
o
o
n
n
n
n
e
e
c
c
t
t
i
i
o
o
n
n
W
W
i
i
r
r
e
e
(
(
U
U
.
.
S
S
.
.
)
)
W
W
i
i
r
r
e
e
(
(
E
E
u
u
r
r
o
o
p
p
e
e
)
)
A
A
C
C
L
L
i
i
v
v
e
e
Black Brown
A
A
C
C
N
N
e
e
u
u
t
t
r
r
a
a
l
l
White Blue
A
A
C
C
G
G
r
r
o
o
u
u
n
n
d
d
Green/Yellow Green/Yellow

8
- 7 -
• After that, manually press the button of the breaker to reset it.
•Reconnect the machine to the power outlet and continue to use it as recommended.
4
4
.
.
4
4
D
D
M
M
X
X
L
L
i
i
n
n
k
k
i
i
n
n
g
g
You can link the X-7M to a DMX controller using a 3-or 5-pin DMX connection. If using other DMX-compatible products with
this product, you can control each individually with a single DMX controller. Instructions for connecting and configuring this
product for DMX operation are in the User Manual.
4
4
.
.
5
5
M
M
o
o
u
u
n
n
t
t
i
i
n
n
g
g
Before mounting the product, read and follow the safety recommendations indicated in the Safety Notes.
4
4
.
.
5
5
.
.
1
1
O
O
r
r
i
i
e
e
n
n
t
t
a
a
t
t
i
i
o
o
n
n
For safety reasons, make sure the unit is well mounted through bracket and with safety cable. Also make sure there is
adequate room for ventilation, configuration, and maintenance.
Do not mix bubble fluid and fog fluid.
4
4
.
.
5
5
.
.
2
2
R
R
i
i
g
g
g
g
i
i
n
n
g
g
Using the following general guidelines when mounting this product:
•Before deciding on a location for the product, make sure there is easy access to the product for maintenance and
programming purposes.
•Make sure that the structure or surface onto which you are mounting the product can support the product’s weight (see
the Technical Specifications).
•When mounting the product on the floor, make sure that the product and cables are away from people and vehicles.

9
- 8 -
55OOPPEERRAATTIIOONN
5
5
.
.
1
1
P
P
r
r
e
e
p
p
a
a
r
r
i
i
n
n
g
g
f
f
o
o
r
r
O
O
p
p
e
e
r
r
a
a
t
t
i
i
o
o
n
n
• After checking that all the parts are intact and complete, position the machine on flat.
• Withdraw the fluid tank from its compartment and remove its cap. Add bubble fluid and fog fluid to the specified tank.
•Verify that the plastic hoses attached to the cap are in place and in good condition without bending or warp.
•Always connect the product to a grounded circuit. Before power on, make sure it is connected with the rated voltage.
•Turn on the machine, and “ Warming up”shows on the display during the heating-up process. After approx. 3 minutes,
the display changes to “Ready to work” when the machine finishes heating.
5
5
.
.
2
2
O
O
n
n
-
-
d
d
e
e
v
v
i
i
c
c
e
e
C
C
o
o
n
n
t
t
r
r
o
o
l
l
M
M
o
o
d
d
e
e
&
&
O
O
p
p
e
e
r
r
a
a
t
t
i
i
o
o
n
n
To access the control panel functions, use the four buttons located underneath the LCD display.
B
B
u
u
t
t
t
t
o
o
n
n
F
F
u
u
n
n
c
c
t
t
i
i
o
o
n
n
<
<
M
M
E
E
N
N
U
U
>
>
Switch menu pages to select a function
▲<TIMER> Increases the numeric value of current function
Trigger TMER output mode
▼
▼
<VOLUME> Decreases the numeric value of current function
Trigger Manual output mode
<
<
E
E
N
N
T
T
E
E
R
R
>
>
<STOP> Save settings
STOP turns the fog output off
5
5
.
.
2
2
.
.
1
1
M
M
e
e
n
n
u
u
M
M
a
a
p
p
D
D
i
i
s
s
p
p
l
l
a
a
y
y
D
D
e
e
s
s
c
c
r
r
i
i
p
p
t
t
i
i
o
o
n
n
P
P
a
a
r
r
a
a
m
m
e
e
t
t
e
e
r
r
R
R
a
a
n
n
g
g
e
e
S
S
t
t
a
a
n
n
d
d
b
b
y
y
p
p
a
a
g
g
e
e
Warming Up
>>>>>>>>>>>
The unit is heating.

10
- 9 -
5
5
.
.
3
3
D
D
M
M
X
X
M
M
o
o
d
d
e
e
&
&
O
O
p
p
e
e
r
r
a
a
t
t
i
i
o
o
n
n
WP-4 Super Bubble Fogger works with a DMX controller.
• Connect the product to a suitable power outlet.
• Turn the product on.
• Connect a DMX cable from the DMX output of the DMX controller to the DMX input socket on the product.
Ready To Work
TOPCAT WP-4
After about 3 minutes heating, it will show this page.That
means the fog system finishes heating, and the unit is
ready to emit haze.
Setting
Pages
Interval Set
10S
Press ▲and ▼button to set interval under TIMER mode. 5-200s
Duration Set
10S
Press ▲and ▼button to set duration under TIMER mode. 5-200s
Bubble Output
ON
Press ▲and ▼button to set bubble output. ON/OFF
Haze Output
100%
Press ▲and ▼button to set haze output. 1%-100%/OFF
Fan Speed
100%
Press ▲and ▼button to set fan speed. 1%-100%/OFF
DMX512 Address
1
Press ▲and ▼button to set DMX starting address. 1 - 512
Clean Mode
OFF
Press U
U
P
P
or D
D
O
O
W
W
N
N
to set cleaning mode
ON/OFF.
(When cleaning mode is ON, it will override all the other
functions. Default cleaning time is 1 minute without
turning of the mode manually.)
ON/OFF
W
W
o
o
r
r
k
k
i
i
n
n
g
g
S
S
t
t
a
a
t
t
u
u
s
s
P
P
a
a
g
g
e
e
Working
TOPCAT WP-4
This is the page shows when the unit is working.

11
- 10 -
5
5
.
.
3
3
.
.
1
1
D
D
M
M
X
X
W
W
o
o
r
r
k
k
i
i
n
n
g
g
P
P
a
a
g
g
e
e
S
S
t
t
a
a
n
n
d
d
b
b
y
y
a
a
n
n
d
d
s
s
e
e
t
t
u
u
p
p
p
p
a
a
g
g
e
e
DMX Address
1
P
P
r
r
e
e
s
s
s
s
i
i
n
n
g
g
“
“
▲
▲
”
”
o
o
r
r
“
“
▼
▼
“
“
t
t
o
o
s
s
e
e
t
t
t
t
h
h
e
e
D
D
M
M
X
X
s
s
t
t
a
a
r
r
t
t
i
i
n
n
g
g
a
a
d
d
d
d
r
r
e
e
s
s
s
s
1 - 512
When setting the DMX starting address, the number of channels occupied by the DMX mode
must be considered. If the starting address is too high, some channels may not be controlled.
In DMX mode, each machine responds to the control of the DMX controller through its own unique
starting address. Machines with the same starting address will be synchronized accordingly.
When connected with DMX controller and receiving DMX signal, the LCD display will always
show current DMX starting address which can be reset by pressing “▲”or “▼“.
5
5
.
.
3
3
.
.
2
2
D
D
M
M
X
X
C
C
h
h
a
a
n
n
n
n
e
e
l
l
A
A
s
s
s
s
i
i
g
g
n
n
m
m
e
e
n
n
t
t
s
s
a
a
n
n
d
d
V
V
a
a
l
l
u
u
e
e
s
s
WP-4 Super Bubble Fogger has 4DMX channelsand can be connected by 3-pin or 5-pin DMX sockets. Set the DMX start
address within the range of 001-512, you can independently control 512pcs devices with one DMX channel.
C
C
h
h
a
a
n
n
n
n
e
e
l
l
F
F
u
u
n
n
c
c
t
t
i
i
o
o
n
n
V
V
a
a
l
l
u
u
e
e
D
D
e
e
s
s
c
c
r
r
i
i
p
p
t
t
i
i
o
o
n
n
1
1
Bubble Output
0-10 OFF
11-255 ON
2
2
Fog Output
0-10 OFF
11-255 Fog volume, low to high
3
Wind Output
0-10 OFF
11-255 Fan speed, low to high
4
Bubble cleaning mode
0-10 OFF
11-255 When Bubble cleaning mode is ON,overriding other
functions
6
6
T
T
E
E
C
C
H
H
N
N
I
I
C
C
A
A
L
L
I
I
N
N
F
F
O
O
R
R
M
M
A
A
T
T
I
I
O
O
N
N
6
6
.
.
1
1
M
M
a
a
i
i
n
n
t
t
e
e
n
n
a
a
n
n
c
c
e
e
Do not allow the WP-4 to become clogged due to the sticky bubble fluid. Cleaning and maintenance are necessary.
The recommended cleaning procedure is as follows.

-11 -
1) Unplug the product from power.
2) Empty bubble fluid from the machine.
3) Add water to the bubble fluid tank.
4) Connect the product to power and allow it to warm up. Run the Cleaning Mode through Menu or DMX. Thoroughly rinse
the Bubble fluid reservoir and fluid tube.
5) Run the product in a well-ventilated area.Do not allow the pump to run dry.
6) Excessive dust, fluid residue and dirt will degrade performance and cause overheating. Remove dust from air vents with air
compressor, vacuum or soft brush. The casing could be cleaned by the damp cloth.
7) Restore the hoses and cap. Store the unit until next use.
Note:The default cleaning time is 1 minute. Without turning of the cleaning mode manually, it will shut of automatically after 1
minute.
Test-run your TOPCAT® WP-4 on a monthly basis to achieve the best performance.
6
6
.
.
2
2
S
S
t
t
o
o
r
r
a
a
g
g
e
e
Before storing the machine, clean it and empty the fluid tank.
12

13

- 1 -
1VOR DEM START
1.1 Lieferumfang
•WP-4 Super Bubble Fogger × 1
•Power cord × 1
•Warranty card× 1
Optionales Zubehör: Flightcase
1.2 Auspacken
Packen Sie das Produkt sofort vorsichtig aus und überprüfen Sie den Behälter, um sicherzustellen, dass alle
Teile in der Verpackung und in gutem Zustand sind. Wenn der Karton oder der Inhalt (das Produkt und das
mitgelieferte Zubehör) durch den Versand beschädigt zu sein scheinen oder Anzeichen einer unsachgemäßen
Handhabung aufweisen, benachrichtigen Sie unverzüglich den Spediteur oder Händler/Verkäufer. Bewahren
Sie außerdem den Karton und den Inhalt zur Kontrolle auf.
1.3 Symbole
Symbol
Meaning
Achtung
Kritische Installations-, Konfigurations-
oder Betriebsinformationen. Die
Nichtbeachtung dieser Anweisungen kann dazu führen, dass das Produkt nicht
funktioniert, das Produkt beschädigt oder der Bediener verletzt wird.
Wichtig
Wichtige Installations-oder Konfigurationsinformationen. Die Nichtbeachtung dieser
Informationen kann dazu führen, dass das Produkt nicht ordnungsgemäß
funktioniert.
Information
Nützliche Information
1.4 Haftungsausschuss
Die in diesem Benutzerhandbuch enthaltenen Informationen und Spezifikationen können ohne
Vorankündigung geändert werden. DJPOWER übernimmt keine Verantwortung oder Haftung für Fehler oder
Vollstädigkeit und behält sich das Recht vor, dieses Handbuch jederzeit zu überarbeiten oder zu erstellen.
Copyright © 2018 DJPOWER. All rights reserved.
1.5 Sicherheitshinweise
Bitte lesen Sie die folgenden Sicherheitshinweise sorgfältig durch, bevor Sie mit dem Produkt arbeiten. Die
Hinweise enthalten wichtige Sicherheitsinformationen zur Installation, Verwendung und Wartung.
14

- 2 -
1.5.1 Persönliche Sicherheit
• Schließen Sie das Produkt immer an einen geerdeten Stromkreis an, um die Gefahr eines Stromschlags zu
vermeiden.
• Stellen Sie sicher, dass Kinder, unbefugte Personen und Tiere keinen Zugang zur Maschine erhalten.
1.5.2 Mounting and Rigging
•Dieses Produkt ist für die Verwendung im Innenbereich gedacht. Nicht in Nassen oder feuchten Umgebungen verwenden
•VORSICHT: Wenn das Produkt aus Umgebungen mit extremen Temperaturen transportiert wird (z. B. von einem kalten Lastwagen
in einen warmen, feuchten Ballsaal), kann sich auf der internen Elektronik des Produkts Kondenswasser bilden. Um einen Ausfall zu
vermeiden, warten Sie, bis sich das Produkt vollständig an die Umgebung akklimatisiert hat, bevor Sie es an die Stromversorgung
anschließen.
•Montieren Sie das Produkt nicht auf einer brennbaren Oberfläche (Linoleum, Teppich, Holz, Papier, Karton, Kunststoff usw.).
•Nicht in geschlossenen Räumen verwenden. Installieren Sie das Produkt immer an einem Ort mit ausreichender Belüftung,
mindestens 50 cm (20 Zoll) von angrenzenden Oberflächen entfernt.
•Stellen Sie sicher, dass keine Lüftungsschlitze am Gehäuse des Produkts blockiert
•Wenn Sie das Produkt fliegen nutzen Sie bitte ein Sicherheitsseil um das Gerät doppelt zu sichern.
1.5.3 Leistung und Anschluss
• Stellen Sie immer sicher, dass die Spannung der Steckdose, an die Sie das Produkt anschließen, innerhalb des Bereichs liegt, der auf
dem Aufkleber oder der Rückseite des Produkts angegeben ist.
• Stellen Sie sicher, dass das Netzkabel nicht geknickt oder beschädigt ist.
• Schließen Sie dieses Produkt niemals an ein Dimmerpack oder ähnliches an.
• Trennen Sie das Produkt niemals vom Netzkabel, indem Sie den Stecker am Gerät oder am Kabel ziehen.
• Um unnötigen Verschleiß zu vermeiden und die Lebensdauer zu verlängern, trennen Sie das Produkt in Zeiten der Nichtbenutzung
vollständig von der Stromversorgung über einen Trennschalter oder durch Ziehen des Netzsteckers.
1.5.4 Bedienung
• Betreiben Sie dieses Produkt nicht, wenn Sie Schäden am Gehäuse oder an den Kabeln sehen. Lassen Sie die beschädigten Teile
sofort von einem autorisierten Techniker ersetzen.
• Stellen Sie sicher, dass sich keine brennbaren Materialien in der Nähe dieses Produkts befinden, während es in Betrieb ist.
• Verdecken oder verschließen Sie die Düse während des Betriebs nicht.
• Verwenden Sie das Produkt nicht als Raumheizung.
• Tragen Sie das Produkt niemals am Netzkabel oder an beweglichen Teilen. Verwenden Sie immer die Griffe.
• Entleeren Sie den Tank, bevor Sie das Produkt transportieren.
• Die maximale Umgebungstemperatur (Ta) beträgt 40 °C (104 °F). Betreiben Sie das Produkt nicht bei höheren Temperaturen.
• Trennen Sie das Produkt vor der Reinigung immer von der Stromquelle.
• Dieses Produkt enthält keine vom Benutzer zu wartenden Teile. Alle Maßnahmen zur Wartung in diesem Benutzerhandbuch gelten
nur für ordnungsgemäß ausgebildete, zertifizierte Techniker. Öffnen Sie nicht das Gehäuse und versuchen Sie keine Reparaturen,
die zu Schäden oder Fehlfunktionen führen können.
• Stellen Sie im Falle eines schwerwiegenden Betriebsproblems die Verwendung des Produkts sofort ein.
• Verwenden Sie nur DJPOWER Nebelfluid PRO-PW/PRO-C
15

- 3 -
Bewahren Sie dieses Benutzerhandbuch für die zukünftige Verwendung auf. Wenn Sie das Produkt verkaufen, stellen Sie
sicher, dass der Käufer dieses Dokument erhält.
2EINFÜHRUNG
2.1 Beschreibung
TOPCAT WP-4 ist eine neu eingeführte professionelle Bubble-Nebelmaschine für große Bühnen und Veranstaltungshallen. Das 4-Düsen-
Design kann dazu beitragen, eine große Menge an Blasen mit darin gefülltem Nebel zu erzeugen. Das innovative patentierte Jet-Design
sorgt dafür, dass Nebel in Blasen eingeschlossen wird und verhindert, dass sich zu viel Nebel in der Luft verteilt. Höhe und Abstand des
Blasennebels lassen sich durch Veränderung des Luftaustrittswinkels einstellen. Bubble Fluid wird gut gelagert und im Tank versiegelt,
ohne auch nach langer Zeit schlecht zu werden, um eine qualitativ hochwertige Show zu gewährleisten.
2.2 Eigenschaften
•Innovatives Jet-Design, erzeugt eine riesige Menge an nebelgefüllterSeifenblasen;
•Gut durchdachtes Heizsystem gibt den Nebel gleichmäßig und rein ab, kein Abtropfen von Flüssigkeit;
•Drei Ventilatoren mit einstellbaren Winkeln lassen die Nebelblase höher und weiter fliegen;
•Eingebaute LCD-Steuerung, 3-polige und 5-polige DMX-Steuerung, einfach zu bedienen;
•Große Flüssigkeitstanks, lange Laufzeit bei voller Leistung;
•Bitte verwenden Sie DJPOWER Spezial Bubble Fluid PRO-PW und Nebelfluid PRO-C.
Hinweis: Der tatsächliche Effekt kann durch die Nutzungsumgebung beeinflusst werden.Product Overview
-
3
-
16

- 4 -
2.3 Produktmaße
3TECHNISCHE SPEZIFIKATIONEN
Leistung
Eingangsspannung AC 220-240 V, 50/60 Hz;
;
AC 110-120 V, 50/60 Hz
Sicherungsart
Breaker
Sicherungsspezifikationen
8 A, 250 V
Gesamte Lastaufnahme
1,600 W
Aufheizen
Aufheizzeit
Ca. 3.5 min
Volumen
Seifenblasenfluid Tankvolumen
9 L
Nebelfluid Tankvolumen
5 L
Ausstoß
Anpassbarer Ausstoß
√
Max Nebelausstoß
Ca. 6,000 cuft/min
Max Ausstoßhöhe
Ca . 10 m
Max Ausstoßweite
Ca . 10 m
Nebelfluidverbrauch (100% Output)Ca . 90.9 min/L
Seifenblasenfluidverbrauch (100% Output)
Ca . 12.5 min/L
Passende Fluidsorten
PRO-PW ,PRO-C und PRO-J
Anbringung
Horizontal
√
Geneigt
×
Liegend
×
Überkopf
×
Rigging & Trussing
√
Bedienung
Manuelle Bedienung am Gerät
LCD control board
Fernbedienung
×
Kabelfernbedienung
×
17

- 5 -
4INBETRIEBNAHME
4.1 Stromzufuhr
Die Maschine verfügt über zwei Arten der Spannungsversorgung, sie kann je nach Modell mit einer Eingangsspannung von AC 110 V-120
V, 50/60 Hz oder AC 220 V-240 V, 50/60 Hz arbeiten.
Um den Strombedarf des Produkts (Schutzschalter, Steckdose und Verkabelung) zu bestimmen, verwenden Sie den Stromwert, der auf
dem Etikett auf der Rückseite des Produkts angegeben ist, oder sehen Sie in der Spezifikationstabelle des Produkts nach. Die aufgeführte
Nennstromstärke gibt die durchschnittliche Stromaufnahme des Produkts unter normalen Bedingungen an.
Schließen Sie das Produkt immer an einen geschützten Stromkreis (Leistungsschalter oder Sicherung) an. Stellen Sie
sicher, dass das Produkt über eine geeignete elektrische Erdung verfügt, um die Gefahr eines Stromschlags oder Feuers zu
vermeiden.
Schließen Sie das Produkt niemals an einen Rheostat (variabler Widerstand) oder einen Dimmerkreis an, selbst wenn der
Rheostat oder der Dimmerkanal nur als 0-bis 100-%-Schalter dient.
4.2 Stromanschluss
Der WP-4 Supper Bubble Fogger wird mit einem Stromeingangskabel geliefert, das an einem Ende mit einem abschließbaren
Stromanschluss abgeschlossen ist. Das andere Ende ist ein EU Stecker.
Wenn das mit Ihrem Produkt gelieferte Netzkabel keinen Stecker hat oder Sie den Stecker austauschen müssen, verwenden Sie die
folgende Tabelle, um den neuen Stecker anzuschließen:
4.3 Sicherung zurücksetzen
• Das Gerät ist mit einerrücksetzbaren Sicherung ausgestattet. Wenn die Sicherung auslöst, wird das Gerät von der Stromversorgung
getrennt.
• Trennen Sie die Maschine vom Strom.
• Warten Sie etwa 15 Minuten, bis das Gerät abgekühlt ist.
• Drücken Sie danach manuell die Taste der Sicherung, um Sie zurückzusetzen.
• Schließen Sie das Gerät wieder an das Stromnetz an und verwenden Sie es wie gewohnt weiter.
Steuerprotokoll
DMX512
DMX Kanäle
4
Verbrauchsmaterial
Passende Fluide
PRO-PW & PRO-C & PRO-J
Gewicht und Maße
Netto Gewicht
40 kg
Brutto Gewicht
45.5 kg
Maße Gerät
532 × 470 × 557 mm
Maße Verpackung
730 × 590 × 640 mm
Leitung
Kabel
Phase
Braun
Neutral
Blau
Erdung
Grün
18

- 6 -
4.4 DMX Verbindung
Sie können die WP-4 über eine 3-oder 5-polige DMX-Verbindung mit einem DMX-Controller verbinden. Wenn Sie andere DMX-
kompatible Produkte mit diesem Produkt verwenden, können Sie jedes einzeln mit einem einzigen DMX-Controller steuern.
Anweisungen zum Anschließen und Konfigurieren dieses Produkts für den DMX-Betrieb finden Sie im Benutzerhandbuch.
4.5 Installation
Lesen und befolgen Sie vor der Montage des Produkts die Sicherheitshinweise in den Sicherheitshinweisen.
4.5.1 Orientierung
Stellen Sie aus Sicherheitsgründen sicher, dass das Gerät gut durch die Halterung montiert und mit Sicherheitskabel gesichert ist. Stellen
Sie außerdem sicher, dass ausreichend Platz für Belüftung, Konfiguration und Wartung vorhanden ist.
Nicht Seifenblasenfluid mit Nebelfluid mischen.
4.5.2 Rigging
Beachten Sie bei der Montage dieses Produkts die folgenden allgemeinen Richtlinien:
•Bevor Sie sich für einen Standort für das Produkt entscheiden, vergewissern Sie sich, dass das Produkt für Wartungs-und
Programmierzwecke leicht zugänglich ist.
•Stellen Sie sicher, dass die Struktur oder Oberfläche, auf der Sie das Produkt montieren, das Gewicht des Produkts tragen kann
(siehe Technische Daten).
•Stellen Sie bei der Montage des Produkts auf dem Boden sicher, dass sich das Produkt und die Kabel nicht in der Nähe von Personen
und Gegenständen befinden.
5BETRIEB
5.1 Vorbereitung für den Betrieb
•Nachdem Sie überprüft haben, dass alle Teile intakt und vollständig sind, stellen Sie die Maschine flach auf.
•Ziehen Sie den Flüssigkeitsbehälter aus seinem Fach und entfernen Sie seinen Deckel. Füllen Sie Seifenblasen-und Nebelfluid in den
angegebenen Tank.
•Vergewissern Sie sich, dass die an der Kappe befestigten Kunststoffschläuche richtig sitzen und in gutem Zustand sind, ohne sich zu
verbiegen oder zu verziehen.
•Schließen Sie das Produkt immer an einen geerdeten Stromkreis an. Stellen Sie vor dem Einschalten sicher, dass es mit der
Nennspannung verbunden ist.
19

- 7 -
•• Schalten Sie das Gerät ein und während des Aufheizvorgangs wird „ Warming up“ auf dem Display angezeigt. Nach ca. 3 Minuten
wechselt die Anzeige auf „Arbeitsbereit“, wenn die Maschine fertig aufgeheizt ist.
5.2 Bedienung am Gerät und Betrieb
Um auf die Funktionen des Bedienfelds zuzugreifen, verwenden Sie die vier Tasten unter dem LCD-Display.
Knopf
Funktion
<MENU>
Menüseiten wechseln, um eine Funktion auszuwählen
▲<TIMER>
Wert der aktuellen Funktion erhöhen
TMER Ausstoß Modus auslösen
▼<VOLUME>
Wert der aktuellen Funktion verringern
Manuellen Ausstoß auslösen
<ENTER> <STOP>
Einstellungen speichern
STOP hält den Ausstoß an
5.2.1 Menü
Display
Beschreibung
Parameter
Standby
page
Warming Up
>>>>>>>>>>>
Das Gerät heizt auf.
Ready To Work
TOPCAT WP-4
Nach etwa 3 Minuten Aufheizen wird diese Seite angezeigt.
Das bedeutet, dass das Nebelsystem das Aufheizen beendet
hat und das Gerät bereit ist.
Einstellungs
Seiten
Interval Set
10S
Drücke ▲und ▼um das Interval des TIMER Modus
festzulegen 5-200s
Duration Set
10S
Drücke ▲und ▼um das Dauer des TIMER Modus festzulegen 5-200s
Bubble Output
ON
Drücke ▲und ▼um das Seifenblasen Interval des TIMER
Modus festzulegen ON/OFF
20
This manual suits for next models
1
Table of contents
Languages:
Other dj power Fog Machine manuals

dj power
dj power H-SW3000 User manual

dj power
dj power DSK-1000V User manual

dj power
dj power H-6 User manual

dj power
dj power DSK-3000 User manual

dj power
dj power DJV DF-V9C User manual

dj power
dj power WP-1S User manual

dj power
dj power 102630 User manual

dj power
dj power DJV DF-V6C User manual

dj power
dj power DJV STAGEEFFECTS F-650 User manual

dj power
dj power djV PT-1500 User manual