
2©2023 DJI All Rights Reserved.
EN
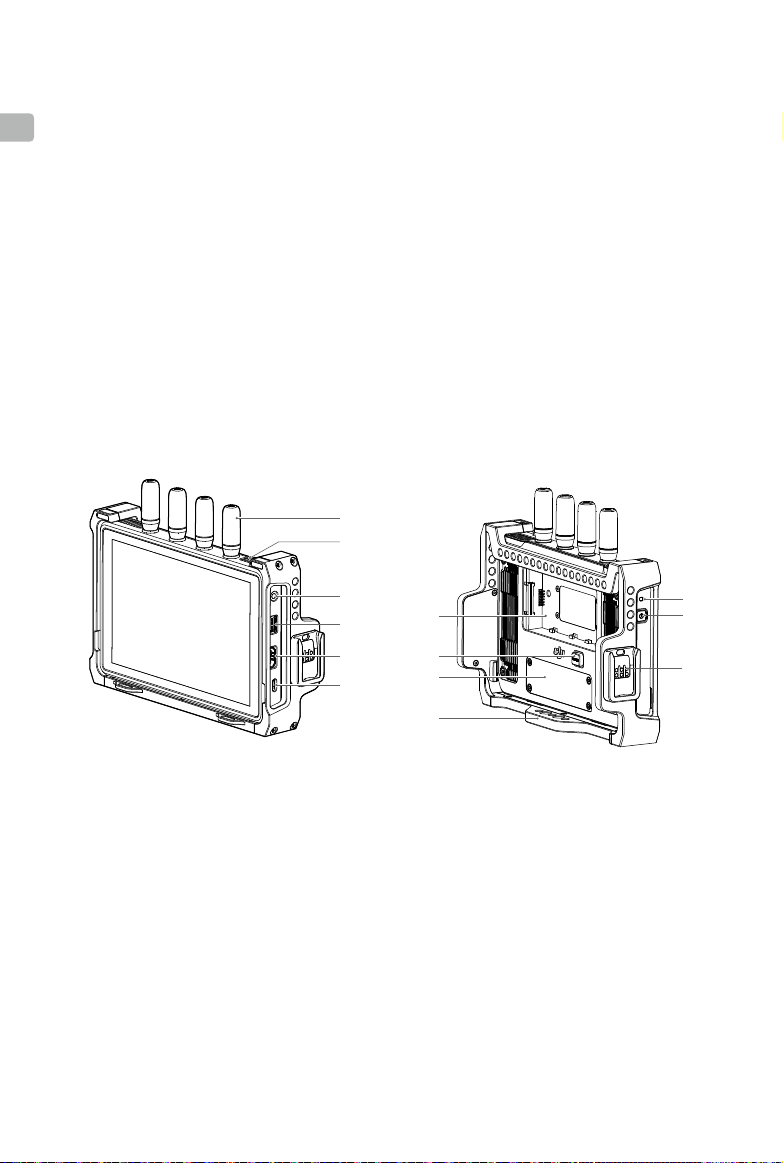
6. USB-C Port
Connect to the DJI Assistant 2 (Ronin Series) software using a USB-C cable for device
activation and firmware update. The video stream from the monitor can be used as a
webcam input when connecting to a computer. It is required to set the usage of the USB-C
port in the Input & Output Settings on the monitor before use.
7. Power Indicator
The indicator will light up when powered on and will turn o when powered o.
8. Power Button
Press once to power on. When powered on, press the power button once to turn o the
screen display. Press again to turn it on. Press the power button twice to lock the touch
screen and all touch operations will be disabled. Press twice again to unlock the touch
screen.
9. Battery Slot
The WB37 Intelligent Battery is used for power supply by default. The NP-F series batteries
can be used for power supply when the NP-F battery adapter is mounted.
10. WB37 Battery Release Button
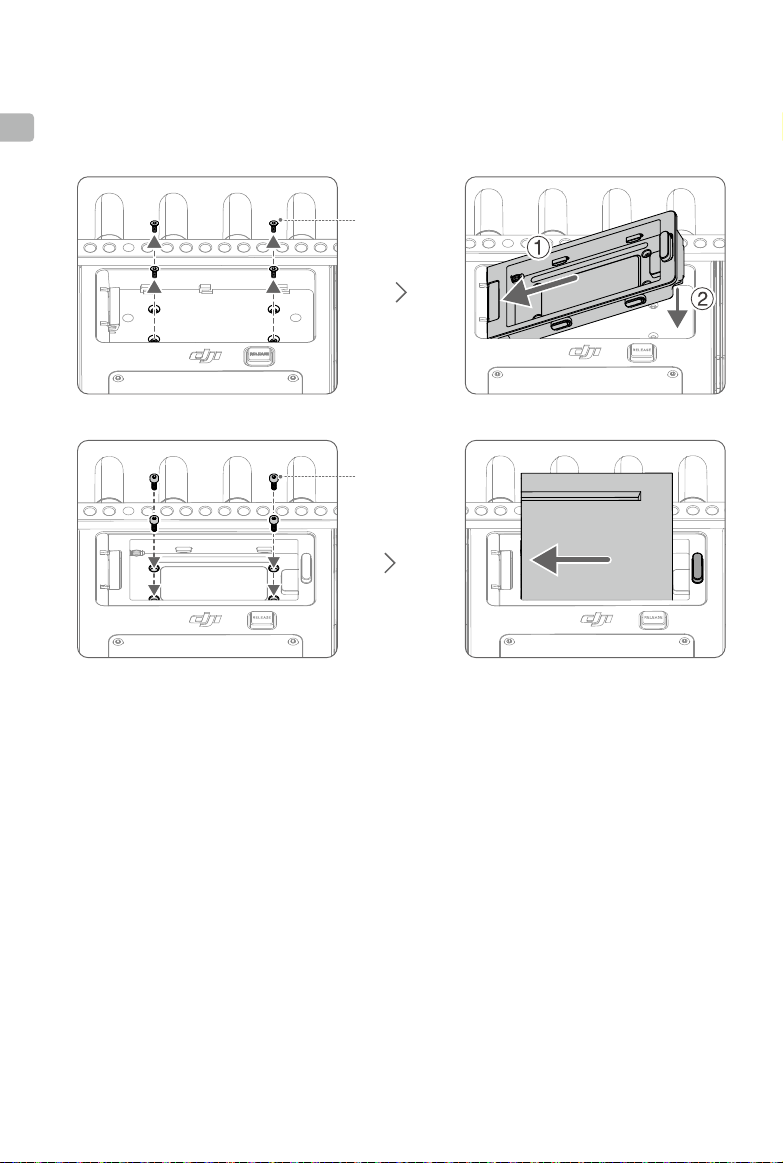
11. Expansion Plate Port Cover
The expansion plate port under the cover is used to mount the remote monitor expansion
plate to expand the DC and CAN input and HDMI and SDI output.
12. Expansion-Protective Frame
Accessories can be mounted to the expansion-protective frame using the 1/4″ screw holes,
1/8″ screw holes, and hand grips port (13 on overview illustration).
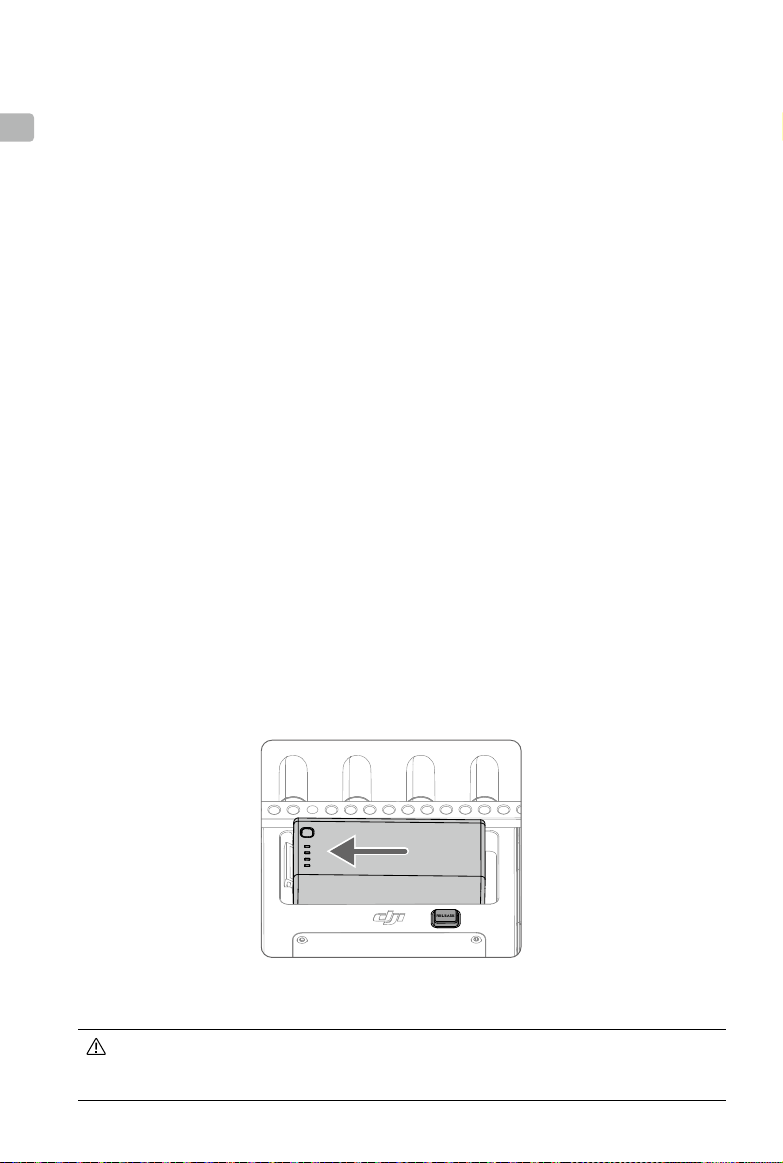
Mounting/Removing the Battery
Before rst use, activate the WB37 battery by charging with the WB37 Battery Charging Hub
(USB-C). Refer to the WB37 Battery Charging Hub (USB-C) User Guide for more information.
1. Insert the WB37 battery into the battery slot and push it to the end. Make sure that the WB37
battery release button pops up, indicating the battery is rmly in place.
Press and hold the WB37 battery release button and push the battery in the opposite direction
to remove it.
Make sure to use the WB37 battery within the operating temperature range. DO NOT disassemble
or pierce a battery in any way or it may leak, catch re, or explode. Refer to the WB37 Intelligent
Battery Safety Guidelines for more information.


 User manual")


