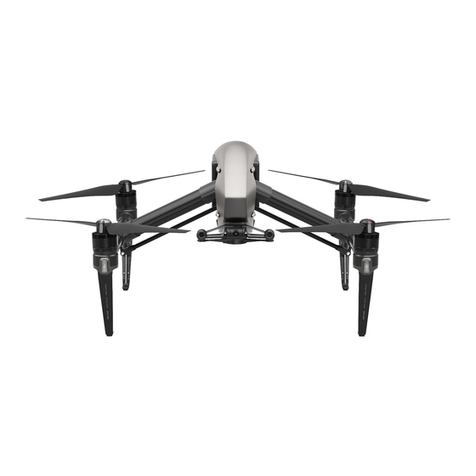
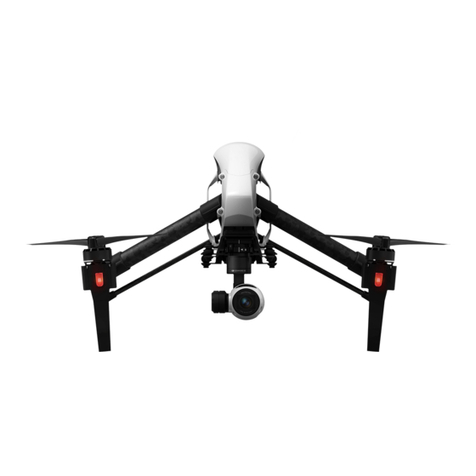
dji INSPIRE 2 User manual

Quick Start Guide
快速入门指南
INSPIRE 2
V1.0

3
EN
Inspire 2
The INSPIRETM 2 is a powerful aerial film making system with class leading agility and speed, redundancy
features for maximum reliability, and new, smart features that make capturing complex shots easy. A new
airframe design together with dual batteries boost ight time to 25* minutes and ight speed to 108kph*.
The camera unit is now independent from image processor so that you have the exibility to choose the perfect
gimbal and camera** system for each of your scenes. This means that regardless of which camera you choose,
you have the same powerful processing backing it, and when using the Zenmuse X5S, the ability to capture
RAW videos.
1. FPV Camera
2. Forward Vision System
3. DJITM Gimbal Connector
V2.0 (DGC2.0)
4. Gimbal and Camera
Detach Button
5. Downward Vision System
6. Extended Device Mounting
Position
7. Transformation Mechanism
8. Control and Processing
Center (with SD Card Slot)
9. Front LEDs
* Maximum ight speed and run time are tested in a lab environment. Performance may vary depending on local conditions.
** Gimbal and camera purchased separately on the ofcial DJI Online Store.
*** Lossless video (in CinemaDNG and ProRes format), and DNG RAW photo burst shooting will be available when DJI CINESSD used. Purchase the
DJI CINESSD and DJI CINESSD STATION separately on the ofcial DJI Online Store.
Travel Mode
Flight Mode
Landing
Gear Down
Landing Mode
Landing
Gear Up
10. Propulsion System (with
Motors, Propellers, etc.)
11. Rear LEDs
12. Intelligent Flight Batteries
13. Power Button
14. Battery Level Indicators
15. Battery Remove Button
16. Upward Infrared Sensor
17. Aircraft Status Indicator
18. DJI CINESSDTM Slot***
19. Linking Button
20. USB Mode Switch
21. USB Port
19
2
0
21
1
11
12
2
5
10
9
7
6
13
14
16
15
18
17
3
4
8

4
EN
10
4
9
8
5
6
1
3
7
2
Remote Controller
The Inspire 2 remote controller features DJI’s LIGHTBRIDGETM technology for a maximum transmission distance
of up to 4.3 mi (7km)*. While ying the aircraft, you have a live HD view directly within the DJI GOTM 4 app on your
paired device for a precise and responsive ying experience. When in dual remote controller mode, each of the
two remote controllers separately control aircraft and camera and can be up to 328 feet (100m) apart.
The maximum run-time of the remote controller’s LiPo battery is approx. four hours**.
11. Control Dial (Gimbal/FPV/Zoom)
12. Camera Settings Dial
13. Record Button
14. Flight Mode Switch
15. Shutter Button
16. Pause Button
17. Micro USB Port
18. CAN Bus (Extended Port)
19. HDMI A Port (for Video Output)
20. USB Port (for Mobile Device Connection)
21. C1 Button
22. C2 Button
1. Power Button
2. Transformation Switch
3. Return-to-Home (RTH) Button
4. Control Sticks
5. Status LED
6. Battery Level LEDs
7. Power Port
8. Mobile Device Holder
9. Antennas
10. Handle Bar
Folded
Connect your
mobile device
* The remote controller is able to reach its maximum transmission distance (FCC) in a wide open area with no Electro-Magnetic interference, and
at an altitude of about 400 feet (120 meters).
** Maximum run-time is tested without supplying power for the external mobile device.
17 18 19 20
11
14
13
12
1615
2221

5
EN
Basic Knowledge
Fly Safe
DJI encourages you to enjoy ying in a safe, responsible and smart way.
DO NOT FLY near or above people,
near trees, power lines or buildings.
DO MONITOR YOUR ALTITUDE
and y under 400 feet
(120 meters).
DO NOT FLY in rain, snow, fog, and wind
speeds exceeding 22 mph or 10 m/s.
DO MAINTAIN LINE OF SIGHT
and avoid ying behind buildings
or obstacles that block your view.
It is important to understand basic
ight guidelines for the safety of
both you and those around you.
Refer to the Disclaimer and Safety
Guidelines for more information.
No Fly Zones
Learn more:
http://www.dji.com/ysafe
Be very careful when ying at high altitude as aircraft performance may be reduced. It is recommended to use a specially-designed
propeller when ying at high altitude.
The compass and GPS will not work in Polar Regions. The aircraft will auto switch to A-mode and use the Vision System for positioning.
Always
y under
400 ft
The Forward Vision System will work properly over surfaces with a clear pattern and adequate lighting (lux > 15).
Flight Mode
P-mode (Positioning): P-mode works best when the GPS
signal is strong. The aircraft utilizes the GPS and Vision
System to automatically stabilize itself, navigate between
obstacles or track a moving object. Advanced features such
as TapFlyTM and ActiveTrackTM are enabled in this mode.
S-mode (Sport): The handling gain values of the aircraft are
adjusted in order to enhance the maneuverability of the aircraft
in S-mode. Note that the Vision System is disabled in this mode.
A-mode (Attitude): When neither the GPS nor the Vision
System is available, the aircraft will only use its barometer for
positioning to control the altitude.
S-mode and A-mode should be enabled in the DJI GO 4 app.
The Downward Vision System will not work properly over surfaces that do not have pattern variations, over water or in low light
conditions (< 15 lux).
Vision Positioning
Effective Altitude:
≤ 32.8 feet
(10 meters)
GPS Positioning
Toggle the ight mode switch on the remote
controller to ‘P’ and wait for a stable satellite
count before takeoff.
Return-to-Home
It is important to take off with a strong GPS signal
(GPS icon is followed by at least four bars) to ensure
that the Home Point is recorded by the aircraft. The
aircraft will automatically return to the Home Point in
the following cases.
Smart RTH: The pilot presses the RTH button.
Low Battery RTH: The battery level is low or
critically low.
Failsafe RTH: Remote controller signal is lost.
The aircraft can sense obstacles at a distance up to
200 meters, then automatically avoid obstacle and
y to the Home Point.
16.4 feet (5 meters)

6
EN
Low
High
High
Low
BA
Using Inspire 2
1. Download the DJI GO 4 App 2. Watch the Tutorial Videos
Search ‘DJI GO 4’ on the App Store or
Google Play and download the app to your
mobile device.
Watch the tutorial videos at www.dji.com or in
the DJI GO 4 app.
DJI GO 4 App Tutorial Videos
First-time activation requires your DJI account and internet connection.
DJI GO 4 app supports iOS 9 (or later) or Android 4.4 (or later).
Only use battery slot A when using one battery to supply power.
Internet
3. Check the Battery Levels and Power on
Press once to check the
battery level.
Press once, again and
hold to turn on/off.
* Provided charger
4. Charge the Batteries
Press the release button and open the corresponding charging port cover.
Insert the Intelligent Flight Battery into the charging port to begin charging.
Charging Time: 1.5 hours* Charging Time: 3 hours*
Power Outlet
100-240V
AB
B
A
1
2
The Intelligent Flight Battery must be fully charged before using it for the rst time. Make sure to press the release button on the Charging
Hub’s top when removing the fully charged battery.
Only use the ofcial DJI charger and Charging Hub with your Intelligent Flight Battery and remote controller.
When charging is complete, the LED lights on the Intelligent Flight Battery will turn off, and the LED on the Charging Hub will show green.
Power off the remote controller before charging. When charging is complete, the LED lights on the remote controller will turn off.
The Charging Hub will sound a signal when the battery has been fully charged. The sound can be turned on or off by toggling the switch
under the hub.
Press the button on the battery once to check the battery level.
When the temperature is lower than 10℃, press and hold for 3 seconds to heat the battery. The battery will maintain a temperature
between 15-20℃ for approximately 20 minutes. Press and hold 3 seconds again to stop heating the battery.
Pairing batteries is recommended. This can be done inside DJI GO 4 app. Ensure each battery pair is charged and discharged
simultaneously to prolong their service life and for a better ight experience.

7
EN
1
3
2
U
P
D
o
w
n
T
u
r
n
R
i
g
h
t
T
u
r
n
L
e
f
t
F
o
r
w
a
r
d
B
a
c
k
w
a
r
d
R
i
g
h
t
L
e
f
t
5. Prepare the Remote Controller
Unfold the mobile device holder and the antennas.
Optimal Transmission Range
Try to keep the aircraft inside the
optimal transmission range. If the
signal is weak, adjust the antennas
or y the aircraft closer.
Place your mobile
device and adjust the
clamp to secure.
Press the button to
release the clamp.
Connect your mobile
device with a Micro USB
cable.
Dual Remote Controllers
You are required to link the Master
and Slave remote controllers.
Regarding the Master RC, launch
the DJI GO 4 app and enter GO FLY.
Tap on the top of your screen
to enter the RC Settings. Set the RC
Status as ‘Master’, and then enter the
desired connection password.
Repeat to set Slave RC Status to
‘Slave’. Then tap Search for Master
RC and connect to the Master RC
with your preset password.
Strong Weak
Dual frequency support makes the HD video downlink more stable. Note that the Russian only have the 2.4G frequency.
DO NOT operate more than 3 aircrafts within the same area (size equivalent to a soccer eld) to prevent transmission interference.
6. Controls
The stick mode is set to Mode 2 by default (left hand throttle). The left stick controls the aircraft's elevation
and heading. The right stick controls the aircraft's forward, backward and lateral movements. To adjust the
FPV camera, press and hold the C2 Button and rotate the control dial.
Left Stick FPV Camera ControlsRight Stick
You can change the stick mode in the DJI GO 4 app.
Remote Controller Status Indicator
RC normal and connected to aircraft. ( B...) Low battery warning / RC error.
RC Slave Mode and not connected to aircraft. ( B—B—...) RC idle for 5 minutes.
RC normal but not connected to aircraft. RC Slave Mode and connected to aircraft.
Unfold
5.8G 2.4G
90。60。

8
EN
2 3
1
11 23
7. Prepare the Aircraft
Press the power button a
minimum of ve times
Unfold the landing gear to Landing
Mode and power on
Keep your hands away from the transformation mechanism when unfolding the landing gear.
Press the power button at least ve times can transform the aircraft to Travel Mode again.
Make sure to press the battery remove button when removing the battery.
Insert the battery pair
8. Mount the Gimbal and Camera
Press the gimbal
detach button to
remove the cover.
Align the white and
red dots and insert the
gimbal.
Rotate the gimbal lock
to the locked position.
Always power off the aircraft before mounting or removing the gimbal. Be sure to remove the gimbal before transforming the aircraft
to Travel Mode.
Make sure to press down the gimbal detach button when rotating the gimbal lock to remove the gimbal and camera. The gimbal
lock should be fully rotated when removing the gimbal for the next installation.
9. Prepare for Takeoff
Pair the propellers and
motors with arrows of
the same color (red or
white).
Press down the shrapnel and
rotate the propeller lock until
the arrows are aligned and
you hear a click.
Attach the propeller
onto the motor.
Again, rotate the
propeller lock until
you hear a click.
Toggle the ight mode
switch to the safest P-mode.
Connect your mobile device. Power on the remote controller
and the aircraft.
Launch the
DJI GO 4 app and
tap GO FLY.
Make sure to press down the shrapnel before rotating the propeller lock.
DJI GO 4
App
5x

9
EN
10. Flight
Before taking off, ensure that the Aircraft Status Bar in the DJI GO 4 app
indicates ‘Ready to Go (GPS)’ or ‘Ready to Go (Vision)’ in ying indoors.
Ready to Go (GPS)
In the DJI GO 4 App
Auto Takeoff
The aircraft will take off and hover at
an altitude of 4 feet (1.2 meters).
Auto Landing
The aircraft will land vertically and stop its
motors.
Return-to-Home (RTH)
Brings the aircraft back to the Home
Point. Tap again to stop the procedure.
Gimbal Working Modes
Includes Tracking Mode, Free Mode and
Reset Mode.
More Intelligent Flight Modes
Tap to use TapFly (P-mode), ActiveTrack (P-mode) and more.
2. Pull left stick down (slowly)
until you touch the ground.
Hold a few seconds to stop
the motors.
Stop motor mid-ight: Press the RTH
button while simultaneously pulling
the left stick to the bottom inside
corner and hold for 3 seconds. Only
stop motors mid-ight in emergency
situations when doing so can
reduce the risk of damage or injury.
Manual Takeoff
Combination Stick Command to start/stop the motors
Left stick up
(slowly) to take off
or
Aircraft Status Indicator
. . . Ready to go (GPS working).
. . . P-ATTI or ATTI mode.
..... Not connected to remote controller.
. . . Vision System on, GPS off or unavailable.
. . . Low battery warning.
..... Critically low battery warning.
—— Critical error.
. . . Compass calibration required.
Watch the tutorial in the DJI GO 4 app or on the ofcial DJI website to learn more.
Always set an appropriate RTH altitude before takeoff. Refer to the Disclaimer and Safety Guidelines for more details.
Return-to-Home (RC)
Same as the RTH button in the DJI GO 4 app. Brings the aircraft
back to the Home Point.
Press and hold to initiate the RTH procedure. Press again to cancel.
Determine RTH status by sound:
Single beep... Request to return, but not receive the respond
from the aircraft yet.
Double beep... RTH in progress.
Rotating propellers can be dangerous. DO NOT start the motors in narrow spaces or
when there are people nearby.
Always keep your hands on the remote controller so long as the motor is still spinning.
After landing, power off the aircraft before turning off the remote controller.
Take off from a at surface in a wide open space, with the rear of the aircraft facing
towards you.
The intelligent landing gear will auto raise after takeoff and lower when landing.
Users can also control the landing gear manually by the Transformation Switch.
The aircraft will not be able to land if the landing gear does not lower.
Manual Landing
1. Ensure the landing gear is lowered
before landing.
Raise Lower

10
EN
Download the detailed user manual at:
www.dji.com/inspire-2
※This content is subject to change without prior notice.
INSPIRETM and DJITM are trademarks of DJI.
Copyright © 2016 DJI All Rights Reserved.
Designed by DJI. Printed in China.
Specications
Aircraft (Model: T650)
Weight 7.25 lbs (3290 g, including two batteries, without gimbal and camera)
Diagonal Distance (propeller excluded) 18 inch (605 mm, Landing Mode)
Max Takeoff Weight 8.82 lbs (4000 g)
Max Takeoff Sea Level 1.55 mi (2500 m); 3.1 mi (5000 m with specially-designed propeller)
Max Flight Time Approx. 25 min (with Zenmuse X5S)
Max Tilt Angle P-mode: 35° (Forward Vision System enabled: 25°); A-mode: 35°; S-mode: 40°
Max Ascent Speed P-mode/A-mode: 16.4 ft/s (5 m/s); S-mode: 19.7 ft/s (6 m/s)
Max Descent Speed Vertical: 13.1 ft/s (4 m/s); Tilt: 13.1-29.5 ft/s (4-9 m/s)
Default tilt is 13.1 ft/s (4 m/s), can be set in-app.
Max Speed 67 mph (108 kph)
GPS Hovering Accuracy Vertical: ±1.64 feet (0.5 m) or ±0.33 feet (0.1 m, Downward Vision System enabled)
Horizontal: ±4.92 feet (1.5 m) or ±0.98 feet (0.3 m, Downward Vision System enabled)
Operating Temperature -4° to 104° F (-20° to 40° C)
Gimbal
Angular Vibration Range ±0.01°
Controllable Range Pitch: -130° to +40°; Roll: ±20°; Pan: ±320°
Max Controllable Speed Pitch: 90°/s; Roll: 90°/s; Pan: 90°/s
Interface Type DGC2.0
Downward Vision System
Velocity Range <32.8 ft/s (10 m/s) at height of 6.56 feet (2 m)
Altitude Range <32.8 feet (10 m)
Operating Range <32.8 feet (10 m)
Operating Environment Surfaces with clear patterns and adequate lighting (> 15 lux)
Ultrasonic Sensor Operating Range 0.33-16.4 feet (10-500 cm)
Ultrasonic Sensor Operating Environment Non-absorbing material, rigid surface (thick indoor carpeting will reduce performance)
Forward Vision System
Obstacle Sensing Range 2.3-98.4 feet (0.7-30 m)
FOV Horizontal: 60°; Vertical: 54°
Operating Environment Surfaces with clear patterns and adequate lighting (> 15 lux)
Upward Infrared Sensing System
Obstacle Sensing Range 0-16.4 feet (0-5 m)
FOV ±5°
Operating Environment Large-size non-reective obstacles of high-reectivity (reectivity>10%)
Remote Controller
Operating Frequency 2.400-2.483 GHz; 5.725-5.825 GHz
Max Transmitting Distance 2.4 GHz: 4.3 miles (7 km, FCC); 2.2 miles (3.5 km, CE); 2.5 miles (4 km, SRRC)
(unobstructed, free of interference) 5.8 GHz: 4.3 miles (7 km, FCC); 1.2 miles (2 km, CE); 3.1 miles (5 km, SRRC)
EIRP 2.4 GHz: 26 dBm (FCC); 17 dBm (CE); 20 dBm (SRRC)
5.8 GHz: 28 dBm (FCC); 14 dBm (CE); 20 dBm (SRRC)
Battery 6000mAh 2S LiPo
Output Power 9 W (Not supply power for mobile device)
USB Supply Power iOS: 1 A @ 5.2 V (Max); Android: 1.5 A @ 5.2 V (Max)
Operating Temperature -4° to 104° F (-20° to 40° C)
Charger (Model: IN2C180)
Voltage 26.1 V
Rated Power 180 W
Intelligent Flight Battery (Model: TB50-4280mAh-22.8V)
Capacity 4280 mAh
Voltage 22.8 V
Battery Type LiPo 6S
Energy 97.58 Wh
Net Weight 515 g
Charging Temperature 41° to 104° F (5° to 40° C)
Operating Temperature -4° to 104° F (-20° to 40° C)
Max Charging Power 180 W
Charging Hub (Model: IN2CH)
Input Voltage 26.1 V
Input Current 6.9 A
DJI incorporates HDMITM technology.
The terms HDMI and HDMI High-Definition Multimedia Interface, and the
HDMI Logo are trademarks or registered trademarks of HDMI Licensing LLC
in the United States and other countries.
11
CH
19
2
0
21
1
11
12
2
5
10
9
7
6
13
14
16
15
18
17
3
4
8
认识您的 INSPIRE 2
INSPIRETM 2 配备全新的云台接口,可适配多种型号的新型三轴稳定云台相机 *。经典的变形机身集成 DJITM 先进
的飞控系统、下视及前视视觉系统、红外感知系统,可在室内外稳定悬停、飞行,并具备障碍物感知功能和指点飞
行、智能跟随等先进飞行功能。全新的双电池系统可实现最长飞行时间约 25 分钟 **。Inspire 2 最大飞行速度可达
108 km/h**。
1. FPV 摄像头
2. 前视视觉系统
3. DGC2.0 接口(DGC: DJI
Gimbal Connector)
4. 云台相机解锁按钮
5. 下视视觉系统
6. 扩展设备安装位
7. 变形机构
8. 控制处理中心(含 SD 卡槽)
9. 机头 LED 指示灯
10. 动力系统(含电机、螺旋桨等)
* 本手册所示例的云台相机需另行购买,请从 DJI 商城了解更多详细信息。
** 最大飞行速度和最长飞行(悬停)时间均为实验环境下(零海拔无风情况下)测得,仅供参考。
*** CinemaDNG、ProRes 等格式的视频存储和高速 DNG raw 照片连拍均需要使用 DJI CINESSD 高速存储卡,请从 DJI 商城购买 DJI CINESSD 和DJI
CINESSD 读卡器。
运输模式
飞行模式
起落架降
降落模式
起落架升
11. 机尾 LED 指示灯
12. 智能飞行电池
13. 飞行器电源开关
14. 飞行器电量指示灯
15. 电池弹出按钮
16. 顶部红外感知系统
17. 飞行器状态指示灯
18. DJI CINESSDTM 卡槽 ***
19. 对频按键
20. USB 模式切换开关
21. USB 接口

12
CH
认识您的遥控器
Inspire 2 遥控器使用 LIGHTBRIDGETM 高清图传技术,配合完备的功能按键可在最大 7 千米 * 通信距离内完成飞行
器与云台相机的各种操作和配置,并可通过 DJI GOTM 4 App 在移动设备上实时显示高清画面。遥控器通过无线信号
可实现主从机功能,最大无线通信范围可达 100 米。
遥控器内置可充电锂电池,单机最长可连续工作 4 小时 **。
11. 控制拨轮(云台 /FPV/ 变焦)
12. 相机设置转盘
13. 录影按键
14. 飞行模式切换开关
15. 拍照按键
16. 急停按键
17. Micro USB 接口
18. CAN Bus 扩展接口
19. HDMI A 口(视频输出接口)
20. USB 接口(用于连接移动设备)
21. C1 按键
22. C2 按键
1. 电源开关
2. 变形控制开关
3. 智能返航按键
4. 摇杆
5. 遥控器状态指示灯
6. 电池电量指示灯
7. 充电接口
8. 移动设备支架
9. 天线
10. 提手
折叠状态
连接移动设备
* 在开阔无遮挡、无电磁干扰的环境飞行,并且飞行高度为 120 米左右,在 FCC 标准下遥控器可以达到最大通信距离。
** 遥控器工作时可以为外接移动设备充电。上述最长可工作时间仅为遥控器供电所测得,仅供参考。
17 18 19 20
11
14
13
12
1615
2221
10
4
9
8
5
6
1
3
7
2

13
CH
基本概念
飞行安全须知
DJI 强烈建议用户在安全、合理的环境中飞行。
注意:飞行时请远离人群、树木、电线和
建筑物等。
注意飞行高度
请将飞行器的飞行高度控制在 120
米以内。
注意:大风(10 米/秒)、雨、雪、有雾
等恶劣天气下请勿飞行。
在视距范围内飞行
避免飞到高大建筑物以及其它
可能阻挡视线的物体后面。
飞行安全认识对于您、周围人群与环境
的安全非常重要。
请务必仔细阅读《免责声明和安全操作
指引》。
限飞区
详情请访问以下网址 :
http://www.dji.com/flysafe
高海拔地区由于环境因素导致动力系统性能下降,飞行性能将会受到影响,请使用适合高原飞行的螺旋桨,并谨慎飞行。
在南北极圈内飞行器指南针与 GPS 失效,但飞行器仍可使用 A模式(姿态模式)与下视视觉系统飞行。
飞行
高度低于
120 米
前视视觉系统感知条件:表面有清晰纹理,光照条件充足 (>15 lux,室内日光灯正常照射环境 )。
返航功能
切记飞行器的 GPS 信号良好之后(DJI GO 4 App
的GPS 信号图标为四格)才起飞,以确保已记录返
航点。以下情况飞行器自动飞回返航点:
智能返航:用户可通过遥控器的智能返航按键或
DJI GO 4 App 的返航键,使飞行器自动返航。
智能低电量返航:当智能电量系统分析出当前电量
仅足够返航时,飞行器将自动返航。
失控返航:遥控器信号丢失的情况下,飞行器将自
动返航。
自动返航过程中飞行器可在最远 200 米处观测到障
碍物,提前规划返航路径,绕开障碍物。
5米
飞行模式
P 模式(定位):使用 GPS 模块或视觉系统以实现飞行器精
确悬停,指点飞行以及高级模式等功能。
S 模式(运动): 使用 GPS 模块或视觉系统以实现精确悬停,
该模式下飞行器感度值被适当调高,务必格外谨慎飞行。
A 模式(姿态):不使用 GPS 模块与视觉系统进行定位,仅
提供姿态增稳,若 GPS 卫星信号良好可实现返航。
S 模式和 A模式需要在 App 中开启多功能开关。
下视视觉系统定位条件:高度在 0-10 米、光线充足 (>15 lux,室内日光灯正常照射环境 ),表面有清晰纹理的室内或室外环境。
视觉定位
高度 10 米
GPS 定位
建议将遥控器飞行模式切换开关拨至 P模式并
等待 GPS 定位成功。

14
CH
低 高
低
高
BA
使用您的 Inspire 2
1. 下载 DJI GO 4 App 2. 观看教学视频
安装 DJI GO 4 App,使用移动设备在软件商
店或扫描二维码下载并安装。
请在 DJI GO 4 App 或访问 DJI 官方网站观看。
DJI GO 4 App 教学视频
全新的飞行器需使用 DJI GO 4 App 激活才能使用。激活时请确保移动设备可以接入互联网。
DJI GO 4 App 要求使用 iOS 9.0 及以上系统 或Android 4.4 及以上系统。
如果需要使用单个电池供电,则电池必须插在 A槽。
Internet
3. 检查电量与开机
4. 充电
检查电量:短按一次。
开启 /关闭:短按一次,
在3秒内长按可开启或关
闭电池。
按下充电管家顶部按键,打开充电接口保护盖。
对准电池与充电管家的电池导轨,插入电池。
AB
B
A
1
2
完全充满两块电池约需 1.5 小时 *完全充满约需 3小时 *
交流电源
100~240 V
(50Hz/60Hz)
首次使用智能飞行电池,请务必充满电。充电完成后,必须按住充电管家顶部按键,才能移除电池。
使用 DJI 官方提供的充电管家和充电器充电。
智能飞行电池电量指示灯全部熄灭且充电管家顶部的指示灯绿灯常亮表示电已充满。
遥控器在关闭状态下充电时,电量指示灯全部熄灭表示本次充电已完成。
充电管家底部开关可用于开启和关闭声音提示。默认开启,智能飞行电池充电完成时会有声音提示。
短按一次电池上的按键可以查看电池电量。
当温度低于 10℃时,长按电池按键 3秒电池启动加热,加热到 16℃后在 15℃-20℃之间保持 20min。长按 3s 可退出加热。
推荐两块电池保持同时充 /放电使用,以获得最佳供电性能。推荐使用 DJI GO 4 app 配对功能,并对配对电池进行标记。
*使用标配充电器

15
CH
5. 准备遥控器
展开遥控器上的移动设备支架并调整天线位置,不同的天线位
置接收到的信号强度不同。
最佳通信范围
操控飞行器时,使飞行器始终处于最佳通
信范围内。
调整支架,放置移动设
备并夹紧。
按下移动设备支架
侧边的按键。
使用移动设备数据线连接
移动设备与遥控器。
主从机使用说明
开启电源后,遥控器主机将自动与飞行器连接。首
次使用时,遥控器主从机模式默认关闭,需在 DJI
GO 4 App 里设置后才能将从机与主机连接。
主机绿灯常亮:连接正常。
从机青灯常亮:连接正常。
强弱
图传系统拥有 5.8G 和2.4G 两个通信频率,可以根据环境的干扰情况切换频率。注意俄罗斯地区只有 2.4G 通信频率。
为避免飞行器之间的通信受到干扰,请勿在同一区域(约足球场大小)同时使用超过 3架飞行器。
6. 遥控器操作说明
遥控器出厂时默认操控方式为美国手 (左手油门 )。按住 C2 开关并拨动控制拨轮可控制 FPV 摄像头的拍摄
角度。
左摇杆 FPV 摄像头控制右摇杆
更多飞行操作详见《Inspire 2 用户手册》;可以在 DJI GO 4 App 更改遥控器的操控方式。
遥控器状态说明
主机工作正常 (B...) 低电量 /异常报警
被设为从机,未连接到飞行器 (B—B—...) 闲置 5分钟及以上
未连接到飞行器 从机工作正常
展开遥控器
主从机连接设置
在App 相机界面,点击 图标后开启主从机
功能。
选择主机:密码栏显示从机连接时所需用到的密码
(可修改)。
选择从机:滑动搜索并从主机列表中选择需要连接
的主机,输入密码后即可连接。
1
3
2
5.8G 2.4G
90。60。

16
CH
11 23
7. 解除运输模式
连续短按电源开关五次或以上 飞行器切换至降落模式并自动开机
飞行器变形时,请注意安全,避免夹手。
连续短按五次或以上电池开关可切回至运输模式。
需要按下电池弹出按钮,才能移除电池。
装入两块电池
8. 安装云台相机
按住云台相机解锁
按钮,移除保护盖。
对齐云台相机上的白点
与DGC2.0 接口红点,
并嵌入安装位置。
旋转云台相机快拆接
口至锁定位置,以固
定云台。
确保先关闭飞行器电源,再安装和移除云台相机。飞行器进入运输模式前务必先取下云台相机。
移除云台相机时,需要按住解锁按钮,才能旋转云台相机的快拆接口。为方便下次安装,请在移除云台时,务必将接口旋转到位才
取下云台。
9. 准备飞行
将相同颜色安装标记
的螺旋桨与电机配对
安装。
按住螺旋桨锁扣的弹
片并转动锁扣,使标
记对齐。
安装螺旋桨。 转动螺旋桨锁扣,
锁定螺旋桨,使标
记对齐。
将遥控器飞行模式切
换开关调到 P档位
连接移动设备 开启遥控器、飞行器电源 启动 DJI GO 4 App
并进入开始飞行
按住弹片之后,才能转动螺旋桨锁扣。
DJI GO 4
App
5次
2 3
1

17
CH
10. 起飞/降落
起飞前请务必等待 DJI GO 4 App 相机界面中的飞行状态指示栏显示为“起飞准备完毕
(GPS)”或“起飞准备完毕(Vision)”,以保障飞行安全。
起飞准备完毕(GPS)
DJI GO 4 App 相机界面中
更多智能飞行模式
点击可使用指点飞行和智能跟随等功能。
请在 DJI GO 4 App 或DJI 官方网站观看教学视频以正确使用指点飞行与智能跟随等功能。
请预先在 DJI GO 4 App 设置合适的自动返航高度以安全返航。飞行安全注意事项详见《免责声明和安全操作指引》。
手动降落
1. 手动降落前请先放下起落架。
2. 缓慢向下拉动油门杆,直
至飞行器降落。
保持油门杆处在最低位置
2秒,电机停止。
空中停止电机方式:向内拨动左摇杆的
同时按下返航按键。空中停止电机将会
导致飞行器坠毁,仅用于发生特殊情况
(如飞行器可能撞向人群)时需要紧急
停止电机以最大程度减少伤害。
自动返航
点击可使飞行器自动返航,返航时再点
击一次即可终止返航。
云台工作模式
包括跟随模式、自由模式和复位功能。
自动起飞
点击使飞行器自动起飞上升至约 1.2 米
处悬停。
自动降落
点击使飞行器自动降落并停止电机。
手动起飞
掰杆动作:电机启动/停止
启动电机
缓慢向上推动油门
杆,飞行器起飞。
或
智能返航按键
功能与 DJI GO 4 App 中的自动返航按键相同。
长按遥控器的智能返航按键可使飞行器自动返航。
再短按一次该按键可终止返航。
可以从遥控器提示音了解当前返航状态:
B...B... 请求返航,尚未收到飞行器应答
BB...BB... 正在返航
飞行器状态指示灯
. . . 绿灯慢闪,GPS 定位开启(P-GPS)
. . . 黄灯慢闪,姿态模式(P-ATTI/ATTI)
..... 黄灯快闪,无遥控器连接
. . . 绿灯双闪,视觉定位工作(P-OPTI)
. . . 红灯慢闪,低电量报警
..... 红灯快闪,严重低电量报警
—— 红灯常亮,严重错误
. . . 红黄灯交替快闪,需校准指南针
高速旋转的螺旋桨具有危险性,操作者应与飞行器保持安全距离并使飞行器远离人群、
建筑物、树木或其它遮挡物,以避免发生撞击。
飞行器电机未停止前务必保持遥控器在手并确保飞行器完全在控制之中。
降落电机停止后请先关闭飞行器,再关闭遥控器。
飞行前请将飞行器平稳放置于户外开阔地带,用户面朝机尾。
智能起落架具有飞行器起飞后自动上升、降落时自动下降的功能。用户也可以通过遥
控器的变形控制开关,手动控制起落架位置。
如果未放下起落架,则不能完成降落。
起落架上升 起落架下降

18
CH
了解产品全部信息,请访问官网产品专页下载《用户手册》
www.dji.com/inspire-2
※ 本指南内容如有更新,恕不另行通知。
INSPIRETM 和DJITM 是大疆创新的商标。
Copyright © 2016 大疆创新 版权所有
Designed by DJI. Printed in China.
技术规格
飞行器(型号:T650)
重量 3290 g(含两块电池,不含云台相机)
轴距 ( 不含桨 ) 605 mm(降落模式)
最大起飞重量 4000 g
最大起飞海拔高度 普通桨:2500 m;高原桨:5000 m
最大飞行时间 25 min(使用 Zenmuse X5S)
最大俯仰角度 P 模式:35°(前视视觉系统启用:25°);A模式:35°;S模式:40°
最大上升速度 P 模式 /A 模式:5 m/s;S模式:6 m/s
最大下降速度 垂直:4 m/s;斜下降:4-9 m/s(App 中可设置,默认:4 m/s)
最大水平飞行速度 108 km/h
GPS 悬停精度 垂直:±0.5 m(下视视觉系统启用:±0.1 m);水平:±1.5 m(下视视觉系统启用:±0.3 m)
推荐工作环境温度 -20 ℃至 40 ℃
云台
角度抖动量 ±0.01°
可控转动范围 俯仰:-130°至 +40°;横滚:±20°;平移:±320°
最大控制转速 俯仰:90°/s;横滚:90°/s;平移:90°/s
接口类型 DGC2.0
下视视觉系统
飞行速度测量范围 <10 m/s(高度 2 m,光照充足)
高度测量范围 <10 m
精确悬停范围 <10 m
使用环境 表面有丰富纹理,光照条件充足(>15 lux,室内日光灯正常照射环境)
超声波高度测量范围 10 -500 cm
超声波使用环境 非吸音材质、硬质地面(厚地毯性能会有衰减)
前视视觉系统
障碍物感知范围 0.7 -30 m;
FOV 水平 60°,垂直 54°
使用环境 表面有丰富纹理,光照条件充足(>15 lux,室内日光灯正常照射环境)
顶部红外感知系统
障碍物感知范围 0-5 m
FOV ±5°
使用环境 漫反射,大尺寸,高反射率(反射率 10%)障碍物
遥控器
工作频率 2.400 -2.483 GHz;5.725 -5.825 GHz
最大信号有效距离 2.4 GHz:7 km(FCC);3.5 km(CE);4 km(SRRC)
(无干扰、无遮挡) 5.8 GHz:7 km(FCC);2 km(CE);5 km(SRRC)
发射功率 (EIRP) 2.4 GHz:26 dBm(FCC);17 dBm(CE);20 dBm(SRRC)
5.8 GHz:28 dBm(FCC);14 dBm(CE);20 dBm(SRRC)
内置电池 6000 mAh 2S LiPo
功耗 9 W(不给移动设备充电状态)
USB 接口供电电流 /电压 iOS:1 A @ 5.2 V (最大);Android:1.5 A @ 5.2 V (最大)
工作环境温度 -20 ℃至 40 ℃
充电器(型号:IN2C180)
电压 26.1 V
额定功率 180 W
智能飞行电池(型号:TB50-4280mAh-22.8V)
容量 4280 mAh
电压 22.8 V
电池类型 LiPo 6S
能量 97.58 Wh
电池整体重量 约515 g
充电环境温度 5 ℃至 40 ℃
电池使用温度 -20 ℃至 40 ℃
最大充电功率 180 W
充电管家(型号:IN2CH)
输入电压 26.1 V
输入电流 6.9 A
DJI incorporates HDMITM technology.
The terms HDMI and HDMI High-Definition Multimedia Interface, and the
HDMI Logo are trademarks or registered trademarks of HDMI Licensing LLC
in the United States and other countries.

www.dji.com
INSPIRE 2
Other manuals for INSPIRE 2
10
This manual suits for next models
1
Table of contents
Other dji Drone manuals

dji
dji S800 User manual

dji
dji FPV FD1W4K User manual

dji
dji ROBOMASTER TT Swarm Combo User manual

dji
dji INSPIRE 3 User manual

dji
dji R4D Instruction Manual

dji
dji PHANTOM 3 PROFESSIONAL User manual

dji
dji MINI 3 PRO User manual

dji
dji PHANTOM 4 PRO User manual

dji
dji M30 User manual

dji
dji MAVIC 3 PRO User manual

dji
dji Air 2S User manual

dji
dji MAVIC MINI Installation guide

dji
dji MATRICE 350 RTK User manual

dji
dji PHANTOM 4 PRO+ User manual

dji
dji Phantom 3 Advanced User manual

dji
dji DSLRPros Nighthawk Aerial Kit User manual

dji
dji INSPIRE 2 User manual

dji
dji MAVI 3 CLASSIC User manual

dji
dji E1200 Standart User manual

dji
dji Mavic 3 User manual