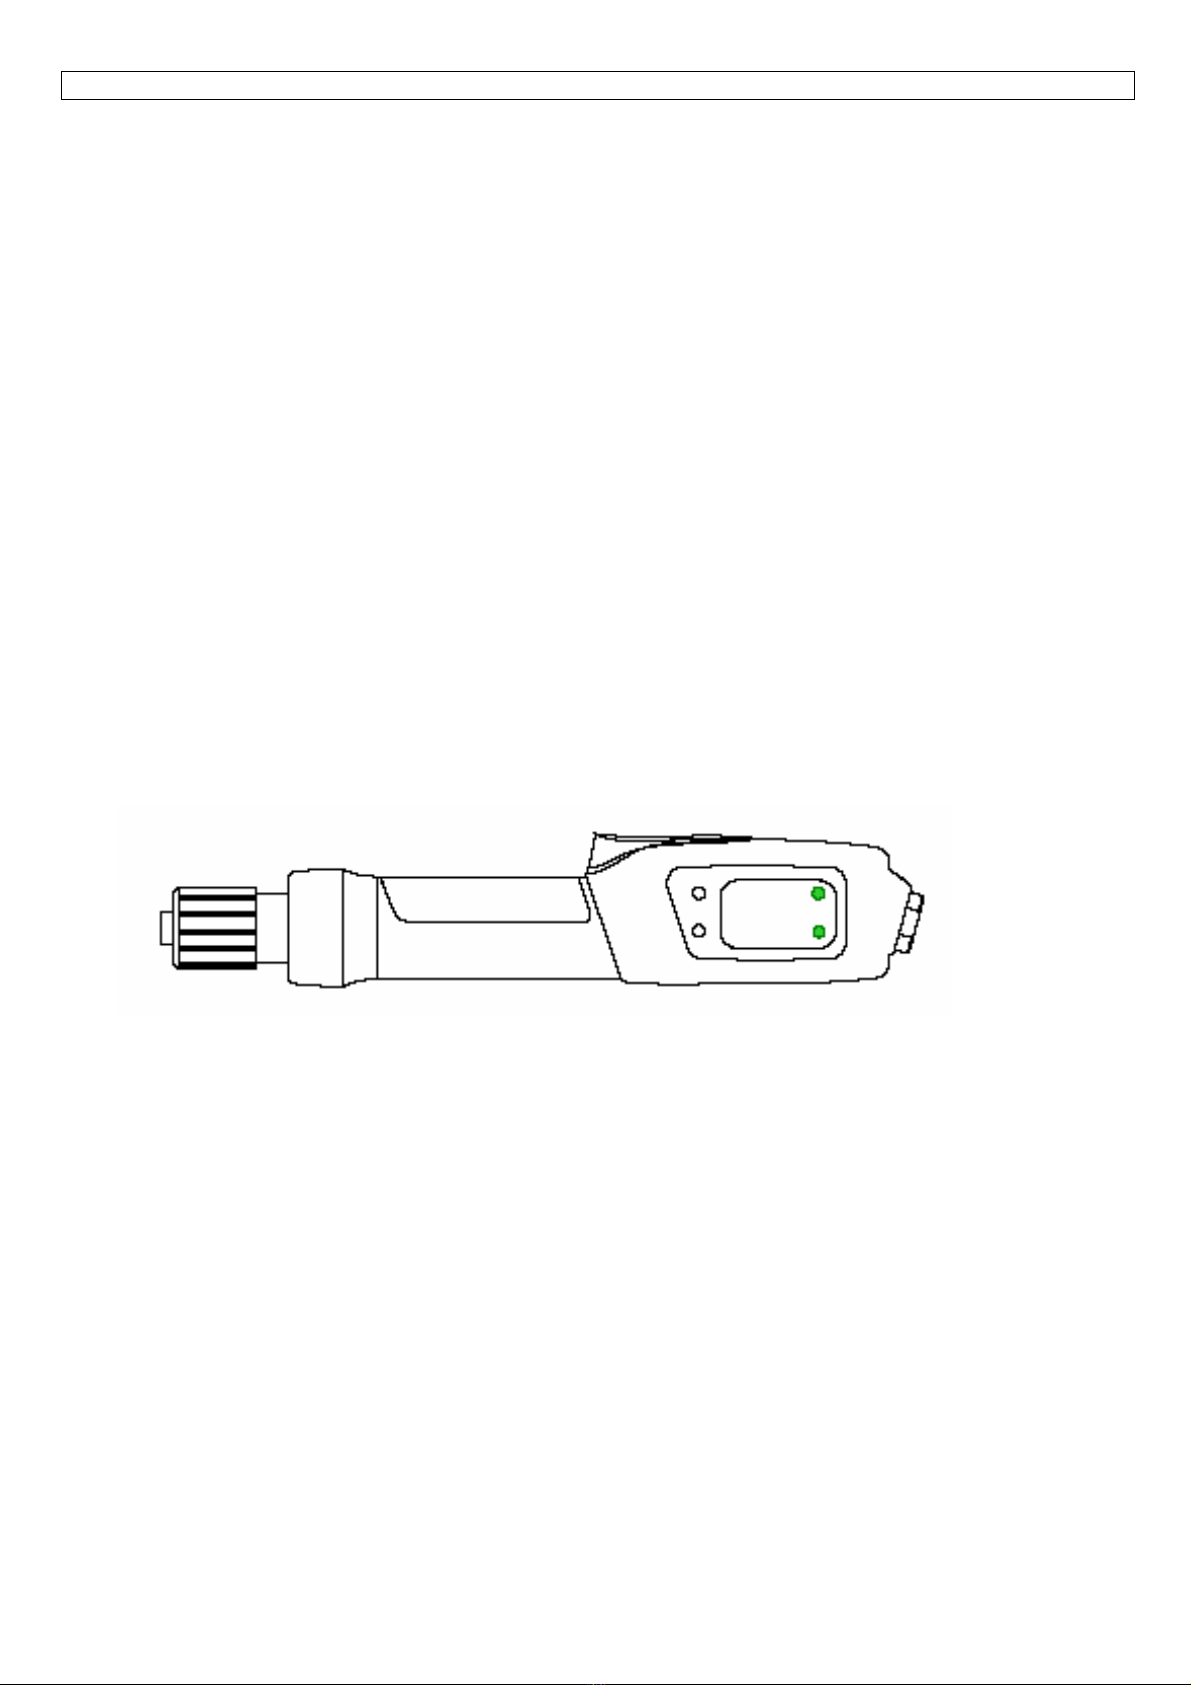
DOGA BRUSHLESS ELECTRIC SCREWDRIVERS / GX SERIE 6
5. Model composition
GX - ○○○ ◇
① ② ③ ④
① Series: GX
② Operation
(Empty) : Standard screwdriver
A: Automation - Direct signal start and clamping flange
S: Soft Stop (Shockless) - lower shock when it stops
T: Timer & Auto Reverse
③ Maxim torque value of the range ( Kgf.cm )
35 = 3.5 Kgf.cm 80 = 8.0 Kgf.cm
45 = 4.5 Kgf.cm 120 = 12.0 Kgf.cm
④ Start type
: Lever start
P: Push start
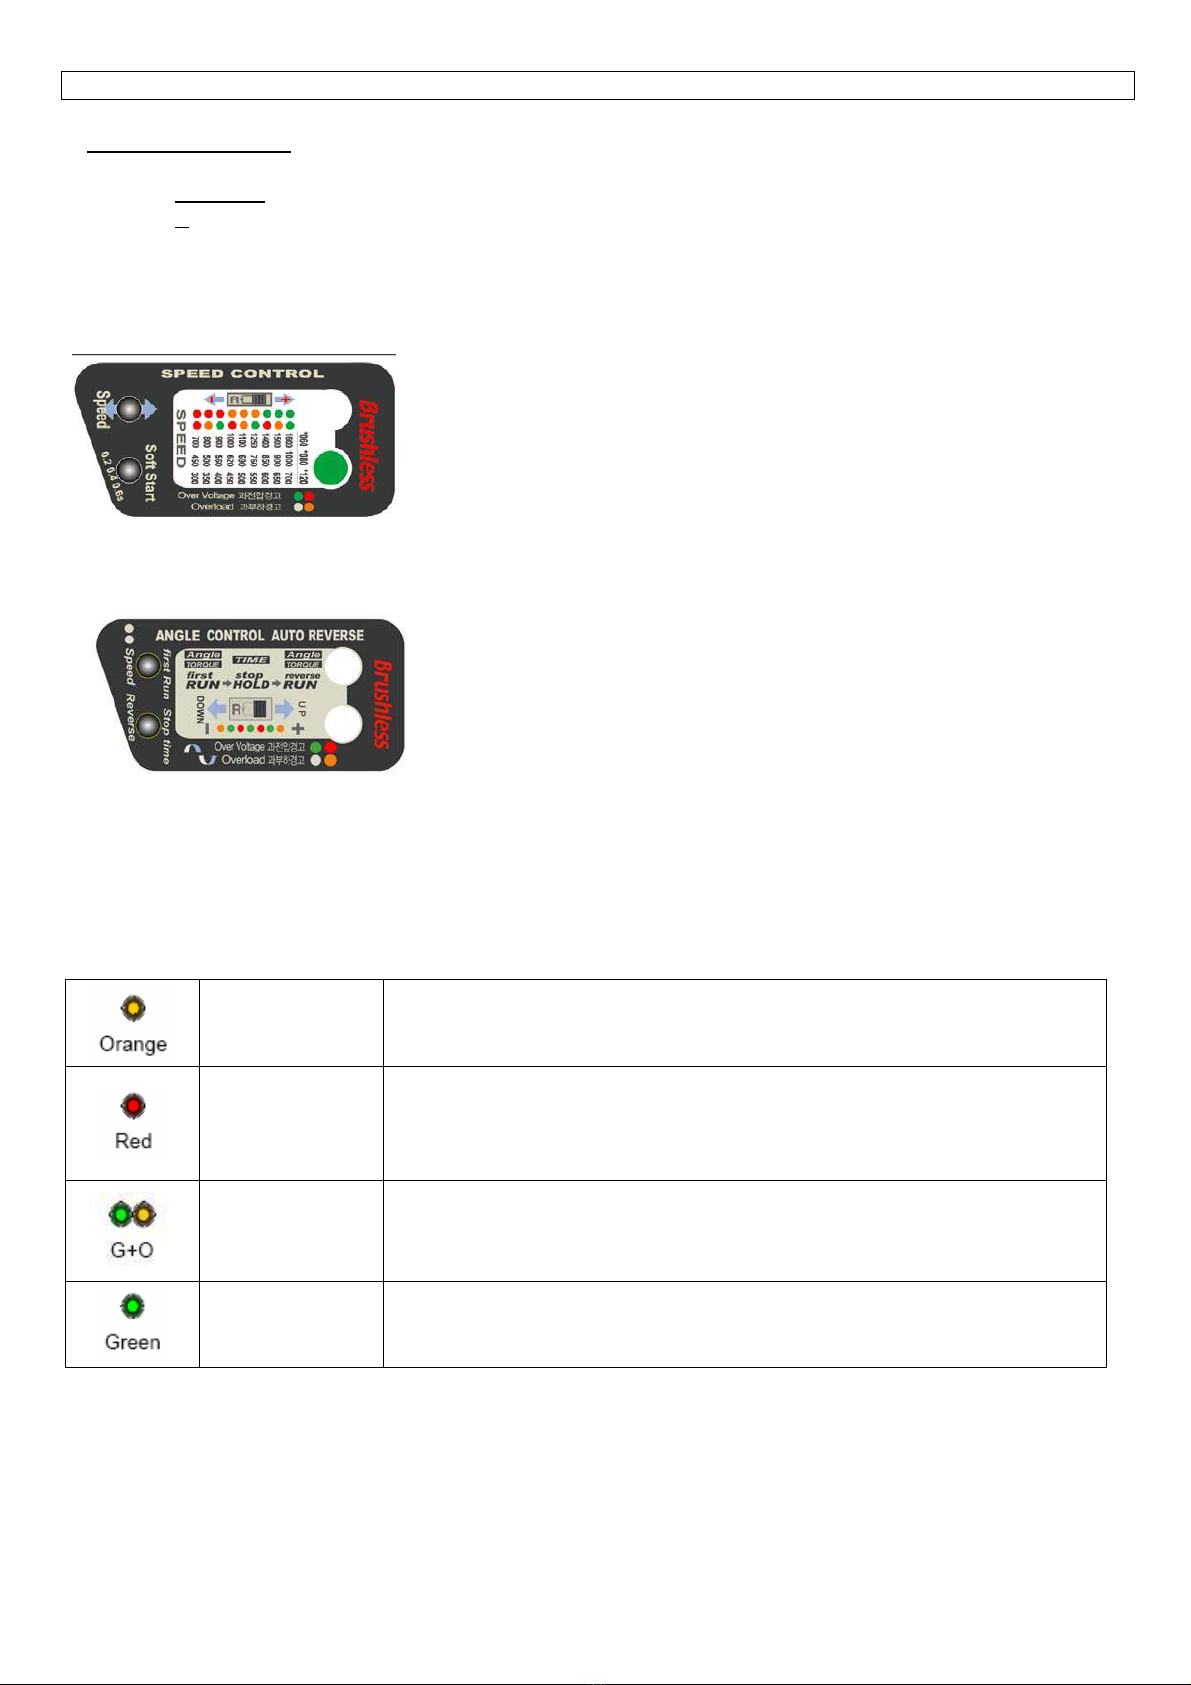
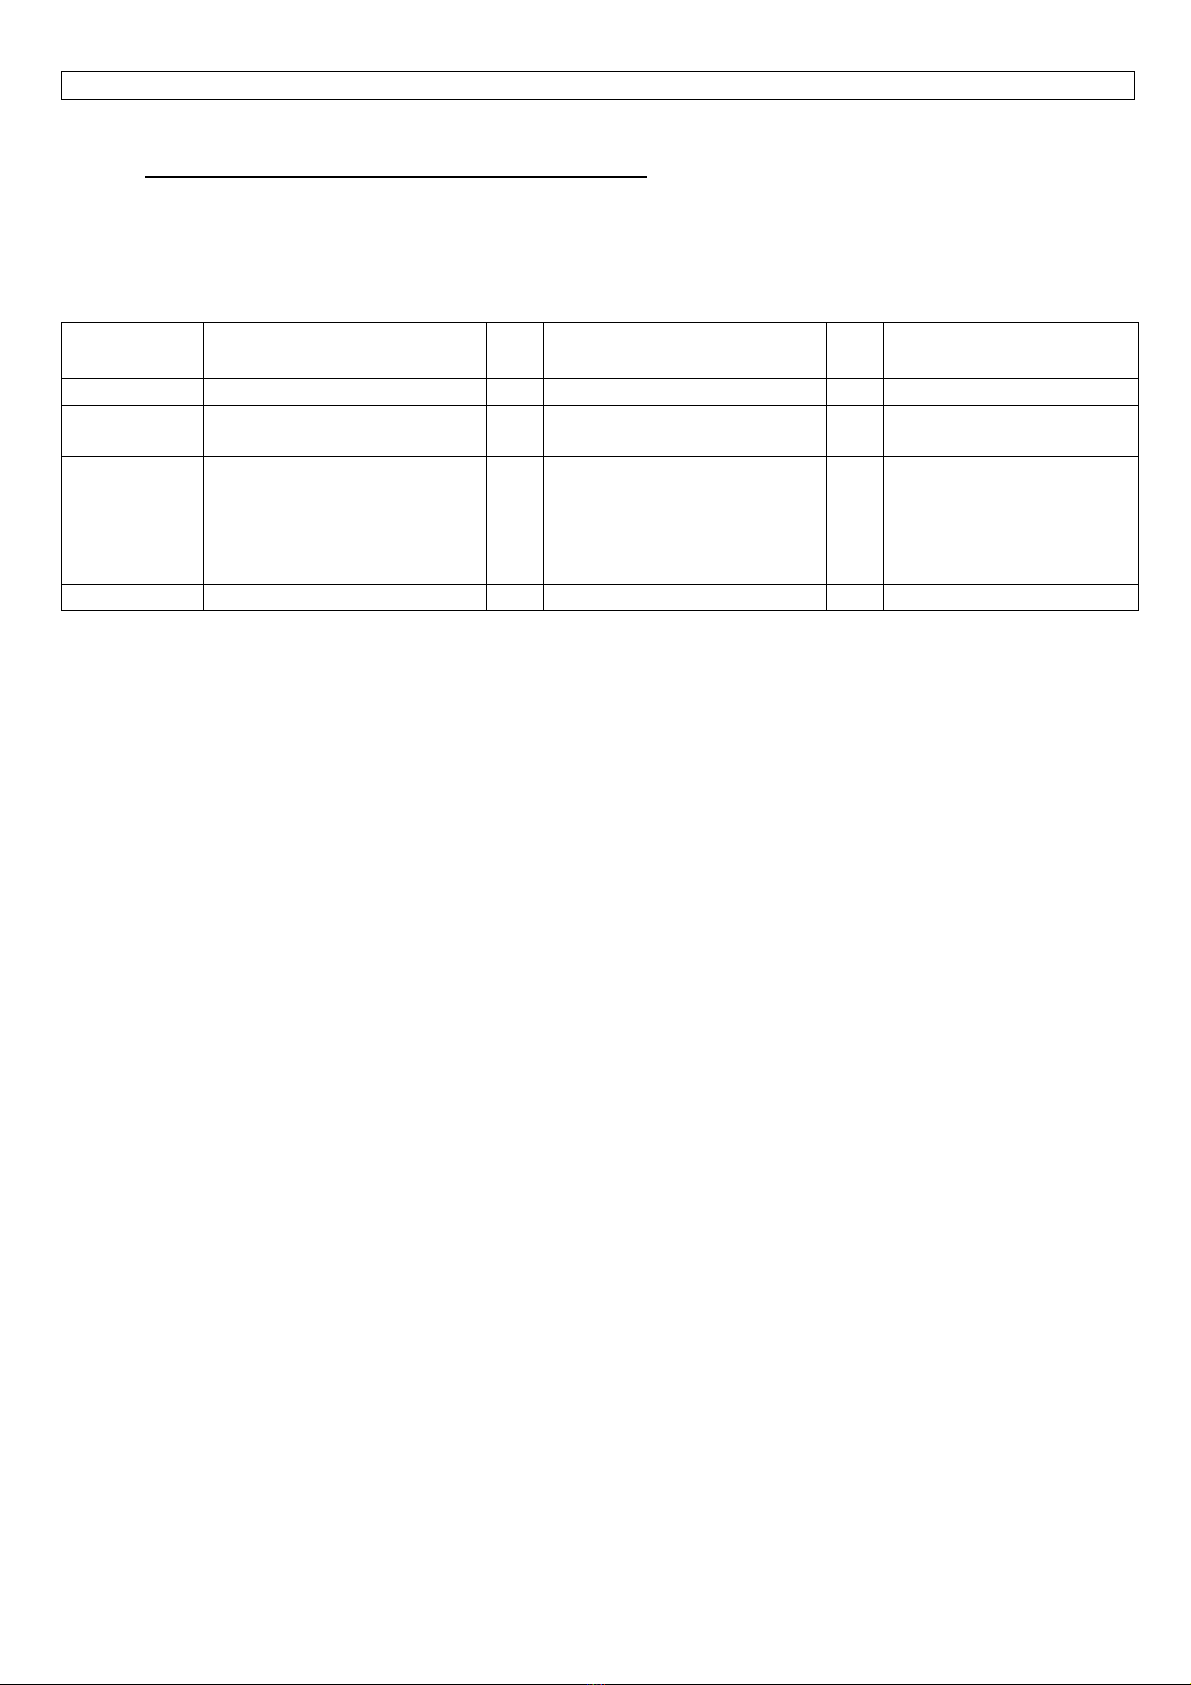
6. Models
Options
Torque Rotation
Speed Clutch Software*
Model Start
(Kgf.cm) (Rpm) Standard Soft Stop Standard T
GX 35/ESD 0.2~3.5 300~1100 ○○
GX 45/ESD LEVER 0.4~4.5 300~700 ○○
GX 80/ESD V2 1.0~8.0 450~1000 ○○
GX 120/ESD V2 LEVER 2.0~12.0 300~700 ○○
GX 80P/ESD V2 1.0~8.0 450~1000 ○○
GX 120P/ESD V2 PUSH 2.0~12.0 300~700 ○○
GXS 80/ESD V2 1.0~8.0 450~1000 ○○
GXS 120/ESD V2 LEVER 2.0~12.0 300~700 ○○
GXS 80P/ESD V2 1.0~8.0 450~1000 ○○
GXS 120P/ESD V2 PUSH 2.0~12.0 300~700 ○○
GXT 80/ESD V2 1.0~8.0 450~1000 ○○
GXT 120/ESD V2 LEVER 2.0~12.0 300~700 ○○
GXA 35/ESD V3 0.2~3.5 300~1100 ○○
GXA 45/ESD V3 0.4~4.5 300~700 ○○
GXA 80/ESD V3 1.0~8.0 450~1000 ○○
GXA 120/ESD V3
REMOTE
2.0~12.0 300~700 ○○