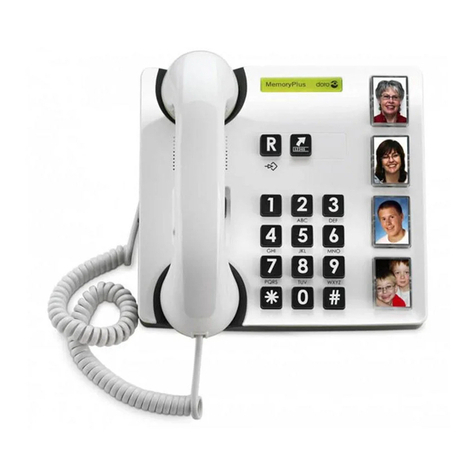
Doro AFTI 40 User manual

AFTI 40
Hotel Telephone
English
User guide

1 Hook switch
2 Mute Button
3 Volume Control for Handset
4 Speaker
5 Redial Button
6 Recall (R) Button
7 Speaker button and LED
8 Volume Control for Speaker
9 MW Indicator
10 Direct Memory Buttons
11 Extension Port
12 Store Button
13 Ringer Switch
14 Recall Time Selector
15 MW Selector Switches

English
www.doro.com 3
Operation
Connection
1. Connect the curly cord to the handset and to the socket marked q
.
2. Connect the telephone cord to the socket marked T
, and then to the telephone
network socket. The modular plug will click when correctly put into place.
3. Pick up the handset and listen for the dial tone.
IMPORTANT!
The earpiece of the handset may attract small ferromagnetic objects such as staples and pins, care
should be taken when placing the handset near these items.
Wall Mounting
To wall-mount the telephone, rst detach the table support by placing thumbs at either
end of the support and pushing towards the rear/top side of the telephone. It can
now be mounted directly to an existing wall plate or by xing two screws in the wall,
positioned vertically 100 mm apart. These screws will t into the two ‘keyholes’ at
the back of the telephone.
Hearing Aid Compatible
This telephone is hearing-aid compatible. Select the T mode on your hearing aid to
enable this feature.
Group Listening
During a call, it is possible to activate the Group Listening function by pressing s.
With this function activated, the call can be heard from the speaker on the base unit
as well as from the handset. That way, anyone in the same room as the base unit will
be able to hear both parties and follow the conversation.
1. Dial the number as usual.
2. Once the call has been connected, press s to activate the Group Listening
function. The conversation can then be heard via the speaker. The speaker
indicator will illuminate while the Group Listening function is active.
3. Adjust the volume, if needed, using the volume control on the side.
4. To deactivate the Group Listening function, press s once again.
The speaker can also be used for hands free dialling. Press s, then dial the number and pick up the
handset when the call is answered. Remember that there is a microphone in the handset only.

English
4 www.doro.com
Operation
Mute Button
The microphone is disabled while the z button is held down.
Redial Button
If the number dialled is engaged, or if you wish to redial the last number dialled, lift
the receiver (or press the s button) and press the redial button r.
Volume Controls
The handset earpiece volume may be adjusted during a call using . Press the
right side of the button to increase the volume, the left side to decrease it.
The base speaker volume is adjusted with the control on the side of
the base.
Labels/protective cover
A set of labels are included with this product. The Hook Switch memory label can
be used for displaying information of a more temporary kind, whereas the label
under the protective cover is to be used for more permanent information, such as
instructions regarding room service, wake-up calls, laundry, etc.
To reduce the possibility of tampering with the label or its information, the
protective cover is designed to be quite difcult to remove. Remove it by pressing
the button located under the table support (after detaching the support). Keep the
button depressed, while pulling the cover upward.
To remove the Hook Switch label, use a thin instrument to remove it from its holder,
and to put it back in. The Hook Switch itself cannot be opened.
Connection of additional equipment
Additional equipment such as modems or cordless phones can be connected to this
telephone via the socket on the right side of the base.
Two methods of operation can be selected by using the 1:2 switch located on the
underside of of the base:
1. allows for single line parallel operation. For example, a computer modem can be
operated through the telephone but only one device can be operated at a time,
either the modem or the telephone.
2. allows for two line operation where a computer modem can be connected via
the telephone and both devices can be used at the same time. The network wall
socket must have two lines connected.

English
www.doro.com 5
Settings
Memory
This telephone has 10 Direct dialling memories.
Once a number has been stored in a memory location, you need only to press
one button to make the call. The store button P is located under the protective
cover.
Storing Direct Memory Numbers
1. Lift the handset (ignore the dialling tone) and press store button P using
a pointed instrument .
2. Enter telephone number (up to 32 digits).
3. Press P again.
4. Select memory position by pressing the corresponding button.
5. Replace the handset. The number is now stored.
Using Direct Memory Dialling
1. Lift the handset (or press the s button) and wait for a dialling tone.
2. Press the direct memory button required.
Press r to insert a pause in the telephone number.
In case of a number change, store the new number in the location of the old one.
The Direct Memories are retained even when the telephone is disconnected.

English
6 www.doro.com
Other
Technical information
Beneath the protective cover and its label are switches to select operational
parameters of the telephone when connected to different types of PBX. Refer to
page 5 for instructions to remove the protective cover.
NB: These switches should only be adjusted by qualied personnel.
Recall Button Timing
There are three different Recall Button Timings available: 100/300/600 ms.
Ringer
Using the switch , the Ringer volume can be set to two different levels. Also
the melody can be set with 4 underneath the telephone
Message Waiting Indicator
Some PBX systems use a function called Message Waiting. The telephone can
indicate that there are voice mail messages by selecting the appropriate method
for your system. Please contact your system administrator for more information.
Pairs of switches must be set to the ON position for compatibility with the
following MW systems:
1 & 2: Line Reversal.
3 & 4: Visual Ring Indicator.
5 & 6: High voltage (NEON). Also Visual Ring Indicator.
7 & 8: Not Used, must be set to Off position.
Troubleshooting
Check that the telephone cord is undamaged and properly plugged in.
Disconnect any additional equipment that may be connected. If the problem is
resolved, the fault is with the other equipment.
Test the equipment on a known working line. If the product works then the
fault is with the line.
If you are still experiencing difculties, contact the place of purchase.

English
www.doro.com 7
Other
Australia and New Zealand
If you believe this product is malfunctioning, please refer to the relevant section
and/or consult the troubleshooting guide in this manual to ensure that you have
followed the instructions carefully. As an alternative you can visit our web site
for FAQ’s or send an e-mail for a prompt reply.
Guarantee
This product is guaranteed for a period of 12 months from the date of purchase.
Should you experience difculties with the product, please contact us for
assistance. If the product is then found to be faulty you will be asked to return it
directly to us with a copy of the purchase receipt.
This guarantee shall not apply to a fault caused by an accident or a similar
incident or damage, liquid ingress negligence, abnormal usage or any other
circumstances on the purchaser’s part. Furthermore, this guarantee shall not
apply to a fault caused by a thunderstorm or lightning, excessive or any other
voltage uctuations or faults on the telephone line. (As a matter of precaution,
we recommend disconnecting the telephone during a thunderstorm).
This guarantee does not affect your statutory rights.
AUSTRALIA NEW ZEALAND
DORO Australia Pty Ltd Atlas Gentech (NZ) Limited
PO Box 6760 Private Bag 14927
Baulkham Hills BC NSW 2153 Panmure
Australia Auckland
New Zealand
Consumer Support Consumer Support
Ph: (02) 8853 8444 Ph: 0900 500-25 (Toll Call)
Fax: (02) 8853-8489 Fax: (09) 574-2722
Email: support@doro.com.au Email: support@atlasgentech.co.nz
Web site: www.doro.com.au

English
8 www.doro.com
Technical Support
Technical information
REN (RN for New Zealand)
The REN (Ringer Equivalence Number) or (RN) is of signicance only if you
wish to connect more than 1 telephone to your telephone line. A standard
telephone line has a maximum REN capacity of 3 (RN of 5). It is possible
to connect 3 devices with a REN of 1 (RN of 1) with no degradation to the
product’s performance. Exceeding this limit may cause the volume of the ringer
in any phone to decrease or not ring at all.
Notes for operation in New Zealand
The grant of a Telepermit for any item of terminal equipment indicates only
that Telecom has accepted that the item complies with the minimum conditions
for connection to its network. It indicates no endorsement of the product by
Telecom, nor does it provide any sort of warranty. Above all, it provides no
assurance that any item will work correctly in all respects with another item of
Telepermitted equipment of a different make or model, nor does it imply that
any product is compatible with all of Telecom’s network services.
This equipment shall not be set to make automatic calls to the Telecom “111“
Emergency Service.
This equipment may not provide for the effective hand-over of a call to another
device connected to the same line.
This equipment should not be used under any circumstances that may constitute
a nuisance to other Telecom Customers.
UK
If you cannot resolve the fault using the faultnder section, technical support is
available on the Premium Rate Number: 0906 302 0114.
Calls cost 50 pence per minute (prices correct at the time of going to
press), and is operational between 9AM - 5PM Monday-Friday excluding Bank
Holidays. Alternatively,
E-mail on: tech@doro-uk.com
You can contact us in writing: Consumer Support Group, Doro UK Ltd.,
22 Walkers Road, North Moons Moat, Redditch, Worcestershire, B98 9HE,
(regarding any Spares or Technical query), or
Telephone (Spares only): 01527 584377
Web site: www.doro-uk.com

English
www.doro.com 9


www.doro.com
Table of contents
Other Doro Telephone manuals