English
10 www.doro.com
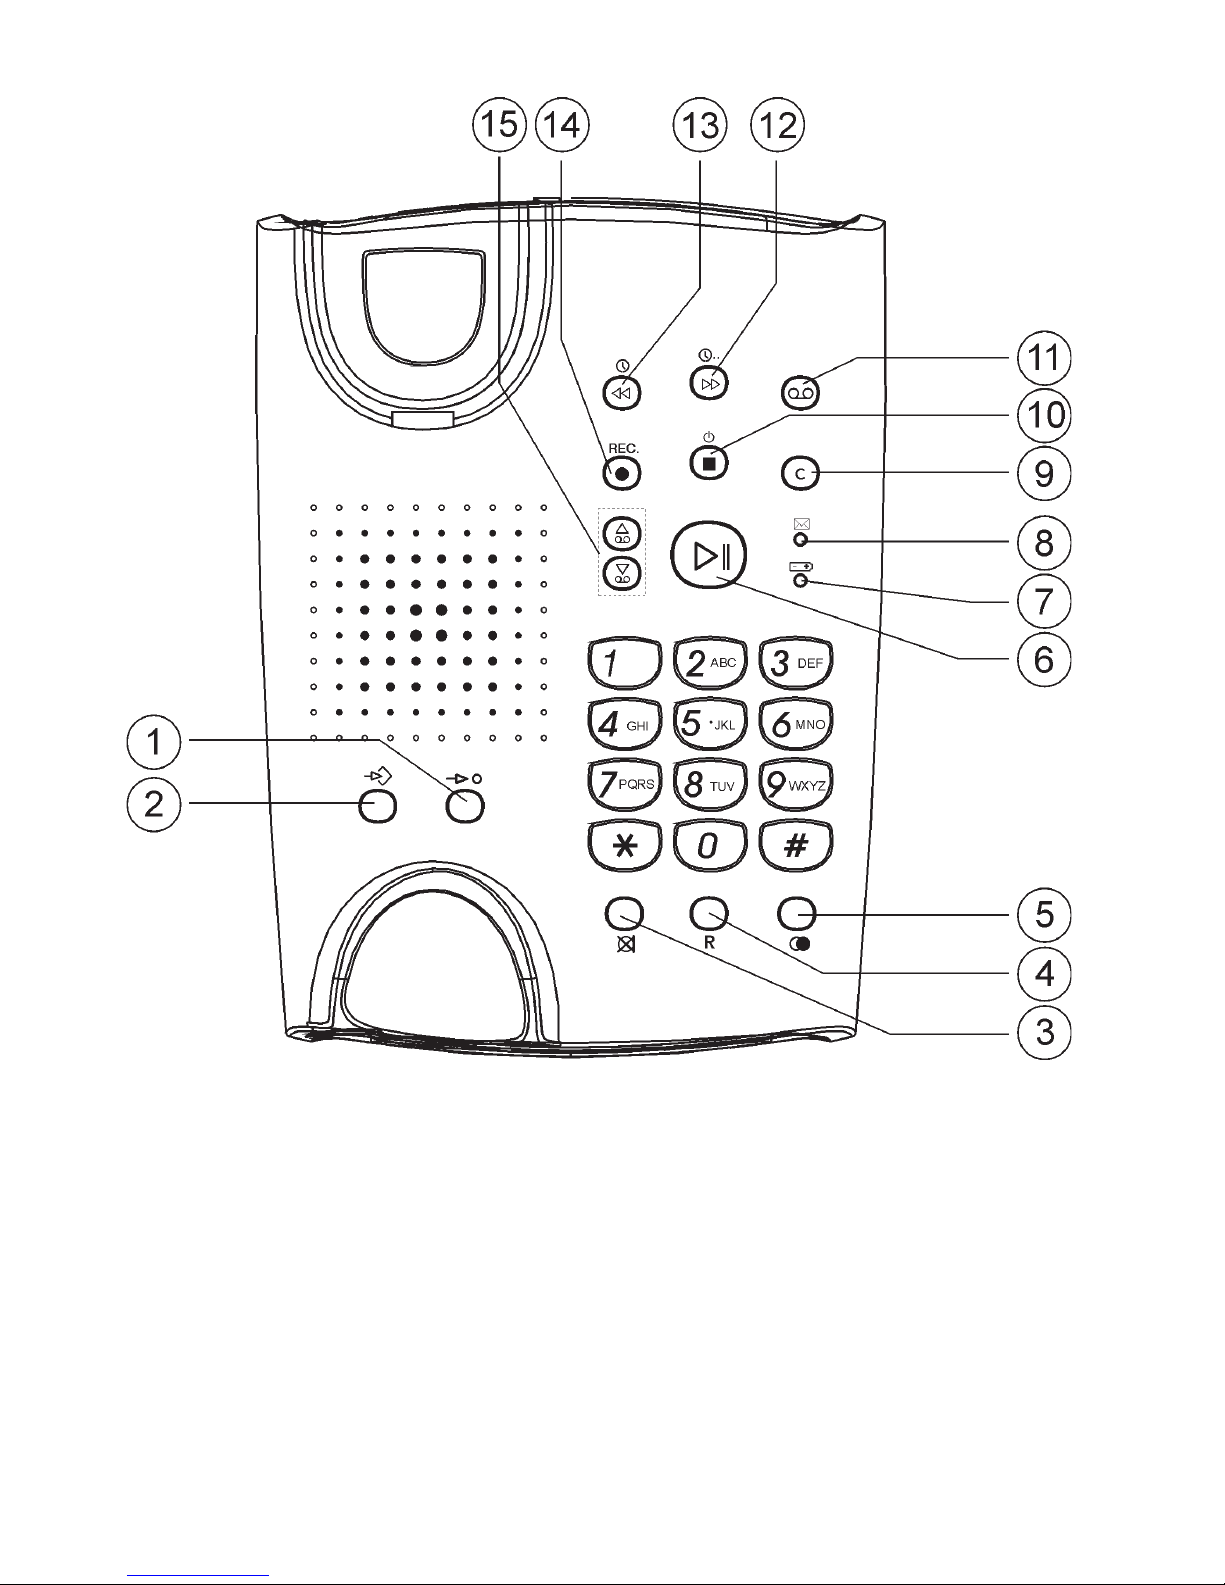
The Answering Machine
Remote Control
This machine can be remotely accessed using an ordinary tone dialling
telephone. Dial the telephone number to which the answering machine is
connected, after the OGM has been played enter the remote code (located on
the underside of the telephone).
Once the code is accepted several options are available.
Remote Code
This three-digit remote code is required in order to gain access to the remote
functions of the answering machine. The remote code is located on the
underside of the telephone.
Remote Control
1. Dial the telephone number to which the answering machine is connected.
2. Enter the three-digit remote code after the OGM has played. If the code is
accepted, you will hear a beep.
3. Select an option (within 10 seconds) from the list below.
4. Once you have nished accessing the machine replace the handset.
Command Function
1#........................................ Play new messages
2#........................................ Play all messages
3#........................................ Erase single message during playback
4#........................................ Repeat message
5#........................................ Stop
6#........................................ Skip to next message
7#........................................ Record a MEMO, Stop=7#
8#........................................ Record new outgoing message, Stop=8#
9#........................................ Turn answering machine On (One beep)/
............................................ Off (Three beeps).
Please note!
If the machine doesn’t respond correctly to the remote control commands, try pressing the
telephone buttons for a longer or shorter time. In normal cases, the answering machine should
react to tones approximately 0.5 – 1 seconds in length, but longer tones may be necessary on
certain telephone networks.
If you do not enter any remote control command, the answering machine will disconnect after
a few seconds.
After 2 minutes and 40 seconds of ICM playback a tone will be heared. Press any key
to continue.