DPA 4060 User manual

1
CONTENTS
Cleaning Guide 2
Correct use of the Miniature Microphone 4
Miniature Microphone Headbands 8
Specifications 12
Accessories Available 14
Service & Repair 16
Warranty 16
CE Standard 16
USER’S MANUAL
Type 4060
Type 406 1
Type 4062
Type 4065
Type 4066
Miniature Microphone

To ensure optimal performance of
your DPA Miniature Microphone,
please follow the simple care and main-
tenance instructions below.
Miniature Microphones from DPA are
designed to be very resistant to humidity,
moisture and sweat. Highly resistant mate-
rials like gold plated stainless steel, and fea-
tures like the double-vent-protection-sys-
tem are used in construction of the micro-
phones, to avoid damage by hostile fluids.
In any case, it is still a good idea to keep the
Miniature Microphones away from any kind
of unnecessary exposure to water and
cleaning fluids and to keep the microphone
element dry at all times.
CLEANING GUIDE
The cable and protection grid are the only
parts that may be cleaned if necessary. Do
not use any kind of cleaning fluid other
than distilled water. Use of ultra-sonic
baths must be avoided. Avoid all kinds of
spray or fluids, which contain chemical
components to remove static electricity on
or close to the microphone as this could
cause damage to the electret layer.
When mounting the Miniature Microphone
directly on the skin of a performer, care
should be taken to avoid sweat from run-
ning directly into the microphone. If the
microphone gets filled up with water or
sweat it will not be damaged, but possibly
turn deaf while the water is captured
inside the microphone, behind the protec-
tion grid. Remove the water by shaking the
microphone or drying it with a piece of lint
free cloth.
2
Keep dry
Sweat stopper

Note: If the microphone has been
exposed to water or sweat it must be
left to dry out to recover its original
specifications. Drying out the Miniature
Microphone between exposures to
humidity will also help to extend its life-
time. Leaving the microphone with the
power on will speed up the drying
process, as the built-in preamplifier will
gently heat up the microphone (idle
power ~2 mW).
Tip: In order to save battery power on
the belt pack transmitters while drying
out the microphones, it is a good idea
to use a P48 Phantom Power Adapter
(DAD6001).
Cleaning the microphone grid
During use in environments where the
microphone is exposed to make-up or dusty
materials, the grid may get clogged up.
Remove the microphone grid from the
microphone element and clean the grid
using a soft cloth and distilled water only.
Make sure the grid is dry before remount-
ing it on the microphone element.
Cleaning the microphone cable
Residue from tape, glue or make-up on the
cable must be removed after use. Leaving
these substances on the cable over longer
periods of time may etch into the cable
jacket and will make the cable more sus-
ceptible to breaks. The cable can easily be
cleaned using organic oil (e.g. olive oil) or
lukewarm, distilled water.
Do not bend the cable or rub it harshly
since this may stress the inner cores of
the cable and cause them to break over
time.
3
Remove grid before cleaning

4
Cleaning the microphone element
The microphone diaphragm is protected
inside the microphone element housing
and access to the diaphragm is via a perfo-
rated grid only. It is therefore well protect-
ed from dust build-up and no attempt to
clean the element should be made.
In case any make-up, paint or other materi-
als have reached the element through the
grid, the only recommended method to
clean the microphone element is to use a
dry cotton bud. Clean (or wipe) the sides of
the element facing away from the perfo-
rated protection grid only.
CORRECT USE OF THE MINIATURE
MICROPHONE
It is important to observe the following
guidelines concerning the daily use of the
microphone.
Correct use of microphone grids
The two different protection grids that are
supplied with the Miniature Microphones
Type 4060, 4061, 4062 and Adjustable
Miniature Microphone Headband Type
4066 are for acoustical equalization,
according to the placement on the body of
the performer. When mounted on the head
of the performer, the microphone normally
needs a 3dB soft boost at 8-20kHz,
A
A
A
BB
B
Soft boost grid
High boost grid

provided by the soft boost grid (position A).
Placements on the chest or near the ear of
the performer require a 10dB boost at 12
kHz for the microphone to sound natural
(position B). This acoustical equalization is
noiseless and is provided by the high boost
grid. Type 4065 Miniature Microphone
Headband is only supplied with the soft
boost grid, as the microphone will always
be placed near the mouth.
Note: The microphone is supplied with
the soft boost grid fitted. This grid
must be removed before being
replaced by the high boost grid. Avoid
excessive force or tampering when
removing or mounting the grid as it
may cause damage to the grid and the
net on top of the grid may become
detached.
Correct use of the microphone
element
The diaphragm in the microphone element
is the most sensitive part of the unit and
as emphasized earlier, it must be left
untouched to preserve its original charac-
teristics. Do not spray any substances
such as hair spray directly into the micro-
phone and avoid getting make-up or paint
on the microphone element and housing.
The protection grids are available in three
standard colours: Black, beige and white.
Check if a different coloured protection
grid will be less visible before painting or
colouring a microphone grid.
Tip: In lapel or tie placement it is re-
commended that the microphone grid
point away from the mouth to
decrease breathing noises caused by
the mouth or nose of the performer.
The microphone element is completely
omnidirectional at all frequencies, so
this method will not colour the sound.
5
DMM0008 Miniature Clip, Double Lock

Correct treatment of the microphone
cable
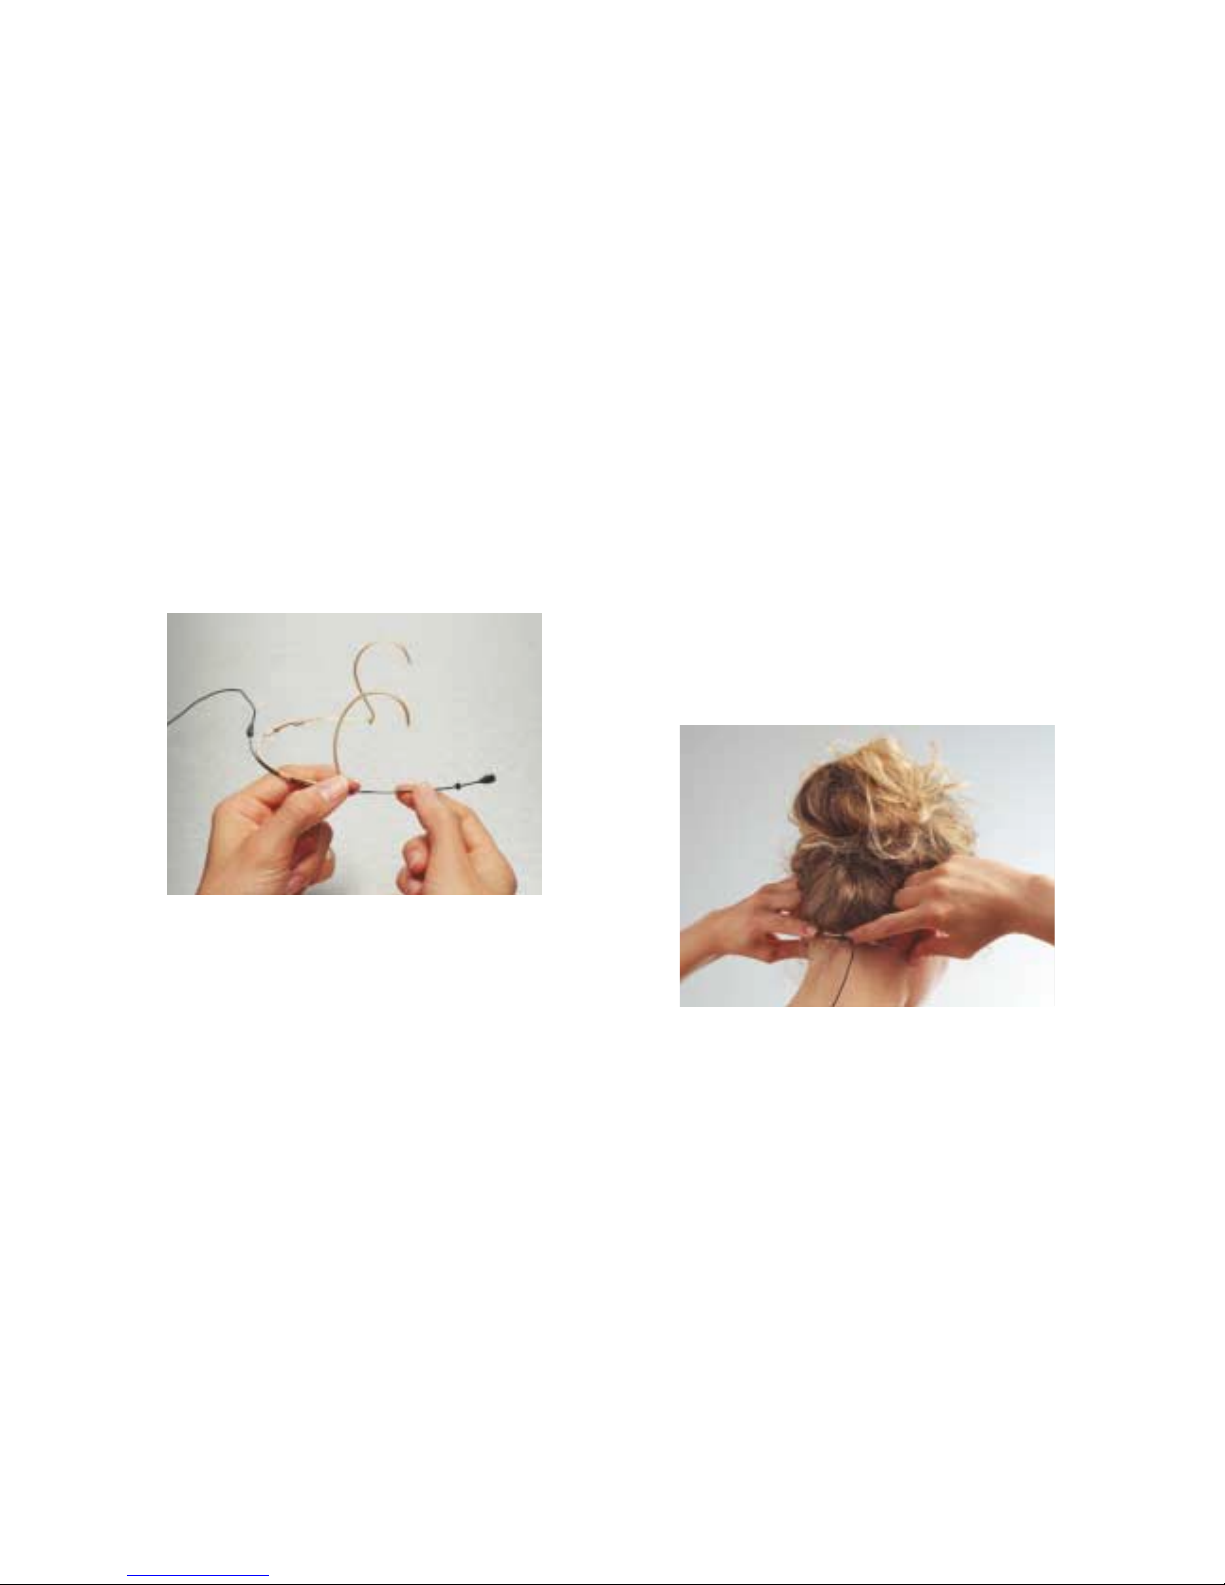
The cable is usually longer than required for
its actual purpose. Ensure that superfluous
cable is wound up in soft loops (preferably
6-8 cm in diameter). Avoid ’kinks’ in the cable.
Exposing the cable to stretching beyond its
specifications or stressing it by winding it
tightly over sharp edges will reduce the
microphone’s operational life.
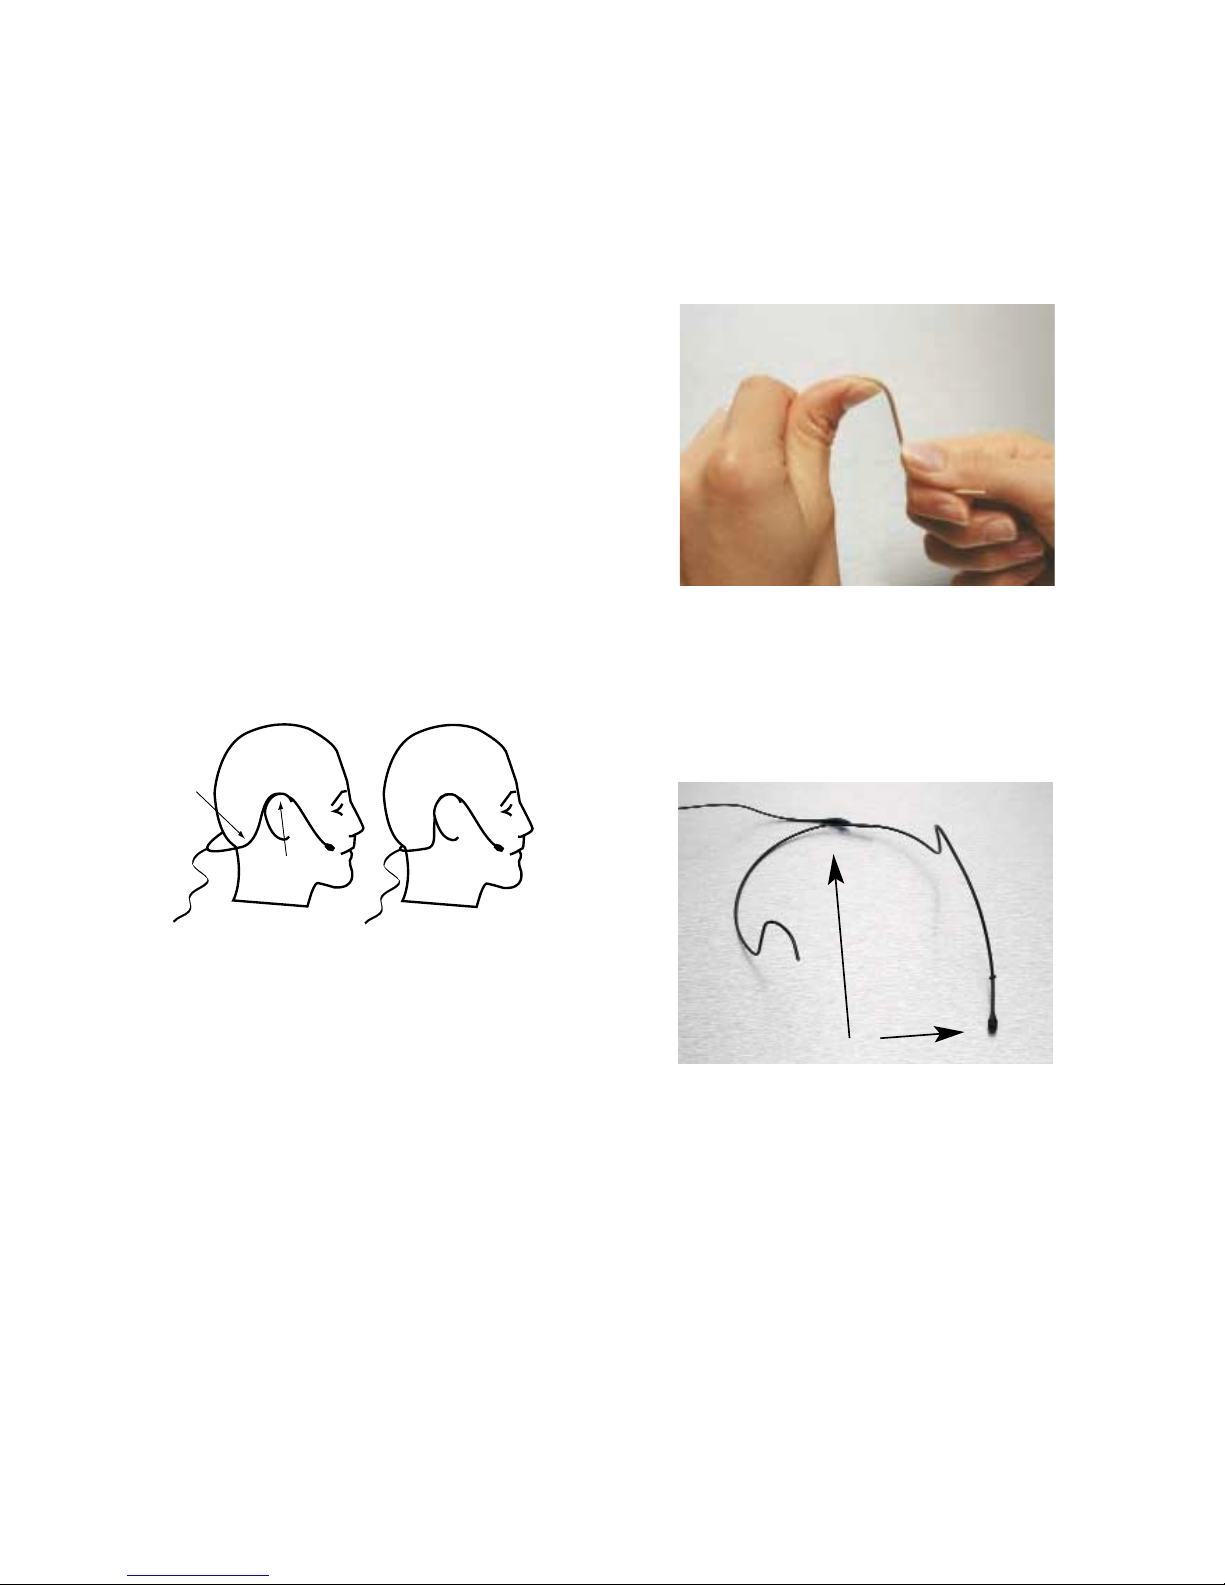
Tip: Handling noise from the cable can
be decreased by up to 30dB by making
a loose loop in the cable, as close to the
microphone element as possible. The
DMM0008 Miniature Clip, double lock,
is designed for this mounting tech-
nique. See picture on page 5.
Tip: The place where the cable enters
the MicroDot connector will sometimes
be exposed to excessive stress and
after long term heavy-duty use, the
cable might show signs of wear at this
point. As a preventive maintenance pro-
cedure, it may be advisable to replace
the connector in this instance. Contact
the nearest DPA Microphones repre-
sentative for maintenance advice or
assistance.
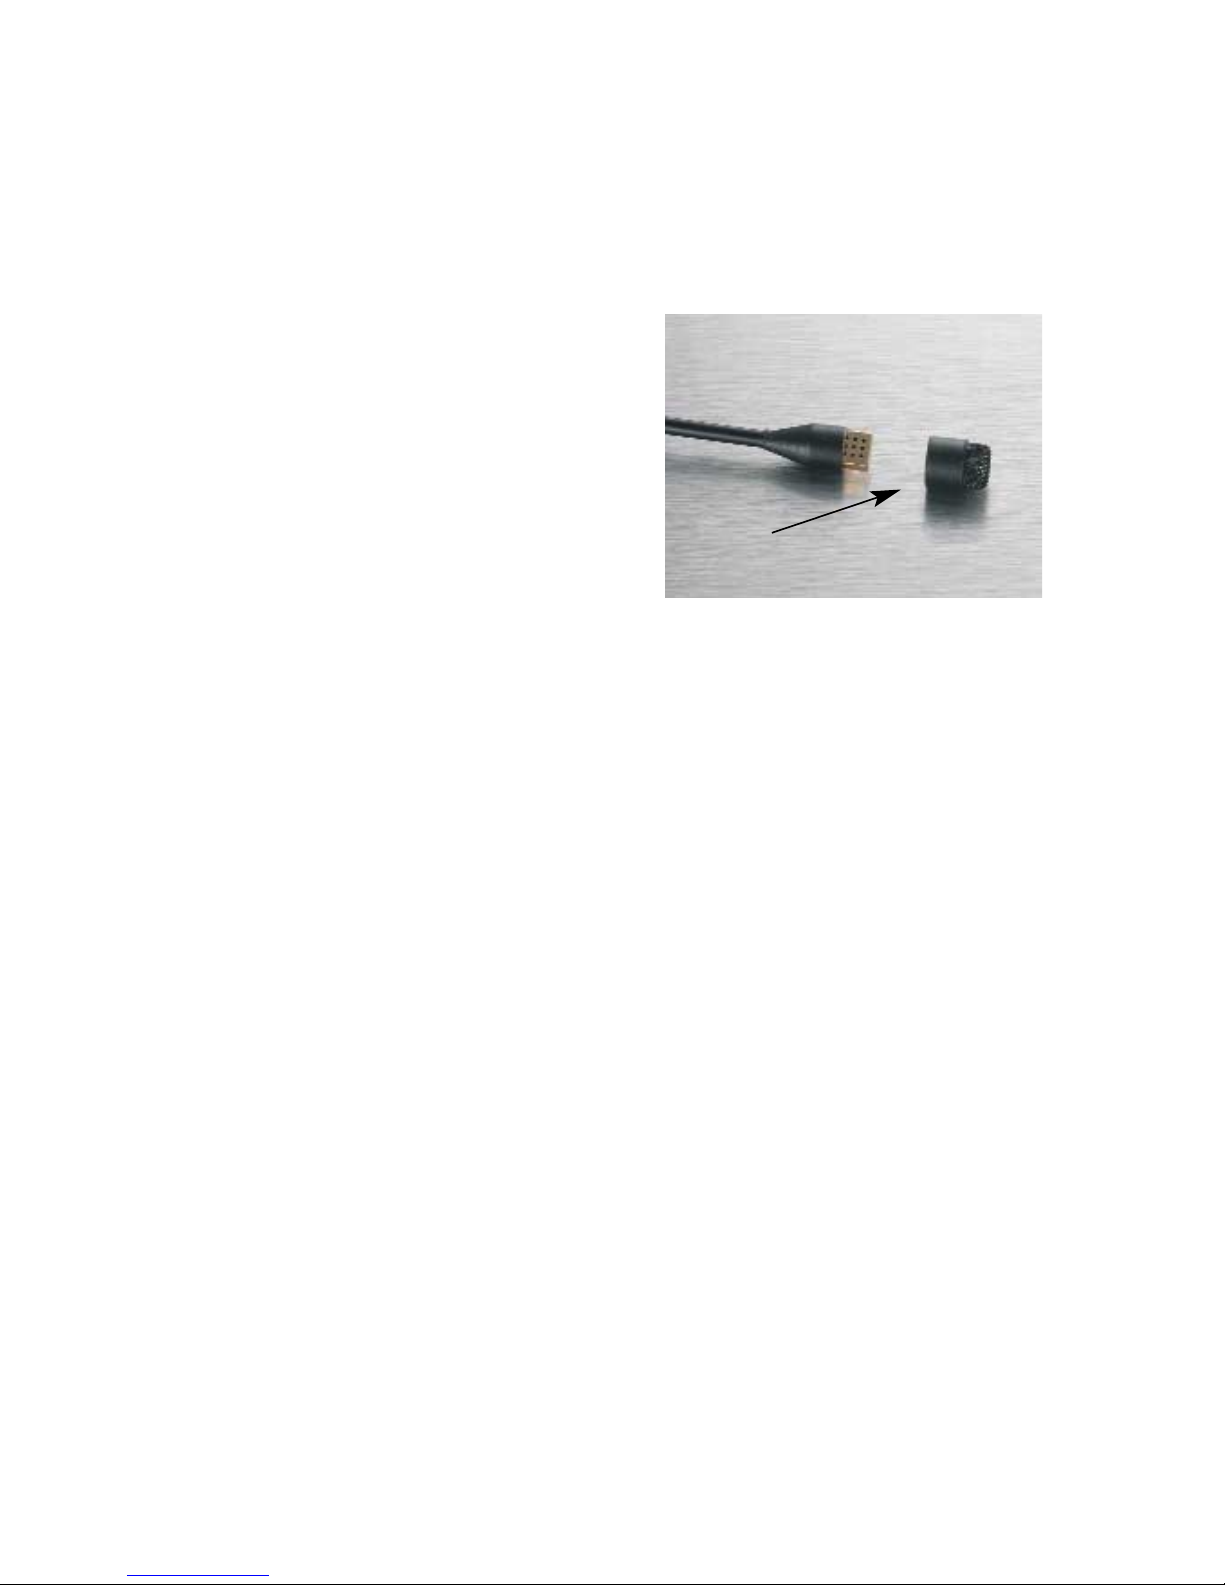
Correct use of adapters and MicroDot
connectors
To provide users with safe and compact
mounting of connectors, all Miniature
Microphones from DPA are fitted with the
MicroDot connector as standard. A broad
range of connection adapters is offered
as optional accessories for most VHF and
UHF systems for professional use. The
adapters are ultra-compact and will in most
cases take up no more space than the orig-
inal connectors.
A connector-tightening tool is supplied with
each adapter and should be employed
whenever the MicroDot connector needs to
be tightened safely onto the adapter for
long periods of time. Never attempt to
6
Correct way to wind up the cable of the
Miniature Microphone. Please note the
slack after the connector.

7
loosen or tighten the connector by the cable
or its strain relief! Despite the use of Kevlar,
the cable might be damaged if twisted with
excessive force. Tighten the MicroDot using
finger torque or the recommended tighten-
ing tool only. Do not use glue.
Do not mount any other connector onto
the cable than the standard MicroDot con-
nector from DPA Microphones. The DPA
MicroDot connector is specially designed
for use with the Kevlar reinforced cable,
ensuring the maximum possible tensile
strength in the design. In case of failure,
MicroDot spare parts, assembly tool and
assembly guide can be acquired.
Various wireless systems require the use
of electronic components inside the adapter
to optimise the signal level, the DC-offset
filtering and powering of the built-in micro-
phone preamplifier. Using the adapters
from DPA Microphones ensures the correct
electronic circuit with the listed types of
wireless systems at all times. Do not attempt
to employ non-standard adapters or con-
nectors as you might damage the micro-
phone preamplifier.
A connector tightening tool is supplied
with each adapter.
MicroDot connector
Tighten here
Not here

8
MINIATURE MICROPHONE
HEADBANDS
Adjusting the Type 4065 Headband
The Miniature Headband 4065 is pre-
formed for your convenience. However, it
requires minor adjustment in order to get
a tight, fixed position to the back of the
neck. Carefully bend the steel tube at the
areas shown on the illustration.
Note: Do not bend the steel tube near
the microphone element or near the
cable exit as you may risk breaking the
tube. The microphone element is per-
fectly omnidirectional and does not
need to point directly towards the
mouth of the performer. Avoid posi-
tioning the microphone in the air
stream from nose or mouth.
Do not bend near these parts of the
headband.
When bending the steel tube please treat
with care. The steel tube must be bent
around a curved object (min. diameter of
20mm) or a thumb in order not to break the
headband.

Adjusting the Type 4066 Headband
The size of the headband mount may easi-
ly be adjusted. Change the standard bend
by carefully expanding the distance
between the earhooks.
The 4066 Adjustable Miniature Microphone
Headband is supplied with the boom mounted.
To change sides simply click the boom out
of the clips and follow the instructions
below.
• Hold the boom in your right hand when
mounting on the right side and vice versa.
Hold the boom by the cable relief.
• Position your hand with the boom between
the ear hooks and turn the boom around in
the loop. Take your hand with the boom
under the headband and draw it towards you.
• Secure the microphone boom into the
two clips next to the ear hook beneath
which the boom is to be mounted. Next,
secure the boom in the clip in the middle of
the headband. This clip is movable and should
be placed near the end of the microphone
boom, before the cable relief (where the
soft cable begins to be visible). The remaining
two clips are not used (unless two booms
are to be mounted on the same headband.)
The soft cable should not be attached into
the clips.
9

Adjust the approximate position that the
microphone boom should be placed on the
cheek between the ear and the mouth.
Hold the headband when pushing or pulling
the microphone boom. (Please note that
when placed near the ear, the high boost
grid should be used in order to compensate
for the high frequency loss in this position.)
Note: The capsule features an omnidi-
rectional transducer and it is therefore
not necessary to pull the capsule to the
front of the mouth. It can be placed
very discreetly on the cheek and still
produce a highly detailed and clean
sound by using the specially designed
DPA grids. Please see page 4.
Now take up the 4066 and adjust the size
of the headband so that it fits the size of
your head: Start with an oversized head-
band and use both hands simultaneously,
holding your index fingers on the back of
the headband while pushing in the ear
hook parts inwards with your thumbs. If
you want the position of the microphone
boom to be altered at this point, adjust-
ments are still possible, simply by drawing
the boom while holding a firm grip with the
other hand on the headband.
For discrete placement, you can now
choose to bend the microphone boom
slightly so that the capsule is as close to
the cheek as possible. This will minimise
10

the risk of shadows on the face, when
used in applications where heavy spot-
lights are common. Do not bend by holding
on the capsule itself, but bend the wire
boom, making a smooth curve with your
thumb to best fit the profile of the face.
Note: When researching the effect of
changes in frequency response of this
microphone, tests were done with the
microphone placed directly on the cheek
as well as in a short distance away. No
appreciable difference in sound quality
is present between the two positions.
Using the boom separately
It is possible to use the MMB4066 Miniature
Microphone Boom separately, in applications
where the headband is not needed. No
electronic components are incorporated in
the headband, which serves purely as a
mount for the boom.
In applications where the miniature micro-
phone needs to be invisible e.g. when
mounted in hair or wigs, it can be useful to
have a hard steel tube instead of a soft
cable running over the head. Also, when
mounted on specific instruments, it can
prove necessary to have the microphone
lifted from the base. This is possible when
using the MMB4066 Miniature Microphone
Boom, because the microphone element is
attached to a hard steel tube.
11

12
SPECIFICATIONS
Directional characteristics:
Omnidirectional
Cartridge type:
Pre-polarized condenser element with
vertical diaphragm
Principle of operation:
Pressure
Power supply:
Via the adapter system from DPA
Microphones
Frequency response:
Soft boost grid:
20Hz-20kHz ±2dB, 3dB soft boost at
8-20 kHz
High boost grid:
20Hz-20kHz ±2dB, 10dB boost at 12 kHz
Sensitivity (± 3dB at 1kHz):
4060: Nominally 20mV/Pa; -34dB re. 1V/Pa
4061: Nominally 6 mV/Pa; -44.5dB re. 1V/Pa
4062: Nominally 1 mV/Pa; -60dB re. 1V/Pa
4065: Nominally 6 mV/Pa; -44.5dB re. 1V/Pa
4066: Nominally 6 mV/Pa; -44.5dB re. 1V/Pa
Equivalent noise level A-weighted:
4060: Typ. 23dB(A) re. 20µPa
(max.26dB(A))
4061: Typ. 26dB(A) re. 20µPa
(max.28dB(A))
4062: Typ. 33dB(A) re. 20µPa
(max.37dB(A))
4065: Typ. 26dB(A) re. 20µPa
(max.28dB(A))
4066: Typ. 26dB(A) re. 20µPa
(max.28dB(A))
Equivalent noise level CCIR 468-1:
4060: Typ. 35dB (max. 38dB)
4061: Typ. 38dB (max. 40dB)
4062: Typ. 45dB (max. 49dB)
4065: Typ. 38dB (max. 40dB)
4066: Typ. 38dB (max. 40dB)
Max SPL:
4060: 134dB SPL before clipping
4061: 144dB SPL before clipping
4062: 154dB SPL before clipping
4065: 144dB SPL before clipping
4066: 144dB SPL before clipping
Total Harmonic Distortion:
123dB SPL peak (<1% THD);
120dB SPL sine (<1% THD)
Output impedance:
30-40 Ohm
Cable drive capability:
Up to 300m (984ft)
Dimensions:
Microphone length:
12.7mm (0.5in)

13
Microphone diameter:
5.4mm (0.21)
Capsule diameter:
5.4mm (0.21)
Weight:
4060, 4061 & 4062:
7.5g (0.26oz) incl. cable and MicroDot
connector
4065 & 4066:
14g (0.49oz) incl. cable and MicroDot
connector
Finish:
4060 & 4061:
Black, beige or white
4062, 4065 & 4066:
Black or beige
dB
30
20
10
200 Hz 500 220 ABC
Lin.
0
-10
-20
10 dB
10050
20 1 510 40
D
On-axis frequency response of Miniature Microphones.
Please notice that Type 4065 only utilizes the soft
boost frequency response

14
ACCESSORIES AVAILABLE
Miniature Holders
DMM0001 Miniature Clip
DMM0002-B Miniature Double Pin, Black
DMM0002-W Miniature Double Pin, White
DMM0003-B Miniature Magnet, Black
DMM0003-W Miniature Magnet, White
DMM0004 Miniature Clip, Small
DMM0005 Miniature Holder, Single Pin, 3pcs.
DMM0007 Universal Surface Mount
DMM0008 Miniature Clip, Double Lock
DMM0009 Miniature Concealer
DMM0509 Minature Concealer, 5 pcs.
DMM0010 Tie Pod, 3 pcs
DMM0011-B Magnet Mount, Black
DMM0011-W Magnet Mount, White
MHS6001 Microphone Holder for Strings,
1 pcs.
MHS6005 Microphone Holder for Strings,
5 pcs.
Acoustic Modification Accessories
DUA6001 Miniature Grids, 5pcs, Soft
Boost, Black
DUA6002 Miniature Grids, 5pcs, High
Boost, Black
DUA6003 Miniature Grids, 5pcs, Soft
Boost, Beige
DUA6004 Miniature Grids, 5pcs, High
Boost, Beige
DUA6005 Miniature Grids, 5pcs, Soft
Boost, White
DUA6006 Miniature Grids, 5pcs, High
Boost, White
Windscreens
DUA0560 Miniature Windscreens, 5pcs,
Black
DUA0561 Miniature Windscreens, 5pcs,
Red
DUA0562 Miniature Windscreens, 5pcs,
Blue
DUA0563 Miniature Windscreens, 5pcs,
Yellow
DUA0564 Miniature Windscreens, 5pcs,
Green
DUA0566 Miniature Windscreens, 5pcs,
White
DUA0567 Miniature Windscreens, 5pcs,
Beige
DUA0570
Miniature Windscreens, 7pcs, Colour Mix
Adhevsive Pads
ADH0001 Double-sided Tape for Tie Pod,
25 pcs.
ADH0002 Double-sided Tape for
Miniature Concealer, 25 pcs.
ADH0003 Miniature mic Tape, 25 pcs.
ADH0004 Double-sided Mic Tape, 10 pcs.
ADH0005 Double-sided Mic Tape, 50 pcs.
Connection Adapters
DAD6001 Adapter: MicroDot to 3-pin XLR
(P48)
DAD6001-BC Adapter: MicroDot to 3-pin
XLR (P48) w. Belt Clip
DAD6002 Adapter: Sennheiser BF1083-
U/BF1053-U

15
DAD6003 Adapter: Sennheiser SK50/SK
250/SK3063
DAD6004 Adapter: Audio Ltd. Tx 2000/
Tx 2020
DAD6006 Adapter: Beyerdynamic TS42/
TS85/TS190/TS900
DAD6007 Adapter: AKG PT 300
DAD6008 Adapter: Sony WRT820/WRT860
DAD6009 Adapter: Samson CT-2/TX-3/
UT4/UT5/UT6
DAD6010 Adapter: Shure U1/UT1/SC1,
TOA WM4300
DAD6011 Adapter: Vega T-66/T-677,
Shure U1L
DAD6012 Adapter: Lectrosonics M185
DAD6013 Adapter: Micron TX501.x/
TX502.x
DAD6014 Adapter: Pastega TMA16/
TMU20 (2 wire preset)
DAD6015 Adapter: Vega T-37
DAD6017 Adapter: AKG PT 40/60/80/81,
Samson UT1L/ VT2L
DAD6018 Adapter: Pastega TMA16/
TMU20 (3 wire preset)
DAD6019 Adapter: Sony Freedom WRT
805, Sennheiser Evolution Series
DAD6020 Adapter: Prostar, Telex UHF-
UB12
DAD6021 Adapter: AT ATW-T101
(System U100), Lectrosonics UHF systems
for low SPL
DAD6022 Adapter: Audio-Technica, ATW-
T51 (1400 Series)
DAD6024 Adapter: MicroDot to 3-pin XLR
(P48) w. Mid Range Attenuation
DAD6025 Adapter: Micron TX700
DAD6026 Adapter: Beyerdynamic TS500/
600, Trantec
DAD6027 Adapter for Beyerdynamic
OPUS 100-200
DAD6028 Adapter: Audio-Technica ATW-
T75 (7000 Series)
Miniature Power Supplies
MPS6010 Miniature Battery Supply,
2-channel, 3-pin XLR
MPS6020 Miniature Battery Supply,
2-channel, Phono
MPS6030 Miniature Battery Supply,
2-channel, Mini-Jack
MPS6040 Miniature Battery Supply,
2-channel, 1⁄4 in. Jack
Extension Cables
DAO6005 Miniature Microphone Cable, 3.5m
DAO6010 Miniature Microphone Cable, 10m
DAO6020 Miniature Microphone Cable, 20m
Parts for 4066 headband
AHM6000 Adjustable Headband Mount
MMB4066-B Miniature Microphone
Boom, Black
MMB4066-F Miniature Microphone
Boom, Beige
Cases & Boxes
DAK4060 Accessory Kit for Miniature
Microphones

16
Miscellaneous
DQA0035 Tool for MicroDot
DUA6010 Drop Stopper, White, 10pcs.
DUA6011 Drop Stopper, Black, 10pcs.
DUA6015 Clips for AHM6000, 5pcs.
SERVICE & REPAIR
Products from DPA Microphones are extreme-
ly stable, and there should not be any sig-
nificant change in the specifications with
time and use. If, however, you are not totally
satisfied with the characteristics exhibited
by these products, contact your nearest
DPA Microphones representative for further
details of service and the repair facilities
that are available. DPA Microphones has a
maximum seven working days in-house
service policy, usually ensuring that no more
than seven working days will elapse from
the day we receive the item for service to
the day we are ready to return it to you.
Please contact DPA Microphones for your
nearest representative on
TEL: + 45 48 14 28 28
FAX: + 45 48 14 27 00
You can also get in touch with DPA
Microphones via the internet using e-mail
or visit our website at
www.dpamicrophones.com
WARRANTY
All products from DPA Microphones are
covered by a two-year limited warranty on
both mechanical functionality and docu-
mented specifications as long as the items
are not mistreated, abused or modified in
any way. In case of a warranty claim your
invoice is your warranty registration.
CE STANDARD
The CE-mark guarantees all products conform
with relevant standards approved by the
European Community. The products
described in this User’s Manual comply with
current relevant standards when used with
cables from DPA Microphones. EMC Directive:
89/336/EEC, amended by 92/31/EEC and
93/68/EEC Low Voltage Directive:
73/23/EEC, amended by 93/68/EEC.
This manual suits for next models
4
Table of contents
Other DPA Microphone manuals