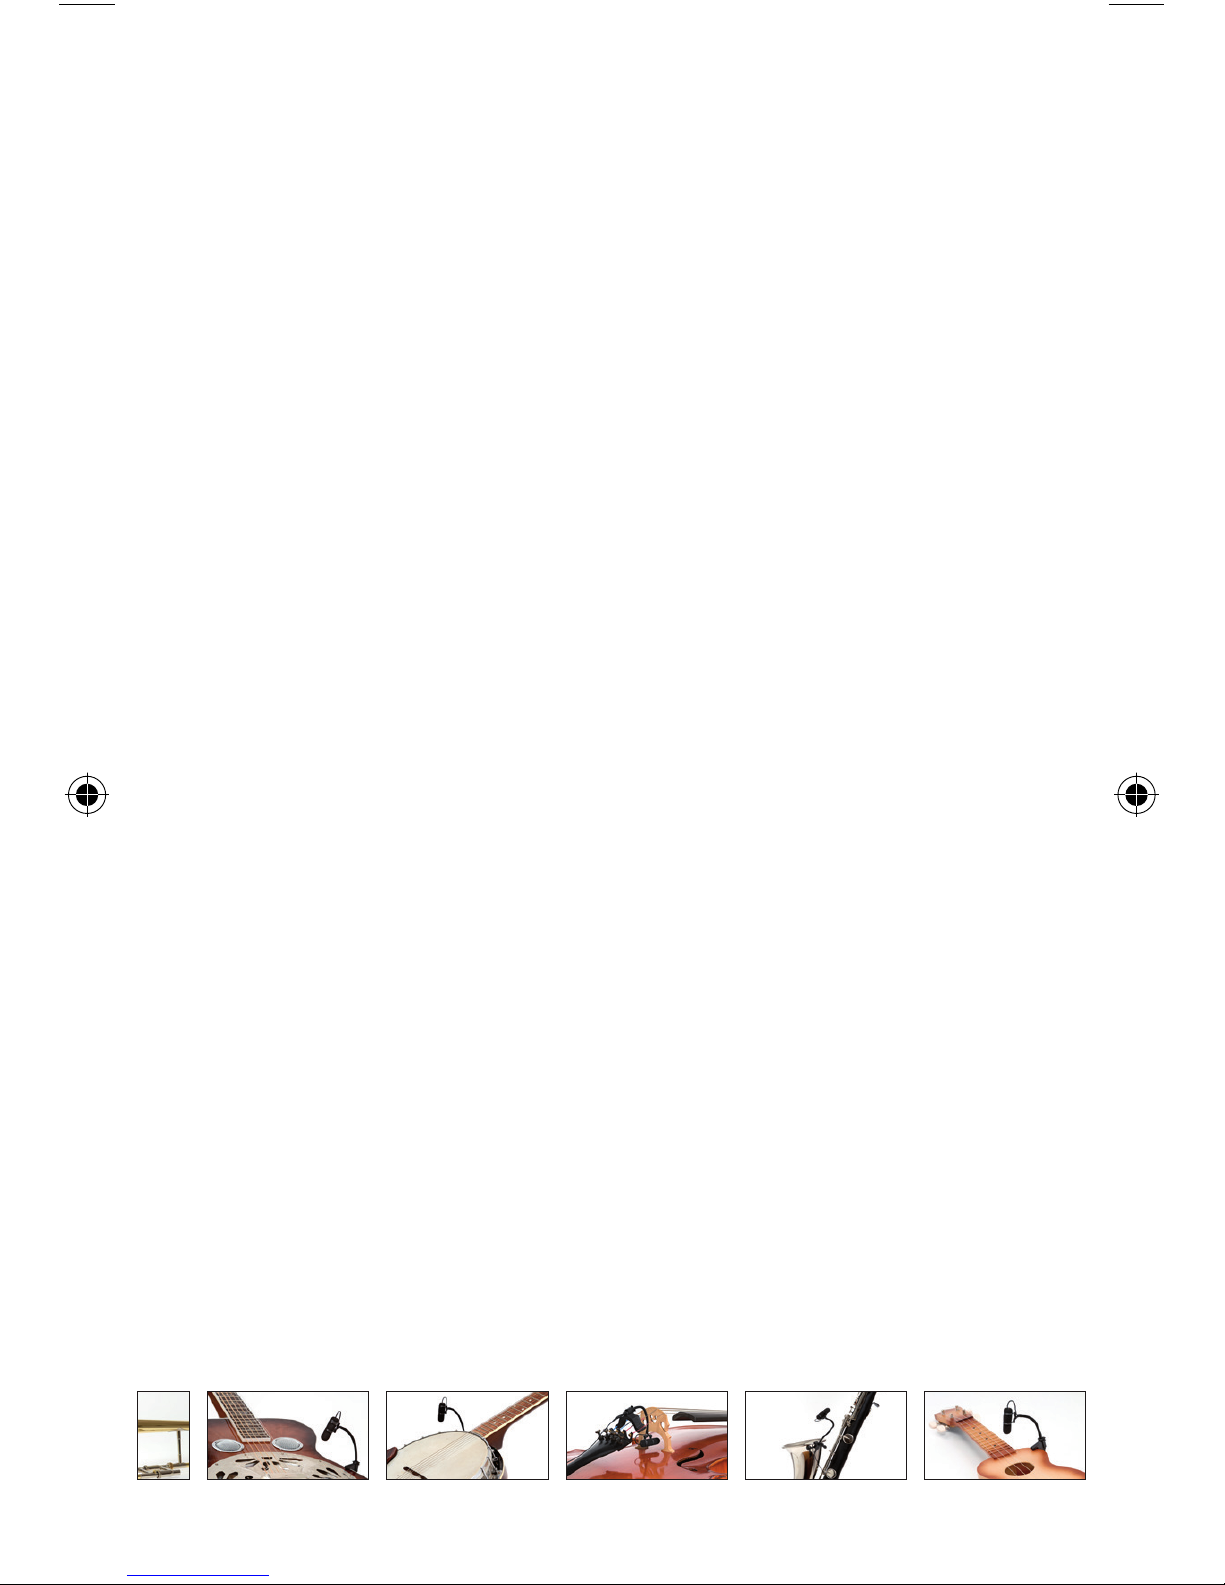
PRODUCT DESCRIPTION
The d:voteTM 4099 clip microphone range features a modular design with many
combinations of microphones, holders, cables and connectors.
The microphones are available in two sensitivities: normal sensitivity for most
instruments, low sensitivity for high-SPL handling of brass and drums (marked
with a dot on the cuff).
Standard gooseneck length is 140 mm (5.5 in). The
optional gooseneck extension unit adds 70 mm (2.8
in) to the length, allowing exibility in nding the
instrument's sweet spot.
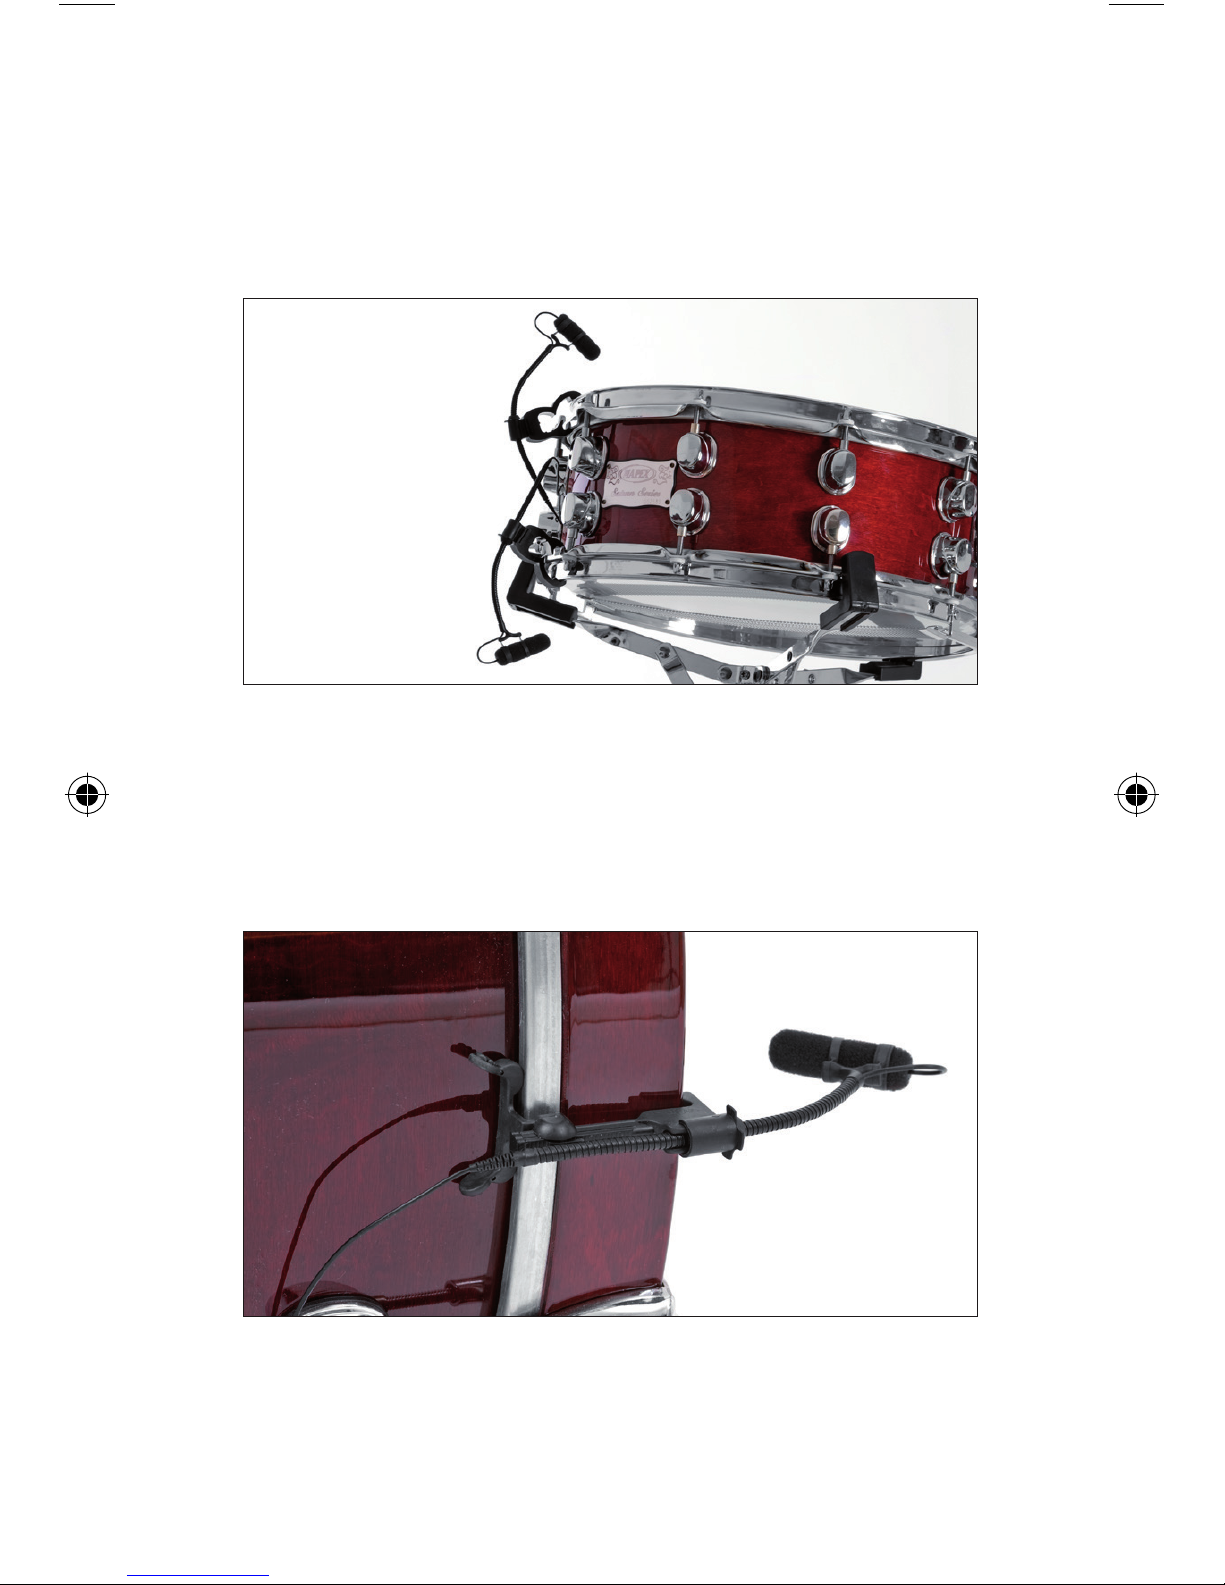
The eight different holders will t the vast majority of instruments.
Detachable cables
Detachable cables make it convenient to mount the mic on an instrument
before connecting it. The choice of two different cable qualities makes it
possible to tailor your mic to the specic task; you may want to use the heavy
duty cable for PA/Live gigs, and the easier-to-hide, thinner cable for personal use
on instruments where you don’t want the cable weight to interfere with your
performance. In case of cable break, service is easy and fast.
More than 35 different adapters are available to make the d:vote 4099 t
various professional wireless systems.
Extending the gooseneck
The gooseneck length can be altered by the optional extension unit,
helping with demanding positioning situations such as trombones with mutes.
Connect the male MicroDot at the end of the microphone gooseneck to
the female MicroDot at the extension using nger torque or employing the
supplied connector-tightening tool for higher security.
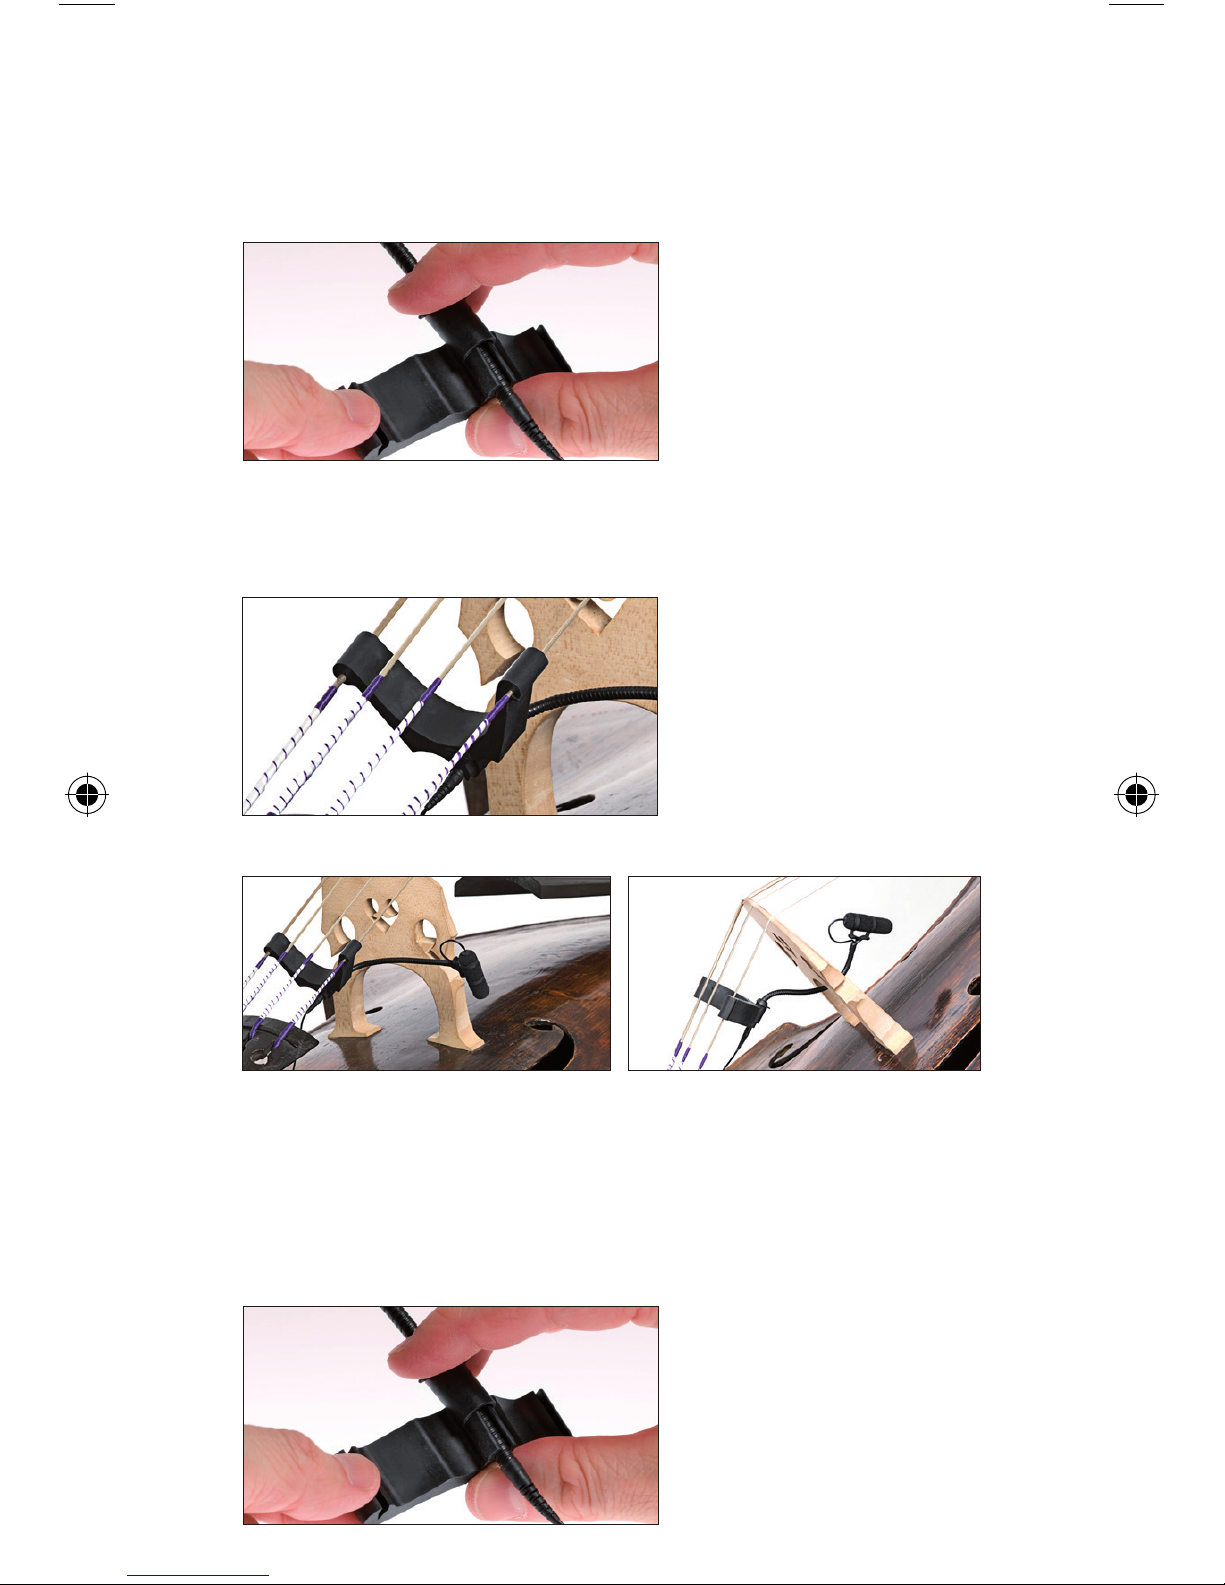
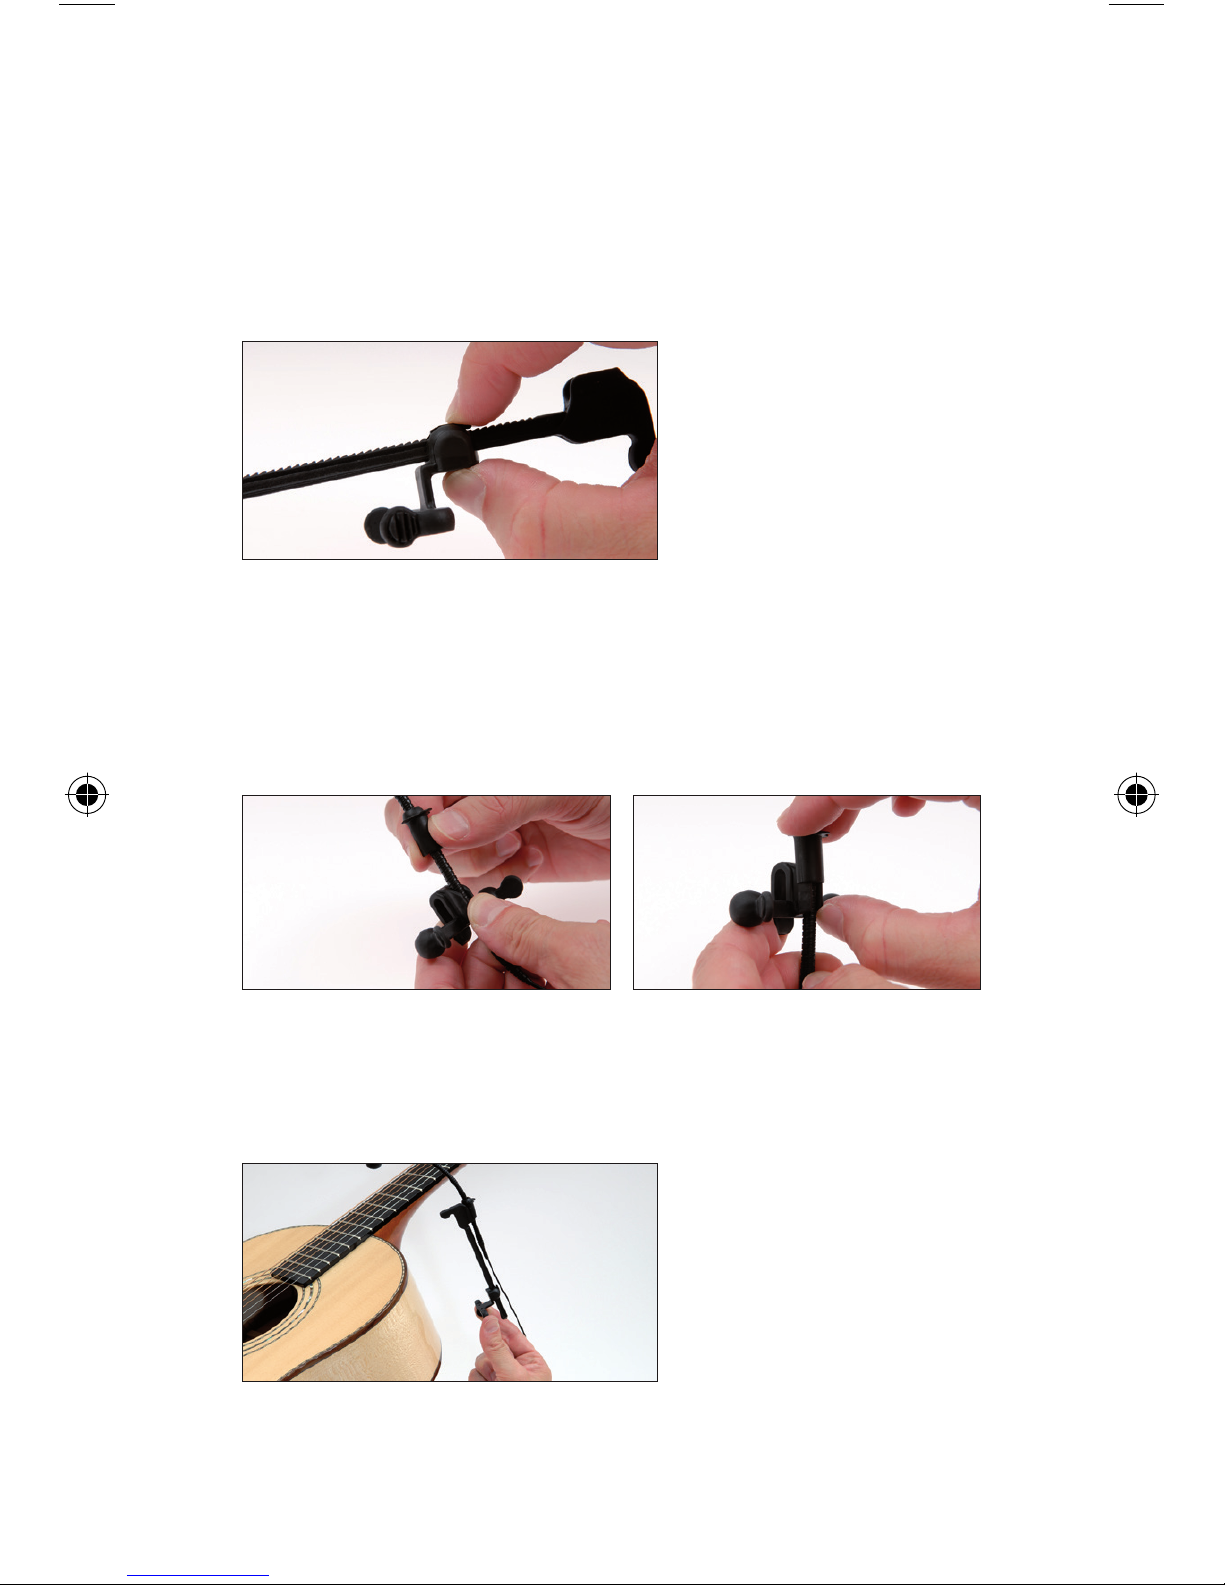
Mounting the gooseneck
Each holder has a grip designed to x the microphone gooseneck.
Furthermore, a xation lock slides over the grip to secure it. See description for
each instrument solution on the following pages.
3