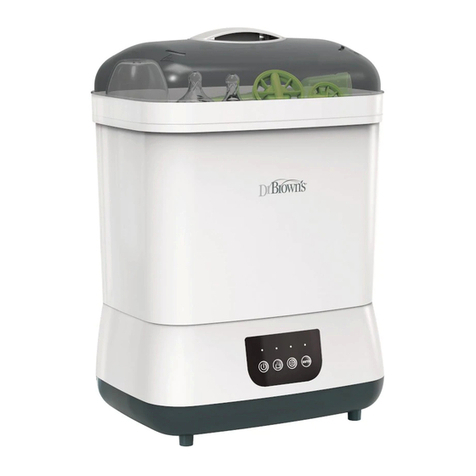
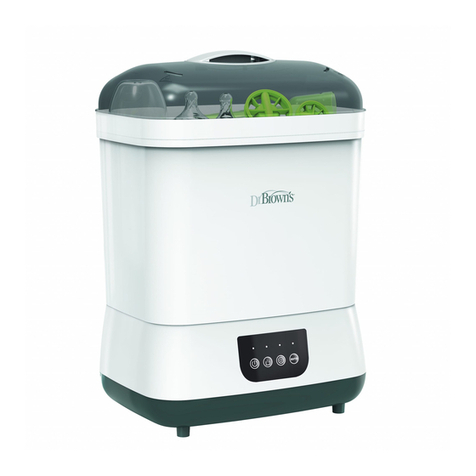
DrBrowns AC178-INTL User manual

Use distilled water only. • Use solo agua destilada. • Gunakan air suling/akuades. • 仅可使用蒸馏水 •
INSTRUCTIONS
FOR USE
PETUNJUK
PENGGUNAAN
使用前须知
INSTRUCCIONES
DE USO
Esterilizador
y secador de
biberones
Número de modelo
AC178-INTL, AC179-INTL
y AC180-INTL
Bottle
Sterilizer
and Dryer
Nomor Model
AC178-INTL, AC179-INTL
dan AC180-INTL
奶瓶
消毒烘干
一体机
型号
AC178-INTL, AC179-INTL
和
AC180-INTL
Bottle Sterilizer and Dryer
Model Number AC178-INTL, AC179-INTL and AC180-INTL
INTL-AC
178
, INTL-AC
179
and INTL-AC
180

READ AND SAVE THESE INSTRUCTIONS
Package Contents:
Bottle Sterilizer and Dryer
Measuring Cup
2 HEPA Type Filters
Instruction Manual
WARNING:
Read the ENTIRE instruction manual to become familiar with the features of
the product before operating. Failure to operate the product correctly can result in dam-
age to the product, personal property and cause serious injury. Failure to operate this
Product in a safe and responsible manner could result in injury or damage to the product
or other property. This product is not intended for use by children. Do not attempt
disassembly or use with incompatible components. This manual contains instructions for
safety, operation and maintenance. It is essential to read and follow all the instructions
and warnings in the manual, prior to setup or use, in order to operate correctly and avoid
damage or serious injury.
IMPORTANT SAFETY INSTRUCTIONS
READ AND SAVE THESE IMPORTANT SAFETY INSTRUCTIONS BEFORE USING
THIS APPLIANCE
WHEN USING ELECTRICAL APPLIANCES, PRECAUTIONS SHOULD ALWAYS BE
FOLLOWED TO REDUCE THE RISK OF FIRE, ELECTRICAL SHOCK AND INJURY TO
PERSONS, INCLUDING THE FOLLOWING:
• Read all instructions.
• Do not touch hot surfaces. Use handles or knobs.
• To protect against electrical shock, do not immerse cord or plug in water or other liquids.
• Close supervision is necessary when any appliance is used near children.
• This appliance shall not be used by children. Keep the appliance and its cord out of
reach of children.
• Unplug from outlet when not in use and before cleaning. Allow to cool before putting
on or taking o parts.
• Do not operate any appliance with a damaged cord or plug or after the appliance
malfunctions or has been damaged in any manner. Return appliance to the nearest
authorized service facility for examination, repair or adjustment.
• The heating element surface is subject to residual heat after use.
• The use of accessory attachments not recommended by Handi-Craft® Company and
may cause injuries.
• Do not use outdoors.
• Do not let cord hang over edge of table or counter or touch hot surfaces.
• Do not place on or near a hot gas or electric burner or in a heated oven.
• Extreme caution must be used when moving an appliance containing hot liquids.
• To operate, plug cord into wall outlet. To disconnect, press“power”button then
remove plug from wall outlet.
• Do not use appliance for other than intended use.
• A short power-supply cord is provided to reduce the risk resulting from becoming
entangled in or tripping over a longer cord.
• Longer extension cords may be used if care is exercised in their use.
EN
Specications:
Nominal voltage: 220-240 VAC, 50-60 Hz, 600 W
2
• If a longer extension cord is used, the marked electrical rating of the extension cord
should be at least as great as the electrical rating of the appliance, and the cord
should be arranged so that it will not drape over the countertop or tabletop where it
can be pulled on by children or tripped over unintentionally.
• Never immerse the sterilizer or power cord in water.
• When in use, the sterilizer contains hot water. Be careful to avoid spilling or splashing
water on yourself when removing contents from the sterilizer.
• This appliance has a polarized plug (one blade is wider than the other). To reduce the
risk of electric shock, this plug is intended to t into a polarized outlet only one way. If
the plug does not t fully into the outlet, reverse the plug. If it still does not t,
contact a qualied electrician. Do not attempt to modify the plug in any way.
• This appliance is intended for household use only.
• Children shall not play with the appliance.
• If the supply cord is damaged it must be replaced by the manufacturer, its service
agent, or similarly qualied person in order to avoid hazard.
• NOT FOR SPACE HEATING PURPOSES.
WARNING:
Do not misuse this sterilizer other than for its intended use to avoid
potential injury.
Surfaces are liable to get hot during use.
SAVE THESE INSTRUCTIONS
Thank you for buying the Dr. Brown’s™ Bottle Sterilizer and Dryer. It has been designed
to provide moms, dads and other caregivers a simple, easy and reliable way to sterilize
Dr. Brown’s® baby bottles and parts before feeding your baby. This appliance works by
transforming water into intense steam heat which kills most common household germs.
It holds up to six Dr. Brown’s baby bottles in addition to all associated parts. It also holds
most major competitive brands of baby bottles. The unit can also be used to sterilize oth-
er items and accessories such as paciers, teethers, toys, cups, utensils and breast pump
parts. They must be able to withstand boiling water in order to be sterilized in this unit.
Please check with the manufacturer of the other items.
As parents we know how important your baby’s well being is, and this appliance will
help you make your baby’s bottles and other feeding equipment more sterile.
Please read through the ENTIRE INSTRUCTION BOOK including the
IMPORTANT SAFEGUARDS before using your new Dr. Brown’s™ Sterilizer with
Dryer for the rst time. A copy of these instructions in English is also available
online at www.drbrownsbaby.com.
IMPORTANT:
Pour water into device before turning on.

3
TO USE:
1. Before running this appliance, it is important that all bottles, bottle parts and/or
other accessories are clean. They must be washed, rinsed and empty.
2. Position the appliance on a at surface and out of reach of children where it cannot
be knocked or moved during operation. Remove the lower rack, tray, and lid from
the base.
3. Fill the measuring cup to 110 ml with DISTILLED water and pour the water ONTO
THE STAINLESS STEEL HEATING PLATE in the base.
NOTE: DO NOT EXCEED the recommended amount of water.
NOTE: Tap water and bottle water contain minerals that shorten the life of this
appliance. Damage from use of non-distilled water will void the warranty.
4. Place the lower rack on the base and arrange bottles with the opening facing
down over the posts of the lower rack. Place the bottle accessories (e.g. nipple/teat,
collar, cap, etc.) on the tray.
NOTE: If using Dr. Brown’s bottles and parts, see Figure A through Figure H on
page 6 for suggested layout options. Both narrow and wide-neck bottles are shown.
NOTE: Always replace lower rack on base before turning the sterilizer on.
PARTS:
A. Lid
B. Tray
C. Removable Handle
D. Lower Rack
E. Base
F. Control Panel
G. Filter Cover
H. HEPA Type Filter
I. Measuring Cup
CONTROL PANEL:
Power
Sterilize Only Dry Only
Automatic
Sterilize/Dry
8
A
1234567
D
C
B
C
A
D
B
5 3 16 248 7
1
THIRD ANGLE
PROJECTION
HANDI-CRAFT COMPANY
4433 FLYER AVE. ST. LOUIS MO. 63116, USA
3D
INTERPET PER ASME Y14.5-1994
OTHER HANDI-CRAFT ENGINEERING
STANDARDS MAY APPLY
NO PLACE:
ONE PLACE:
TWO PLACE:
THREE PLACE:
ANGLE:
ANGLE:
2.5
0.5
0.25
0.13
0.5
0.25
X
.X
.XX
.XXX
X
.X
THIS DRAWING AND RELATED 3D CAD DATA
CONTAINS PROPRIETARY INFORMATION
THAT ARE THE PROPERTY OF
HANDI-CRAFT CO. AND ARE NOT TO BE
COPIED OR USED WITHOUT THE
PERMISSION OF HANDI-CRAFT CO.
ENG APPR.
MFG/Q.A APPR.
SOLIDWORKS
DESIGN UNITS: MILLIMETERS
TOLERANCES UNLESS NOTED:
DRAWN
TITLE:
SIZE
D
DWG. NO.
REV.
SCALE: 1:2
SHEET 1 OF 1
DO NOT SCALE DRAWING
STERILIZER EXPLODED
RBW
10JUL19
MATERIAL
A
B
C
D
E
FG
I
H

4
5. Stack the tray on top of the lower rack and place the lid on top of the tray. Ensure
that the lid ts securely on the tray without any gaps.
6. Plug the power cord into an electrical outlet and press the Power Button.
NOTE: When the sterilizer is turned on, the appliance will beep and the indicator
above the power button will light up. Choose your desired function following the
instructions on pages 4 & 5.
STERILIZE ONLY FUNCTION:
7. Complete steps 1 – 6 outlined on page 3 & 4, then press the “Sterilize Only”button
once. The appliance will beep one time and the sterilization cycle will start.
8. When the sterilization cycle is complete, the appliance will beep ve times and
switch o automatically.
NOTE: Wait 10 minutes to allow parts to cool before removing anything from the unit.
NOTE: This cycle lasts approximately 9 minutes but may vary by the amount of
water you add, the number of items to be sterilized and other environmental
factors. If insucient water is added, the appliance will beep ve times to remind
you the sterilization time may be insucient to disinfect the bottles and accessories,
and the indicator light will ash. Wait 10 minutes to allow unit to cool, then
press the power button to reset the appliance and repeat steps (7) and (8) above.
Should no action be taken, the indicator light will ash for 2 hours and then the
appliance will automatically turn o.
CAUTION:
Do not touch the lid, tray, or lower rack when sterilization is in process,
as these surfaces get hot.
DRY ONLY FUNCTION:
9. Press the power button, then press the“Dry Only” button once. The appliance will
beep one time and the drying cycle will start.
10. When the drying cycle is complete, the appliance will beep ve times and switch
o automatically.
NOTE: This cycle lasts approximately 45 minutes.
AUTOMATIC STERILIZE/DRY FUNCTION:
11. Complete steps 1 – 6 outlined on page 3 & 4, then press the“Automatic Sterilize/Dry”
button once. The appliance will beep one time and the sterilization cycle will start.
12. When the sterilization cycle is complete, the drying cycle will begin automatically.
The drying cycle lasts approximately 45 mins.
CAUTION:
As the unit switches from the sterilization to the drying cycle, it is
expected to see a large initial release of steam as the fan turns on. Keep a safe
distance from the unit while this cycle is in process.

5
13. When the drying cycle is complete, the appliance will beep 5 times and switch o
automatically.
NOTE: If insucient water is added, the appliance will beep 5 times to remind you
the sterilization time may be insucient to disinfect the bottles and accessories.
The indicator light will ash. Press the power button to reset the appliance and
repeat steps 11 – 13. Should no action be taken, the indicator light will ash for 2
hours and then the appliance will automatically turn o.
NOTE: Any cycle can be stopped at any time by pressing the power button.
CAUTION:
If it is necessary to drain water from the base, always
POUR AWAY FROM YOU, as shown by the symbol on base.

6
FIGURE D. Placement of
wide-neck reservoir tubes
FIGURE G. Placement of
wide-neck parts (nipples/
teats, collars, caps, and
travel discs)
FIGURE E. Placement of
wide-neck bottles
FIGURE H. Placement of
paciers/soothers, teethers,
and other small parts
FIGURE C. Placement of
narrow parts (nipples/teats,
collars, caps, and travel discs)
FIGURE F. Placement of
wide-neck caps (2 caps on
bottom, 4 caps on top)
FIGURE A. Placement of
narrow bottles
FIGURE B. Placement of
narrow reservoir tubes

7
TO CLEAN THE APPLIANCE:
The Dr. Brown’s™ Bottle Sterilizer and Dryer should be cleaned at least once a week
when in regular use. Wait at least 60 minutes after a cycle to allow the device to cool.
Before cleaning your device, ALWAYS disconnect the power plug from the outlet.
• The removable tray, lid, lower rack, and measuring cup can be cleaned in hot soapy
water and rinsed completely.
• The base exterior and heating chamber can be cleaned with a damp sponge or
damp cloth.
CAUTION: DO NOT IMMERSE THE STERILIZER BASE IN WATER. DAMAGE TO
ELECTRICAL COMPONENTS WILL RESULT.
TO CLEAN THE HEATING ELEMENT:
Mineral deposits may form on the metal heating element in the bottom of the heating
chamber. To remove the mineral deposits, follow the steps below.
• Unplug the device.
• Remove the tray.
• De-scale utilizing a 120 ml mixture of vinegar/water:
1. Fill measuring cup to 90 ml with white vinegar.
2. Add 30 ml distilled water, for a total of 120 ml.
3. Pour directly over the heating element.
4. Turn the unit on and run a sterilization cycle.
5. Empty any remaining solution and rinse with clean water.
NOTE: DO NOT USE BLEACH, HARSH ABRASIVES OR SOLVENTS TO CLEAN THE
HEATING CHAMBER OR HEATING ELEMENTS AS THEY MAY CAUSE PERMANENT
DAMAGE AND WILL VOID THE WARRANTY.

8
REPLACING HEPA FILTER:
For optimal performance, it is recommended to replace the lter every 6 months of
regular use. Replace the lter by following the steps below.
1. Remove the lter cover from the bottom of the base and take out the old lter.
2. Place a new lter into the base, ensuring the pull tab is still visible on top of the lter.
3. Insert the lter cover back into the base.
NOTE: Filter must always be used to ensure proper performance.
2 HEPA Type Filters are included.
To purchase replacement lters, visit www.drbrownsbaby.com
or contact your local distributor.
4
A
123
D
C
B
2 14 3
C
B
A
D
MATERIAL
FILTER REPLACEMENT
DO NOT SCALE DRAWING
SHEET 1 OF 1
SCALE: 1:1
REV.
DWG. NO.
C
SIZE
TITLE:
DRAWN
DESIGN UNITS: MILLIMETERS
TOLERANCES UNLESS NOTED:
SOLIDWORKS
MFG/Q.A APPR.
ENG APPR.
THIS DRAWING AND RELATED 3D CAD DATA
CONTAINS PROPRIETARY INFORMATION
THAT ARE THE PROPERTY OF
HANDI-CRAFT CO. AND ARE NOT TO BE
COPIED OR USED WITHOUT THE
PERMISSION OF HANDI-CRAFT CO.
X
.X
.XX
.XXX
X
.X
2.5
0.5
0.25
0.13
0.5
0.25
NO PLACE:
ONE PLACE:
TWO PLACE:
THREE PLACE:
ANGLE:
ANGLE:
INTERPET PER ASME Y14.5-1994
OTHER HANDI-CRAFT ENGINEERING
STANDARDS MAY APPLY
3D
HANDI-CRAFT COMPANY
4433 FLYER AVE. ST. LOUIS MO. 63116, USA
THIRD ANGLE
PROJECTION
1
15JUL19
RBW
2 1
A
B
A
B
12
1
THIRD ANGLE
PROJECTION
HANDI-CRAFT COMPANY
4433 FLYER AVE. ST. LOUIS MO. 63116, USA
3D
INTERPET PER ASME Y14.5-1994
OTHER HANDI-CRAFT ENGINEERING
STANDARDS MAY APPLY
NO PLACE:
ONE PLACE:
TWO PLACE:
THREE PLACE:
ANGLE:
ANGLE:
2.5
0.5
0.25
0.13
0.5
0.25
X
.X
.XX
.XXX
X
.X
THIS DRAWING AND RELATED 3D CAD DATA
CONTAINS PROPRIETARY INFORMATION THAT
ARE THE PROPERTY OF
HANDI-CRAFT CO. AND ARE NOT TO BE
COPIED OR USED WITHOUT THE PERMISSION
OF HANDI-CRAFT CO.
ENG APPR.
MFG/Q.A APPR.
SOLIDWORKS
DESIGN UNITS: MILLIMETERS
TOLERANCES UNLESS NOTED:
DRAWN
TITLE:
SIZE
A
DWG. NO.
REV.
SCALE: 1:2
RBW
15JUL19
SHEET 1 OF 1
DO NOT SCALE DRAWING
FILTER AND COVER
MATERIAL
WARRANTY:
This appliance is warranted against defective material or workmanship for a period of
one year from the date of purchase. Any defective part will be repaired or replaced at
no charge if it has not been tampered with and appliance has been used according to
these printed instructions. This warranty gives you specic legal rights as well as other
rights which vary from state to state.
PLEASE NOTE: This warranty does not cover a defect that has been caused by
negligence, accidents or improper use of the appliance. To keep your Dr. Brown’s
Bottle Sterilizer and Dryer in good condition and retain your warranty, USE ONLY
DISTILLED WATER.
CUSTOMER SERVICE
If you experience unsatisfactory operation or have any questions/comments, call
Handi-Craft’s Customer Service at 1-800-778-9001, send an email to info@handi-craft.
com, or write to Handi-Craft Company, Customer Service, 4433 Fyler Avenue, St. Louis,
Missouri 63116 USA. Our Customer Service Representative will advise you how to correct
the problem yourself or will ask you to return the product for repair or replacement.
For purchases made outside of the United States and Canada, please contact your local
distributor.

9
LEA Y GUARDE ESTAS INSTRUCCIONES
Contenido del paquete:
Esterilizador y secador de biberones
Taza para medir
2 Filtros tipo HEPA
Manual de instrucciones
ADVERTENCIA:
Lea el manual de instrucciones COMPLETO para conocer las
características del producto antes de ponerlo a funcionar. No utilizar correctamente el
producto puede causar daño al producto y a la propiedad personal, así como lesiones
serias. No utilizar este Producto de una forma segura y responsable podría causar
lesiones o daño al producto o a otra propiedad. Este producto no está diseñado para ser
usado por niños. No intente desarmar o usar con componentes que no son compatibles.
Este manual contiene instrucciones para seguridad, uso y mantenimiento. Es esencial
leer y seguir todas las instrucciones y advertencias en el manual antes de armar o usar el
producto, para poder utilizarlo correctamente y evitar daños o lesiones serias.
INSTRUCCIONES DE
SEGURIDAD IMPORTANTES
LEA Y GUARDE ESTAS INSTRUCCIONES DE SEGURIDAD IMPORTANTES ANTES
DE USAR ESTE APARATO
CUANDO USE APARATOS ELÉCTRICOS, SIEMPRE DEBE SEGUIR LAS
PRECAUCIONES PARA REDUCIR EL RIESGO DE FUEGO, DESCARGA ELÉCTRICA Y
LESIONES PERSONALES, INCLUYENDO LO SIGUIENTE:
• Lea todas las instrucciones.
• No toque las supercies calientes. Use las asas o tiradores.
• Para protegerse contra una descarga eléctrica, no sumerja el cable ni el enchufe en agua
u otros líquidos.
• Cuando use cualquier aparato cerca de los niños es necesario supervisar de forma
constante.
• No permita que los niños usen este aparato. Mantenga el aparato y el cable fuera del
alcance de los niños.
• Desenchufe el aparato cuando no esté en uso y antes de limpiarlo. Permita que se enfríe
antes de colocar o quitar piezas.
• No haga funcionar ningún aparato que tenga un cable o enchufe dañado, ni después de
observar que funciona mal o que sufrió cualquier tipo de daño. Lleve el aparato al centro
de reparaciones autorizado más cercano para que lo examinen, reparen o ajusten.
• La supercie de la placa calentadora puede guardar calor residual después de su uso.
• Usar piezas o accesorios que no sean recomendados por Handi-Craft® Company pueden
causar lesiones.
• No use el aparato al aire libre.
• No permita que el cable cuelgue del borde de la mesa o supercie de apoyo, ni que toque
supercies calientes.
• No lo coloque sobre o cerca de un fuego caliente a gas o eléctrico, ni dentro del horno
caliente.
• Debe tener mucho cuidado al mover un aparato que contenga líquidos calientes.
• Para encender, conecte el cable en una toma de corriente en la pared. Para desconectar,
presione el botón de encendido (“power”) y luego, desconecte el enchufe de la toma de
corriente en la pared.
ES
Especicaciones:
Voltaje nominal: 220-240 V CA, 50-60 Hz, 600 W

10
• No use el aparato para otro n que no sea para el que fue diseñado.
• Se incluye un cable corto para reducir el riesgo de enredarse o tropezarse con un cable
más largo.
• Puede usar cables de extensión más largos si tiene mucho cuidado al hacerlo.
• Si usa un cable de extensión más largo, debe ser un cable de extensión diseñado para
una corriente igual a la del aparato como mínimo, y debe colocarse de manera que
no cuelgue de la supercie de apoyo o la mesa, ya que los niños podrían jalar de él o
tropezarse por accidente.
• Nunca sumerja el esterilizador o el cable de corriente en agua.
• Cuando se encuentra en uso, el calentador contiene agua caliente. Tenga cuidado y evite
derrames o salpicaduras de agua sobre usted al retirar el contenido del esterilizador.
• Este aparato cuenta con un enchufe polarizado (una pata es más ancha que la
otra). Para reducir el riesgo de descarga eléctrica, este enchufe fue diseñado para
conectarse a una toma de corriente polarizada solamente de una manera. Si el
enchufe no entra en la toma de corriente, dele la vuelta al enchufe. Si continúa sin
entrar, comuníquese con un electricista cualicado. No intente modicar el enchufe
de ninguna forma.
• Este aparato debe ser usado solamente en el hogar.
• Los niños no deben jugar con el aparato.
• Si el cable de corriente está dañado, tiene que ser reemplazado por el fabricante, su
agente de servicio u otra persona igualmente capacitada, para evitar riesgos.
• SU PROPÓSITO NO ES LA CALEFACCIÓN DE AMBIENTES.
ADVERTENCIA:
Evite posibles lesiones; no use incorrectamente este esterilizador para
un propósito para el que no fue diseñado.
Es probable que las supercies se calienten durante el uso.
GUARDE ESTAS INSTRUCCIONES
Gracias por comprar el Esterilizador y secador de biberones Dr. Brown’s™. El esterilizador
fue diseñado para ofrecer a las mamás, papás y demás personas que cuidan del bebé
una forma sencilla, fácil y segura de esterilizar los biberones y las piezas Dr. Brown’s®
antes de alimentar a su bebé. Este aparato convierte el agua en vapor intenso que mata
los gérmenes más comunes en el hogar. Tiene capacidad hasta para seis biberones
Dr.Brown’s, además de las piezas relacionadas. También puede usarse para la mayoría
de los biberones de las principales marcas. También puede usarse para esterilizar otros
objetos y accesorios como chupetes, mordedores, juguetes, vasos, utensilios y piezas
del extractor de leche. Estos productos deben soportar agua hirviendo para poder ser
esterilizados en esta unidad. Por favor, consulte con el fabricante de los demás objetos
que desee esterilizar.
Como padres, sabemos lo importante que es el bienestar de su bebé y este aparato le
ayudará a que los biberones y otros utensilios para alimentar a su bebé estén más estériles.
Por favor, lea TODO EL MANUAL DE INSTRUCCIONES, incluyendo la sección
de INFORMACIÓN IMPORTANTE, antes de usar por primera vez su nuevo
Esterilizador y secador de biberones Dr. Brown’s™. Puede obtener una copia de
estas instrucciones en inglés en internet, en www.drbrownsbaby.com.
IMPORTANTE:
Vierta el agua en el aparato antes de encenderlo.

11
USO:
1. Antes de hacer funcionar este aparato, es importante que todos los biberones, piezas
de biberones y/o demás accesorios estén limpios. Deben estar lavados,
enjuagados y vacíos.
2. Coloque el aparato sobre una supercie plana y lejos del alcance de los niños, donde
no se pueda derribar ni mover mientras esté encendido. Retire la rejilla inferior, la
bandeja y la tapa de la base.
3. Llene la taza para medir hasta 110 ml con agua DESTILADA y vierta el agua EN LA
PLACA DE CALENTAMIENTO DE ACERO INOXIDABLE en la base.
NOTA: NO USE MÁS AGUA de la cantidad recomendada.
NOTA: El agua del grifo y el agua embotellada contienen minerales que acortan la
vida de este aparato. El daño causado por no usar agua destilada anulará la garantía.
4. Coloque la rejilla inferior en la base y acomode los biberones con la abertura hacia
abajo en los soportes de la rejilla inferior. Coloque los accesorios de los biberones
(ej., tetina, rosca, tapa, etc.) en la bandeja.
NOTA: Si usa biberones y piezas Dr. Brown’s, vea de la Figura A a la Figura H en la
página 14 para ver todas las opciones de colocación recomendadas. Se muestran
biberones de boca estrecha y de boca ancha.
NOTA: Siempre vuelva a colocar la rejilla inferior en la base antes de encender el
esterilizador.
PIEZAS:
A. Tapa
B. Bandeja
C. Asa extraíble
D. Rejilla inferior
E. Base
F. Panel de control
G. Tapa del ltro
H. Filtro tipo HEPA
I. Taza para medir
PANEL DE CONTROL:
Power
Sterilize Only Dry Only
Automatic
Sterilize/Dry
8
A
1234567
D
C
B
C
A
D
B
5 3 16 248 7
1
THIRD ANGLE
PROJECTION
HANDI-CRAFT COMPANY
4433 FLYER AVE. ST. LOUIS MO. 63116, USA
3D
INTERPET PER ASME Y14.5-1994
OTHER HANDI-CRAFT ENGINEERING
STANDARDS MAY APPLY
NO PLACE:
ONE PLACE:
TWO PLACE:
THREE PLACE:
ANGLE:
ANGLE:
2.5
0.5
0.25
0.13
0.5
0.25
X
.X
.XX
.XXX
X
.X
THIS DRAWING AND RELATED 3D CAD DATA
CONTAINS PROPRIETARY INFORMATION
THAT ARE THE PROPERTY OF
HANDI-CRAFT CO. AND ARE NOT TO BE
COPIED OR USED WITHOUT THE
PERMISSION OF HANDI-CRAFT CO.
ENG APPR.
MFG/Q.A APPR.
SOLIDWORKS
DESIGN UNITS: MILLIMETERS
TOLERANCES UNLESS NOTED:
DRAWN
TITLE:
SIZE
D
DWG. NO.
REV.
SCALE: 1:2
SHEET 1 OF 1
DO NOT SCALE DRAWING
STERILIZER EXPLODED
RBW
10JUL19
MATERIAL
A
B
C
D
E
FG
I
H
Encendido Esterilizar/
secar automático
Esterilizar solamente Secar solamente

12
5. Apile la bandeja sobre la rejilla inferior y coloque la tapa encima de la bandeja.
Asegúrese de que la tapa se ajusta bien en la bandeja, sin dejar espacio.
6. Enchufe el cable en una toma de corriente y presione el Botón de encendido
(“Power”).
NOTA: Cuando el esterilizador se enciende, emite un sonido y el indicador encima
del botón de encendido (“power”) se ilumina. Escoja la función que desea siguiendo
las instrucciones en las páginas 12 y 13.
FUNCIÓN DE ESTERILIZAR SOLAMENTE:
7. Siga los pasos del 1 al 6 en las páginas 11 y 12, luego presione una vez el botón de
Esterilizar solamente (“Sterilize Only”). El aparato sonará una vez y comenzará el
ciclo de esterilización.
8. Cuando el ciclo de esterilización termine, el aparato sonará cinco veces y se apagará
automáticamente.
NOTA: Espere 10 minutos para permitir que se enfríe antes de retirar algo de la unidad.
NOTA: Este ciclo tiene una duración aproximada de 9 minutos, pero puede variar
según la cantidad de agua que agregue, el número de artículos que se esterilicen
y otros factores ambientales. Si no se agrega suciente agua, el aparato sonará cinco
veces para recordarle que el tiempo de esterilización podría no ser suciente para
desinfectar los biberones y los accesorios, y la luz indicadora se encenderá de forma
intermitente. Espere 10 minutos para permitir que la unidad se enfríe, luego,
presione el botón de encendido (“power”) para reprogramar el aparato y repita los
pasos (7) y (8) indicados antes. Si no hace nada, la luz indicadora seguirá intermitente
durante 2 horas y luego el aparato se apagará automáticamente.
PRECAUCIÓN:
No toque la tapa, la bandeja ni la rejilla inferior mientras la
esterilización esté en proceso; estas supercies se calientan.
FUNCIÓN DE SECAR SOLAMENTE:
9. Presione el botón de encendido (“power”), luego presione una vez el botón de
Secar solamente (“Dry Only”). El aparato sonará una vez y comenzará el ciclo de
secado.
10. Cuando el ciclo de secado termine, el aparato sonará cinco veces y se apagará
automáticamente.
NOTA: Este ciclo tiene una duración aproximada de 45 minutos.
FUNCIÓN DE ESTERILIZAR/SECAR AUTOMÁTICA:
11. Siga los pasos del 1 al 6 en las páginas 11 y 12, luego presione una vez el botón de
Esterilizar/secar automático (“Automatic Sterilize/Dry”). El aparato sonará una vez y
comenzará el ciclo de esterilización.
12. Cuando el ciclo de esterilización termine, comenzará automáticamente el
ciclo de secado. El ciclo de secado tiene una duración aproximada de 45 minutos.
PRECAUCIÓN:
Cuando la unidad pase del ciclo de esterilización al de secado, es
natural ver que se libera una gran cantidad de vapor inicial al encenderse el ventilador.
Mantenga una distancia segura de la unidad mientras está en proceso este ciclo.

13
13. Cuando el ciclo de secado termine, el aparato sonará 5 veces y se apagará
automáticamente.
NOTA: Si no se agrega suciente agua, el aparato sonará 5 veces para recordarle
que el tiempo de esterilización podría no ser suciente para desinfectar los
biberones y los accesorios. La luz indicadora se encenderá de forma intermitente.
Presione el botón de encendido (“power”) para reprogramar el aparato y repita los
pasos del 11 al 13. Si no hace nada, la luz indicadora seguirá intermitente durante
2horas y luego el aparato se apagará automáticamente.
NOTA: Todos los ciclos se pueden detener en cualquier momento si presiona el
botón de encendido (“power”).
PRECAUCIÓN:
Si es necesario escurrir el agua de la base, siempre
HÁGALO HACIA AFUERA, no hacia usted, como muestra el símbolo
en la base.

14
FIGURA A. Colocación de
biberones de boca estrecha
FIGURA D. Colocación de
tubos de ventilación de
boca ancha
FIGURA G. Colocación
de piezas de boca ancha
(tetinas, roscas, tapas y
discos para viaje)
FIGURA B. Colocación de
tubos de ventilación de
boca estrecha
FIGURA E. Colocación de
biberones de boca ancha
FIGURA H. Colocación de
chupetes, mordedores y
otras piezas pequeñas
FIGURA C. Colocación de
piezas estrechas (tetinas, roscas,
tapas y discos para viaje)
FIGURA F. Colocación de
tapas de boca ancha (2tapas
abajo, 4 tapas arriba)

15
LIMPIEZA DEL APARATO:
El Esterilizador y secador de biberones Dr. Brown’s™ debe limpiarse al menos una vez
por semana, si lo usa con regularidad. Espere al menos 60 minutos después de un ciclo
para permitir que el aparato se enfríe. Antes de limpiar el aparato, SIEMPRE desconecte
el enchufe de la toma de corriente.
• La bandeja extraíble, la tapa, la rejilla inferior y la taza para medir pueden lavarse
con agua caliente jabonosa y deben enjuagarse completamente.
• La base exterior y la cámara de calentamiento pueden limpiarse con una esponja o
trapo húmedo.
PRECAUCIÓN: NO SUMERJA LA BASE DEL ESTERILIZADOR EN AGUA.
SEDAÑARÁN LOS COMPONENTES ELÉCTRICOS.
PARA LIMPIAR LA PLACA CALENTADORA:
Pueden formarse depósitos minerales en la placa calentadora de metal en la parte
inferior de la cámara de calentamiento. Para eliminar los depósitos minerales, siga
estos pasos.
• Desenchufe el aparato.
• Retire la bandeja.
• Desincruste utilizando una mezcla de 120 ml de vinagre con agua:
1. Llene la taza para medir hasta 90 ml de vinagre blanco.
2. Agregue 30 ml de agua destilada, para un total de 120 ml.
3. Vierta directamente sobre la placa calentadora.
4. Encienda la unidad y complete un ciclo de esterilización.
5. Retire cualquier resto de la solución y enjuague con agua limpia.
NOTA: NO USE BLANQUEADORES, PRODUCTOS ABRASIVOS NI SOLVENTES
PARA LIMPIAR LA CÁMARA DE CALENTAMIENTO O LA PLACA CALENTADORA,
YA QUE PUEDEN CAUSAR DAÑOS PERMANENTES Y ANULARÁN LA GARANTÍA.

16
REEMPLAZO DEL FILTRO HEPA:
Para un funcionamiento óptimo, se recomienda reemplazar el ltro cada 6 meses de
uso regular. Reemplace el ltro siguiendo estos pasos.
1. Retire la tapa del ltro de la parte inferior de la base y saque el ltro usado.
2. Coloque el ltro nuevo en la base y asegúrese de que la pestaña para tirar de él se
vea por encima del ltro.
3. Inserte la tapa del ltro en la base.
NOTA: Siempre debe usarlo con el ltro para asegurar un funcionamiento adecuado.
Se incluyen 2 Filtros tipo HEPA.
Para comprar ltros de reemplazo, visite www.drbrownsbaby.com
o comuníquese con su distribuidor local.
4
A
123
D
C
B
2 14 3
C
B
A
D
MATERIAL
FILTER REPLACEMENT
DO NOT SCALE DRAWING
SHEET 1 OF 1
SCALE: 1:1
REV.
DWG. NO.
C
SIZE
TITLE:
DRAWN
DESIGN UNITS: MILLIMETERS
TOLERANCES UNLESS NOTED:
SOLIDWORKS
MFG/Q.A APPR.
ENG APPR.
THIS DRAWING AND RELATED 3D CAD DATA
CONTAINS PROPRIETARY INFORMATION
THAT ARE THE PROPERTY OF
HANDI-CRAFT CO. AND ARE NOT TO BE
COPIED OR USED WITHOUT THE
PERMISSION OF HANDI-CRAFT CO.
X
.X
.XX
.XXX
X
.X
2.5
0.5
0.25
0.13
0.5
0.25
NO PLACE:
ONE PLACE:
TWO PLACE:
THREE PLACE:
ANGLE:
ANGLE:
INTERPET PER ASME Y14.5-1994
OTHER HANDI-CRAFT ENGINEERING
STANDARDS MAY APPLY
3D
HANDI-CRAFT COMPANY
4433 FLYER AVE. ST. LOUIS MO. 63116, USA
THIRD ANGLE
PROJECTION
1
15JUL19
RBW
2 1
A
B
A
B
12
1
THIRD ANGLE
PROJECTION
HANDI-CRAFT COMPANY
4433 FLYER AVE. ST. LOUIS MO. 63116, USA
3D
INTERPET PER ASME Y14.5-1994
OTHER HANDI-CRAFT ENGINEERING
STANDARDS MAY APPLY
NO PLACE:
ONE PLACE:
TWO PLACE:
THREE PLACE:
ANGLE:
ANGLE:
2.5
0.5
0.25
0.13
0.5
0.25
X
.X
.XX
.XXX
X
.X
THIS DRAWING AND RELATED 3D CAD DATA
CONTAINS PROPRIETARY INFORMATION THAT
ARE THE PROPERTY OF
HANDI-CRAFT CO. AND ARE NOT TO BE
COPIED OR USED WITHOUT THE PERMISSION
OF HANDI-CRAFT CO.
ENG APPR.
MFG/Q.A APPR.
SOLIDWORKS
DESIGN UNITS: MILLIMETERS
TOLERANCES UNLESS NOTED:
DRAWN
TITLE:
SIZE
A
DWG. NO.
REV.
SCALE: 1:2
RBW
15JUL19
SHEET 1 OF 1
DO NOT SCALE DRAWING
FILTER AND COVER
MATERIAL
GARANTÍA:
Este aparato tiene garantía contra defectos materiales o de fábrica por el período
de un año a partir de la fecha de compra. Cualquier pieza defectuosa será reparada
o reemplazada sin costo alguno si no ha sido alterada y si el aparato se ha usado de
acuerdo con estas instrucciones impresas. Esta garantía le ofrece derechos legales
especícos, así como otros derechos que varían de un estado a otro.
NOTA: Esta garantía no cubre un defecto que haya sido causado por negligencia,
accidentes o uso inapropiado del aparato. Para mantener su Esterilizador y secador de
biberones Dr. Brown’s en buenas condiciones y retener su garantía, USE SOLO AGUA
DESTILADA.
SERVICIO AL CLIENTE
Si el funcionamiento no es satisfactorio o si tiene alguna pregunta o comentario, llame
al departamento de Servicio al Cliente de Handi-Craft al 1-800-778-9001, envíe un
correo electrónico a info@handi-craft.com o escriba a: Handi-Craft Company, Customer
Service, 4433 Fyler Avenue, St. Louis, Missouri 63116 USA. Nuestro Representante de
Servicio al Cliente le aconsejará cómo corregir el problema usted mismo o le pedirá
que devuelva el producto para repararlo o reemplazarlo. Para las compras que se
realizan fuera de los EE. UU. y Canadá, por favor, comuníquese con su distribuidor local.

17
BACA DAN SIMPAN PETUNJUK INI
Isi Kemasan:
Sterilizer dan Pengering Botol
Gelas Ukur
2 Filter Jenis HEPA
Buku Petunjuk
PERINGATAN:
Baca petunjuk penggunaan pada buku petunjuk sebelum
menggunakannya. Pengoperasian produk secara tidak benar dapat merusak produk,
benda pribadi, dan menimbulkan cedera parah. Pengoperasian produk secara tidak
aman dan bertanggung jawab dapat menimbulkan cedera atau merusak produk atau
benda lain. Tidak diperbolehkan digunakan oleh anak-anak. Tidak disarankan untuk
membuka mesin unit. Buku ini berisi petunjuk tentang keselamatan, penggunaan, dan
pemeliharaan. Anda harus membaca dan mengikuti semua petunjuk dan peringatan
dalam buku ini sebelum menyetel atau menggunakan alat ini agar dapat digunakan
dengan benar dan menghindari kerusakan atau cedera parah.
PETUNJUK KESELAMATAN PENTING
BACA DAN SIMPAN PETUNJUK KESELAMATAN INI SEBELUM MENGGUNAKAN UNIT
KETIKA MENGGUNAKAN PERALATAN LISTRIK, TINDAKAN PENCEGAHAN
HARUS SELALU DIPATUHI UNTUK MENGURANGI RISIKO KEBAKARAN,
SENGATAN LISTRIK, DAN CEDERA PADA ORANG, TERMASUK YANG BERIKUT:
• Baca semua petunjuk.
• Jangan menyentuh permukaan yang panas tanpa pelindung. Gunakan pelindung berupa
kain atau sarung tangan anti-panas.
• Untuk menghindari tersengat listrik, jangan merendam kabel atau steker di dalam air
atau cairan lain.
• Awasi secara ketat apabila unit digunakan di dekat anak-anak.
• Unit ini tidak untuk digunakan oleh anak-anak. Simpan alat dan kabel di luar jangkauan
anak-anak.
• Lepaskan kabel dari stopkontak apabila unit sedang tidak digunakan dan sebelum
dibersihkan. Biarkan unit dingin sebelum memasang atau melepaskan komponen.
• Jangan menggunakan unit apabila kabel atau steker rusak atau setelah unit tidak
berfungsi atau rusak. Sampaikan keluhan atau kendala ke service centre resmi untuk
dilakukan pemeriksaan dan perbaikan.
• Permukaan elemen pemanas mungkin masih menyisakan panas setelah unit selesai
digunakan.
• Penggunaan aksesori tambahan tidak dianjurkan dan dapat menyebabkan cedera.
• Jangan gunakan unit di luar ruangan.
• Jangan membiarkan kabel menggantung di tepi meja atau menyentuh permukaan
panas.
• Jangan diletakkan di atas atau di dekat kompor gas atau kompor listrik yang panas, atau
di dalam oven yang dipanaskan.
• Mohon berhati-hati saat memindahkan unit yang berisi cairan panas.
• Untuk mengoperasikan unit, sambungkan kabel ke stopkontak. Ketika selesai digunakan,
tekan tombol daya, lalu lepaskan kabel dari stopkontak.
IND
Spesikasi:
Jumlah voltase: 220-240 VAC, 50-60 Hz, 600 W

18
• Jangan menggunakan unit untuk keperluan selain mensterilkan botol susu dan peralatan
bayi.
• Kabel listrik dibuat pendek untuk mengurangi risiko terbelit atau tersandung kabel
panjang.
• Boleh memakai kabel ekstensi lebih panjang jika digunakan secara berhati-hati.
• Jika digunakan kabel ekstensi lebih panjang, peringkat listrik yang tertera pada kabel
harus setidaknya sebesar peringkat unit, dan kabel itu harus diatur agar tidak menjuntai
dari atas meja dan berisiko ditarik anak-anak atau membuat tersandung.
• Jangan merendam sterilizer atau kabel listrik dalam air.
• Saat digunakan, sterilizer berisi air panas. Berhati-hatilah agar air tidak tumpah atau
terciprat ke badan saat Anda mengeluarkan isi dari sterilizer.
• Unit ini hadir dengan memiliki steker terpolarisasi (satu kaki lebih lebar daripada
yang lain). Untuk mengurangi risiko sengatan listrik, steker ini hanya bisa dimasukkan
ke stopkontak terpolarisasi dengan satu cara. Jika steker tidak bisa masuk ke
stopkontak, hubungi ahli listrik yang kompeten. Jangan mencoba mengutak-atik
steker.
• Unit ini hanya untuk digunakan di dalam rumah.
• Anak-anak tidak diperbolehkan bermain-main dengan unit ini.
• Jika unit atau kabel rusak, harap hubungi service centre resmi untuk menghindari
korsleting listrik yang berbahaya.
• BUKAN UNTUK MENGHANGATKAN UDARA.
PERINGATAN:
Jangan menyalahgunakan sterilizer untuk tujuan selain mensterilkan
botol susu dan peralatan bayi, untuk menghindari kemungkinan cedera.
Permukaan unit akan menjadi panas selama penggunaan.
SIMPAN PETUNJUK INI
Terima kasih telah memilih Sterilizer dan Pengering Botol Dr. Brown’s™. Alat ini dibuat
untuk memberi para ibu, ayah, dan pengasuh cara yang sederhana dan mudah untuk
mensterilkan botol bayi Dr. Brown’s® dan komponennya sebelum memberi susu kepada
si kecil. Alat ini beroperasi dengan mengubah air menjadi panas uap pekat yang
membunuh kuman rumah yang paling umum. Alat ini dapat menampung hingga enam
botol susu Dr. Brown’s, serta semua komponennya. Alat ini juga dapat menampung
botol bayi dari merek lain. Alat ini juga dapat digunakan untuk mensterilkan peralatan
dan aksesori bayi lainnya, seperti empeng, teether, mainan, cangkir, alat makan, dan
komponen pompa ASI. Untuk disterilkan di dalam alat ini, peralatan tersebut harus
tahan panas.
Sebagai orang tua, kita tahu betapa pentingnya kesehatan si kecil, dan alat ini akan
membantu mensterilkan botol bayi dan peralatan makan lain.
Baca BUKU PETUNJUK ini, termasuk PERINGATAN PENTING, sebelum pertama
kali menggunakan Sterilizer Dr. Brown’s™ dengan Pengering. Petunjuk ini juga
tersedia dalam bahasa Inggris di www.drbrownsbaby.com.
PENTING:
Tuangkan air ke dalam unit sebelum dinyalakan.

19
CARA MENGGUNAKAN:
1. Sebelum menyalakan unit ini, semua botol, komponen botol, dan/atau aksesori lain
harus dalam keadaan telah dicuci bersih, dan kosong.
2. Letakkan alat di permukaan datar dan di luar jangkauan anak-anak, sehingga tidak
akan tersenggol atau dipindahkan selama pengoperasian. Keluarkan rak bawah,
tray, dan tutup dari dasar.
3. Isi gelas ukur hingga 110 ml dengan air BERSIH dan tuangkan air itu KE ELEMEN
PEMANAS di dasar unit.
CATATAN: JANGAN MELEBIHI jumlah air yang dianjurkan.
CATATAN: Air keran dan air botol mengandung mineral yang memperpendek usia
pakai alat ini. Kerusakan akibat penggunaan air non-suling akan membatalkan
garansi.
4. Letakkan rak bawah di atas mesin unit, lalu atur botol dengan mulut botol
mengarah ke bawah. Letakkan aksesoris botol (misal dot, leher botol, tutup, dll.) di
tray.
CATATAN: Jika menggunakan botol dan komponen Dr. Brown’s, lihat Gambar A
sampai Gambar H di halaman 22 untuk melihat peletakan yang disarankan.
CATATAN: Selalu letakkan rak bawah di dasar alat sebelum menyalakan sterilizer.
KOMPONEN:
A. Tutup
B. Tray
C. Removable Handle
D. Rak Bawah
E. Mesin Utama
F. Panel Kontrol
G. Tutup Filter
H. Filter Jenis HEPA
I. Gelas Ukur
PANEL KONTROL:
Power
Sterilize Only Dry Only
Automatic
Sterilize/Dry
8
A
1234567
D
C
B
C
A
D
B
5 3 16 248 7
1
THIRD ANGLE
PROJECTION
HANDI-CRAFT COMPANY
4433 FLYER AVE. ST. LOUIS MO. 63116, USA
3D
INTERPET PER ASME Y14.5-1994
OTHER HANDI-CRAFT ENGINEERING
STANDARDS MAY APPLY
NO PLACE:
ONE PLACE:
TWO PLACE:
THREE PLACE:
ANGLE:
ANGLE:
2.5
0.5
0.25
0.13
0.5
0.25
X
.X
.XX
.XXX
X
.X
THIS DRAWING AND RELATED 3D CAD DATA
CONTAINS PROPRIETARY INFORMATION
THAT ARE THE PROPERTY OF
HANDI-CRAFT CO. AND ARE NOT TO BE
COPIED OR USED WITHOUT THE
PERMISSION OF HANDI-CRAFT CO.
ENG APPR.
MFG/Q.A APPR.
SOLIDWORKS
DESIGN UNITS: MILLIMETERS
TOLERANCES UNLESS NOTED:
DRAWN
TITLE:
SIZE
D
DWG. NO.
REV.
SCALE: 1:2
SHEET 1 OF 1
DO NOT SCALE DRAWING
STERILIZER EXPLODED
RBW
10JUL19
MATERIAL
A
B
C
D
E
FG
I
H
Daya Sterilizer/Pengering
Otomatis
Sterilizer Pengering
Other manuals for AC178-INTL
3
This manual suits for next models
2
Table of contents
Languages:
Other DrBrowns Laboratory Equipment manuals

DrBrowns
DrBrowns Natural Flow AC177 User manual

DrBrowns
DrBrowns Natural Flow AC147 User manual

DrBrowns
DrBrowns Natural Flow Microwave Steam Sterilizer User manual

DrBrowns
DrBrowns AC178-INTL User manual

DrBrowns
DrBrowns AC045-INTL User manual

DrBrowns
DrBrowns AC178-INTL User manual

DrBrowns
DrBrowns AC178-INTL User manual