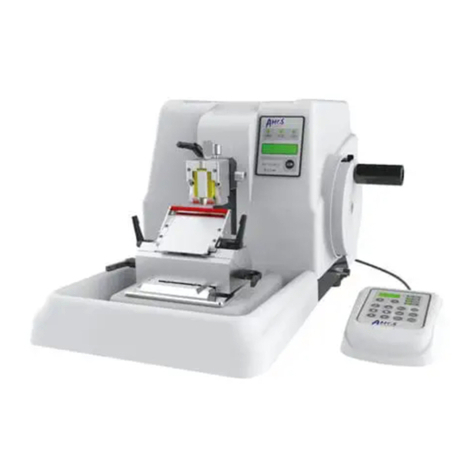
Amos AEM 480 User manual

AEM 480 (Version:AMOSAEM480OP20180306)
Fully-automatic Microtome
Operation Manual
www.amos-scientific.com
AMOS SCIENTIFIC PTY.LTD. ABN37 159 778 140


This Operation manual introduces the instruments component, key
features and using notes. Be sure to read these instructions before using
the instrument.
Smooth-turning
handwheel
Lever for activating the
handwheel brake
Handwheel Locking
Mechanism
Knife holder
Section Waste tray
Separate control panel
Display Panel

Foreward
AEM480 Motorized Microtome is
designed for the worldwide user. It can meet
the different requirement in the fields of
biology, medicine and industry.
It is necessary to read this technical
manual to ensure that the instrument is snuff,
long haul and safely used.
Our company is responsible for service
after the microtome have been used, our
agents have ability to service, the client all of
world can connect with our agent in order to
get timely service.
Attention: our company products
will be mended and updated continually
along with developing of the technology.
Regarding of being updated of the
technical data and instruments
component, we will not inform.

Contents
1、Safety Notes………………………………………………………1
1. 1 O v er v ie w …… …… … … …… …… … … …… … …… … …… … … …… …… 1
1.2 Safety Warning……………………………………………………………..1
1.3 Safety Devices………………………………………………………………3
2、Performance & Parameters……………………………………..4
2.1 Overview-Instrument Components……………………………………… .4
2.2 Performance Index…………………………………………………………5
2.3 Technical Data………………………………………………………………5
3、Preparing before using…………………………………………..6
3.1 Installation Site Requirement…………………………………………… ...6
3.2 Standard Delivery………………………………………………………… ..6
3.3 Ins tall ation……… ……………………… ………………………………… ..7
3.4 Electrical Connection……………………………………………………….8
4、Operation…………………………………………………………9
4.1 Control Panel Function &Control…………………………………………9
4.2 Knife Holder inserting…………………………………………………… ..13
4.3 Clamping The Specimen………………………………………………… ...14
4.4 Specimen Clamps/Knife Inserting……………………………………… ...15
4.5 Trimming ……………………………………………………………………1 6
4.6 Sectioning…………………………………………………………………...18
5、Clearance & Maintenance………………………………………19
5.1 Cleaning The Instrument………………………………………………… ..19
5.2 Maintenance……………………………………………………………… ...21
6、Trouble Shooting…………………………………………………22
7、Instrument Diagram……………………………………………..25

AEM480 Fully-automatic Microtome
AMOSAEM480OP20180306
---1---
1、Safety Notes
1.1 Overview
The Instruction Manual contains important safety instructions and information. The operation
manual is an important part of the instrument, which the operator must be read carefully prior to
startup and use in order to running safely. It will at a critical moment to ensure personal safety
and avoid instrument damage. Please keep the Manual near the instrument to easy read.
This instrument was built and test in accordance with the safety regulations as specified below:
GB4793.1-2007 Medical Electrical Equipment First Part: Current Requirements for safety.
▲ Notes:The safety marks and protective device on both instrument and accessories may neither
be removed nor modified, so as to not injury body or instrument.
1.2 Safety Warning
The following safety notes relating to transport, installation, calibration, operation, maintenance,
cleaning and all aspects of the instrument. Every principal person must be read carefully and
carry out this mentioned strictly.
1.2.1 Warnings-Transport and Installation
● The instrument may only be transported or moved in an upright position always, the
tilt angle should not exceed 45℃!
● After installation, please remove the section waste tray and knife holder before
transporting or movement!
● The input voltage has been preset at the factory, please check this setting complies
with your local power requirement before connecting the instrument to the mains
power!
● Please using the power cord provided. If changing the power cord, must ensure the
power cord with earth wire!
● Don’t operate in rooms with explosion hazard !
● The protective devices on both instrument and accessories must neither be removed
nor modified, in order to avoid injury to instrument or person body !

AEM480 Fully-automatic Microtome
AMOSAEM480OP20180306
---2---
1.2.2 Warnings-Operation
● Take care when handling microtome knives and disposable blades. The cutting edge
is extremely sharp and can cause serious injury!
● Always remove the knife/blade before detaching the knife holder from the instrument,
and put the knives back into the knife box when not in use!
● Never place knife anywhere with the cutting edge facing upwards and never try to
catch knife when you take out the knife!
● Always clamp the specimen block before clamping the knife!
● Prior to changing the specimen and knife, always lock the handwheel firstly. If
changing the specimen only, always must cover the cutting edge with the knife guard !
● Always turn the handwheel clockwise, otherwise , the effect may affect the slice!
● Always cover the knife guard when slicing!
● Don’t Clockwise and Counterclockwise rotate the handwheel frequently at top and
bottom! Slice thickness many deviations!
● Ensure that liquids don’t enter the interior of the instrument during working!
● Don’t touch the handwheel while it is running, otherwire injury the operator!
1.2.3 Warning- Maintenance and Cleaning
● Only authorized person may do the service and repair!
● Before cleaning, always switch off the instrument, disconnect the power plug,
remove the knife holder completely and clean it separately. Must remove the blade
before cleaning the knife holder!
● Lock the handwheel before each cleaning!
● Don’t use any solvents containing acetone or xylene for cleaning!
● Ensure that no liquids enter the interior of the instrument when cleaning!
● Don’t turn on the instrument before it is completely dry!
● Turn the instrument off with the mains switch and pull the mains plug before
replacing the fuses! Only use fuses of the same specification and operation in this
manual.

AEM480 Fully-automatic Microtome
AMOSAEM480OP20180306
---3---
1.3 Safety Devices
Handwheel locking mechanism
As showed in the Fig, lever(1)and(2)
can be to lock the handwheel.
To clockwise push lever(1)until it lock the
handwheel while specimen place at the top
position.
And also can clockwise rotate lever(2)about
180°which it may lock handwheel in any
position.
Rotate the lever counterclockwise to unlock
the handwheel.
The Left drawing shows the status at :
Lever (1) is activated to lock and lever (2) is
not activated.
When the lock is activated, the “LOCK”
indicator will light on display panel while the
machine DON’T running.
●DON’T lock the handwheel when the
handwheel is rotating, otherwise it will damage
the instrument.
▲Attention:Before remove the instrument, change specimen and blade or cleaning and
maintenance the instrument, the handwheel must be locked.
Knife Guard on the knife holder
Turn the knife guard(3) upward to cover
the knife to avoid personal injury and damage
the knife edge.
The knife guard(3)on the upper station
(see the drawing) that is stay in protection.
●Note: Only authorized and qualified service
personnel may access the internal components
of the instrument.
Emergency Stop Function
Fig(4)is switch for Emergency Stop.
The emergency-stop function is activated with
the red switch(4) pressed while the main power
off and all actions stops.
To deactivate this function, turn the switch in
the direction of the arrow.
The function should be use on emergency status.
Correct use in order:
1
2
3
4

AEM480 Fully-automatic Microtome
AMOSAEM480OP20180306
---4---
Activate Emergency switch —turn off power
switch—deactivate—turn on power switch.
2、Performance & Parameters
2.1 Overview- Instrument Structure
Handwheel
Instrument Base
Handle of handwheel
Storage Tray
Power Switch
Separate Control Panel
connection with socket
Power Socket
with fuse inside
Emergency-stop
Switch
Quick release
cassette clamp
Knife guard at knife holder
Knife holder
Section waste tray
Specimen clamp adjustor
Clamping lever for knife holder
Display panel
Separate control panel
Handwheel locking
mechanism-lock at
any position
Handwheel locking
Mechanism-lock at
fixed position

AEM480 Fully-automatic Microtome
AMOSAEM480OP20180306
---5---
2.2 Performance Index
AEM480 is a motorized rotary microtome. The stepper motor operated the specimen
movement forward and back, coarse feed and sectioning in manual operation. It is better in
precision sectioning, easy operation.
⊙The crust is made in ABS plastic with fire prevention function, and streamlined
designed in artistic appearance.
⊙Spacious ingenious assembly section waste tray.
⊙Retraction function make it is better to sectioning. The retraction value can be set.
⊙Quick release cassette clamp and specimen clamp fit to internal Embedding
cassette.
⊙Locking may be activated at any position by handwheel. It ensure cassette
changing safety when the cassette located in the toppest locked.
⊙The electric coarse feed operates two speeds which is easy to record the feed.
⊙Separate control panel is more easy to operate.
⊙Three motorized sectioning modes (Cont, Single and Step) are available, user can
choose at will.
⊙Automatic memorized coarse feed and reload fast can improve efficiency during
sectioning.
2.3 Technical Data
⊙Surroundings requirements:
Working temperature:+10℃—40℃
Working humidity: <80%,defrosting
Working pressure:(86~106)kPa;
⊙Power supply:100-240 VAC±10 %
⊙Frequency:50/60 Hz
⊙Power:<60 VA
⊙Fuse:3 A
⊙Safe classify:ClassifyⅠ- type B
⊙Section thickness:0 to 600µm
0 to 2µm,0.5µm increments
2 to 10µm,1µm increment
10 to 20µm,2µm increments
20 to 100µm,5µm increments
100 to 600µm,50µm increments
⊙Trimming thickness: 0 to 600µm
0 to 2µm,0.5µm increments
2 to 10µm,1µm increment
10 to 20µm,2µm increments
20 to 100µm,5µm increments
100 to 600µm,50µm increments

AEM480 Fully-automatic Microtome
AMOSAEM480OP20180306
---6---
⊙Retraction thickness: 5-100µm. 5µm increments (can deactivate)
⊙Specimen horizontal feed:28mm
⊙Specimen vertical feed:70mm
⊙Maximum specimen :40x50x30mm, or standard cassette
⊙Specimen holder adjusted system: Horizontal orientation: ±8°
Vertical orientation:±8°
⊙Repositioning of knife holder base(left-right):50mm
⊙Electric Coarse Feed Speed:300µm/s (Slow) and 900µm/s (Quick)
⊙cutting speed:100-420mm/s±10%
⊙Dimension: Length:550mm,
Width:405mm , (without handwheel,310mm),
Height:325mm ,
⊙Net Weight: about 37kgs
3、Preparing before using
3.1 Installation Site Requirement
⊙Put the instrument on a steady table to ensure the instrument base is in horizon when the
instrument is running.
⊙Ensure that no other goods around the instrument to avoid the shelter affecting the
operator operate the instrument.
⊙The working temperature and humidity must be accord with the data in the manual.
⊙Ensure there is enough space for the handwheel running.
▲Attention:Do not operate in rooms with explosion hazard.
3.2 Standard Delivery
⊙Microtome(with quick release cassette clamp) 1 unit
⊙Knife holder 1 set
⊙Specimen Clamp 1 pc
⊙Section Waste tray 1 pc
⊙Separate Control Panel with connection cable 1 pc
⊙Foot switch with cable 1 pc
⊙2.5 Allen wrench(M3)1 pc
⊙3 Allen wrench(M4) 1 pc
⊙Dust Cover 1 pc
⊙Disposable blade 1 box
⊙Power Cord 1 pc
⊙Fuse 2 pcs
⊙Operation Manual 1 pc
●Please carefully check out the supply with the packing list after open the carton. If you have
any doubt, immediately contact the seller. If the client has any special requirement, please
illuminate it before order.

AEM480 Fully-automatic Microtome
AMOSAEM480OP20180306
---7---
3.3 Installation
3.3.1 Unpacking
As Fig shows:
⊙Box Cover(1)
⊙Microtome(2)
⊙Back protect board(3)
⊙Section Waste Tray(4)
⊙Knife holder(5)
⊙Front protect board(6)
⊙Specimen Clamp(7)
⊙Box Base(8)
Cut off the tie and then remove
the cover (1), and then take knife
holder (5), waste tray (4), standard
cassette clamp (7), front protect board
(6), back protect board and then the
instrument in turn. Final to take out
other accessories in the inner package
to install the instrument.
3.3.2 Knife holder
Take the knife holder (9) out from
the box, push it along the track as it is
showed in the Fig, and then rotate the
knife holder locking lever (10) to lock
the knife holder.
3.3.3 Section Waste Tray
Take the Section waste tray(11)
out from the box and push it along the
track as it is showed in the Fig
1
3
2
5
4
7
6
8
9
10
11

AEM480 Fully-automatic Microtome
AMOSAEM480OP20180306
---8---
3.3.4 Separate Control Panel
Take the separate control panel
(12)and connecting cable(13)out
from the box,As Fig shows, insert the
plug of the connecting cable into the
control panel(12)and socket(14)on
the rear of instrument. And fasten the
plug, tighten the two screws.
●Note: Must connect well the
instrument to separate control panel,
otherwise, the instrument don’t work
normally.
3.3.5 Foot Switch installation
Take out the foot switch(16)
from box. As Fig shows, insert the
plug of the connecting cable into
socket(15)on the rear of instrument.
And fasten the plug, tighten the two
screws.
●The foot switch is selected parts.
3.4 Electrical Connection
●The voltage has been preset at the factory. Before connecting the instrument to the power,
please check that this setting complies with the local power requirements of your laboratory.
●Connect the instrument to a grounded power socket, to avoid accident.
●It is better to use the power cable provided or use an extension cord with a ground wire.
●Insert the fuse(17) into the fuse
socket (16) as it is showed in the Fig
and insert the whole fuse socket into
the socket (15).
●Attention: Cut off the power
supply and then pull the plug before
change the fuse。To ensure trouble-free
operation of the instrument, make sure
to comply with the explanation in the
operation manual.
15
16
17
12
13
14
16
15

AEM480 Fully-automatic Microtome
AMOSAEM480OP20180306
---9---
●Power off as the left fig show and
Turn the instrument on as right fig
show.
●After the microtome is switched on,
the display field in the control panel is
lit up. And the specimen holder will
back to zero automatically. A beep
sound will follow.
4、Operation
4.1 Control Panel Function &Control
All the parameters are set and displayed via separate control panel. After power on, use
the separate control panel to operate the instrument, the following is the distribution and
explanation of separate control panel.
4.1.1 Display Panel
OFF
ON
LCD display:
Current section thickness/
trimming thickness, section
counter and section
Section Mode: Continue
Indicator Light
Power: power on/off
False: Coarse feed wrong
Lock: handwheel locked
Section Mode: Single
CLEAR:
Clear the display parameters of
counter, section thickness sum
back to Zero .
Section Mode: Manual
Menu MODE: Three section
mode for choose

AEM480 Fully-automatic Microtome
AMOSAEM480OP20180306
---10---
The LCD display area for two lines with blue screen and
white words.
The first line displays: Current set value of section Thickness/trimming
section thickness setting
The second line displays: section/trimming counter and section
thickness sum.
●The trimming status be stand by when instrument switch on.
Indicator Light
If Power Led lit up, it shows the power working on.
If False Led lit up, it shows coarse feed operation wrong and
alarm voice at same time.
If Lock Led lit up,it shows the handwheel is locking and no
response to section.
Sectioning Mode indicator light
If select CONT mode, the led lit up, it means sectioning
continues is ready..
If select SINGLE mode, the led lit up, it means single sectioning
is ready.
If select ROCK mode, the led lit up, it shows manual sectioning
is ready.
Sectioning Mode selection button
Press this button to choose desired operating sectioning mode
(CON,SINGLE AND ROCK)
CLEAR button
Clear the display (section counter or section thickness sum) to Zero.
●The system will automatic clear the section number and
thickness when machine switch on.

AEM480 Fully-automatic Microtome
AMOSAEM480OP20180306
---11---
4.1.2 Separate Control Panel
Display Area
Shows the section/trimming retraction setting value.
Action Display LED
If TRIM Led lit up, it shows the status at trimming and trimming
thickness setting.
If SECT Led lit up, it shows the status at sectioning and section
thickness setting.
If RETRA Led lit up, it shows the status at retraction and
retraction thickness setting.
If RUN Led lit up, it shows the working at sectioning or
trimming, except Speed adjustment button can be activated, the
others button no response.
Set the sectioning, trimming,
retraction thickness
Auto running on Continure/signle
mode.
自动模式时切片运行按键
Trim light: at trimming mode
Sect light: at sectioning mode
Retra light: at retraction mode
Run light: running at “Continue”
and “Single”mode.
DisplayArea:
Display the sectioning,
trimming, retraction value.
Adjust different speed of
sectioning.
SECT: sectioning setting
TRI: trimming setting
RETRA: retraction setting
Coarse feed backward /
forward at different speed.
Memo: memory position of
coase feed
Feed: coarse feed button

AEM480 Fully-automatic Microtome
AMOSAEM480OP20180306
---12---
Buttons for setting the section thickness / trimming section thickness/
retraction value
Section thickness setting range:0µm to 600µm
Setting values: From 0.5µm to 2µm,in 0.5µm increments
From 2µm to10µm,in 1µm increments
From 10µm to 20µm,in 2µm increments
From 20µm to 100µm,in 5µm increments
From 100µm to600µm,in 50µm increments
Retraction value:From 5µm to 100µm,in 5µm increments.
Buttons for adjusting sectioning speed
The two buttons can be used in motorized operation. It can be adjust
the sectioning speed , the range is 100-420mm/s±10%.
Buttons for coarse feed backward/forward fast.
Fast adjust the movement of coarse feed, the speed is 900µm/s
Buttons for coarse feed backward/forward slow
Slow adjust the movement of coarse feed, the speed is 300µm/s
●Specimen feed is 28mm. If exceed the value, the buzzer will alarm
with voice and the specimen movement stopped.
Button for trimming
Light up when trimming mode is active. Trimming and trimming
thickness setting can be done.
Button for sectioning
Light up when sectioning mode is active. Sectioning and sectioning
thickness setting can be done.
Button for retraction
Light up when specimen retraction function active and light off when
the function close.
Long push the button about three seconds, the retraction LED
illuminates and flickers while the retraction value select and exit via
push other button(trimming or sectioning).
Button for run
In motorized operation the button can be used. Long press the button
about three seconds while the LED illuminates and automatic to run.
Short press the button to stop the run. The button for adjusting speed
can be active only during running, the others buttons have no response.

AEM480 Fully-automatic Microtome
AMOSAEM480OP20180306
---13---
●Don’t active the button in manual operation, otherwise the
others buttons have no response .
Memorized coarse feed value and fast reload the next new specime
Memo: Memorized the specimen coarse feed value.
Feed: Push the button, the specimen move to the last memorized
feed value automatically when reload the specimen.
4.2 Knife Holder inserting
As the drawing shows,the knife holder be composed of the following parts:Zaxis slider
(1), Y axis slider(2), X axis slider(3), clamp2(4), clamp1(5), knife guard(6),
lever 2(7), lever 2(8), lever 2(9),lever 1(10).
⊙Insert the Y axis slider(2)into the track of Z axis slider(1), and then insert the lever
2 (7) and rotate it until the slider securely clamped and then adjust the adjustable
handle of the lever 2(7)to horizontal position.
⊙Rotate the rotating X axis slider (3) to slide it into the Y axis slider (2), and then
insert the lever 2 (8),and rotate it until the slider securely clamped, and then adjust
the adjustable handle of the lever 2 (8) to horizontal position.
⊙Place the clamp(4) and clamp(5)on the X axis slider (3), and then rotate lever 2 (9)
to lock , adjust the adjustable handle of the lever 2( 9) to the vertical position.
⊙Rotate the Lever 1(10) to lock the clamp2(4)and clamp1(5).
⊙Turn the knife guard(6) over the knife edge to avoid the accidental injury.
9
8
5
6
4
3
10
2
1
7

AEM480 Fully-automatic Microtome
AMOSAEM480OP20180306
---14---
Knife holder and the instrument base holder
Insert the knife holder(11) along the track of the
base holder(12), and then rotate lever 2 (7) to lock
and adjust the adjustable handle of the lever 2(7) to
horizontal position.
▲Attention: Always remove the knife before
detaching the knife holder from the
instrument. Always put the knives back into
the knife case when not in use.
Tighten the knife holder and the base holder by
the four levers and adjust the rotating angle as
requirement before tighten it.
The rotating angle is from 0 to 10 degree (see the
picture), the user can adjust the angle in this range
according to the requirement.
▲Caution:Take care to operate the knife holder and the knife, it is very sharp and easy to
cause serious injury.
4.3 Clamping the Specimen
As the drawing shows , turn the handwheel (2)
to drive the specimen clamp(1) moving in the
vertical direction.
●To clockwise turn the handwheel when
sectioning to obtain a best section.
As drawing shows, the specimen clamping
system is made up of adjustor(3)、connect board (4)
and clamp(5、6).
There are two kinds of clamp specimen clamp
(6) and Quick release cassette clamp (5).
Specimen clamp is fit for:
Dimension of specimen:40*50*30mm
Or standard cassette.
Quick release cassette clamp is fit for : Standard
cassette.
Use the screws to fix each component as Fig
1
2
6
4
5
3
11
12

AEM480 Fully-automatic Microtome
AMOSAEM480OP20180306
---15---
shows. To change the specimen clamp, the user can
loosen the screw connected the specimen and
connector.
The specimen clamp adjustor
Loosen the lever 1(7), and adjust the vertical knob (8)
to calibration the vertical angle of the specimen; and
the horizontal adjusting knob(9) can be used to adjust
the horizontal angle of the specimen.
After the above, use the rotating lever 1(7) to tighten
it.
Specimen adjusting system:
horizontal orientation : ±8°
vertical orientation:±8°
4.4 Specimen Clamps/Knife Inserting
Specimen Clamp
The specimen Clamp is available two
kinds:Specimen clamp(1)and Quick release
cassette clamp(2).
Specimen clamp:
Put the specimen (4) into the clamp (1) as
it showed in the drawing. And then clockwise
rotate the knurled screw (3) to tighten the
clamp. And take down the specimen by
rotating the knurled screw counterclockwise.
Quick release cassette clamp:
Push the lever (5) as the direction
showed in the drawing to open the clamp(2),
while put the specimen (6) into. and then
free loosen lever (5), the specimen will be
clamped automatically. To take down the
specimen, just operate as above.
Easy to change the specimen by one
hand operating the quick release cassette
clamp.
8
7
9
1
3
4
(1)
2
6
5
(2)
Table of contents
Other Amos Laboratory Equipment manuals
Popular Laboratory Equipment manuals by other brands

Binder
Binder APT.line FP 56 operating manual

Appleton
Appleton appMIX instruction manual

Sirona
Sirona DAC PROFESSIONAL operating instructions

Sartorius Stedim Biotech
Sartorius Stedim Biotech BIOSTAT B-DCU operating instructions

Infors HT
Infors HT Multitron Standard operating manual

THORLABS
THORLABS PMT1000 Series user guide