manuals.online logo
Brands
  1. Home
  2. •
  3. Brands
  4. •
  5. Dremel
  6. •
  7. 3D Printer
  8. •
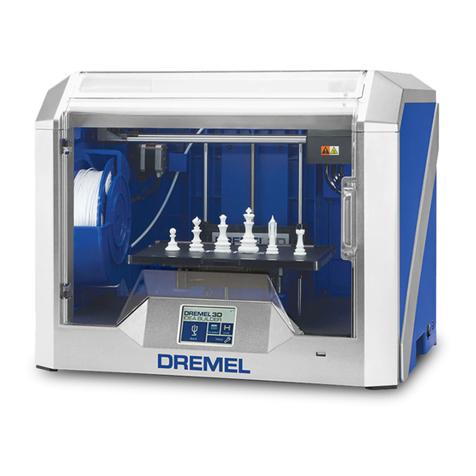
  9. Dremel 3D40 Idea Builder User manual

Dremel 3D40 Idea Builder User manual

Spool
Holder
FIG
. 1
WARNINGWARNING
READALLOPERATING/SAFETYINSTRUCTIONS IN THE MANUAL AND FAMILIARIZE YOURSELF WITH THE
DREMEL3D40BEFORESETUP AND USE. FAILURE TO COMPLY WITH THE WARNINGS AND INSTRUCTIONS MAY
RESULTINFIRE,EQUIPMENT DAMAGE, PROPERTY DAMAGE,OR PERSONAL INJURY.
1-844-4DRML3D(1-844-437-6533) www.dremel.com
P.O.Box081126Racine , WI 53408-1126
3D40
IdeaBuilder
Operating/SafetyInstructions
Consignesd’utilisation/desécurité
Instruccionesdefuncionamientoy seguridad
ForEnglishVersion
Seepage2
Versionfrançaise
Voirpage16
Versiónenespañol
Verlapágina 30
IMPORTANT
ReadBeforeUsing
IMPORTANT
Lireavantusage
IMPORTANTE
Leerantesdeusar
CallTollFreeforConsumerInformation& Service Locations
Pourobtenirdesinformationsetlesadressesdenoscentresdeserviceaprès-vente,appelezcenumérogratuit
Llamegratisparaobtenerinformaciónpara elconsumidor y ubicacionesde servicio
22 23 24
Model3D40F0133D4000
100V–240V~
47–63Hz1.5A Ø
1.75m
m(0.069")
Dremel•M
ountProspect,IL•MadeinChina
LISTED
3DPRINTER
E469311
1U1
SN
AVERTISSEMENT
ADVERTENCIA
WARNING
Toreduce riskof inj ury read the Operating / Safe ty Instructionsfor
Dremel3D4 0. Set up the Dre mel 3D40 in a well-ventilated area.
Provideatleast 8 incheso f unobstructed spacing aroundDremel 3D40.
Parareducir el riesgo de lesiones, leal as Instrucciones de
Utilización/Seguridad dela D remel 3D40. Instal e la
Dremel3D4 0 en un área bien ventilada.P roporcionepor lo meno s 8 pulgadasde espacio
sinobstrucciones alrededo r de la 3D40.
Pourréduire le risque de blessure, l isez le m ode
d’emploietle s consignes de sécurité pour l’équipem ent
Dremel3D4 0. Installez l’équi pement Dreme l 3D40 dansun endroit bien venti lé.Prévoyez
aumoins8 po (20 cm) d’espace sa ns obstructionsautour de l’équipement Dre mel 3D40.
2625
Open
Close Filament Filament
Guide Tube
Guide Tube Filament Filament
Guide Extruder
Intake
FILAMENT LEVEL
!
!
PRESS DONE WHEN
NEW COLOR APPEARS
BACK
DONE
HOME
QuickStart Guide
BACK
!
FEED FILAMENT
NEXT HOME
1
4
96
12
10
2
11
5
3
Quick Start Guide
Unboxing
1
Getting to Know Your Dremel 3D40
3
Getting Ready to Build
4
1. Lid
2. Extruder
3. Z-Axis Guide Rail
4. Door
5. Gripping Handles
6. USB A Port
7. Leveling Knobs
8. Build Platform Clip
9. Touch Screen
10. Build Platform
11. Filament Spool Holder
12. Filament Spool
13. Y-Axis Guide Rail
14. Stepper motor
15. Filament Guide Tube
16. Extruder Lever
17. Filament Guide Clip
18. Extruder Intake
19. Extruder Fan
20. Ribbon Cable
21. X-Axis Guide Rail
22. Leveling Sensor
23. Extruder Tip
24. Power Switch
25. USB B Port
26. Ethernet Port
27. Nameplate
28. Power Input
FILAMENT INSTALLATION
1. Ensure the power switch is in the o position.
2. Twist spool door counter-clockwise and remove.
3. Place filament spool onto spool holder with spool being fed
from the bottom towards the back of the Dremel 3D40.
4. Thread filament through filament guide tube and replace
spool door.
5. Insert the filament coming from the filament guide tube into
the extruder intake.
6. Plug power cord into outlet and turn on power switch.
7. Tap “Filament” on your Dremel 3D40’s touch screen and wait
for extruder to heat.
8. When Feed Filament screen appears, tap “Next” and thread
filament into extruder intake until extruder feeds through on
its own.
9. When new filament appears from extruder tip, tap “Done” to
complete filament load process.
Kit Contents
2
WARNING: In case your printer needs to be sent to a service
center, please contact customer service for packaging instructions
before shipping your printer. Please use the provided inlay and
package as per instructions or the warranty will be void.
Dremel 3D40 Instruction Manual Quick Start Guide
1 Filament Spool Power Cable USB Cable
Build Tape Object Removal Tool USB Flash Drive
WARNINGWARNING
READ ALL OPERATING/SAFETY INSTRUCTIONS IN THE MANUAL AND FAMILIARIZE YOURSELF WITH THE
DREMEL 3D40 BEFORE SETUP AND USE. FAILURE TO COMPLY WITH THE WARNINGS AND INSTRUCTIONS MAY
RESULT IN FIRE, EQUIPMENT DAMAGE, PROPERTY DAMAGE, OR PERSONAL INJURY.
1 2
3
4
5
6
78
9
10
11
12
13
14 15 16 17 18 19
22
20
21
23
24 25 26 27 28
WARNINGWARNING
OBSERVE ALL PROVIDED WARNINGS AND SAFETY
INSTRUCTIONS WHEN USING THE DREMEL 3D40. FAILURE
TO DO SO MAY RESULT IN FIRE, EQUIPMENT DAMAGE, PROPERTY DAMAGE OR
PERSONAL INJURY.
5
7
9
3
8
12
34
5
ENGLISH
Unclog Tool
SIDE 1
English
PRESS COLORS
2199621996 Dremel 3D40 Quick Start_ENGLISH.ai
SMW 1.11.16
PMS 8402 PMS286 PMS 151 BLACK
FILAMENT LEVEL
!
FILAMENT LEVEL
!
!
BUILD PLATFORMIS TOO HIGH
TURN RIGHTTO LOWER HOME
BACK
!
READYTO VERIFY
HOME
BACK
VERIFY
!
BUILD PLATFORMIS TOO LOW
TURN LEFTTO RAISE HOME
BACK
!
HOMEBACK
ScrewdriverHandle...
frog.g3drem DiamondStencil.g3...
FishStencil.g3drem
!
BUILD
DELETE
COPY TO
PRINTER
FILE NAME
BUILD TIME 00:00
HOMEBACK
Part#: 2610Z08073
08/2016
Getting Ready to Build (continued…)
5
LEVELING BUILD PLATFORM
1. Make sure you have placed Build Tape on Build Platform
and no objects are present.
2. Tap“Level” on your Dremel 3D40’s touch screen.
3. 3D40 will first check the level at the back of the build
platform, then move to the first leveling position.
4. The touchscreen will indicate if your build platform is too
high or too low.
a) If the build platform is too high, turn knob to the right
until you hear a “beep”. Tap “Verify” to check the bed
level again.
b) If the build platform is too low, turn knob to the left until
you hear a “beep”. Tap “Verify” to check the bed level again.
5. Repeat step above for the second levelling position.
6. When the build platform is level, extruder will automatically
move to the calibration position and complete the
levelling process.
Building
6
BUILDING OUT OF THE BOX
1. On the main screen, tap the “Build” option.Then tap the
machine icon to select from pre-installed models.
2. Tap on the model file you would like to build and tap “Build”.
3. Your Dremel 3D40 will align the extruder with the build
platform and will begin heating the extruder.
4. Once the correct temperature is reached, your model will
begin to build.
5. Touch screen will display “Object Finished”.
REMOVING YOUR OBJECT FROM THE BUILD
PLATFORM
6. Wait for the extruder to cool before removing your object.
7. With the object still attached, remove build platform from
the build area.
8. Use your hand to peel your object from the build platform. If
needed, gently use the object removal tool to remove object
from build platform.
Best Practices & Resources
7
BEST PRACTICES
1. ALWAYS USE BUILD TAPE.
2. Ensure your platform is level (before you begin building
your object).
3. Ensure spool is installed properly and can rotate freely.
4. When loading filament, allow Dremel 3D40 to extrude until
material is consistent with the installed filament color.
5. It is important to stay near your Dremel 3D40 during
operation and watch the Dremel 3D40 begin building
objects. (If a situation occurs, select the STOP icon right
away, to stop any further building).
6. Remove the build platform before removing the object.
7. Use object removal tool gently to avoid damaging the build
platform or object.
OPERATING ENVIRONMENT
Room Temperature: 16-29° C (60 - 85° F)
Level workspace
Dry workspace environment
3D40 RESOURCES
Quick Start Guide In box and www.dremel3d.com
3D40 Website www.dremel3d.com
3D40 Customer www.dremel3d.com
Support
Print Studio www.dremel3d.com
Software
1
3
2
8
1
16”(406mm)
20.25”(515mm) 15.5”(394mm)
WALL
8”(203mm)
8”(203mm)8”(203mm)
14”(356mm)
SIDE 2
English
PRESS COLORS
2199621996 Dremel 3D40 Quick Start_ENGLISH.ai
SMW 1.11.16
PMS 8402 PMS286 PMS 151 BLACK

Other manuals for 3D40 Idea Builder

5

Other Dremel 3D Printer manuals

Dremel 3D40-EDU Assembly instructions

Dremel

Dremel 3D40-EDU Assembly instructions

Dremel 3D40 Idea Builder User manual

Dremel

Dremel 3D40 Idea Builder User manual

Dremel DigiLab 3D45 User manual

Dremel

Dremel DigiLab 3D45 User manual

Dremel DigiLab 3D45 Assembly instructions

Dremel

Dremel DigiLab 3D45 Assembly instructions

Dremel DigiLab 3D40 FLEX User manual

Dremel

Dremel DigiLab 3D40 FLEX User manual

Dremel 3D20 Idea Builder User manual

Dremel

Dremel 3D20 Idea Builder User manual

Dremel 3D20 Idea Builder User manual

Dremel

Dremel 3D20 Idea Builder User manual

Dremel 3D20 Idea Builder User manual

Dremel

Dremel 3D20 Idea Builder User manual

Dremel 3D20 Idea Builder User manual

Dremel

Dremel 3D20 Idea Builder User manual

Dremel DigiLab 3D45 User manual

Dremel

Dremel DigiLab 3D45 User manual

Dremel DIGILAB 3D40 User manual

Dremel

Dremel DIGILAB 3D40 User manual

Dremel DigiLab 3D45 User manual

Dremel

Dremel DigiLab 3D45 User manual

Dremel DigiLab 3D45 Quick guide

Dremel

Dremel DigiLab 3D45 Quick guide

Dremel DigiLab 3D45 User manual

Dremel

Dremel DigiLab 3D45 User manual

Dremel DigiLab 3D45 User manual

Dremel

Dremel DigiLab 3D45 User manual

Dremel 3D40 Idea Builder User manual

Dremel

Dremel 3D40 Idea Builder User manual

Dremel DigiLab 3D45 User manual

Dremel

Dremel DigiLab 3D45 User manual

Dremel 3D20 Idea Builder User manual

Dremel

Dremel 3D20 Idea Builder User manual

Dremel 3D20 Idea Builder User manual

Dremel

Dremel 3D20 Idea Builder User manual

Dremel 3D40 Idea Builder Operating instructions

Dremel

Dremel 3D40 Idea Builder Operating instructions

Dremel 3D20 Idea Builder User manual

Dremel

Dremel 3D20 Idea Builder User manual

Dremel 3D20 Idea Builder User manual

Dremel

Dremel 3D20 Idea Builder User manual

Dremel DigiLab 3D45 Use and care manual

Dremel

Dremel DigiLab 3D45 Use and care manual

Dremel 3D20 Idea Builder User manual

Dremel

Dremel 3D20 Idea Builder User manual

Popular 3D Printer manuals by other brands

Mooreco Makerspace 91413 Assembly instructions

Mooreco

Mooreco Makerspace 91413 Assembly instructions

Ender 3 Series quick start guide

Ender

Ender 3 Series quick start guide

Ultimaker S5 Material Station quick start guide

Ultimaker

Ultimaker S5 Material Station quick start guide

LONGER LK2 instruction manual

LONGER

LONGER LK2 instruction manual

SHAREBOT BIG quick start guide

SHAREBOT

SHAREBOT BIG quick start guide

Flashforge Creator Pro Start up and instruction guide

Flashforge

Flashforge Creator Pro Start up and instruction guide

Zonestar Z6 user manual

Zonestar

Zonestar Z6 user manual

FLASHFORGE 3D PRINTER Foto 8.9s quick start guide

FLASHFORGE 3D PRINTER

FLASHFORGE 3D PRINTER Foto 8.9s quick start guide

Raiscube R10 user manual

Raiscube

Raiscube R10 user manual

TRONXY X3A Operating	 instruction

TRONXY

TRONXY X3A Operating instruction

Deezmaker Bukito Assembly manual

Deezmaker

Deezmaker Bukito Assembly manual

Monoprinter Mono2 manual

Monoprinter

Monoprinter Mono2 manual

Snapmaker Artisan quick start guide

Snapmaker

Snapmaker Artisan quick start guide

Ultimaker 2 Extended user manual

Ultimaker

Ultimaker 2 Extended user manual

PowerSpec Pro 3D Printer Startup guide

PowerSpec

PowerSpec Pro 3D Printer Startup guide

AIO ROBOTICS ZEUS Quick start user guide

AIO ROBOTICS

AIO ROBOTICS ZEUS Quick start user guide

Elegoo Saturn 3 Ultra user manual

Elegoo

Elegoo Saturn 3 Ultra user manual

Atom ATOM 3 Series user manual

Atom

Atom ATOM 3 Series user manual

manuals.online logo
manuals.online logoBrands
  • About & Mission
  • Contact us
  • Privacy Policy
  • Terms and Conditions

Copyright 2025 Manuals.Online. All Rights Reserved.