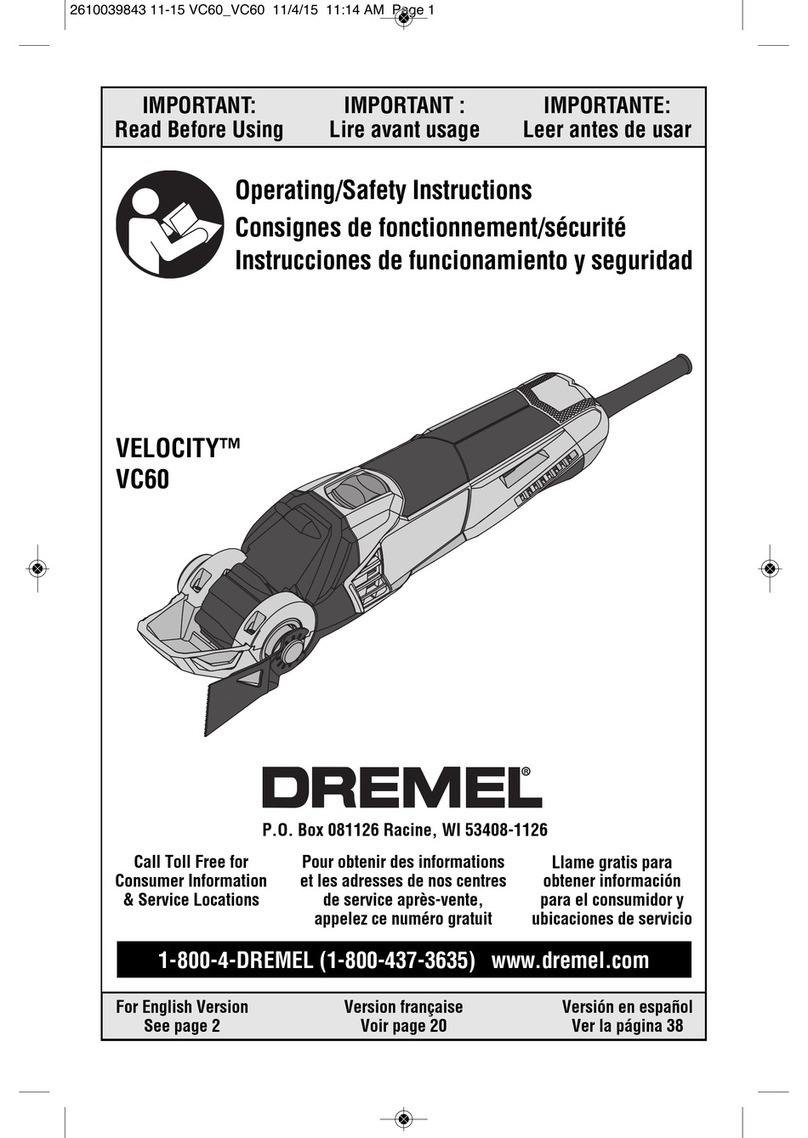
Dremel VRT1 Assembly instructions

For English Version: See page 2 Version française : Voir page 17 Versión en español: Ver la página 32
1-800-4-DREMEL (1-800-437-3635) www.dremel.com
IMPORTANT: Read Before Using IMPORTANT : Lire avant usage IMPORTANTE: Leer antes de usar
VRT1
Operating/Safety Instructions
Consignes de sécurité/d’utilisation
Instrucciones de funcionamiento
y seguridad
Call Toll Free for Consumer
Information
& Service Locations
Pour obtenir des informations et les adresses
de nos centres de service après-vente,
appelez ce numéro gratuit
Llame gratis para obtener
informaciónpara el consumidor y
ubicaciones de servicio
P.O. Box 081126 Racine, WI 53408-1126

2
Read all safety warnings and all instructions. Failure to follow the warnings and instructions may result in electric shock, fire and/or
serious injury.
Read all safety warnings and all instructions that were provided with your wet/dry vacuum.
SAVE ALL WARNINGS AND INSTRUCTI NS F R FUTURE REFERENCE
The term “power tool” in the warnings refers to your mains-operated (corded) power tool or battery-operated (cordless) power tool.
!
WARNING
General Power Tool Safety Warnings
Work area safety
Keep work area clean and well lit. Cluttered or
dark areas invite accidents.
Do not operate power tools in explosive
atmospheres, such as in the presence of
flammable liquids, gases or dust. Power tools
create sparks which may ignite the dust or
fumes.
Keep children and bystanders away while
operating a power tool. Distractions can cause
you to lose control.
Personal safety
Stay alert, watch what you are doing and use
common sense when operating a power tool.
Do not use a power tool while you are tired
or under the influence of drugs, alcohol or
medication. A moment of inattention while
operating power tools may result in serious
personal injury.
Use personal protective equipment. Always
wear eye protection. Protective equipment
such as dust mask, non-skid safety shoes, hard
hat, or hearing protection used for appropriate
conditions will reduce personal injuries.
Prevent unintentional starting. Ensure the
switch is in the off-position before
connecting to power source and / or battery
pack, picking up or carrying the tool. Carrying
power tools with your finger on the switch or
energizing power tools that have the switch on
invites accidents.
Remove any adjusting key or wrench before
turning the power tool on. A wrench or a key
left attached to a rotating part of the power tool
may result in personal injury.
Do not overreach. Keep proper footing and
balance at all times. This enables better control
of the power tool in unexpected situations.
Dress properly. Do not wear loose clothing or
jewelry. Keep your hair, clothing and gloves
away from moving parts. Loose clothes,
jewelry or long hair can be caught in moving
parts.
If devices are provided for the connection of
dust extraction and collection facilities,
ensure these are connected and properly
used. Use of dust collection can reduce dust-
related hazards.
Power tool use and care
Do not force the power tool. Use the correct
power tool for your application. The correct
power tool will do the job better and safer at the
rate for which it was designed.
Do not use the power tool if the switch does
not turn it on and off. Any power tool that
cannot be controlled with the switch is
dangerous and must be repaired.

3
Disconnect the plug from the power source
and/or the battery pack from the power tool
before making any adjustments, changing
accessories, or storing power tools. Such
preventive safety measures reduce the risk of
starting the power tool accidentally.
Store idle power tools out of the reach of
children and do not allow persons unfamiliar
with the power tool or these instructions to
operate the power tool. Power tools are
dangerous in the hands of untrained users.
Maintain power tools. Check for
misalignment or binding of moving parts,
breakage of parts and any other condition
that may affect the power tool’s operation. If
damaged, have the power tool repaired
before use. Many accidents are caused by
poorly maintained power tools.
Keep cutting tools sharp and clean. Properly
maintained cutting tools with sharp cutting edges
are less likely to bind and are easier to control.
Use the power tool, accessories and tool bits
etc. in accordance with these instructions,
taking into account the working conditions
and the work to be performed. Use of the
power tool for operations different from those
intended could result in a hazardous situation.
Service
Have your power tool serviced by a qualified
repair person using only identical
replacement parts. This will ensure that the
safety of the power tool is maintained.
Safety warnings common for sanding,
polishing, or carving operations:
This power tool is intended to function as a
sander, polisher, or carving tool. Read all
safety warnings, instructions, illustrations and
specifications provided with this power tool.
Failure to follow all instructions listed below may
result in electric shock, fire and/or serious injury.
perations such as grinding, wire brushing, or
cutting-off are not recommended to be
performed with this power tool. Operations for
which the power tool was not designed may create
a hazard and cause personal injury.
Use this tool only on wet/dry vacuums. Using
tool on other types of vacuums may cause
property damage and personal injury.
Do not use on material that generate sparks.
Spark may cause fire or explosion in the vacuum.
Do not use accessories which are not
specifically designed and recommended by
the tool manufacturer. Just because the
accessory can be attached to your power tool, it
does not assure safe operation.
The rated speed of the accessory must be at
least equal to the maximum operating speed
marked on the power tool. Accessories running
faster than their RATED SPEED can break and fly
apart.
The outside diameter and the thickness of
your accessory must be within the capacity
rating of your power tool. Incorrectly sized
accessories cannot be adequately guarded or
controlled.
The arbor size of wheels, sanding drums or
any other accessory must properly fit the
spindle or collet of the power tool. Accessories
that do not match the mounting hardware of the
power tool will run out of balance, vibrate
excessively and may cause loss of control.
Mandrel mounted wheels, sanding drums,
cutters or other accessories must be fully
inserted into the collet or chuck. If the mandrel
is insufficiently held and/or the overhang of the
wheel is too long, the mounted wheel may become
loose and be ejected at high velocity.
Do not use a damaged accessory. Before each
use inspect the accessory such as abrasive
wheels for chips and cracks, sanding drum for
cracks, tear or excess wear, wire brush for
loose or cracked wires. If power tool or
accessory is dropped, inspect for damage or
Safety Rules for Rotary Tools

4
install an undamaged accessory. After
inspecting and installing an accessory,
position yourself and bystanders away from
the plane of the rotating accessory and run the
power tool at maximum no-load speed for one
minute. Damaged accessories will normally break
apart during this test time.
Wear personal protective equipment.
Depending on application, use face shield,
safety goggles or safety glasses. As
appropriate, wear dust mask, hearing
protectors, gloves and workshop apron
capable of stopping small abrasive or
workpiece fragments. The eye protection must
be capable of stopping flying debris generated
by various operations. The dust mask or
respirator must be capable of filtrating particles
generated by your operation. Prolonged exposure
to high intensity noise may cause hearing loss.
Keep bystanders a safe distance away from
work area. Anyone entering the work area must
wear personal protective equipment. Fragments
of workpiece or of a broken accessory may fly
away and cause injury beyond immediate area of
operation.
Hold power tool by insulated gripping surfaces
only, when performing an operation where the
cutting accessory may contact hidden wiring.
Cutting accessory contacting a “live” wire may
make exposed metal parts of the power tool “live”
and could give the operator an electric shock.
Always hold the tool firmly in your hand(s)
during the start-up. The reaction torque of the
motor, as it accelerates to full speed, can cause
the tool to twist.
Use clamps to support workpiece whenever
practical. Never hold a small workpiece in one
hand and the tool in the other hand while in
use. Clamping a small workpiece allows you to
use your hand(s) to control the tool. Round
material such as dowel rods, pipes or tubing have
a tendency to roll while being cut, and may cause
the bit to bind or jump toward you.
Position the cord clear of the spinning
accessory. If you lose control, the cord may be cut
or snagged and your hand or arm may be pulled
into the spinning accessory.
Never lay the power tool down until the
accessory has come to a complete stop. The
spinning accessory may grab the surface and pull
the power tool out of your control.
After changing the bits or making any
adjustments, make sure the collet nut, chuck
or any other adjustment devices are securely
tightened. Loose adjustment devices can
unexpectedly shift, causing loss of control, loose
rotating components will be violently thrown.
Do not run the power tool while carrying it at
your side. Accidental contact with the spinning
accessory could snag your clothing, pulling the
accessory into your body.
Make sure vacuum hose is free of snags and
obstructions. Do not attach a vacuum hose to
your body. Entangled or snarled hoses can cause
a loss of balance or footing in addition to
unintentional tool operation.
Regularly clean the power tool’s air vents. The
motor’s fan will draw the dust inside the housing
and excessive accumulation of powdered metal
may cause electrical hazards.
Do not operate the power tool near flammable
materials. Sparks could ignite these materials.
Do not use accessories that require liquid
coolants. Using water or other liquid coolants
may result in electrocution or shock.
Always disconnect the vacuum hose before
making any adjustments or attaching any
accessories. You may unexpectedly cause the
tool to start leading to serious personal injury.
Avoid unintentional operation. While connecting
air supply do not hold On/Off Ring. Do not carry
the tool by On/Off Ring or connect the tool to the
wet/dry vacuum with the switch “on.”
Disconnect tool from vacuum hose when not
in use. Leaving the tool unattended with the
vacuum hose connected can result in unintentional
operation of the tool by users unfamiliar with tool.
Do not use tool with wire and bristle brushes.
Bristles or wires will be discharged at high
velocity and may cause personal injury.
5
If cutting into existing walls or other blind
areas where electrical wiring may exist is
unavoidable, disconnect all fuses or circuit
breakers feeding this worksite.
Be aware of the switch location, when placing
the tool down or when picking the tool up. You
may accidentally activate the switch.
Do not reach in the area of the spinning bit.
The proximity of the spinning bit to your hand
may not always be obvious.
Never use dull or damaged bits. Sharp bits
must be handled with care. Damaged bits can
snap during use. Dull bits require more force to
push the tool, possibly causing the bit to break.
Inspect your workpiece before cutting. When
cutting irregularly shaped workpieces, plan
your work so it will not slip and pinch the bit
and be torn from your hand. For example, if
carving wood, make sure there are no nails or
foreign objects in the workpiece. Nails or foreign
objects can cause the bit to jump.
Never start the tool when the bit is engaged in
the material. The bit cutting edge may grab the
material causing loss of control of the cutter.
The direction of feed with the bit into the
material when carving, routing or cutting is
very important. Always feed the bit into the
material in the same direction as the cutting
edge is exiting from the material (which is the
same direction as the chips are thrown).
Feeding the tool in the wrong direction, causes
the cutting edge of the bit to climb out of the work
and pull the tool in the direction of this feed.
If the workpiece or bit becomes jammed or
bogged down, turn the tool “ FF” by the
switch. Wait for all moving parts to stop and
unplug the tool, then work to free the jammed
material. If the switch to the tool is left “ON” the
tool could restart unexpectedly causing serious
personal injury.
Do not leave a running tool unattended, turn
power off. Only when tool comes to a complete
stop is it safe to put it down.
Do not touch the bit or collet after use. After
use the bit and collet are too hot to be touched by
bare hands.
Do not allow familiarity gained from frequent
use of your rotary tool to become
commonplace. Always remember that a careless
fraction of a second is sufficient to inflict severe
injury.
Do not alter or misuse tool. Any alteration or
modification is a misuse and may result in serious
personal injury.

This product is not intended for use as a
dental drill, in human or veterinary medical
applications. Serious personal injury may result.
When using the steel saws, cut off wheels, high
speed cutters or tungsten carbide cutters,
always have the work secure ly clamped. Never
attempt to hold the work with one hand while
using any of these accessories. The reason is
that these wheels will grab if they become slight ly
canted in the groove, and can kick back causing
loss of control resulting in serious in jury. Your
second hand should be used to steady and guide
the hand holding the tool. When a cutoff wheel
grabs, the wheel itself usually breaks. When the
steel saw, high speed cutters or tungsten carbide
cutter grab, it may jump from the groove and you
could lose control of the tool.
Use only Dremel®, high-performance
accessories. Other accessories are not designed
for this tool and may lead to personal injury or
property damage.
Kickback and Related Warnings
Use special care when working corners, sharp
edges etc. Avoid bouncing and snagging the
accessory. Corners, sharp edges or bouncing
have a tendency to snag the rotating accessory
and cause loss of control or kickback.

6
Keep handles dry, clean and free from oil and
grease. Slippery hands cannot safely control the
power tool.
Develop a periodic maintenance schedule for
your tool. When cleaning a tool be careful not
to disassemble any portion of the tool since
internal wires may be misplaced or pinched or
safety guard return springs may be improperly
mounted. Certain cleaning agents such as
gasoline, carbon tetrachloride, ammonia, etc. may
damage plastic parts.
Empty your vacuum’s dust canister before
use and before storing. Be extremely careful of
dust disposal, materials in fine particle form may
be explosive. Do not throw dust on an open fire.
Combustion from mixture of varnishes, lacquers,
polyurethane, oil or water with dust particles can
occur if there is a static discharge, spark
introduced in the box, or excessive heat.
Some dust created by power
sanding, sawing, grinding,
drilling, and other construction activities
contains chemicals known to cause cancer,
birth defects or other reproductive harm.
Some examples of these chemicals are:
• Lead from lead-based paints,
• Crystalline silica from bricks and cement and
other masonry products, and
• Arsenic and chromium from chemically-
treated lumber.
Your risk from these exposures varies, depending
on how often you do this type of work. To reduce
your exposure to these chemicals: work in a well
ventilated area, and work with approved safety
equipment, such as those dust masks that are
specially designed to filter out microscopic
particles.
Additional Safety Warnings !
WARNING
Symbols
n0
No load speed
Rotational speed, at no load
nRated speed
Maximum attainable speed
.../min
Revolutions per minute
Revolutions, strokes, surface
speed, orbits etc. per minute
Warning symbol
Alerts user to warning messages
Read manual symbol
Alerts user to read manual
Wear eye protection symbol
Alerts user to wear eye protection
IMP RTANT: Some of the following symbols
may be used on your tool. Please study them
and learn their meaning. Proper interpretation of
these symbols will allow you to operate the tool
better and safer.

7
Disconnect from vacuum hose before making any assembly, adjustments or changing accessories. Such preventive safety
measures reduce the risk of starting the tool accidentally.
SAVE THESE INSTRUCTI NS
!
WARNING
Functional Description and Specifications
Collet Lock
Collet Nut
On/Off Ring
FIG. 1
Vacuum Powered Rotary Tool
Collet
Vacuum Hose
Port (1-1/4”)
Collet
Wrench
Cutting
Guide
Model Number VRT1
No Load Speed n035,000/min
Collect Capacity 1/8"

8
Disconnect from vacuum
hose before making any
assembly, adjustments or changing
accessories. Such preventive safety measures
reduce the risk of starting the tool accidentally.
After changing bits or making
any adjustments, make sure
the chuck and any other adjustment devices
are securely tightened. Loose adjustment
device can unexpectedly shift, causing loss of
control, loose rotating components will be
violently thrown.
Your Rotary Tool is compatible with 1-1/4”
diameter vacuum hoses. If your wet/dry vacuum
has a larger hose it may be possible to buy an
adapter to achieve 1-1/4” connection diameter.
Contact the manufacturer of your wet/dry
vacuum.
Installing and Removing
Vacuum Hose
Use this tool only on wet/dry
vacuums. Using tool on other
types of vacuums may cause property damage
and personal injury.
To install Vacuum Hose (Fig. 2):
1. Grip the body of tool and exterior of vacuum
hose.
2. Firmly press end of vacuum hose into hose
port of tool until it fits snugly.
3. It may be necessary to twist the vacuum hose
in port for the best fit.
4. To remove vacuum hose grip tool body and
hose exterior and firmly pull to separate.
Installing and Removing Cutting Guide
To install cutting guide (Fig. 3):
1. Grip body of tool and rim of cutting guide.
2. Align threads of cutting guide with threads on
the interior of tool’s housing.
3. Rotate cutting guide clockwise until it fits
snugly against nose of tool.
4. To remove cutting guide grip and rotate
counterclockwise.
Installing and Removing Accessories
To Change Accessories (Fig. 4):
1. Remove cutting guide if it has been installed.
2. Loosen the collet nut by pressing shaft lock
button and rotating the shaft by hand until the
lock engages and holds the shaft.
Do not engage lock while the
Rotary Tool is running.
3. With the shaft lock engaged use the collet
wrench to loosen the collet nut. The collet nut
must be loosely threaded on when inserting
an accessory.
4. Remove old accessory and inserting the new
one into the collet as far as possible to
minimize runout and unbalance.
5. With the shaft lock engaged, use the collet
wrench to tighten the collet nut until the
!
WARNING
!
WARNING FIG. 2
FIG. 3
Assembly
CAUTION
!
!
WARNING

9
accessory shank is gripped by the collet.
Avoid excessive tightening of the collet nut
when there is no bit inserted.
Installing and Removing Collets
Always use the collet which
matches the shank size of the
accessory you plan to use. Never force a
larger diameter shank into a collet. Undersize
shanks will damage the collets and the
accessories will not run true.
Note: Your Rotary Tool kit includes only the 1/8”
collet.
Four different size collets (see illustration), to
accommodate different shank sizes, are
available for your Rotary Tool.
To install a different collet (Fig. 5):
1. Remove the collet nut.
2. Remove the existing collet.
3. Insert the unslotted end of the new collet in
the hole in the end of the tool shaft.
4. Replace collet nut on the shaft.
Balancing Accessories
For precision work, it is important that all
accessories be in good balance (much the same
as the tires on your automobile). To true up or
balance an accessory, slightly loosen collet nut
and give the accessory or collet a 1/4 turn. Re
tighten collet nut and run the Rotary Tool. You
should be able to tell by the sound and feel if
your accessory is running in balance. Continue
adjusting in this fashion until best balance is
achieved.
CAUTION
!
C LLET IDENTIFICATI N CHART
Collet sizes can be identified by the rings on
the back end of collet.
1/32" Collet has one (1) ring.
1/16" Collet has two (2) rings.
3/32" Collet has three (3) rings.
1/8" Collet has no rings. (Included in
most tool kits on the tool)
Collet
Nut
Identification
Rings
480
1/8"
Collet
481 3/32"
Collet
482 1/16"
Collet
483 1/32"
Collet
FIG. 5
Collet
Nut
Collet
Wrench
Shaft Lock
Button
LOOSEN
TIGHTEN
FIG. 4

10
Disconnect from vacuum
hose before making any
assembly, adjustments or changing
accessories. Such preventive safety measures
reduce the risk of starting the tool accidentally.
Empty your vacuum’s dust
canister before use and
before storing. Be extremely careful of dust
disposal, materials in fine particle form may be
explosive. Do not throw sanding dust on an
open fire. Combustion from mixture of varnishes,
lacquers, polyurethane, oil or water with dust
particles can occur if there is a static discharge,
spark introduced in the box, or excessive heat.
Rotary Tool Introduction
The Rotary Tool has a small, powerful motor, is
comfort able in the hand, and is made to accept a
large variety of accessories. Accessories come in a
variety of shapes and permit you to do a number of
different jobs. As you be come familiar with the
range of accessories and their uses, you will learn
just how versatile the Rotary Tool is. You’ll see
dozens of uses you hadn’t thought of before.
The real secret of the Rotary Tool is its speed. To
understand the advantages of its high speed, you
have to know that the standard portable electric
drill runs at speeds up to 2,800 revolutions per
minute. The Rotary Tool operates at speeds up to
30,000 revolutions per minute. The typical electric
drill is a low-speed, high torque tool; the Rotary
Tool is just the opposite – a high-speed, low torque
tool. The major difference to the user is that in the
high speed tools, the speed combined with the
acces sory mounted in the collet does the work.
You don’t apply pressure to the tool, but simply
hold and guide it. In the low speed tools, you not
only guide the tool, but also apply pressure to it, as
you do, for example, when drilling a hole.
It is this high speed, along with its compact size
and wide variety of special accessories and
attachments, that makes the Rotary Tool differ ent
from other tools. The speed enables it to do jobs
low speed tools cannot do, such as en graving
glass, etc.
Getting the most out of your Rotary Tool is a matter
of learning how to let this speed work for you. To
learn about more uses and the versatility of Dremel
accessories and attachments refer to this Owner's
Manual or check our website at www.Dremel.com.
Using the Rotary Tool
The first step in learning to use the Rotary Tool is
to get the “feel” of it. Hold it in your hand and feel
its weight and balance. Feel the taper of the
housing. This taper permits the Rotary Tool to be
grasped much like a pen or pencil (Figure A).
Always hold the tool away from your face.
Accessories can be damaged during handling, and
can fly apart as they come up to speed. This is not
perating Instructions
!
WARNING
The “Golf Grip” method of holding the tool is
used for more aggressive operations such as
grinding a flat surface or using cutoff wheels.
FIG. A
FIG. B
For best control in close work, grip the Rotary
Tool like a pencil between your thumb and
forefinger.
!
WARNING

11
common, but it does happen.
Practice on scrap materials first to see how the
Rotary Tool's high speed action performs. eep in
mind that the work is done by the speed of the tool
and by the accessory in the collet. You should not
lean on or push the tool during use.
Instead, lower the spinning accessory lightly to the
work and allow it to touch the point at which you
want cutting (or sanding or etching, etc.) to begin.
Con centrate on guiding the tool over the work
using very little pressure from your hand. Allow the
accessory to do the work.
Usually, it is best to make a series of passes with
the tool rather than attempt to do all the work in
one pass. To make a cut, for example, pass the
tool back and forth over the work, much as you
would a small paint brush. Cut a little material on
each pass until you reach the desired depth. For
most work, the gentle touch is best. With it, you
have the best control, are less likely to make
errors, and will get the most effi cient work out of
the accessory.
Do not use on material that
generate sparks. Spark may
cause fire or explosion in the vacuum.
Turning the tool n and ff
Always check to make sure the
tool N/ FF switch is at the
“ ” position before plugging tool to vacuum
hose. Accidental start-ups could cause injury.
To turn tool on:
1. With wet/dry vacuum ON.
2. Grip body of tool and ON/OFF Ring.
3. Rotate ON/OFF Ring counterclockwise (Fig. 6).
4. Variable speed can be achieved by partially
opening ON/OFF Ring.
To turn tool off:
1. Rotate ON/OFF Ring clockwise (Fig. 7).
2. Turn wet/dry vacuum OFF.
peration
!
WARNING
O
I
FIG. 6
O
I
FIG. 7
“ FF”
“ N”
!
WARNING

12
Needs for Slower Speeds
Certain materials, however, (some plastics and
precious metals, for ex ample) require a relatively
slow speed because at high speed the friction of
the accessory generates heat and may cause
damage to the material.
Slow speeds usually are best for polishing
operations employing the felt polishing ac ces -
sories. They may also be best for working on
deli cate projects as “eggery” work, delicate wood
carving and fragile model parts.
Higher speeds are better for carving, cutting,
routing, or shaping in wood.
Hardwoods and glass require high speed
operation, and drilling should also be done at
high speeds.
The point to remember is this: Many applications
and accessories in our line will provide the best
performance at full speed, but for certain
materials, applications, and accessories, you
need slower speeds, which is the reason our
variable speed models are available.
Ultimately, the best way to determine the correct
speed for work on any material is to practice for
a few minutes on a piece of scrap, even after
referring to the chart. You can quickly learn that
a slower or faster speed is more effective just by
observing what hap pens as you make a pass or
two at different speeds. When working with
plastic, for example, start at a slow rate of speed
and increase the speed until you observe that
the plastic is melting at the point of contact.
Then reduce the speed slight ly to get the
optimum working speed.
Some rules of thumb in regard to speed:
1. Plastic and other materials that melt at low
temperatures should be cut at low speeds.
2. Polishing and buffing must be done at low
speeds.
3. Wood should be cut at high speed.
Increasing the pressure on the tool is not the
answer when it is not performing as you think it
should. Perhaps you should be using a different
accessory, and perhaps an adjustment in speed
would solve the problem. Leaning on the tool
does not help.
Let speed do the work!
Service
Preventive maintenance pe r -
formed by unauthorized per -
so n nel may result in misplacing of internal
wires and components which could cause
serious hazard. We recommend that all tool
service be performed by a Dremel Service
Facility.
BEARINGS
Model VRT1has ball bearing construction.
Under normal use no additional lubrication is
required.
Cleaning
To avoid accidents always
disconnect the tool from
vacuum hose before cleaning or performing
any maintenance. The tool may be cleaned
most effectively with com pressed dry air.
Always wear safety goggles when cleaning
tools with compressed air.
Ventilation openings and switch levers must be
kept clean and free of foreign matter. Do not
attempt to clean by inserting pointed objects
through opening.
Certain cleaning agents and
solvents damage plastic parts.
Some of these are: gasoline, car bon
tetrachloride, chlorinated cleaning solvents,
ammonia and household detergents that contain
ammonia.
perating Speeds
Maintenance
!
WARNING
!
WARNING
CAUTION
!

13
Use only Dremel®, high-
performance accessories that
are 2” or less in daimeter and rated at least
35,000/min. Other accessories are not designed
for this tool and may lead to personal injury or
property damage.
The number and variety of accessories for the
Rotary Tool are almost limitless. There is a
category suited to almost any job you might have
to do — and a variety of sizes and shapes within
each category which en ables you to get the perfect
accessory for every need.
C LLETS
If you expect to use a variety of accessories, we
recommend that in the beginning you purchase a
complete set of four collets. Store these so that
you will have the proper size of collet for any
accessory or drill bit you want to use. Currently,
the 1/8", 3/32",1/32" and 1/16" collets
accommodate all of the avail able Dremel
accessories. 1/8" collets are included in most
rotary tool kits.
MANDRELS
A mandrel is a shank with a threaded or screw
head, which are required when you use polishing
accessories, cutting wheels, sanding discs, and
pol ish ing points. The reason mandrels are used is
that sanding discs, cutting wheels and similar
accesso ries must be replaced frequently. The
mandrel is a per manent shank, allowing you to
replace only the worn head when necessary, thus
saving the expense of replacing the shaft each
time.
Screw Mandrel No 401
This is a screw mandrel used with the felt
polishing tip and felt polishing wheels. 1/8" shank.
Small Screw Mandrel No 402
This is a mandrel with a small screw at its tip, and
is used with emery and fiberglass cutting wheels,
sanding discs and polishing wheels. 1/8" shank.
EZ Lock Mandrel No 402
The Dremel EZ Lock makes accessory changes
easy as PULL - TWIST - RELEASE. The one-
piece mandrel design simplifies the process of
changing cutting wheels, buffs and detail abrasive
brushes (EZ Lock compatible accessories).
High Speed Cutters
Available in many shapes, high speed cutters are
used in carving, cutting and slotting in wood and
plastics. These are the accessories to use for
freehand carving in wood or plastic, and for
precision cutting. Made of high quality steel. 1/8"
shank.
Tungsten Carbide Cutters
These are tough, long-lived cutters for use on fired
ceramics and other very hard ma terials. 1/8"
shanks.
Engraving Cutters
This group has a wide variety of sizes and
shapes, and are made for intricate work on
ceramics (greenware), wood carvings, jewelry and
scrimshaw. They often are used in making
complicat ed printed circuit boards. They should
not be used on steel and other very hard materials
but are excellent on wood, plastic and soft metals.
1/8" shank.
Dremel Accessories
!
WARNING

14
Structured Tooth Tungsten Carbide Cutters
Fast cutting, needle-sharp teeth for greater
material removal with minimum loading. Use on
fiberglass, wood, plastic, epoxy and rubber. 1/8"
shank.
Silicon Carbide Grinding Stones (blue/green)
Tougher than aluminum oxide points, these are
made es pecially for use on hard materials such as
glass and ce ramics. Typical uses might be the
removal of stilt marks and excess glaze on
ceramics and engraving on glass. 1/8" shank.
Diamond Wheel Points
Excellent for fine detail work on wood, jade,
ceramic, glass and other hard material. Bits are
covered with diamond particles. 1/8" shanks. (Not
recommended for drilling)
Polishing Accessories
These include an impregnated polishing point and
an impregnated polishing wheel for bringing metal
sur faces to smooth finish; a felt polishing tip and
felt polish ing wheel, and cloth polishing wheel, all
used for polishing plastics, metals, jewelry and
small parts. Also included in this group is a
polishing compound (No. 421) for use with the felt
and cloth polishers.
Polishing points make a very smooth surface, but
a high luster is obtained using felt or cloth wheels
and polishing compound. For best results
polishing accessories should be used at slow
speeds.
No polishing compound is needed when using the
425 Polishing Wheel.
Sanding Accessories
Sanding discs in fine, medium and coarse grades
are made to fit mandrel No. 402 and EZ407. They
can be used for nearly any small sanding job you
might have, from model making to fine furniture
finish ing. In addition, there is the drum sander, a
tiny drum which fits into the Rotary Tool and makes
it possible to shape wood, smooth fiberglass, sand
inside curves and other diffi cult places, and other
sanding jobs. You replace the sanding bands on
the drum as they become worn and lose their grit.
Bands come in fine medium and coarse grades.
Flapwheels grind and polish flat or contoured
surfaces. They are used most effectively as a
finishing sander after heavier surface sanding and
material removal is completed. Flapwheels come
in fine and coarse grades. Buffs are a great
finishing accessory for cleaning and light sanding.
They work effectively on metal, glass, wood,
aluminum and plastics. Coarse and medium buffs
are sold together. All buffs are sold individually.
Use slower speeds for sanding accessories.

15
Cutting guide should be attached when using
Drywall, Tile, and Spiral cutting bits according
to assembly instructions.
Drywall Cutting Bit
Gives you fast, clean cuts in drywall.
Tile Cutting Bit
Cuts ceramic wall tile, cement board, and plaster.
Spiral Cutting Bit
Cuts through all types of wood and wood
composites.
Replacing Screw Mandrel
Accessories
Mandrel No. 401 is used with the felt polishing
tip and wheels. Thread the tip on to the screw
carefully. The felt tip must thread down straight
on the screw Mandrel, and be turned all the way
to the collar.
Mandrel N° 402 has a small screw at its tip, and
is used with sanding discs. Higher speeds,
usually maximum, are best for most work.
To replace a band on the Drum Sander, loosen
the screw without removing it to contract the drum
then slide the old band off. Slide the new sanding
band on and then expand the drum by tightening
the screw once again.
Before each use, check to
make certain that all
components are assembled to accessory
shank and that the drum is sufficiently
expanded to secure the band during use. If
sanding band is loose on the drum during
operation it may “fly” off and strike you or
bystanders.
!
WARNING

16
Your Dremel product is w rr nted g inst defective m teri l or workm nship for period of
one ye r from d te of purch se. In the event of f ilure of product to conform to this
written w rr nty, ple se t ke the following ction:
1. DO NOT return your product to the pl ce of purch se.
2. C refully p ck ge the product by itself, with no other items, nd return it, freight prep id,
long with:
A. A copy of your d ted proof of purch se (ple se keep copy for yourself).
B. A written st tement bout the n ture of the problem.
C. Your n me, ddress nd phone number to:
UNITED STATES CANADA
Dremel Service Center Giles Tool Agency
4915 21st Street OR 47 Gr nger Av.
Racine, WI 53406 C n d M1K 3K9 1-416-287-3000
OUTSIDE CONTINENTAL UNITED STATES CONTINENTAL UNITED STATES
See your loc l distributor or write to Dremel, 4915 21st Street R cine, WI 53406
We recommend th t the p ck ge be insured g inst loss or in tr nsit d m ge for which we
c nnot be responsible.
This w rr nty pplies only to the origin l registered purch ser. DAMAGE TO THE PRODUCT
RESULTING FROM TAMPERING, ACCIDENT, ABUSE, NEGLIGENCE, UNAUTHORIZED
REPAIRS OR ALTERATIONS, UNAPPROVED ATTACHMENTS OR OTHER CAUSES
UNRELATED TO PROBLEMS WITH MATERIAL OR WORKMANSHIP ARE NOT COVERED BY
THIS WARRANTY.
No employee, gent, de ler or other person is uthorized to give ny w rr nties on beh lf of
Dremel. If Dremel inspection shows th t the problem w s c used by problems with m teri l
or workm n ship within the limit tions of the w rr nty, Dremel will rep ir or repl ce the
product free of ch rge nd return product prep id. Rep irs m de necess ry by norm l we r
or buse, or rep ir for product outside the w rr nty period, if they c n be m de, will be
ch rged t regul r f ctory prices.
DREMEL MAKES NO OTHER WARRANTY OF ANY KIND WHATEVER, EXPRESSED OR
IMPLIED, AND ALL IMPLIED WARRANTIES OF MERCHANTABILITY AND FITNESS FOR A
PARTICULAR PURPOSE WHICH EXCEED THE ABOVE MENTIONED OBLIGATION ARE
HEREBY DISCLAIMED BY DREMEL AND EXCLUDED FROM THIS LIMITED WARRANTY.
This w rr nty gives you specific leg l rights nd you m y lso h ve other rights which v ry
from st te to st te. The oblig tion of the w rr ntor is solely to rep ir or repl ce the product.
The w rr ntor is not li ble for ny incident l or consequenti l d m ges due to ny such
lleged defect. Some st tes do not llow the exclusion or limit tion of incident l or
consequenti l d m ges, so the bove limit tions or exclusion m y not pply to you.
For prices nd w rr nty fulfillment in the continent l United St tes, cont ct your loc l Dremel
distributor.
Export do por: © Robert Bosch Tool Corpor tion Mt. Prospect, IL 60056 -2230, E.U.A.
Import do México por: Robert Bosch, S. de R.L. de C.V.
C lle Robert Bosch No. 405 - 50071 Toluc , Edo. de Méx. - México
Tel. 052 (722) 279 2300 ext 1160 / F x. 052 (722) 216-6656
Dremel®Limited Warranty

17
Veuillez lire tous les avertissements et toutes les consignes de sécurité. Si l'on n'observe p s ces vertissements et ces consignes de sécurité, il existe un
risque de choc électrique, d'incendie et/ou de blessures corporelles gr ves.
Read all safety warnings and all instructions that were provided with your wet/dry vacuum.
CONSERVEZ TOUS LES AVERTISSEMENTS ET TOUTES LES CONSIGNES DE SÉCURITÉ POUR RÉFÉRENCE FUTURE.
D ns les vertissements, le terme « outil électroport tif » se r pporte à votre outil br nché sur le secteur ( vec fil) ou à votre outil limenté p r piles (s ns fil).
Avertissements généraux concernant la sécurité des outils électroportatifs
AVERTISSEMENT
!
Sécurité du lieu de travail
Maintenez le lieu de travail propre et bien éclairé. Les
risques d’ ccident sont plus élevés qu nd on tr v ille d ns
un endroit encombré ou sombre.
N’utilisez pas d’outils électroportatifs dans des
atmosphères explosives, comme par exemple en
présence de gaz, de poussières ou de liquides
inflammables. Les outils électroport tifs produisent des
étincelles qui risquent d’enfl mmer les poussières ou les
v peurs.
Éloignez les enfants et les visiteurs quand vous vous
servez d’un outil électroportatif. Vous risquez une perte de
contrôle si on vous distr it.
Sécurité personnelle
Restez concentré, faites attention ce que vous faites, et
servez-vous de votre bon sens lorsque vous utilisez un
outil électroportatif. N'employez pas d’outils
électroportatifs quand vous êtes fatigué ou sous l’emprise
de drogues, d’alcool ou de médicaments. Qu nd on utilise
des outils électroport tifs, il suffit d’un moment d’in ttention
pour c user des blessures corporelles gr ves.
Utilisez des équipements de sécurité personnelle. Portez
toujours une protection oculaire. Le port d'équipements de
sécurité tels que des m sques ntipoussières, des
ch ussures de sécurité ntidér p ntes, des c sques de
ch ntier et des protecteurs d'oreilles d ns des conditions
ppropriées réduir le risque de blessure corporelle.
Évitez les démarrages intempestifs. Assurez-vous que
l'interrupteur est dans la position arrêt (Off) avant de
brancher l’outil dans une prise de courant et/ou un bloc-
piles, de le ramasser ou de le transporter. Le tr nsport
d'un outil électroport tif vec le doigt sur l gâchette ou le
br nchement de cet outil qu nd l'interrupteur est en position
de m rche (ON) est une invite ux ccidents.
Enlevez toutes les clés de réglage avant de mettre l’outil
électroportatif en marche. Si on l isse une clé sur une
pièce tourn nte de l’outil électroport tif, il y risque de
blessure corporelle.
Ne vous penchez pas. Conservez toujours une bonne
assise et un bon équilibre. Ceci vous permettr de mieux
m îtriser l’outil électroport tif d ns des situ tions
in ttendues.
Habillez-vous de manière appropriée. Ne portez pas de
vêtements amples ou de bijoux. Attachez les cheveux
longs. N’approchez pas les cheveux, les vêtements ou les
gants des pièces en mouvement. Les vêtements mples,
les bijoux ou les cheveux longs risquent d’être h ppés p r
les pièces en mouvement.
Si l’outil est muni de dispositifs permettant le
raccordement d’un système d’aspiration et de collecte
des poussières, assurez-vous que ces dispositifs sont
raccordés et utilisés correctement. L'utilis tion d'un
dépoussiéreur peut réduire les d ngers ssociés à
l' ccumul tion de poussière.
Utilisation et entretien des outils électroportatifs
Ne forcez pas sur l’outil électroportatif. Utilisez l’outil
électroportatif qui convient la tâche effectuer. L’outil
qui convient à l tâche f it un meilleur tr v il et est plus sûr
à l vitesse pour lequel il été conçu.
Ne vous servez pas de l’outil électroportatif si son
interrupteur ne parvient pas le mettre en marche ou
l’arrêter. Tout outil électroport tif qui ne peut p s être
comm ndé p r son interrupteur est d ngereux et doit être
rép ré.

18
Débranchez la fiche de la prise ou enlevez le bloc-piles de
l’outil électroportatif avant tout réglage, changement
d’accessoires ou avant de ranger l’outil électroportatif. De
telles mesures de sécurité préventive réduisent le risque de
dém rr ge intempestif de l’outil électroport tif.
Rangez les outils électroportatifs dont vous ne vous
servez pas hors de portée des enfants et ne permettez pas
des personnes qui ne connaissent pas l’outil
électroportatif ou qui ignorent ces consignes de s’en
servir. Les outils électroport tifs sont d ngereux d ns les
m ins d’utilis teurs inexpérimentés.
Entretenez les outils électroportatifs. Vérifiez que les
pièces mobiles sont alignées correctement et ne coincent
pas. Vérifiez qu’il n’y a pas de pièces cassées ou d’autres
circonstances qui risquent d’affecter le fonctionnement de
l’outil électroportatif. Si l’outil est abîmé, faites-le
réparer avant de l’utiliser. De nombreux ccidents sont
c usés p r des outils électroport tifs m l entretenus.
Maintenez les outils coupants affûtés et propres. Les
outils coup nts entretenus correctement et dotés de bords
tr nch nts ffûtés sont moins susceptibles de coincer et
sont plus f ciles à m îtriser.
Utilisez l'outil électroportatif, les accessoires et les
embouts d'outil, etc. conformément ces instructions, en
tenant compte des conditions de travail et des travaux
réaliser. L'emploi d’outils électroport tifs pour des tâches
différentes de celles pour lesquelles ils ont été prévus peut
résulter en une situ tion d ngereuse.
Réparation
Faites réparer votre outil électroportatif par un agent de
service qualifié n’utilisant que des pièces de rechange
identiques. Ceci ssure que l sécurité de l’outil
électroport tif est préservée.
Avertissements relatifs la sécurité pour les
applications courantes de ponçage, de polissage et
de ciselage
Cet outil électroportatif est conçu pour fonctionner comme
un outil de ponçage, de polissage ou de ciselage. Lisez tous
les avertissements relatifs la sécurité ainsi que toutes les
instructions, illustrations et spécifications accompagnant
cet outil électroportatif. Le non-respect de toutes les
instructions indiquées ci-dessous pourr it c user un choc
électrique, un incendie et/ou une blessure gr ve.
Des opérations telles que le meulage, le passage la
brosse métallique ou le tronçonnage ne sont pas
recommandées avec cet outil électroportatif. Des opér tions
pour lesquelles cet outil électroport tif n’ p s été conçu
pourr ient créer un d nger et entr îner des blessures.
N’utilisez cet outil que sur des aspirateurs de liquides et de
poussières. L’utilis tion de cet outil sur d’ utres types
d’ spir teurs pourr it c user des domm ges ux biens et des
blessures.
N’utilisez pas cet outil sur des matériaux produisant des
étincelles. Les étincelles pourr ient c user un incendie ou une
explosion à l’intérieur de l’ spir teur.
N’utilisez pas d’accessoires qui ne sont pas spécifiquement
conçus et recommandés par le fabricant de l’outil. Le simple
f it qu’un ccessoire puisse être r ccordé à votre outil
électroport tif ne s ur it g r ntir son fonctionnement s ns
d nger.
La vitesse nominale de l’accessoire doit être au moins
égale la vitesse de fonctionnement indiquée sur l’outil
électroportatif. Des ccessoires fonctionn nt à une vitesse
supérieure à leur VITESSE NOMINALE risquer ient de se
c sser et d’être projetés violemment.
Le diamètre extérieur et l’épaisseur de votre accessoire
doivent être compatibles avec la capacité nominale de votre
outil électroportatif. Des ccessoires de t ille incorrecte ne
pourr ient p s être protégés ou contrôlés de f çon déqu te.
La taille des axes des meules, des tambours de ponçage ou
de tous autres accessoires doit correspondre celle de la
douille ou de la broche de l’outil électroportatif. Les
ccessoires dont l t ille ne correspond p s à celle du petit
m tériel de mont ge de l’outil électroport tif tourneront de
f çon déséquilibrée, vibreront excessivement et pourr ient
c user l perte du contrôle de l’outil.
Les meules montées sur mandrin, les tambours de
ponçage, les couteaux et autres accessoires doivent être
insérés complètement dans la douille ou dans le mandrin.
Si le m ndrin n’est p s r ccordé de f çon ppropriée et/ou si
le porte-à-f ux de l meule est trop long, l meule montée
pourr it se desserrer progressivement et être projetée à
gr nde vitesse.
N’utilisez pas d’accessoires endommagés. Avant chaque
emploi, inspectez l’accessoire, comme une meule abrasive
pour vous assurer qu’elle n’est pas fissurée ou ébréchée, un
tambour de ponçage pour vous assurer qu’il n’est pas
fissuré, déchiré ou excessivement usé, ou une brosse
métallique pour vous assurer qu’il n’y a pas de fils détachés
ou cassés. Si vous faites tomber l’outil électroportatif ou
Consignes de sécurité pour
les outils rotatifs

19
l’accessoire, inspectez-le pour vous assurer qu’il n’est pas
endommagé, et installez un accessoire non endommagé le
cas échéant. Après avoir inspecté et installé un accessoire,
positionnez-vous ainsi que les autres personnes présentes
hors de la trajectoire possible de l’accessoire rotatif, et
faites fonctionner l’outil électroportatif sa vitesse
maximum vide pendant une minute. Les ccessoires
endomm gés se c sseront norm lement pend nt cette
période de test.
Portez des équipements de protection personnelle. En
fonction de l’application, utilisez un masque de protection
du visage, des lunettes de protection ou des lunettes de
sécurité. Selon le cas, portez un masque de protection
contre la poussière, des protecteurs d’oreilles, des gants et
un tablier d’atelier capable d’arrêter de petits fragments
d’ouvrage ou des fragments abrasifs. L’appareil de
protection des yeux doit pouvoir arrêter des débris volants
projetés par diverses opérations. Le m sque de protection
contre l poussière ou l’ pp reil respir toire doit être c p ble
de filtrer les p rticules produites p r votre opér tion. Une
exposition prolongée à du bruit de h ute intensité pourr it
entr îner des pertes uditives.
Veillez ce que toutes les personnes présentes se trouvent
une distance suffisamment grande de la zone de travail.
Toute personne entrant dans la zone de travail doit porter
des équipements de protection personnelle. Des fr gments
d’un ouvr ge ou d’un ccessoire brisé pourr ient être projetés
et c user des blessures u-delà de l zone de tr v il
immédi te.
Tenez l’outil électroportatif par ses surfaces de préhension
isolées seulement lorsque vous effectuez une opération
dans le cadre de laquelle l’accessoire de coupe peut entrer
en contact avec des fils électroportatifs cachés. L’entrée en
cont ct d’un ccessoire tr nch nt vec un fil sous tension
pourr it rendre conductrices des surf ces en mét l exposées
de l’outil électroport tif et risquer ient de tr nsmettre une
déch rge électrique à l’opér teur.
Tenez toujours l’outil électroportatif fermement dans votre
main (ou dans vos mains) pendant sa mise en marche. Le
couple de ré ction du moteur pourr it f ire tourner l’outil
pend nt l ph se d’ ccélér tion pour tteindre s vitesse de
fonctionnement norm le.
Utilisez des brides de fixation pour supporter l’ouvrage si
cela peut être utile. Ne tenez jamais un petit ouvrage dans
une main et l’outil dans l’autre main pendant que vous vous
servez de ce dernier. L fix tion d’un petit ouvr ge vous
permet d’utiliser une m in (ou les deux) pour contrôler l’outil.
Les objets ronds, comme les b guettes, les tuy ux et
conduites ont tend nce à rouler pend nt qu’on les coupe, et
ceci pourr i coincer l’embout ou le projeter vers vous.
Positionnez le cordon de façon qu’il ne soit pas dans la
trajectoire d’un accessoire en train de tourner. Si vous
perdez le contrôle, le cordon risquer it d’être ccroché ou
coupé, et votre m in ou votre br s pourr it être ttiré vers
l’ ccessoire en tr in de tourner.
Ne posez jamais l’outil avant que l’accessoire ne se soit
arrêté complètement de tourner. L’ ccessoire en tr in de
tourner pourr it h pper l surf ce et ttirer l’outil
électroport tif, vous f is nt insi perdre contrôle de l’outil.
Après avoir changé l’embout ou effectué un réglage
quelconque, vérifiez que l’écrou de fixation de la douille, le
mandrin ou tout autre dispositif de fixation est serré comme
il se doit. Des dispositifs insuffis mment serrés pourr ient
glisser de f çon in ttendue, c us nt une perte de contrôle, et
des compos nts en rot tion m l serrés pourr ient être
projetés violemment.
Ne transportez pas l’outil électroportatif pendant qu’il est en
marche. Un ccessoire en tr in de tourner pourr it entrer en
cont ct vec un utre objet et ccrocher vos vêtements en
rebondiss nt, ce qui risquer it de diriger l’ ccessoire vers
votre corps.
Veillez ce qu’il n’y ait pas de coudes ou d’obstructions
dans le tuyau de l’aspirateur. N’ tt chez p s un tuy u
d’ spir teur à votre corps. Des tuy ux emmêlés ou
enchevêtrés pourr ient vous f ire perdre l’équilibre en plus de
provoquer un fonctionnement indésir ble de l’outil.
Nettoyez périodiquement les ouvertures d’aération de l’outil
électroportatif. Le ventil teur du moteur ttirer de l
poussière à l’intérieur du boîtier, et l’ ccumul tion excessive de
poudre de mét l pourr it c user des d ngers électriques.
Ne vous servez pas de l’outil électroportatif côté de
matériaux inflammables. Des étincelles risquer ient de
mettre le feu à ces m téri ux.
N’utilisez pas d’accessoires qui nécessitent des liquides de
refroidissement. L’utilis tion d’e u ou d’ utres liquides de
refroidissement pourr it c user une déch rge électrique ou
même l’électrocution.
Déconnectez toujours le tuyau de l’aspirateur avant
d’effectuer des réglages ou d’attacher un accessoire. Vous
risqueriez de c user l mise en m rche ccidentelle de l’outil et
d’entr îner insi des blessures gr ves.
Évitez toute mise en marche accidentelle. Ne tenez p s
l’ nne u de m rche/ rrêt (On/Off) lors que vous êtes en tr in
de r ccorder l’ liment tion en ir. Ne tr nsportez p s l’outil p r
cet nne u et ne connectez p s l’outil à l’ spir teur de liquides
et de poussières lorsque son interrupteur est sur l position de
m rche (On).

20
Déconnectez l’outil du tuyau de l’aspirateur lorsque vous
ne vous en servez pas. Si vous l issez l’outil s ns
surveill nce vec le tuy u de l’ spir teur connecté, il se peut
qu’il soit mis en m rche ccidentellement p r des
utilis teurs ne m îtris nt p s l f çon de s’en servir.
N’utilisez pas cet outil avec des brosses fils de métal ou
poils en soie. Les poils ou les fils seront éjectés à gr nde
vitesse et pourr ient c user des blessures.
Si vous devez couper dans des murs existants ou dans
d’autres surfaces sans visibilité derrière lesquels des fils
électroportatifs peuvent se trouver, déconnectez tous les
tous les fusibles ou disjoncteurs contrôlant le circuit de ce
lieu de travail.
Sachez où est situé l’interrupteur lorsque vous posez
l’outil ou lorsque vous le ramassez. Sinon, vous risqueriez
d’ ctiver l’interrupteur ccidentellement.
Tenez toujours votre bras ou votre main une distance
suffisante d’un embout en rotation. L proximité de
l’embout en tr in de tourner et de votre m in peut ne p s
être évidente.
N’utilisez jamais d’embouts émoussés ou endommagés.
Les embouts tranchants doivent être manipulés avec
précaution. Les embouts endomm gés risquent de se
c sser pend nt l’emploi. Les embouts émoussés
nécessitent plus de force pour pousser l’outil, ce qui
pourr it c user le bris de l’embout.
Inspectez votre ouvrage avant de commencer couper.
Lorsque vous coupez des ouvrages de forme irrégulière,
planifiez votre travail de façon ce que l’ouvrage ne
glisse pas et ne risque pas de pincer l’embout, ce qui
risquerait de vous en faire perdre le contrôle. P r
exemple, si vous ciselez du bois, ssurez-vous qu’il n’y
p s de clous ou d’ utres corps étr ngers d ns l’ouvr ge.
Des clous ou des corps étr ngers peuvent c user un
mouvement in ttendu de l’embout.
Ne mettez jamais l’outil en marche lorsque l’embout est
engagé dans le matériau. Le bord tr nch nt de l’embout
pourr it h pper le m téri u et c user une perte de contrôle
de l’outil de coupe.
Le sens du mouvement de l’embout dans le matériau
lorsque vous ciselez, toupillez ou coupez est très
important. Faites toujours pénétrer l’embout dans le
matériau dans le même sens que celui d’où le bord
tranchant sort du matériau (qui est le sens dans lequel les
copeaux seront éjectés). Le dépl cement de l’outil d ns le
m uv is sens c user it l sortie de l’ouvr ge du bord
tr nch nt de l’embout, ce qui ttirer it l’outil d ns cette
m uv ise direction.
Si l’ouvrage ou l’embout se coince ou s’immobilise dans
l’ouvrage, éteignez l’outil par le biais de l’interrupteur.
Attendez que toutes les pièces en mouvement s’arrêtent,
puis débranchez l’outil et faites ensuite le nécessaire
pour libérer l’embout du matériau. Si l’interrupteur de
l’outil est l issé en position de m rche (ON), l’outil risque de
se remettre en m rche de f çon imprévisible et c user des
blessures gr ves.
Ne laissez pas un outil en marche sans surveillance.
Mettez-le hors tension. Attendez toujours que l’outil se soit
complètement rrêté de fonctionner pour le poser.
Ne touchez pas tout de suite l’embout ou la douille après
vous en être servi. Après voir fonctionné pend nt un
cert in temps, l’embout et l douille sont trop ch uds pour
pouvoir être touchés à m in nue.
Ne laissez pas le fait que vous avez pris l’habitude
d’utiliser cet outil rotatif vous empêcher de prendre
toujours toutes les précautions nécessaires. R ppelez-
vous toujours qu’un m nque d’ ttention pend nt une
fr ction de seconde peut suffire pour c user de gr ves
blessures.
N’altérez pas l’outil et ne l’utilisez pas de façon
inappropriée. Toute ltér tion ou modific tion
représenter it une utilis tion in ppropriée et pourr it c user
de gr ves blessures.
Ce produit n’est pas conçu pour emploi comme fraise
dentaire ou dans des applications médicales humaines ou
vétérinaires. Ceci risquer it de c user de gr ves blessures.
Lorsque vous utilisez des scies froid, des meules
tronçonner, ou des outils de coupe grande vitesse ou
lame au carbure de tungstène, veillez toujours fixer
l’ouvrage solidement en place. Ne tentez jamais de tenir
l’ouvrage d’une main pendant que vous utilisez n’importe
lequel de ces accessoires. L r ison en est que ces meules
ccrocheront si elles sont même légèrement inclinées d ns
l r inure, et elles pourr ient subir un effet de rebond qui
c user it l perte du contrôle de l’outil et pourr it entr îner
de gr ves blessures. Votre utre m in doit être utilisée pour
guider et st biliser l m in ten nt l’outil. Si une meule à
tronçonner ccroche, l meule elle-même se c sse
génér lement. Si une scie à froid, un outil de coupe à gr nde
vitesse ou un outil de coupe à l me u c rbure de tungstène
ccroche, elle risque de sortir de l r inure et de vous f ire
perdre le contrôle de l’outil.
Utilisez seulement des accessoires haute performance de
Dremel®. Les utres ccessoires ne sont p s conçus pour
emploi vec cet outil et risquer ient de c user des blessures
ou des domm ges ux biens.
Table of contents
Languages:
Other Dremel Power Tools manuals

Dremel
Dremel 4200 User manual

Dremel
Dremel US20V-02 Assembly instructions

Dremel
Dremel 3000 Operating/s User manual

Dremel
Dremel 8300 User manual

Dremel
Dremel 800 Assembly instructions

Dremel
Dremel 200 series User manual

Dremel
Dremel HSSC-01 User manual

Dremel
Dremel MM20 User manual

Dremel
Dremel 1100 Assembly instructions

Dremel
Dremel 800-49 Assembly instructions

Dremel
Dremel 4200 Assembly instructions

Dremel
Dremel MOTO-TOOL 275 User manual

Dremel
Dremel 370 User manual

Dremel
Dremel 675 User manual

Dremel
Dremel 6300 Assembly instructions

Dremel
Dremel 212 User manual

Dremel
Dremel 2000 Versatip User manual

Dremel
Dremel 2050 User manual

Dremel
Dremel 231 User manual

Dremel
Dremel 7700 User manual