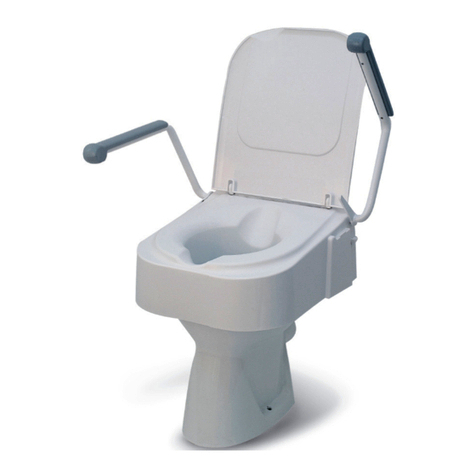
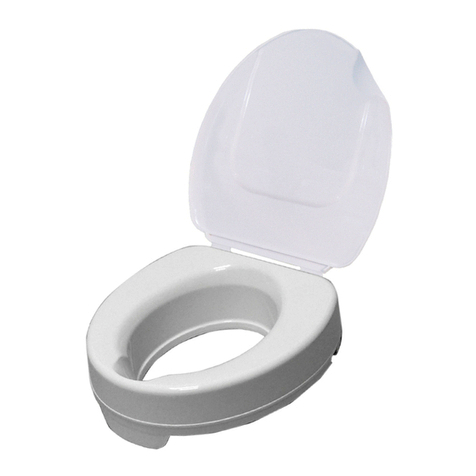
Drive TSE 120 User manual

Gebrauchsanweisung - Instructions for use - Mode d’emploi - Gebruiksaanwijzing - Istruzioni per l’uso
TSE 120 / TSE 120 Plus

2
Gebrauchsanweisung TSE 120 / TSE 120 PlusDrive Medical GmbH & Co. KG | Stand: 24.03.2020 | Irrtum und Änderungen vorbehalten
DE
2
TSE 120 / TSE 120 Plus
Drive Medical GmbH & Co. KG | Stand: 24.03.2020
Inhaltsverzeichnis
Inhaltsverzeichnis ..................................................................... 2
Vorwort .........................................................................................3
Konformitätserklärung..............................................................3
Lebensdauer ...............................................................................3
Entsorgung ..................................................................................3
Typenschild..................................................................................3
Wiedereinsatz .............................................................................3
Gewährleistung ..........................................................................3
Indikation......................................................................................4
Lieferumfang ...............................................................................4
Sicherheitshinweise ................................................................. 5
Anwendung ................................................................................ 5
Montage ...................................................................................... 5
Höheneinstellung .....................................................................7
Technische Daten ......................................................................7
Reinigung | Wartung..................................................................7

Gebrauchsanweisung TSE 120 / TSE 120 Plus
3
Drive Medical GmbH & Co. KG | Stand: 24.03.2020 | Irrtum und Änderungen vorbehalten
DE
Typenschild
1
2
3
4
5
9
7 86
DE: 1 Artikelnummer | 2 Artikelbezeichnung | 3 Hersteller |
4 Seriennummer | 5 UDI-Code | 6 Max. Belastung |
7 Gebrauchsanweisung beachten | 8 Medizinprodukt |
9 Produktionsdatum (Jahr|Monat)
Wiedereinsatz
Dieses Produkt ist für den Wiedereinsatz geeignet.
Beachten Sie, dass auch sämtliche für eine sichere
Handhabung notwendigen technischen Unterlagen dem
neuen Nutzer übergeben werden.
Das Produkt muss durch den Fachhandel überprüft, ge-
reinigt und für den Wiedereinsatz in einen einwandfreien
Zustand versetzt werden.
Bei der Auereitung sind die Vorgaben des Herstellers
zu beachten und werden auf Anfrage zur Verfügung
gestellt.
Erhältliches Zubehör finden Sie unter
www.drivedevilbiss.de oder bei Ihrem Fachhändler.
Gewährleistung
Für das von uns gelieferte Produkt beträgt die
Gewährleistungsfrist 24 Monate ab Kaufdatum.
Sofern nachweislich ein Werksto- bzw. Herstellungsfeh-
ler vorliegt, werden schadhafte Teile kostenlos ersetzt.
Verschleißteile werden im Allgemeinen wäh-
rend der normalen Garantiezeit nicht gedeckt,
es sei denn, die Artikel benötigen eine Reparatur
oder einen Ersatz, die als eine eindeutige direkte
FolgeeinesHerstellungs- oderMaterialfehlersnotwendig
wurden.
Irrtum und Änderungen aufgrund von technischen
Verbesserungen und Designveränderungen
vorbehalten.
Vorwort
Wir danken Ihnen, dass Sie sich für ein Produkt aus dem
Hause Drive DeVilbiss entschieden haben.
Das Design, die Funktionalität und die Qualität dieses
Produktes werden Sie nicht enttäuschen.
Bitte lesen Sie diese Bedienungsanleitung vor dem ers-
ten Gebrauch sorgfältig durch. Sie erhalten wichtige
Sicherheitshinweise und wertvolle Tipps zur richtigen
Benutzung und Pflege. Wenn Sie Fragen haben oder zu-
sätzliche Informationen benötigen, wenden Sie sich an
Ihren Drive DeVilbiss-Fachhändler, der Ihnen das Pro-
dukt geliefert hat.
Diese Bedienungsanleitung enthält alle notwendigen
Hinweise für die Anpassung und Bedienung. Die aktu-
ellste Bedienungsanleitung ist als PDF online abruar
oder kann beim Kundenservice angefordert werden.
Hierbei können vergrößerte Formate für sehbehinderte
Personen dargestellt werden. Blinde Patienten müssen
durch ihre Begleitperson eingewiesen werden. Repara-
turen sowie einige Einstellungen erfordern eine speziel-
le technische Ausbildung und müssen daher vom Sani-
tätsfachhandel vorgenommen werden.
Konformitätserklärung
Für das beschriebene Produkt erklärt die
DRIVE MEDICAL GMBH & Co.KG die Konformität gemäß
der Verordnung über Medizinprodukte (EU) 2017/745.
Lebensdauer
Unser Unternehmen geht bei diesem Produkt von ei-
ner Produktlebensdauer von fünf Jahren aus, soweit
das Produkt innerhalb des bestimmungsgemäßen Ge-
brauchs eingesetzt wird und sämtliche Wartungs- und
Servicevorgaben eingehalten werden.
Diese Lebensdauer kann deutlich überschritten wer-
den, wenn das Produkt sorgfältig behandelt, gewartet,
gepflegt und genutzt wird und sich nach der Weiterent-
wicklung der Wissenschaft und Technik nicht technische
Grenzen ergeben.
Die Lebensdauer kann sich durch extremen Gebrauch
und unsachgemäße Nutzung allerdings auch erheblich
verkürzen. Die Festlegung der Lebensdauer durch unser
Unternehmen stellt keine zusätzliche Garantie dar.
Entsorgung
Sollten Sie das Produkt nicht mehr benötigen,
kontaktieren Sie bitte Ihren Fachhändler oder bringen
Sie das Produkt zu Ihrer lokalen Entsorgungsstelle.

4
Gebrauchsanweisung TSE 120 / TSE 120 PlusDrive Medical GmbH & Co. KG | Stand: 24.03.2020 | Irrtum und Änderungen vorbehalten
DE
Indikation
INDIKATION:
Erschwerte Toilettennutzung aufgrund unangepasster
Sitzhöhe durch eingeschränkte Fähigkeit des Hinset-
zens und Aufstehens bei gleichzeitig eingeschränkter
Rumpontrolle bei Funktionsstörung der unteren Ext-
remität mit erheblich eingeschränkter oder vollständig
aufgehobener Beweglichkeit der Gelenke und/oder
Einschränkungen der muskulären Kraft der unteren Ex-
tremität und/oder Schädigung von LWS, Hüfte und/oder
Kniegelenk und/oder Schädigung des Nervensystems/
Zentralnervensystems und/oder Schädigung der Mus-
kelfunktion mit eingeschränkter oder aufgehobener
Rumpfstabilität.
Lieferumfang
1 x AKorpus
1x BAuflage
2 x CRaster/Aufnahme
2 x DAuflage vorn
2 x EVersteifung
2 x FBefestigungsschrauben (nur bei TSE 120)
2 x GGrimuttern (nur bei TSE 120)
2 x HSterngrischraube (nur bei TSE 120 Plus)
2 x ITopmontage-Dübel (nur bei TSE 120 Plus)
2 x JArmlehne (nicht bei 520500300 TSE 120
ohne Armlehne)
1 x Gebrauchsanweisung
1 x Vinylhandschuhe
TSE 120 TSE 120 Plus
1. Armlehne
2. Armlehnenaufnahme
3. Verriegelung für Raster/Aufnahme
4. Korpus
5. Griffmulde (im Deckel)
6. Deckel
7. Befestigungsschraube
8. Griffmuttern
9. Auflage hinten
10. Raster / Aufnahmen
11. Auflage vorn
12. Versteifungen
13. Hygieneaussparrungen
14. Sterngriffschraube
15. Topmontage-Dübel
1
2
4
5
6
3
7
8910 11
12
13
3
9
10
11
15
14
12

Gebrauchsanweisung TSE 120 / TSE 120 Plus
5
Drive Medical GmbH & Co. KG | Stand: 24.03.2020 | Irrtum und Änderungen vorbehalten
DE
Sicherheitshinweise
• Bei Defekt nicht verwenden!
• Vorsicht – Abrutsch-/Absturzgefahr!
• Der Deckel darf im geöneten Zustand nicht als
Rückenlehne verwendet werden!
• Der Deckel darf bei geschlossenem Zustand nicht
belastet werden (z. B. durch Sitzen)!
• Regelmäßig die Toilettensitzerhöhung auf festen Sitz
auf dem Toilettenbecken prüfen. Gegebenenfalls Gri-
muttern nachziehen.
• Beachten Sie das zugelassene Maximalgewicht des
Benutzers. Diese Angabe finden Sie in den techni-
schen Daten in dieser Bedienungsanleitung sowie auf
dem Typenschild.
Anwendung
Die Toilettensitzerhöhung TSE 120 ist geeignet für
nahezu alle genormten, bzw. handelsübliche WC-Becken.
Montage
Brille und Deckel am Toilettenbecken entfernen.
Die Montage erfolgt ohne Werkzeug.
TSE 120:
Die Auflage hinten (B) mit den Befestigungsschrauben
(F) auf die Keramik legen. Die Grimuttern (G) von
unten andrehen, aber noch nicht festziehen. Die Auflage
hinten mittig zur Keramik ausrichten und die Grimuttern
fest anziehen (Bild 1).
1
B
GG
FF
C
C
Die Raster/Aufnahmen (C) in der gewünschten Höhe
(8,5 / 12 / 15,5 cm) auf die Auflage hinten (B) rechts und
links aufstecken (Bild 2).
2C
CC
B
8,5 cm
12 cm
15,5 cm
Um die Höhe vorne einzu-
stellen, stecken Sie die
Auflagen (D) in die ent-
sprechende Önung bis
es hörbar einrastet
(Bild 3).
• Darauf achten, dass die
vordere Auflagen (D)
rechts und links jeweils
in derselben Höhe ein-
gesteckt werden.
• Die vordere Auflagen (D) können niedriger eingestellt
werden als die hintere Auflage (B).
• Stecken Sie die zwei Versteifungen (E) in die entspre-
chende Önungen hinten, bis sie hörbar einrasten
(Bild 3).
• Toilettensitzerhöhung Korpus (A)in die Raster/Aufnah-
men (C) einstecken. Die Raster/Aufnahmen (C)müssen
dabei mit den Verrieglungslaschen (L)im Korpus (A)
einrasten (Bild 4+5).
4
C
C
5
A
J
J
L
Die Raster/Aufnahmen (C) können nur in eine Richtung
in die Toilettensitzerhöhung eingesteckt werden.

6
Gebrauchsanweisung TSE 120 / TSE 120 PlusDrive Medical GmbH & Co. KG | Stand: 24.03.2020 | Irrtum und Änderungen vorbehalten
DE
TSE 120 PLUS:
Topmontage-Dübel (I)wie
auf dem Bild dargestellt
zusammendrücken und
von oben in die Befesti-
gungslöcher der Keramik
stecken (Bild 6).
Die Auflage hinten (B) auf die Keramik legen und die
Sterngrischrauben (H)von oben andrehen, aber noch
nicht festziehen. Die Auflage hinten (B)mittig zur Kera-
mik ausrichten und die Sterngrischrauben (H) fest
anziehen (Bild 7+8).
7
II
CC
H H
B
8
Die Raster/Aufnahmen (C)in der gewünschten Höhe
(8,5 / 12 / 15,5 cm) auf die Auflage hinten (B)rechts und
links aufstecken (Bild 2).
Um die Höhe vorne einzustellen, stecken Sie die Aufla-
gen (D) in die entsprechende Önung bis es hörbar ein-
rastet (Bild 3).
• Darauf achten, dass die vordere Auflagen (D) rechts
und links jeweils in derselben Höhe eingesteckt
werden.
• Die vordere Auflagen (D) können niedriger eingestellt
werden als die hintere Auflage (B).
• Stecken Sie die zwei Versteifungen (E) in die entspre-
chende Önungen hinten, bis sie hörbar einrasten
(Bild 4).
• Toilettensitzerhöhung Korpus (A)in die Raster/Aufnah-
men (C) einstecken. Die Raster/Aufnahmen (C)müssen
dabei mit den Verrieglungslaschen (L)im Korpus (A)
einrasten (Bild 4+5).
Die Raster/Aufnahmen (C) können nur in eine Richtung
in die Toilettensitzerhöhung eingesteckt werden.
MONTAGE DECKEL:
Der Deckel ist bei Auslieferung vormontiert, kann im
Bedarfsfall getauscht werden. Hierzu Toilettensitzerhö-
hung Korpus (A) umdrehen, und die Deckelclips gleich-
zeitig drücken.
Der Deckel kann dann aus den Aufnahmen herausge-
nommen werden. Den neuen Deckel entsprechend ein-
clipsen.
MONTAGE ARMLEHNEN:
Die Armlehnen (J) seitlich in die dafür vorgesehenen
Armlehnenaufnahmen einschieben (Bild 9).
9
J
Hierzu sollen die Pfeile an der Armlehne (J) und der Arm-
lehnenaufnahme übereinstimmen (Bild 10).
J
10
Die Armlehnen (J) jetzt bis zum Anschlag einschieben
und dann nach unten klappen.

Gebrauchsanweisung TSE 120 / TSE 120 Plus
7
Drive Medical GmbH & Co. KG | Stand: 24.03.2020 | Irrtum und Änderungen vorbehalten
DE
Höheneinstellung
Die Toilettensitzerhöhung kann über Raster (C)wahlwei-
se für eine Erhöhung um 8,5 cm, 12 cm oder 15,5 cm ein-
gestellt werden.
• Verriegelungslaschen (L) rechts und links unter den
Armlehnenaufnahmen leicht eindrücken und dann die
Toilettensitzerhöhung hochziehen.
• Die Raster/Aufnahmen (C)herausziehen und die
gewünschte Höhe einstellen (Bild 10).
• Darauf achten, dass die Raster/Aufnahmen (C)rechts
und links jeweils in derselben Höhe eingesteckt
werden.
• Um die Höhe vorne einzustellen, stecken Sie die Auf-
lagen (D) in die entsprechende Önung bis es hörbar
einrastet.
• Darauf achten, dass die vordere Auflagen (D)rechts
und links jeweils in derselben Höhe eingesteckt
werden.
• Die vordere Auflagen (D)können niedriger eingestellt
werden als die hintere Auflage (B).
• Toilettensitzerhöhung Korpus (A)in die Raster/Aufnah-
men (C) einstecken. Die Raster/Aufnahmen (C)müssen
dabei mit den Verrieglungslaschen (L)im Korpus (A)
einrasten.
• Die Raster/Aufnahmen (C) können nur in eine Richtung
in die Toilettensitzerhöhung eingesteckt werden.
Produkt TSE 120 ohne Armlehne TSE 120 mit Armlehne TSE 120 PLUS
Artikelnummer 520500300 520500400 520500500
Gesamtlänge 49 cm 49 cm 49 cm
Gesamtbreite 46 cm 55 cm 55 cm
Gesamthöhe 19 cm 38 cm 38 cm
Öffnung Länge 27 cm 27 cm 27 cm
Öffnung Breite 20,5 cm 20,5 cm 20,5 cm
Breite zwischen den Armlehnen - 46 cm 46 cm
Höhenverstellung 8,5 / 12 / 15,5 cm 8,5 / 12 / 15,5 cm 8,5 / 12 / 15,5 cm
Gewicht 2,6 kg 4,1 kg 4,1 kg
Max. Belastung 120 kg 120 kg 120 kg
Farbe weiß weiß weiß
Material Plastic (PP / PA) Plastic (PP / PA) Plastic (PP / PA)
Technische Daten
Reinigung | Wartung
• Von Hand mit einem feuchten Tuch regelmäßig
reinigen!
• Keine aggressiven Reinigungsmittel verwenden!
• Keine Scheuermittel verwenden!
• Keine hochdosierten Chlor- und Essigreiniger
verwenden!
• Zur Desinfektion kann ein Sprühdesinfektionsmittel
verwendet werden, z.B. Descosept AF oder Bacillol AF
• Schrauben regelmäßig kontrollieren und gegebenen-
falls nachziehen!
• Das Produkt darf nicht dauerhaft Temperaturen
über 60°C ausgesetzt werden (z.B. Verwendung in
Sauna etc.).
• Bei Defekten suchen Sie Ihren Fachhändler auf bei
dem Sie dieses Produkt erworben haben.

8
Instructions for use TSE 120 / TSE 120 Plus
Drive Medical GmbH & Co. KG | As per: 24.03.2020 | Errors and alterations excepted
EN
Table of contents
Table of contents....................................................................... 8
Preface......................................................................................... 9
Declaration of conformity....................................................... 9
Service life .................................................................................. 9
Disposal....................................................................................... 9
Identification plate.................................................................... 9
Reuse............................................................................................ 9
Warranty ...................................................................................... 9
Indication....................................................................................10
Scope of delivery.....................................................................10
Safety instructions....................................................................11
Use................................................................................................11
Assembly.....................................................................................11
Height settings ........................................................................13
Technical data...........................................................................13
Cleaning | Maintenance..........................................................13

Instructions for use TSE 120 / TSE 120 Plus
9
Drive Medical GmbH & Co. KG | As per: 24.03.2020 | Errors and alterations excepted
EN
Identification plate
1
2
3
4
5
9
7 86
EN: 1 Article number | 2 Article name | 3 Manufacturer
| 4 Serial number | 5 UDI code | 6 Max. load | 7 Follow
the instructions for use | 8 Medical device | 9 Production
date (year/month)
Reuse
This product can be reused.
Please note that all technical documents needed for safe
handling must also be given to the new user.
The product must be checked by the specialist dealer,
cleaned, and restored to optimum condition.
Always follow the manufacturer's instructions during
preparation; these are made available on request.
Accessories are available at www.drivedevilbiss.de or
from your specialist dealer.
Warranty
The warranty period for the product supplied by us is 24
months from the date of purchase. Defective parts will
be replaced free of charge if it can be shown that there is
a defect in materials or manufacturing.
Parts subject to wear are generally not covered during
the normal guarantee period unless the parts need re-
pair or replacement which became necessary as a clear,
direct consequence of a manufacturing or material error.
We reserve the right of error and modifications on the
basis of technical improvements and changes in design.
Preface
Thank you for choosing a product from Drive DeVilbiss.
You will not be disappointed by the design, functionality
and quality of this product.
Please read these operating instructions carefully prior to
initial use. They contain important safety information and
valuable tips for the proper use and care. If you have ques-
tions or need additional information, contact your Drive
DeVilbiss specialist dealer who supplied your product.
These operating instructions contain all of the important
information for adjustment and operation. The most cur-
rent operating instructions are available as a PDF online
or can be requested from customer service.
Enlarged formats for visually impaired persons can be
displayed. Blind patients must be instructed by their at-
tendant. Repairs as well as some adjustments require
special technical training and must therefore be made by
the medical supplies dealer.
Declaration of conformity
For the product described, DRIVE MEDICAL GMBH &
Co.KG declares compliance according to the medical de-
vice regulation (EU) 2017/745.
Service life
Our company assumes a service life of five years for this
product as long as the product is used as intended and
all maintenance and service requirements are observed.
This service life may be significantly exceeded if the
product is carefully handled, repaired, maintained and
used and there are no technical limits based on the fur-
ther development of science and technology.
The service life may also be significantly shortened
through extreme and improper use, however. Determi-
nation of the service life by our company does not repre-
sent any additional guarantee.
Disposal
If you no longer need the product, please contact your
specialist dealer or bring the product to your local dis-
posal center.

10
Instructions for use TSE 120 / TSE 120 Plus
Drive Medical GmbH & Co. KG | As per: 24.03.2020 | Errors and alterations excepted
EN
Indication
INDICATION:
Use of the toilet hindered due to unadapted seat height
through limited ability to sit down and stand up along
with limited control of the trunk with functional disorder
of the lower extremity with significantly restricted or
fully absent movement of the joints and/or limited mus-
cular strength of the lower extremity and/or damage to
the lumbar spine, hip and/or knee and/or damage to the
nervous system/central nervous system and/or damage
to muscle function with limited or absent stability of the
trunk.
Scope of delivery
1 x ABody
1 x BSupport
2 x CAdjustable holder
2 x DFront support
2 x EBrace
2 x FFixing screws (only for TSE 120)
2 x GKnurled nuts (only for TSE 120)
2 x HStar screw (only for TSE 120 Plus)
2 x ITop-mounting pin (only for TSE 120 Plus)
2 x JArmrest (not for 520500300 TSE 120
without armrest)
1 x Instructions for use
1 x Vinyl gloves
TSE 120 TSE 120 Plus
1. Armrest
2. Armrest holder
3. Locking mechanism for adjustable holder
4. Body
5. Recessed grip (in the lid)
6. Lid
7. Fixing screw
8. Knurled nuts
9. Rear support
10. Adjustable holders
11. Front support
12. Braces
13. Hygiene openings
14. Star screw
15. Top-mounting pin
1
2
4
5
6
3
7
8910 11
12
13
3
9
10
11
15
14
12

Instructions for use TSE 120 / TSE 120 Plus
11
Drive Medical GmbH & Co. KG | As per: 24.03.2020 | Errors and alterations excepted
EN
Safety instructions
• Do not use if there are any defects!
• Caution – risk of slipping/falling!
• The lid must not be used as a backrest in the opened
position!
• The lid must not bear a load when closed (by sitting on
it, for example)!
• Check the raised toilet seat regularly for a secure fit on
the toilet bowl. Retighten the knurled nuts if necessary.
• Take note of the permitted maximum weight of the
user. This information can be found in the technical
data in these instructions for use as well as on the
identification plate.
Use
The raised toilet seat TSE 120 is suitable for nearly all
standardized or commercially available toilet bowls.
Assembly
Remove the seat and lid from the toilet bowl.
Assembly is carried out without tools.
TSE 120:
Place the rear of the support on the ceramic bowl (B)
with the fixing screws (F). Screw in the knurled nuts (G)
from below but do not tighten them yet. Align the rear of
the support on the center of the ceramic bowl and tight-
en the knurled nuts (photo 1).
1
B
GG
FF
C
C
Insert the adjustable holders (C) at the desired height
(8.5/ 12 / 15.5 cm) on the rear of the support (B) on the
right and left (photo 2).
2C
CC
B
8,5 cm
12 cm
15,5 cm
To adjust the height in the
front, insert the supports
(D) in the corresponding
opening until they audibly
click into place (photo 3).
• Take care that the front
supports (D) on the
right and left are each
inserted at the same
height.
• The front supports (D)
can be set lower than the rear support (B).
• Insert the two braces (E) in the corresponding open-
ings in the rear until they audibly click into place
(photo 3).
• Insert the body of the raised toilet seat (A)into the
adjustable holders (C). In doing so, the adjustable
holders (C)must engage with the locking tabs (L)in the
body (A) (photo 4+5).
4
C
C
5
A
J
J
L
The adjustable holders (C) can only be inserted in one
direction into the raised toilet seat.

12
Instructions for use TSE 120 / TSE 120 Plus
Drive Medical GmbH & Co. KG | As per: 24.03.2020 | Errors and alterations excepted
EN
LID ASS EMBLY:
The lid is preassembled at the time of delivery, but can
be replaced if necessary. To do this, turn the body (A) of
the raised toilet seat around and press the lid clips at the
same time.
The lid can then be taken out of the holders. Clip the new
lid on.
ARMREST ASSEMBLY:
Push the armrests (J) sideways into the armrest holders
provided for this purpose (photo 9).
9
J
When doing so, the arrows on the armrest (J) and the
armrest holder should match up (photo 10).
J
10
Now push the armrests (J) in until they catch, and then
fold them down.
TSE 120 PLUS:
Push the top-mounting pin
together (I)as shown in the
photo and insert down into
the mounting holes of the
ceramic bowl (photo 6).
Place the rear of the support (B) on the ceramic bowl and
screw in the star screws (H)from above but do not tight-
en them yet. Align the rear of the support (B)in the cen-
ter on the ceramic bowl and tighten the star screws (H)
(photo 7+8).
7
II
CC
H H
B
8
Insert the adjustable holders (C)at the desired height
(8.5/ 12 / 15.5 cm) on the rear of the support (B)on the
right and left (photo 2).
To adjust the height in the front, insert the supports (D)
in the corresponding opening until they audibly click into
place (photo 3).
• Take care that the front supports (D) on the right and
left are each inserted at the same height.
• The front supports (D) can be set lower than the rear
support (B).
• Insert the two braces (E) in the corresponding open-
ings in the rear until they audibly click into place (photo
4).
• Insert body (A)of the raised toilet seat into the adjust-
able holders (C). In doing so, the adjustable holders (C)
must engage with the locking tabs (L)in the body (A)
(photo 4+5).
The adjustable holders (C) can only be inserted in one
direction into the raised toilet seat.

Instructions for use TSE 120 / TSE 120 Plus
13
Drive Medical GmbH & Co. KG | As per: 24.03.2020 | Errors and alterations excepted
EN
Height settings
The raised toilet seat can optionally be adjusted using
the adjustable holders (C)for an elevation of 8.5 cm,
12cm or 15.5 cm.
• Slightly push in the locking tabs (L) on the right and left
under the armrest holders and then lift the raised toi-
let seat.
• Pull out the adjustable holders (C)and adjust the
desired height (photo 10).
• Take care that the adjustable holders (C)on the right
and left are each connected at the same height.
• To adjust the height in the front, insert the supports (D)
in the corresponding opening until they audibly click
into place.
• Take care that the front supports (D)on the right and
left are each inserted at the same height.
• The front supports (D)can be set lower than the rear
support (B).
• Insert the body of the raised toilet seat (A)into the
adjustable holders (C) . In doing so, the adjustable hold-
ers (C)must engage with the locking tabs (L)in the body
(A).
• The adjustable holders (C) can only be inserted in one
direction into the raised toilet seat.
Product TSE 120 without armrest TSE 120 with armrest TSE 120 PLUS
Article number 520500300 520500400 520500500
Overall length 49 cm 49 cm 49 cm
Overall width 46 cm 55 cm 55 cm
Overall height 19 cm 38 cm 38 cm
Opening length 27 cm 27 cm 27 cm
Opening width 20.5 cm 20.5 cm 20.5 cm
Width between armrests - 46 cm 46 cm
Height adjustment 8.5 / 12 / 15.5 cm 8.5 / 12 / 15.5 cm 8.5 / 12 / 15.5 cm
Weight 2.6 kg 4.1 kg 4.1 kg
Max. load 120 kg 120 kg 120 kg
Color white white white
Material Plastic (PP / PA) Plastic (PP / PA) Plastic (PP / PA)
Technical data
Cleaning | Maintenance
• Clean regularly with a moist cloth!
• Do not use any aggressive cleaning agents!
• Do not use abrasive cleaners!
• Do not use any high-dose chlorine and vinegar-based
cleaners!
• To disinfect, a spray disinfectant can be used such as
Descosept AF or Bacillol AF.
• Check the screws regularly and tighten, if necessary.
• The product should not be exposed to temperatures
above 60°C for long periods of time (for example, use
in a sauna, etc.).
• In the event of defects, contact your specialist dealer
from whom you purchased this product.

14
Mode d’emploi TSE 120 / TSE 120 PlusDrive Medical GmbH & Co. KG | Dernière mise à jour: 24.03.2020 | Sous réserve d’erreurs et de modifications
FR
Sommaire
Sommaire ...................................................................................14
Avant-propos.............................................................................15
Déclaration de conformité.....................................................15
Durée de vie..............................................................................15
Élimination..................................................................................15
Plaque signalétique.................................................................15
Recyclage...................................................................................15
Garantie ......................................................................................15
Indication....................................................................................16
Contenu de la livraison...........................................................16
Consignes de sécurité............................................................ 17
Utilisation.................................................................................... 17
Montage ..................................................................................... 17
Réglage en hauteur ................................................................19
Caractéristiques techniques.................................................19
NettoyageI maintenance ......................................................19

Mode d’emploi TSE 120 / TSE 120 Plus
15
Drive Medical GmbH & Co. KG | Dernière mise à jour: 24.03.2020 | Sous réserve d’erreurs et de modifications
FR
Plaque signalétique
1
2
3
4
5
9
7 86
FR : 1 Référence | 2 Désignation | 3 Fabricant |
4 N° de série | 5 Code UDI | 6 Charge maximale |
7 Se conformer au mode d’emploi | 8 Dispositif médical |
9 Date de fabrication (année/mois)
Recyclage
Ce produit est recyclable.
Veiller à ce que tous les documents techniques néces-
saires à une utilisation sûre du produit soient également
remis au nouvel utilisateur.
Le produit doit être contrôlé, nettoyé et remis en parfait
état par un distributeur en vue de sa réutilisation.
Pour son retraitement, il convient de suivre les instruc-
tions du fabricant (disponibles sur demande).
Vous trouverez les accessoires disponibles sur le site
www.drivedevilbiss.de ou chez votre distributeur.
Garantie
Le produit livré par nous est garanti 24 mois à compter
de la date de l’achat. Les pièces défectueuses seront
remplacées gratuitement s'il a été démontré qu'elles
présentent un défaut de matériau ou de fabrication.
Les pièces d’usure ne sont normalement pas couvertes
par la garantie habituelle, excepté si elles nécessitent
des réparations ou un remplacement qui sont clairement
la conséquence directe d’un défaut de matériau ou de
fabrication.
Sous réserve d'erreurs et de modifications dues à des
améliorations techniques ou à des modifications de de-
sign.
Avant-propos
Nous vous remercions d'avoir choisi un produit de De-
Vilbiss.
Le design, la fonctionnalité et la qualité de ce produit
sauront vous apporter pleine satisfaction.
Avant d’utiliser le produit pour la première fois, veuil-
lez lire attentivement le présent mode d’emploi. Vous y
trouverez des consignes de sécurité importantes et de
précieux conseils pour son utilisation et son entretien
corrects. Pour toute question ou information complé-
mentaire, adressez-vous au distributeur Drive DeVilbiss
qui vous a livré ce produit.
Le présent mode d’emploi contient toutes les instruc-
tions nécessaires au réglage et à l'utilisation du produit.
La version la plus récente du mode d’emploi peut être
consultée en ligne au format PDF et téléchargée ou de-
mandée auprès du service client.
Elle existe en caractères grand format pour malvoyants.
Les non-voyants doivent être initiés à l'utilisation du pro-
duit accompagnés d'un auxiliaire. Les réparations ainsi
que certains réglages requièrent des compétences tech-
niques spéciales et doivent donc obligatoirement être
eectués par un distributeur de matériel médical qualifié.
Déclaration de conformité
DRIVE MEDICAL GMBH & Co.KG déclare que le produit
est conforme au règlement (UE) 2017/745 relatif aux dis-
positifs médicaux.
Durée de vie
Pour ce produit, notre entreprise table sur une durée de
vie de cinq ans, dans la mesure où il est utilisé confor-
mément à l'usage pour lequel il est prévu et où toutes
les indications relatives à la maintenance et au service
après-vente sont respectées.
Cette durée de vie peut même être sensiblement pro-
longée lorsque le produit est traité, entretenu et utilisé
avec soin et qu'aucune limite technique ne résulte des
évolutions scientifiques et techniques.
La durée de vie peut par contre être fortement raccour-
cie si le produit est soumis à des sollicitations extrêmes
et s’il n’est pas correctement utilisé. La détermination de
la durée de vie par notre entreprise ne constitue en au-
cun cas une garantie supplémentaire.
Élimination
Si vous n’avez plus besoin du produit,
contactez s’il vous plaît votre distributeur ou apportez le
produit à la déchetterie près de chez vous.

16
Mode d’emploi TSE 120 / TSE 120 PlusDrive Medical GmbH & Co. KG | Dernière mise à jour: 24.03.2020 | Sous réserve d’erreurs et de modifications
FR
Indication
INDICATION:
Difficulté d’utiliser le WC, car la hauteur du siège est ina-
daptée du fait des difficultés à s’asseoir et se relever as-
sociées à un contrôle postural restreint du tronc dans le
cas de troubles fonctionnels des membres inférieurs se
traduisant par une forte diminution ou une perte de la
mobilité articulaire et/ou une amyotrophie des membres
inférieurs et/ou une lésion du rachis lombaire, de la
hanche et/ou du genou et/ou du système nerveux/sys-
tème nerveux central et/ou une atteinte de la fonction
musculaire, avec diminution ou perte de la stabilité du
tronc.
Contenu de la livraison
1 x ACorps
1 x BSupport
2 x CTringle
2 x DSupport avant
2 x ERenfort
2 x FVis de fixation (uniquement TSE 120)
2 x GÉcrous (uniquement TSE 120)
2 x H
Vis à poignée étoile (uniquement TSE120 Plus)
2 x ICheville pour montage par le haut
(uniquement TSE120 Plus)
2 x JAccoudoirs (pas pour le modèle 520500300
TSE 120 sans accoudoirs)
1 x Mode d’emploi
1 x Gants en vinyle
TSE 120 TSE 120 Plus
1. Accoudoir
2. Logement de l'accoudoir
3. Verrouillage de la tringle
4. Corps
5. Poignée (intégrée au couvercle)
6. Couvercle
7. Vis de fixation
8. Écrous
9. Support arrière
10. Tringle
11. Support avant
12. Renforts
13. Découpes pour toilette intime
14. Vis à poignée étoile
15. Cheville pour montage par le haut
1
2
4
5
6
3
7
8910 11
12
13
3
9
10
11
15
14
12

Mode d’emploi TSE 120 / TSE 120 Plus
17
Drive Medical GmbH & Co. KG | Dernière mise à jour: 24.03.2020 | Sous réserve d’erreurs et de modifications
FR
Consignes de sécurité
• Ne pas utiliser le produit s’il est défectueux.
• Attention – Risque de glissade/de chute.
• Ne pas utiliser le couvercle ouvert comme dossier.
• Ne pas s'asseoir ni poser de charge sur le couvercle
fermé.
• Vérifier régulièrement le réhausseur WC pour s'assurer
qu'il est solidement fixé à la cuvette. Le cas échéant,
resserrer les écrous.
• Respecter le poids maximal autorisé pour l’utilisateur.
Il est indiqué dans ce mode d’emploi à la rubrique
des caractéristiques techniques et sur la plaque
signalétique.
Utilisation
Le réhausseur WC TSE120 s’adapte sur presque toutes
les cuvettes de WC courantes et/ou normalisées.
Montage
Démonter l'abattant de la cuvette.
Le réhausseur se monte sans outils.
TSE 120:
Poser le support arrière (B) avec les vis de fixation (F) sur
la cuvette en céramique. Emboîter les écrous (G) sur les
vis par le bas, mais ne pas les serrer. Positionner le sup-
port arrière au milieu du rebord de la cuvette en céra-
mique et serrer les écrous à fond (fig.1).
1
B
GG
FF
C
C
Emboîter les tringles (C) à la hauteur souhaitée (8,5/ 12/
15,5cm) sur le support arrière (B) à droite et à gauche
(fig.2).
2C
CC
B
8,5 cm
12 cm
15,5 cm
Pour régler la hauteur à
l’avant, insérer les sup-
ports (D) dans les trous
à la hauteur souhaitée et
les enfoncer à fond (on
doit entendre un « clic »)
(fig.3).
• Veiller à ce que les sup-
ports avant (D) soient
insérés à la même hau-
teur à droite et à gauche.
• Les supports avant (D)peuvent être réglés à une hau-
teur plus basse que le support arrière (B).
• Insérer les deux renforts (E) dans les ouvertures à l’ar-
rière et les enfoncer à fond (on doit entendre un «clic»)
(fi g . 3 ).
• Emboîter le corps du réhausseur (A)dans les tringles
(C). Les tringles (C)doivent s’emboîter dans le corps (A)
avec les boutons de verrouillage (L) (fi g . 4 + 5 ).
4
C
C
5
A
J
J
L
Les tringles (C) ne peuvent être insérées dans le réhaus-
seur que dans une seule direction.

18
Mode d’emploi TSE 120 / TSE 120 PlusDrive Medical GmbH & Co. KG | Dernière mise à jour: 24.03.2020 | Sous réserve d’erreurs et de modifications
FR
TSE 120 PLUS:
Comprimer les chevilles
pour montage par le haut
(I)comme indiqué sur la
figure et les insérer par le
haut dans les trous de la
cuvette (fi g . 6 ).
Poser le support arrière (B) sur la cuvette et insérer les
vis à poignée étoile (H)par le haut, mais ne pas les ser-
rer. Positionner le support arrière (B)au milieu du rebord
de la cuvette et serrer à fond les vis à poignée étoile (H)
(fig.7+8).
7
II
CC
H H
B
8
Emboîter les tringles (C)à la hauteur souhaitée (8,5 / 12/
15,5 cm) sur le support arrière (B)à droite et à gauche
(fi g . 2 ) .
Pour régler la hauteur à l’avant, insérer les supports (D)
dans les trous et les enfoncer à fond (on doit entendre
un «clic») (fi g . 3 )).
• Veiller à ce que les supports avant (D) soient insérés à
la même hauteur à droite et à gauche.
• Les supports avant (D)peuvent être réglés à une hau-
teur plus basse que le support arrière (B).
• Insérer les deux renforts (E) dans les ouvertures à l’ar-
rière et les enfoncer à fond (on doit entendre un «clic»)
(Fig. 4).
• Emboîter le corps du réhausseur (A)dans les tringles
(C). Les tringles (C)doivent s’emboîter dans le corps (A)
avec les boutons de verrouillage (L) (fi g . 4 + 5 ).
Les tringles (C) ne peuvent être insérées dans le ré-
hausseur que dans une seule direction.
MONTAGE DU COUVERCLE:
Le réhausseur est livré avec le couvercle prémonté. Ce-
lui-ci peut être remplacé si nécessaire. Pour cela, retour-
ner le corps du réhausseur (A) tout en appuyant sur les
clips du couvercle.
Le couvercle peut alors être extrait des logements. Clip-
ser le couvercle neuf.
MONTAGE DES ACCOUDOIRS:
Insérer les accoudoirs (J) par les côtés dans les loge-
ments prévus à cet eet (fi g . 9 ).
9
J
Les flèches sur les accoudoirs (J) et les logements
doivent être alignées (fi g . 1 0 ).
J
10
Enfoncer les accoudoirs (J) jusqu'en butée puis les rabattre.

Mode d’emploi TSE 120 / TSE 120 Plus
19
Drive Medical GmbH & Co. KG | Dernière mise à jour: 24.03.2020 | Sous réserve d’erreurs et de modifications
FR
Réglage en hauteur
La hauteur de réhausse peut être réglée au choix à
8,5cm, 12 cm ou 15,5 cm au moyen des tringles (C).
• Appuyer légèrement (L)sur les boutons de verrouillage
à droite et à gauche sous les logements des accou-
doirs puis soulever le réhausseur.
• Extraire les tringles (C)et régler le siège à la hauteur
souhaitée (fig. 10).
• Veiller à ce que les tringles (C)soient insérées à la
même hauteur à droite et à gauche.
• Pour régler la hauteur à l’avant, insérer les supports (D)
dans les trous et les enfoncer à fond (on doit entendre
un «clic»).
• Veiller à ce que les supports avant (D) soient insérés à
la même hauteur à droite et à gauche.
• Les supports avant (D)peuvent être réglés à une hau-
teur plus basse que le support arrière (B).
• Emboîter le corps du réhausseur (A)dans les tringles
(C). Les tringles (C)doivent s’emboîter dans le corps (A)
avec les boutons de verrouillage (L).
• Les tringles (C) ne peuvent être insérées dans le
réhausseur que dans une seule direction.
NettoyageI maintenance
• Nettoyer régulièrement le produit à la main avec un
chion humide.
• Ne pas utiliser de détergents agressifs.
• Ne pas utiliser de produits abrasifs pour le nettoyage.
• Ne pas utiliser de détergent chloré ni de vinaigre
ménager fortement concentrés.
• Pour la désinfection, on peut utiliser un désinfectant
en spray, par exemple Descosept AF ou Bacillol AF.
• Vérifier les vis régulièrement et les resserrer le cas
échéant.
• Le produit ne doit pas être exposé à des températures
supérieures à 60 °C pendant une durée prolongée
(p. ex., ne pas l’utiliser dans une cabine de sauna, etc.).
• Si le produit est défectueux, contacter le distributeur
qui vous l’a livré.
Produit TSE 120 sans accoudoirs TSE 120 avec accoudoirs TSE 120 PLUS
Référence 520500300 520500400 520500500
Longueur totale 49 cm 49 cm 49 cm
Largeur totale 46 cm 55 cm 55 cm
Hauteur totale 19 cm 38 cm 38 cm
Ouverture, longueur 27 cm 27 cm 27 cm
Ouverture, largeur 20,5 cm 20,5 cm 20,5 cm
Largeur entre les accoudoirs - 46 cm 46 cm
Réglage en hauteur 8,5 / 12 / 15,5 cm 8,5 / 12 / 15,5 cm 8,5 / 12 / 15,5 cm
Poids 2,6 kg 4,1 kg 4,1 kg
Charge maximale 120 kg 120 kg 120 kg
Couleur blanc blanc blanc
Matériau Plastique (PP / PA) Plastique (PP / PA) Plastique (PP / PA)
Caractéristiques techniques

20
Gebruiksaanwijzing TSE 120 / TSE 120 Plus
Drive Medical GmbH & Co. KG | Versie: 24.03.2020 | Drukfouten en wijzigingen voorbehouden
NL
Inhoudsopgave
Inhoudsopgave........................................................................20
Voorwoord.................................................................................21
Verklaring van overeenstemming .......................................21
Levensduur ................................................................................21
Verwijdering ..............................................................................21
Typeplaatje ................................................................................21
Hergebruik.................................................................................21
Garantie ......................................................................................21
Indicatie .....................................................................................22
Geleverd product....................................................................22
Veiligheidsinstructies.............................................................23
Gebruik ......................................................................................23
Montage ....................................................................................23
Hoogte instellen .....................................................................25
Technische gegevens............................................................25
Reiniging | onderhoud ...........................................................25
Other manuals for TSE 120
1
This manual suits for next models
2
Table of contents
Languages:
Other Drive Toilet manuals
Popular Toilet manuals by other brands

sanindusa
sanindusa WCA 111500 Assembly instructions

SFA
SFA SANIMARIN MAXLITE+ installation instructions

Clou
Clou Hammock CL/04.01081.01 installation instructions

Icera
Icera RIOSE CT3140R06 Installation & Care Guide

Speakman
Speakman T-5000 installation instructions

URIMAT
URIMAT eco Installation instruction