Duevi PEPEROSSO Guide

Installation and use manual
Made in Italy
PEPEROSSO
Dissuader with nebulization irritating gas
14.09-M1.2.1-H1.0-F>1.0-ENG

2
Warnings and precautions
BEFORE INSTALL THE DEVICE READ CAREFULLY ALL PARTS OF THIS MANUAL.
KEEP THIS MANUAL FOR FUTURE REFERENCE.
QUALIFIED TECHNICIAN MUST DO INSTALLATION OF THE DEVICE.
INSTALLER MUST FOLLOW REGULATIONS.
THE DEVICE MUST BE USED ONLY INDOOR, WITHIN THE TEMPERATURE RANGE
INDICATED.
DO NOT INSTALL THE DEVICE IN VERY HUMID OR HOT ENVIRONMENTS OR NEAR TO
SINK, BATHTUBS, ETC.
INSTALL IT OUT OF REACH OF CHILDREN OR PEOPLE THAT MAY DAMAGE IT
DELIBERATELY OR ACCIDENTALLY.
THE MANUFACTURER SHALL NOT BE LIABLE FOR ANY IMPROPER USE OF THE
PRODUCT, INCORRECT INSTALLATION OR FAILURE TO COMPLY WITH
INSTRUCTIONS OF THIS MANUAL AND THE LAW REGARDING ELECTRICAL SYSTEMS.
Legal notes
THE ACTIVE PRINCIPLE USED BY PEPEROSSO IS A NATURAL ESSENCE OF CHILLI
PEPPER CALLED OLEORESIN CAPSICUM (OC) WITH A CONCENTRATION OF 10%. THE
IMPORTANCE OF THE NATURAL ESSENCE IS THAT IT IS LEGAL AND SAFE: FEW
ILLEGAL PRODUCTS EXIST, IN FACT, WITH ACTIVE PRINCIPLES OF CHEMICAL
DERIVATION, THAT IN ITALY ARE CONSIDERED “CHEMICAL AGGRESSIVE” AND, IF
USED AGAINST PEOPLE, CAN BE ALSO CONSIDERED AS “WAR WEAPON” AS THEY
CAN CAUSE PERMANENT HEALTH DAMAGES ON INTOXICATED PEOPLE. WE
SUGGEST YOU TO STAY AWAY FROM THESE PRODUCTS. OUR PRODUCT IS
MANUFACTURED INTO THE EUROPEAN COMMUNITY AND IT FOLLOWS ALL RULES.
CHILLI PEPPER SPRAY USAGE IS CONTROLLED BY APPOSITE DECREE OF 12 MAY 2011
N.103 EMITTED BY INTERNAL MINISTER FOLLOWING THE ART.3, COMMA 32, OF LEY
N.94/2009.

3
INDEX
Introduction .......................................................................................................................................................................................................................... 4
Functioning ........................................................................................................................................................................................................................... 5
Nebulisation driven by IN3 .......................................................................................................................................................................................... 5
Instantaneous nebulisation.......................................................................................................................................................................................... 5
Precautions ......................................................................................................................................................................................................................... 6
After nebulisation............................................................................................................................................................................................................. 6
Installation............................................................................................................................................................................................................................. 7
Installation .......................................................................................................................................................................................................................... 9
Connections .....................................................................................................................................................................................................................11
Technical...............................................................................................................................................................................................................................13
TERMINALS.......................................................................................................................................................................................................................14
JUMPERS............................................................................................................................................................................................................................15
BUTTONS...........................................................................................................................................................................................................................15
LEDS.....................................................................................................................................................................................................................................15
Tamper...................................................................................................................................................................................................................................15
Battery substitution ........................................................................................................................................................................................................16
Substitution of spray cans...........................................................................................................................................................................................17
After a nebulisation:......................................................................................................................................................................................................17
Substitution for maintenance:...................................................................................................................................................................................17
Test ..........................................................................................................................................................................................................................................18
Stand-alone mode ...........................................................................................................................................................................................................19

4
Introduction
Peperosso is a dissuading system with nebulization of irritating gas able to saturate in only 10 seconds
an area of 100 m2(note: unique environment).
The nebulized gas is a no- greasy chilli pepper based gas that causes irritation on skin
and mucosa, cough, lacrimation, heavy abundance of mucus and intense burning
sensation, persuading the intruder to leave immediately the area.
Gas is emitted by three disposable sprays of 20 ml located inside Peperosso.
Peperosso can be connected by wire to an alarm control panel. Gas diffusion occurs only after the
activation of the three different wired inputs (control panel activated, alarm start and additional sensor
confirmation close to nebulizer), avoiding any gas nebulization due to wrong usage by the owner.
Peperosso represents an efficient and immediate solution to fast thefts attempts.

5
Functioning
The electronic board analyses the wired input commands to safely determine the need for spray. In positive
case, a mechanical system compress the sprays that nebulize the chili pepper based gas.
The active principle will spread in an area of about 100 m2(unique environment), causing irritation on skin
and mucosa, cough, lacrimation, heavy abundance of mucus and intense burning sensation, persuading
the intruder to leave immediately the area.
Peperosso can work in two different modes to avoid unwanted nebulization:
Nebulisation driven by IN3
THE SECURITY SYSTEM MUST BE ARMED…
Peperosso is connected to control panel (input IN1) and enable its working only when the alarm
system is armed
…IN CASE OF ALARM NEBULISATION IS READY…
When the system is in alarm the control panel signals it to Peperosso (input IN2) that prepares
nebulisation: the gas is not yet emitted, depends on input IN3 state
…AN INTRUDER CAUSE NEBULISATION TO START
Peperosso verify if the confirm input (input IN3) signals a detection: it’s the confirm an intruder is
near and thus gas nebulisation can start
It’s possible to connect input IN3 to a remote control system (example: surveillance system) to
enable nebulisation from remote
Instantaneous nebulisation
THE SECURITY SYSTEM MUST BE ARMED…
Peperosso is connected to control panel (input IN1) and enable its working only when the alarm
system is armed
…AS SOON AS AN ALARM STARTS THE GAS IS NEBULIZED
When the system is in alarm, the control panel signals it to Peperosso (input IN2) that prepares
nebulisation: the gas is nebulized. The confirm input (input IN3) must be correctly connected

6
Precautions
SPRAY CANS MUST BE INSTALLED AS LAST, JUST BEFORE THE COVER CLOSING AND AFTER REALIZING ALL
THE REQUIRED CONNECTIONS, PROVIDED POWER AND ELECTRICAL SIGNALS FROM CONTROL PANEL AND
DETECTORS.
IF NOT PEPEROSSO SHOULD ACCIDENTALLY ACTIVATE THE NEBULISATION.
USING THE DEVICE ACCORDING TO THESE INSTRUCTIONS IS LEGAL.
IT IS SUGGESTED TO SIGNALIZE ITS PRESENCE WITH SPECIAL SIGNS EASILY VISIBLE TO ALERT THE RISK OF
IRRITATING SPRAY
ALL THE INSTALLING OPERATIONS MUST BE DONE WITHOUT THE SPRAY CANS INSIDE THE DEVICE!
TO ALLOW THE GAS IS RELEASED CORRECTLY INTO THE ENVIRONMENT AND AVOID SPOTS, AVOID THE
PRESENCE OF ITEMS THAT MEETS THE NOZZLES OF CANS WITHIN 2 METRES.
PEPEROSSO IS ACTIVATED AT CONTROL PANEL ARMING (COMMAND CONNECTED TO INPUT IN1): USE
ONLY TOTAL ARMING COMMAND.
DO NOT ACTIVATE PEPEROSSO WHEN IN PARTIAL ARMING BECAUSE IS NOT GUARANTEED THE COMPLETE
ABSENCE OF PEOPLE IN PROTECTED AREA
DO NOT INSTALL THE DEVICE WHEN IN PRESENCE OF NOT PACKAGED FOOD OR ENVIRONMENT
INCOMPATIBLE WITH GAS NEBULISATION.
ATTENTION: PEPEROSSO IS PROTECTED AGAINST WIRE CUTTING: IF PROPER SIGNALS ARE MISSING ON
MONITORING INPUTS (EXAMPLE: WIRE CUT, BLACKOUT OR CONTROL PANEL BATTERY TEST OR ITS
FAILURE), GAS NEBULISATION CAN STARTS.
After nebulisation
The gas nebulized is not harmful to health although it is very irritating.
The active principle decay after about 36 hours.
After the area has been saturated with the gas, it is necessary to proceed with an accurate decontamination
as the residual chilli pepper fine dust may react again after depositing on surfaces.
Furniture and home furnishings are not damaged.
ensure proper ventilation
irritation subsides in about 30 minutes
contamination of clothes can prolong the action
be careful to not touch your eyes and wash your hands thoroughly
to avoid unpleasant irritation is recommended the use of masks during cleaning

7
Installation
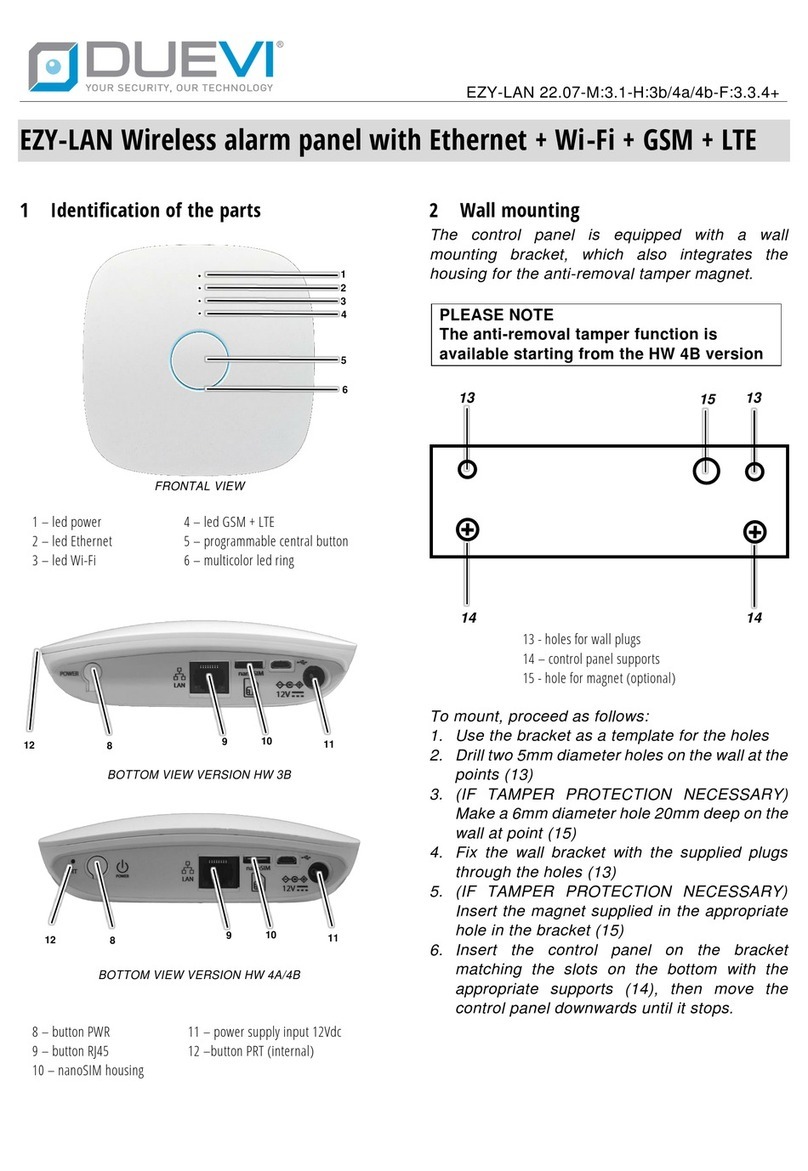
To open the cover unscrew the screws at both sides of the device (fig. 1).
Screw
Screw
Cover
Nebulisation
windows
Motor base
Screw for
motor base
Anti-opening
tamper
Screw for
motor base
CN1
connector
(removable)
Space for spray
cans
Anti-removing
tamper
Battery
compartment
Electronic
board
Anti-opening
tamper
Wall
mounting
hole
Wall
mounting
hole
Wall mounting
hole
Cable path
Screw for
motor base
Fig. 1
Fig. 2
Fig. 3
Fig. 4

8
Fig. 6
Fig. 5

9
Installation
FOLLOW STRICTLY AND IN PRECISE ORDER THE FOLLOWING INSTALLATION
INSTRUCTIONS, OTHERWISE MAY RESULT AN ACCIDENTAL NEBULISATION OF
HARMFUL GAS
INSTALLATION OPERATIONS MUST BE DONE WITHOUT SPRAY CANS
1. Unscrew the three screws of motor base (fig. 2) and remove it carefully: unplug the motor (CN2)
and end-line (CN7) connectors freeing the base, then set it aside (fig. 3).
Unplug the CN1 connector
2. Fix the main case on wall using it as template for holes (fig. 3)
Peperosso must be fixed stably on a solid vertical wall, with appropriate dowels, in such a way that
the spray jet is as much as possible in the direction of any intruders
Peperosso can be installed ONLY in vertical position
Installation height can vary between 1,5 and 3 m
3. Deactivate the control panel with tamper control excluded, set the battery and lock it with the
appropriate metal plate
4. Plug the end-line CN7 and motor CN2 connectors
5. Connect the battery
ATTENTION! By connecting the battery the motor move forward the plunger (leave it go
completely forward)
6. Screw the three screws of the motor base
7. Cable the CN1 connector according to the functioning mode will be used (instantaneous or driven
by IN3, see schemes at page 11 of this manuals)
Ensure the control panel provide the following commands to the connector (this is the minimum
configuration required for a secure behaviour of the system):
n°
Terminal
Predisposition
1
GND
GND
2
+12V
+ 12 V
3
T1
Tamper line
4
T2
Tamper line
5
IN1
+ 12 V (BLOCK)
6
IN2
+ 12 V (NEBULISATION READY)
7
IN3
This connection depends on functioning mode will be used:
connected to NC output of local detector for driven mode or to
remote surveillance interface
connected to IN2 for instantaneous mode
9
+VS
supply +12 V for NC contact and powering the local detector /
surveillance interface

10
Plug in the CN1connector already cabled
8. From control panel provide the unlock command on IN1 (remove the positive 12 V)
9. Press K1 button until the plunger back to its initial position
10. Block Peperosso using IN1 (provide a positive 12 V)
11. Remove jumpers JP1 e JP2 (in this way both tamper of Peperosso are activated)
12. At this point make a functioning test using the test spray can (containing water, see “Test”
paragraph)
At the end of test block Peperosso using IN1 (provide a positive 12 V)
13. Peperosso must stay at rest with the plunger completely back and settled
Only in this position is possible to fix the spray cans with the straps (fig. 6)
In this phase, to avoid unwanted nebulisations, (caused by error on wiring or moved on CN1),
remove the CN2 motor connector, in this way the plunger is mechanically blocked allowing a secure
installation
14. Close the cover
15. Plug in the CN2 motor connector
16. Peperosso is ready to be used

11
Connections
Driven mode (confirm from IN3 input)

12
Instantaneous mode (immediate nebulisation in case of alarm)
Control panel connection with remote activation (surveillance)

13
Technical
Power supply
12 V (max 13,8 V )
Absorption
Standby: 20 mA –Nebulisation: 0,7 A
Battery
Lead battery 12 V / 0,8 Ah (not included)
Autonomy (only battery supply, IN1 enabled): about 24 hours
Inputs
IN1: BLOCK input TC (to be connected to system status of panel)
IN2: NEBULISATION READY (to be connected to alarm output of
panel)
IN3: CONFIRM (to be connected to local detector or remote control
interface)
Confirmation is monitored up to 8 minutes after the end of
NEBULISATION READY signal!
Outputs
1 output for power supply 12 V / 500 mA (2 A for 100 ms MAX)
1 output for failure of Peperosso
1 output for nebulisation occurred
Functioning
Gas nebulisation can occur only when system is armed (IN1 unlocked) and
after activation of IN2 input (alarm) and confirm of IN3 input (local
detector / remote control)
Installation height
1,5 ÷ 3 m
Dimension
About 263 x 95 x 80 mm
Temperature
0 ÷ 40 °C
Accessories
Provided with 3 chili pepper spray cans (mod. GAS) and 1 test can with
water

14
TERMINALS
GND
Power supply: negative pole
+12V
Power supply: positive pole 12 V (max 13,8 V )
T1
T2
Tamper output: normally closed at rest (tamper closed)
In case of opening or removal (without distinction) the terminal opens signalling tamper
IN1
BLOCK device input:
+12 V : the device is deactivated
GND: the device is activated
IN2
NEBULISATION READY input: normally closed towards positive (+12 V )
When the positive is removed the IN3 input status is checked (depends by connection):
INSTANTANEOUS MODE
Nebulisation starts immediately
DRIVEN MODE
if IN3 confirm, gas is sprayed (confirm is monitored up to 8 minutes after the end of
NEBULISATION READY)
if IN3 stay at rest the nebulisation is disabled (it’s then necessary to provide a disarm/arm
cycle on input IN2)
IN3
NEBULISATION input: normally closed towards positive (+12 V )
If positive is removed when NEBULISATION READY is activated (by IN2) the nebulisation starts
OUT D
MOTOR SUPPLY FAILURE output: normally at 12 V
The output switches to GND in case of failure on motor power supply circuit
If the main supply voltage or the battery voltage are lower than 10,5 V , the OUT D output
switches to GND signalling the failure (inadequate voltage). The voltage check is made when
IN1 (BLOCK) is at GND, that is with Peperosso unlocked.
If OUT D is at GND it is necessary to check the power voltages are correct (between 12 and 13,8
V ); if power voltages are correct but output D –with Peperosso unlocked –is still at GND, it
is necessary to call technical service assistance
+VS
POWER 12 V output: normally at +12 V
Provide a positive pole +12 V for power supplying local detector/external devices
OUT G
EXTERNAL ACTUATOR output: normally floating
Connect to negative (GND) of an external actuator to drive it
The positive can be taken from +12V terminal
This output act only during nebulisation!
OUT A
NEBULISATION OCCURRED output: normally at 12 V - (signalling for control panel)
This output switches to GND when the motor starts to rotate, and stays to GND until the
plunger return (by pressing the K1 button on main board)
CN2
Motor
CN3
NOT USED
CN4
Anti-removal Tamper
CN5
Anti-opening Tamper
CN6
NOT USED
CN7
End-line control

15
CN11
NOT USED
CN12
NOT USED
BAT
Battery connector 12 V / 0,8 Ah
JUMPERS
OFF
ON
JP1
Anti-opening Tamper active
Anti-opening Tamper deactivate
JP2
Anti-removal Tamper active
Anti-removal Tamper deactivate
BUTTONS
K1
Plunger return button (after nebulisation)
Allow to –after nebulisation occurred –rearm the device
LEDS
OFF
ON
LED
Normal functioning
Battery poles inverted
Tamper
In case of cover removing the tamper line through T1-T2 terminals is opened.

16
Battery substitution
Verify periodically the battery status and substitute if necessary with a new one.
FOLLOW STRICTLY AND IN PRECISE ORDER THE FOLLOWING INSTALLATION
INSTRUCTIONS, OTHERWISE MAY RESULT AN ACCIDENTAL NEBULISATION OF
HARMFUL GAS
1. Deactivate the control panel with tamper control excluded
2. Ensure Peperosso is blocked with IN1 and IN2 at +12 V
3. Open the cover
4. Cut the straps and remove the spray cans, unplug the CN2 motor connector
5. Unplug the CN1 connector
6. Remove the motor base unscrewing the three screws, unplug the CN7end-line connector and
the BAT battery connector
7. Unscrew the battery bracket and remove it
8. Place the new battery and fix it with the bracket
9. Plug in the motor and end-line connectors
10. Plug in the battery connector: the motor moves the plunger forward
11. Screw the three screws the motor base
12. Plug in the CN1 connector already cabled
13. Enable Peperosso removing the positive +12 V from IN1 from control panel
14. Press K1 button to bring the plunger to rest
15. At this point make a functioning test using the test spray can (containing water, see “Test”
paragraph)
16. At the end of test block Peperosso using IN1 (provide a positive 12 V)
17. Peperosso must stay at rest with the plunger completely back and settled
Only in this position is possible to fix the spray cans with the straps (fig. 6)
In this phase, to avoid unwanted nebulisations, (caused by error on wiring or moved on CN1),
remove the CN2 motor connector, in this way the plunger is mechanically blocked allowing a
secure installation
18. Close the cover
19. Plug in the CN2 motor connector
20. Peperosso is ready to be used

17
Substitution of spray cans
After a nebulisation or at least every three years (even if no nebulisation) it’s necessary to substitute the
spray cans (the expiry date is stated on the bottom of the container).
FOLLOW STRICTLY AND IN PRECISE ORDER THE FOLLOWING INSTALLATION
INSTRUCTIONS, OTHERWISE MAY RESULT AN ACCIDENTAL NEBULISATION OF
HARMFUL GAS
After a nebulisation:
1. Deactivate the control panel (IN1 and IN2 to +12 V ) with tamper control excluded, then
remove the cover of Peperosso
2. Enable Peperosso removing the positive +12 V from IN1
3. Press the K1 button to bring the plunger to rest
4. Block Peperosso giving the positive +12 V to IN1
5. Unplug the CN2 connector which power the motor, in this way the plunger is mechanically
blocked
6. Substitute the spray cans
7. Plug in the CN2 motor connector
8. Close the cover
Substitution for maintenance:
1. Deactivate the control panel (IN1 and IN2 to +12 V ) with tamper control excluded, then
remove the cover of Peperosso
2. Block Peperosso giving the positive +12 V to IN1
3. Unplug the CN2 connector which power the motor, in this way the plunger is mechanically
blocked
4. Substitute the spray cans
5. Plug in the CN2 motor connector
6. Close the cover

18
Test
To test the system:
follow installation steps (see previous paragraphs) installing the test spray cans (containing water)
arm the control panel: Peperosso is unlocked
trigger an alarm (do not provoke the confirm detector connected to input IN3)
oif Peperosso is connected in Instantaneous mode, the nebulisation of spray (with water) starts
immediately
oif is connected in Driven mode, provoke the confirm detector connected to IN3: Peperosso
will nebulize the spray can (with water)
Verify the detection area of the confirm detector is properly covered and adjusted to avoid
false detections
at the end of test change the test spray can with the chili pepper spray cans (see the spray can
substitution paragraph)

19
Stand-alone mode
Principle diagram for use of Peperosso in stand-alone mode (no control panel required).
Note: it’s necessary to connect the detector as in scheme on page 11
Peperosso
Must be powered with
12 V
Detector
Connect to Peperosso
on IN3 as confirm
Hardware key
Close IN1 and IN2
towards +12 V
disabling Peperosso
Table of contents
Other Duevi Security System manuals