Durafit DFIHE002 User manual

PRODUCT INSTRUCTION
Tips: [Image is for reference only] Model: DFIHE002 Configuration: LCD screen
In order to use our products safely and smoothly, please read the product manual
carefully before use.

CONTENT
Content
Page
1.
Safety instructions
1
2.
Special safety instructions
1-2
3.
Warranty commitment
2~3
4.
Assembly
3
5.
Configuration list
4
6.
Hardware package
4
7.
Structure
4
8.
Assembly instructions
5
9.
Instructions for use
6
10.
Meter operation instructions
7-10
11. Daily maintenance
10-12
12.
Failure analysis and processing
13
13. Important matters
13-15
14. Whole body muscle distribution
15
15.
Stretching exercises
16

Thank you.
When you purchase our products.
1. Safety instructions
The product is designed with many safety issues in mind, but please follows the instructions below,
just in case. We do not bear the consequences of any abnormal operation.
In order to ensure your safety and avoid accidents, please read the instruction manual carefully
before use.
1. Before exercising, please wear suitable sneakers and do not run barefoot. The abnormalities and
injuries caused by not wearing shoes have nothing to do with product quality problems. Our
company does not assume any responsibility.
2. When starting training with this product, please consider your physical condition and train
properly and regularly to ensure that you have enough physical strength to train. Incorrect or
excessive training will not benefit your health.
3. This product is forbidden for children under 10 years of age; those who feel uncomfortable or
mentally deficient and who lack common sense are prohibited from using it; parents are advised to
take good care of the elderly and children during the use of the machine, and are prohibited from
approaching this product or touching it; Operation, unauthorized modification of machine parts,
unauthorized removal of the machine and ignoring the prohibition of accidents and other accidental
injuries have nothing to do with the quality of our products, our company does not assume any
responsibility.
4. This product is suitable for home use, not suitable for professional training and testing, and
cannot be used for medical purposes.
5. The heart rate of the product does not provide data for clinical medicine.
6. If the power cord is damaged, it must be replaced by the manufacturer or professional service
personnel to avoid danger.
7. Please check all parts before use to ensure that the screws and nuts are locked.
8. When using, please wear comfortable tight clothes to avoid the clothes being caught by the
machine. Don't let children or pets play around to avoid accidents.
9. Place the product on a smooth, clean, level surface to ensure that there are no sharp objects
nearby. Do not use it near water and heat sources.
10. Keep away from all moving parts with your hands. Do not place your hands and feet in the gap
below the running belt.
11. This product is for one person only when it is running.
12. Please use the accessories provided by the original manufacturer. It is strictly forbidden to
change it privately.
13. The maximum user weight is 90kg.
- 1 -

2. Special safety
instructions Power supply
The power plug must be grounded reliably. The socket must have a dedicated circuit to
avoid sharing with other electrical equipment.
Insert the power cord directly into the socket, and do not allow looseness.
Please use qualified sockets to avoid the danger. If the plug and socket are not compatible,
please do not touch the plug and ask the electrician to handle it.
The voltage used is 220V AC 50Hz power supply.
Do not let the power cord touch the roller. Do not put the power supply on the running belt.
Do not use the damaged plug.
Do not pull or plug in the power plug with wet hands.
Unplug the plug from the socket before cleaning and maintenance.
WARNING: Failure to remove the plug may result in personal injury and equipment damage.
Please check if the function of the treadmill is normal before use. It can be used normally, it
is forbidden to use, and contact customer service in time.
When moving, please put the safety lock cable clip on the clothes to prevent a safe shutdown
in case of emergency.
When exercising, ensure that there is a 2000*1000mm vacant barrier-free safety zone behind
the treadmill.
When an abnormal situation occurs, the handrail can be used to pull up the body, and the
feet leave the running belt and jump away from the outside of the treadmill.
If you feel dizzy, chest pain, nausea, or shortness of breath during exercise, stop exercising
immediately and consult a fitness instructor or doctor.
Please do not use this product outdoors, high humidity and sunlight.
Shut down when the person leaves, and unplug the plug.
Model
<70 Kgs
70-80
80-90
Number/Weight
Kgs
DFIHD002
90 mins
75 mins
60 mins
3. Warranty promise
We make sure that the product is made of high quality materials.
In normal use, there is a problem and we will be responsible for the warranty.
The warranty period of the whole machine is 1 year (from the date of purchase). If the product you
- 2 -

purchased has quality problems, please contact our customer service within 12 months. Please do
not handle it without permission. We warranty the following accessories: frame, wire, motor,
electronic control system, moving wheel, etc.
The following conditions are not covered by the warranty.
1. Damage caused by external causes.
2. Use non-original accessories.
3. I am not handling it correctly.
4. Do not follow the instructions.
Consumables such as running belts, armrest foam, running boards, side pedals, moving wheels, etc.,
the normal use period is not less than 1 year.
This warranty is valid only for private use by the family and does not apply to professional training
such as the gym.
If you need to purchase non-warranty accessories, please contact customer service. Please provide
the following information when ordering:
1. Instructions.
2. Treadmill model.
3. Accessories serial number.
4. Proof of purchase date.
Please do not send the product to our company without the customer's customer service
confirmation, and return the product without permission. Our company does not bear any expenses.
4. Assembly
1. Please read the assembly procedure instructions carefully before assembly.
2. Remove all the packaging and place them on a clean floor, so that your overall checkup will
make your installation easier.
3. Based on the packing list, carefully check that all parts are complete.
4. Be careful when you are using tools or handling. Please do not force installation according to
personal preference when assembling.
5. Please confirm that the remaining tools and packaging materials pose a hazard. Plastics and
foams are harmful to children.
6. Assemble the product according to the instructions, please read the assembly steps and
instructions carefully.
7. This product must be carefully installed by an adult and should be installed by a professional if
necessary.
WARNING: Install the product carefully and do not damage the product.
- 3 -

5.
Configuration list
Pic
Name
Qty
overview
1
Safety lock
1
User manual
1
6.
Hardware package
6mm L-type Allen
Knobs
wrench 1pc
2pcs
Knobs 2pcs
oil 1pc
Multi-function
4 plastic
open end wrench 1pc
gaskets
7. Structure
Display
Heart rate
Meter
Safety lock
Stander
Motor cover
Running belt
Knob
Adjustment pad
Back cover-R
Sidebar
Back cover-L
- 4 -

8. Assembly instructions
Step 1: Install the machine
A:) Lift the machine out of the package and put it on the ground. Hold the column tube with your
hand and set it up. Place the aluminium knob (long) on the plastic gasket, then thread it into the
column and fasten it clockwise (as shown).
B:) Hold the instrument panel with your hand and rotate it backwards. Put the aluminium knob
(short) on the plastic gasket, and then screw it into the column and the instrument frame to fix it
clockwise (as shown).
C:) Rotate the instrument cluster to the appropriate angle and then secure the pivot screw with a
6mm L-wrench.
3
2
Plastic gasket
1
Step 2: Place the red safety switch magnet end on the yellow label position in the middle of the
instrument. The whole machine is assembled.
Important: Locate the red security lock in the
kit, place the end of the magnet on the yellow
label on the meter, and press the start button
to run.
- 5 -

9. Instructions for
use Use the treadmill
Plug in the power, turn on the switch (1), the switch will light up, then you will hear a "click" and
the meter will light up.
1
Security lock
The treadmill will only work if the security lock is placed completely in the slot of the meter. Clip
the clip of the security lock to the clothing. In the unlikely event that the safety lock is removed, the
motor can be immediately terminated. If you want to continue using the treadmill, put the safety
lock back.
Folding instructions:
Folding treadmill
Folding the treadmill saves space.
Before folding, turn off the power switch and unplug the power cord.
Loosen the upper and lower aluminium knobs in the opposite direction, and fold the column and the
instrument (as shown below).
- 6 -

10. Meter operation instructions
1. Meter info
2.Window description
3. Window and button description
3-1: A large LCD window displays the following functions: time, distance, calories, heart rate,
and speed.
3-2: Function buttons: program, mode, start, stop, speed plus, speed reduction.
3-3: Function button description:
a: Program key: In the stop state, press the program key to cycle through the program: manual
mode->P01->P02->P03->...P11->P12.
b: mode key: when the manual mode is selected to the manual mode, the speed window displays
the initial value of 0.0, and the mode key can be cycled to select the countdown mode window
display in the manual mode. 30:00->countdown distance mode window display 1.0-> Countdown
Calorie Mode Window Display 50->Normal Mode.
c: Start: Press this button in the stop state, the window will display 333, 222, 111 will start the
motor.
d: Stop: When the treadmill is running, pressing this button will stop running.
e: Speed plus: In the setting state, the button will increase the set value. In the motor running
- 7 -

state, the button will increase the speed.
f: Speed reduction: In the setting state, the button will decrease the set value. When the motor is
running, the button will decrease the speed.
4. Startup instructions
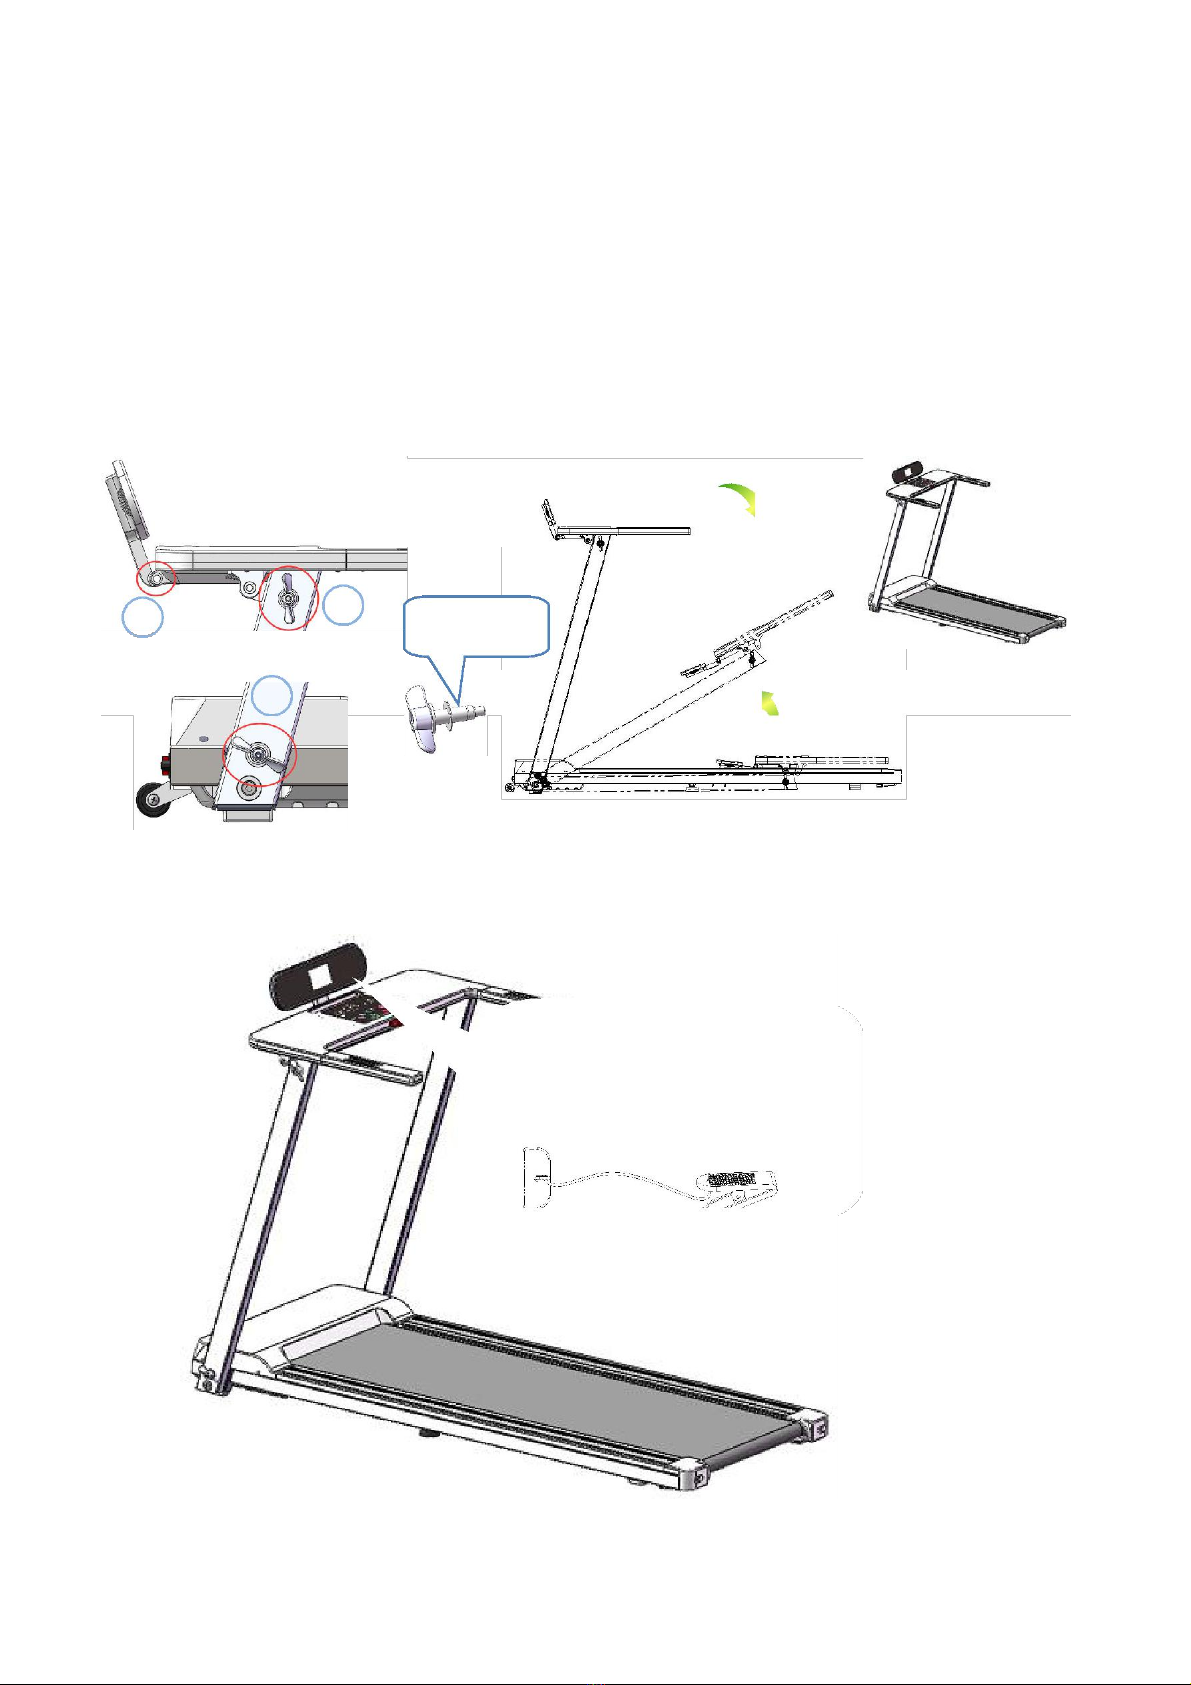
4-1: Attach the safety lock to the safety lock position on the panel, turn on the main power switch,
all LCD segments will be displayed for 2 seconds, then the software version number will be
displayed. Then enter the manual normal mode.
4-2: Press the start key, the display window will display: 333-222-111, and each time the buzzer is
sounded, the motor will start.
5. Program Description
5-1: A manual program, including: normal mode, manual mode, time countdown, distance
countdown, calorie countdown mode.
5-2: 18 speed programs: P1, P2, P3, P4, P5, P6...P11, P12.
5-3: How to enter manual mode:
a: Turn on the power switch and go directly to the normal mode in manual mode.
b: In the stop state, press the program key to enter the normal mode in the manual mode.
B: Three setting functions in manual mode: time setting, distance setting, calorie setting.
a: When entering the manual mode, it is in the normal mode first, and all parameters are initial
values.
b: In the manual normal mode, press the mode button, then enter the time countdown mode, the
time bar displays 30:00 and flashes, press the speed plus or minus button to set the countdown
time. Time setting range: 5:00-99:00.
c: In the time countdown mode, press the mode button to enter the distance countdown mode. The
distance bar displays: 1.0 and flashes. Press the speed plus or minus button to set the distance. The
setting range is 1.0-999.9 km.
d: In the distance countdown mode: press the mode button to enter the calorie countdown mode,
the calorie bar displays 50 and flashes, press the speed plus or minus button to set the calorie
setting range: 20-999 kcal.
5-4: Manual mode operation:
a. Press the start button and the motor will start running. b.
Press the speed plus or minus button to adjust the speed.
c. Press the stop button again; the speed will slowly decrease until it stops;
d. When the set time is decremented to zero, the speed slowly decreases until it stops.
e. When the set distance is decremented to zero, the speed slowly decreases until it stops. f.
When the calorie setting is decremented to zero, the speed slowly decreases until it stops.
6. Program
6-1. The initial time is set to 30 minutes. Only the time can be set. The time setting range is 5:00-
99:00. Press the speed plus or minus button to adjust the set value. 6-2 Press START motor to start
running, the speed is according to the programmed speed.
6-3 Press the speed plus or minus button to adjust the speed.
6-4 Each program is divided into 16 segments, each of which runs at 1/16 of the set time.
6-5 will beep when switching between segments and segments.
- 8 -

6-6 When the set time is decremented to zero, the speed slowly decreases until it stops.
7. Security lock function
In any state, the safety lock is pulled off and the window displays the "E-7" buzzer bi-bi-bi. If
the motor is running, the motor is stopped urgently. At this time, the treadmill cannot perform any
other operations except the shutdown. After the safety lock is correctly reinstalled, the treadmill
re-enters the standby state and waits for an input command.
8. Numerical display range
initial
starting
setting range
showing range
Time(min:scd)
0:00
30:00
5:00-99:00
0:00-99:59
Speed(km/h)
0.0
N/A
N/A
1.0-14.0
Distance(km)
0.00
1.00
1.0-999.9
0.0-999.9
Calorie(Kcal)
0
50
20-9999
0-9999
Schedule 1: P1-P12 program motion diagram
sege
1
1
1
1
1
1
ment
1
2
3
4
5
6
7
8
9
11
0
2
3
4
5
6
s
P1
spee
4
6
1
1
6
4
8
1
1
1
1
8
1
1
6
4
d
0
0
0
2
2
0
0
0
P2
spee
2
4
6
4
6
6
4
6
6
8
1
8
6
8
4
2
d
0
P3
spee
4
6
8
1
6
4
6
8
1
1
8
4
1
1
6
4
d
0
0
2
0
0
P4
spee
2
2
6
1
6
4
6
1
6
4
6
1
8
6
4
2
d
0
0
0
P5
spee
4
4
8
1
8
6
8
1
8
6
6
1
8
6
4
2
d
0
0
0
P6
spee
4
6
8
8
8
8
1
8
8
6
6
6
6
6
6
4
d
0
P7
spee
6
4
2
4
6
8
1
1
1
1
1
1
8
6
4
4
d
0
0
2
2
0
0
P8
spee
4
6
8
1
1
1
1
1
1
8
6
6
6
4
2
2
d
0
0
0
0
0
0
P9
spee
2
4
4
4
6
6
4
6
4
4
4
4
2
4
6
2
d
P10
spee
2
4
4
4
6
6
4
6
4
4
4
4
2
4
6
2
d
P11
spee
4
4
6
6
4
6
6
8
8
6
6
6
6
8
6
4
d
P12
spee
4
4
6
8
1
1
1
1
1
8
1
1
1
1
8
6
d
0
2
0
2
0
0
2
2
0
- 9 -

9. Sleep function
When there is no operation for more than 10 minutes at the stop, the system turns off all displays
and goes to sleep. Press any key to wake up.
10.General failures and troubleshooting methods of the control system
The following is the error code and solution for the electronic watch:
E01: The information fed back to the electronic watch by the controller is blocked.
Solution: Check if the connector of the 4-wire cable connected to the controller is loose or damaged.
E02: The controller does not detect the voltage on the motor line.
Solution: Check if the positive and negative motor wires are securely connected to the terminals on
the controller.
E05: The current is too high when the motor is running, exceeding the rated current.
Solution: Please check the motor for damage or contact the after-sales service personnel for
technical support.
E07: The MTC did not detect the signal of the safety lock.
Solution: Please check if the safety switch is fastened, fasten one end of the safety switch to the
treadmill and the other end to the user's clothes.
E09: MTC communication is interrupted.
Solution: Please turn off the power and restart the treadmill. If the problem persists, please contact
the after-sales engineer.
11. Daily maintenance Electric
treadmill maintenance
Proper maintenance is the only way to keep your treadmill at its best. Wrong maintenance can hurt
or shorten the life of your treadmill.
Important reminder:
- Do not use sandpaper or solvents to clean the treadmill. The controller part of the treadmill should
not be exposed to direct sunlight or moisture to avoid damage.
- Always check and lock all parts of the treadmill, replace those defective parts immediately and/or
leave the equipment idle for repair.
Adjusting the running belt
Adjusting the run has two functions: elastic adjustment and running center position adjustment. The
running belt has been adjusted at the factory, but after use, the running belt will be stretched, which
will cause the running belt to rub against the center strip and the rear cover to be damaged. It is
normal for the running belt to be stretched during use.
- 10 -

Adjust the running belt
If you are running with a treadmill that is slippery or not smooth, you can adjust the tightness of the
running belt to improve.
How to adjust the running belt
1. Insert the 6mm hex wrench into the adjustment screw on the left side of the running belt and turn
the wrench 1/4 turn clockwise to adjust the rear roller to tighten the running belt.
2. Repeat step 1 to adjust the right screw. It must be determined that the adjustment screw rotates
the same distance so that the rear roller is adjusted parallel to the frame.
3. Repeat steps 1 and 2 until the running belt does not slip.
4. Note that the running belt cannot be adjusted too tightly. This will break the running belt,
increase the pressure of the front/rear drum, cause damage to the roller bearing, etc., causing
abnormal sound or other problems.
If you want to reduce the tension of the running belt, turn the wrench counter clockwise, paying
attention to the same distance between the left and right sides.
Run to the middle
When you use the treadmill, the pressure on the two belts is not the same when running, and the
pressure on the running belt is unbalanced, causing the running belt to deviate from the centre. This
deviation is normal, and when no one runs on the run, it will return to the center. If you don't get
back to the center, you will need to bring the belt back to the center.
1. Run the treadmill at no load and adjust the speed to 6km/H.
2. Observe the distance from the running belt to the left and right side bars
If it is to the left, use a hex wrench and turn the left screw 1/4 turn clockwise
If it is to the right, use a hex wrench and turn the screw on the right clockwise 1/4 turn
If the running belt is still not in the middle, repeat the above action until it is adjusted to the
middle.
3. After adjusting the running belt to the middle, adjust the speed to 12KM/H, and observe the
deviation of the running belt and the smooth running condition. If there is any deviation, repeat the
adjustment steps.
Caveat! Do not over tighten the rollers! This will result in permanent bearing damage!
If the above steps do not work, you will need to tighten the running belt.
T
L
T
- 11 -
L

Lubricating oil
When the treadmill is shipped from the factory, it is lubricated. However, the treadmill's lubricate is
often checked to help keep the treadmill in optimal use. The treadmill must be lubricated after one
year of use or 100 hours of operation.
After 30 hours or 30 days of use, pull up the running belt from the side and reach the surface of the
running platform as far as possible. If you feel silicone oil, you don't need to add lubricating oil; if
you touch the surface, it has a strong feeling of dryness. Please follow the instructions below for
lubrication.
Please use non-petroleum silicone oil
◆How to add lubricant to the treadmill
1. The position of the refuelling is in the running position of the lower surface of the running belt.
(As shown below)
2. Cut the mouth of the oil bottle into a small mouth, not too big, to be able to inject.
3. Lift the running belt to extend the oil bottle to the bottom of the running belt and inject the oil
into the middle of the running board. Put down the running belt, press the oil part by hand, turn the
running belt, and spread the oil evenly on the running belt;
4. After turning on the machine, wait a minute for the oil to be applied evenly and then use the
treadmill.
Clean up
Clean up frequently to ensure the life of the treadmill.
Warning: When cleaning the treadmill, the power must be cut off and the power cord must
be disconnected from the outlet.
After each use: Wipe the instrument and other parts with sweat and debris with a clean towel
or a damp cloth.
Note: Do not use corrosive materials; do not use liquid materials, so as not to damage
electronic components. Do not expose the electronic components to the sun.
Every week:Clean the ground once a week, and clean the dirt and other debris on the
- 12 -

ground.
Place your treadmill in a clean, dry environment, making sure the power switch is off and the plug
is not on the power outlet.
Move and fold
Wheels are installed to facilitate the movement of the treadmill. Be sure to disconnect the power and
fold the body before moving.
12. Failure analysis and processing
Fault problem and handling
The product is designed to be reliable and easy to use. If you have problems, please read the
following questions carefully.
Problem: Meter does not display
Solution: Check if the power cord is plugged in, the plug is loose, and the power switch is turned on.
Problem: Sudden power outage during use
Solution: Check if the power cord is securely connected and the over current protector is
disconnected.
Problem: Running belt is not in the middle
Solution: Check if the treadmill is placed on a flat surface and the running belt is adjusted. Refer to
the adjustment process of the running belt.
If the problem is not within the above, and you are not sure how to solve it, please contact us in time;
please do not handle it privately.
13. Important matters
warning
Before using this product, please consult your doctor and have a complete health check. You
should obtain a doctor's permission before frequent and intense exercise. If you experience any
discomfort with this product, please stop using it and consult your doctor. This product should be
used in the correct way. Please read the manual carefully before exercise.
If this product is left unattended or in use, please keep children and pets close to each other.
Wear appropriate clothing, including sports shoes, while exercising. Do not loosen your
clothes during exercise to avoid being caught by the machine.
Make sure all bolts and nuts are tightened when using the device. To maintain good use, all
sports equipment must be maintained on a regular basis. Before you start using:
How to get started with a fitness program depends on your physical condition. If you haven't
exercised for years, or you are overweight, you must slowly and gradually increase your
exercise
- 13 -

time, such as a few minutes per week.
At the beginning you may only be able to exercise for a few minutes at the target heart rate range.
In any case, your aerobic fitness will improve in about six to eight weeks. If it takes a long time to
improve, don't be discouraged. It is very important to exercise according to your personal pace.
One day you will be able to continue exercising for thirty minutes. Your aerobic fitness
• Consult your doctor before starting a exercise or training program, ask your doctor to review
the training and diet plan, and advise on your exercise plan.
• Set your goals with your doctor to ensure that the plan is realistic and you can start your
training program with ease.
• You can add some aerobics to your exercise plan, such as walking, jogging, swimming, dancing
or cycling. Always check the pulse. If you do not have an electronic heartbeat monitor, ask your
doctor how to measure the pulse from your wrist or neck. In addition, you must set the target heart
rate based on your age and physical condition.
Drink plenty of water during exercise. You must replenish moisture lost from excessive exercise to
prevent dehydration. Avoid drinking plenty of ice water or beverages. Drinking water or beverages
should be at room temperature.
Target Heart
Rate Measuring pulse:
To determine if your heartbeat is within the target heart rate, you must first know how to measure
the heart rate. The easiest way is to measure the carotid pulse between the trachea and the neck
muscles on both sides of the neck. Count the pulse for a few times in ten seconds, then multiply
the number by six, which is the number of heartbeats per minute.
How fast should your heartbeat be when doing aerobic exercise? It is fast enough to reach and
maintain the “target heart rate range”, which can be set by your age and physical condition. You
can find out the range of your target heart rate from the chart we provide below.
- 14 -

Little knowledge:Aerobic exercise?
Refers to any continuous exercise in which oxygen can be delivered to your body through your
cardiopulmonary effects. Aerobic exercise can improve your heart and lungs: this is the most
important muscle in your body. Aerobic fitness can be enhanced by exercising your body's large
muscle groups - including hands, feet or hips. During the process, your heart beats faster and
your breathing worsens. Aerobics should be an important part of your exercise program.
14. Whole body muscle distribution
map Target muscle group:
The muscles that are used in this product are mainly the lower body muscle groups, which
are shown in gray in the figure below.
A: shoulder muscles G: Muscles of leg
B: Pectoral muscles H: Cowl-muscles
C: Biceps brachii I: Triceps
D: Abdominal muscles J: Dorsal muscles
E: Forearm muscles K: Hip muscles
F: Quadriceps L: Thighs muscles
- 15 -

15. Stretching exercises
A successful exercise plan must include warmth, aerobic and soothing exercise. The
number of movements is at least two or three times a week, one day after a day of exercise,
and after a few months you can increase the number of sports to one to four to five days.
Warm-up is a very important part of your fitness exercise, before each exercise must first
warm-up, moderate warm-up allows your body to prepare the next more intense exercise,
because warm-up can help muscle heating and stretching, Improve blood circulation to
increase the pulse, the more oxygen into the muscle. And after the end of aerobic exercise,
repeated warm-up exercise can also reduce muscle soreness. We recommend the
following warmth and soothing exercise.
TOUCH TOES:
SHOULDER
Bend your body
EXERCISE:
slowly, and relax
Raise right shoulder to
back & shoulder. Try
right ear, count 1,
your best to bend as
release. In the
low as you can, and
meantime, raise the left
then keep still for 15
shoulder to left ear,
seconds.
count 2.
STRETCH INNER
STRETCH THIGHS:
THIGHS:
Sit on the floor, keep
Sit on the floor, bend
right leg straight. Bend
legs as in pic, foot to
left leg and make it
foot. Try to bend
close to inner right leg.
knees to floor, keep
Try best to stretch body
still for 15 seconds.
close to right toes, keep
still for 15 seconds.
Then do the same to left
legs.
WAIST
Extend of Shank:
EXTENDED:
Forward the body,
Extend arms to right
hands against the wall,
& left, and then raise
step forward the left
slowly, up to head.
leg. Keep right leg
Extend right arm to
straight, left foot
ceiling, keep still for
against the floor; and
1 second, feel the
then bend left leg, move
extension of right
hip against the wall.
arm. Then do the
Keep still for a while
same to left arm.
and do the same to the
other shank.
- 16 -

HEAD EXERCISE:
Head to the right,
count
1, feel the extension
of
the left side of neck;
then head back, let
the
jaw to ceiling and
open
your mouth, count 2;
head to left side,
count 3, Turn back
your head.
- 17 -

Table of contents
Other Durafit Treadmill manuals

Durafit
Durafit DFIHB001 Instruction Manual

Durafit
Durafit Beast Instruction Manual

Durafit
Durafit DFIHD001 User manual

Durafit
Durafit SPARK DFIHB003 Instruction Manual

Durafit
Durafit Heavy-Hike GV-4602F Instruction Manual

Durafit
Durafit AGILE User manual

Durafit
Durafit DFIHB002 User manual

Durafit
Durafit Tiger User manual

Durafit
Durafit DFISA001 Instruction Manual
Popular Treadmill manuals by other brands

BH FITNESS
BH FITNESS G6510O Instructions for assembly and use

Horizon Fitness
Horizon Fitness ELITE SERIES 1.2T user guide

York Fitness
York Fitness York Pacer 4700 instruction manual

Weslo
Weslo Cadence G 7.0 Cwl Treadmill Manual do utilizador

Paradigm
Paradigm T560 Service manual

Weslo
Weslo compact SL user manual