manuals.online logo
Brands
  1. Home
  2. •
  3. Brands
  4. •
  5. DXV
  6. •
  7. Indoor Furnishing
  8. •
  9. DXV Belshire D19080000.550 User manual

DXV Belshire D19080000.550 User manual

- 1 -
INSTALLATION INSTRUCTIONS
SAVE FOR FUTURE USE
Thank you for selecting DXV. To ensure this product is installed properly, please read these instructions carefully
before you begin. (Certain installations may require professional help.) Also be sure your installation conforms to local codes.
CAUTION: PRODUCT IS FRAGILE. TO AVOID BREAKAGE AND POSSIBLE INJURY HANDLE WITH CARE!
NOTE: Pictures may not exactly define contour of china and components.
!
RECOMMENDED TOOLS AND MATERIALS
Most of the procedures require the use of common tools and materials, which are available from hardware and plumbing
supply stores. It is essential that the tools and materials be on hand before work is begun.
Models: D19080000.550 — Marble Top Console - No Hole
D19080003.550 — Marble Top Console - Three Hole
D21065000.144 — Console Frame - Platinum Nickel
D21065000.427 — Console Frame - Satin Brass
D20205000.415 — Undercounter Lavatory
DXV Belshire™
Console Lavatory Kit
770283-100 (2/2020)
Product names listed herein are trademarks of AS America, Inc.
© AS America, Inc. 2020
Adjustable Wrench
Regular Screwdriver
Phillips Screwdriver
10'
Putty Knife
Drill Saber Saw
Tape Measure
8-#10 x 1"
Machine Screws
8-#10 x 2"
Wood Screws
Silicone
Supplied
Screws & Washers
Level
Basin Wrench
Channel LockPipe Wrench
Hacksaw
Tubing Cutter
For rough-in dimensions and supply line information, see spec page or web site
EXPLODED VIEW
1
2
7
6
3
4
5
ITEM # DESCRIPTION
1 Left Console Frame
2 Right Console Frame
3 (2) Horizontal Support Tubes
4 Marble Top
5 Left Side Marble Panel
6 Right Side Marble Panel
7 Glass Shelf
NOTE: Repair Part 770268-200.0070A Set
Screws & Allen Key
- 2 -
4
Place marble top upside down onto the cardboard spacer to cushion and prevent scratching. Do not place marble top on its
edges/corners or chipping can occur.
3
Remove lavatory from shipping container and carefully place in
center of marble top opening as an under counter mount
installation. Ensure lavatory is centered evenly over marble top
opening front to back, side to side and trace a pencil line
around the perimeter of the lavatory onto the underside of the
marble top (4).
NOTE: Ensure “Overflow” of lavatory is installed towards
“Front” of console.
770283-100 (2/2020)
Typical installation includes wall preparation, installation of faucet and pop-up drain, supplies to house water system.
Console Mounting Provisions - Whether the lavatory is used for replacement or new installation, the wall area behind the
console must be reinforced to provide secure mounting for the new unit.
Preparing Wall for Console Mounting
1. Remove wallboard/covering from designated area.
2. Toenail 2" x 6" (51 x 152 mm) cross piece between studs (or notch studs to accept a 1" x 6" (25 x 152 mm) crosspiece,
and attach securely). Place the console into desired position and check height for dimensional location of horizontal
crosspiece.
3. Replace wallboard/nished wall media.
WALL PREPARATION:
1
NOTCH STUDS
OR TOE-NAIL
DRAIN PIPE
WATER
SUPPLY
PIPES
CONSOLE
CROSS-PIECE
SUPPORT
INSTALLING
CROSS-PIECE
Refer to exploded view. Set aside items (1) & (2) (left & right console frames)
and 2 horizontal support tubes (3). Assemble support tube by sliding end of tube
over square connector. Set screw should be positioned on the bottom. Tighten
set screw using supplied hex wrench.
NOTE: There is a FRONT and REAR to the console frames that can be
identified by a slight opening on the top of the console frames
tubing, this is the rear.
2CONSOLE
REAR
OPENING
- 3 -
5
6
8
Remove lavatory and apply silicone sealant to the
inside of the traced pencil line of the marble top.
770283-100 (2/2020)
1/2 MIN.
Clip
Brass insert
#10-32 Machine screw
Place lavatory back onto underside of marble top (4) within the traced
pencil line. Further attach the sink to the marble top using the supplied
sink clips and screws at 4 corner locations to hold lavatory in place.
Carefully tighten all 4 screws alternately, do not overtighten.
Clean off any sealant that may have run out.
Place assembled metal console frame (1, 2 & 3) upside
down over marble top (4) and lavatory ensuring rear of
console is positioned to the rear of the marble top. (The
rear of the metal console frame can be identied by a
slight opening on the top of the console frames tubing,
this is the rear. Refer to section 2)
7
Ensure marble top and lavatory are still upside down and squarely
sitting on the cardboard spacer.
This will aid installing the assembled metal console frame (1 & 2) to
the marble top when installing mounting screws.
REAR OF CONSOLE
AND MARBLE TOP
- 4 -
In the United States:
DXV
One Centennial Avenue
Piscataway, New Jersey 08855
Attention: Director of Customer Care
For residents of the United States, warranty
information may also be obtained by calling
the following toll free number: (800) 227-2734
www.DXV.com
In Canada:
DXV
5900 Avebury Road
Mississauga, Ontario
L5R 3M3
Canada
Toll Free: 1-800-387-0369
Local: 905-306-1093
Fax: 1-800-395-1498
www.DXV.ca
In Mexico:
DXV
Via Morelos 330
Col. Santa Clara Coatitla
Ecatepec, Estado de México 55540
Toll Free: 01-800-8391200
www.DXV.mx
770283-100 (2/2020)
10
Align slots in metal console with holes in marble side panel using a small ashlight to visually see where the hole locations are,
position the marble side panel (5 or 6) with that of the slots on the metal console frame. Place a washer over one of the
supplied 10-32 x 1"screws and place through the slot of the metal console into one of the screw holes of the marble
side panel (5 or 6). 4 screws are required for each marble panel. Ensure rear of side marble panel (5 or 6) is ush to rear
of marble top (4). Tighten in place. Do not over tighten! Once side marble panel (5 & 6) are installed to marble top (4),
check to determine if the side panels are approximately at the same level as the top surface of the marble top.
Slight adjustment to the side marble panels can be made to accomplish this.
Install faucet and drain to sink according to manufacturer’s instructions.
Complete installation of drain and water supply lines per manufacturer’s instructions.
Position completed assembly upright against the wall over drain and water supply lines. Level marble top front to back and
side to side. Adjust level using adjustable feet on the bottom of metal console frame legs (1 & 2). Pre-drill 2 pilot holes in
the rear of the wooden marble top and screw marble top to wall into cross support or stud behind nished wall using
#10 x 2"wood screws (NOT SUPPLIED) to securely attach console to wall.
NOTE: The console must be fully attached to the wall.
After the drain and water supply lines have been connected and checked for leaks, carefully place the glass shelf (7)
onto the shelf support studs on the lower portion of the console assembly.
11
13
12
14
9
Position metal console rear side ush to the rear of the marble top (4).
Using supplied #10x2" wood screws and washers, screw console
frame to wooden portion of marble top (4) following predrilled pilot
holes. 4 screws are required for each side. Slots are provided in
the frame for alignment of frame to rear of marble.
Tighten into place.

This manual suits for next models

4

Other DXV Indoor Furnishing manuals

DXV Modulus D19075036LH Series User manual

DXV

DXV Modulus D19075036LH Series User manual

DXV Oak Hill D19005000.620 User manual

DXV

DXV Oak Hill D19005000.620 User manual

DXV Modulus D19035075 Series User manual

DXV

DXV Modulus D19035075 Series User manual

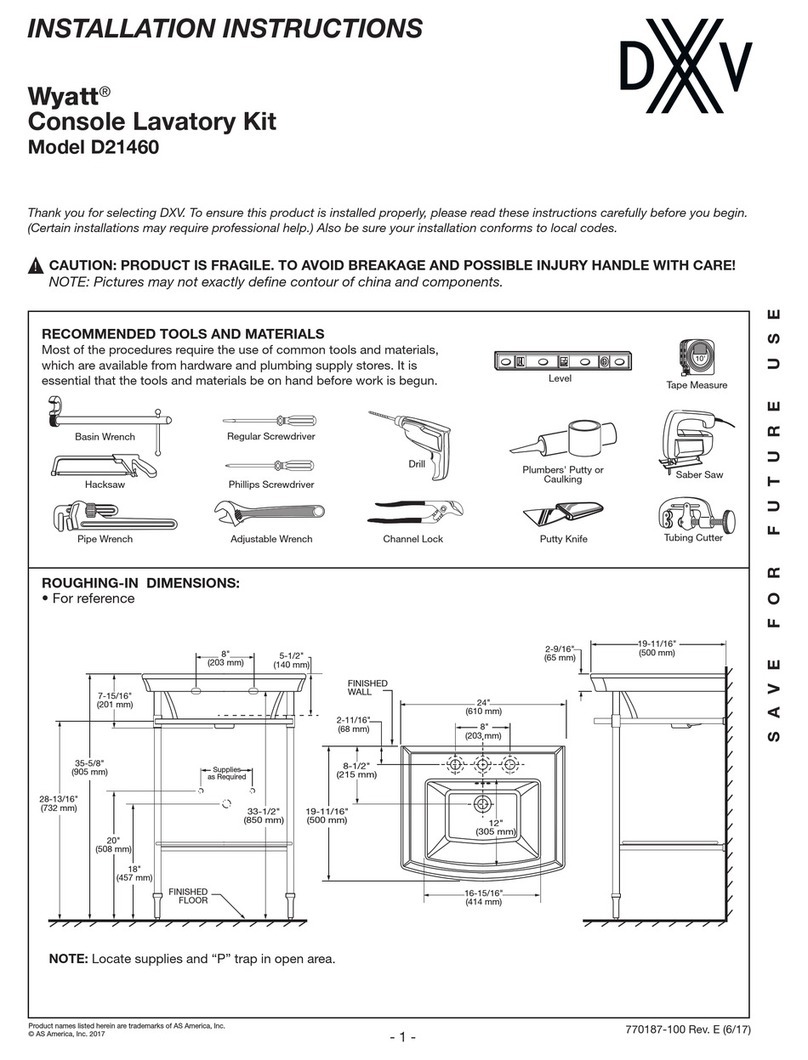
DXV Wyatt D21460 User manual

DXV

DXV Wyatt D21460 User manual

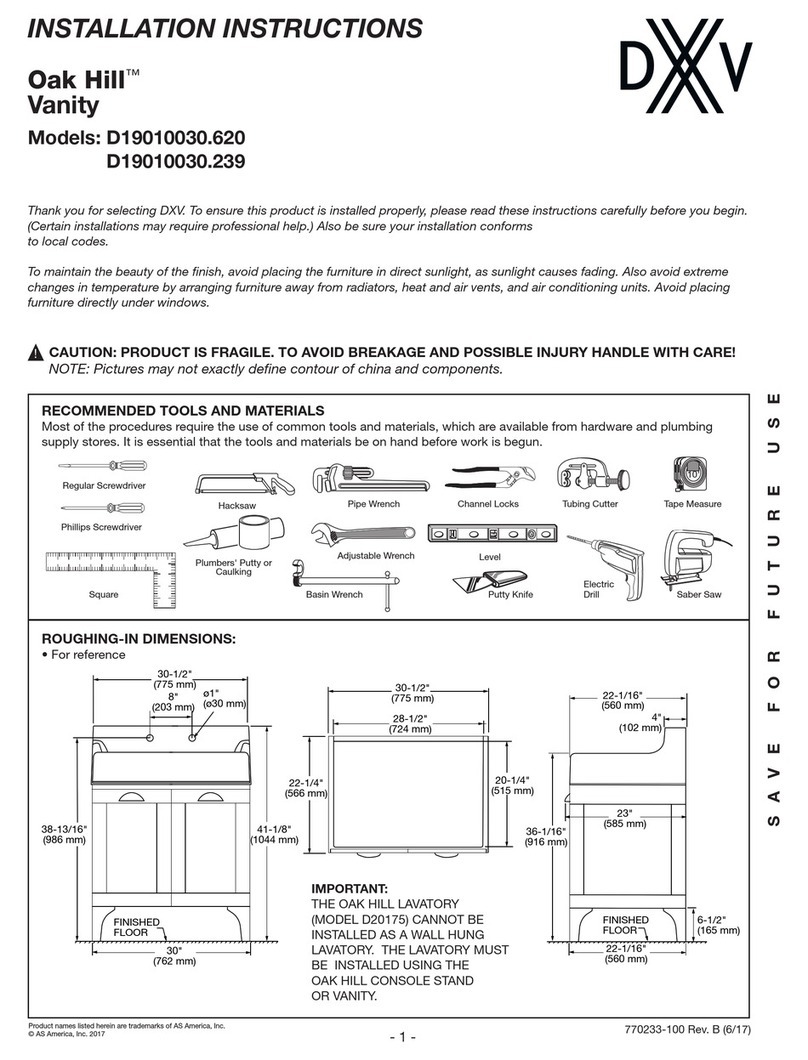
DXV Oak Hill Vanity D19010030.620 User manual

DXV

DXV Oak Hill Vanity D19010030.620 User manual

DXV Modulus D19025036 Series User manual

DXV

DXV Modulus D19025036 Series User manual

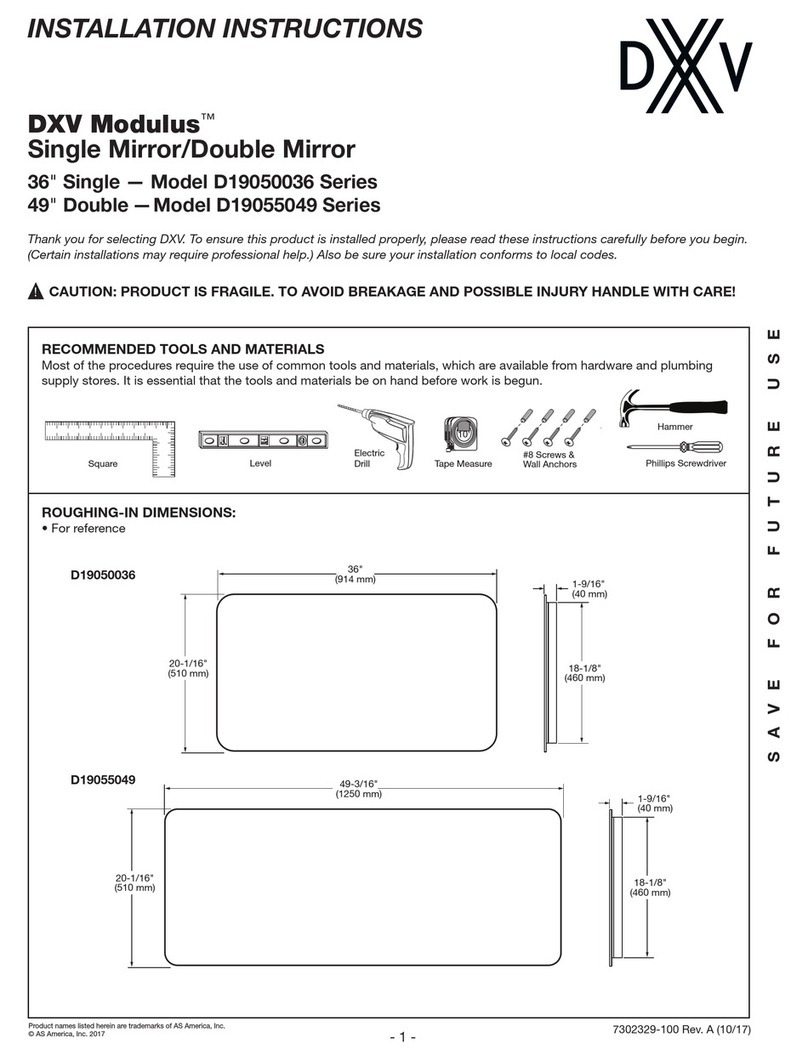
DXV Modulus D19050036 Series User manual

DXV

DXV Modulus D19050036 Series User manual

Popular Indoor Furnishing manuals by other brands

Furniture of America CM7182N Assembly instructions

Furniture of America

Furniture of America CM7182N Assembly instructions

Zaor Vision WS Assembly manual

Zaor

Zaor Vision WS Assembly manual

Rosewill RMS-19044 instruction manual

Rosewill

Rosewill RMS-19044 instruction manual

Decolav Sag Harbour FSW5118-8-509 manual

Decolav

Decolav Sag Harbour FSW5118-8-509 manual

BDI CORRIDOR Assembly instructions

BDI

BDI CORRIDOR Assembly instructions

Cooper Lighting Nimbus I 601-IP Specification sheet

Cooper Lighting

Cooper Lighting Nimbus I 601-IP Specification sheet

BIG FURNITURE WAREHOUSE BED IN A BOX Assembly instructions

BIG FURNITURE WAREHOUSE

BIG FURNITURE WAREHOUSE BED IN A BOX Assembly instructions

HOME RETAIL GROUP 842/8976 Assembly instructions

HOME RETAIL GROUP

HOME RETAIL GROUP 842/8976 Assembly instructions

Next Compton Chest Assembly instructions

Next

Next Compton Chest Assembly instructions

Home affaire Ascona 60566612 Assembly instructions

Home affaire

Home affaire Ascona 60566612 Assembly instructions

Create table 546Wd Assembly instructions

Create table

Create table 546Wd Assembly instructions

Whittier Wood 2376FST Assembly instructions

Whittier Wood

Whittier Wood 2376FST Assembly instructions

Rauch 34813.9370 Assembly instructions

Rauch

Rauch 34813.9370 Assembly instructions

VEVOR GSC4200 Assembly instructions

VEVOR

VEVOR GSC4200 Assembly instructions

DHP 5458096 Instruction booklet

DHP

DHP 5458096 Instruction booklet

Fulltime System FTS-5200 Series user manual

Fulltime System

Fulltime System FTS-5200 Series user manual

Franke M600HD Mounting instruction and Manual

Franke

Franke M600HD Mounting instruction and Manual

OFM Mesa Series Assembly instructions

OFM

OFM Mesa Series Assembly instructions

manuals.online logo
manuals.online logoBrands
  • About & Mission
  • Contact us
  • Privacy Policy
  • Terms and Conditions

Copyright 2025 Manuals.Online. All Rights Reserved.