manuals.online logo
Brands
  1. Home
  2. •
  3. Brands
  4. •
  5. DXV
  6. •
  7. Indoor Furnishing
  8. •
  9. DXV Modulus D19035075 Series User manual

DXV Modulus D19035075 Series User manual

- 1 -
INSTALLATION INSTRUCTIONS
SAVE FOR FUTURE USE
Product names listed herein are trademarks of AS America, Inc.
© AS America, Inc. 2015 7302267-100 (4/17)
RECOMMENDED TOOLS AND MATERIALS
Most of the procedures require the use of common tools and materials, which are available from hardware and plumbing
supply stores. It is essential that the tools and materials be on hand before work has begun.
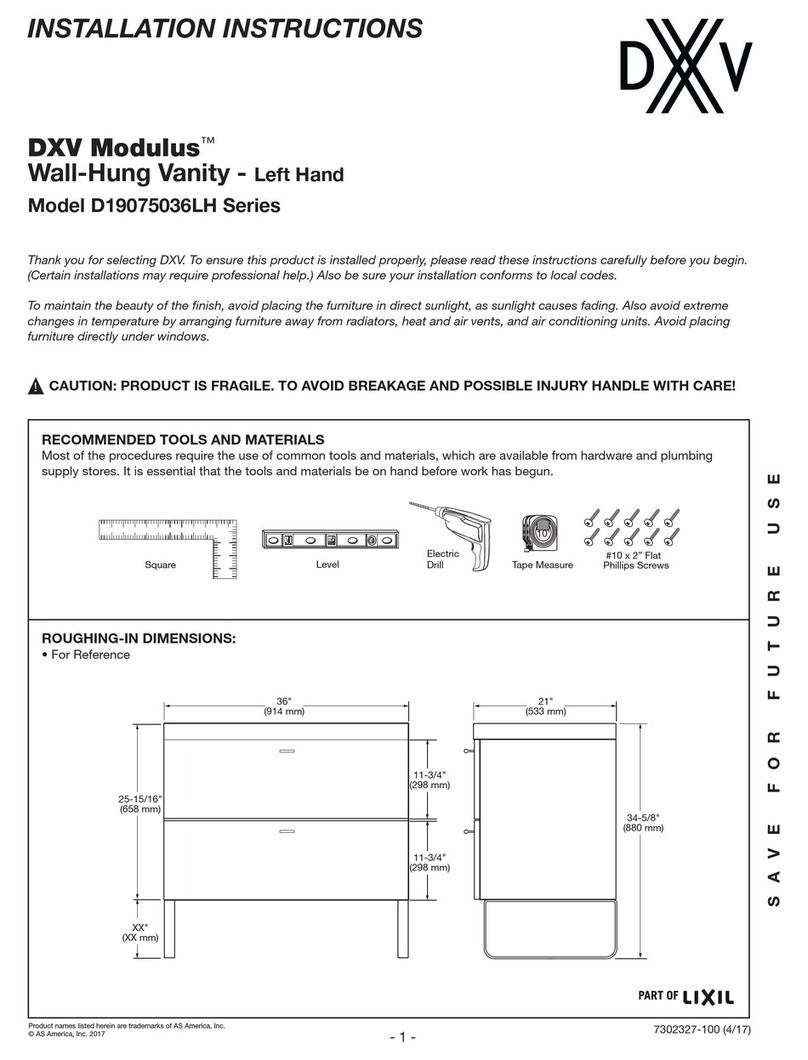
ROUGHING-IN DIMENSIONS:
• For reference
Thank you for selecting DXV. To ensure this product is installed properly, please read these instructions carefully before you begin.
(Certain installations may require professional help.) Also be sure your installation conforms to local codes.
To maintain the beauty of the finish, avoid placing the furniture in direct sunlight, as sunlight causes fading. Also avoid extreme
changes in temperature by arranging furniture away from radiators, heat and air vents, and air conditioning units. Avoid placing
furniture directly under windows.
CAUTION: PRODUCT IS FRAGILE. TO AVOID BREAKAGE AND POSSIBLE INJURY HANDLE WITH CARE!
!
75"Model D19035075 Series
90"Model D19040090 Series
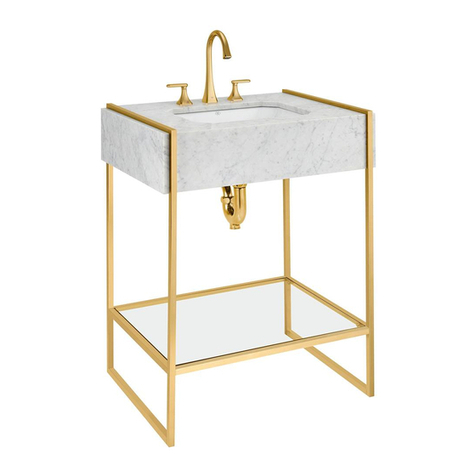
DXV Modulus™
Countertop Slab Single/Double
10'
Electric
Drill Tape Measure
#10 x 3/4" Flat
Phillips Screws
#14 1-1/2"
Lag Screw
Level
Square
22-3/4"
(578 mm)
90"
(2286 mm)
75"
(1905 mm)
2"
(51 mm)
2"
(51 mm)
22-3/4"
(578 mm)
- 2 - 7302267-100 (4/17)
In the United States:
DXV
One Centennial Avenue
Piscataway, New Jersey 08855
Attention: Director of Customer Care
For residents of the United States, warranty
information may also be obtained by calling
the following toll free number: (800) 227-2734
www.DXV.com
In Canada:
DXV
5900 Avebury Road
Mississauga, Ontario
L5R 3M3
Canada
Toll Free: 1-800-387-0369
Local: 905-306-1093
Fax: 1-800-395-1498
www.DXV.ca
In Mexico:
DXV
Via Morelos 330
Col. Santa Clara Coatitla
Ecatepec, Estado de México 55540
Toll Free: 01-800-8391200
www.DXV.mx
COUNTERTOP SLAB INSTALLATION
• Studded walls must be exposed for installation of brackets.
• Once a nal height for the sink is determined, subtract 6 -3/4"(155 mm)
to mark the bottom area of the bracket. Figure 1.
• Each bracket needs to be attached to a 2x4 stud. If a stud is
not available for the bracket location selected, one must be
provided for support of the bracket. Figure 2.
• Mount each bracket centerline of the 2x4 using
#14 1-1/2"Lag Screws. Ensure each bracket is level
and mounted at the correct predetermined height.
• Install all waterproof drywall as usual and around each
bracket before installing countertop slab. Figure 3.
• Place countertop slab on top of brackets and up against
surface of wall with no gaps and level. Also ensure that
a bracket does not interfere with the bottom of the sink
or the drain/water supply once installed. Figure 4.
• Attach the countertop slab to the brackets using
#10-3/4"wood screws. Screws should be installed only
through the large hole under the bracket.
Figure 1.
Figure 2.
MARK HOLES BEFORE REMOVING
BRACKET AND DRILLING 3/32" PILOT
HOLE
FINISHED WALL
FINISHED WALL
Figure 4.Figure 3.
- 1 -
INSTALLATION INSTRUCTIONS
SAVE FOR FUTURE USE
Product names listed herein are trademarks of AS America, Inc.
© AS America, Inc. 2015 7302268-100 Rev. A (8/17)
RECOMMENDED TOOLS AND MATERIALS
Most of the procedures require the use of common tools and materials, which are available from hardware and plumbing
supply stores. It is essential that the tools and materials be on hand before work has begun.
ROUGHING-IN DIMENSIONS:
• For reference
Thank you for selecting DXV. To ensure this product is installed properly, please read these instructions carefully before you begin.
(Certain installations may require professional help.) Also be sure your installation conforms to local codes.
To maintain the beauty of the finish, avoid placing the furniture in direct sunlight, as sunlight causes fading. Also avoid extreme
changes in temperature by arranging furniture away from radiators, heat and air vents, and air conditioning units. Avoid placing
furniture directly under windows.
CAUTION: PRODUCT IS FRAGILE. TO AVOID BREAKAGE AND POSSIBLE INJURY HANDLE WITH CARE!
!
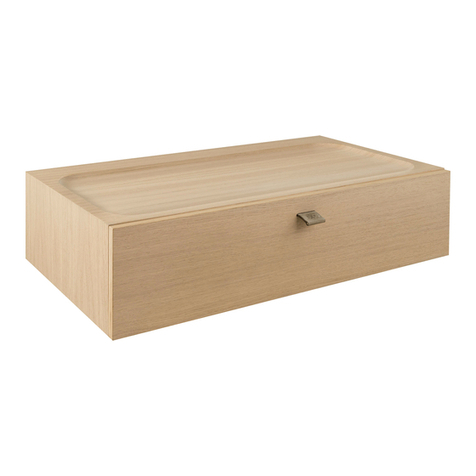
Model D19025036 Series
DXV Modulus™
Wall-Hung Drawer Unit
10'
Electric
Drill Tape Measure
#10 x 2" Flat
Phillips Screws
¼" x 1 ½"
Lag Screw
Level
Square
36"
(914 mm)
21"
(533 mm)
8-9/16"
(218 mm)
In the United States:
DXV
One Centennial Avenue
Piscataway, New Jersey 08855
Attention: Director of Customer Care
For residents of the United States, warranty
information may also be obtained by calling
the following toll free number: (800) 227-2734
www.DXV.com
In Canada:
DXV
5900 Avebury Road
Mississauga, Ontario
L5R 3M3
Canada
Toll Free: 1-800-387-0369
Local: 905-306-1093
Fax: 1-800-395-1498
www.DXV.ca
In Mexico:
DXV
Via Morelos 330
Col. Santa Clara Coatitla
Ecatepec, Estado de México 55540
Toll Free: 01-800-8391200
www.DXV.mx
- 2 - 7302268-100 Rev. A (8/17)
DRAWER INSTALLATION
• Studded walls must be exposed for installation of brackets.
• Provide suitable 2x8 horizontal brace at least 36" long, notched and
ush to exposed studs where the drawer will be mounted. Figure 1.
NOTE: Remove bracket mounting screws to remove brackets from drawer.
• Brackets must be spaced at 34-1/2" apart on the 2x8 horizontal brace
and level. Mark these hole locations on the 2x8. Figure 2.
• Drill 3-32" pilot holes for each of the holes where the 1/4 x 1-1/2"
Lag Screws will go.
• Install each bracket using the 1/4 x 1-1/2" Lag Screws ensuring the
brackets are level and at the required 34-1/2" distance from each other.
• Finish covering the wall with waterproof drywall.
Do not cover the brackets mounting base area.
• Unpack unit carefully, taking care not to damage the corners, unit is heavy.
• Remove the drawer from the cabinet by rotating the plastic clips underneath
the drawer rails, then pull drawer off the rails.
• Place the cabinet section of the drawer into the mounting brackets and
ensure the cabinet sits ush against the surface of the wall.
• Drill a 1/8" pilot hole through each of the brackets holes into
the wooden cabinet.
CAUTION: DO NOT DRILL THROUGH THE SIDE OF THE CABINET!
• Use a #10 x 1-3/4" wood (preferably MDF) screws to attach the cabinet
to the bracket.
• Place the drawer back onto the cabinet rails and latch the plastic clips back
into place to secure the drawer to the cabinet rails.
Figure 1.
Figure 2.
2x8 BRACE
34-1/2" D.
BRACKETS
34-1/2"
(876 mm)

This manual suits for next models

2

Other DXV Indoor Furnishing manuals

DXV Modulus D19075036LH Series User manual

DXV

DXV Modulus D19075036LH Series User manual

DXV Modulus D19050036 Series User manual

DXV

DXV Modulus D19050036 Series User manual

DXV Oak Hill Vanity D19010030.620 User manual

DXV

DXV Oak Hill Vanity D19010030.620 User manual

DXV Modulus D19025036 Series User manual

DXV

DXV Modulus D19025036 Series User manual

DXV Oak Hill D19005000.620 User manual

DXV

DXV Oak Hill D19005000.620 User manual

DXV Belshire D19080000.550 User manual

DXV

DXV Belshire D19080000.550 User manual

DXV Wyatt D21460 User manual

DXV

DXV Wyatt D21460 User manual

Popular Indoor Furnishing manuals by other brands

Amart Furniture HERCULES 66097 Assembly instruction

Amart Furniture

Amart Furniture HERCULES 66097 Assembly instruction

Ballard Designs Savoy MB488 manual

Ballard Designs

Ballard Designs Savoy MB488 manual

Costway HW66352 user manual

Costway

Costway HW66352 user manual

Safavieh Furniture AMH6579 quick start guide

Safavieh Furniture

Safavieh Furniture AMH6579 quick start guide

Naomi Home Taylor Assembly instructions

Naomi Home

Naomi Home Taylor Assembly instructions

Germania 3255 Assembly instruction

Germania

Germania 3255 Assembly instruction

Furniture of America CM7152D quick start guide

Furniture of America

Furniture of America CM7152D quick start guide

Otto ERXT42 Assembling Instruction

Otto

Otto ERXT42 Assembling Instruction

studioduc knox tall bookcase Assembly instructions

studioduc

studioduc knox tall bookcase Assembly instructions

Article TIMBER SKU14574 Assembly instructions

Article

Article TIMBER SKU14574 Assembly instructions

Furniture of America YNJ-2165C21 Assembly instructions

Furniture of America

Furniture of America YNJ-2165C21 Assembly instructions

Manhattan Comfort Hampton quick start guide

Manhattan Comfort

Manhattan Comfort Hampton quick start guide

Boahaus 4204 Assembly instructions

Boahaus

Boahaus 4204 Assembly instructions

Allseating ENTAIL Disassembly instructions

Allseating

Allseating ENTAIL Disassembly instructions

Linon 6280SF-AB-KD-U Assembly instructions

Linon

Linon 6280SF-AB-KD-U Assembly instructions

LDI Spaces SAFCO Task Master 5100 Assembly instructions

LDI Spaces

LDI Spaces SAFCO Task Master 5100 Assembly instructions

Essential Home chest of drawers user guide

Essential Home

Essential Home chest of drawers user guide

Burrow RELAY DINING TABLE Assembly instructions

Burrow

Burrow RELAY DINING TABLE Assembly instructions

manuals.online logo
manuals.online logoBrands
  • About & Mission
  • Contact us
  • Privacy Policy
  • Terms and Conditions

Copyright 2025 Manuals.Online. All Rights Reserved.