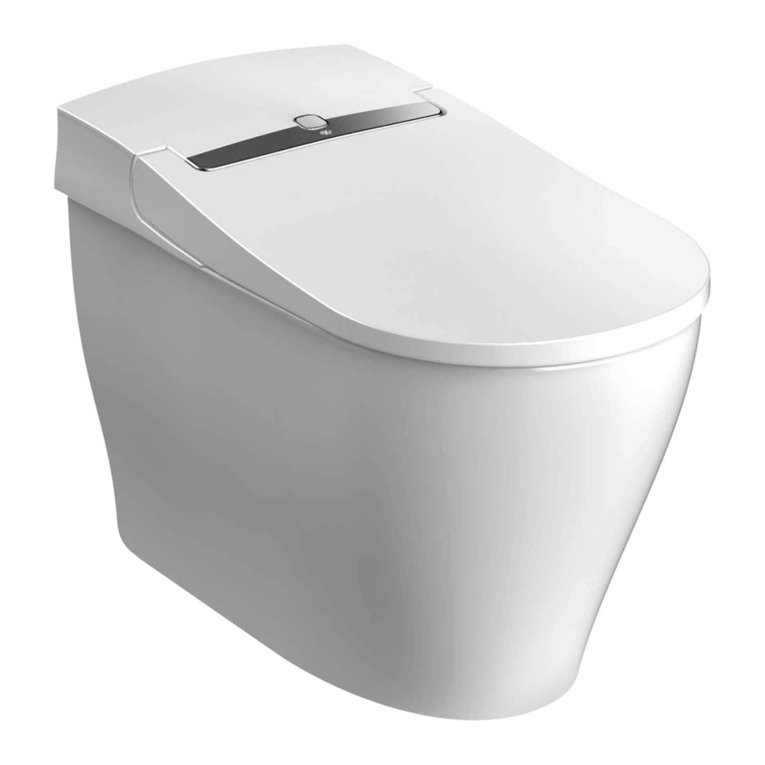
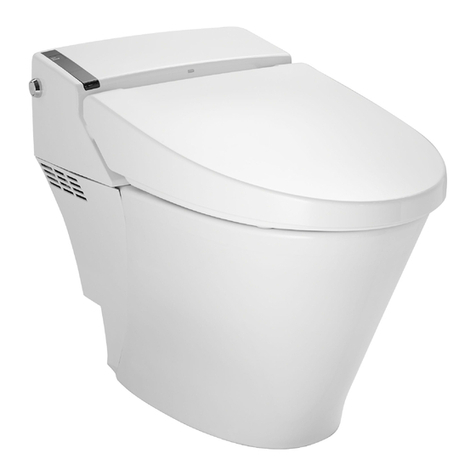
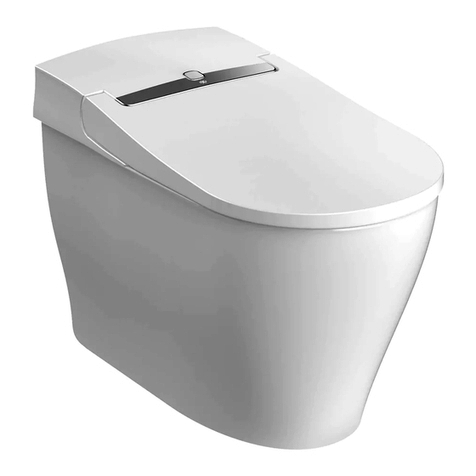
DXV AT200 User manual


TABLE OF CONTENTS

TABLE OF CONTENTS

BE SURE TO FOLLOW THE IMPORTANT SAFEGUARDS
Failure to follow the IMPORTANT SAFEGUARDS may
result in serious accidents in some circumstances.
Each of these items is extremely important for safety
and should be strictly observed.
In the event that an accident occurs as a result of
improper usage, DXV will assume no responsibility
for damages.
This product is assumed to be used by persons, such
as elderly persons, persons with limited mobility or
illness and children.
This product usage includes direct contact with the skin.
To ensure proper usage of this product, please read the
manual carefully before using it.
IMPORTANT SAFEGUARDS
READ ALL INSTRUCTIONS BEFORE USING
When using the product - especially in the presence
of children - you should always observe the following
safety instructions.
Cannot be held liable for damages that are the result of
disregarding these instructions.
In order to illustrate varying degrees of severity, the
following terms are used:
DANGER
Denotes an immediately hazardous
situation, which may result in death or
severe injury if not prevented.
WARNING
Denotes a potentially hazardous situation,
which may result in death or severe injury
if not prevented.
CAUTION
Denotes a potentially hazardous situation,
that may result in mild to moderate injuries
and/or damages to the product and/or other
items and property if not prevented.
DANGER
Risk of electric shock (risk of death!):
Improper connection of the power plug or sock-
et can result in a risk of electric shock.
Do not install this product
in a wet or damp location,
such as inside a shower
room or steam room, as
this may lead to electric
shock or re.
Do not pour water or cleaning agents into
or onto the back housing where electronics are
stored. It could cause electric shock or res.
Do not use while bathing.
Do not place or store product where it can fall
or be pulled into a tub or sink.
Do not place in or drop into water or other
liquid.
Do not reach for a product that has fallen into
water. Unplug immediately.
WARNING
Risk of burns, electric shock, res and/
or personal injury:
The device must be disconnected from the
power supply for any and all installation and
maintenance work and for repairs.
This also applies in the event that you nd
damages on the power supply line or on
the product itself.
Please ensure this by
– setting the fuses (Breakers) of the electrical
installation into the off position or
– by completely removing the screw-in
fuses of the electrical installation or
– by completely pulling the power plug
(if any) out of the wall socket.
When doing so, do not pull on the cord, but
pull on the power plug instead.
Do not connect or disconnect the power plug
with wet hands, as this may cause electric
shock.
Hold the power plug when connecting or
disconnecting it. If you hold the cord, the plug
or cord may be damaged, resulting in electric
shock or re.
Disconnect the power plug periodically and
clean it with a dry cloth, as dust accumulated
on the power plug may cause re
This product should only be connected to
AC120V. Do not use an extension cord or any
other kind of adapter to connect this product to
an outlet.
Completely insert the power plug into the
electrical outlet, as failure to do so may
cause electric shock or re.
Do not use a loose outlet, as this may
cause electric shock or re.
Connect this product to a properly grounded
outlet only. See Grounding Instructions.

BE SURE TO FOLLOW THE IMPORTANT SAFEGUARDS
GROUNDING INSTRUCTIONS:
This product should be grounded in the event
of an electrical short circuit, grounding reduces
the risk of electric shock by providing an
escape wire for the electric current. This
product is equipped with a cord having a
grounding wire with a grounding plug. The
plug must be pugged into an outlet that is
properly installed and grounded.
GROUNDED
OUTLET
GROUNDING
PIN
DANGER
Improper use of the grounding plug can
result in a risk of electric shock.
If repair or replacement of the cord or plug is
necessary, do not connect the grounding wire
to either at blade terminal. The wire with insu-
lation having an outer surface that is green with
or without yellow stripes is the grounding wire.
This product is factory equipped with a specic
electric cord and plug to permit connection to a
proper electric circuit. Make sure that the prod-
uct is connected to an outlet having the same
conguration as the plug. No adapter should
be used with this product. Do not modify the
plug provided-if it will not t the outlet, have the
proper outlet installed by a qualied electrician.
If the product must be reconnected for use on a
different type of electric circuit, the reconnection
should be made by qualied service personnel.
Never use while sleeping or drowsy.
WARNING
Risk of burns, electric shock, res and/
or personal injury:
If the SpaLet®seat is used for a long period
of time without setting the seat temperature to
“OFF”, the user may suffer a low-temperature
burn. These precautions should especially be
observed when any of the following use
the SpaLet.
– Children
– Elderly persons
– Persons with an illness
– Persons with sensitive skin
– Persons on medication that may cause drows-
iness
– Persons who are under the inuence
of alcohol
– Persons who are suffering from exhaustion
Check the temperature settings of the water and
the dryer air before each use. Set the air dryer
temperature to the lowest level if you intend to
use this feature for a prolonged period of time.
There is a risk of burns, if this feature is used for
a prolonged period of time at high temperature
settings. This applies particularly to the following
people: children, the elderly, ill persons, persons
with sensitive skin and those under the inuence
of alcohol and overly tired people.
Do not use outdoors and do not operate in a
space where aerosol spray is used or
concentrated oxygen is being administered.
It may cause a malfunction or loss of glossiness.
Make sure that no items or foreign objects
obstruct any openings (air outlets, hoses, etc.).
Remove any obstructions immediately to
prevent possible hazards and damages.
Observe the following instructions if you
are using batteries.
– Make sure to use the right poles (+ /-)
when inserting the batteries.
– Remove the batteries from the remote
control if you won’t use the SpaLet for an
extended period of time.
– Do not leave expired batteries inside the re-
mote control, as they can corrode which could
cause damages to your health or the remote
control.
– Batteries do not belong in the household
waste! Discard batteries in compliance with
your local regulations. Battery leakage may
cause re.
– Keep batteries away from children.
Batteries are not toys. Contact a physician
immediately in the event of a battery being
swallowed accidentally.
– If your skin comes into contact with the
liquid inside a battery, rinse immediately with
copious amounts of water.
– If spilled battery uid comes into contact with
the eyes, immediately rinse with clean water
without rubbing. The liquid can cause
blindness. Talk to a doctor.
GROUNDED
OUTLET
GROUNDING
PIN

BE SURE TO FOLLOW THE IMPORTANT SAFEGUARDS
Be mindful of the following when handling
batteries:
– Do not store batteries carelessly together with
other metal objects (necklaces,
hair pins etc.).
– Please do not mix new and old batteries, but
remove both batteries at the same time as
they will discharge otherwise. Only use batter-
ies of the same type.
– Do not recharge batteries, short them, open
or damage them by force and do not bring
them into contact with re, water or high tem-
peratures. They could otherwise explode or
leak and thereby cause damages.
Do not try to open or repair the SpaLet®on your
own. Do not make modications or install
additional items. The SpaLet contains
energized power lines. Upon being opened,
there is a risk to your life! Repairs must only be
performed with original replacement parts and
accessories by certied electrician. Improper
installation and maintenance work or repairs
can create substantial hazards to the user.
Do not use near electronics and medical
equipment with a weak signal. There is a
danger that electrical malfunction may
cause an accident.
Use this product only for its intended use
as described in the manual. Do not use
attachments not recommended by the
manufacturer.
If water leaks from the SpaLet seat or the water
supply line, disconnect the SpaLet from the
power supply and close the water cutout valve.
There is a risk of electric shock, re and
ooding.
If there is any indication of damages to the
SpaLet, disconnect immediately from the power
supply and contact the customer service.
This product should only be connected to
a potable water supply line. Failure to do
so will cause problems in the operation.
Keep the power supply cord away from
heated surfaces. (e.g. surface radiators)
If there is a possibility of water freezing in the
SpaLet, be sure to employ the "In Case You Will
Not Be Using This Product for a Long Time"
procedure. Damage due to freezing may cause
re or ooding.
CAUTION
Risk of minor injuries and property
damage:
For care of the plastic parts,
use a mild detergent. There
is a danger of electric shock,
re and/or injury due to
damage to the plastic parts.
Do not use chlorine-based
detergent, acidic detergent, or
disinfectant for cleaning the
ceramic parts. It may cause
malfunction and damage due to
the vaporized gas.
Make sure that the clamp ring is
placed rmly onto the water
supply hose. There is a risk of
water spilling if the hose slips
from the untightened clip.
Do not supply with water other than potable
water. It may cause electric shock, re and skin
inammation due corrosion of electronic parts
inside the seat unit.
Do not stand on the lid or lean on
the SpaLet seat. There is a risk
of injury and damages to the
device.
Keep ame sources away from the product.
There is a risk of re damage.
If you identify damage on the SpaLet seat, do
not touch or plug in the SpaLet, do not touch
these areas as there is a risk of personal injury.
Contact Customer Service.

BE SURE TO FOLLOW THE IMPORTANT SAFEGUARDS
Do not supply the SpaLet®with a hot water, or
do not expose the SpaLet to any impact. There
is a risk of injury from damaged parts. There is
a danger of damage or water leakage
Regularly inspect the device for visible damages.
Damages on the device can pose a risk to your
safety. Never switch on a damaged device.
If you will not be using this product for a long
time, close the water shutoff valve and drain the
water from the SpaLet, and then, turn off the
power at the power breaker or disconnect the
power plug from the outlet. There is a danger of
re or ooding due to freeze damage. There is a
danger of skin inammation due to dirty water.
When the device is used by children, the elderly
or persons with mobility impairments you must
ensure that they won’t fall off. There is a risk of
injury and damages to the device.
The on-site electrical installation and connecting
the device to the power mains must only be
performed by authorized and qualied
electricians, who are well versed in the locally
applicable regulations and supplemental
requirements and know the requirements
of the local utility providers extensively.
Improper installation and maintenance
work or repairs can create substantial hazards
to the user, for which we cannot be held liable.
Do not apply impact to the
clip ring or pull it when
cleaning the SpaLet, as the
clip ring may break and
the water supply hose may
come off, resulting in
ooding.
Turn off the power at the power breaker or
disconnect the power plug from the outlet when
cleaning. Failure to do so may cause electric
shock. (Ensure the power is turned on when
using the nozzle cleaning function.)
This product is not intended to be used by
children aged under 8 years old, persons
with physical and/or mental disabilities, or
persons lacking experiences and knowledge
without the supervisions and instructions of
the person responsible for the safety and
understands possible hazards.
Children shall not play with the product.
Do not bend or crush the water supply hose,
as this may result in water leakage
and ooding.
Note the following when using the strainer. If
foreign materials are attached to the O-ring, it
may cause ooding due to water leakage.
– Close the water shutoff valve when
removing the strainer.
– When installing the strainer, tighten it
fully so there is no gap.
– Check that the O-ring is free from
foreign materials when attaching it.

PRECAUTIONS FOR PREVENTING FAILURE
HANDLING PRECAUTIONS
Do not expose the SpaLet®to direct
sunlight. It can cause discoloration of
the plastic parts. Direct sunlight can
furthermore lead to the remote control
and the sensor not working properly.
Do not open and close the SpaLet seat
or lid roughly. It may cause malfunction
of auto open/close, cracking or electrical
leakage.
Do not pour water or cleaning
agents onto the remote control.
It could cause it to malfunction.
Never block the air openings of the
product. It may cause malfunction.
Do not use electrical heaters in the
vicinity of the SpaLet. It could cause
discoloration of the plastic parts or re.
Do not use any paper other than toilet
paper. Be careful not to drop any
foreign materials in the bowl, as they
may clog the drain pipe. If you drop,
pick it up before ushing.
If the SpaLet should become clogged,
use a plunger to remove the clogging.
Do not ush the SpaLet and do not ll
water into it by other means (e.g. with
a bucket) until the clogging is removed.
Waste water spilling over constitutes
a risk of electric shock and damages
to the device (electronic components
inside the SpaLet seat can get
damaged).
Do not operate the remote control with wet hands. It
could cause it to malfunction.

INTRODUCTION
CONTROL AND BUTTONS
■MAIN UNIT
9
11
12
2
1
4
5
8
7
14
13
6
3
10
1. SpaLet®seat lid (Pages 15, 20, 37-40)
2. Upper body sensor
3. Lower body sensor, seating sensor
4. SpaLet seat (Pages 15, 20, 37-40)
5. Dust lter of the odor absorption cartridge (Page 43)
6. Nozzle (for feminine washing) (Page 44)
7. Nozzle (for posterior washing) (Page 44)
8. SpaLet bowl (Page 15, 41)
9. Top cover (Page 37)
10. AC power plug (Page 14)
11. Water shutoff valve (Pages 10, 14, 46, 47)
12. Strainer (Pages 10, 46, 47)
13. Water supply hose (Page 30)
14. Flush button (Page 15)
HINT
• When ushing the SpaLet manually, open the top cover and operate the ushing lever. (Page 32)
9
11
12
2
1
4
5
8
7
14
13
6
3
10

INTRODUCTION
■WATER SHUTOFF VALVE
1
2
3
1. Water shutoff valve (Pages 10, 14, 46, 47)
2. Strainer (Pages 10, 46, 47)
3. Open/close handle (Pages 14, 46, 47)
NOTES:
• The open/close handle is used when stopping the washing water. Be sure that it is fully opened.
• Rotate the water shutoff valve seven turns to fully open it.
• Be sure that the water shutoff valve is closed before removing the strainer. When removing the strainer,
a small amount of water will spill. Place a cloth under the strainer. (Page 46)
1
2
3

INTRODUCTION
■REMOTE CONTROL
1234
5
6
78910111213
1. SpaLet seat open/close button
2. Flush (full) button
3. Flush (light) button
4. Screen
The screen changes according to usage.
5. Power/home button
Turns on/off, or goes to the home menu.
6. Set/next button
Changes the screen display.
7. Function buttons
Button operation changes according to the screen display.
8. Nozzle position adjust buttons
Adjusts the nozzle position backwards or forwards.
9. Water pressure adjust buttons
Adjusts the water pressure for posterior, posterior-gentle, and feminine washing functions.
10. Feminine washing (for women) button
Provides feminine washing for women.
11. Posterior washing - gentle button
Provides a gentle spray for posterior washing.
12. Posterior washing button
Provides a strong spray for posterior washing.
13. Stop button
Stops the washing and dryer functions.
HINT
• The power off screen will be displayed when power is turned off by pressing the Power/Home button.
• When there is no operation for 30 seconds, the screen returns to the home menu. In this case, start the
operation from the beginning.
• A residual image may appear on the screen when the remote control is used in a low temperature
environment. This is not a malfunction. The screen display will return to normal state when the
temperature of the environment becomes normal.
• The screen may display a reversed black and white screen once in a while. This is not a malfunction.
1234
5
6
78910111213

INTRODUCTION
HOME MENU
DURING WASHING
Posterior Washing Feminine Washing
ON
OFF
ON
OFF
ON
OFF
ON
OFF
ON
OFF
ERROR MESSAGE
During the power-OFF
Press the power button.
Replace the battery.
-Slide up the remote
control and replace the
battery cover on the back.
Connect the remote control
with the toilet seat.
-Bring the remote control
close to the toilet and
press the setting button.
Can not connect with
the toilet.
-power on and operate
near the toilet.
ON
OFF
ON
OFF
ON
OFF
ON
OFF
ON
OFF
During the power-OFF
Press the power button.
Replace the battery.
-Slide up the remote
control and replace the
battery cover on the back.
Connect the remote control
with the toilet seat.
-Bring the remote control
close to the toilet and
press the setting button.
Can not connect with
the toilet.
-power on and operate
near the toilet.

INTRODUCTION
1
Press the (set/next) button
2
Press the buttons below the screen
1
Press the
(s
et/nex
t)
button
ONLY LID
SEAT & LID
OFF
2 sec
6 sec
10 sec
15 sec
OFF
Auto flush after standing up
Auto open/close mode
Intermittent flushing (Anti-freeze function)
Use for automatic drain
Pairing the remote and the SpaLet
Returns to default setting
Power saving mode
Anti-bacteria ion
Ion blue light mode
Odor absorption function
Button operation sound
Seat heater auto off
Flash of the of the remote
Reset to initial setting?
YES NO
Each press changes the
display from [SETTING 1] to
[SETTING 5].
The corresponding setting is
displayed.
SPRAY STRENGTH
DRYER
DRYER
TEMP SEAT
TEMP WATER
TEMP
SETTING 1
6SEC
AUTO OPEN
/CLOSE
ONLY LID
AUTO
FLUSH
1 2
1
2
1
2
3
4
1
2
3
4
1
2
3
Cleaning nozzle
Pre-wash function
Turns on the light mode
1
2
3
SETTING 3
ION
BLUE
LIGHT
ON
ODOR
ABSORPTION
ON
POWER
SAVE
OFFOFF
ION
1 2 3 4
OFF
BOWL
ROOM
ON
OFF
ON
OFF
ON
OFF
ON
OFF
AUTO
ON
OFF
SETTING 4
KEYPAD
SOUNDS
ON
SEAT
HEATER
AUTO OFF
OFF
STOP
LED
ON
1 2 3
ON
OFF
ON
OFF
ON
OFF
SETTING 5
RESET
INTER-
MITTENT
FLUSH
OFF
AUTO-
MATIC
DRAIN
SYNC
1 2 3 4
ON
OFF
SETTING 2
PRE WASH
ON
NIGHT
LIGHT
AUTO
21 3
CLEAN-
ING
NOZZLE
HOME MENU

INTRODUCTION
PREPARATION BEFORE USE
■CHECKING THE WATER SHUTOFF VALVE AND POWER
Before using the SpaLet®for the rst time, check the following items.
1. Open the water shutoff valve.
OPEN
Water shutoff valve
Open/close handle
• If the water shutoff valve is closed, turn the open/close handle counterclockwise.
• Rotate the water shutoff valve seven turns to fully open it.
• Turn the open/close handle 90 degrees from fully opened position to prevent the open/close handle
from getting stuck.
• If the open/close handle is hard to turn, turn the water shutoff valve while holding it with a dry towel, etc.
2. If attaching the power plug, connect the power plug to the outlet.
Power plug
NOTE:
• Please wait for about 10 seconds before connecting the power plug again.
OPEN
Water shutoff valve
Open/close handle
Power plug

HOW TO USE
GENERAL USE
■BASIC OPERATIONS
OPENING THE SpaLet®SEAT LID / SpaLet SEAT
AUTO MANUAL
The lid opens automatically when you stand in front of
the SpaLet.
The seat opens by pressing
the (open/close) button
on the remote control.
PRE-WASH
When you sit on the seat, a small amount of water washes the bowl to minimize stain
accumulation.
1 WASHING
WASH ADJUST STOP
Posterior washing Water
Pressure
Nozzle
Position
Stop spray
Posterior washing-
gentle
Feminine (for women) Water
temperature
2 DRYING
DRY ADJUST STOP
Dry with warm air Dry temperature
Stop warm
air
3 FLUSHING
AUTO
PRESS THE FLUSH BUTTON ON THE SEAT UNIT
REMOTE
Flushing starts automatically when you stand up.
A short beep sounds from the seat unit and the SpaLet is flushed.
Flush (full)
Flush (light)
AUTO MANUAL
The lid closes automatically when you leave the SpaLet.
The seat closes by pressing
the (open/close) button
on the remote control.
FLUSH
BUTTON
ON OTHER
SIDE
4 FLUSHING - FLUSH BUTTON OPERATION
CLOSING THE SpaLet SEAT LID / SpaLet SEAT

HOW TO USE
■WASHING WITH THE SpaLet®
321465
1. Posterior washing button: Washes posterior part
2. Posterior washing-gentle button: Washes posterior part gently
3. Feminine washing for women: Washes feminine part
4. ■ Stop button: Stops washing
5. Spray strength adjust button (+/-): Adjusts spray pressure (6 levels) during washing
6. Nozzle position adjust button (∧/∨): Adjusts nozzle position
(5 levels: default/2 levels forward/2 levels backward) during washing
CHANGING THE WASHING MODE
Press the buttons below the indicators on the screen during washing.
1
1 2 3
1. Super wide : Washes an extended range
Narrow : Moves back and forth over a short span
2. Massage : Alternates the water pressure between two levels for massaging effect
3. Water temp : Adjusts the water temperature (6 levels: of water temperature,
Low (approximately 89.6°F / 32°C) to High (approximately 104°F / 40°C)
321465
1
1 2 3

HOW TO USE
HINT
• The washing function cannot be operated without sitting on the SpaLet®seat.
• The bidet automatically stops after 2 minutes. However, this function can be extended up to 6 minutes
when the massage function is used during washing.
• Water will come out from a point near the nozzles upon sitting on the SpaLet seat, or right before or
after using the washing function. This is not a malfunction.
NOTES:
• The water temperature of the bidet may become lower than expected when temperature of the
supplied water is extremely low, during winter for example.
• For less water splashing while using washing function, sit further back on the SpaLet seat.
• The bidet stops when the SpaLet is ushed. The bidet cannot be used while ushing the SpaLet.
• Avoid using the bidet for an extended period of time.

HOW TO USE
■DRYING WITH WARM AIR
1 23
1. Dryer: Press the button below this indicator to use dryer function.
2. Dryer temp: Press the button below this indicator while using the dryer function
to adjust the dryer temperature.
High (Approx. 56°C/133°F)
Medium (Approx. 40°C/104°F)
Low (Room temp.)
3. ■ STOP: Stops the dryer function.
HINT
• If the DRYER indicator is not displayed on the screen, press the Power/home button.
• The dryer temperature will return to its initial setting when the dryer function is stopped.
• The dryer function automatically stops after approximately 4 minutes.
1 23

HOW TO USE
■AUTO FLUSH FUNCTION
Flushes the SpaLet®automatically.You can change the ush delay setting.
SETTING 1
6SEC
AUTO OPEN
/CLOSE
ONLY LID
AUTO
FLUSH
2 1
1. Press the (set/next) button repeatedly until the Setting 1 screen appears.
2. Press the button below Auto ush repeatedly to select the setting.
2 sec: Flushes after 2 seconds
6 sec: Flushes after 6 seconds (Default)
10 sec: Flushes after 10 seconds
15 sec: Flushes after 15 seconds
OFF: Auto ush function is off
HINT
• In the case of a power outage or water failure, ush the SpaLet following the procedure in “Flushing the
SpaLet in the Case of Power Outage or Water Failure” (page 32).
• When too much toilet paper is used, it may not be ushed completely when the Flush/light button is
used. In this case, press the Flush/full button or manual ush button on the side of SpaLet.
• If ushing twice without pause, the SpaLet may be unable to ush. If this happens, ush the SpaLet
manually by pressing the / buttons after a while or manual ush button on the side of SpaLet.
• The auto ush function will not activate when the user sits on the SpaLet for less than 10 seconds.
SETTING 1
6SEC
AUTO OPEN
/CLOSE
ONLY LID
AUTO
FLUSH
2 1

HOW TO USE
■AUTO SEAT/LID OPEN AND CLOSE FUNCTION
You can set the automatic opening/closing function of the SpaLet®seat lid and the SpaLet seat.
SETTING 1
6SEC
AUTO OPEN
/CLOSE
ONLY LID
AUTO
FLUSH
2 1
1. Press the Set/next button repeatedly until the Setting 1 screen appears.
2. Press the button below Auto Open/Close repeatedly to select the setting.
Only lid: Automatically opens/closes the SpaLet seat lid (Default).
Seat & lid: Automatically opens/closes the SpaLet seat and the SpaLet seat lid.
Off: Automatic opening and closing function is off.
HINT
• The sensor may fail to detect the user when the room temperature is above 86°F. If this happens,
ventilate the bathroom to lower the temperature or move closer to the SpaLet.
NOTES:
• Direct sunlight and heating equipment may cause the sensor to malfunction and the SpaLet seat lid to
automatically open.
• Open or close the SpaLet seat lid gently when opening or closing it manually. Excessive force may
damage the SpaLet seat lid.
• Do not manually obstruct, stop, or move opposite the direction of the SpaLet seat or lid when it
operates. This may damage the SpaLet seat or lid or cause the auto close function to malfunction.
SETTING 1
6SEC
AUTO OPEN
/CLOSE
ONLY LID
AUTO
FLUSH
2 1
Other manuals for AT200
2
Table of contents
Other DXV Toilet manuals

DXV
DXV Wyatt VorMax Right Height Elongated... User manual

DXV
DXV Modulus Right Height D22020A Series User manual

DXV
DXV Belshire D22025A101 User manual

DXV
DXV Modulus Right Height D22020A Series User manual

DXV
DXV AT200 Instruction Manual

DXV
DXV Equility D22690A109 User manual

DXV
DXV AT200 LS SpaLet User manual

DXV
DXV AT200 User manual

DXV
DXV Belshire D23050A000.415 User manual

DXV
DXV Lowell D22010C104.415 User manual