manuals.online logo
Brands
  1. Home
  2. •
  3. Brands
  4. •
  5. E-Z UP
  6. •
  7. Tent
  8. •
  9. E-Z UP INSTANT SHELTER SPRINT User manual

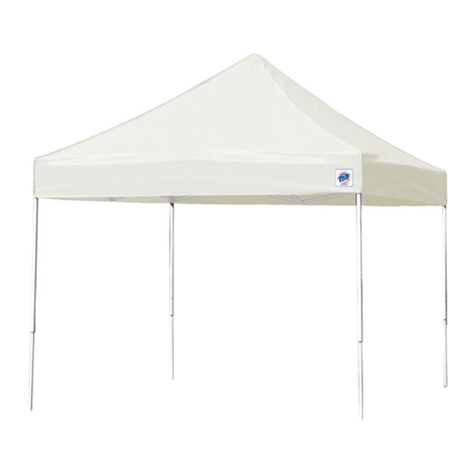
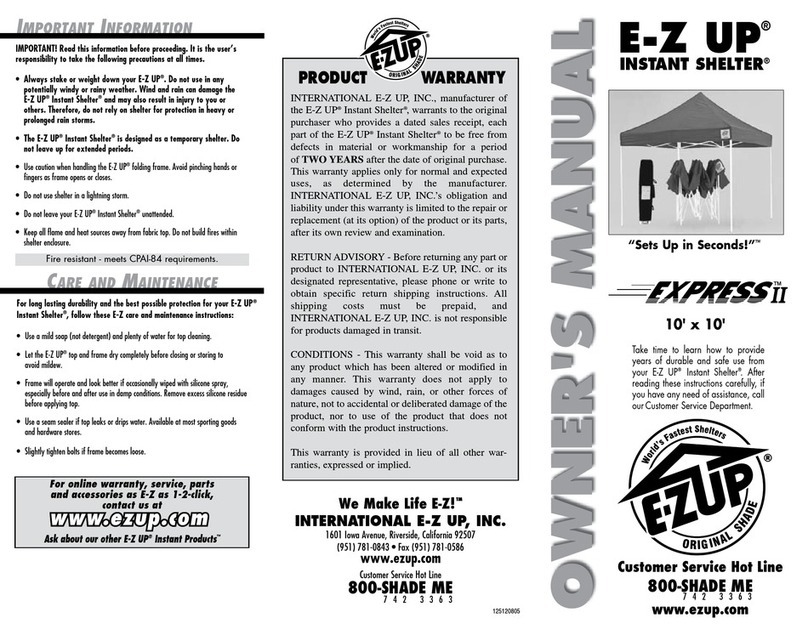
E-Z UP INSTANT SHELTER SPRINT User manual

Customer Service Hot Line
1 (800) SHADE ME
www.ezupdirect.com
7 4 2 3 3 6 3
OWNER'S MANUAL
Take time to learn how to provide
years of durable and safe use from
your E-Z UP®Instant Shelter®product.
After reading these instructions
carefully, if you have any need of
assistance, call our Customer Service
Department.
10ft x 10ft (3.0m x 3.0m)
IMPORTANT INFORMATION
CARE AND MAINTENANCE
IMPORTANT! Read this information before proceeding. It is the user’s
responsibility to take the following precautions at all times.
• Always stake or weight down your E-Z UP® shelter. Do not use in any
potentially windy or rainy weather. Wind and rain can damage the
E-Z UP®shelter and may also result in injury to you or others.
Therefore, do not rely on shelter for protection in heavy or prolonged
rain storms.
• The E-Z UP®shelter is designed as a temporary sun shelter. Do
not leave up for extended periods.
• Use caution when handling the E-Z UP®frame. Avoid pinching hands or
fingers as frame opens or closes.
• Do not use shelter in a lightning storm.
• Do not leave your E-Z UP®Instant Shelter®product unattended.
• Do not build fires under shelter.
For long lasting durability and the best possible protection for your E-Z UP®
Instant Shelter®product, follow these E-Z care and maintenance
instructions:
• Use a mild soap (not detergent) and plenty of water for top cleaning.
• Let the E-Z UP®top and frame dry completely before closing or storing to avoid
mildew. Inner legs must be dry and clean before sliding inside outer legs.
• Frame will operate and look better if occasionally wiped with silicone spray,
especially before and after use in damp conditions. Remove excess silicone residue
before applying top.
• Use a seam sealer if top leaks or drips water. Available at most sporting goods
and hardware stores.
• Slightly tighten bolts if frame becomes loose.
Ask about our other E-Z UP
®
Instant Products
™
For online warranty, service, parts
and accessories as E-Z as 1-2-click,
contact us at
WARNING: Keep all flame and heat sources away from this top
fabric. This top meets the flammability requirements of CPAI-84. The
fabric may burn if left in continuous contact with any flame source.
The application of any foreign substance to the top may render the
flame-resistant properties ineffective.
E-Z UP®
INSTANT SHELTER®
PRODUCT
“Sets Up in Seconds™!”
INTERNATIONAL E-Z UP, INC., manufacturer of the E-Z UP®
Instant Shelter®product, warrants to the original purchaser
who provides a dated sales receipt from an Authorized
Dealer, each part of the E-Z UP®shelter to be free from
defects in material or workmanship for a period of one
year after the date of original purchase. The E-Z UP®Instant
Shelter®frame is covered under a limited one year warranty
and guarantees the frame to be free from defects in
material or workmanship. This warranty applies only for
normal and expected uses, as determined by the
manufacturer.
INTERNATIONAL E-Z UP, INC.’s obligation and liability
under this warranty is limited to the repair or replacement
(at its option) of the product or its parts, after its own review
and examination.
RETURN ADVISORY - Before returning any part or product
to INTERNATIONAL E-Z UP, INC. or its designated
representative, please phone or write to obtain specific
return shipping instructions. All shipping costs must be
prepaid, and INTERNATIONAL E-Z UP, INC. is not
responsible for products damaged in transit.
CONDITIONS - This warranty shall be void as to any
product which has been altered or modified in any manner.
This warranty does not apply to damages caused by wind,
rain, or other forces of nature, not to accidental or
deliberate damage of the product, nor to use of the product
that does not conform with the product instructions.
This warranty is provided in lieu of all other warranties,
expressed or implied.
1 YEAR LIMITED WARRANTY
We Make Life E-Z!™
INTERNATIONAL E-Z UP, INC.
1601 Iowa Avenue, Riverside, California 92507
(909) 426-0060 • Fax (909) 426-0063
www.ezupdirect.com
Customer Service Hot Line
1 (800) SHADE ME
7 4 2 3 3 6 3
May be covered under one or more of the following patents: 4,607,656; 4,924,896;5,244,001; 5,421,356; 5,485,863; 5,490,533;
5,511,572; 5,632,292; 5,632,293;5,794,546; 5,797,412; 5,865,127; 5,921,260; 5,934,301; 6,041,800; 6,070,604;6,076,312;
6,129,102; 6,230,729; 6,240,940; 6,431,193; 6,439,251; 6,601,599; 95-704390;94/2354; 91461; 132167; 95/0693;
95/6140; 95/6141; 84107895; 684,978; 2123096;190486; 289754; 215344; 701077; 2128935; 2949648; 48648; DE 695 10
919 T2; W096/03561. International Design Registration No. DM/009515. Benelux Design Registration No.16959-04. Other US and
foreign patents pending. © Copyright 2009 International E-Z UP, Inc. 1601 Iowa Ave., Riverside, CA 92507 USA (800) 457-4233,
www.ezup.com. All rights reserved. Made in China. 022A-09-R00
OM_Sprint_09.qxd 3/19/09 1:11 PM Page 1

Please read each step before you attempt to set up.
Save these instructions for future reference.
W
HAT
’
S
I
N
T
HE
B
OX
H
OW
T
O
T
AKE
D
OWN
2. Grasp the top and bottom of
diamond-shaped area of trusses by
“open” sticker. Slightly lift shelter
up and push hands together while
stepping backwards until shelter is
fully opened.
Be careful not to
pinch fingers or push too hard so
as to avoid truss damage.
2.Release the Pull Pin slider at
each corner by first lifting fabric
top corner and pull the pin out to
release.
3. With partner on opposite
side, grasp top and bottom of
diamond-shaped area of trusses
by “close” sticker and slightly lift
up. Shake shelter slightly, pulling
hands apart, while stepping
towards partner until shelter is
3/4 closed.
Be careful not to
pinch fingers!
4. With partner grasp two outer legs and push frame together to fully
close it.
Be careful not to pinch fingers!
Store shelter in roller bag.
(See Roller Bag Instruction enclosed within your Warranty Kit).
3. Engage Pull Pin slider at each
corner by pushing up on slider with
one hand while holding down on
top of leg with other hand. Pull Pin
will engage in hole. Repeat step on
remaining legs.
4. With partner, lift two adjacent outer legs up and slide out the inner legs
until the snap button locks. Repeat on the opposite legs - make sure to do
two legs at a time on same side.
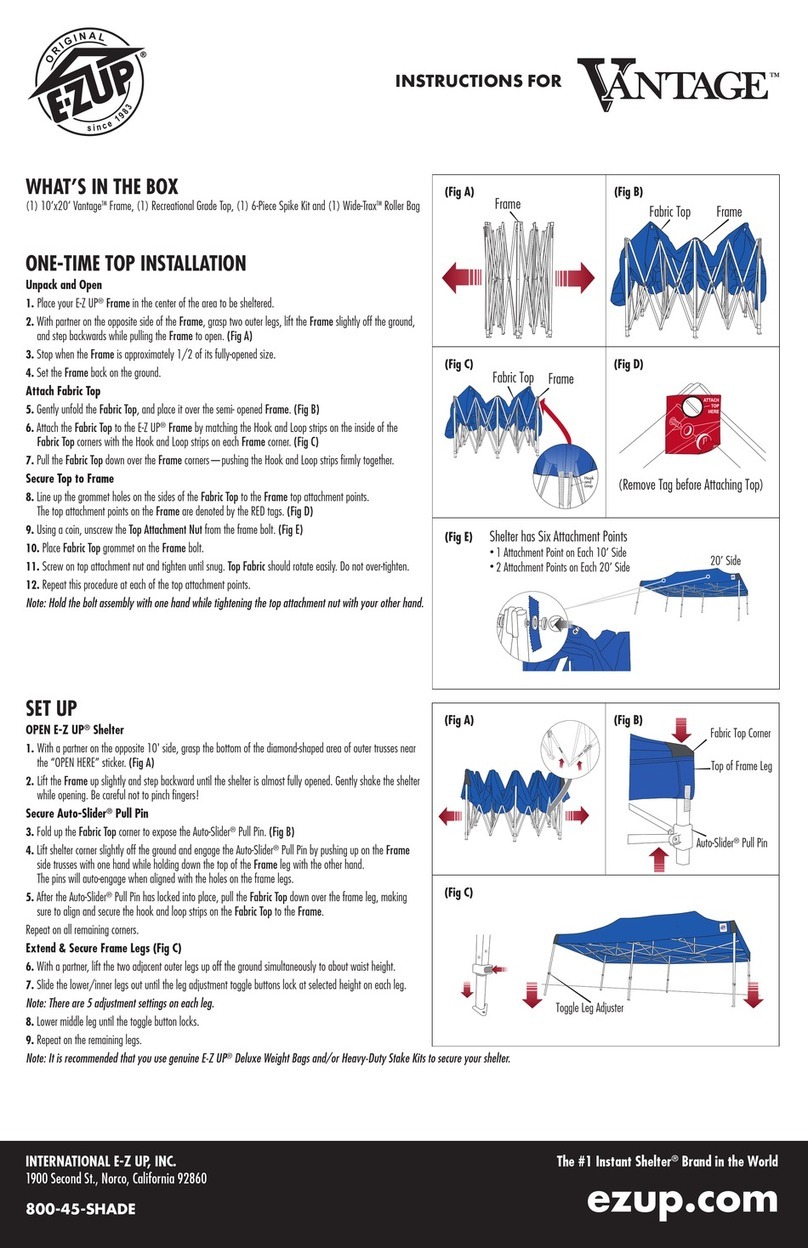
1. Place your E-Z UP®frame in the center of area to be shaded. With
partner on opposite side, grasp outer legs, lift off the ground, and step
backwards - stopping at full arms length, approximate size as shown above.
2. Gently unfold the fabric top and place it over the open frame.
3. Attach the fabric top to the
E-Z UP®frame by matching hook
& loop strips on the top with the
hook & loop strips on the frame.
Pull the corners down fully.
1. With partner, slightly lift up two adjacent outer legs, depress snap
button and slide inner legs into outer legs. Repeat on the opposite legs -
making sure to do two legs at a time on same side.
• Sprint®Frame • Carry Bag
• Polyester Top with Silver UV Backing
• 4 Piece Stake Kit
FIRST TIME TOP
ATTACHMENT
HOW TOSET UP
Pull Pin
1. Place your E-Z UP®frame in the center of area to be shaded. With
partner on opposite side, grasp outer legs, lift off the ground, and step
backwards - stopping at full arms length.
OM_Sprint_09.qxd 3/19/09 1:11 PM Page 2

Other E-Z UP Tent manuals

E-Z UP INSTANT SHELTER User manual

E-Z UP

E-Z UP INSTANT SHELTER User manual

E-Z UP Instant Shelter Escort User manual

E-Z UP

E-Z UP Instant Shelter Escort User manual

E-Z UP PATRIOT 10' X 10' INSTANT SHELTER User manual

E-Z UP

E-Z UP PATRIOT 10' X 10' INSTANT SHELTER User manual

E-Z UP Instant Shelter Endeavor User manual

E-Z UP

E-Z UP Instant Shelter Endeavor User manual

E-Z UP Endeavor User manual

E-Z UP

E-Z UP Endeavor User manual

E-Z UP Instant Shelter Express III User manual

E-Z UP

E-Z UP Instant Shelter Express III User manual

E-Z UP Instant Shelter Pyramid II Plus User manual

E-Z UP

E-Z UP Instant Shelter Pyramid II Plus User manual

E-Z UP INSTANT SHELTER User manual

E-Z UP

E-Z UP INSTANT SHELTER User manual

E-Z UP Instant Shelter Escort User manual

E-Z UP

E-Z UP Instant Shelter Escort User manual

E-Z UP Vantage User manual

E-Z UP

E-Z UP Vantage User manual

E-Z UP Eclipse II Professional User manual

E-Z UP

E-Z UP Eclipse II Professional User manual

E-Z UP Hi-Viz HV910BOR User manual

E-Z UP

E-Z UP Hi-Viz HV910BOR User manual

E-Z UP INSTANT SHELTER User manual

E-Z UP

E-Z UP INSTANT SHELTER User manual

E-Z UP Bungalow User manual

E-Z UP

E-Z UP Bungalow User manual

E-Z UP INSTANT SHELTER SPEED SHELTER II User manual

E-Z UP

E-Z UP INSTANT SHELTER SPEED SHELTER II User manual

E-Z UP Instant Shelter Eclipse II User manual

E-Z UP

E-Z UP Instant Shelter Eclipse II User manual

Popular Tent manuals by other brands

MMI TREK TENTS 217 Setup instructions

MMI

MMI TREK TENTS 217 Setup instructions

Dancover Pagoda Marquee UNICO 6x6m manual

Dancover

Dancover Pagoda Marquee UNICO 6x6m manual

Woods 076-6071-4 owner's manual

Woods

Woods 076-6071-4 owner's manual

Vango SPEY Pitching instructions

Vango

Vango SPEY Pitching instructions

skandika outdoor MILANO 8 Assembly instructions

skandika outdoor

skandika outdoor MILANO 8 Assembly instructions

mont-bell U.L. Zelt user manual

mont-bell

mont-bell U.L. Zelt user manual

Palram CANOPIA VERONA 10x17 / 3x5 How to assemble

Palram

Palram CANOPIA VERONA 10x17 / 3x5 How to assemble

Napier Sportz SUV Tent Series manual

Napier

Napier Sportz SUV Tent Series manual

TWISTIM Koala Creek EIGER 140K instruction manual

TWISTIM

TWISTIM Koala Creek EIGER 140K instruction manual

LAMS Serre Tunnel 9m2 Assembly instructions

LAMS

LAMS Serre Tunnel 9m2 Assembly instructions

TentCraft MONARCHSTOREFRONT How to set up

TentCraft

TentCraft MONARCHSTOREFRONT How to set up

KING CANOPY Hercules HC1027PC quick start guide

KING CANOPY

KING CANOPY Hercules HC1027PC quick start guide

Clarke CIG81224 Assembly instructions

Clarke

Clarke CIG81224 Assembly instructions

Euromate 389167 operating instructions

Euromate

Euromate 389167 operating instructions

YitaHome FTPLCG-0001 Assembly instructions

YitaHome

YitaHome FTPLCG-0001 Assembly instructions

Classic Accessories SledGear Extreme 71527 quick start guide

Classic Accessories

Classic Accessories SledGear Extreme 71527 quick start guide

Royal garden GQC00229A Assembly instructions

Royal garden

Royal garden GQC00229A Assembly instructions

Toptec FutureTrac installation instructions

Toptec

Toptec FutureTrac installation instructions

manuals.online logo
manuals.online logoBrands
  • About & Mission
  • Contact us
  • Privacy Policy
  • Terms and Conditions

Copyright 2025 Manuals.Online. All Rights Reserved.