EarthLink Mitel 6867i User manual

Getting Started
Options:
Accesses services
and options to cus-
tomize your phone.
Goodbye
Hold
Volume
Directory
Navigation/Select:
Multi-directional
navigation keys that
allow you to navigate
through the phone’s
user interface.
Mute Line/Call
Appearance:
Line presentation
for incoming and
outgoing calls.
Speaker/Headset:
Toggles the phone’s audio between speaker
and headset. If you are using a DHSG/EHS
headset, ensure that the headset jack adaptor
is removed from the headset port.
Bottom Softkeys:
4 programmable/state-based
softkeys that support up to 18
functions.
Left Softkeys:
6 programmable keys that
support up to 20 functions.
Presence:
See Other Features
for more details.
Transfer
Conference
Callers:
Accesses a list of
received/missed
incoming calls.
Redial
Basic Call Handling
Placing a Call
1. Lift the handset, press a Line key, or press the
key.
2. Dial the number from the keypad and press the Dial
softkey.
Ending a Call
Place the handset on its cradle or press the
key.
Answering a Call
Lift the handset for handset operation or press the Line key or key for handsfree
operation.
Ignoring a Call
Press the key or Ignore softkey when the phone is ringing to ignore the incoming
call and (if configured) send the incoming call directly to voicemail.
Redialing
Press the key once to access a list of recently dialed numbers. Use the Up and
Down navigation keys to scroll through the entries and the Select key (or Dial softkey) to
redial the selected number. Press the key twice to call the last dialed number.
Muting
Press the key to mute the handset, headset, or speakerphone.
Holding and Resuming
1. To place a call on hold, press the key when connected to the call.
2. To resume the call, press the key again or press the Line key corresponding to the
line where the call is being held.
Warning!
The headset port is for headset use only.
Plugging any other devices into this port
may cause damage to the phone and will
void your warranty.
41-001545-00 REV02
Mitel Model 6867i IP Phone
Quick Reference Guide

User Interface (UI) Overview
Line/Screen Name
Indicator
Phone/Line Status
Indicators:
Phone Locked
Voicemail
Do Not Disturb
Call Forward
Status Messages
Date and Time
Bottom Softkeys
Left Softkeys
More Softkeys:
Dots indicate the num-
ber of softkey “pages”
and its relative position.
New Call Key:
When a line is not in use, a New Call key is available allowing you to dial out using the selected line.
Line Usage Indicators:
Indicates the number of
connected calls on the
respective line or if the
line is in a incoming/out-
going ringing state.
Incoming Call
Outgoing Call
Available Lines:
Displays a list of the
lines that are confi g-
ured on the phone. See
UI Navigation for more
details.
Line Selection Screen
The Line Selection Screen allows you to easily view the lines in use and select a line to
act upon.
Home Screen
The Home Screen displays the date and time along with various important status
messages. It is the default screen displayed when the phone is in an idle state.
UI navigation is easily performed using the navigation
keys located to the right of the LCD screen. The Left
and Right navigation keys are used to switch to the
different screens and the Up and Down keys are used
to highlight and scroll through the different lines/calls
on the respective screen. The fi gure below provides a
visual representation of the different screens and the UI
behavior when a navigation key is pressed.
UI Navigation
Home Screen Line Selection Screen
Press Right
Press Left
Press DownPress Up
Press Right
Press Left

Advanced Call Handling
The 6867i IP phone provides simple and convenient methods for trans-
ferring calls and establishing conference calls.
Call Transferring
1. Ensure you are on active call with the party you wish to transfer.
2. If you are already connected to the transfer recipient, press the Up or Down navigation
keys to highlight the recipient and press the key or Xfer softkey to complete the
call transfer.
OR
If you are not connected to the transfer recipient, press the key or Xfer softkey,
enter the recipient’s number and press the Dial softkey. At any time, press the key
or Xfer softkey again to complete the call transfer.
3-Way Conferencing
1. Ensure you are on active call with one of the parties with whom you wish to create a
conference.
2. If you are already connected to the party you wish to conference in, press the Up or Down
navigation keys to highlight the conference target and press the key or Conf
softkey to complete the 3-way conference.
OR
If you are not connected to the party you wish to conference in, press the key or
Conf softkey, enter the conference target’s number and press the Dial softkey. At any time,
press the key or Conf softkey again to complete the 3-way conference.
Note:
If the 3-way conference is successful, icons will be displayed in the
call status indicator area of both conference participants.
Other Features
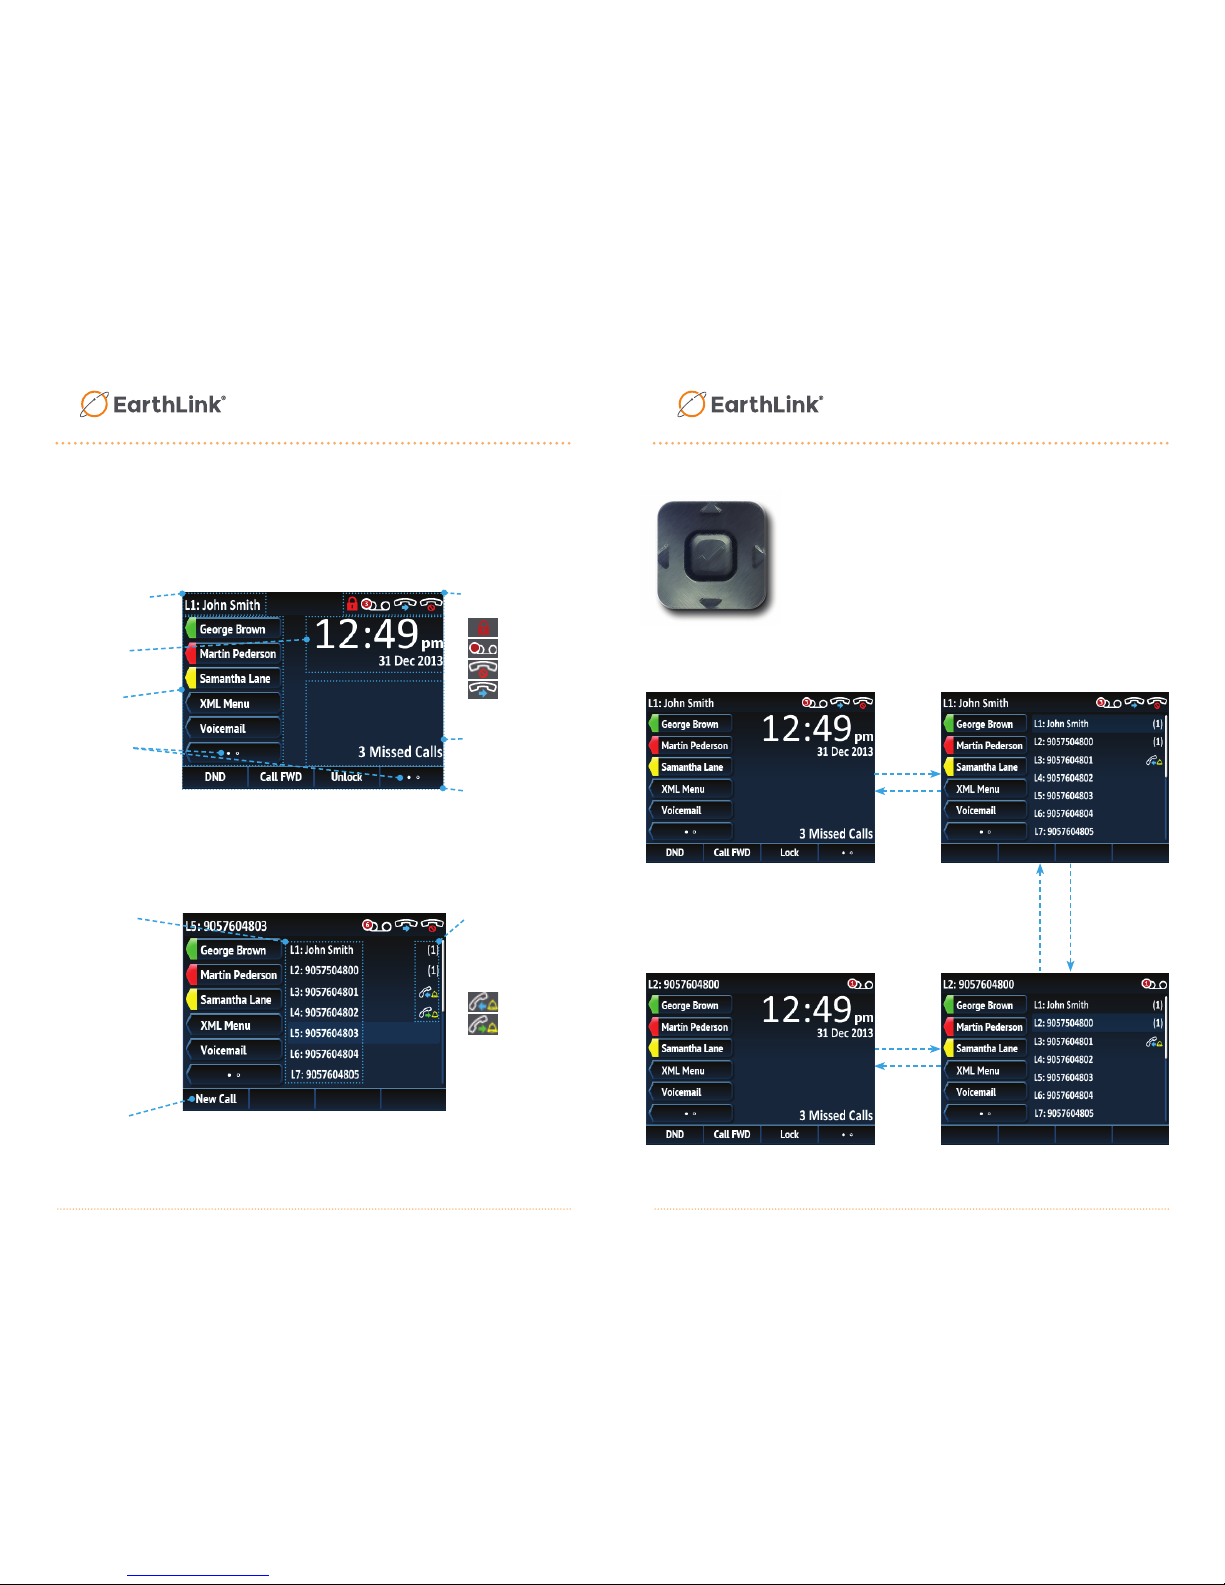
Using the Line State Monitoring
Line State Monitoring is used to access
the contact information screens, which
provide detailed information about a
respective Busy Lamp Field (BLF) or
Speed Dial contact.
1. On the Home Screen, press the key.
2. Press a left softkey that is confi gured with
BLF or Speed Dial functionality. The contact
information screen will be displayed.
Note:
To switch to another contact, simply press the desired BLF or Speed Dial softkey.
3. Press the Select key to place a call using the contact’s default phone number. If you would
like to place a call to a different phone number attached to the contact (if applicable),
highlight the desired phone number using the Up or Down navigation keys, and press the
Select key.
Using the Directory
1. Press the key to access the Directory.
2. Scroll through the list by pressing the Up or Down navigation keys or enter characters
using the keypad to use the search feature.
3. When the desired entry is highlighted, press the Select key to place a call using the entry’s
default phone number. If you would like to place a call to a different phone number
attached to the entry (if applicable), press the Right navigation key, highlight the desired
phone number using the Up or Down navigation keys, and press the Select key.
Using the Callers List
1. Press the key to access the Callers List.
2. Scroll through the list by pressing the Up or Down navigation keys. If you would like to view
additional entry details, press the Right navigation key.
3. Press the Select key to place a call to the respective entry.

Voicemail
Setting Up Your Mailbox
This process will take about two minutes.
1. Dial *99
2. You will be prompted to enter your PIN
3. When you have signed-in, you will go to one of two menus:
• If you have not completed setting up your mailbox you will be redirected to the
fi rst-time sign-in menu described below.
• Otherwise, you will be redirected to the Main menu.
First Time Sign-In
When you sign-in for the fi rst time, you must set up
your mailbox. First time sign-in involves three steps:
1. Recording your greeting
2. Recording your name
3. Changing your PIN
You may skip the first time sign-in once by pressing **, but after skipping it once, you must
complete the first two steps before you can enter your mailbox and listen to messages.
You can end the setup process at any time by ending the call. You will be asked to
complete the remaining setup steps the next time you enter your mailbox.
Changing Your Pin
When setting up your mailbox PIN it must meet the following criteria:
• Must be between 6 and 20 digits long
• Cannot be part of your telephone number
• Cannot repeat a single digit more than two (2) times
• Cannot be a sequence of numbers such as “123456”
CALLERS CAN LEAVE MESSAGES FOR YOU EVEN IF YOU
HAVE NOT SET UP YOUR MAILBOX.
CommPortal
The CommPortal is a self-admin portal that allows you to view missed
calls, listen to voicemail messages, view contacts, and set up rules to
handle your calls. You can access the CommPortal anywhere with access
to the Internet.
Go to http://voip.elnk.us/
When you fi rst login to CommPortal, you will see the following tabs:
Enter 10-digit phone
number
Enter voicemail PIN
Quick overview
of settings &
messages
Messages &
Call History
Store &
Retrieve
Contact Info
Manage How
Incoming Calls
are Managed
Access Applications
for your desktop &
Mobile device
Access & Change
Call Services
Settings

© 2016 EarthLink. Trademarks are property of their respective owners. All rights reserved. MKPRINT-150
Dashboard
Most of your everyday needs will be met by the functionality in the
Dashboard.
See CommPortal Assistant Installation Guide.
Visit www.earthlinkbusiness.com/hostedvoice
Access
Voicemail
Contacts
Click to Dial
Call Settings for
Incoming Calls
Missed
Call Log
Table of contents
Other EarthLink IP Phone manuals