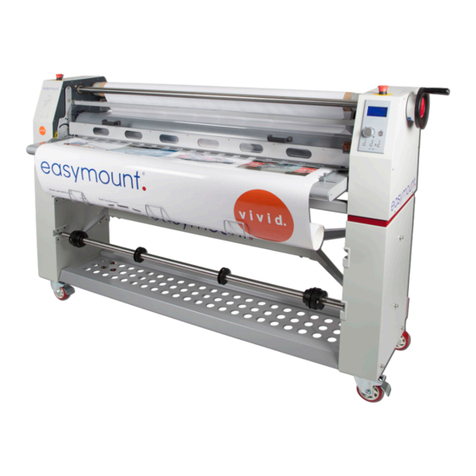
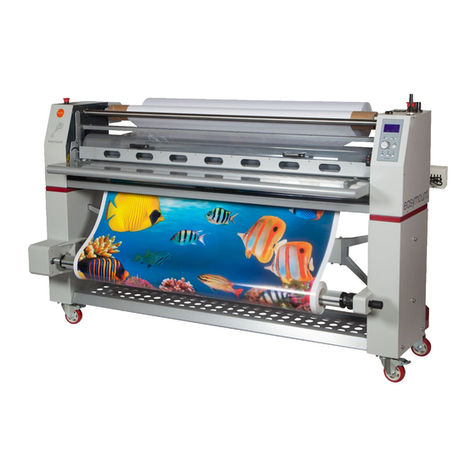
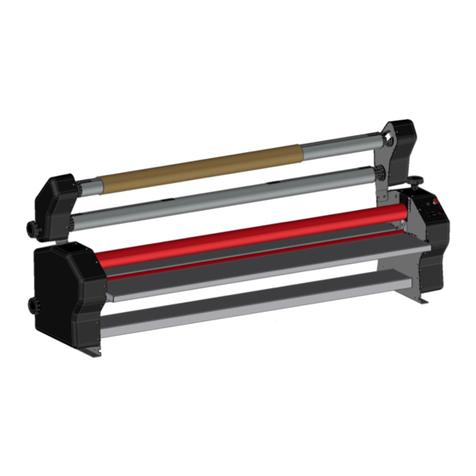
Easymount EM-1200DH Specification sheet

Product instruction manual
Magnum EM-1200DH & EM-1650DH
The Easymount has been designed to be user friendly,
however we strongly recommend you take a few minutes
to read through this manual to ensure correct operation.
Keep this manual safe for future reference.

1
Contents
Preface---------------------------------------------------------------------------------------------1
Contents-------------------------------------------------------------------------------------------2
Ⅰ. Applications & Characteristics of EM1180DH/EM-1650DH Series ----------------3
Ⅱ. Application Requirements------------------------------------------------------------------3
Ⅲ. Safety Points for Attention-----------------------------------------------------------------4
Ⅳ. Figure of the Whole Machine--------------------------------------------------------------6
V. Figure of Control Panel--------------------------------------------------------------------7
VI. Major Technical Parameters--------------------------------------------------------------8
Ⅶ. Unpacking & Installation of the Machine-----------------------------------------------9
A. Open the Packing Box of the Stand-----------------------------------------------------9
B. Mount the Stand---------------------------------------------------------------------------9
C. Take Out the Machine--------------------------------------------------------------------10
D. Fix the Machine on the Stand-----------------------------------------------------------11
E. Install the Support of Material Roller and the Roller(Parts)------------------------12
Ⅷ. Preparations before Starting-up----------------------------------------------------------13
IX. Adjust the Pressure between Rubber Rollers ------------------------------------------14
X. Operation Instructions and Steps---------------------------------------------------------15
A. Continuous Cold Mounting--------------------------------------------------------------15
B. Continuous Hot Laminating-------------------------------------------------------------16
C. Continuous Double-Face Hot laminating----------------------------------------------18
XI. Common Faults & Settlements of Quality Issues--------------------------------------20
A. Checking Methods and Adjusting of Pressure Balance of the Rubber Rollers---20
B. Treatments of the Problems before Repairs-------------------------------------------21
XII. Maintenance and Repair---------------------------------------------------------------22
XIII. After-sales Services---------------------------------------------------------------------22

2
Ⅰ
. Applications & Characteristics of EM1180DH/EM-1650DH Series
EM-1200DH and EM-1650DH laminators are the large or medium-sized
post-production equipments for the computer picture & text systems. They integrate
the functions of cold lamination, hot lamination and mounting. The number 1200 and
1650 means the maximum widths of the films used on these machines, and the unit is
in ‘mm’.
These machines have wide applications for the films, which can adopt sheet film to
mount wide pictures, and roll film to continuously mount picture and text or carry
out single-face and double-face lamination at a high temperature.
This type of machines is applicable for various industries and fields, especially in
printing, color ink-jet printing and advertisement, etc.
With proper designs, simple structures and easy operation, quick and effective
mounting and laminating can be carried out by workers without special skills.
II. Application Requirements
·The machines should be used at a temperature ranging from 10℃- 40℃. Keep
them away from high temperatures.
·The temperature during storage and transportation is between –20℃-60℃.
·Humidity:40%—70%;ideal humidity:55%. Keep the machines away from
damp places.
·Considering the static adherence of the films, please keep the environment clean and
better not use the machines in dusty places.
·The machines should be put on special stands.
·Operation spaces: applicable and enough spaces are needed so as to ensure the safe
and effective uses. The minimum area covered is 3m x 3m.
·Keep the machines away from strong sunlight.
·When finish laminating with PVC film, please don’t leave the laminated objects on
or between the rollers for long, in case the laminated objects will lose colours.
·After lamination, if you don’t use the machine for a long time, please take away the
film and the picture and text. Do not let the film wrap around the rollers all the
time.
·It is suggested that the laminated picture and text not be put on top of rubber
substance, in case close touch may cause change of colours.
·Note:This machine can laminate automatically objects less than 12mm thick in a
succession. If you want to laminate objects over 12mm but less than 25mm thick,
you need to use the pedal switch.
3
Ⅲ
. Safety Points for Attention
· Please ensure that the voltages of power supply you are using match
the rated working voltages before operations. Please use the power supply
matching the rated voltage. Do not misuse other incorrect power supply.
·
The electric wire should be connected with the air-brake
switch with a rated current ≥20A.
·
The power supply source should be close to the machine for convenient use.
·The electric wire s and parts should meet the power requirements.
· The power supply should have reliable earth wire.
·
No other person is allowed to touch the motor or other rotating parts except
the operator of this machine.
·
Please don’t use damaged wires or sockets. And don’t put heavy hard object
on the wires.
·
If abnormal conditions occur, please switch off the power supply first.
·As the machines have a heating-up system, please don’t touch the
surface of the rollers, in case it will cause burns on your skin.
·
When the film, picture and text or guide paper are fed in between the two
rubber rollers, please operate at a lower speed with the pedal switch.
·
Keep rigid objectsaway from the surfaces of rubber rollers during operation,
otherwise the surfaces of rubber rollers may be damaged or other mechanical
faults may be caused, which will affect the quality of laminating directly.
· During the operation, please take care that no clothes, neckties, hairs,
necklaces and cuffs will be rolled into the machine, in case body injuries,
surface damages of rubber rollers or other damages may be caused.
·
During the laminating operation, please don’t put anything but laminating
materials on the working panels and the cabinets on the two sides so as to
avoid accidental involvements, which will cause damages to the surface of
rubber rollers or to the machine.
· This machine can’t mount metal materials or other hard objects.

4
Please don’t put burrs, sharp blade or over-thick rigid materials in between
the two rubber rollers. ( such as tools, rulers and knives, etc.)
· Don’t cut the films directly on the surface of rubber rollers so as to avoid
damages to them.
· Please be careful of the foot wheels while moving or operating the
machines so as to avoid injuries to your feet.
·When faults occur, non-professional persons should not dismantle the machine
for repairs. Ask for help from professionals or from the local distributors. Any
dismantling or repairing by persons without our authorization, will affect
normal use and maintenance of the machine.
·Before repairing the mechanical faults or electric faults, you should
shut off the power supply first and don’t operate or maintain the machine
with power on.
·
Please switch off the machine after operation so as to avoid misusing it by
others.
·
Please switch off the power supply (or pull out the power plugs) when
the machine is not in use for a long time.
·
When the machine lies idle for a long period of time, please lift up the top
rubber roller so as to avoid the distortion of its rubber surface due to high
pressure.
·
Please don’t use corrosive liquids to wipe the machine when cleaning it,
otherwise the machine frame and rubber rollers will be damaged. You can use
soft dry cloth to clean the enclosures and wipe the surfaces of rubber rollers
with alcohol in higher purities.
●
The operator mustn’t leave the machine alone while it is in operation,in case an
accident may occur.

5
Ⅳ
. Figure of the Whole Machine
( Figure 1 )
1.Left cabinet 2. Emergency stop switch 3.Pressure-adjusting linkage axle of the
front rubber roller 4. Backing paper roller 5. Front guard shield 6. Right cabinet
7. Pressure-adjusting hand-wheel of the front roller 8. Control panel
9. Pressure-adjusting hand-wheel of the rear roller 10. Stand 11. Axle of material

6
roller 12. Supporting sleeve of material roller 13. Front working table 14. The
right and left supports of material roller 15. Adjustable foot wheel 16. Positioning
plate of the front working table 17. Supporting beam 18. Rear working table 19.
The upper support of material roller 20. Rear top roller 21. Front top roller
V. Figure of Control Panel
1.Indicator of cold mounting 2. LCD of temperature 3. Temperature-regulating
knob 4. Continuous / Intermittent key 5. Hot / Cold Laminating key
6. Forward / Reverse key 7. Single / Double Roller key8. Speed-regulating knob
9. ‘Ready’ indicator 10. Indicator of hot laminating
Note: This machine doesn’t have the function of Continuous Reverse. If you need it,
please use the pedal switch.
( Figure 2 )
·The control panel of this machine is located in the up right front, with a digital
display screen. The switches include a Motor’s Speed-regulating Knob; a
Temperature-regulating Knob; a Forward / Reverse Key; a Single / Double Roller
Heat-up Key; a Continuous / Intermittent Key, and so on. Turn or press any of them,
you can gain the function as marked.
·Press the key for Cold, the indicator of cold mounting is on; but if press the key for
Hot, the Heat-up light is on. And when the set temperature has been reached, the

7
Ready indicator is on.
·For the Single / Double Roller Heat-up Key, when you press Single, the top roller
will be heated up. And when Double, both the top and bottom rollers will be heated
up at the same time.
·The Temperature-regulating Knob is used to set the temperature of the rollers.
·The Speed-regulating Knob is used to control the speed of the rollers.
·The Forward / Reverse Key is used to change the rotation directions.
·When the key is at ‘Intermittent’, the rotation of the machine can be controlled by
the pedal switch.
Please note:
When continuous running is stopped by the protective photo-electric eye, please don’t
try to re-start the machine within 5 seconds, for the motor can’t resume running again.
After 5 seconds have passed, put the key to Intermittent first, then turn back to
Continuous, you can make the rollers run continuously.
VI. Major Technical Parameters
Model
Max. width of film
1180mm
EM-1650DH
Max. thickness of Lamination
25mm
1650mm
Range of Speed-regulation
0.1~3.9m/min
25mm
Range of Temp.-regulation
30℃°~130℃
0.1~3.9m/min
Rated voltage and Frequency
230V
30℃°~130℃
Max. rated in-put power
3950W
400V
Rated in-put power for Cold Mounting
150W
5150W
Rated in-put power for Single Roller Heat-up
2050W
150W
Rated in-put power for Double Roller Heat-up
3950W
2650W
Max. rated work current
17.5A
5150W
Rated work current for Cold Mounting
0.7A
13.2A
Max. rated work current for Single Heat-up
9.5A
0.7A
Max. rated work current for Double Heat-up
17.5A
7.5A
Dimension of the whole machine
1700X785X1265
13.2A
Dimension of the stand
1625X522X472
2170X785X1265
Weight of the machine
2095X522X472
Weight of the stand
Weight during transportation

8
Warning: Please pay attention to the rated voltage of the machines, and do not use
the voltage of power supply by mistake!
Ⅶ
. Unpacking & Installation of the Machine
A. Open the Packing Box of the Stand (See Figure 3)
( Figure 3)
1. Right support board of the stand 2. Left support board of the stand 3. Cross
beams of the stand
Open the packing box and take out the support boards and the beam.
B. Mount the Stand (See Figure 4)
1) Take out the stand and mount it in the steps as shown in Figure 4.
2) Fasten the right and left supports tightly and properly with the beams,
using the screws.
( Figure 4)
1. fastening screws 2. Left support board 3. Support beams 4. Right support
board

9
3) Put the mounted stand at a pointed place ( a plain ground ) for further use.
C. Take Out the Machine ( See Figure 5 )
( Figure 5 )
1. Hex bolt and nut 2. Pressing board 3. Frame 4. Fixing plate of material roller
5. Material roller ( parts) 6. Pallet of the packing box
The machine is fixed onto the bottom pallet with 4 bolts, and covered by a plastic
bag to keep dust and moisture out.
1)Loosen and take down the bolts and nuts.
2)Lift up the machine from the pallet to separate them.
D. Fix the Machine on the Stand ( See Figure 6)
1) Lift up the frame and put it onto the special stand. ( See illustration of
Figure 6)
2) After that, open the covers on both sides. Join the frame and the stand with
the socket hex head screws and washers taken from the accessory box, then

10
put the covers back.
( Figure 6 )
1. Stand 2. Frame
▲
When putting the frame onto the stand or moving it, be careful not to hurt
your fingers!

11
E. Install the Support of Material Roller and the Roller(Parts) ( See Figure 7)
( Figure 7 )
1. Material roller ( parts) 2. Fastening bolts 3. Joint plate of material roller’s
support
1) Fix the two joint plates onto the frame with the bolts.
2) Put the parts of material roller into the notch of the support.
Ⅷ
. Preparations before Starting-up

12
·Switch on the power supply and choose any function key or knob as you need.
·When doing cold mounting work, press Cold.
·When doing hot laminating work, press Heat-up.
· When doing single-face or double-face lamination, just choose Single-roller or
Double-roller Heat-up accordingly.
·Select the films: The material and quality of the film are quite important to
the quality of lamination. It is recommended that you’d better select films of
better quality.
·Select the films a little narrower than the picture and text ( the picture and
text should have margins on all sides), and if there are no margins forcutting,
lining paper should be applied on the back (or at least on both sides of the
picture and text), and the lining paper should be wider than the film.
·Put film rolls onto the material roller:
1)Loosen the screws on the positioning sleeve of the material roller.
2)Put the film roll onto the material roller.
3)Fix the removed positioning sleeve on one end of the paper core.
4)Adjust the distances between the two positioning sleeves according to the
practical width of consuming materials so as to make the film in the middle
of the material roll.
5)Fasten the screws for positioning sleeve of material rollers (Note: there
should be
3~
5mm clearance between the positioning and the adjusting
sleeves of material rollers so as to make transverse adjustments easier).
6)Adjust the friction forces by turning the adjusting nuts of the material
rollers ( Note: the friction forces should not be too big ).
( Please refer to the illustrations of Figure 8)
( Figure 8 )
1. Material roller shaft 2. Cold film ( lining paper ) 3. Paper tube

13
4. Positioning sleeve 5. Adjusting nuts 6. fastening bolts of orientation sleeve
7. Orientation sleeve
·The method of mounting and adjusting of backing paper roller
( See Figure 9 )
1. Turn pressure-adjusting nuts anti-clockwise towards the right cabinet,
move the backing paper roller transversely and take it down from the
machine, and doing the opposite will help fix it on.
2. Fix the paper tube onto the shaft or tape the backing paper after being
separated from the film onto the backing paper roller directly.
3. The shaft of backing paper roller is driven by friction. The friction
and torsion will be increased with clockwise turn of the pressure-adjusting
hand-wheel, and an anti-clockwise turn will decrease them.
4. If the paper tube refuses to go along with the shaft, you need to adjust
the supporting plate so as to make it rotate, following the steps below:
a) loosen the screws b) move the supporting plate c) Fasten the screws
Note: It will be OK if the friction can meet the practical requirements. Better
not too big.
( Figure 9 )
1. Backing paper shaft 2. Screws 3. Supporting plate 4. Left cabinet
5. Left positioning sleeve 6. Right Positioning sleeve
7. Pressure-adjusting nut 8. Right cabinet
Ⅸ
. Adjust the Pressure between Rubber Rollers
The pressure adjustment is achieved by turning the hand-wheel. And the
automatic devices inside can make the top roller move up or down.
When the pressure-adjusting hand-wheel is turned clockwise, the top roller comes
down and the pressure increases, while with a counter-clock turn the top roller
goes up and the pressure decreases. ( Please see XI on page20)

14
When you open or close the folded hand-wheel, please pull the handgrip out a
little more first. Don’t force a turning so as to avoid possible damages.
▲
When the machine lies idle for a long period of time, please lift up the top
roller with the hand-wheel, so as to avoid distortion of the rubber surface due to
high pressure.
Ⅹ
. Operation Instructions and Steps
This machine has a function of cold and hot single or double face
lamination, and can carry out the work with either sheet film or roll
film.
1. Continuous cold mounting:
A. How to adjust the damp of roll film
:
After load the roller onto the supporting plate, pull the film with your hands,
and you should feel certain resistance. If not meeting the requirement, turn to
adjust the orientation sleeve.
B. When the film is fed in, ( as shown in Figure 10 )
1) Lift up the top roller ( the rear roller is not in use while cold mounting ).
2) Turn the pressure-adjusting hand-wheel of the front roller, to raise the top
roller. Put the film through between the two rollers. Lay it on the rear
working table.
3) Pull the film plain with appropriate force, turn the pressure-adjusting
hand-wheel to let the roller down. And put the hand-wheel in a free
position—that is to say in a completely pressure-free state.
Mounting with cold film Double-face laminating

15
( Figure 10 )
1
. Front working table 2.Front top roller 3. Pressure-adjusting linkage shaft
4. Top guiding roller 5.Film 6. Backing paper roller 7. Backing paper
8. Cold film roller 9. Rear top roller 10. Rear bottom roller 11. Lining paper
12. Double-face film roller 13. Lining paper ( for double-face film)
14. Bottom guiding roller 15. Front bottom roller
C. Function setting:
1) Turn the Cold mounting and Heat-up to Cold mounting.
2) Turn the Speed-regulating knob to what you require.
5. Cut to separate the film from the backing paper at an appropriate place,
and pull up the backing paper straightly, and tape it plainly on the
paper tube ( or directly on the backing paper roller). Adjust the
pressure-regulating nuts on the roller to gain proper friction.
6.
If the front edge of the picture and text is neat, you can align its two
sides
with the film. Then roll the picture and text into the two rollers by using
the pedal switch. Make sure everything is ok before turning the knob to
‘
Continuous
’
. Leave the pedal switch and carry out continuous lamination.
7.
If the front edge is not neat, lift up the roller and aim the picture and
text
at the middle of the film and align its two sides, then lower the roller and
then roll the picture and text into the two rollers by using the pedal switch.
Make sure everything is OK before turning the knob to
‘
Continuous
’
. Leave the
pedal switch and carry out continuous lamination.
Please note that when rolled into the two rollers, the picture and text must be
very plain. The front edge of the picture and text should be fed into the rollers
all at the same time for lamination, in case drapes appear during the laminating
process.
▲The picture and text should be wider than the film, in case the film may stick
on to the roller.
2. The instructions and steps of how to use heat-sensitive single-face film
in continuous lamination:
OPP film is the commonly use material for single-face lamination. Its feature
is that it has no backing paper, and there is a thin layer of heat-sensitive glue
on the surface of the film, lamination can only be carried out with a high
temperature. And the laminating quality mainly depends on the temperature on the
roller
’
s surface, the speed, the temperature for melting the glue, the environment
temperature and so on. Pay attention to the control of the above factors during

16
lamination.
·
Single-face mounting with roll film:
1)
Adjusting the friction:
After putting the film roller onto the support, pull the film and you should feel
roper resistance. If not, turn to adjust the sleeve.
▲ Note: if the film is not very tight, you need to adjust the positioning sleeve
to increase friction.
2) Feeding in the film ( as shown in Figure 11 ):
Turn the pressure-regulating hand-wheel of the front rubber roller to lift
the roller up. Insert the film through between the two rollers and lay it
on the rear working penal. Put a piece of lining paper under the front part
of the film ( the lining paper should be wider than the film),
Pull the film
plain with appropriate force, turn the pressure-adjusting hand-wheel to let the roller
down. And put the hand-wheel in a free position—that is to say in a completely
pressure-free state.
Note: As the rubber roller will expand while being heated, the pressure will
also change. So some adjustment needs to be made after the roller
’
s
surface reaches the set temperature. That is to say ;
put the hand-wheel
in a free position—which means in a completely pressure-free state.
(
Figure 11
)
1)Front bottom roller 2)Front working table 3)Front top roller
4)Pressure-adjusting linkage shaft 5)Top guiding roller 6)Heat-
sensitive film 7)Roller for film 8)Rear top roller 9) Rear bottom

17
roller 10)Film 11)Heat-sensitive film 12)Bottom guiding roller
3.Function setting:
A.Press the key for ‘Hot’;
B.Press the key for ‘Single’roller heat-up;
C.Choose a temperature which is fit for the lamination;
D.Adjust the speed to what you need;
When ‘Ready’ light is on,the heat-up process is over.
4.How to feed in the film:
Tape the picture and text plainly onto the lining paper.
Note:
▲The two edges should be vertical to the roller, in case inclination
may be caused during lamination.
▲The picture and text should be wider than the film, in case the film may stick on to
the roller.
▲If you want a quick heating-up, you may choose ‘Double’ roller heat-up
first. When the temperature reaches around 60℃, turn back to ‘Single’.
5. Insert the picture and text in between the two rollers by using the pedal switch.
After making sure everything is OK, press the key for
‘
Continuous
’
, then leave
the pedal switch and finish the work.
Note:
While the picture and text being inserted, they must be plain and their front
edge should be put in all at once, in case inclination or drape may be caused.
▲
There is a proportion between temperature and speed. Never try to gain high
speed and temperature all at one time, in case the laminating quality may
be affected.
▲
Observe the consequence closely during lamination. If find the heat-sensitive
film is not melted totally, turn the temperature higher ( or lower the speed ).
And if find any distortion of the laminated object, turn the temperature down
( or turn up the speed ).
▲
If there are obvious drapes on the picture and text, stop the machine, pull
the film flat and do the work again.

18
C. Continuous Double-Face Hot laminating
( Figure 12 )
1) Front working table 2) Front top roller 3) Pressure-adjusting linkage
shaft 4) Top guiding roller 5)Top heat-sensitive film 6)Top film roller
7) Rear top roller 8) Rear bottom roller 9) Bottom film roller
10) Bottom heat-sensitive film 11) Bottom guiding roller 12) Front bottom
roller
A. How to adjust the friction of the roll film:
1) Put the loaded film rollers onto the front and rear supports separately. Pull the film
with your hands and feel some resistance.
2) Align the top and bottom films. If there is any difference, turn the right or left regulating
sleeve on the roller to get rid of it.
3) If fail in doing so, loosen the positioning sleeve and feed in the films again.
▲ Note:
If the films are not tight enough, you need to turn the regulating sleeve
To increase the friction.
B. How to feed in the films ( Shown as in Figure 12 ):
Turn the front and rear pressure-regulating hand-wheels separately to lift the
rollers up. Pull the films through between the two rollers and lay them on the

19
rear working table. Pull the two film plain and turn the hand-wheels to lower
the rollers. Then
put the hand-wheels in a free position—that is to say in a completely
pressure-free state.
Note: As the rubber roller will expand while being heated, the pressure will
also change. So some adjustment needs to be made after the roller
’
s
surface reaches the set temperature.
Put the hand-wheel in a free position—
that is to say in a completely pressure-free state.
C. How to set the functions:
1) Press the key for
“
Heat-up
’
;
2) Press the key for
‘
Double
’
roller
’
s heating-up;
3) Turn to the temperature which is fit for your lamination;
4) Find the speed you need.
When the
‘
Ready
’
light is on, it means the heating-up process is over.
D. How to laminate the picture and text:
Feed the picture and text in plainly between the rollers by using the pedal switch.
After making sure everything is OK, press the key for
‘
Continuous
’
and leave the
pedal switch to finish the laminating work.
Note:
▲ The two edges should be vertical to the roller, in case inclination
may be caused during lamination.
▲The picture and text should be narrower than the films.
D.
Feed the picture and text in plainly between the rollers by using the pedal
switch. After making sure everything is OK, press the key for
‘
Continuous
’
and
leave the pedal switch to finish the laminating work.
Note:
While the picture and text being inserted, they must be plain and their front
edge should be put in all at once, in case inclination or drape may be caused.
▲
There is a proportion between temperature and speed. Never try to gain high
speed and temperature all at one time, in case the laminating quality may
be affected.
▲
Observe the consequence closely during lamination. If find the heat-sensitive
film is not melted completely, turn the temperature higher ( or lower the speed ).
And if find any distortion of the laminated object, turn the temperature down
( or turn up the speed ).
▲ If there are obvious drapes on the picture and text, stop the machine, pull the
film flat and do the work again.
XI
. Common Faults & Settlements of Quality Issues
A.
Checking Methods and Adjusting of Pressure Balance of the Rubber Rollers
This manual suits for next models
1
Table of contents
Other Easymount Laminator manuals

Easymount
Easymount Air EM-A1600SH Specification sheet

Easymount
Easymount Sign EM-S1400C Specification sheet

Easymount
Easymount Sign EM-720 Specification sheet

Easymount
Easymount EM-S880 Specification sheet

Easymount
Easymount EMS-650 Specification sheet

Easymount
Easymount SIGN User manual

Easymount
Easymount Single Hot EM-1600SH Specification sheet

Easymount
Easymount EM-1200 Specification sheet

Easymount
Easymount Cold EM-1400 User manual