EchoMaster Pro FCTP-DP1504 User manual

Installation Guide
FCTP-DP1504
Lane Change Assistance
For RAM PROMASTER (2014-2018)
with Universal Monitor

email - support@aampglobal.com (US)
tel - 1-800-477-2267 (East Coast) - 1-888-883-2790 (West Coast)
email - technical.eu@aampglobal.com (Europe)
2
Illustrations are typical and may not match exact vehicle details
tel - 1-800-477-2267 (East Coast) - 1-888-883-2790 (West Coast)
FCTP-DP1504
Lane Change Assistance - RAM PROMASTER
What’s In The Box
FCTP-DP1504
Image Part Number Description Qty
1SVC-02 Side Cameras 2
2P-RAMPM-LHD Side Mirror Cap Camera Mounts (L) 1
3 & 4 BSM1-SCEH 70 Inch Camera Connection Harness 1
5CAM-EXT4PRCA-HAR Front Camera Adapter Harness 1
6P-VS41.3-B Camera Switcher 1
7 VS41-TP-HAR Camera Switcher Harness 1
2
43
5
7
6
1

3
Illustrations are typical and may not match exact vehicle details
tel - 1-800-477-2267 (East Coast) - 1-888-883-2790 (West Coast)
FCTP-DP1504
Lane Change Assistance - RAM PROMASTER
tel - 1-800-477-2267 (East Coast) - 1-888-883-2790 (West Coast)
Wiring Diagram
VS41-TP-HAR
VS41-TP-HAR

email - support@aampglobal.com (US)
tel - 1-800-477-2267 (East Coast) - 1-888-883-2790 (West Coast)
email - technical.eu@aampglobal.com (Europe)
4
Illustrations are typical and may not match exact vehicle details
tel - 1-800-477-2267 (East Coast) - 1-888-883-2790 (West Coast)
FCTP-DP1504
Lane Change Assistance - RAM PROMASTER
Cover all surfaces with tape or plastic protection lm to protect against
scratching and damage. EchoMaster is in no way responsible for any damage
that may occur during installation.
This product has been validated in the vehicles listed on the application guide only.
Care must be taken when installing this accessory to ensure damage does not occur
to the vehicle. The installation of this accessory should follow approved guidelines to
ensure proper installation. Read entire instructions thoroughly before starting.
This document covers such items as:
- Vehicle Protection (use of covers and blankets, cleaning chemicals, etc).
- Vehicle Disassembly / Reassembly (panel removal, part storage, etc).
- Electrical Component Disassembly / Reassembly (battery disconnection,
connector removal, etc).
NOTES:
Removed Parts: Inspect the vehicle and parts for any damage.
Place all removed parts on a protected surface in an area where they will not get
damaged.
Connectors: When disconnecting connectors, do not pull on the wires; pull by
holding the connectors.
Retain the factory reverse camera if equipped.
Prior to Installation

5
Illustrations are typical and may not match exact vehicle details
tel - 1-800-477-2267 (East Coast) - 1-888-883-2790 (West Coast)
FCTP-DP1504
Lane Change Assistance - RAM PROMASTER
tel - 1-800-477-2267 (East Coast) - 1-888-883-2790 (West Coast)
CAUTION
Consult your vehicle owner’s manual to disconnect
the battery. Do not disconnect ANY airbag
connectors or indicators. Doing so may result in
activating a diagnostic code. These codes will require
the dealer to perform the reset procedure which may
incur a reset fee.
Vehicle Preparation & Protection
Recommended Tools
Torx
T20 & T40
Nylon Trim
Removal Tools
No 1 Philips
Screwdriver
Painter’s
Tape
Routing
Tool
If you are unsure of any vehicle trim removal process consult the OEM service manual.
Removing vehicle trim panels in extreme hot and/or cold climate could result in
damage. Use care when removing all vehicle trims.
Using painter’s blue tape on the vehicle trim panels can help limit any scratches
and/or marring. Use a nylon trim panel removal tool whenever possible.

email - support@aampglobal.com (US)
tel - 1-800-477-2267 (East Coast) - 1-888-883-2790 (West Coast)
email - technical.eu@aampglobal.com (Europe)
6
Illustrations are typical and may not match exact vehicle details
tel - 1-800-477-2267 (East Coast) - 1-888-883-2790 (West Coast)
FCTP-DP1504
Lane Change Assistance - RAM PROMASTER
Door & Mirror Disassembly
Once again, using a trim removal tool
remove the electric window switch panel
to reveal the wing mirror wiring harness.
Step 2
Unplug the harness connectors found
underneath the window switch panel.
Step 3
With the T40 Torx driver, remove the 4
bolts that secure the mirror assembly
to the door panel on each side.
Step 4
PLEASE NOTE
Driver side mirror harness will have 2 connectors.
Both of which will need to be disconnected.
Using a Nylon trim removal tool, remove the
inner door trim panel to allow access to the
mirror housing bolts.
Step 1

7
Illustrations are typical and may not match exact vehicle details
tel - 1-800-477-2267 (East Coast) - 1-888-883-2790 (West Coast)
FCTP-DP1504
Lane Change Assistance - RAM PROMASTER
tel - 1-800-477-2267 (East Coast) - 1-888-883-2790 (West Coast)
Door & Mirror Disassembly - (continued)
Carefully push the mirror
housing upwards and then pull
towards you allowing the mirror
xing to release from door pillar.
Step 5
PLEASE NOTE
Be sure to protect the side of the
vehicle when removing the mirrors.
Using even pressure, push the outer
edge of the mirror glass downwards in
order to access the 2 x Philips screws
that secure the indicator light.
Step 6
Once the screws are removed, place
to one side. Next, lift the indicator
housing from the mirror assembly.
Step 7

email - support@aampglobal.com (US)
tel - 1-800-477-2267 (East Coast) - 1-888-883-2790 (West Coast)
email - technical.eu@aampglobal.com (Europe)
8
Illustrations are typical and may not match exact vehicle details
tel - 1-800-477-2267 (East Coast) - 1-888-883-2790 (West Coast)
FCTP-DP1504
Lane Change Assistance - RAM PROMASTER
Door & Mirror Disassembly - (continued)
To remove the Indicator bulb from the
housing, twist the connector in a
counter-clockwise direction.
Step 8
Cable Routing - Camera Harness
Using a Nylon trim removal tool,
remove the plastic access cover from
the mirror arm as shown in the image
opposite.
Step 1
Using a suitable draw cable, route the
camera extension harness through the
mirror assembly.
Left and Right Hand Side = BSM1-SCEH
Step 2
Left Hand
Drive vehicles

9
Illustrations are typical and may not match exact vehicle details
tel - 1-800-477-2267 (East Coast) - 1-888-883-2790 (West Coast)
FCTP-DP1504
Lane Change Assistance - RAM PROMASTER
tel - 1-800-477-2267 (East Coast) - 1-888-883-2790 (West Coast)
Mirror Reassembly
Standard Camera Inserts Trailer/Towing Camera Inserts Camera Insert Bracket
Turn both inserts over and check the reverse to determine
the correct insert for each side of the vehicle.
Step 1
Step 2
The camera can only be installed by
aligning the at edge against the at
edge of the insert.
PLEASE NOTE
The following steps refer to both Normal & Trailer/Towing Camera Inserts
LHD-LH Left Hand Side
LHD-RH Right Hand Side
LHD-RH-T Right Hand Side (Trailer/Towing)
LHD-LH-T Left Hand Side (Trailer/Towing)
Left Hand
Drive vehicles

email - support@aampglobal.com (US)
tel - 1-800-477-2267 (East Coast) - 1-888-883-2790 (West Coast)
email - technical.eu@aampglobal.com (Europe)
10
Illustrations are typical and may not match exact vehicle details
tel - 1-800-477-2267 (East Coast) - 1-888-883-2790 (West Coast)
FCTP-DP1504
Lane Change Assistance - RAM PROMASTER
PLEASE NOTE
Do not apply pressure to the camera lens.
The camera insert bracket is designed to t
between the indicator lens and the mirror housing.
Mirror Reassembly - (continued)
Step 3
Push the camera through the insert and
snap into place. The clips on the side of
the camera ensure it is secured in place.
Step 4
Insert the indicator housing into the camera
insert bracket along one edge and then
press other side into place.
Step 5
Click the camera insert into place under
the indicator housing and secure with the
2 x Philips screws provided.
PLEASE NOTE
Each camera insert bracket is marked for a specic
side of the vehicle.

11
Illustrations are typical and may not match exact vehicle details
tel - 1-800-477-2267 (East Coast) - 1-888-883-2790 (West Coast)
FCTP-DP1504
Lane Change Assistance - RAM PROMASTER
tel - 1-800-477-2267 (East Coast) - 1-888-883-2790 (West Coast)
Mirror Reassembly - (continued)
Step 6
Connect the camera to the harness
previously routed and attach the indicator
bulb back in to the housing by turning
clockwise.
Step 7
Once the camera is connected insert the
indicator housing into the mirror assembly
and secure with the 2 x Phillips screws
provided.
PLEASE NOTE
The supplied screws are longer than the factory versions
Step 8
To reattach the mirror housing, insert the
top xing point into the top hole on the
door pillar and lower into place making
sure the xing hook is inside the door. Then
push the bottom of the mirror inwards and
secure with the 4 x T40 torx bolts.
2
3

email - support@aampglobal.com (US)
tel - 1-800-477-2267 (East Coast) - 1-888-883-2790 (West Coast)
email - technical.eu@aampglobal.com (Europe)
12
Illustrations are typical and may not match exact vehicle details
tel - 1-800-477-2267 (East Coast) - 1-888-883-2790 (West Coast)
FCTP-DP1504
Lane Change Assistance - RAM PROMASTER
Cable Routing - Through Bodywork
Step 1
Using a suitable draw cable, feed the
camera harness through the door to where
the factory wires come through the rubber
grommet.
Unclip the protective door harness boot
and using a suitable draw cable feed the
harness through into the vehicle. Do not
remove the boot from the black snap ring
used to secure to the vehicle.
PLEASE NOTE
Only the vehicle side of the protective boot needs
to be removed in order to route the cable.
Step 2
Once inside the vehicle, using a suitable
draw cable, route the camera extension
harness behind the lower section of the
dash, until it reaches the radio cavity
making sure to avoid any moving parts.
Secure the cable using cable ties.
PLEASE NOTE
For Left Hand Drive vehicles
For LH and RH side installation you will need to use
the supplied BSM1-SCEH extension harness.
1

13
Illustrations are typical and may not match exact vehicle details
tel - 1-800-477-2267 (East Coast) - 1-888-883-2790 (West Coast)
FCTP-DP1504
Lane Change Assistance - RAM PROMASTER
tel - 1-800-477-2267 (East Coast) - 1-888-883-2790 (West Coast)
NOTES:

email - support@aampglobal.com (US)
tel - 1-800-477-2267 (East Coast) - 1-888-883-2790 (West Coast)
email - technical.eu@aampglobal.com (Europe)
14
Illustrations are typical and may not match exact vehicle details
tel - 1-800-477-2267 (East Coast) - 1-888-883-2790 (West Coast)
FCTP-DP1504
Lane Change Assistance - RAM PROMASTER

15
Illustrations are typical and may not match exact vehicle details
tel - 1-800-477-2267 (East Coast) - 1-888-883-2790 (West Coast)
FCTP-DP1504
Lane Change Assistance - RAM PROMASTER
tel - 1-800-477-2267 (East Coast) - 1-888-883-2790 (West Coast)

AGREEMENT: EchoMaster provides instructions and safety warnings with respect to this product
and disclaims all liability for any use not in conformity with those instructions or other misuse of its
product. If you do not agree, please discontinue use immediately and contact EchoMaster.
This product is intended for o-road use and passenger use only.
IG-FCTP-DP1504
REV. 071818
Unit 25B, Woolmer Way, Bordon, Hampshire, United Kingdom, GU35 9QE
tel - +44(0)1420 487110 (sales) - +44(0)1420 470618 (technical)
15500 Lightwave Drive, Suite 202, Clearwater, Florida 33760
tel - 1-800-477-2267 (East Coast) - 1-888-883-2790 (West Coast)
EchoMaster is a Power Brand of AAMP Global.
EchoMaster.com
Table of contents
Other EchoMaster Pro Automobile Accessories manuals
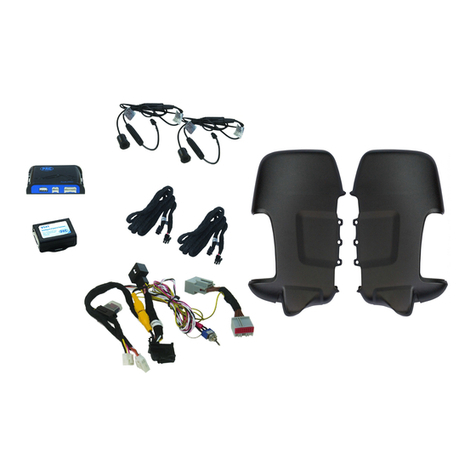
EchoMaster Pro
EchoMaster Pro FCTP-FT1602 User manual
EchoMaster Pro
EchoMaster Pro FCTP-GM2003 User manual

EchoMaster Pro
EchoMaster Pro PHD-MOUNT User manual
EchoMaster Pro
EchoMaster Pro PBS-MW01 User manual

EchoMaster Pro
EchoMaster Pro FCTP-DR1304 User manual

EchoMaster Pro
EchoMaster Pro FCTP-MB1903 User manual
EchoMaster Pro
EchoMaster Pro IntelliHaul User manual

EchoMaster Pro
EchoMaster Pro IntelliHaul FC-GMOESWR-TC User manual

EchoMaster Pro
EchoMaster Pro PMON-50-FM User manual
EchoMaster Pro
EchoMaster Pro RV-MM7 User manual