manuals.online logo
Brands
  1. Home
  2. •
  3. Brands
  4. •
  5. ECR 4 Kids
  6. •
  7. Indoor Furnishing
  8. •
  9. ECR 4 Kids ELR-0731 User manual

ECR 4 Kids ELR-0731 User manual

40mm 100mm
12mm
35mm
A
Easel Frame (4)
Acrylic Sheet (4)
Easel Tray (4)
Wire Basket (1)
Wire Shelf (1)
Easel Clip (8)
Nut (36)
Parts List
Apron Screw (4)
N
Apron Hook (4)
O
B
C
D
E
F
G
I
Plastic Washer (40)
M
Screw (20)
Brace Screw (12)
H
Metal Washer (60)
L
BEFORE ASSEMBLING, MAKE SURE YOU HAVE ALL THE PARTS
Mounting Wedge (8)
Mounting Wedge Screw (16)
J
P
Brace (12)
K
Adult Assembly Required.
Two adults recommended.
- Contains small parts, sharp points and
edges.
- Do not stand, sit, kneel, climb, lean or
pull on unit for support.
- Never leave children unattended.
- Do not place unit near high heat or
moisture.
- Adult supervision recommended.
WARNING:
- Do not allow children to climb on art easel.
- Do not use as a ladder.
CAUTION:
TOOLS INCLUDED
Screwdriver
4-Station See-Thru Art Easel
with Storage & Drying Racks
Model# ELR-0731
San Diego, CA 92110 USA
www.ecr4kids.com
10mm Wrench
x
x
x
x
x
x
x
x
x
x
x
x
x
x
x
x
x
x
x
x
xx
x
x
x
x
x
Batch ID Sticker
located on a brace
1Build Easel Frame 2Install Wire Basket & Wire Shelf
Attach the Easel Frames (A) with Brace Screws (L), Metal Washers (J),
Braces (N) and Nuts (I).
Place the Wire Basket (D) & Wire Shelf (E) onto the bottom Braces (N).
N
N
N
D
E
x
x
Tip #1: Connect the screws & nuts loosely at first. Once all
screws have been installed correctly, tighten securely.
Tip #2: For the nuts to function properly, the plastic ends
should face away from the frame.
Tip #3: Using the wrench, hold the nut in place while tightening
the screw with a screwdriver.
J N J
3
Tip #4: Decide where the (4) Apron
Hooks (M) will be positioned and use
the 40mm Apron Screws (G), not
the 35mm Screws (H), to attach.
x
x
x
Attach Acrylic Sheets
and Apron Hooks
Carefully remove protective paper from Acrylic
Sheets (B). Attach an Acrylic Sheet (B) to
the Easel Frame (A) with Screws (H), Plastic
Washers (K), Metal Washers (J) and Nuts (I).
The plastic washers should sandwich the
acrylic sheet.
Attach an Apron Hook (M) to the Easel
Frame (A) with a Screw (G), 2Plastic
Washers (K), 2 Metal Washers (J)
& aNut (I).
Attach Easel Trays
Attach the Mounting Wedges (O) to the
Easel Frames (A) with Mounting Wedge
Screws (P).Place the back of the Easel
Tray (C) against the Mounting Wedges (P)
and attach the Easel Tray to the Easel
Frame (A).
Assemble the Apron Hooks, Acrylic Sheets & Easel Trays as shown above.
(Repeat assembly on remaining 3 sides.)
G K
J
J
M
I
J
IKH
KJ
J
HI
O
P
OA
P
Batch ID Sticker
located on a brace
Part N
Attach Easel Clips
Attach the Easel Clips (F)
to the top edge of the
Acrylic Sheet (B).
The Art Easel is now
ready for use!
©2011 ECR LLC Version: ELR-0731.2011.03.23
x
x
x
x
x
x
x
x
x
x
x
x
x
x
x
x
xx
x
x
x
x
x
x
x
x
x
We appreciate your purchase of the 4-Station See-Thru Art Easel
with Storage & Drying Racks. Early Childhood Resources® has made
every effort to supply a quality product, that with proper use and care,
will bring you many years of trouble free use!
“Early Childhood Resources® guarantees the quality of all of our products. You can
trust the quality and safety of our furniture and materials, along with the peace of mind
that our products are made to last. If for any reason, you are not satisfied with the
quality and workmanship of our products, we will replace the item or refund the sale.”
Record the manufacture date here.
Information is located on the Batch ID
sticker and on the shipping carton.
Save this sheet in an accessible place.
Model Number: ELR-0731
Factory Code: F
Manufacture Date:
Batch ID Number:
(Located on Part N)
If you experience any difficulties with this product, please email us at
customerservice@ecr4kids.com or call toll-free at (888) 227-9028
(Monday - Friday, 7:00am - 4:00pm Pacific Standard Time)
Please do not return to place of purchase as Early Childhood Resources
will replace defective part(s) and/or product.
4
Care and Cleaning
Clean unit with a soft cloth or sponge using
mild soap and water.
Always clean thoroughly and do not allow
solution to remain on the acrylic for an
extended period of time.
Do not use abrasive, ammonia, or other
harsh chemicals to clean.
If unsure, always test a small area before
applying to the entire acrylic surface.
Do not place near heat, moisture or
vaporizer which may cause easel to warp.
Check for loose or worn parts periodically
and tighten or replace as necessary.
Other ECR 4 Kids Indoor Furnishing manuals

ECR 4 Kids ELR Series User manual

ECR 4 Kids

ECR 4 Kids ELR Series User manual

ECR 4 Kids ELR Series User manual

ECR 4 Kids

ECR 4 Kids ELR Series User manual

ECR 4 Kids ELR-17257 User manual

ECR 4 Kids

ECR 4 Kids ELR-17257 User manual

ECR 4 Kids ELR-0450-A User manual

ECR 4 Kids

ECR 4 Kids ELR-0450-A User manual

ECR 4 Kids ELR-0453-B User manual

ECR 4 Kids

ECR 4 Kids ELR-0453-B User manual

ECR 4 Kids Streamline ELR-17410 User manual

ECR 4 Kids

ECR 4 Kids Streamline ELR-17410 User manual

ECR 4 Kids ELR-17254 User manual

ECR 4 Kids

ECR 4 Kids ELR-17254 User manual

ECR 4 Kids ELR-0419-A User manual

ECR 4 Kids

ECR 4 Kids ELR-0419-A User manual

ECR 4 Kids ELR-0421-A User manual

ECR 4 Kids

ECR 4 Kids ELR-0421-A User manual

ECR 4 Kids ELR-17102-A User manual

ECR 4 Kids

ECR 4 Kids ELR-17102-A User manual

ECR 4 Kids ELR-0425-B User manual

ECR 4 Kids

ECR 4 Kids ELR-0425-B User manual

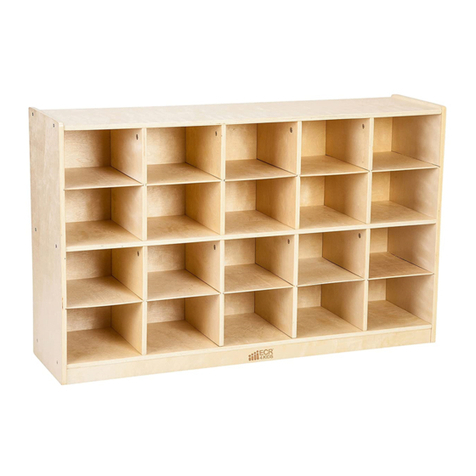
ECR 4 Kids 20 Section Storage Cabinet ELR-0426-A User manual

ECR 4 Kids

ECR 4 Kids 20 Section Storage Cabinet ELR-0426-A User manual

Popular Indoor Furnishing manuals by other brands

Mocka Essentials 3 Cube quick start guide

Mocka

Mocka Essentials 3 Cube quick start guide

Bontempi Casa ZAC 06.32 Assembly instructions

Bontempi Casa

Bontempi Casa ZAC 06.32 Assembly instructions

New England PX947 Assembly instructions

New England

New England PX947 Assembly instructions

Ironwood GLACIER LWRC quick start guide

Ironwood

Ironwood GLACIER LWRC quick start guide

Sundrape 5060 Assembly instructions

Sundrape

Sundrape 5060 Assembly instructions

DESKHAUS APEX PRO/6 Product assembly instructions

DESKHAUS

DESKHAUS APEX PRO/6 Product assembly instructions

Living Spaces 305-P236163 Assembly instructions

Living Spaces

Living Spaces 305-P236163 Assembly instructions

RUSTA EXCELLENCE 623514660101 manual

RUSTA

RUSTA EXCELLENCE 623514660101 manual

Triarch Indoor Lighting 60115 Assembly instructions

Triarch

Triarch Indoor Lighting 60115 Assembly instructions

JWA ELCHE ETU 70850 Assembly instruction

JWA

JWA ELCHE ETU 70850 Assembly instruction

FSC DORMANTE 180 Hmix LED Assembly instructions

FSC

FSC DORMANTE 180 Hmix LED Assembly instructions

VP Recycled Plastic APT-05-071018-RF Assembly guide

VP Recycled Plastic

VP Recycled Plastic APT-05-071018-RF Assembly guide

Pioneer Woman PWS336158813027 manual

Pioneer Woman

Pioneer Woman PWS336158813027 manual

Sonpol DALLAS 47 installation instructions

Sonpol

Sonpol DALLAS 47 installation instructions

Artely Ever II user guide

Artely

Artely Ever II user guide

NORTH STATES 5264 instructions

NORTH STATES

NORTH STATES 5264 instructions

DHP 4027249 manual

DHP

DHP 4027249 manual

Wilding Wallbeds Remington manual

Wilding Wallbeds

Wilding Wallbeds Remington manual

manuals.online logo
manuals.online logoBrands
  • About & Mission
  • Contact us
  • Privacy Policy
  • Terms and Conditions

Copyright 2025 Manuals.Online. All Rights Reserved.