manuals.online logo
Brands
  1. Home
  2. •
  3. Brands
  4. •
  5. ECR 4 Kids
  6. •
  7. Indoor Furnishing
  8. •
  9. ECR 4 Kids ELR-17257 User manual

ECR 4 Kids ELR-17257 User manual

B
C
D
E
F G
H
I J
K
L
Use the Hex Tool.
Batch ID
located underneath.
Middle Shelf (1)
Top Panel (1)
Left & Right
Side Panels (1/1)
Parts List
A
BEFORE ASSEMBLING, MAKE SURE YOU HAVE ALL THE PARTS
Phillips Screws & Casters (16/4)
Cam Posts & Cam Locks (20/20)
Bottom Shelf (1)
Upper Dividers (5)
Lower Dividers (5) Lower Back Panels (6)
Upper Back Panel (1)
Thin Shelves (18) Hex Screws (32)
Use a Phillips Screwdriver.
A1
L1 L2
K1 K2
A2
30 Section
Storage Cabinet
Model# ELR-17257
WARNING:
Adult Assembly Required.
Two adults recommended.
- Contains small parts, sharp points and edges.
- Do not stand, sit, kneel, climb, lean or pull on unit for support.
- Never leave children unattended.
- Do not place unit near high heat or moisture.
- Adult supervision recommended.
Children climbing on furniture
can lead to death or serious
injury due to tipping. Secure
unit to wall using appropriate
hardware.
TOOLS INCLUDED
Hex Tool (1)
TOOLS NEEDED
Phillips Screwdriver
San Diego, CA 92110 USA
www.ecr4kids.com
Batch ID Sticker
4Install Lower Dividers to Bottom Shelf
2Install Upper Dividers to Middle Shelf
Connect Top Panel to Upper Dividers
3
Install the Upper Dividers (E) on to the Middle Shelf (C) with ten Hex Screws (J) using the
Hex Tool.
Note: The grooves on the Middle Shelf are toward the ground.
Place two Cam Locks (K2) into the recessed holes on each Upper Divider (E), with the arrow
facing the closest edge.
Install the Lower Dividers (F) on to the Bottom Shelf (D) with ten Hex Screws (J) using the
Hex Tool.
Note: The grooves on the Bottom Shelf & Lower Dividers are toward the ground.
Install ten Cam Posts (K1) into the threaded plastic inserts on the underside of Top Panel (B)
with a Phillips screwdriver.
Reminder: Do not overtighten, as the plastic threads can be stripped.
Insert the Top Panel (B) Cam Posts into the holes on the top edge of the Upper Dividers (E).
Turn the Cam Locks clockwise with a Phillips screwdriver to lock the Upper Dividers (E) onto
the posts.
Note: The groove on the Top Panel is toward the ground.
See Next Page
1Install the Casters onto Bottom Shelf
Install the four Casters (L2) into the pre-drilled holes on the underside of the Bottom Shelf (D),
with four Phillips Screws (L1) per caster, using a Phillips screwdriver.
Insert the Lower Back Panels
5
6Connect Middle Shelf to Lower Dividers
Insert Left Side Lower Back Panel
7
8Install the Left Side Panel
C
a
r
e
f
u
l
l
y
R
o
t
a
t
e
O
v
e
r
Install the Left Side Panel (A1) on to the Top Panel (B), Middle Shelf (C) and Bottom Shelf (D)
with six Hex Screws (J) using the Hex Tool.
Two Adults Recommended: Carefully rotate unit over so the front is facing the ground.
Install ten Cam Posts (K1) into the threaded plastic inserts on the underside of Middle Shelf (C)
with a Phillips screwdriver.
Reminder: Do not overtighten, as the plastic threads can be stripped.
Insert the Middle Shelf (C) Cam Posts into the holes on the top edge of the Lower Dividers (F).
Turn the Cam Locks clockwise with a Phillips screwdriver to lock the Lower Dividers (F) onto the
posts.
See Next Page
Slide four Lower Back Panels (G) into the rear grooves on the Lower Dividers (F) as shown,
until fully seated into the groove on the topside of the Bottom Shelf (D).
Tip: If the Back Panels do not slide in easily, wiggle the panels while pushing into place.
Place two Cam Locks (K2) into the recessed holes on each Lower Dividers (F), with the arrow
facing the closest edge.
Slide one Lower Back Panel (G) into the grooves on the underside of Middle Shelf (C) and
topside of the Bottom Shelf (D) as shown, until fully seated into the groove on the inside of the
Lower Divider (F).
Tip: If the Back Panel does not slide in easily, wiggle the panel while pushing into place.
Insert Remaining Back Panels
Install the Right Side Panel
9
10
Insert the Thin Shelves
11
C
a
r
e
f
u
l
l
y
R
o
t
a
t
e
U
p
r
i
g
h
t
Install the Right Side Panel (A2) on to the Top Panel (B), Middle Shelf (C) and Bottom Shelf (D)
with six Hex Screws (J) using the Hex Tool.
Two Adults Recommended:
Carefully rotate unit upright.
See Next Page
Slide the remaining Lower Back Panel (G) into the grooves on the underside of Middle Shelf (C)
and topside of the Bottom Shelf (D) as shown, until fully seated into the groove on the inside of
the Lower Divider (F).
Slide the Upper Back Panel (H) into the grooves on the underside of the Top Panel (B) and
topside of Middle Shelf (C) as shown, until fully seated into the groove on the inside of the Left
Side Panel (A1).
Tip: If the Back Panel does not slide in easily,
wiggle the panel while pushing into place.
Slide the Thin Shelves (I) into the grooves on the sides of Upper & Lower Dividers (E, F)
and insides of the Side Panels (A1, A2) as shown, until fully seated against the Back Panels.
Tip: If the Shelves do not slide in easily,
wiggle them while pushing into place.
©2016 ECR4KIDS, LP Version: ELR-17257_EP_2016.04.14
Care and Cleaning
Clean wood with a damp cloth or sponge
using warm water and mild soap. Wipe dry.
Do not place near heat, moisture or
vaporizer which may cause wood to warp
and peel.
Check for loose or worn parts periodically
and tighten or replace as necessary.
Record the manufacture date here.
Information is located on the Batch ID
sticker and on the shipping carton.
Save this sheet in an accessible place.
Model Number: ELR-17257
Factory Code: EP
Manufacture Date:
Batch ID Number:
(Located on Part D)
We appreciate your purchase of the 30 Section Storage Cabinet.
ECR4KIDS has made every effort to supply a quality product that with proper
use and care, will provide many years of trouble-free use.
Warranty: Visit our website for product specific warranty information at:
www.ecr4kids.com
If you experience any difficulties with this product, please email us at
[email protected] or call toll-free at (855) ECR-4KIDS
(Monday - Friday, 7:00am - 4:00pm Pacific Standard Time)
Please do not return to place of purchase as ECR4KIDS will
replace defective part(s) and/or product.
To prevent a tip-over tragedy:
Buy and install low-cost anchoring devices that can prevent TVs,
dressers, bookcases and other furniture from tipping. For more
information please visit www.ecr4kids.com/resources

This manual suits for next models

1

Other ECR 4 Kids Indoor Furnishing manuals
ECR 4 Kids ELR-0421-A User manual

ECR 4 Kids

ECR 4 Kids ELR-0421-A User manual

ECR 4 Kids 20 Section Storage Cabinet ELR-0426-A User manual

ECR 4 Kids

ECR 4 Kids 20 Section Storage Cabinet ELR-0426-A User manual

ECR 4 Kids ELR-17102-A User manual

ECR 4 Kids

ECR 4 Kids ELR-17102-A User manual

ECR 4 Kids ELR-0425-B User manual

ECR 4 Kids

ECR 4 Kids ELR-0425-B User manual

ECR 4 Kids ELR Series User manual

ECR 4 Kids

ECR 4 Kids ELR Series User manual

ECR 4 Kids Streamline ELR-17410 User manual

ECR 4 Kids

ECR 4 Kids Streamline ELR-17410 User manual

ECR 4 Kids ELR-0450-A User manual

ECR 4 Kids

ECR 4 Kids ELR-0450-A User manual
ECR 4 Kids ELR Series User manual

ECR 4 Kids

ECR 4 Kids ELR Series User manual
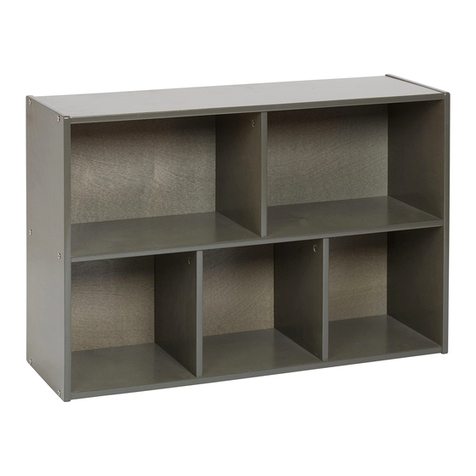
ECR 4 Kids ELR-17254 User manual

ECR 4 Kids

ECR 4 Kids ELR-17254 User manual

ECR 4 Kids ELR-0731 User manual

ECR 4 Kids

ECR 4 Kids ELR-0731 User manual

ECR 4 Kids ELR-0453-B User manual

ECR 4 Kids

ECR 4 Kids ELR-0453-B User manual

ECR 4 Kids ELR-0419-A User manual

ECR 4 Kids

ECR 4 Kids ELR-0419-A User manual
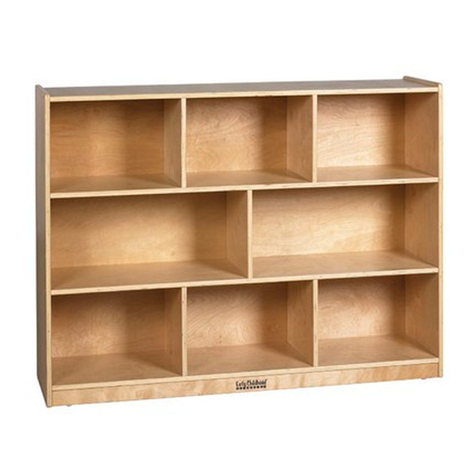
Popular Indoor Furnishing manuals by other brands

Twin-Star International SB6999 manual

Twin-Star International

Twin-Star International SB6999 manual

Alsapan 571053 Assembling instructions

Alsapan

Alsapan 571053 Assembling instructions

Bouclair 9399424 Assembly instructions

Bouclair

Bouclair 9399424 Assembly instructions

John Lewis 82089649 quick start guide

John Lewis

John Lewis 82089649 quick start guide

IKEA HEMNES Assembly instruction

IKEA

IKEA HEMNES Assembly instruction

Norton TD466 Assembly instructions

Norton

Norton TD466 Assembly instructions

rst brands LINDON SL-ST-5 Assembly instructions

rst brands

rst brands LINDON SL-ST-5 Assembly instructions

East West Furniture LAT-07-TP Assembly instructions

East West Furniture

East West Furniture LAT-07-TP Assembly instructions

World Market Leilani Channel 549817 Assembly instructions

World Market

World Market Leilani Channel 549817 Assembly instructions

ROOMS TO GO KIDS CREEKSIDE 2.0 3704440P manual

ROOMS TO GO

ROOMS TO GO KIDS CREEKSIDE 2.0 3704440P manual

Ameriwood HOME Franklin 5062096PCOM manual

Ameriwood HOME

Ameriwood HOME Franklin 5062096PCOM manual

Flam DAMA Console 1400 Product information

Flam

Flam DAMA Console 1400 Product information

PHI VILLA PV-001-BN Use and care guide

PHI VILLA

PHI VILLA PV-001-BN Use and care guide

Target BALI 2 SEATER Assembly instructions

Target

Target BALI 2 SEATER Assembly instructions

ofichairs Maya manual

ofichairs

ofichairs Maya manual

Ballard Designs SL119 manual

Ballard Designs

Ballard Designs SL119 manual

Mantel X4714-1WHM quick start guide

Mantel

Mantel X4714-1WHM quick start guide

Casa Bonita K064 Instructions for use

Casa Bonita

Casa Bonita K064 Instructions for use

manuals.online logo
manuals.online logoBrands
  • About & Mission
  • Contact us
  • Privacy Policy
  • Terms and Conditions

Copyright 2025 Manuals.Online. All Rights Reserved.