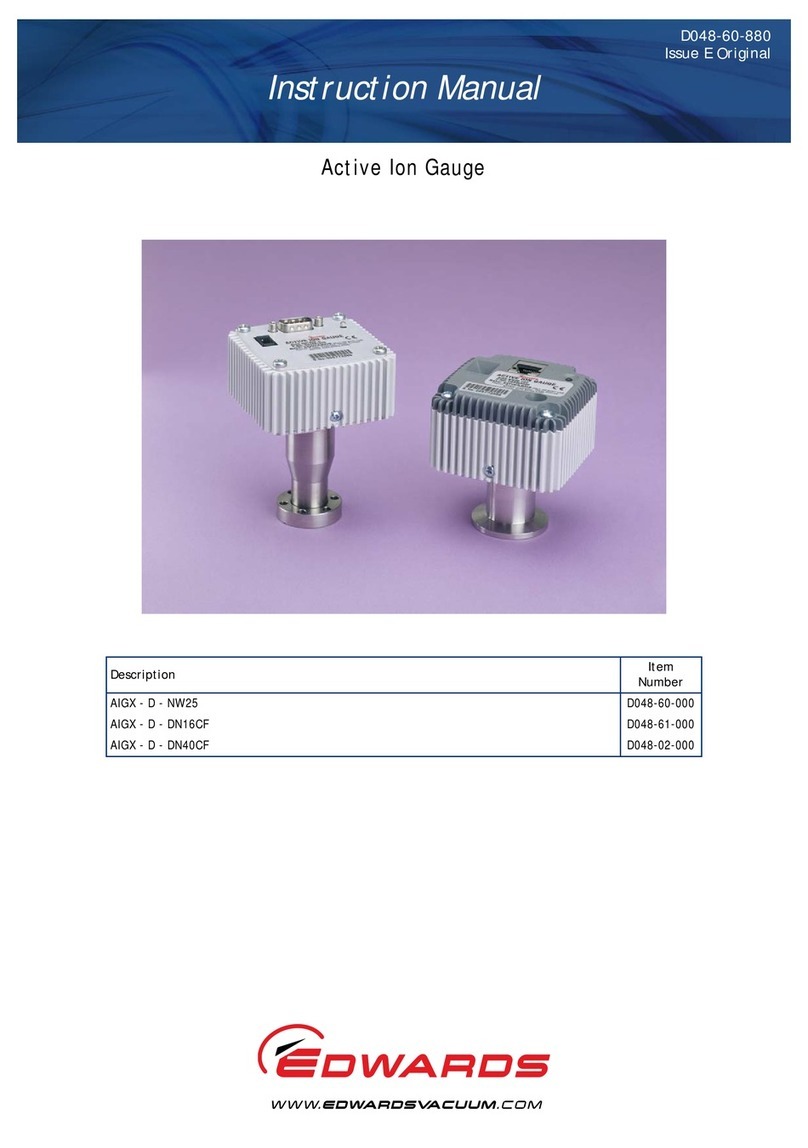
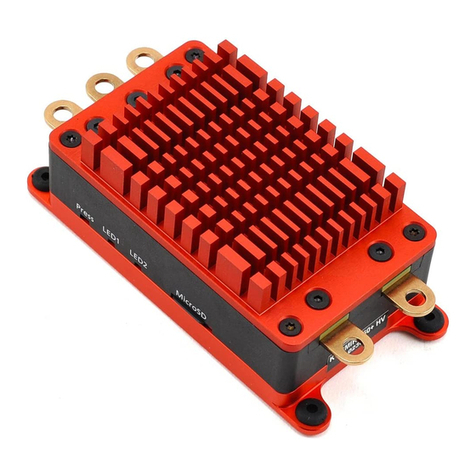
Edwards AIGX-S-NW25 User manual

D048-50-880
Issue E Original
Instruction Manual
Active Ion Gauge
Description Item Number
AIGX-S-NW25 D048-50-000
AIGX-S-DN16CF D048-51-000
AIGX-S-DN40CF D048-52-000

This product has been manufactured under a quality management system certified to ISO 9001:2008
Declaration of Conformity
We, Edwards Limited,
Crawley Business Quarter,
Manor Royal,
Crawley,
West Sussex, RH10 9LW, UK
declare under our sole responsibility, as manufacturer and person within the EU authorised
to assemble the technical file, that the product(s)
Active Ion Gauge
AIGX-S-NW25 D048-50-000
AIGX-S-DN16CF D048-51-000
AIGX-S-DN40CF D048-52-000
to which this declaration relates is in conformity with the following standard(s) or other
normative document(s)
EN61010-1: 2010 Safety Requirements for Electrical Equipment for Measurement,
Control and Laboratory Use. General Requirements
EN61326-2-3: 2013 Electrical equipment for measurement, control and laboratory
(Class B Emissions, Use. EMC requirements. Particular requirements. Test
Industrial Immunity) configuration, operational conditions and performance criteria
for transducers with integrated or remote signal conditioning
EN50581:2012 Technical Documentation for the Assessment of Electrical and
Electronic Products with respect to the Restriction of Hazardous
Substances
and fulfils all the relevant provisions of
2014/30/EU Electromagnetic Compatibility (EMC) Directive
2011/65/EU Restriction of Certain Hazardous Substances (RoHS) Directive
Note: This declaration covers all product serial numbers from the date this Declaration was
signed onwards.
09.07.2015, Eastbourne
Larry
Marini,
Senior
Technical Manage
r
Date and Place
P200-02-520 Issue F

© Edwards Limited 2013. All rights reserved. Page i
Edwards and the Edwards logo are trademarks of Edwards Limited.
Contents
DO48-50-880 Issue E
Contents
Section Page
1 INTRODUCTION .................................................................................... 1
1.1 Scope ...................................................................................................................... 1
1.2 Description ................................................................................................................ 1
2 TECHNICAL DATA ................................................................................. 3
2.1 Mechanical Data ......................................................................................................... 3
2.2 Performance, Operating and Storage Conditions ................................................................... 3
2.3 Electrical Data ........................................................................................................... 3
2.3.1 Electrical Supply .........................................................................................................3
2.3.2 Output Signal .............................................................................................................3
2.3.3 Gauge and Degas Enable ................................................................................................ 4
2.3.4 Set-point ................................................................................................................. 4
2.3.5 Gauge Identification .................................................................................................... 4
2.3.6 Electrodes ................................................................................................................. 4
2.4 Materials Exposed to Vacuum .......................................................................................... 5
3 INSTALLATION ..................................................................................... 7
3.1 Unpack and Inspect ...................................................................................................... 7
3.2 Fit the AIGX to the Vacuum System ................................................................................... 7
3.3 Electrical Connections .................................................................................................. 7
3.3.1 Connect to Edwards Controller ........................................................................................ 7
3.3.2 Connect to Your Own Supply and Control Equipment .............................................................. 7
3.3.3 Maximum Cable Length ................................................................................................. 9
4 OPERATION ...................................................................................... 11
4.1 Enable and Disable the AIGX ..........................................................................................11
4.2 Pressure Measurement .................................................................................................11
4.2.1 Calibration in Different Gases ........................................................................................12
4.3 Emission Current ........................................................................................................13
4.4 Degas the AIGX ..........................................................................................................13
4.5 Over-pressure Protection ..............................................................................................13
4.6 Filament Selection ......................................................................................................13
4.7 LED Status ................................................................................................................13
4.8 Set-point Adjustment ..................................................................................................14
4.9 Error Indication .........................................................................................................14
4.10 Bakeout ................................................................................................................... 14
5 MAINTENANCE ................................................................................... 17
5.1 Fault Finding Guide .....................................................................................................17
5.2 Replace the Body Tube ................................................................................................17
5.3 Replace the Internal Fuse .............................................................................................17
5.4 Calibration Service .....................................................................................................18
6 STORAGE AND DISPOSAL ....................................................................... 19
6.1 Storage ...................................................................................................................19
6.2 Disposal ................................................................................................................... 19
7 SPARES AND ACCESSORIES ..................................................................... 21
7.1 Introduction .............................................................................................................21
gea/0226/07/13

DO48-50-880 Issue E
Page ii © Edwards Limited 2013. All rights reserved.
Edwards and the Edwards logo are trademarks of Edwards Limited.
Contents
7.2 Spares ..................................................................................................................... 21
7.3 Accessories ...............................................................................................................21
For return of equipment, complete the HS Forms at the end of this manual.
Illustrations
Figure Page
1 General View of the AIGX (NW25 version) ........................................................................... 2
2 Dimensions (mm) ........................................................................................................ 5
3 Schematic Diagram of Recommended Electrical Connections .................................................... 8
4 Pressure Output Signal of AIGX .......................................................................................12
5 Separate the Electronics Housing from the Body Tube ...........................................................15
6 Fuse Replacement ......................................................................................................18
Tables
Table Page
1 Pins On the AIGX Connector ............................................................................................ 9
2 Maximum Recommended Cable Length .............................................................................. 9
3 Gas Calibration Factors for Various Gases ..........................................................................12
4 LED Status ................................................................................................................13
5 Error Indication .........................................................................................................14
6 Fault Finding Guide .....................................................................................................17
Associated publications
Publication title Publication number
Vacuum pump and vacuum system safety P300-20-000
Trademark credits
Fomblin®is a registered trademark of Ausimont SpA.
LET-LOK®is a registered trademark of HAM-LET Group.
Swagelok™ is trademark of Crawford Fitting Company.
Viton™ is trademark of DuPont Dow Elastomers L.L.C.

© Edwards Limited 2013. All rights reserved. Page 1
Edwards and the Edwards logo are trademarks of Edwards Limited.
INTRODUCTION
D048-50-880 Issue E
1 INTRODUCTION
1.1 Scope
This manual provides installation, operation and maintenance instructions for the Edwards Active Ion Gauge (AIGX).
You must use the AIGX as specified in the manual. Read this manual before installing and operating the AIGX.
Important safety information is highlighted as WARNING and/or CAUTION instructions which must be followed. The
use of WARNINGS and/or CAUTIONS is defined below.
CAUTION
Cautions are given where failure to observe the instruction could result in damage to the equipment, associated
equipment and process.
The units used throughout this manual conform to SI international system of measurement followed by imperial units
in parenthesis; SI (imperial).
In accordance with the recommendations of IEC1010, the following warning symbols are on the pump:
1.2 Description
The AIGX is an ion gauge head and gauge controller in a single compact unit. The gauge operates as a hot filament
ionisation gauge, in which the pressure is measured indirectly as a function of the current.
The measurement range of the AIGX is 5 x 10⁻¹⁰ to 5 x 10⁻² torr (6.6 x 10⁻¹⁰ to 6.6 x 10⁻² mbar). Three types of
vacuum connections are available: DN16CF, DN40CF and NW25.
The AIGX requires a 14.5 - 30 V d.c. power supply; it has a 0 to 10 V d.c. analogue output which is related to pressure.
The AIGX is compatible with Edwards Controllers. Alternatively, you can use an independent power supply and you
can read the output signal with a voltmeter or analogue to digital converter.
An 8-way electrical connector socket on the AIGX (Figure 1, item 1) is used to connect the AIGX to your Controller or
electrical supply and voltmeter. Electrical cables fitted with suitable connectors are available as accessories. A
gauge identification signal is available on the electrical connector: this signal is used by Edwards Controllers to
identify which type of active gauge is connected.
The AIGX is supplied with two filaments. A switch on top of the gauge selects between filament 1 and 2 (Figure 1,
item 2).
There are two levels of emission currents: 0.1 and 1 mA. The gauge will automatically select 1 mA emission current
at low pressure, and 0.1 mA at high pressure.
A protection circuit is built into the gauge to prevent operating the gauge at pressures higher than 5 x 10⁻² torr.
The AIGX can be degassed using the degas feature. During degas, the grid voltage is 500 V and the emission current
is 10 mA. The degas is inhibited at high pressure. The maximum duration of degas is three minutes, after which the
gauge returns automatically to its normal mode.
WARNING
Warnings are given where failure to observe the instruction could result in injury or death to
people.
Warning - refer to accompanying
documentation.
From August 2005, Edwards will offer
European customers a recycling service.

D048-50-880 Issue E
Page 2 © Edwards Limited 2013. All rights reserved.
Edwards and the Edwards logo are trademarks of Edwards Limited.
INTRODUCTION
The AIGX has a set-point facility. The set-point signal is an open collector transistor output, which is on when the
pressure measured by the gauge is below a preset pressure. The pressure at which the set-point operates can be
adjusted using the set-trip switch on the top of the gauge (1, item 3).
The AIGX is fitted with a status LED (Figure 1, item 4) . This LED indicates the operating status of the gauge.
Figure 1 - General View of the AIGX (NW25 version)
1
1
2
4
3
5
1. Electrical connector
2. Filament select switch
3. Set trip switch
4. Status LED
5. Vacuum flange

© Edwards Limited 2013. All rights reserved. Page 3
Edwards and the Edwards logo are trademarks of Edwards Limited.
TECHNICAL DATA
D048-50-880 Issue E
2 TECHNICAL DATA
2.1 Mechanical Data
2.2 Performance, Operating and Storage Conditions
2.3 Electrical Data
2.3.1 Electrical Supply
2.3.2 Output Signal
Dimensions See Figure 2
Mass
2AIGX-S-NW25260 g 260 g
AIGX-S-DN16CF300 g 300 g
AIGX-S-DN40CF510 g 510 g
Volume of gauge tube 21 cm3
Enclosure rating IP30
Ambient temperature
Operation 0 to 40 ºC
Storage -30 to 70 ºC
Ambient humidity 90% RH (non-condensing) up to 31 ºC reducing to
50 % RH at 40 ºC
Atmosphere Dry non-conductive only (pollution degree 1)
Bakeout temperature 200 ºC (with electronics removed)
Maximum operating altitude 2000 m
Maximum internal pressure 10 bar absolute
Pressure measurement range 5 x 10⁻¹⁰ to 5 x 10⁻² torr
(6.6 x 10⁻¹⁰ to 6.6 x 10⁻² mbar)
Voltage +14.5 V to +30 V d.c.
Internal fuse 1 A (T)
Maximum power consumption
Operating 7 W
Degas 14 W
Electrical connector FCC 68 (RJ45)
Measurement range 0.7 V to 8.7 V
Gauge disabled 9.0 V
Emission error 9.5 V
Over-pressure trip 9.7 V
Minimum load impedance 10 kW

D048-50-880 Issue E
Page 4 © Edwards Limited 2013. All rights reserved.
Edwards and the Edwards logo are trademarks of Edwards Limited.
TECHNICAL DATA
2.3.3 Gauge and Degas Enable
2.3.4 Set-point
2.3.5 Gauge Identification
2.3.6 Electrodes
Control sense Active low
Active level < 1.5 V
Trip level 0.6 V to 8.8 V
Hysteresis 500 mV
Set-point output load rating 30 V d.c., 100 mA max
Back EMF suppression diode *
Min surge rating 1 A
Min reverse voltage rating 100 V
* required when you use an external d.c. relay connected to the set-point output
Identification resistance 162 k?
Emission current
Normal 0.1 or 1 mA
Degas 10 mA
Grid voltage
Normal 180 V
Degas 500 V
Filament bias voltage + 30 V
Collector voltage 0 V

© Edwards Limited 2013. All rights reserved. Page 5
Edwards and the Edwards logo are trademarks of Edwards Limited.
TECHNICAL DATA
D048-50-880 Issue E
2.4 Materials Exposed to Vacuum
Figure 2 - Dimensions (mm)
Collector Tungsten
Grid Tantalum Pt Clad Mo
Filament Yttria coated iridium
Body Stainless Steel
Feedthrough Stainless Steel and UHV compatible, glass/ceramic
A
Dim A
NW25 85 mm
DN16CF 106 mm
DN40CF 98 mm

D048-50-880 Issue E
Page 6 © Edwards Limited 2013. All rights reserved.
Edwards and the Edwards logo are trademarks of Edwards Limited.
This page has been intentionally left blank.

© Edwards Limited 2013. All rights reserved. Page 7
Edwards and the Edwards logo are trademarks of Edwards Limited.
INSTALLATION
D048-50-880 Issue E
3 INSTALLATION
3.1 Unpack and Inspect
Remove all packing materials and protective covers and check the AIGX .
If the AIGX is damaged, notify your supplier and the carrier in writing within three days; state the Item Number of
the gauge together with your order number and your supplier’s invoice number. Retain all packing materials for
inspection. Do not use the AIGX if it is damaged.
If the AIGX is not to be used immediately, replace the protective covers. Store the AIGX in suitable conditions as
described in Section 6.
3.2 Fit the AIGX to the Vacuum System
The AIGX can be mounted in any orientation. To avoid the build-up of debris or condensable material in the body
tube of the AIGX (which will probably cause pressure measurement errors), we recommend that you install the AIGX
vertically with the flange facing down.
Use a copper gasket and screws to connect the DN16CF and DN40CF flanges of the AIGX to a similar flange on your
vacuumSystem. Use an ‘O’ ring /centring-ring or Co-Seal and metal clamp to connect the NW25 flange of the AIGX
to a similar flange on your vacuum system.
Note: ’O’ rings are not recommended for systems where UHV pressures are required.
3.3 Electrical Connections
3.3.1 Connect to Edwards Controller
Connect the AIGX to the Controller using a cable which is terminated in suitable connectors. Suitable cables are
available from Edwards. Refer to Section 7.3.
Note: Your Controller must have a version of software that is compatible with the AIGX. If the Controller display
shows ??? when the AIGX is plugged in, then an upgrade to the Controller software is required. Please
contact Edwards.
Note: For cable lengths exceeding 10 m, cables with a larger conductor cross-section are required.
3.3.2 Connect to Your Own Supply and Control Equipment
Note: Do not connect the electrical supply common (pin 2) to the signal common (pin 5). If you do, the AIGX
pressure output signal will be inaccurate.
A schematic diagram of the recommended electrical connections to the AIGX is shown in Figure 3.
WARNING
The AIGX must be connected to an earthed (grounded) vacuum system. For gauges with a NW25
flange, a conductive metallic clamping ring must be used.
WARNING
If the AIGX malfunctions, the AIGX pressure output may be incorrect. If such a failure could result
in damage to equipment or cause injury to people, you must install a suitable control system to
indicate the failure and, if necessary, to close down your process system.

D048-50-880 Issue E
Page 8 © Edwards Limited 2013. All rights reserved.
Edwards and the Edwards logo are trademarks of Edwards Limited.
INSTALLATION
Figure 3 - Schematic Diagram of Recommended Electrical Connections
Connect a switch between pins 7 and 2 to enable and disable the gauge.
Connect a switch between pin 6 and 2 to enable and disable the degas function.
A. AIGX connector (socket)
B. Cable electrical (plug)
C. Degas enable switch
D. Gauge enable switch
E. Back EMF suppression diode (optional)
F. D.C. relay (optional)
G. View of AIGX connector

© Edwards Limited 2013. All rights reserved. Page 9
Edwards and the Edwards logo are trademarks of Edwards Limited.
INSTALLATION
D048-50-880 Issue E
The pins on the AIGX connector are used as shown in Table 1. The specification of the electrical supply, d.c. relay
and back EMF suppression diode are given in Section 2.
The connection to Pin 8 is optional. Make the connection to Pin 8 if you want to connect the set-point output signal
to a d.c. relay. You must connect a suppression diode between pins 8 and 1 to protect the AIGX from transient voltage
generated when the d.c. relay is switched off.
3.3.3 Maximum Cable Length
The maximum cable length is dependent on the conductor cross-section and the supply voltage used. The following
maximum cable lengths are recommended:
The common mode signal voltage (that is, the voltage between signal common and supply common) could be as much
as 2.5 V with long cables due to the voltage drop in the supply cable. You should ensure that the signal voltage
measurement will operate correctly.
Table 1 - Pins On the AIGX Connector
Pin No. Use
1 Supply positive
2 Supply common
3Signaloutput
4 ID resistor
5Signalcommon
6 Degas enable
7 Gauge enable
9 Set-point output
Table 2 - Maximum Recommended Cable Length
Conductor Cross-Cection 24 V Supply 15 V Supply
24 awg 30 m 0.5 m
28 awg 10 m 1 m

D048-50-880 Issue E
Page 10 © Edwards Limited 2013. All rights reserved.
Edwards and the Edwards logo are trademarks of Edwards Limited.
This page has been intentionally left blank.

© Edwards Limited 2013. All rights reserved. Page 11
Edwards and the Edwards logo are trademarks of Edwards Limited.
OPERATION
D048-50-880 Issue E
4OPERATION
4.1 Enable and Disable the AIGX
CAUTION
The gauge should not be operated at pressures higher than 5 x 10⁻² torr (6.6 x 10⁻² mbar). Operating the AIGX
at high pressures may reduce the lifetime of the filament.
If you are using the AIGX with a Controller, refer to the Controller instruction manual for details of how to enable
the AIGX. Alternatively, to enable (switch on) the AIGX, connect pin 7 to pin 2. To disable (switch off) the AIGX,
disconnect pin 7 from pin 2.
When the AIGX is enabled, the output signal will remain at 9.0 V whilst the emission current is being stabilised. This
will take typically 5 seconds (may be longer at lower pressures). After this time the output signal will indicate
pressure. If an error occurs, then the output signal will indicate the error.
4.2 Pressure Measurement
If you are using an AIGX with a Controller, the pressure measurement is shown on the Controller display. Otherwise,
convert the output signal to pressure using the following equation:
P = 10 (V - 10) torr
P = 10 (V - 9.875) mbar
P = 10 (V - 7.875) Pa
where V is the measured voltage in volts. Refer to Figure 4. This formula is valid for the range 0.7 V to 8.7 V.
WARNING
Do not use the AIGX to measure the pressure of explosive or flammable gases or mixtures.
WARNING
During operation, the surface of the ion gauge tube might become hot. To avoid risk of injury, do
not touch the tube whilst the gauge is operating. Switch off the gauge and allow to cool down for
few minutes before handling.
WARNING
Disconnect the electrical supply cable from the AIGX before you remove the AIGX from the vacuum
system. High voltages are generated inside the AIGX.

D048-50-880 Issue E
Page 12 © Edwards Limited 2013. All rights reserved.
Edwards and the Edwards logo are trademarks of Edwards Limited.
OPERATION
Figure 4 - Pressure Output Signal of AIGX
4.2.1 Calibration in Different Gases
The equation given in Section 4.2 is for air or nitrogen only. For other gases, the indicated pressure has to be
multiplied by a gas calibration factor (GCF).
The following table lists the gas calibration factor for most commonly used gases.
Table 3 - Gas Calibration Factors for Various Gases
Gas GCF
Helium 5.7
Argon 0.75
Neon 3.3
Krypton 0.5
Xenon 0.35
Hydrogen 2.4
Oxygen 1
Carbon Monoxide 1.15
Carbon Dioxide 0.7
0
1
2
3
4
5
6
7
8
1E-10 1E-9 1E-8 1E-7 1E-6 1E-5 1E-4 1E-3 1E-2 1E-1 1E+0 1E+1
Indicated Pressure
Gauge output (volts)
mbar
torr
Pascal

© Edwards Limited 2013. All rights reserved. Page 13
Edwards and the Edwards logo are trademarks of Edwards Limited.
OPERATION
D048-50-880 Issue E
4.3 Emission Current
To increase the life time of the filament, the two levels of emission currents are automatically controlled by the
gauge. As the pressure goes down, the emission current changes from 0.1 mA to 1mA at 2 x 10⁻⁵ torr (2.6 x 10⁻⁵
mbar). As the pressure goes up, the emission current changes from 1 mA to 0.1 mA at 5 x 10⁻⁵ torr (6.6 x 10⁻⁵ mbar).
4.4 Degas the AIGX
CAUTION
You must degas the AIGX regularly. Failure to do so will affect the performance and reduce the lifetime of the
gauge.
During use in contaminating environments the gauge electrodes become coated in insulating layers, eventually
resulting in premature failure of the product. This can be prevented by regular use of the degas feature. Typically,
degas will be required on a weekly basis although the interval will depend on the level of contamination.
The degas operation is also recommended if measurement of low pressure are required.
During degas, the grid will be heated to high temperature, sufficient to remove absorbed gases and some
contamination.
Degas the AIGX when the pressure is below 1 x 10⁻⁵ torr (1.3 x 10⁻⁵ mbar). The degas is inhibited when the pressure
is above 1 x 10⁻⁴ torr (1.3 x 10⁻⁴ mbar). The gauge will automatically return to the normal operation mode after 3
minutes.
If you are using the AIGX with a Controller, refer to the Controller instruction manual for details of how to degas the
AIGX. Otherwise, to enable degassing of the AIGX, connect pin 6 to pin 2.
4.5 Over-pressure Protection
The gauge will automatically switch off when the measured pressure rises above 5 x 10⁻² torr (6.6 x 10⁻² mbar). If
this occurs then the signal output and LED status will indicate over-pressure trip. Refer to Section 4.9.
4.6 Filament Selection
The AIGX has two filaments, 1 and 2. To select either of these filaments, use the sliding switch at the top of the
gauge. Make sure that the gauge is turned off before switching between filaments.
4.7 LED Status
The AIGX is fitted with a tri-coloured LED which can be used to monitor the status of the gauge according to the
following table:
Table 4 - LED Status
Colour Status
Off No power to the gauge or malfunction
Amber Power on, gauge disabled
Green/Amber (alternating) Emissions start-up
Green Emission on
Green (slow flashing) Degas on
Red (flashing) Emission error
Red Over-pressure trip

D048-50-880 Issue E
Page 14 © Edwards Limited 2013. All rights reserved.
Edwards and the Edwards logo are trademarks of Edwards Limited.
OPERATION
4.8 Set-point Adjustment
To read the voltage at which the set-point output signals are activated, press the required set trip switch (refer to
Figure 1) with an appropriate tool. The output of the gauge will indicate the set trip level for 3 seconds after which
the output will read the normal voltage output.
To adjust the voltage at which the set-point output signal is activated, press the required set trip switch and hold
it down for more than 3 seconds. The set-point voltage will start scrolling upwards. Remove pressure from the switch
as soon as you reach the required trip voltage. To make a finer adjustment, remove pressure from the set trip switch
and immediately depress the switch as many times as required. Each depression will increase the set trip voltage by
approximately 10 mV. Refer to Section 4.2 to determine the operating voltage which corresponds to a given
pressure.
If required, the set-point signal can be used to indicate when the gauge is operating correctly. Adjust the set-point
trip level to > 8.8 V. The set-point output will then be ON when the AIGX is operating normally. The set-point output
will be OFF if the gauge is disabled or if an error condition is detected.
4.9 Error Indication
If an error occurs during operation of the AIGX, then the output signal and the LED will indicate the error. Refer to
Section 5.1 for a fault finding guide.
If an error is indicated then the AIGX will automatically turn off. You should disable the AIGX to remove the error
indication, and correct the error. You may then re-enable the AIGX if required.
Note: If you are using the AIGX with an AGC, then the AGC will display an error message and disable the AIGX
when an error occurs. In this case the LED status will return to OFF, and you should view the AGC display
to determine the error.
4.10 Bakeout
The AIGX tube can be baked to temperatures up to 200 °C after removing the electronics housing. Refer to Figure 5
and the procedure in Section 5.2 to remove and refit the electronics housing.
Ensure that the tube has cooled down before refitting the electronics housing.
Table 5 - Error Indication
Error Condition Output Signal LED AGC Display
Emission error 9.5 V Red Flashing EM ERR
Over-pressure trip 9.7 V Red OVER R

© Edwards Limited 2013. All rights reserved. Page 15
Edwards and the Edwards logo are trademarks of Edwards Limited.
OPERATION
D048-50-880 Issue E
Figure 5 - Separate the Electronics Housing from the Body Tube
1
2
4
3
4
1. Electronics housing
2. Fixing screws
3. Body tube assembly
4. Locating lugs

D048-50-880 Issue E
Page 16 © Edwards Limited 2013. All rights reserved.
Edwards and the Edwards logo are trademarks of Edwards Limited.
This page has been intentionally left blank.
This manual suits for next models
2
Table of contents
Other Edwards Controllers manuals
Edwards
Edwards PC2K User manual

Edwards
Edwards EXC 100E User manual

Edwards
Edwards PGC202 User manual
Edwards
Edwards 4-NET-TP-HC Assembly instructions
Edwards
Edwards D397-00-000 User manual
Edwards
Edwards D395-90-000 User manual
Edwards
Edwards D395-92-000 User manual
Edwards
Edwards iTIM E73/A1/T1 User manual

Edwards
Edwards CXS User manual

Edwards
Edwards ASG2-1000-1/8 NPT User manual

