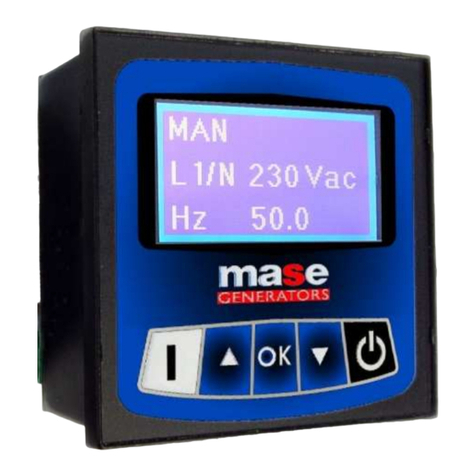
Edwards D395-92-000 User manual

D395-92-880
Issue D
Original Instructions
Instruction Manual
Turbo and Active Gauge Controller
Description Item Number
Turbo and Active Gauge Controller D395-92-000

This product has been manufactured under a quality management system certified to ISO 9001:2008
Declaration of Conformity
We, Edwards Limited,
Crawley Business Quarter,
Manor Royal,
Crawley,
West Sussex, RH10 9LW, UK
declare under our sole responsibility, as manufacturer and person within the EU authorised
to assemble the technical file, that the product(s)
D395-92-000 Turbo and Active Gauge Controller
to which this declaration relates is in conformity with the following standard(s) or other
normative document(s)
EN61326-1:2013 Electrical equipment for measurement, control and laboratory
(Class B Emissions, Use. EMC requirements. General requirements
Industrial Immunity)
EN50581:2012 Technical Documentation for the Assessment of Electrical and
Electronic Products with respect to the Restriction of Hazardous
Substances
and fulfils all the relevant provisions of
2014/30/EU Electromagnetic Compatibility (EMC) Directive
2012/19/EU Waste from Electrical and Electronic Equipment (WEEE) Directive
2011/65/EU Restriction of Certain Hazardous Substances (RoHS) Directive
Note: This declaration covers all product serial numbers from the date this Declaration was
signed onwards.
19.08.2015, Eastbourne
Larry
Marini,
Senior
Technical Manage
r
Date and Place
P200-06-520 Issue C

P200-10-072
Issue A
Material Declaration
In accordance with the requirements of the Chinese regulatory requirement on the Management Methods for the
Restriction of the Use of Hazardous Substances in Electrical and Electronic Products Order No. 32 (also known as
‘China RoHS2’) and SJ/T 11364 Marking for the Restricted Use of Hazardous Substances in Electronic and Electrical
Products:
Product Product Label Meaning
D39592000 Turbo and Active Gauge Controller
This product contains hazardous substances
in at least one of the homogeneous
materials used which are above the limit
requirement in GB/T 26572 as detailed in
the declaration table below.
These parts can safely be used for the
environmental protection use period as
indicated.
材料成分声明
Materials Content Declaration
部件名称
Part name
有害物质
Hazardous Substances
铅
Lead
(Pb)
汞
Mercury
(Hg)
镉
Cadmium
(Cd)
六价铬
Hexavalent
Chromium
(Cr VI)
多溴联苯
Polybrominated
biphenyls (PBB)
多溴二苯醚
Polybrominated
diphenyl ethers
(PBDE)
印刷电路组件
(PCA)
Printed Circuit
Assembly (PCA)
X O X O O O
电缆/电线/连接器
Cable/wire/connector
X O O O O O
机械部件
Mechanical Components
X O O O O O
O: 表示该有害物质在该部件的所有均质材料中的含量低于 GB/T 26572 标准规定的限量要求。
O: Indicates that the hazardous substance contained in all of the homogeneous materials for this part is
below the limit requirement in GB/T 26572.
X: 表示该有害物质在该部件的至少一种均质材料中的含量超出 GB/T26572 标准规定的限量要求。
X: Indicates that the hazardous substance contained in at least one of the homogeneous materials used for
this part is above the limit requirement of GB/T26572.
NOTE: These products are EU RoHS compliant, the following Exemptions apply:
6(b)
Lead
as an alloying element in aluminium containing up to 0.4% by weight
6(c) Copper alloy containing up to 4%
lead
by weight
7(a)
Lead
in in high melting temperature type solder (i.e. lead based alloys containing 85% by or more)
7(b)
Lead
in solders for servers, storage and storage array systems, network infrastructure equipment for switching, signalling,
transmission, and network management for telecommunications
7(c) I Electrical and electronic components containing
lead
in a glass or ceramic other than dielectric ceramic in capacitors, e.g.
piezoelectronic devices, or in a glass or ceramic matrix compound
7(c) II
Lead
in dielectric ceramic in capacitors for a rated voltage of 125 V AC or 250 V DC or higher
8(b)
Cadmium
and its compounds in electrical contacts
15
Lead
in solders to complete a viable electrical connection between semiconductor die and carrier within integrated circuit flip
chip packages
34
Lead
in cermet-based trimmer potentiometer elements

This page has been intentionally left blank.

© Edwards Limited 2016. All rights reserved. Page i
Edwards and the Edwards logo are trademarks of Edwards Limited.
Contents
D395-92-880 Issue D
Contents
Section Page
1 Introduction .......................................................................................1
1.1 Scope and definitions ................................................................................................... 1
1.2 Description ................................................................................................................ 1
1.3 Configuration example .................................................................................................. 2
2 Technical data ....................................................................................3
2.1 Electrical data ............................................................................................................ 3
2.2 Operating and storage data ............................................................................................ 3
2.3 Mechanical data .......................................................................................................... 3
2.4 Display .....................................................................................................................3
2.5 Connections ............................................................................................................... 3
2.5.1 Fan connector ........................................................................................................... 3
2.5.2 Power connector ........................................................................................................ 4
2.5.3 Turbomolecular pump .................................................................................................. 5
2.5.4 Backing pump ............................................................................................................ 5
2.5.5 Active gauge .............................................................................................................6
2.5.6 Total power consumption .............................................................................................. 7
2.6 Power Supply accessory data .......................................................................................... 7
3 Installation .........................................................................................8
3.1 Unpack and inspect ...................................................................................................... 8
3.2 Fitting the controller .................................................................................................... 8
3.2.1 Bench-top mounting ..................................................................................................... 8
3.2.2 Panel mounting .......................................................................................................... 9
3.3 Rear panel description .................................................................................................10
3.3.1 Connecting a fan accessory ...........................................................................................10
3.3.2 Connecting the power supply .........................................................................................10
3.3.3 Connecting a turbomolecular pump .................................................................................12
3.3.4 Connecting a backing pump ...........................................................................................12
3.3.5 Connecting an isolation valve .........................................................................................13
3.3.6 Connecting an active gauge ...........................................................................................14
4 Operation ........................................................................................ 15
4.1 Control panel description .............................................................................................15
4.2 Start up ...................................................................................................................15
4.2.1 Return to factory defaults .............................................................................................15
4.3 Menu structure ..........................................................................................................16
4.3.1 Turbo screen .............................................................................................................17
4.3.2 Gauge screen ............................................................................................................18
4.3.3 Vent valve screen .......................................................................................................19
4.3.4 Turbo Set-Point screen .................................................................................................20
4.3.5 Calibrate gauge screen ................................................................................................21
4.3.6 Units screen .............................................................................................................22
4.4 Electrical supply failure ...............................................................................................23
5 Maintenance ..................................................................................... 24
5.1 Fault finding guide ......................................................................................................24
5.2 Cleaning the controller ................................................................................................24
5.3 Software upgrade .......................................................................................................24
cg/7692/09/16

D395-92-880 Issue D
Page ii © Edwards Limited 2016. All rights reserved.
Edwards and the Edwards logo are trademarks of Edwards Limited.
Contents
6 Storage and disposal ........................................................................... 25
6.1 Storage ...................................................................................................................25
6.2 Disposal ...................................................................................................................25
7 Spares and accessories ......................................................................... 26
7.1 Introduction .............................................................................................................26
7.2 Accessories ...............................................................................................................26
Appendix A1 Error numbers ............................................................................ 29
Index .............................................................................................. 31
For return of equipment, complete the HS Forms at the end of this manual.
Illustrations
Figure Page
1 Configuration example using logic interface ........................................................................ 2
2 Pin connections for a Phoenix 2-way ................................................................................. 4
3 Pin connections for a Kycon KPPX-4P mating part .................................................................. 4
4 Pin connections for a 15-way sub-miniature ‘D’ type socket ..................................................... 5
5 Pin connections for an 8-way RJ45 .................................................................................... 6
6 Bench mounted dimensions (mm) ..................................................................................... 9
7 Panel cut-out required .................................................................................................. 9
8 Panel mounting the TAG ................................................................................................ 9
9 Rear panel connections ................................................................................................10
10 Assembly of DC power connector ....................................................................................11
11 24 volts pumps with logic interface connection ...................................................................12
12 Mains powered pumps with logic interface connection ...........................................................12
13 Mains powered backing pumps connections ........................................................................13
14 Connecting an isolation valve .........................................................................................14
15 TAG Controller overlay .................................................................................................15
16 Menu Structure ..........................................................................................................16

© Edwards Limited 2016. All rights reserved. Page iii
Edwards and the Edwards logo are trademarks of Edwards Limited.
Contents
D395-92-880 Issue D
Tables
Table Page
1 Compatible pumps and gauges ........................................................................................ 2
2 Fan connector pin-out .................................................................................................. 4
3 Power connector pin-out ............................................................................................... 4
4 Turbomolecular pump connector pin out ............................................................................ 5
5 Backing pump connector pin-out ...................................................................................... 6
6 Active gauge connector pin-out ....................................................................................... 6
7 Component checklist .................................................................................................... 8
8 Front panel symbols and their functions ............................................................................15
9 Menu items ...............................................................................................................15
10 Gauge ID numbers ......................................................................................................18
11 Fault finding guide ......................................................................................................24
12 Accessories ...............................................................................................................26
A1 Error numbers ...........................................................................................................29
Trademark credits
Barocel™ is a registered trademark of Edwards.

This page has been intentionally left blank.
D395-92-880 Issue D
Page iv © Edwards Limited 2016. All rights reserved.
Edwards and the Edwards logo are trademarks of Edwards Limited.

© Edwards Limited 2016. All rights reserved. Page 1
Edwards and the Edwards logo are trademarks of Edwards Limited.
Introduction
D395-92-880 Issue D
1Introduction
1.1 Scope and definitions
This manual provides installation, operation and maintenance instructions for the Edwards Turbo and Active Gauge
Controller. You must use the Controller as specified in this manual. Read this manual before you install and operate
the Edwards Turbo and Active Gauge Controller. Important safety information is highlighted as WARNING and
CAUTION instructions; you must obey these instructions. The use of WARNINGS and CAUTIONS is defined below.
CAUTION
Cautions are given where failure to observe the instruction could result in damage to the equipment, associated
equipment and process.
The following IEC warning label appears on the TAG Controller:
1.2 Description
Note: This controller will return your pump to factory default settings. For most applications this is not an issue,
however this does mean that this controller is not suitable for controlling a pump that needs modified
settings for a particular application i.e. a pump that has had its default settings changed either by a PC or
a TIC.
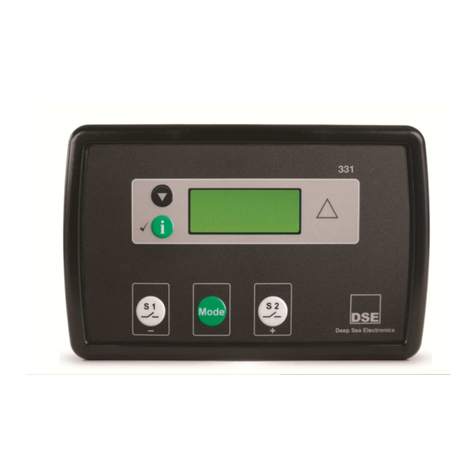
The TAG (Turbo and Active Gauge) Controller is a small, compact pumping system controller which is suitable for a
wide range of vacuum applications. The controller provides connections for a turbomolecular pump, a backing pump,
a single active gauge and a turbo air cooler. Compatible pumps and gauges are listed in Table 1.
The TAG Controller is controlled by an easy to use user interface. A large clear LED display shows the pump speed or
vacuum pressure. The compact size of the controller is ideal for use on bench-tops or suitable mobile platforms.
The TAG Controller requires a 24 volt power supply which powers the turbomolecular pump and other accessories. A
200 W mains power supply with a suitable connector is available as an optional accessory. Refer to Section 7 for
details.
The TAG Controller has the following features:
Start/stop control of a backing pump
Turbomolecular pump start options: start with backing pump, start after time delay or start at pressure
setpoint
Turbomolecular pump speed display
WARNING
Warnings are given where failure to observe the instruction could result in injury or death to
people.
Warning - refer to accompanying documentation.
Edwards offer European customers a recycling service.

D395-92-880 Issue D
Page 2 © Edwards Limited 2016. All rights reserved.
Edwards and the Edwards logo are trademarks of Edwards Limited.
Introduction
Vent valve control options: vent from full speed or vent from half speed
Pressure display from active gauge in mbar, Torr or Pa
Air cooler powered when turbo is spinning
1.3 Configuration example
Figure 1 - Configuration example using logic interface
Table 1 - Compatible pumps and gauges
Turbomolecular pumps EXT75DX and nEXT range
Backing pumps XDD1 24V, nXDS range, XDS35i and any mains powered backing pump e.g.
E2M1.5
Active gauges APG100 range, WRG, AIM-S, AIM-X and ASG
A. TAG Controller F. Air-cooler
B. 2 m UK mains cable G. Pump extension cable 2 m
C. Active gauge H. Pump extension cable 2 m (optional)
D. Backing pump J. 0.5 m active gauge cable
E. Turbomolecular pump K. Power supply

© Edwards Limited 2016. All rights reserved. Page 3
Edwards and the Edwards logo are trademarks of Edwards Limited.
Technical data
D395-92-880 Issue D
2Technicaldata
2.1 Electrical data
Note: The Power In connector supplies power to the TAG Controller and all of the accessories which are connected
i.e. turbomolecular pump, fan, gauge and in some cases the backing pump. Refer to Section 2.5.6 for
further details.
2.2 Operating and storage data
2.3 Mechanical data
2.4 Display
2.5 Connections
2.5.1 Fan connector
Supply voltage 24 V d.c. ±10%
Power consumption 5 W
Maximum input power 240 W
Ambient operating temperature range 0 °C to 40 °C
Ambient storage temperature range -30 °C to 70 °C
Maximum ambient operating humidity Max 90% RH non condensing at 40 °C
Maximum operating altitude 2000 m max
IP rating IP20. IP40 when panel mounted. For indoor use only.
Mass 0.3 kg
Dimensions (w x h x d) 96 x 48 x 165 mm
Panel cut-out 92+0.8 x 45+0.6 mm to DIN43700
Panel thickness 1.5 mm minimum
Type High brightness green LED 7-segment display
LED enunciators for units and display mode
Update rate 300 ms
Connector type Phoenix 2-way
Mating part Phoenix order number 1881325 (Supplied with TAG)
Power supply 24 V d.c. nominal
Maximum power output 3.6 W

D395-92-880 Issue D
Page 4 © Edwards Limited 2016. All rights reserved.
Edwards and the Edwards logo are trademarks of Edwards Limited.
Technical data
Figure 2 - Pin connections for a Phoenix 2-way
Table 2 - Fan connector pin-out
2.5.2 Power connector
Figure 3 - Pin connections for a Kycon KPPX-4P mating part
Table 3 - Power connector pin-out
Pin Description
124V
20V
Connector type Kycon KPJX 4-way
Mating part Kycon KPPX-4P (Supplied with TAG)
Pin Description
124V
224V
30V
40V
Screen 0 V

© Edwards Limited 2016. All rights reserved. Page 5
Edwards and the Edwards logo are trademarks of Edwards Limited.
Technical data
D395-92-880 Issue D
2.5.3 Turbomolecular pump
Figure 4 - Pin connections for a 15-way sub-miniature ‘D’ type socket
Table 4 - Turbomolecular pump connector pin out
2.5.4 Backing pump
Refer to Figure 4 for pin connections and Table 5 for pin out.
Connector type Sub-miniature “D” type socket 15-way
Power supply 24 V d.c. nominal
Maximum power output 160 W
Pin Function
1 Power supply positive
2Signalcommon
3n/c
4RS232Tx
5 Serial enable output
6 Power supply positive
7RS232Rx
8 Power supply common
9 Speed signal input
10 Screen
11 Power supply positive
12 Screen
13 Power supply common
14 Power supply common
15 Normal signal input
Connector type Sub-miniature “D” type socket 15-way
Power supply 24 V d.c. nominal
Maximum power output 80 W
Relay coil rating (when using external relay) 24 V d.c. 5 W max.

D395-92-880 Issue D
Page 6 © Edwards Limited 2016. All rights reserved.
Edwards and the Edwards logo are trademarks of Edwards Limited.
Technical data
Table 5 - Backing pump connector pin-out
2.5.5 Active gauge
Figure 5 - Pin connections for an 8-way RJ45
Table 6 - Active gauge connector pin-out
Pin Function
1 Power supply positive
2Signalcommon
3 Start signal output
4ID
5n/c
6 Power supply positive
7n/c
8 Power supply common
9 Speed signal input
10 Screen
11 Power supply positive
12 Screen
13 Power supply common
14 Power supply common
15 Normal signal input
Connector type RJ45 8-way
Power supply 24 V d.c. nominal
Maximum power output 4 W
Pin Function
1 Power supply positive
2 Power supply common
3Signalinput
4 Identification
5Signalcommon
6 Control line 1
7 Control line 2
8N/C

© Edwards Limited 2016. All rights reserved. Page 7
Edwards and the Edwards logo are trademarks of Edwards Limited.
Technical data
D395-92-880 Issue D
2.5.6 Total power consumption
You must ensure that the 24 volt power supply that you are using has sufficient power for the TAG Controller and all
the accessories which are connected. An example of a power budget calculation would be:
The maximum permitted total power consumption for the system is 240 W.
The optional power supply accessory is rated at 200 W and is sufficient for most applications using turbomolecular
pumps of up to 160 W. If you are using this accessory the following restrictions apply:
1. Do not use an XDD1 24 V backing pump and a 160 W turbomolecular pump, as this combination will exceed the
200 W rating
2. Do not use an nEXT turbomolecular pump with a default power setting of more than 160 W.
2.6 Power Supply accessory data
Item Power
TAG Controller 5 W
Turbomolecular pump 80 W
Fan 4 W
Backing pump relay 1 W
Active gauge 2 W
Total 92 W
Input connector type IEC60320
Electrical supply 100 to 240 V a.c. 50 to 60 Hz
Output connector type KPPX-4P mates with power input connector on TAG
Controller
Output 24 V d.c. 200 W maximum
Protection Over voltage and over current - resettable
Mass 1.1 kg
Storage temperature -20 to 85 °C
Operating temperature 0 to 40 °C
Approvals CE, UL/CUL, TUV, FCC

D395-92-880 Issue D
Page 8 © Edwards Limited 2016. All rights reserved.
Edwards and the Edwards logo are trademarks of Edwards Limited.
Installation
3 Installation
3.1 Unpack and inspect
Remove all of the packaging material and check the TAG. If the Controller is damaged, follow the Edwards return of
equipment procedures that are laid out in the back of this manual. Do not use the Controller if it is damaged.
Check that your package contains the items that are listed in Table 7. If any of these items are missing, notify your
supplier in writing within three days. If the Controller is not to be used immediately, store the Controller in suitable
conditions as described in Section 6.1.
Table 7 - Component checklist
3.2 Fitting the controller
CAUTION
Ensure that the unit is installed where fluids cannot enter into the Controller. The Controller is IP20 rated, and
therefore has no protection against fluid ingress.
3.2.1 Bench-top mounting
The TAG can be used on a bench-top. Figure 6 shows the dimensions of the Controller that are required for bench
top use. The self-adhesive non-slip feet may be fitted to the bottom of the Controller if required.
Ensure the cables are secured to keep the controller on the bench top as the TAG Controller weight is not sufficient
to keep it in place should the turbomolecular or backing pump cables be disturbed.
Quantity Description Check ()
1 Turbo and Active Gauge Controller
2 Panel mounting clamps
4Non-slipfeet
1 Phoenix fan connector
1 DC power connector
WARNING
Ensure that all wiring is safely secured so that people cannot trip on them.

© Edwards Limited 2016. All rights reserved. Page 9
Edwards and the Edwards logo are trademarks of Edwards Limited.
Installation
D395-92-880 Issue D
Figure 6 - Bench mounted dimensions (mm)
3.2.2 Panel mounting
If the Controller is to be panel mounted, follow the directions given in Figure 7 and Figure 8 below.
CAUTION
Allow 150 mm at the rear for cables. Allow 50 mm top and bottom and 15 mm to the sides for sufficient air
circulation.
Figure 7 - Panel cut-out required
Figure 8 - Panel mounting the TAG

D395-92-880 Issue D
Page 10 © Edwards Limited 2016. All rights reserved.
Edwards and the Edwards logo are trademarks of Edwards Limited.
Installation
Make a cut-out in the panel according to Figure 7. The minimum panel thickness should be 1.5 mm.
Fit the panel mount clamps to the case, by placing into the recesses and sliding towards the rear of the case.
Use both the left and right or the top and bottom mounting positions.
Slide the Controller into the panel from the front. The Controller is a push fit and will be retained by the
spring clamps.
3.3 Rear panel description
Figure 9 - Rear panel connections
3.3.1 Connecting a fan accessory
A compatible turbomolecular pump fan can be fitted to the TAG Controller. A Phoenix connector is provided to
connect the fan into the connector located on the rear of the controller housing (refer to Figure ). Fan operation is
controlled by the TAG Controller when a turbomolecular pump is connected. When no turbo is connected, the fan
will not be activated.
A fan may also be connected directly to the turbomolecular pump’s controller. If you do this you should configure
this connection for fan operation. See pump instruction manual and Section 4.3.3.
3.3.2 Connecting the power supply
If you are using the power supply accessory, simply connect it to the Power In connector on the TAG Controller and
connect the mains to the IEC inlet of the power supply accessory. Suitable cables are available from Edwards, see
Section 7.
If you are not using the power supply accessory, connect an appropriate 24 volt supply using the DC Power connector
supplied with the TAG Controller. Refer to Figure 10 for details of how to assemble this connector. This power supply
should be limited to a maximum of 10 A using a fuse, circuit breaker or active current limit.
WARNING
If you are using the power supply accessory, you must ensure that it is adequately earthed
(grounded) via the electrical supply cable.

© Edwards Limited 2016. All rights reserved. Page 11
Edwards and the Edwards logo are trademarks of Edwards Limited.
Installation
D395-92-880 Issue D
Figure 10 - Assembly of DC power connector
Assembly Instructions
1. Attach Strain Relief (B) to Plastic Enclosure (C).
2. Pass Cable (A) through Strain Relief (B)/Plastic Enclosure (C) assembly, Metal Spring (D), and Plastic Guide
Ring (E).
3. Solder cable wires to solder cups on Pin Mould (F).
4. Properly align Pin Mould (F) with Lower Metal Sleeve (H). The slotted sections on the sides of the Pin Mould (F)
must line up with the slotted cut-outs on the Lower Metal Sleeve (H) and the 3 semi-circular notches around the
perimeter of the Pin Mould (F) must line up with the 3 metal tabs inside the Lower Metal Sleeve (H).
5. Push Pin Mould (F) forward into the Lower Metal Sleeve (H) until it locks into place.
6. *IMPORTANT* Manually press the 3 metal tabs on the Lower Metal Sleeve (H) into the notches in the Pin
Mould (F).
7. Crimp ‘U’ section of Lower Metal Sleeve (H) onto Cable (A).
8. Fit Plastic Ring Guide (E) into Lower Metal Sleeve (H) by placing plastic arms into the appropriate slots on the
sides of the sleeves.
9. Attach Top Metal Cover (G) onto Lower Metal Sleeve (H). Be sure to align all tabs and securely install cover.
10.Push Metal Spring (D) onto the Top Metal Cover (G)/Lower Metal Sleeve (H) assembly. This will help to hold the
assembly together.
11.Push Strain Relief (B)/Plastic Enclosure (C) assembly onto the Top Metal Cover (G)/Lower Metal Sleeve (H)
assembly. The two assemblies must be properly aligned as shown in the drawing. Be sure to check that the Metal
Spring (D) remains in place and does not go underneath either the Plastic Enclosure (C) or the Plastic Guide (E)
or twists during assembly. A significant amount of force may be necessary to lock the two assemblies together.
A. Customer cable
B. Strain relief
C. Plastic enclosure
D. Metal spring
E. Plastic guide
F. Pin mould
G. Top metal cover
H. Lower metal sleeve
J. Plastic coupling

D395-92-880 Issue D
Page 12 © Edwards Limited 2016. All rights reserved.
Edwards and the Edwards logo are trademarks of Edwards Limited.
Installation
12.Check to make sure that the Strain Relief (B)/Plastic Enclosure (C) assembly is securely locked into place over
the Top Metal Cover (G)/Lower Metal Sleeve (H) assembly. The two assemblies should not be able to be pulled
apart.
13.Properly align the new assembly with the Plastic Coupling (J) as shown in the drawing. Push assembly (twisting
plastic enclosure ‘C’ part) into Plastic Coupling (J) until it locks properly in place. The entire plug assembly is
now complete.
3.3.3 Connecting a turbomolecular pump
A compatible turbomolecular pump can be connected to the TAG Controller through the 'D' type connector on the
rear panel (refer to Figure 9). All turbomolecular pumps come with a cable fitted as standard; extension cables are
available from Edwards if required.
The TAG Controller will reset the pump to its default settings in order to ensure correct operation. If you have
previously configured the pump with non-default parameters, these settings will be lost.
3.3.4 Connecting a backing pump
A compatible backing pump can be connected to the TAG Controller through the 'D' type connector on the rear panel
(refer to Figure 9). Backing pump connections are of two types: those with a logic interface control and those which
require an external relay.
3.3.4.1 Logic interface
24 volt pumps, with a logic interface (e.g. XDD1 24 V), are connected to the TAG Controller using a 15 way cable as
shown in Figure 11. This cable supplies power to the pump as well as control signals.
Figure 11 - 24 volts pumps with logic interface connection
Mains powered pumps, with a logic interface (e.g. nXDS), are connected to the TAG Controller using a 15-way cable
as shown in Figure 12. For these pumps the controller provides control signals only.
Figure 12 - Mains powered pumps with logic interface connection
A. TAG Controller
B. 15-way cable
C. 24 volt pump
A. TAG Controller
B. 15-way cable
C. Mains powered pump
D. Mains cable
Table of contents
Other Edwards Controllers manuals

Edwards
Edwards PGC202 User manual
Edwards
Edwards 4-NET-CAT Assembly instructions
Edwards
Edwards AIGX-S-NW25 User manual

Edwards
Edwards EXC120 User manual
Edwards
Edwards AIGX-D-NW25 User manual
Edwards
Edwards D395-90-000 User manual
Edwards
Edwards iTIM E73/A1/T1 User manual

Edwards
Edwards PGC201 User manual

Edwards
Edwards EXC 100E User manual

Edwards
Edwards ASG2-1000-1/8 NPT User manual
