EIJKELKAMP Scuba Blue Green Algae Buoy User manual
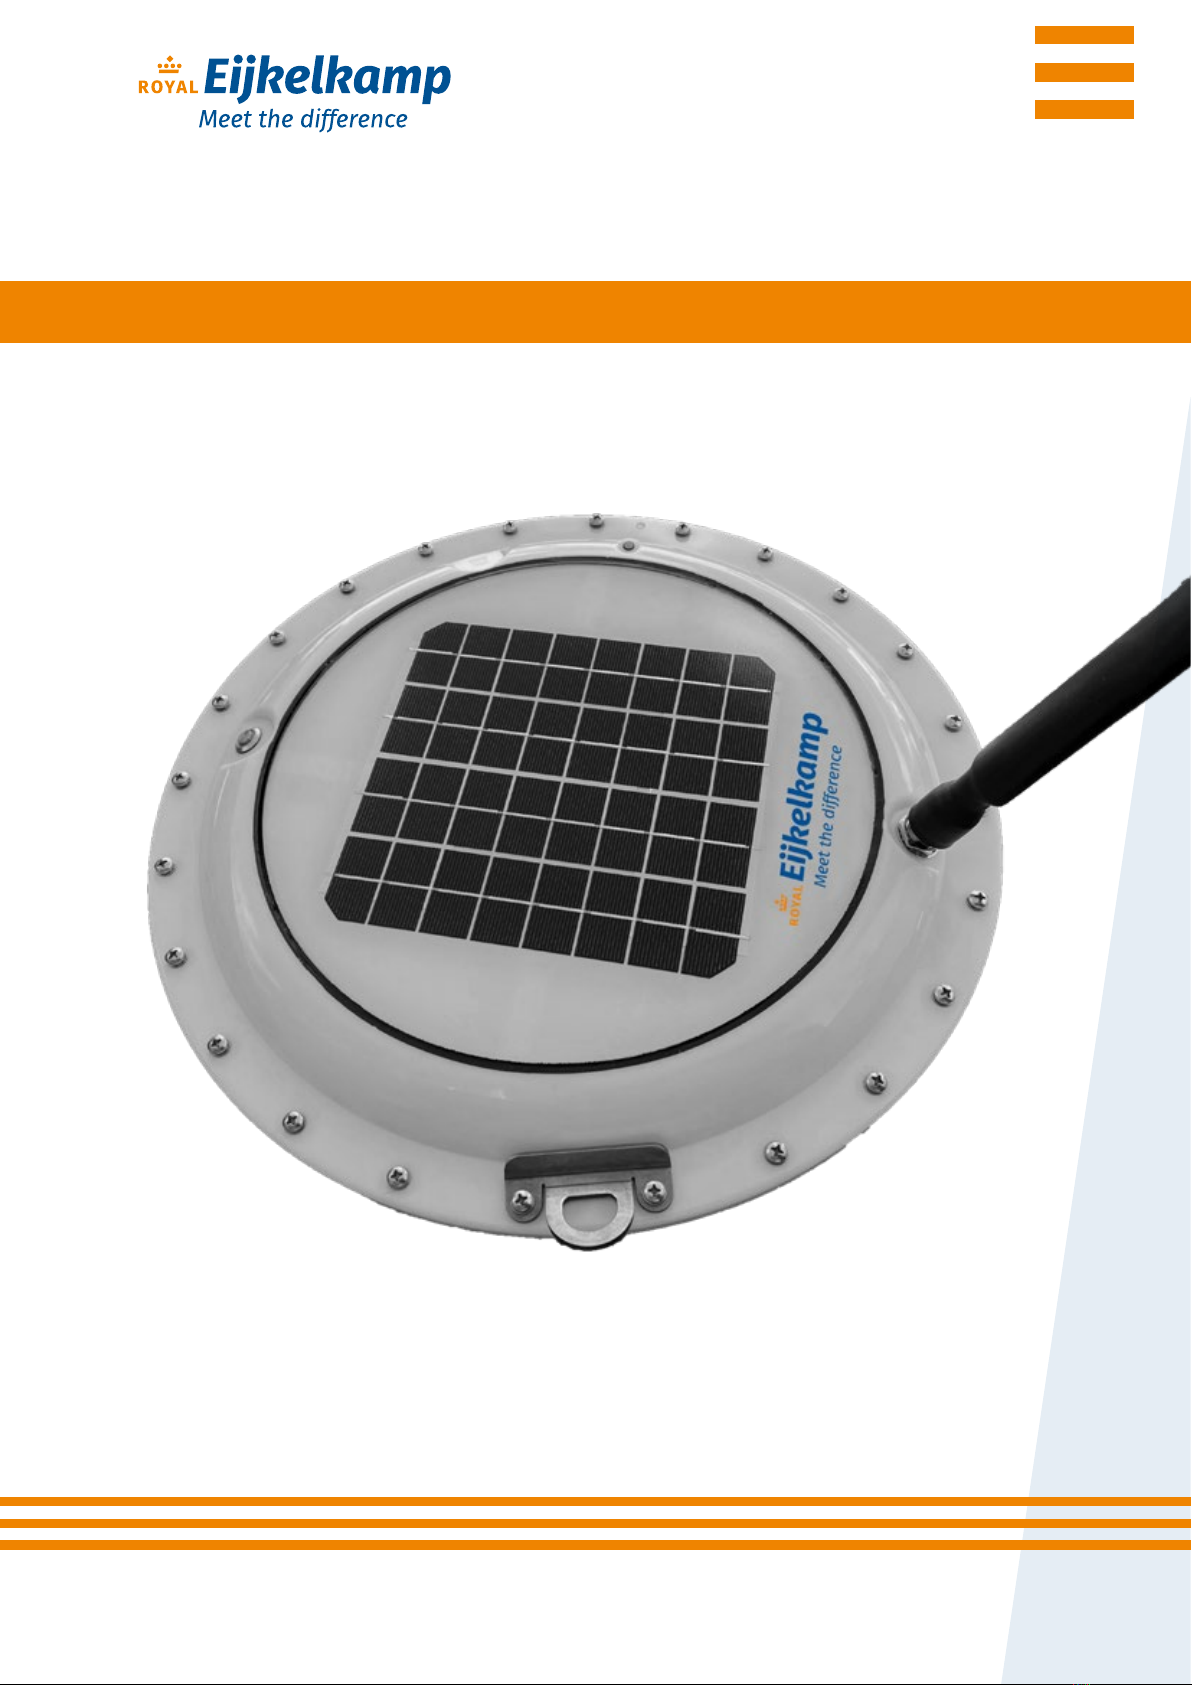
Scuba Blue Green Algae Buoy
Water quality meter for blue and green algae
Royal Eijkelkamp
Nijverheidsstraat 9, 6987 EN
Giesbeek, the Netherlands
T +31 313 880 200
E info@eijkelkamp.com
I royaleijkelkamp.com © 2023-05
Meet the dierence
User manual
M-181150E

2
Content
On these operating instructions...............................................................................................................................................3
1. Introduction ..............................................................................................................................................................................3
1.1 Warranty................................................................................................................................................................................3
1.2 Safety instructions............................................................................................................................................................3
2. The Scuba BGA buoy...............................................................................................................................................................3
2.1 Functional description .....................................................................................................................................................3
2.2 Limitations of use ............................................................................................................................................................4
2.3 Product overview...............................................................................................................................................................5
2.4 Technical specifications..................................................................................................................................................6
2.5 Accessories..........................................................................................................................................................................6
3. Installation ................................................................................................................................................................................ 7
3.1 Setup .................................................................................................................................................................................... 7
3.2 Installing buoy .................................................................................................................................................................. 7
3.2.1 General installation guidelines ............................................................................................................................ 7
3.2.2. Installation accessory set-BGA .......................................................................................................................... 7
3.2.3. Instructions............................................................................................................................................................... 7
3.3 Enabling buoy.....................................................................................................................................................................8
3.4 Access to data ....................................................................................................................................................................8
4. Web portal for data presentation.......................................................................................................................................9
5. Maintenance ...........................................................................................................................................................................10
5.1 Maintenance frequency..................................................................................................................................................10
5.2 Cleaning .............................................................................................................................................................................10
5.3 Spare parts .......................................................................................................................................................................10
5.4 Changing lithium battery pack....................................................................................................................................10
6. Calibration ................................................................................................................................................................................10
6.1 Calibration by field measurement...............................................................................................................................11
6.2 Calibration using Rhodamine and turbidity solutions ........................................................................................11
6.2.1 Preparing the calibration environment.............................................................................................................11
6.2.2. Performing the calibration................................................................................................................................. 12
6.3 Customer service contact information..................................................................................................................... 13
7. Storage and transportation.................................................................................................................................................. 13
7.1 Storage................................................................................................................................................................................. 13
7.2 Transportation .................................................................................................................................................................13
Appendix 1: Certificate................................................................................................................................................................14
Appendix 2: Technical specifications Rhodamine WT dye............................................................................................... 15
Appendix 3: MSDS Rhodamine WT dye..................................................................................................................................16
Nothing in this publication may be reproduced and/or made public by means of print, photocopy, microfilm or any other means without
previous written permission from Royal Eijkelkamp. Technical data can be amended without prior notification.
Royal Eijkelkamp is not responsible for (personal) damage due to (improper) use of the product.
Royal Eijkelkamp is interested in your reactions and remarks about its products and operating instructions.

3
On these operating instructions
If the text follows a mark (as shown on the left), this means that an important instruction follows.
If the text follows a mark (as shown on the left), this means that an important warning follows
relating to danger to the user or damage to the apparatus.The user is always responsible for its own
personal protection.
Italic indicated text indicates that the text concerned appears in writing on the display (or must be
typed).
1. Introduction
This manual describes the use and maintenance of the Scuba BGA. The Scuba BGA is suitable for monitoring
harmful algal blooms and rain events in surface waters.
1.1 Warranty
The Scuba BGA is warranted for 3 years from the date of delivery subject to proper installation and application
of the equipment in accordance with the provisions of this manual. Any defects or faults should be reported
in writing to your supplier immediately, but no later than 30 days ater discovery. Transportation costs, travel
hours and travel kilometers are not covered by the warranty. Defects or faults resulting from unintended/
incompetent use, modifications not authorized by Royal Eijkelkamp, inadequate maintenance, other abuse and
damage due to transport are not covered by the warranty. Royal Eijkelkamp can never be held liable for direct
and/or indirect consequential damage resulting from defects or faults in the equipment supplied by Royal
Eijkelkamp. During the statutory warranty period, maintenance shall only be carried out by Royal Eijkelkamp
or competent persons designated by it. Any claim under the warranty can only be made if the maintenance
intervals mentioned in Chapter 5 have been met.
1.2 Safety instructions
To safely perform measurements with the Scuba BGA buoy in surface water that may be contaminated with
algae, we recommend wearing protective clothing (including liquid-proof gloves) to prevent contact with the
algae. You should also follow normal safety regulations for working on the water, such as wearing a life jacket
and using a stable boat.
2. The Scuba BGA buoy
The Scuba BGA buoy is a revolutionary new monitoring and measurement system that provides early warning
of harmful algal blooms and other water contaminants. With low cost per unit, Scuba BGA buoys can be quickly
deployed at multiple sites, where they instantly transmit data to a web portal where analyses improve early
warning capabilities.
2.1 Functional description
The Scuba BGA buoy is a floating sensor buoy that measures 5 key water parameters and transmits the data to
the cloud. It is solar powered, mobile connected and has self-cleaning sensors that collect data 24/7. Readings
are updated every 30 minutes en sent to the dashboard every 2 hours. The buoy weighs 3.6 kg and can be
deployed within 30 minutes by non-technical personnel.
Text

4
The Scuba BGA buoy measures the following parameters:
Green algae via chlorophyll-a (RFU or g/l)
Blue algae (cyanobacteria) via phycocyanin (RFU or g/l)
Turbidity (NTU)
Ambient light (PAR = Photosynthetically Active Radiation)
Water temperature (Celsius or Fahrenheit)
Air temperature, wind, rain (via local 5-day weather forecast on the Internet)
GPS coordinates
The algae are measured in RFU (= Relative Fluorescence Units) and are created from light sensor volts. The RFU
can be transformed into g/l by field calibration as described in chapter 6. Field calibration involves calibrating
the buoy based on sampling in the field. This can be done through:
a. The measurement result (e.g. g/l) of a portable fluorescence meter (e.g. AlgaeTorch from BBE Moldaenke)
b. An analytical result (e.g. g/l) of a water sample analyzed in a laboratory
The RFU : g/l ration typically ranges from 6 to 14 depending on among others like algae species, cell transparency
and geometry (see also 2.2 Limitations of use).
The measurement data are sent to the web portal, which presents the data and analyzes the sensor results in
a simple dashboard accessible via the Internet from any device (PC, phone, tablet). The data are presented in
easy-to-interpret graphs, are permanently stored and are easily downloadable. Customized alerts at thresholds
and progressively evolving and predictive analytics enable more accurate algorithms for bloom identification.
2.2 Limitations of use
Determination of chlorophyll and phycocyanin in the field using fluorescence measurement techniques will never
be as accurate as measurements made in a lab using either cell counting or analysis of molecular chlorophyll
and phycocyanin ater its extraction from cells.
Factors adversely aecting accuracy include:
Dierences in the fluorescent response:
between various species of phytoplankton
due to cell transparency and geometry
due to stage of algae growth
caused by temperature
by ambient light (Non Photochemical Quenching (NPQ))
Interference caused by turbidity
Interference from other microbiological species and compounds, which fluoresce at similar wavelengths.
Non Photochemical Quenching (NPQ) reduces fluorescence of algae in bright daylight. Handheld measurements
in bright daylight can underestimate readings. Chlorophyll-a fluorescence can decreased by up to 79% and
Phycocyanin fluorescence by up to 59% at maximum irradiance compared to dark-adapted periods. Therefore it
is recommended to measure with a handheld sensor early or late in the day. In the webportal a compensation
algorithm is included to compensate the measured chlorophyll-a and phycocyanin for NPQ.
Fluorescence measurement techniques are ideal for researchers who are interested in detecting the presence or
absence of a specific substance and measuring relative fluorescence changes that can be used as an indication
of increasing or decreasing concentrations.
Fluorescence measurement techniques are not ideal for quantitative measurement. In order to obtain more
accurate results, data obtained with the fluorometer in the field should be post-calibrated with data from
standard laboratory analysis of field samples acquired during the study.
If field sample data is available, the field sample data should be put in on the calibration option in the webportal
in order to improve the accuracy of future readings.
5
1
4
5
6
7
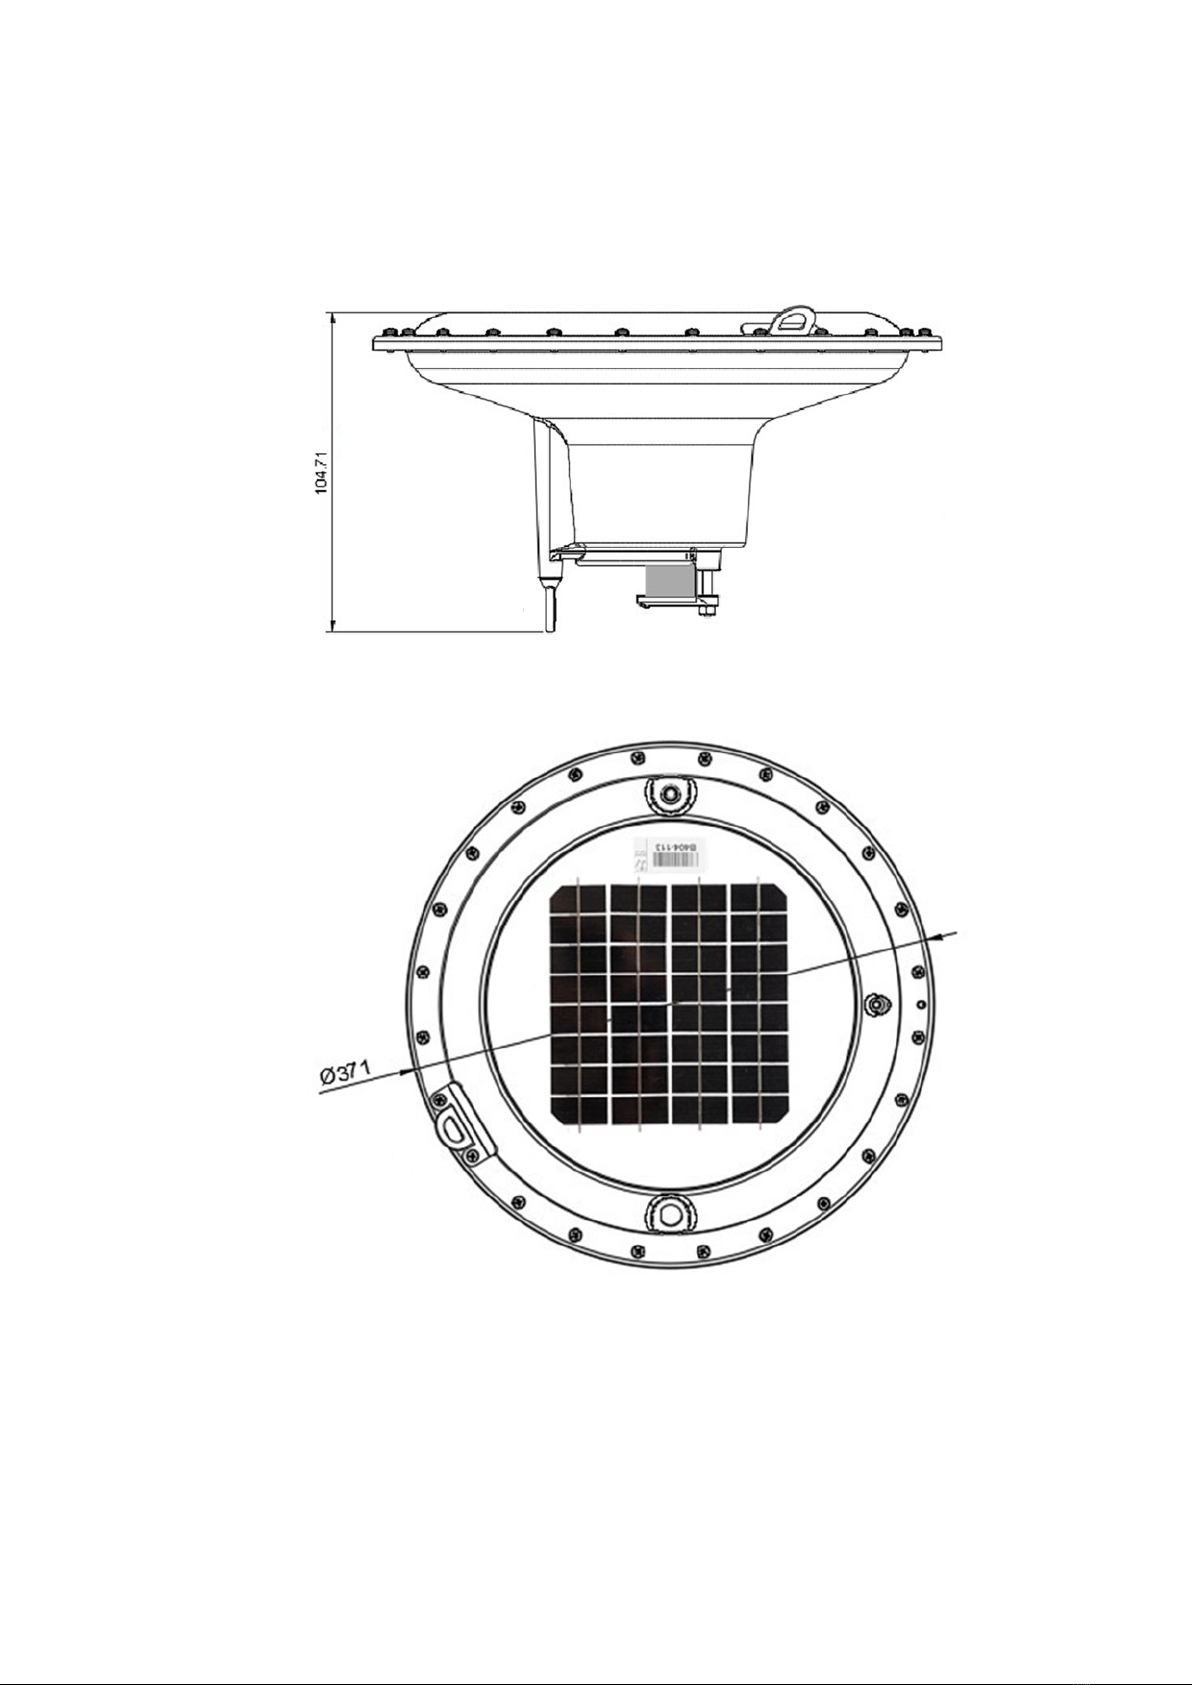
2.3 Product overview
The drawing shows the dimensions of the buoy in inches.
Parts of the buoy:
1. Attachement ring
2. Wiper
3. Ring for protection of wiper
4. Solar cell
5. Power button
6. Sticker with serial number and bar code
7. Antenna
1
2
3

6
2.4 Technical specifications
Device features Specification
Sensors Range Resolution
Green algae (chlorofyl-a) 0 - 200 g/l or 0 – 2,000 RFU 0.1 g/l or 0.1 RFU
Blue algae (phycocyanin) 0 – 1,500 g/l or 0 – 750 RFU 0.1 g/l or 0.1 RFU
Turbidity 0 - 200 NTU 0.1 g/l or 0.1 RFU
Ambient light (PAR)* 0 – 2,000 E/m2/sec 0.1 E/m2/sec
Water temperature 0 oC - 50 oC, resolution 0.1 oC0.1 oC
Air temperature 0 oC - 50 oC, resolution 0.1 oC0.1 oC
GPS coordinates WGS-84 2.5 m
Measure frequency 1x every 30 minutes
Transmission frequency 1x every 2 hours
Battery 4.2 V, life time 3 years
Power Supply Solar panel 4.3 Watt**
Housing Delrin
Diameter 35 cm (14 inch)
Height 18 cm (7 inch)
Weight 3.6 kg (8 lbs)
Data transmission Via 2G/3G (Integrated modem Incl. SIM)
Mobile coverage Most countries
Operating temperature -2 oC to + 45 oC
Storage temperature -10 oC to + 50 oC
Putting into operation Push button and green LED lamp
* Photosynthetically Active Radiation
** The buoy can work for 2 to 3 weeks without sunlight from 100% battery capacity
2.5 Accessories
For the buoy, the accessories below are available at Royal Eijkelkamp.
Article number Accessory
181170 Accessory set for BGA Buoy, set to protect and anchor Scuba BGA buoy. Contains orange lifebuoy with
hard shell, 4x stainless steel mounting wire + clips, anchoring rope 30 m and weight bag.
18117001 Lifebuoy round orange ø 60x40 cm, highly visible and robust buoy with hard shell, Polyethylene
with polyurethane foam, fitted with Solas reflection tape. Weight 2.5 kg
18117002 Stainless steel wire with clips, for attaching Scuba BGA to outside buoy, 4x 50 cm stainless steel wire,
4x clips and 4x D-clasp.
18117003 Anchor line ø10 mm with stainless steel stocking 30 m, incl. D-clasp 8 mm. For attachment to outer
buoy and anchor bag, breaking strength 1600 kg. Color white/black.
18117004 Anchor bag with 6m anchor line, for Scuba BGA buoy, to be filled with sand or stones
181181 Replacement brush for Scuba BGA, with mounting nut
181182 Antenna, for Scuba BGA buoy
181183 Bucket black, rubber 7.5 liter, for calibration Scuba BGA buoy
2.5 m

7
3. Installation
3.1 Setup
We recommend verifying field measurement site requirements prior to installation.
Place the Scuba BGA buoy at an intake point of a watermanagement area, at a swimming beach, in a city pond, or
where algal blooms have occurred in the past. The staging area must meet the following minimum requirements:
Water depth of at least 91 cm (3 feet)
Direct sunlight available most of the day
Not in a crowded environment
Sucient range for mobile communication
The buoy is powered by a solar panel that charges an internal battery. A connection to the power grid is
therefore not necessary.
3.2 Installing buoy
3.2.1 General installation guidelines
Installation of the Scuba BGA buoy requires installation or selection of a fixed object, such as an anchor,
navigation buoy or other object, to which the Scuba BGA buoy is attached, called the “anchor point”. Place
an orange buoy around the Scuba BGA buoy as a marker for other water users (boats, swimmers, fishermen).
The Scuba BGA buoy has a ring on the top cover and the bottom. The top ring is called the attachment ring. Only
the top attachment ring should be used for tethering, not the bottom ring. The lower ring is used to protect
the window from impact during handling and may sometimes be used to attach a counterweight to stabilize
the Scuba BGA buoy. The Scuba BGA buoy must be attached via a secondary ‘counterweight’ or via a ring buoy
(‘Life Ring’). These can be supplied by Royal Eijkelkamp as the 181170 Accessory set BGA.
3.2.2. Installation accessory set-BGA
Choose this option when waves from boats or wind may be higher than 12 inches or 30 cm, or if you do not
know the wave status. Also choose this option when the Scuba BGA buoy may be hit by objects or collide with
other objects, such as hard walls or boats. The Scuba BGA buoy comes with 4 mounting rings.
Parts included in the accessory set-BGA:
1x 18117001 Lifebuoy, 60 cm diameter
1x 18117002 stainless steel wire with clips
4x stainless steel wire Ø1mm, 50 cm, stainless steel 316
4x clips, stainless steel 303
8x Spherical cylinder screw with Phillips cross slot DIN 7985-H Stainless steel (SS) A2 M3X6
5x D-latch 8 mm, stainless steel
1x 18117003 Anchor line with stainless steel stocking, 30m
1x 18117004 Anchor bag
3.2.3. Instructions
Follow these instructions to mount the lifebuoy to the Scuba BGA buoy:
Attach the lifebuoy to the Scuba BGA buoy
Remove the 4 white rope pieces from the lifebuoy
Attach the 4 pieces of stainless steel wire through the existing holes of the lifebuoy every 90° by clamping
these wires with the 4 clamps by passing the wire through and clamping them with the 2 screws
8
The four mounting rings of the Scuba BGA buoy should be attached to the lifebuoy using 4 of the supplied
D-clasp 8 mm. Tighten only by hand. Do not over-tighten to prevent them from getting stuck during prolonged
use
Important: point the Scuba BGA buoy cleaning brush downstream in wind or current conditions for reducing
the likelihood of debris sticking to the brush
Attach the lifebuoy to your anchor point
The lifebuoy should be attached to the anchor point using the 30 m of anchor line provided
Cut the anchor line to the appropriate length for your application. Leave enough slack so that the Scuba
BGA buoy can move back and forth, even with varying water levels.
The connection of the cable to the anchor point is let to the user as it is dependent on the anchor point.
If the anchor bag is going to be used fill it with sand or stones. Possibly the length of the cable attached to
the anchor bag is sucient for the placement, otherwise it can be extended with the supplied 30m anchor
line (if necessary, a 50m anchor line is also available).
Important: Attach the anchor line connection only to the lifebuoy NOT to the Scuba BGA buoy.
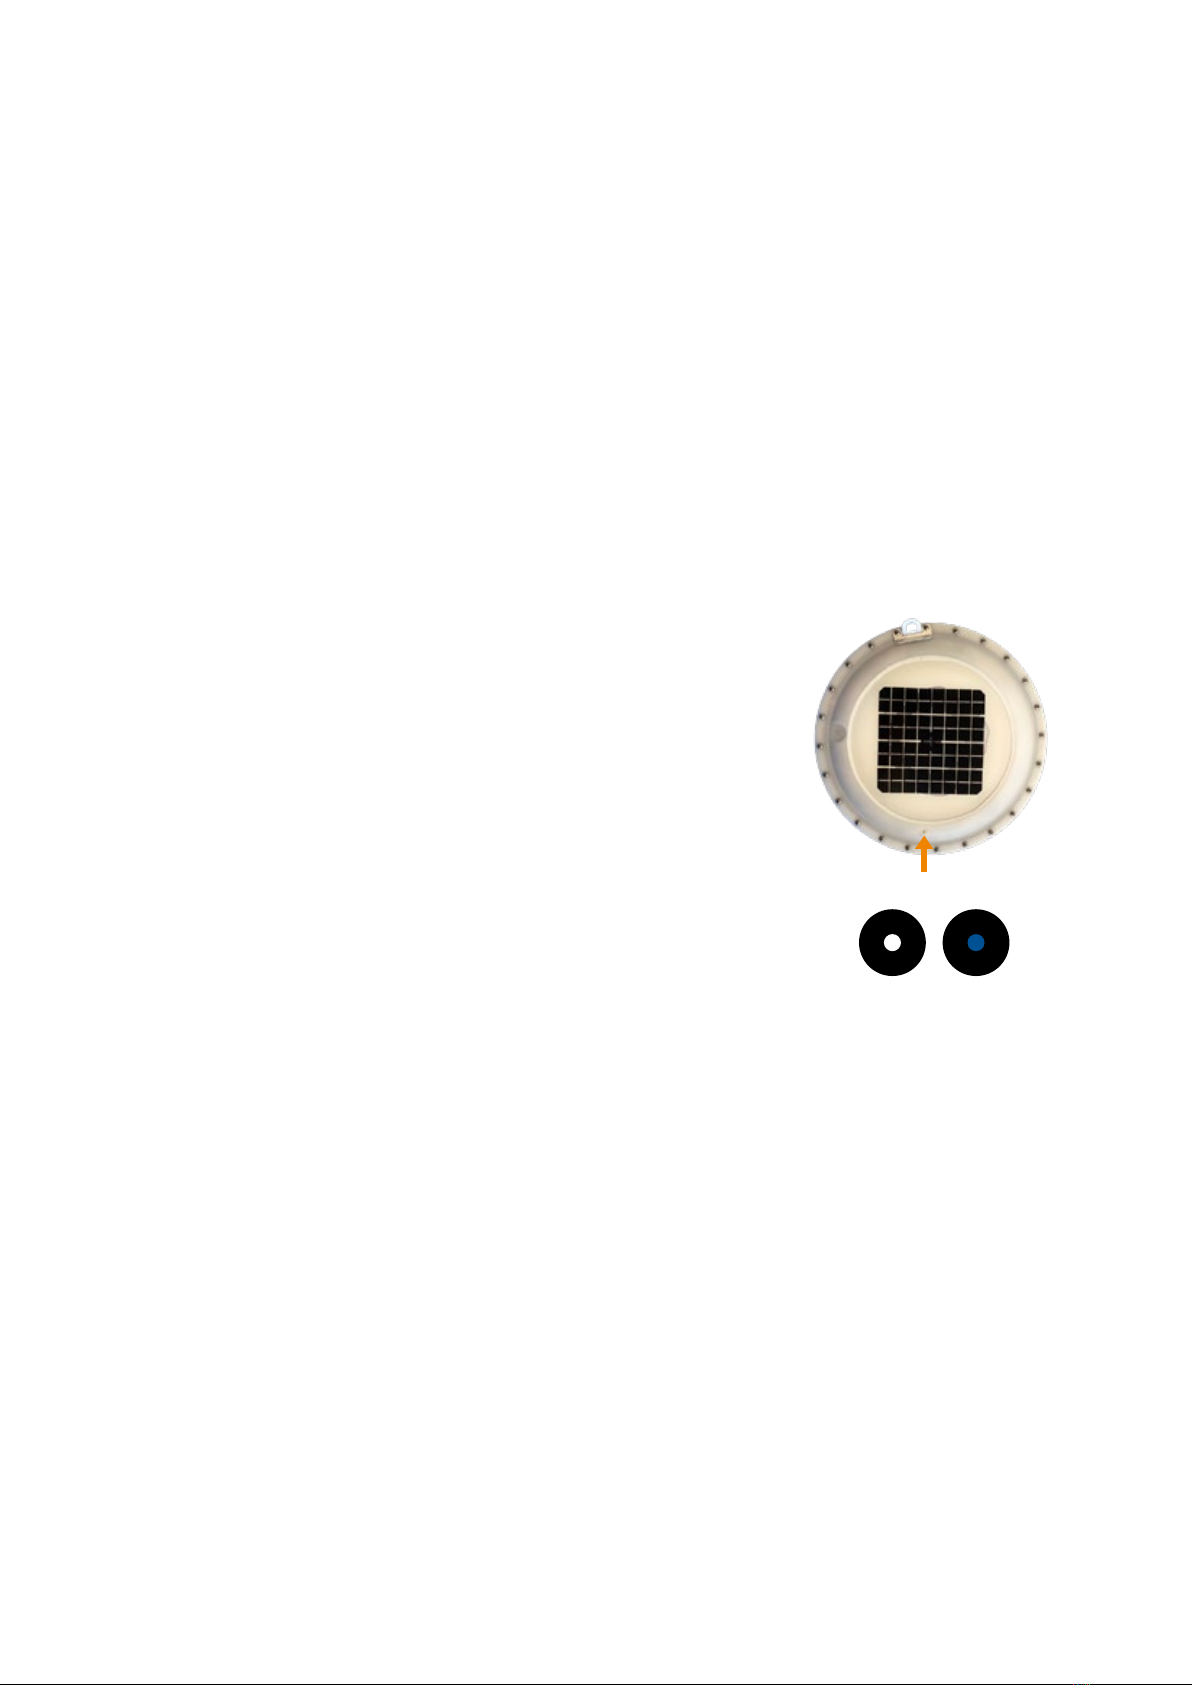
3.3 Enabling buoy
Before turning on the buoy, remove all objects from the area because the brush
will rotate once it is turned on.
To turn on the buoy, follow these instructions:
Locate the power button on the lid of the Scuba BGA buoy
Press and hold the power button for 8 seconds until the blue LED in the center
of the button lights up.
Release the button. The blue LED turns o when the button is released to
conserve battery power.
To turn o the buoy:
Press and hold the power button for 8 seconds. When turned on, the blue LED
dot will light up and turn o ater 8 seconds.
Release the button.
Important: Be sure to turn off the device when not in use to conserve battery power
To know whether the buoy is on or off, press the on/off button for 2 seconds. If the buoy is on, the
blue LED will light up while the button is pressed. If it is not on, the LED will not illuminate. The LED
will never illuminate if the button is not pressed.
While pressing the power button, make sure not to completely cover the dot in the center of the blue
LED with your finger so that you can see that the dot turns on or off.
3.4 Access to data
The webportal can be reached at algae.royaleijkelkamp.com
Enter the login information provided by Royal Eijkelkamp for your account
To reset your account information, contact Royal Eijkelkamp
Select your device from the drop down menu
Data will be completed within a few hours of switching on the Scuba BGA buoy as long as mobile data is
available at the site.
Power Button
O On

9
4. Web portal for data presentation
The webportal shows a dashboard that contains the following items:
Device data (device name, online status, signal strength, battery status)
Map with location (map, satellite, location pointer, streetview)
Weather forecast (current, 5 day forecast)
Parameters (PC (Phycocyanin), CA (chlorophyll-a), turbidity, air and water temperature, ambient light).
You can set an alarm (minimum, maximum) for each parameter via the -symbol
Graphs with history of measured parameters.
Graph with historical data of power supply (battery, solar panel)
Graph with historical data of signal strength modem and ambient light
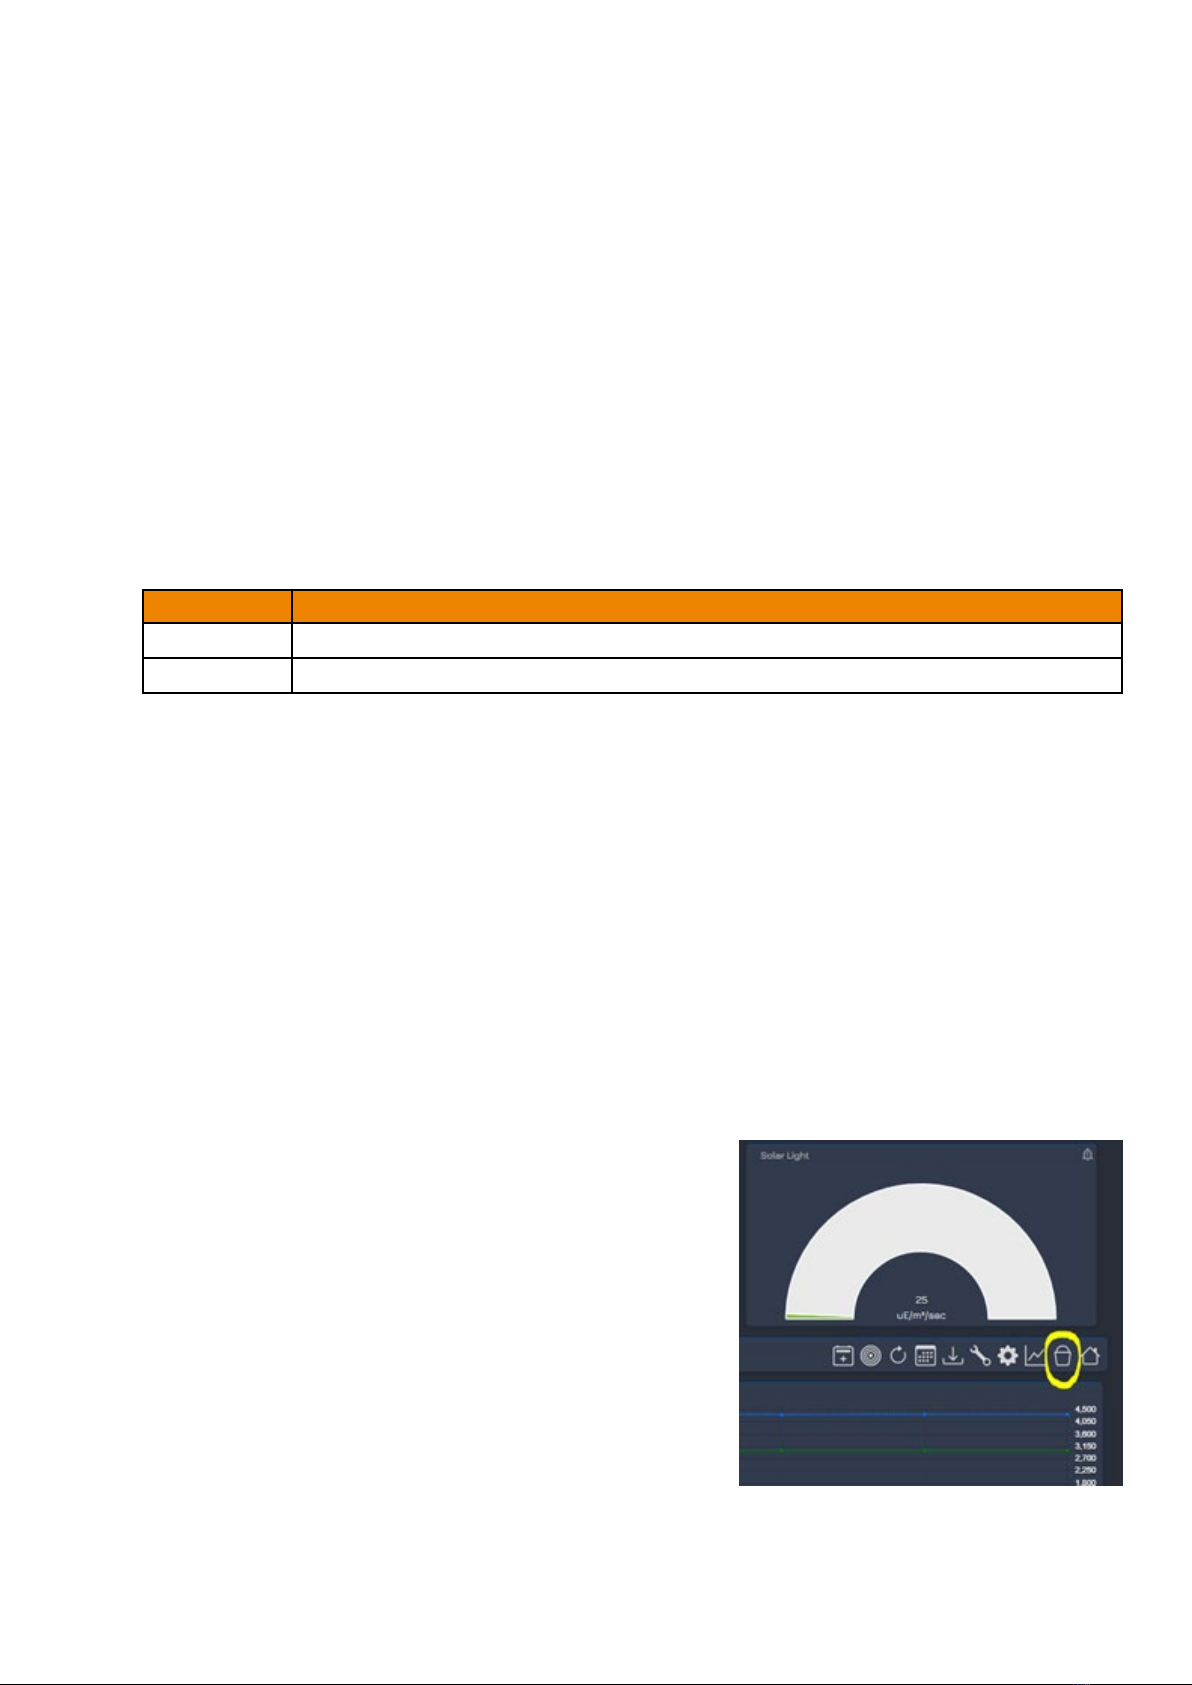
Under the graphs, the following 6 options are available:
1. Add weather condition and maintenance round
2. Calibrate device
3. Refresh settings
4. Change date range graphs
5. Download data to computer. This is for exporting the data to a CSV file of a specific measurement period
6. Customize graph properties (temperature (F/C), water temperature trend (on/o), turbidity trend (on/o),
show graph format, show playground graph)
All options are briefly explained below:
Re 1 Adding weather conditions and maintenance round
Here you can enter abnormal weather conditions and maintenance work.
Re 2 Calibrate device
Through this option you calibrate the buoy for phycocyanin, chlorophyll-a and turbidity. There are 2 options
for this which are further detailed in chapter Calibration.
Re 3 Refresh settings
Refreshes the dashboard settings ater making changes.
Re 4 Change date range graphs
Here you can change the date range of the graphs for the desired measurement period.
Re 5 Download data to computer
Here you can download and export the measurement data of a specific measurement period to a CSV file.
Re 6 Adjust graph properties
Here you can adjust the following properties of the graphs:
Temperature (F/C)
Water temperature trend (on/o)
Turbidity trend (on/o)
Show graph format
Show playground graph
10
5. Maintenance
5.1 Maintenance frequency
The maintenance frequency is once a year at the end of the measurement period. Maintenance consists of
cleaning and calibrating the buoy. If the buoy is used for drinking water basins with moderate food enrichment,
you must take into account 2 to 4 times a year calibration of the buoy, because oten from legislation stricter
requirements are imposed on the measurements.
5.2 Cleaning
To clean the Scuba BGA buoy, follow the instructions below:
Turn o the device by holding the power button for 8 seconds (the green light turns o)
Use a cleaning brush with nylon bristles to brush clean the measuring window, brush and base of the buoy unit
Remove any remaining weeds from the buoy
For hard-to-remove biological fouling or iron deposits, use boat hull cleaner (we use Star Brite) and a kitchen
scrubber (Blue Scotch-Brite non-scratch scouring sponge)
To use the hull cleaner, you would first spray the cleaner on all the surfaces, let it soak in 5 minutes, then
proceed with cleaning
5.3 Spare parts
The spare parts for the buoy are given in the table below.
Article number Spare part
181181 Replacement brush for Scuba BGA, with mounting nut
181182 Antenna, for Scuba BGA buoy
181183 Bucket black, rubber 7.5 l, for calibration Scuba BGA buoy
5.4 Changing lithium battery pack
The lithium ion battery pack in the Scuba BGA buoy is charged by the solar panel and has a life time of 3 years.
If the battery is not chargeable anymore, you have to send the buoy for service to Royal Eijkelkamp to change
the battery. Our technicians are trained for changing the battery pack and watertight sealing of the buoy again.
6. Calibration
You can calibrate the buoy for phycocyanin (blue-green algae), chlorophyll-a (green algae) and turbidity.
There are 2 options for this:
1. Calibration by field measurement
2. Calibration using Rhodamine and turbidity solutions
The sensors for chlorophyll-a, phycocyanin and turbidity have two calibration points. Careful calibration is
essential in order to ensure consistent and reliable results. The sensors must be calibrated at both points in
order to set the sensors relative sensitivity and establish its slope.
Important: there is no direct correlation between Rhodamine concentration and the concentration
of chlorophyll. Rhodamine is used as a convenient dye for setting the sensitivity of the sensor. The
subsequent display of chlorophyll in terms of g/L is a generalisation based on research and experience.
The only way to obtain a true value in terms of g/l is to correlate the values from the sensors to
quantitative data that has been obtained by field measurements or laboratory analysis of field samples,
then to apply a ratio between RFU and g/l. See also previous section 2.2 Limitations of Use.
11
6.1 Calibration by field measurement
Field calibration involves calibrating the buoy based on sampling in the field. This can be done through:
1. An analytical result (e.g. g/l) of a water sample analyzed in a laboratory
2. The measurement result (e.g. g/l) of a portable fluorescence meter (e.g. AlgaeTorch from BBE Moldaenke)
Note: the dashboard in our webportal allows you to use any measurement unit you have from another source.
In this way, the sensors has been corrected for the local conditions and species of chlorophyll-a and phycocyanin.
Royal Eijkelkamp’s Youtube channel has an instructional video on how to calibrate the sensor with a field
measurement.
6.2 Calibration using Rhodamine and turbidity solutions
The buoy can also be calibrated for chlorophyll-a, phycocyanin and turbidity with normal Rhodamine and
turbidity solutions using our standard calibration bucket (an optical black bucket) as listed in the table below.
Article number Calibration fluid
186010 Rhodamine WT dye, concentration 20% (200 g/l), 100 ml
18180155 Turbidity, Formazin, 4.000 NTU, 1 liter
Important: Read and follow all the safety instructions and MSDS documentation which is supplied
with the Rhodamine WT dye and Turbidity fluids before proceeding.
6.2.1 Preparing the calibration environment
The required items for the calibration are:
1. Calibration bucket, article 181183
2. Rhodamine WT 20% solution (200 g/l), 100 ml, article 186010
3. Turbidity 4,000 NTU solution, 1 litre, article 18180155
4. DI (de-ionized) water, 6 litre
5. Tool to measure precise quantities of the solution such as a pipette or other tool
6. One 100 ml and one 400 ml measured glass beaker
7. 10” (25.4 cm) or longer mixing stick
Use the following procedure to prepare a Rhodamine WT solution that will roughly correlate with in situ
chlorophyll values:
Before calibration, the Scuba BGA buoy must be thoroughly cleaned (See the instructions provided in 5.2
Cleaning)
Place the calibration bucket on a stable flat surface
Pour 4.2 Liters of DI water into the bucket
Bring up the Scuba BGA buoy dashboard on a web browser and
click the Calibration button
Power cycle the Scuba BGA Buoy by turning it o then back on
Wait until the ‘Buoy Connected’ light on the dashboard turns
green
Prepare a Rhodamine WT 2,5% solution:
Take the Rhodamine WT dye 20% solution
Pour accurately 125 l (or 12,5 ml) of the Rhodamine solution
into the 100 ml beaker glass
Fill it up with DI water till 100 ml and mix it thoroughly to
produce a solution that is approximately 25 g/l (is 2,5%
solution)

12
Prepare the Calibration Standard Solution:
Pour accurately 2 ml of the Rhodamine WT 2.5% solution into the 400 ml beaker
Fill the beaker with DI water till 400 ml
Mix it thoroughly to obtain a solution which is 125 mg/l.
Store the concentrated standard Rhodamine WT dye solution in a refrigerator to retard decomposition. The dilute
standard prepared in the previous step should be used within 24 hours of its preparation. When Rhodamine
standards are required in the future, perform another dilution of the concentrated Rhodamine solution ater
warming it to ambient temperature. Our experience has indicated that the concentrated solution that has been
kept at cold temperatures is much more stable than the dilute solution stored at room temperature.
6.2.2. Performing the calibration
There are 4 calibration steps to calibration the buoy.
1. Calibration in the zero solution, ‘Solution 1’
The zero solution is the pure DI water solution.
Place the Scuba BGA buoy in the calibration bucket, centering it relative to the bucket
Click the ‘Calibrate’ button on the dashboard page
Wait for the ‘Calibration Step Complete’ message
Click ‘Next’
2. Calibration in the phycocyanin (BGA) high solution, ‘Solution 2’
Remove the Scuba BGA buoy from the bucket and dry the bottom o
Add 3 ml of the prepared Rhodamine WT standard calibration solution to the bucket and mix thoroughly
to obtain a solution which is approximately 89,3 g/l. Use 30 brisk circles of the mixing stick then reverse
direction slowly to stop the water movement. Allow to settle for 10 seconds
Place the Scuba BGA buoy in the calibration bucket, centering it relative to the bucket
Click the ‘Calibrate’ button on the dashboard page
Wait for the ‘Calibration Step Complete’ message
Click ‘Next’
3. Calibration in the chlorophyll-a high solution, ‘Solution 3’
Remove the Scuba BGA buoy from the bucket and dry the bottom o
Add 21 ml of the prepared Rhodamine WT standard calibration solution to the bucket and mix thoroughly
to prepare a solution which is approximately 714 g/l. Use 30 brisk circles of the mixing stick then reverse
direction slowly to stop the water movement. Allow to settle for 10 seconds
Place the Scuba BGA buoy in the calibration bucket, centering it relative to the bucket
Click the ‘Calibrate’ button on the dashboard page
Wait for the ‘Calibration Step Complete’ message
Click ‘Next’
4. Calibration in the turbidity high solution, ‘Solution 4’
Remove the Scuba BGA buoy from the bucket and dry the bottom o
Add 50 ml of the turbidity solution to the bucket and mix thoroughly to obtain a solution which is
approximately 47 NTU/l. Use 30 brisk circles of the mixing stick then reverse direction slowly to stop the
water movement. Allow to settle for 10 seconds
Place the Scuba BGA buoy in the calibration bucket, centering it relative to the bucket
Click the ‘Calibrate’ button on the dashboard page
Wait for the ‘Calibration Step Complete’ message
Click ‘Next’.
The calibration is now complete. Click on the button ‘Back to dashboard’.
13
6.3 Customer service contact information
If ater reading this manual you still have questions about buoy maintenance or calibration, please feel free
to contact us at:
Royal Eijkelkamp, Service Department
T: +31 313 800 200
E: service@eijkelkamp.com
I: royaleijkelkamp.com/nl/service-verhuur/
7. Storage and transportation
7.1 Storage
To store the buoy, follow the instructions below:
Clean the device thoroughly before storing it, as described in
Cleaning (Chapter 5.2)
Switch o the device by pressing and holding the power button
for 8 seconds (the green light goes out)
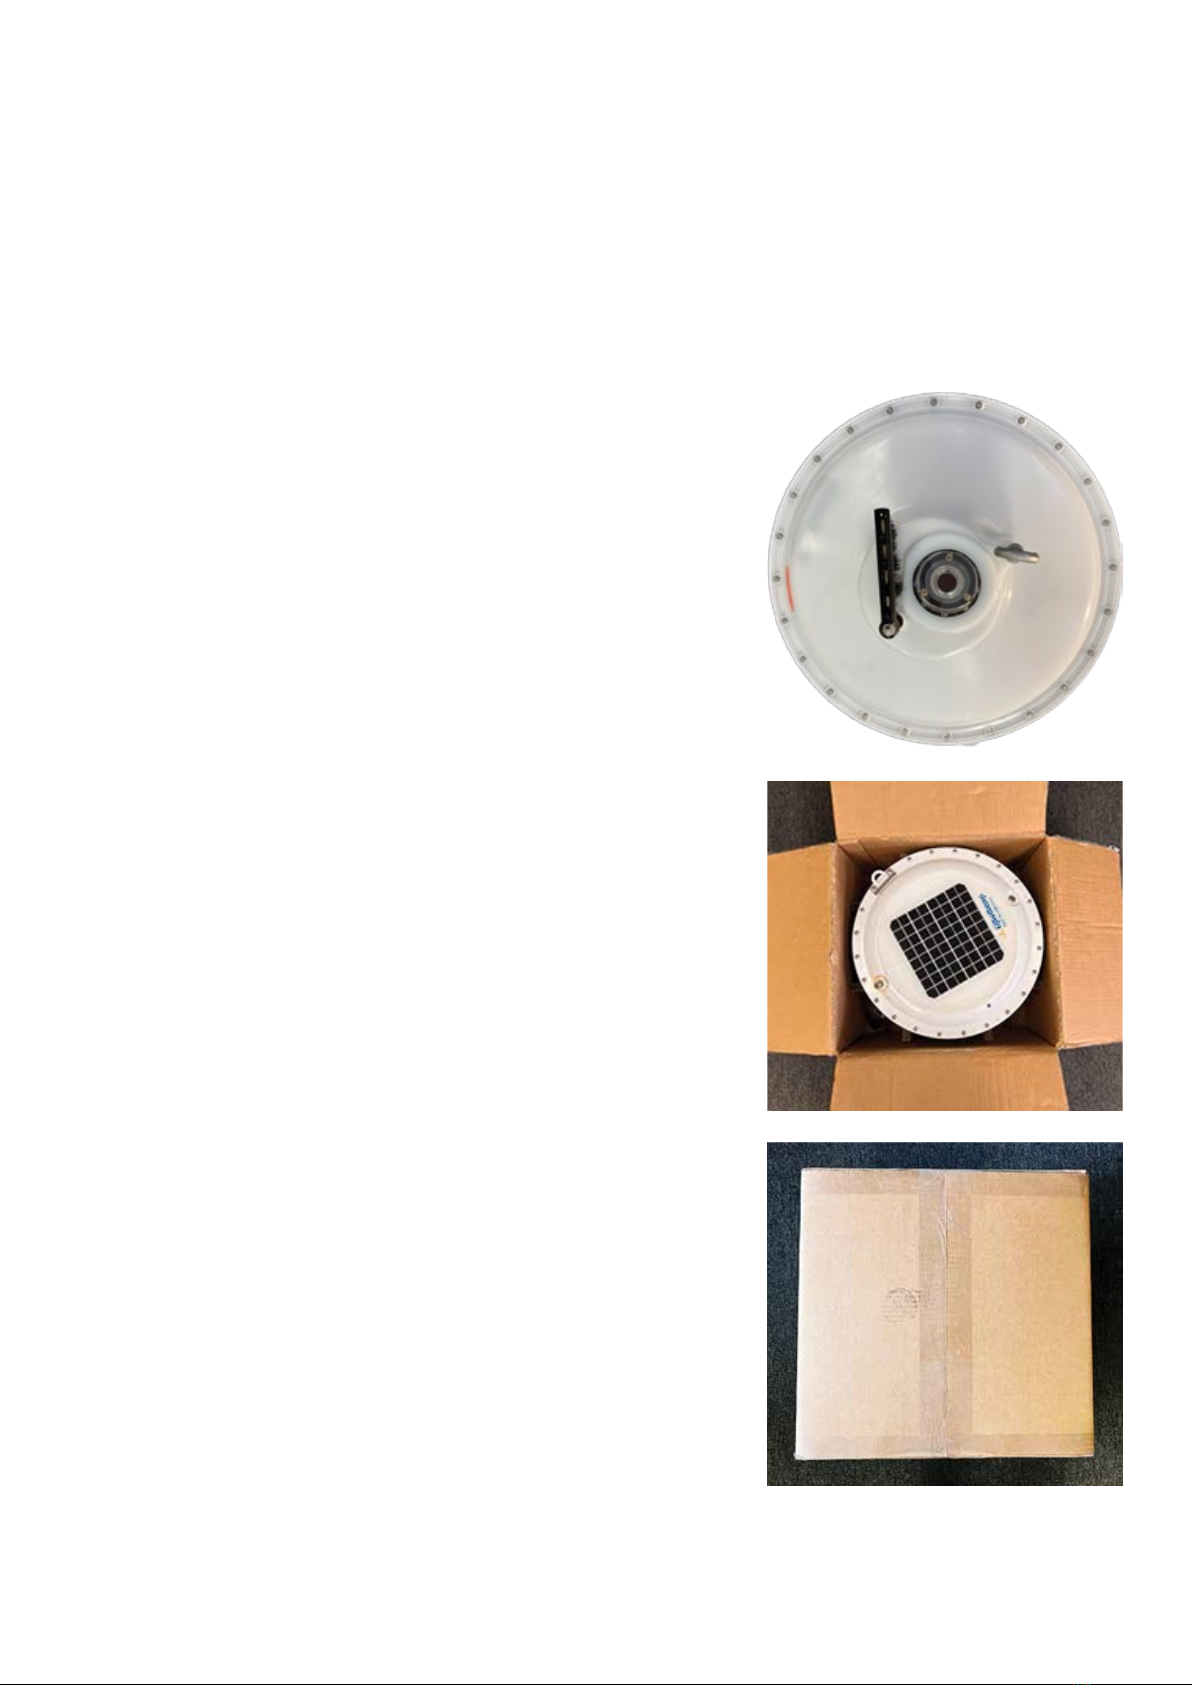
Rotate the brush so that it does not touch the base or measurement
window, as shown in the illustration.
Remove the antenna and store the tracker in the original box. If
you do not have the original box, an 8-10” bucket will work for
storage as long as the brush does not touch the bottom.
7.2 Transportation
To send the buoy, follow the instructions below:
Follow the steps for Cleaning and Storage.
The Scuba BGA buoy should only be shipped in its original box.
Packing with loose padding almost always results in damage to
the buoy.
If you do not have the original box, please let us know at service@
eijkelkamp.com
Orient the mounting ring(s) on the corners of the box as shown
in the image.
Place the antenna in one of the corner slots of the shipping box.
Place the cardboard insert over the unit. Note, if it is dicult to
get the insert in, the insert may touch the seam of the box shown
in the upper let corner of the image.
Close the box and secure it with 3” packing tape.
Box dimensions: 40.64 x 40.64 x 27.94 cm (16x16x11 inches), 4.54
kg (10 pounds)
Send to this address:
Royal Eijkelkamp
Service Department
Nijverheidstraat 9
6987 EN Giesbeek
The Netherlands

14
Appendix 1: Certificate
To be defined.
Kingscote Chemicals, 3334 S. Tech Blvd., Miamisburg, Ohio 45342
Telephone (937) 886-9100 Fax (937)886-9300 Web:www.brightdyes.com
Division of Kingscote Chemicals ®
TECHNICAL DATA BULLETIN
Bright Dyes FWT Red products are proprietary formulations of Rhodamine dyes. Our Bright Dyes
FWT Red liquid products are specially formulated versions of Rhodamine WT dye for convenient
use in water tracing and leak detection studies. This bright, fluorescent red dye is certified by NSF
International to ANSI/NSF Standard 60 for use in drinking water. It may be detected visually, by
ultraviolet light and by appropriate fluorometric equipment. Today it is most often used visually.
Visually the dye appears bright pink to red, depending on its concentration and under ultraviolet
light as bright orange.
The dye is resistant to absorption on most suspended mater in fresh and salt water. Compared to
Bright Dyes FLT Yellow/Green products it is significantly more resistant to degradation by
sunlight and when used in fluorometry, stands out much more clearly against background
fluorescence. As always the use and suitability of these products for any specific application should
be evaluated by a qualified hydrologist or other industry professional.
General Properties
Tablets
FWT Red 25 Liquid
Powders
Detectability of active ingredient 1
Visual <100 ppb
Visual <100 ppb
Visual <100 ppb
Maximum absorbance wavelength 2
550/588 nm
550/588 nm
550/588 nm
Appearance
Dark red convex
1.6cm diameter
Clear dark red
aqueous solution
Dark red fine
powder
NSF (Max use level in potable water)
0.3 ppb
0.8 ppb
0.1 ppb
Weight
1.35 gms + 0.05
Dissolution Time 3
50% < 3 minutes
95% < 6 minutes
50% < 3 minutes
95% < 6 minutes
Specific Gravity
1.03 + 0.05 @ 25C
Viscosity 4
1.3 cps
pH
8.7 + 0.5 @ 25C
Coverage of Products
One Tablet
One Pint Liquid
One Pound
Powder
Light Visual
604 gallons
31,250 gallons
600,000 gallons
Strong Visual
60 gallons
3,125 gallons
60,000 gallons
Caution: These products may cause irritation and/or staining if allowed to come in contact wit the skin. The use of gloves and goggles is
recommended when handling this product, as with any other dye or chemical.
To our best knowledge the information and recommendations contained herein are accurate and reliable. However, this information and
our recommendations are furnished without warranty, representation, inducement, or license of any kind, including, but not limited to
the implied warranties and fitness for a particular use or purpose. Customers are encouraged to conduct their own tests and to read the
material safety data sheet carefully before using.
1In deionized water in 100 ml flask. Actual detectability and coverage in the field will vary with specific water conditions.
2No significant change in fluorescence between 6 and 11 pH.
3(One tablet, 1 gram of powder), in flowing deionized water in a 10 gallon tank.
4Measured on a Brookfield viscometer, Model LV, UL adapter, 60 rpm @ 25C.
WATER TRACING DYE
FWT RED PRODUCTS
Appendix 2: Technical specifications Rhodamine WT dye

Page 1of 6
Safety Data Sheet
Issue Date: 30-May-2013 Revision Date: 18-Jan-2019 Version Number: 2.2
1. Identification
Product Identifiers
Product Name: Bright Dyes® FWT Red 25 Liquid
Product Number: 106023
Recommended Use & Restrictions on Use
Water tracing & leak detection dye
Manufacturer/Supplier
Kingscote Chemicals, Inc.
3334 South Tech Blvd.
Miamisburg, OH 45342
U.S.A.
Emergency Telephone Number
Company Telephone Number: (937) 886-9100
Emergency Telephone (24 hr): INFOTRAC (800) 535-5053 (North America)
+1-352-323-3500 (International)
2. Hazards Identification
Classification
This chemical does not meet the hazardous criteria set forth by the 2012 OSHA Hazard Communication
Standard (29 CFR 1910.1200). However, this Safety Data Sheet (SDS) contains valuable information critical
to the safe handling and proper use of this product. This SDS should be retained and available for
employees and other users of this product.
3. Composition/Information on Ingredients
This product is not hazardous according to OSHA 29 CFR 1910.1200. Components not listed are not
hazardous or are below reportable limits.
4. First-Aid Measures
First-Aid Measures
Eye Contact
Rinse immediately with plenty of water, also under the eyelids, for at least
15 minutes. If eye irritation persists: Get medical advice/attention.
Skin Contact
Wash thoroughly with plenty of soap and water. If skin irritation occurs:
Get medical advice/attention.
Inhalation
Remove to fresh air. If breathing is difficult, administer oxygen; seek
medical attention immediately.
Appendix 3: MSDS Rhodamine WT dye

Bright Dyes® FWT Red 25 Liquid Revision Date: 18-Jan-2019
Page 2of 6
Ingestion
Rinse mouth. DO NOT induce vomiting. Drink plenty of water. Never give
anything by mouth to an unconscious person. Get medical attention if large
quantities were ingested or if nausea occurs.
Most Important Symptoms and Effects
Symptoms
Will cause staining of the skin on contact. May cause eye irritation.
Inhalation of dust may cause respiratory irritation. Ingestion may cause
urine to be a red color until the dye has been washed through the system.
Indication of Any Immediate Medical Attention and Special Treatment Needed
Notes to Physician
Treat symptomatically.
5. Fire-Fighting Measures
Suitable Extinguishing Media
Water spray (fog). Carbon dioxide (CO2). Dry chemical. Regular foam.
Unsuitable Extinguishing Media
Not determined
Specific Hazards Arising from the Chemical
Product is not flammable. Burning/combustion may produce oxides of carbon and nitrogen (NOx).
Protective Equipment and Precautions for Firefighters
Wear self-contained breathing apparatus pressure-demand, MSHA/NIOSH (approved or equivalent) and full
protective gear.
6. Accidental Release Measures
Personal Precautions, Protective Equipment and Emergency Procedures
Personal Precautions
Use personal protective equipment as recommended in Section 8.
Environmental Precautions
Prevent from entering into soil, ditches, sewers, waterways and/or
groundwater. See Section 12 and Section 13.
Methods and Material for Containment and Cleaning Up
Methods for Containment
Prevent further leakage or spillage if safe to do so.
Methods for Cleaning Up
Sweep up and collect into suitable containers for disposal. Flush area
with water.
7. Handling and Storage
Precautions for Safe Handling
Advice on Safe Handling
Handle in accordance with good industrial hygiene and safety practices.
Use personal protection recommended in Section 8. Avoid contact with
skin, eyes, or clothing. Avoid breathing dusts. Contaminated clothing
should be thoroughly washed before reusing.

Bright Dyes® FWT Red 25 Liquid Revision Date: 18-Jan-2019
Page 3of 6
Conditions for Safe Storage, Including Incompatibilities
Storage Conditions
Keep container tightly closed and store in a cool, dry, and well-
ventilated area. Keep from freezing.
Incompatible Materials
No materials to be especially mentioned
8. Exposure Controls / Personal Protection
Exposure Guidelines
This product, as supplied, does not contain any hazardous materials with occupational exposure limits
established by the region specific regulatory bodies.
Engineering Controls
Ensure adequate ventilation, especially in confined areas. Eyewash stations. Showers.
Individual Protection Measures, Such as Personal Protective Equipment:
Eye/Face Protection
Goggles.
Skin & Body Protection
Rubber gloves. Suitable protective clothing.
Respiratory Protection
No protection is ordinarily required under normal conditions of use.
Hygiene Measures
Handle in accordance with good industrial hygiene and safety practices.
9. Physical and Chemical Properties
Information on Basic Physical and Chemical Properties
Physical State
Liquid
Odor
Mild
Appearance
Dark red liquid
Odor Threshold
Not determined
Color
Dark red
Property
Values
pH
8.6 –8.8
Melting/Freezing Point
Not determined
Boiling Point/Range
Not determined
Flash Point
Not applicable
Evaporation Rate
Not applicable
Flammability (solid, gas)
Liquid –not applicable
Upper Flammability Limits
Not applicable
Lower Flammability Limits
Not applicable
Vapor Pressure
Not applicable
Vapor Density
Not applicable
Relative Density
Not applicable
Specific Gravity
Not determined
Solubility
Highly soluble in water
Partition Coefficient
Not determined
Auto-ignition Temperature
Not determined
Decomposition Temperature
Not determined
Viscosity
Not determined

Bright Dyes® FWT Red 25 Liquid Revision Date: 18-Jan-2019
Page 4of 6
10. Stability and Reactivity
Reactivity
Not reactive under normal conditions.
Chemical Stability
Stable under recommended storage conditions.
Possibility of Hazardous Reactions
None under normal processing.
Conditions to Avoid
Keep separated from incompatible substances. Keep out of reach of children.
Incompatible Materials
No materials to be especially mentioned
Hazardous Decomposition Products
Oxides of carbon and nitrogen (NOx).
11: Toxicological Information
Information on Likely Routes of Exposure
Inhalation
Avoid breathing vapors or mists.
Ingestion
Do not ingest.
Skin Contact
May cause an allergic skin reaction.
Eye Contact
Avoid contact with eyes.
Delayed, Immediate, and Chronic Effects from Short- and Long-Term Exposure
May cause an allergic skin reaction.
Numerical Measures of Toxicity
Not determined
Symptoms Associated with Exposure
See Section 4 of this SDS for symptoms.
Carcinogenicity
NTP
None
IARC
None
OSHA
None

Bright Dyes® FWT Red 25 Liquid Revision Date: 18-Jan-2019
Page 5of 6
12. Ecological Information
Ecotoxicity
This product is not classified as environmentally hazardous. However, this does not exclude the possibility
that large or frequent spills can have a harmful or damaging effect on the environment.
Component Information
Not available
Persistence/Degradability
Not determined
Bioaccumulation
Not determined
Mobility
Not determined
Other Adverse Effects
Not determined
13. Disposal Considerations
Waste Disposal Methods
Dispose of in accordance with federal, state, and local regulations.
Contaminated Packaging
Do not re-use empty containers. Dispose of containers in accordance with federal, state, and local
regulations.
14. Transport Information
Note
See current shipping paper for most up-to-date shipping information, including exemptions and special
circumstances.
DOT
Not regulated
IATA
Not regulated
OMDG
Not regulated
15: Regulatory Information
International Inventories
TSCA
Listed
U.S. Federal Regulations
CERCLA
This material, as supplied, does not contain any substances regulated as
hazardous substances under the Comprehensive Environmental Response
Compensation and Liability Act (CERCLA) (40 CFR 302) or the Superfund
Amendments and Reauthorization Act (SARA) (40 CFR 355).
Table of contents
Other EIJKELKAMP Measuring Instrument manuals

EIJKELKAMP
EIJKELKAMP bbe AlgaeTorch 100 User manual

EIJKELKAMP
EIJKELKAMP M1 User manual

EIJKELKAMP
EIJKELKAMP 14.36 User manual

EIJKELKAMP
EIJKELKAMP Scuba User manual

EIJKELKAMP
EIJKELKAMP HD2 User manual

EIJKELKAMP
EIJKELKAMP QUICK DRAW 2900F1 User manual

EIJKELKAMP
EIJKELKAMP Aquaread Flowcell User manual

EIJKELKAMP
EIJKELKAMP Aquameter Series User manual

EIJKELKAMP
EIJKELKAMP Aquaprobe AP-5000 User manual

EIJKELKAMP
EIJKELKAMP 0865 User manual


