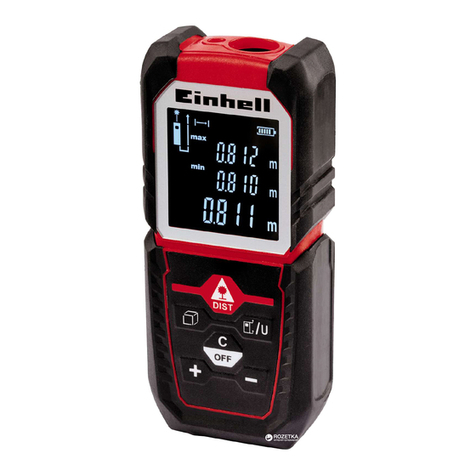
EINHELL TC-LD 25 User manual

TC-LD 25
8
EManual de instrucciones original
Medidor laser
GB Original operating instructions
Laser Measuring Tool
South America
Anl_SA_TC_LD_25_SPK8.indb 1Anl_SA_TC_LD_25_SPK8.indb 1 27.06.2017 13:33:0627.06.2017 13:33:06

- 2 -
1
2
3
4
5
2 1
3
5 a b
A
B
4
Anl_SA_TC_LD_25_SPK8.indb 2Anl_SA_TC_LD_25_SPK8.indb 2 27.06.2017 13:33:0627.06.2017 13:33:06

- 3 -
4 5
8
min
8a
1. 2.
1.
2.
6
2.
3.
1.
1.
3.
2.
7
Anl_SA_TC_LD_25_SPK8.indb 3Anl_SA_TC_LD_25_SPK8.indb 3 27.06.2017 13:33:0727.06.2017 13:33:07

- 4 -
max
8b
Anl_SA_TC_LD_25_SPK8.indb 4Anl_SA_TC_LD_25_SPK8.indb 4 27.06.2017 13:33:1127.06.2017 13:33:11

E
- 5 -
Índice de contenidos
1. Instrucciones de seguridad
2. Descripción del aparato y volumen de entrega
3. Uso adecuado
4. Características técnicas
5. Antes de la puesta en marcha
6. Manejo
7. Mantenimiento, limpieza y pedido de piezas de repuesto
8. Eliminación y reciclaje
9. Almacenamiento
10. Codigos de Error
Anl_SA_TC_LD_25_SPK8.indb 5Anl_SA_TC_LD_25_SPK8.indb 5 27.06.2017 13:33:1227.06.2017 13:33:12

E
- 6 -
Aviso - Leer el manual de instrucciones para reducir cualquier riesgo de sufrir daños
Anl_SA_TC_LD_25_SPK8.indb 6Anl_SA_TC_LD_25_SPK8.indb 6 27.06.2017 13:33:1227.06.2017 13:33:12

E
- 7 -
¡Atencion!
Al usar aparatos es preciso tener en cuenta una
serie de medidas de seguridad para evitar le-
siones o daños. Por este motivo, es preciso leer
atentamente este manual de instrucciones/adver-
tencias de seguridad. Guardar esta información
cuidadosamente para poder consultarla en cual-
quier momento. En caso de entregar el aparato
a terceras personas, será preciso entregarles,
asimismo, el manual de instrucciones/advertenci-
as de seguridad. No nos hacemos responsables
de accidentes o daños provocados por no tener
en cuenta este manual y las instrucciones de
seguridad.
1. Instrucciones de seguridad
Encontrará las instrucciones de seguridad corres-
pondientes en el prospecto adjunto.
Peligro!
Lea todas las instrucciones de seguridad e
indicaciones. El incumplimiento de dichas inst-
rucciones e indicaciones puede provocar descar-
gas, incendios y/o daños graves. Guarde todas
las instrucciones de seguridad e indicacio-
nes para posibles consultas posteriores.
Advertencias especiales sobre el láser
Cuidado: Radiación láser
No mirar directamente el trayecto del rayo
Clase de láser 2
PRECAUCION ! - RADIACIÓN !
No mirar al haz de laser
Especificación Laser
Laser clase 2;
Ǹ: 635 nm; P: < 1 mW
Segun IEC 60825-1
• No mirar jamás directamente en el canal de
salida del rayo.
• No dirigir nunca el rayo láser sobre superfi-
cies reflectantes, ni tampoco sobre personas
ni animales. Incluso un rayo láser de baja po-
tencia puede provocar lesiones oculares.
• Atención: si no se siguen estas instrucciones
al pie de la letra se podría producir una expo-
sición peligrosa a las radiaciones.
• Jamás abrir el módulo láser.
• No se permite realizar modificaciones en el
láser para aumentar la potencia del láser.
• El fabricante no asume ninguna responsabili-
dad por los daños resultantes de la no obser-
vancia de las advertencias de seguridad.
Instrucciones de seguridad para las pilas
Utilización de las pilas
• Introducir las pilas con el láser encendido
puede provocar accidentes.
• Si las pilas no se utilizan adecuadamente, su
líquido podría derramarse. Evitar el contacto
con el líquido de las pilas. En caso de que
una parte de su cuerpo entre en contacto
con el líquido de las pilas, limpiarla con agua
corriente. En caso de que el líquido de las
pilas entre en contacto con los ojos, es im-
prescindible además acudir inmediatamente
a un médico.
• El líquido puede provocar irritaciones o que-
maduras.
• No exponer las pilas a un calor excesivo ni a
la radiación solar, el fuego o similares.
• No cargar nunca pilas no recargables. ¡Pelig-
ro de explosión!
• Mantener las pilas fuera del alcance de los
niños, no cortocircuitarlas, ni abrirlas.
• En caso de ingerir una pila, acudir inmediata-
mente a un médico.
• Cuando sea necesario, limpiar los contactos
de las pilas y de los aparatos antes de intro-
ducirlas.
• Asegurarse de introducirlas con la polaridad
correcta.
• Extraer inmediatamente las pilas gastadas
del aparato. En caso contrario, existe un gran
peligro de que se derrame el líquido.
• Cambiar siempre todas las pilas a la vez.
• Introducir solamente baterías del mismo tipo,
no utilizar tipos diferentes o mezclar pilas
usadas con nuevas.
• Asegurarse de apagar el aparato después de
usarlo.
• Retirar las pilas cuando el aparato no vaya a
utilizarse durante un largo tiempo.
Anl_SA_TC_LD_25_SPK8.indb 7Anl_SA_TC_LD_25_SPK8.indb 7 27.06.2017 13:33:1227.06.2017 13:33:12
E
- 8 -
2. Descripción del aparato y
volumen de entrega
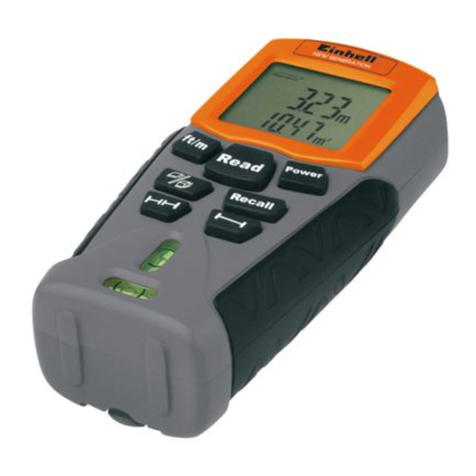
2.1 Descripción del aparato (fig. 1)
1. Sensor
2. Láser
3. Display
4.Teclado
5.Tapa del compartimento de pilas
2.2 Volumen de entrega
Sirviéndose de la descripción del volumen de
entrega, comprobar que el artículo esté completo.
Si faltase alguna pieza, dirigirse a nuestro Ser-
vice Center o a la tienda especializada más cer-
cana en un plazo máximo de 5 días laborales tras
la compra del artículo presentando un recibo de
compra válido. A este respeto, observar la tabla
de garantía de las condiciones de garantía que se
encuentran al final del manual.
• Abrir el embalaje y extraer cuidadosamente
el aparato.
• Retirar el material de embalaje, así como los
dispositivos de seguridad del embalaje y para
el transporte (si existen).
• Comprobar que el volumen de entrega esté
completo.
• Comprobar que el aparato y los accesorios
no presenten daños ocasionados durante el
transporte.
• Si es posible, almacenar el embalaje hasta
que transcurra el periodo de garantía.
¡Atencion!
¡El aparato y el material de embalaje no son
un juguete! ¡No permitir que los niños jue-
guen con bolsas de plástico, láminas y pie-
zas pequeñas! ¡Riesgo de ingestión y asfixia!
• Distanciómetro por láser
• Bolsa
• Manual de instrucciones original
• No incluye pilas
3. Uso adecuado
El láser ha sido concebido para medir distancias,
superficies y volúmenes.
Utilizar la máquina sólo en los casos que se indi-
can explícitamente como de uso adecuado. Cual-
quier otro uso no será adecuado. En caso de uso
inadecuado, el fabricante no se hace responsable
de daños o lesiones de cualquier tipo; el respon-
sable es el usuario u operario de la máquina.
Tener en consideración que nuestro aparato no
está indicado para un uso comercial, industrial o
en taller. No asumiremos ningún tipo de garantía
cuando se utilice el aparato en zonas industria-
les, comerciales o talleres, así como actividades
similares.
4. Características técnicas
Veáse Certificado de Garantia de su pais.
Limitar el tiempo de trabajo.
Al hacerlo deben tenerse en cuenta todas las
partes del ciclo de servicio (por ejemplo los
tiempos en los que la herramienta eléctrica está
desconectada y los tiempos en los que está
conectada pero funciona sin carga).
5. Antes de la puesta en marcha
Colocar y cambiar pilas (fig. 2)
• Apagar el aparato.
• Retirar la tapa del compartimento de pilas
(5) presionando el cierre (a) hacia dentro y la
tapa hacia arriba.
• Introducir las pilas (b) asegurando que la po-
laridad sea correcta.
• Volver a poner la tapa asegurándose de que
el cierre se enclave.
6. Manejo
¡Advertencia!
El ancho y la precisión de medición pueden estar
influidos por factores del entorno como la luz so-
lar o un grado de reflexión desfavorable, de ma-
nera que perjudican el resultado de medición.
6.1 Explicación de las teclas de función
(fig. 3)
A Tecla ON/OFF/de medición
B Tecla de opciones de medición/selección del
punto de referencia de medición de distancia
Anl_SA_TC_LD_25_SPK8.indb 8Anl_SA_TC_LD_25_SPK8.indb 8 27.06.2017 13:33:1227.06.2017 13:33:12
E
- 9 -
6.2 Conexión/desconexión del láser
• Pulsar la techa ON/OFF/de medición (A)
prolongadamente para encender el láser.
• Mantener pulsada la misma tecla (A) durante
1 segundo para apagar el láser.
6.3 Ajuste del punto de referencia (fig. 3 - 4)
Se puede medir desde 2 puntos de referencia en
el aparato. Mantener para ello la tecla B pulsada
hasta que cambie el punto de referencia. Selecci-
onar así el punto de referencia deseado.
• Punto de referencia borde delantero
(ver figura 4).
• Punto de referencia borde trasero
(ver figura 4).
6.4 Emplear las funciones de medición
Aviso
Una vez finalizada una medición, se apaga au-
tomáticamente el rayo láser. Pulsar la tecla cone-
xión/medición.
6.4.1 Función: „Medir una distancia sencilla“
„Ningún símbolo“ (figura 5)
Procedimiento:
• Pulsar prolongadamente 1 vez de la tecla A:
Conectar el aparato
• Pulsar tecla B prolongadamente: Elegir punto
de referencia en el aparato
• 1 vez tecla A: Encender el láser
• Ajustar el láser
• 1 vez tecla A: Medir
→El resultado se muestra abajo en m
6.4.2 Funcionamiento: „Medir superficies“
„Símbolo “ (fig. 6)
Procedimiento:
• Pulsar prolongadamente 1 vez de la tecla A:
Conectar el aparato
• 1 vez tecla B: Seleccionar función
• Pulsar tecla B prolongadamente: Elegir punto
de referencia en el aparato
• 1 vez tecla A: Encender el láser
• Ajustar el láser
• 1 vez tecla A: Medir longitud de superficie
• 1 vez tecla A: Encender el láser
• Ajustar el láser
• 1 vez tecla A: Medir ancho de superficie
→El resultado se muestra abajo en m²
6.4.3 Función: „Medir volumen“
„Símbolo “ (fig. 7)
Procedimiento:
• Pulsar prolongadamente 1 vez de la tecla A:
Conectar el aparato
• 2 veces tecla B: Seleccionar función
• Pulsar tecla B prolongadamente: Elegir punto
de referencia en el aparato
• 1 vez tecla A: Encender el láser
• Ajustar el láser
• 1 vez tecla A: Medir longitud de sala
• 1 vez tecla A: Encender el láser
• Ajustar el láser
• 1 vez tecla A: Medir ancho de sala
• 1 vez tecla A: Encender el láser
• Ajustar el láser
• 1 vez tecla A: Medir altura de sala
→El resultado se muestra abajo en m³
6.4.4 Función: „Medir distancia continua
(mín.)“
„Símbolo “ (fig. 8 / 8a)
Procedimiento:
• Pulsar prolongadamente 1 vez de la tecla A:
Conectar el aparato
• 3 veces tecla B: Seleccionar función
• Pulsar tecla B prolongadamente: Seleccionar
punto de referencia
• 1 vez tecla A: Encender el láser
• 1 vez tecla A: Medición continua
→Arriba se muestra en m el resultado de me-
dición más pequeño hasta el momento
→Abajo se muestra el resultado de medición
actual en tiempo real
6.4.5 Función: „Medir distancia continua
(máx.)“
„Símbolo “ (fig. 8 / 8a)
Procedimiento:
• Pulsar prolongadamente 1 vez de la tecla A:
Conectar el aparato
• 4 veces tecla B: Seleccionar función
• Pulsar tecla B prolongadamente: Seleccionar
punto de referencia
• 1 vez tecla A: Encender el láser
• 1 vez tecla A: Medición continua
→Arriba se muestra en m el resultado de me-
dición mayor hasta el momento
→Abajo se muestra el resultado de medición
actual en tiempo real
Anl_SA_TC_LD_25_SPK8.indb 9Anl_SA_TC_LD_25_SPK8.indb 9 27.06.2017 13:33:1227.06.2017 13:33:12
E
- 10 -
7. Mantenimiento, limpieza y pedido
de piezas de repuesto
Peligro!
Desenchufar siempre antes de realizar algún tra-
bajo de limpieza.
7.1 Limpieza
• Reducir al máximo posible la suciedad y
el polvo en los dispositivos de seguridad,
las rendijas de ventilación y la carcasa del
motor. Frotar el aparato con un paño limpio o
soplarlo con aire comprimido manteniendo la
presión baja.
• Se recomienda limpiar el aparato tras cada
uso.
• Limpiar el aparato con regularidad con un
paño húmedo y un poco de jabón blando. No
utilizar productos de limpieza o disolventes ya
que se podrían deteriorar las piezas de plá-
stico del aparato. Es preciso tener en cuenta
que no entre agua en el interior del aparato.
Si entra agua en el aparato eléctrico existirá
mayor riesgo de una descarga eléctrica.
7.2 Mantenimiento
No hay que realizar el mantenimiento a más
piezas en el interior del aparato.
7.3 Pedido de piezas de repuesto y acces-
orios:
A la hora de pasar pedido de piezas de repuesto,
es preciso indicar los siguientes datos:
• Tipo de aparato
• Número de artículo del aparato
• Número de identificación del aparato
• Número de la pieza
8. Eliminación y reciclaje
El aparato está protegido por un embalaje para
evitar daños producidos por el transporte. Este
embalaje es materia prima y, por eso, se puede
volver a utilizar o llevar a un punto de reciclaje. El
aparato y sus accesorios están compuestos de
diversos materiales, como, p. ej., metal y plástico.
Los aparatos defectuosos no deben tirarse a la
basura doméstica. Para su eliminación adecu-
ada, el aparato debe entregarse a una entidad
recolectora prevista para ello. En caso de no
conocer ninguna, será preciso informarse en el
organismo responsable del municipio.
Eliminación de las pilas
Las pilas contienen materiales perjudiciales para
el medio ambiente. No tirar las pilas al cubo de la
basura, al fuego o al agua. Las pilas deben elimi-
narse o reciclarse de forma ecológica.
9. Almacenamiento
Guardar el aparato y sus accesorios en un
lugar oscuro, seco, protegido de las heladas e
inaccesible para los niños. La temperatura de
almacenamiento óptima se encuentra entre los
5 y 30 ˚C. Guardar la herramienta eléctrica en su
embalaje original.
Anl_SA_TC_LD_25_SPK8.indb 10Anl_SA_TC_LD_25_SPK8.indb 10 27.06.2017 13:33:1227.06.2017 13:33:12
E
- 11 -
10. Codigos de Error
E
Err 8 Err 10 Err 14 Err 15 Err 16
Posibles
causas
Fallo de cálculo „Medición
de distancia indirecta“
Nivel de batería
excesivamente bajo/
vacío
Movimiento demasi-
ado rápido durante la
medición
Fuera del radio de
alcance:
<0,05 m o >50 m
Señal demasiado dé-
bil/tiempo de medición
excesivo
Solución
El „cateto“ tiene que estar
en ángulo de 90° con res-
pecto al „cateto opuesto“.
Ver el punto 6.5.6/6.5.7 del
manual
Sustituir las pilas
gastadas por nuevas
Mantener quieto el
aparato durante la
medición
Medir dentro del radio
de alcance
(0,05 – 50 m)
Mejorar la reflexión de
la superficie.
P. ej., con una hoja de
papel blanco
Anl_SA_TC_LD_25_SPK8.indb 11Anl_SA_TC_LD_25_SPK8.indb 11 27.06.2017 13:33:1327.06.2017 13:33:13

E
- 12 -
No tirar herramientas eléctricas en la basura casera.
Según la directiva europea 2012/19/CE sobre aparatos usados electrónicos y eléctricos y su aplicación
en el derecho nacional, dichos aparatos deberán recojerse por separado y eliminarse de modo ecológi-
co para facilitar su posterior reciclaje.
Alternativa de reciclaje en caso de devolución:
El propietario del aparato eléctrico, en caso de no optar por su devolución, está obligado a reciclar ade-
cuadamente dicho aparato eléctrico. Para ello, también se puede entregar el aparato usado a un centro
de reciclaje que trate la eliminación de residuos respetando la legislación nacional sobre residuos y
su reciclaje. Esto no afecta a los medios auxiliares ni a los accesorios sin componentes eléctricos que
acompañan a los aparatos usados.
Sólo está permitido copiar la documentación y documentos anexos del producto, o extractos de los
mismos, con autorización expresa de iSC GmbH.
Nos reservamos el derecho a realizar modificaciones técnicas
Anl_SA_TC_LD_25_SPK8.indb 12Anl_SA_TC_LD_25_SPK8.indb 12 27.06.2017 13:33:1327.06.2017 13:33:13

GB
- 13 -
Table of contents
1. Safety regulations
2. Layout and items supplied
3. Proper use
4. Technical data
5. Before using the equipment
6. Operation
7. Cleaning, maintenance and ordering of spare parts
8. Disposal and recycling
9. Storage
10. Error Codes
Anl_SA_TC_LD_25_SPK8.indb 13Anl_SA_TC_LD_25_SPK8.indb 13 27.06.2017 13:33:1327.06.2017 13:33:13

GB
- 14 -
Caution - Read the operating instructions to reduce the risk of inquiry
Anl_SA_TC_LD_25_SPK8.indb 14Anl_SA_TC_LD_25_SPK8.indb 14 27.06.2017 13:33:1327.06.2017 13:33:13

GB
- 15 -
Danger!
When using the equipment, a few safety pre-
cautions must be observed to avoid injuries and
damage. Please read the complete operating
instructions and safety regulations with due care.
Keep this manual in a safe place, so that the in-
formation is available at all times. If you give the
equipment to any other person, hand over these
operating instructions and safety regulations as
well.We cannot accept any liability for damage
or accidents which arise due to a failure to follow
these instructions and the safety instructions.
1. Safety regulations
The corresponding safety information can be
found in the enclosed booklet.
Danger!
Read all safety regulations and instructions.
Any errors made in following the safety regula-
tions and instructions may result in an electric
shock, fire and/or serious injury.
Keep all safety regulations and instructions
in a safe place for future use.
Special information about the laser
Caution: Laser radiation
Do not look into the beam
Laser class 2
• Never look directly into the laser path.
• Never direct the laser beam at reflecting sur-
faces or persons or animals. Even a low out-
put laser beam can inflict injury on the eye.
• Caution: It is vital to follow the work proce-
dures described in these instructions. Using
the equipment in any other way may result in
hazardous exposure to laser radiation.
• Never open the laser module.
• It is prohibited to carry out any modifications
to the laser to increase its power.
• The manufacturer cannot accept any liability
for damage due to non-observance of the
safety information.
Safety information on the batteries
Use of the batteries
• Inserting the batteries when the laser is swit-
ched on can cause accidents.
• If the equipment is not used correctly, the bat-
teries may leak. Avoid contact with the battery
fluid. If you come into contact with battery flu-
id, clean the affected body part with running
water. If you get battery fluid in your eyes,
seek immediate medical assistance.
• Escaped battery fluid can cause skin irritation
and acid burns.
• Never expose the batteries to excess heat
such as sunshine, fire or similar.
• Never recharge batteries that are not suitable
for recharging. There is a risk of explosion!
• Keep batteries away from children, do not
short circuit batteries or disassemble.
• Seek a doctor’s advice immediately if a batte-
ry is swallowed.
• If necessary, clean the contacts on the
battery and equipment before inserting the
batteries.
• Ensure that you insert the batteries the right
way round.
• Remove flat batteries immediately from the
equipment.There is an increased risk of
leakage.
• Always change all batteries in one go.
• Insert only batteries of the same type, do not
use different types of batteries or used and
new batteries together.
• Make sure that the equipment is switched off
after use.
• Remove the batteries if the equipment is not
used over a longer period.
2. Layout and items supplied
2.1 Layout (Fig. 1)
1. Sensor
2. Laser
3. Display
4. Keypad
5. Battery compartment cover
PRECAUCION ! - RADIACIÓN !
No mirar al haz de laser
Especificación Laser
Laser clase 2;
Ǹ: 635 nm; P: < 1 mW
Segun IEC 60825-1
Anl_SA_TC_LD_25_SPK8.indb 15Anl_SA_TC_LD_25_SPK8.indb 15 27.06.2017 13:33:1327.06.2017 13:33:13

GB
- 16 -
2.2 Items supplied
Please check that the article is complete as
specified in the scope of delivery. If parts are
missing, please contact our service center or the
sales outlet where you made your purchase at
the latest within 5 working days after purchasing
the product and upon presentation of a valid bill
of purchase. Also, refer to the warranty table in
the service information at the end of the operating
instructions.
• Open the packaging and take out the equip-
ment with care.
• Remove the packaging material and any
packaging and/or transportation braces (if
available).
• Check to see if all items are supplied.
• Inspect the equipment and accessories for
transport damage.
• If possible, please keep the packaging until
the end of the guarantee period.
Danger!
The equipment and packaging material are
not toys. Do not let children play with plastic
bags, foils or small parts. There is a danger of
swallowing or suffocating!
• Laser measuring tool
• Bag
• Original operating instructions
• Battery not included
3. Proper use
The laser is designed for measuring distances,
areas and volumes.
The equipment is to be used only for its prescri-
bed purpose. Any other use is deemed to be a
case of misuse.The user / operator and not the
manufacturer will be liable for any damage or inju-
ries of any kind caused as a result of this.
Please note that our equipment has not been de-
signed for use in commercial, trade or industrial
applications. Our warranty will be voided if the
machine is used in commercial, trade or industrial
businesses or for equivalent purposes.
4. Technical data
See warranty card of your country.
Limit the operating time.
All stages of the operating cycle must be conside-
red (for example, times in which the electric tools
are switched offand times in which the tool is
switched on but operates without load).
5. Before using the equipment
Inserting/changing batteries (Fig. 2)
• Switch off the equipment.
• Remove the battery compartment cover (6)
by pressing in the fastener (a) and flipping up
the battery compartment cover.
• Insert the batteries (b), ensuring that you fit
them the right way round.
• Fit the battery compartment cover back on,
making sure that the fastener snaps into
place.
6. Operation
Important!
The measuring distance and measuring accuracy
can be affected by ambient conditions such as
sunlight or poor reflection and this can have an
adverse effect on the measurement result.
6.1 Description of the function buttons
(Fig. 3)
A ON / OFF / Measuring button
B Measurement options button / Selection of
the reference point for distance measurement
6.2 Switching the laser on/off
• To switch on the laser, press the ON / OFF /
Measuring button (A) and keep it pressed for
a short time.
• To switch off the laser, press the ON / OFF /
Measuring button (A) and keep it pressed for
about 1 second.
Anl_SA_TC_LD_25_SPK8.indb 16Anl_SA_TC_LD_25_SPK8.indb 16 27.06.2017 13:33:1327.06.2017 13:33:13

GB
- 17 -
6.3 Setting the reference point (Fig. 3 - 4)
Measurements can be performed from two dif-
ferent reference points on the equipment.To do
so, press button B and keep it pressed until the
reference point changes.This is how you select
the reference point you require.
• Front edge reference point (see Fig. 4)
• Rear edge reference point (see Fig. 4)
6.4 Using the measurement functions
Note:
The laser beam switches offautomatically after
completion of each measurement. Press the ON/
Measuring button.
6.4.1 Function: “Measure single distance”
“No symbol” (Fig. 5)
Procedure:
• Press button A once and keep it pressed for a
short time: Switch on the equipment
• Press button B for longer if necessary: Select
the reference point on the equipment
• Press button A once: Switch on the laser
• Align the laser
• Press button A once: Measure
→The result is displayed at the bottom in m
6.4.2 Function: “Measure areas”
“Symbol ” (Fig. 6)
Procedure:
• Press button A once and keep it pressed for a
short time: Switch on the equipment
• Press button B once: Select function
• Press button B for longer if necessary: Select
the reference point on the equipment
• Press button A once: Switch on the laser
• Align the laser
• Press button A once: area length
• Press button A once: Switch on the laser
• Align the laser
• Press button A once: Measure the area width
→The result is displayed at the bottom in m²
6.4.3 Function: “Measure volumes”
“Symbol “ (Fig. 7)
Procedure:
• Press button A once and keep it pressed for a
short time: Switch on the equipment
• Press button B twice: Select function
• Press button B for longer if necessary: Select
the reference point on the equipment
• Press button A once: Switch on the laser
• Align the laser
• Press button A once: Measure the room
length
• Press button A once: Switch on the laser
• Align the laser
• Press button A once: Measure the room width
• Press button A once: Switch on the laser
• Align the laser
• Press button A once: Measure the room
height
→The result is displayed at the bottom in m³
6.4.4 Function: “Measure continuous
distance (min)”
“Symbol ” (Fig. 8 / 8a)
Procedure:
• Press button A once and keep it pressed for a
short time: Switch on the equipment
• Press button B three times: Select function
• Press button B for longer if necessary: Select
reference point
• Press button A once: Switch on the laser
• Press button A once: Continuous measure-
ment
→The lowest measurement result so far is
displayed at the top in m
→The current measurement result is dis-
played at the bottom in real time
Anl_SA_TC_LD_25_SPK8.indb 17Anl_SA_TC_LD_25_SPK8.indb 17 27.06.2017 13:33:1327.06.2017 13:33:13

GB
- 18 -
6.4.5 Function: “Measure continuous
distance (max)
“Symbol ” (Fig. 8 / 8b)
• Procedure:
• Press button A once and keep it pressed for a
short time: Switch on the equipment
• Press button B four times: Select function
• Press button B for longer if necessary: Select
reference point
• Press button A once: Switch on the laser
• Press button A once: Continuous measure-
ment
→The highest measurement result so far is
displayed at the top in m
→The current measurement result is
displayed at the bottom in real time
7. Cleaning, maintenance and
ordering of spare parts
Danger!
Always pull out the mains power plug before star-
ting any cleaning work.
7.1 Cleaning
• Keep all safety devices, air vents and the
motor housing free of dirt and dust as far as
possible.Wipe the equipment with a clean
cloth or blow it with compressed air at low
pressure.
• We recommend that you clean the device
immediately each time you have finished
using it.
• Clean the equipment regularly with a moist
cloth and some soft soap. Do not use
cleaning agents or solvents; these could at-
tack the plastic parts of the equipment. Ensu-
re that no water can seep into the device.The
ingress of water into an electric tool increases
the risk of an electric shock.
7.2 Maintenance
There are no parts inside the equipment which
require additional maintenance.
7.3 Ordering spare parts and accessories
Please provide the following information when
ordering spare parts:
• Type of unit
• Article number of the unit
• ID number of the unit
• Spare part number of the required spare part
8. Disposal and recycling
The equipment is supplied in packaging to pre-
vent it from being damaged in transit. The raw
materials in this packaging can be reused or
recycled.The equipment and its accessories are
made of various types of material, such as metal
and plastic. Never place defective equipment in
your household refuse.The equipment should
be taken to a suitable collection center for proper
disposal. If you do not know the whereabouts of
such a collection point, you should ask in your
local council offices.
Disposing of batteries:
Batteries contain materials that are potentially
harmful to the environment. Never place batteries
in your household refuse, in fire or in water. Batte-
ries should be collected, recycled or disposed of
by environment-friendly means.
9. Storage
Store the equipment and accessories in a dark
and dry place at above freezing temperature.The
ideal storage temperature is between 5 and 30
°C. Store the electric tool in its original packaging.
Anl_SA_TC_LD_25_SPK8.indb 18Anl_SA_TC_LD_25_SPK8.indb 18 27.06.2017 13:33:1327.06.2017 13:33:13

GB
- 19 -
10. Error Codes
GB
Err 8 Err 10 Err 14 Err 15 Err 16
Possible
cause
Calculation error “Indirect
distance measurement”
Battery charge too
low/battery flat
Device moved too
quickly when taking
the measurement
Out of range:
<0.05 m or >50 m
Signal too weak/
measuring time
too long
Remedy
“Adjacent side” must be at
right-angles to the “opposite
side”.
See also point 6.5.6/6.5.7
Replace old batteries
with new ones
Keep the device still
when taking measu-
rements
Take measurements
within the range
(0.05 – 50 m)
Increase the surface
reflection.
For example: use a
white sheet
Anl_SA_TC_LD_25_SPK8.indb 19Anl_SA_TC_LD_25_SPK8.indb 19 27.06.2017 13:33:1327.06.2017 13:33:13

GB
- 20 -
Never place any electric power tools in your household refuse.
To comply with European Directive 2012/19/EC concerning old electric and electronic equipment and
its implementation in national laws, old electric power tools have to be separated from other waste and
disposed of in an environment-friendly fashion, e.g. by taking to a recycling depot.
Recycling alternative to the return request:
As an alternative to returning the equipment to the manufacturer, the owner of the electrical equipment
must make sure that the equipment is properly disposed of if he no longer wants to keep the equipment.
The old equipment can be returned to a suitable collection point that will dispose of the equipment in
accordance with the national recycling and waste disposal regulations.This does not apply to any ac-
cessories or aids without electrical components supplied with the old equipment.
The reprinting or reproduction by any other means, in whole or in part, of documentation and papers
accompanying products is permitted only with the express consent of the iSC GmbH.
Subject to technical changes
Anl_SA_TC_LD_25_SPK8.indb 20Anl_SA_TC_LD_25_SPK8.indb 20 27.06.2017 13:33:1427.06.2017 13:33:14
Other manuals for TC-LD 25
1
Table of contents
Languages:
Other EINHELL Measuring Instrument manuals

EINHELL
EINHELL NDM 15 User manual

EINHELL
EINHELL TC-LD 50 User manual

EINHELL
EINHELL TC-LD 50 User manual

EINHELL
EINHELL 21010 User manual

EINHELL
EINHELL SPK7 User manual

EINHELL
EINHELL 41.331.15 User manual

EINHELL
EINHELL NWL 90 User manual

EINHELL
EINHELL 11037 User manual

EINHELL
EINHELL 41.327.76 User manual

EINHELL
EINHELL TC-LL 2 User manual
Popular Measuring Instrument manuals by other brands

Hanna Instruments
Hanna Instruments HI 93713 instruction manual

Balluff
Balluff BSI R65K0-HXX-M S92 Series Configuration guide

Ingeteam
Ingeteam INGECON SUN 3Play quick start guide

Thermo Scientific
Thermo Scientific Orion Star quick start guide

DeFelsko
DeFelsko PosiTector BHI manual

Brultech
Brultech Greeneye Monitor manual